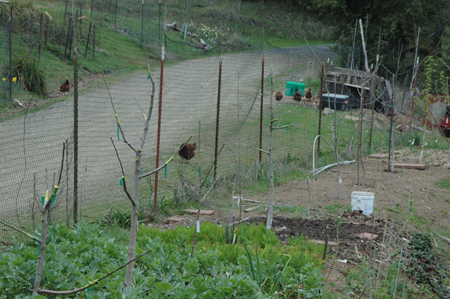
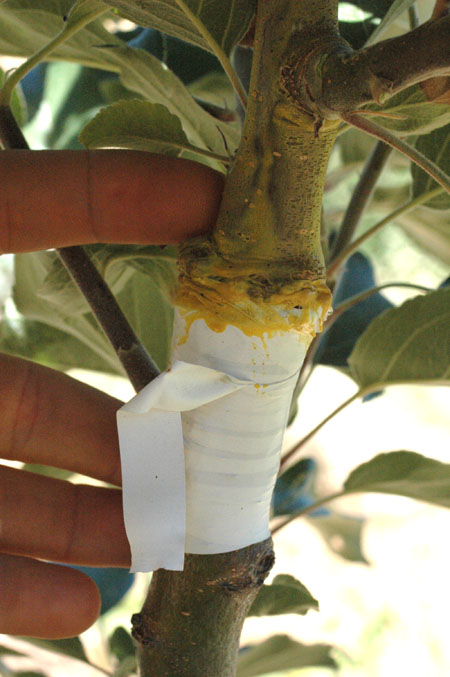
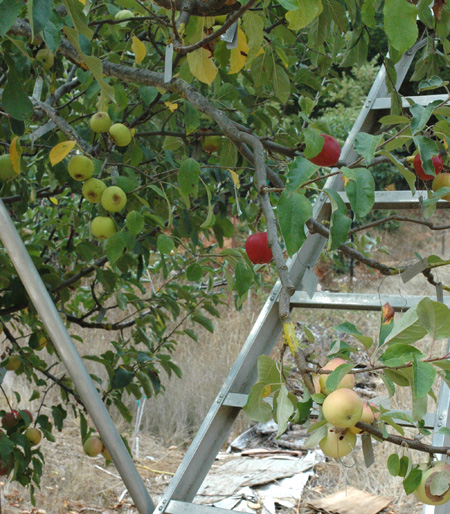
A quick look at Chucks Frankenapple tree that we re-grafted to 5 different varieties last February. Everything went as planned except the chip bud and growth is vigorous.
April Apple Breeding Update, Seedlings and Blooms!
A short video update showing some red fleshed traits in seedlings and the new blossoms in the trial rows. I'm finally going to get some fruit out of these guys! More below...
The seedlings are mostly up now and ready to plant out, though there are still a few stragglers. Many of the crosses I made with Maypole, an intensely red fleshed apple that shows pigmentation throughout the plant, are showing obvious red pigmentation. Not all of them though, some seem to be taking after the other parent, whatever that might be.
One of the seedlings is showing pinker blossoms than the others. I'm hoping that means it will have redder flesh. We'll see in a few months, or maybe many months since it is a Lady Williams cross and Lady Williams won't be ripe for over 10 months! Wow.
Since several people have asked about getting pollen from me. I decided to add it to the store to see if that is a service people might use. Here is the link. I only have a few varieties this year, but If it seems like people will buy it, I'll have more next year of all the varieties that I like and use in breeding.
15 Super Late Winter Apples, Still Hanging on at Winter Solstice
Here are a couple of videos about very late hanging apples, which I'm always excited about. I broke it into two parts, because, in spite of heavy editing, it's still pretty long. More below.
I'm not good at a lot of things, like remembering people, where I met them, their names, their faces, why I should care who they are and what they think, book keeping... But, one thing I am good at is spotting potential. Years ago when I found out that some apples can hang and ripen late into the winter, I was intrigued. This was potential. The potential to have fresh fruit in perfect condition off the tree at a time when most people in temperate climates are eating fruit out of storage and often already of marginal quality. Imagine a tree that is grafted to many different late varieties ripening through December and January and maybe beyond? That is an awesome idea- which is why I'm doing it! I have a new frankentree started just for very late ripening apples. But, I only know some of what I'll be grafting onto it, and a lot of work has gone into getting this far.
First I started collecting as many very late ripening, late hanging apples as I could find. I spent hours upon hours researching apples to find more of them. Some have fruited and some haven't yet. Now, years later, all that labor is starting to pay off, and not just for me, for you too and anyone else that will listen to me. Here are about 15 different apples that are still hanging on the tree just around the Winter Solstice/Christmas. Some would have been better for sure in early Dec. or even back in late Nov., but some are excellent and a couple are not ripe yet. There is something of a gap between the very latest, Lady Williams, and the ones at their best now, but I'm sure that gap can be filled with apples that are in existence somewhere now, let alone with what could still be bred in the future using the late apple genes that are out there.
Speaking of which, after making this video, I'm even more fired up about breeding for this type of apple. I would guess that the season can be extended even further past Lady Williams coming in at about Feb 1st. I have seen wildling apples here hang until March and still be in good condition, but there was not much else to recommend them unfortunately. I hope to start getting some fruit this year from late variety crosses I made four years ago, like Grenadine x Lady Williams and Grenadine x Gold Rush.
Let me tell you, as soon as I finish this post, I'm going to mosey on out to Frankentree and bite into one of those amazing, crisp, perfect apples that yesterday was covered in snow and last night kissed by a 25 degree freeze, and I'm going to be stoked. I'm sure you'll hear more from me on this topic in the future, but for now, this is a pretty good start.
I'd like to continue work along these lines, collecting, breeding and sharing information. You can easily support me in this and the other development and educational work at no cost to you simply by using my amazon links. If you bookmark this link and use it every time you shop at amazon and I'll make a small commission for sending you there. Thanks for your support. I'm not sure what else to do with myself! I'm already planning more late apple variety breeding crosses to make this spring...
Red Coloration in Blood Apple Seedling Leaves, Flowers, Bark and Wood
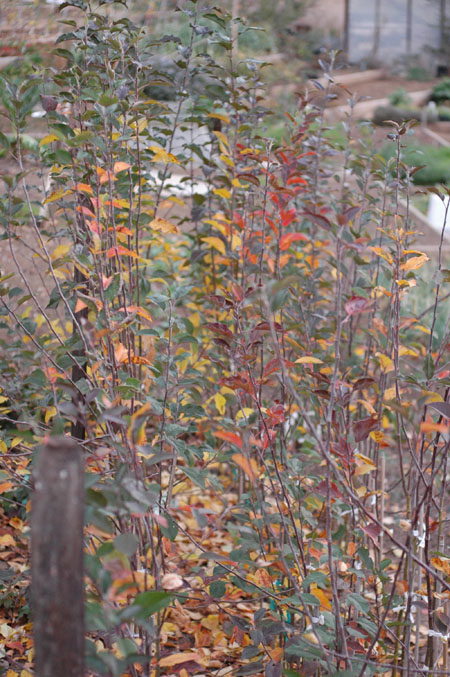
Red fall leaves on one of my seedling apples
I’ve been interested in how much my blood apple seedlings show red pigmentation in the bark, flowers, wood and leaves. My impression is that the apples with the most red flesh also tend to have more of this coloration in other parts of the tree as well. Bud 9 rootstock is a good example, with very red flesh and bright orange to red coloration in the fall leaves. It also has dark red bark and even red in the wood. Most of my seedlings show only minimal red coloration in the spring and fall and very few have really reddish bark, with none close to the deep purple/red of bud 9. This video shows one seedling that has stronger red traits than the rest. I suppose this trait may be affected somewhat by it’s age and where it’s growing, but I’m pretty sure this seedling is exceptional.
Maypole has strong expression of red genes in general as you can see in this spring photo. The apples are also strongly red fleshed, a bit crabby, but still very edible, with some of the delicious red flavor found in red fruits like berries. I've been very impressed by this apple the last couple years and made numerous crosses with it this past spring. I'd like to plant enough of them to make juice. The tree is very narrow and short so they could probably be planted only 3 feet apart or so. I haven't juiced any, because I haven't had enough fruit, but I'm sure it will be very good.
I suppose one could select seedlings by coloration in the new leaves, or in the fall leaves, or in the bark even. I know that Nigel Deacon does that in selecting his seedlings. I’ve decided not to for the time being. I may later when I have gathered information from the fruit of seedlings I have in the ground right now. For the time being, I want to see what happens with all of them. Not all of the best blood apples that I grow have strong pigmentation in places other than the flesh, so by culling most of the seedlings and keeping only the reddest leaved ones, I could end up tossing out something really good and I’d never know. Another reason to keep everything for now is that I have speculated that the expression of the red flesh tends to come with some other traits that may not always be desirable. Blood apples, are still being developed from primitive breeding stock. They have not been refined by long breeding, so there are issues with bitterness, poor cultural traits and texture. I’m not sure, but again I suspect that those traits may tag along somehow with the red fleshed gene expression. So, by culling out the less red seedlings, I may also be culling out some of the best dessert traits. What would you do? Risk growing out everything to see what happens? or select only the seedlings showing the most red? Hopefully this spring will see blossoms in my seedling rows with apples to follow.
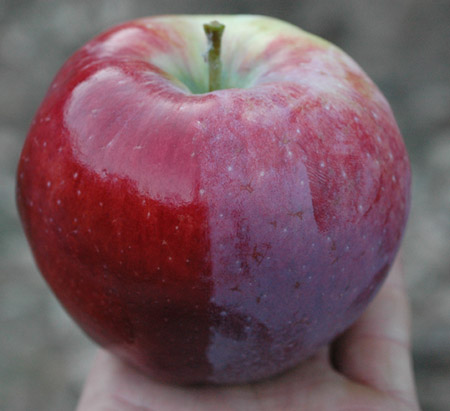
I haven't noticed that Williams' Pride has particularly red anything else, but it does have very red skin (it gets darker than this) and a little bit of red flesh. Rome Beauty is another very red fleshed apple that can have pink tinges in the flesh, and I've seen small tinges in other apples, including cherry cox. I'm hoping that simply by combining red fleshed apples with apples like King David that just have dark red skin, I may still reinforce the red fleshed trait.
William's pride showing tendency to red flesh
How I Pick Parent Apples for Breeding New Varieties, My List
Here is a video I put together on Apples that I have used as parents for my breeding project. I show and discuess a few apples that I am using which were in season at the time, and talk about some others I’ve used. My approach is not very sophisticated, but I’m trying to keep it fun. Poring over scientific papers and reading about genetics is not my idea of a good time. Perhaps my approach will become more sophisticated in the future, but I’m also just curious to see what an average person could do without learning too much new stuff beyond the basics of pollinating, growing seeds and grafting, which are all pretty accessible. Below is a list of parents I’ve used, though I may have forgotten a couple. I will probably do more full reviews of some of these in the future. They were generally chosen for flavor, texture and overall desert quality, flesh color, season and keeping ability. Those are the main things I think about with flavors and desert quality toping the list.
White and yellow fleshed apples:
Wickson
Sweet 16
Cherry cox
King David
Rubinette
Golden Russet
Lady Williams (parent of cripps pink)
Cripp’s Pink (trademark name Pink Lady)
Granny Smith (probable parent of Lady Williams)
Newtown Pippin
Chestnut Crab
Beautiful, tasty King David
Red Fleshed Apples:
Etter 7/13 (Grenadine)
Etter 8/11 Rubaiyat
Etter 7/9 (Pink Parfait)
Maypole Crab (dwarf columnar growth habit and intense red flesh that is an odd combination of very edible and barely edible. I like eating it and am excited about breeding with it.)
This year’s crosses (if I do any. I have to stop at some point. Hell, who am I kidding! ;) This year’s crosses will probably involve William’s pride, Trailman Crab, Centennial crab, Chestnut Crab, William’s Pride, Sweet 16, Katherine, Etter 7/9, Maypole, Red Pippin (fiesta), Golden Russet, Cherry Cox, and Lady Williams, and possibly some other russets. We need more russets! St. Edmund’s Pippin is very intriguing. It is a dyed in the wool russet that ripens in summer. I just haven’t fruited it enough to be ready to jump in yet. I will continue to do red fleshed crosses, but also some that aren't. I'm pretty sure that using just red fleshed crosses is seriously diminishing the percentage of seedlings that will be successful, because of some of the unrefined genes in red fleshed apples. Also, I'm just intrigued about other lines of dessert apples too. I should be getting some fruit out of my trials this coming year, so stay tuned for actual results!
For more on apple breeding see the plant breeding pages:
Grape Tasting Notes 2015, and a sneak peek at my New Apple!
Grapes are a miracle. They often produce enormous quantities of fruit packed with precious sugar and flavor with very little input. I recently attended a grape tasting at local fruit enthusiast Richard Jeske’s house. He and his wife host this tasting almost every year, where he collects other peoples opinions on his collection of grape varieties. I can relate. I’m always curious about what people think of the apples I grow. I hold impromptu tastings and hand them out when I go places. Richard has other fruit trees, vines and bushes, but his main interest and efforts have been among grapes. He generously prints up a list with descriptions and brings cuttings to the Boonville scion exchange each winter to give away. He is the reason I have any good grapes here. He's been doing with grapes for a long time, what I've been doing with apples here for a shorter time. He also sells rooted vines.
There were 30 grape varieties on the main tables. I went through systematically and wrote down my favorites. I plan to put in more grapes here, and have been meaning to go back to this tasting and then get cuttings for everything I like so I can further test them. I have 4 varieties here now all of which are pretty good to excellent. and two of which I’ve already reviewed in youtube videos, linked below. Here are my favorites from this tasting.
Blue/Purple Grapes
Enormous fantasy grape and raisin. This guy had a big hand!
Fantasy: This grape is huge and seedless. It has a crunchy texture, which I like. The flavors are mild, but very pleasant. It makes gigantic grapes, which is cool, but they take a long time to dry.
Saturn: This is similar to Fantasy right down to the shape, except that it is smaller. It probably had just a little bit more flavor. I will probably grow both of them.
Mars: This is a big, seeded grape. It is flavorful, but I’m not sure I can describe it. There were other similar large round blue grapes, but this was just the one I liked the best, though not by a large margin. I think the juice would be excellent.
New York Muscat: A very flavorful muscat cross. It has good muscat flavor, but without the harsh dusty flavored, or coarse unrefined animal like musk that some of them have. One of them, St. Vallier, tasted like laundry soap, but the woman next to me though that was the best grape ever. Different strokes. I’m not a huge muscat fan and most of them didn’t appeal to me. I’m sure this one would make amazing juice.
Summer Royal: Large round and crunchy. I don’t remember much else, just that I liked it. Like many of the large crunchy seedless grapes, it's not overflowing with sensational flavor.
Glenora: This is a small crunchy blueberry shaped grape. I really enjoy it, though it is finicky to eat because many of the fruits are very small. It also tends to fall off with the stem attached, which makes it harder to process. I will keep a vine though for sure. I wouldn’t plant more than one though. Video review here.
Green Grapes
Interlaken: I already have this one. It is similar to Himrod, which I also have, but I like the Interlaken better. It is a soft textured seedless green grape. My friend, local fruit expert and keeper of Feijoas Mark Albert also grows this in the hotter valley and swears it is the best thing going for reliability but also being of high quality. It is a very good grape. It’s not exciting, but my vine is also vigorous and productive and good eating.
Golden Muscat: This is another muscat on the mild side. Extremely sweet, soft, seeded. Again, no doubt would make an amazing juice. This is a crowd favorite.
Delight: Delightful crunchy seedless grape. Richard says it makes a small compact vine.
Red Grapes
Reliance: This is my favorite of the four grapes that I already grow here, and Richard says it is very popular at tastings. So, I’m already a big fan and did a video review last year. It has some muscat flavor, but uniquely so. I highly recommend it.
Beautiful, delicious Reliance
Swenson Red: This one was stashed away in the limited quantity stash for fruit geeks like me to taste. It may have been my favorite in the whole tasting. I’m definitely picking that one up if I can get a cutting or plant this winter. It is had a sweet candy like flavor. I think it was seedless, but don’t remember for sure. The grapes are small.
I regret not spending more time picking Richard’s brain about the growth habits, disease resistance and any other relevant bits of info on all of these selections. He did say that he has almost no problem with anything except the pure European vines. He seemed to be saying that the hybrids and muscats are basically disease free.
The blurry woman in the blue shirt is my mother.
I hope to do some sizeable grape plantings here in the future, but I haven’t yet located where I want them in relation to other infrastructure and plantings. I also have vague plans for a self supporting grape arbor, but again, haven’t settled on a location. In the mean time. I’d really like to get cuttings for all of these and plant them somewhere for further observation over the coming years. It is one thing to taste a grape a couple times and decide it is probably worth growing, and another to live with it a few years and see how it fares. How productive is it? How vigorous? What color and shape are the leaves (some go bright red in the fall)? And will the fruit grow on me or become boring? And then there is raisin making, grape syrup making and juice. I think I’ll forgo wine making for the most part.
With the quantities of sugars and juice I currently consume, growing a ton of grapes sounds like a good idea. I’ve done my own hot packed grape juice in the past and it is truly amazing. The grapes have to compete with kiwi vines for arbor space, but I’ll find someplace to put them. I’ve got some cool ideas for soil modification etc..
yum, fresh grape juice!
I also took a bunch of apples and put them out for people to taste. They didn’t get a ton of play competing with all those grapes, but some of the results were interesting. Wickson as always was a winner. Not surprisingly King David too. Margil was also popular. Most gratifying though was that my first seedling apple was well received. Yes, five years into my apple breeding efforts, I have a fruit. It is actually an open pollinated seedling though, not one that I crossed intentionally.. More on that soon. I’m going to have so much fun making that video! For now, lets just say it has had a lot of fans and not much in the way of detractors.
My new apple! In at least the top 25% of the 150 or so apples that have fruited here so far, as pleasant eating as any apple in season here right now, and not too bad lookin'! Stay tuned for a full report and what may very well be a snarky, gloating video :D
A Visit to FRANKENTREE, With Over 85 Varieties Fruiting This Season!
Wow, frankentree has really kicked some apple tree butt this year with at least 85 varieties fruiting out of 150 grafts. He looks amazing and I'm pretty excited to retry some old varieties and some new ones as well. it's just a good apple year in general, and most of the trees are coming through year two of severe drought pretty well. The apples on frankentree are on the small side, but I've had some pretty tasty ones so far, like the two great crabs I reviewed in July, Centenial and Trailman. Check it out, its quite a sight!
I know I talk about Frankentree a lot, and multigrafting and frameworking in general, AND I keep threatening to tell you more about how to do it all, but it is coming! I swear! A lot actually ;) I'm trying to tone it down lately, but it's just hard to express myself without cursing like a sailor sometimes! Well heck, what was I saying? Oh yeah, it's definitely coming and it's gonna be good. If I wasn't already stoked enough about the idea, and convinced that it should be the rule rather than the exception, I'm even more stoked after seeing frankentree drooping with so many different apples this year. I WILL influence thousands more people to do this, either directly or indirectly. Maybe not to do it like a totally obsessed nutball such as myself, but at least to stick some new and exciting varieties with varying ripening times on that old tree out back. Well, I'm going to try anyway. That's the plan. Help me out by sharing this video on social media!
Seven Summer Apples, Head to Head Taste Test
Beautiful and Tasty Chestnut Crab
Untold hours of research into apple geekery has resulted, among other things, in a fair collection of early apples of high reputation. Although many have not lived up their reputations, at least not in my climate, my last taste test of two early crab apples, TRAILMAN and CENTENNIAL was very encouraging This week I got to taste 7 early apples that are in eating around early to mid August. The results didn't surprise me. I've tasted most of these apples before. Still, it was very revealing to taste all of them at the same time and compare directly. What did surprise me was significant red staining in the flesh of William's pride, making it a good candidate for my red fleshed apple breeding efforts, along with it's other merits.
For anyone searching for good early apples,the winners in this tasting are good at any season and very exceptional for early apples. There are other apples which I grow that ripen in the same season, but for various reasons, like birds, Drought, and alternate bearing, I didn't have any specimens to add. So, they will have to wait for another year. Most promising among those so far are probably St. Edmunds russet, Irish peach and golden nugget. I also just today discovered an entire cordon Mother apples (Mother is the variety name) that I hadn't noticed. I've had them before, but I just ate one that was by far the best I've ever had, and it may have been a contender up against the winners of this taste test. Extremely sweet with lots of rich flavor. This one may have been an early drop. It takes a while to learn when to pick and eat each variety.
An old early apple variety known as Mother
I now have a dedicated Frankentree in one of the orchards for only the very best early apples, which I will graft on over the years as I suss them out.
Peeling Oak Bark for Tanning Leather and Apple Breeding Update
Here are a couple of recent videos I did on the stuff I do around here. One is a short update on labeling and protecting fruit that was pollinated earlier this year as part of my apple breeding project. I talk a little about the breeding parents and related stuff, but it's pretty straightforward and short, with a quick visit to my new pig. The second is a follow along while I cut down, cut up, and peel the bark off of a tan oak tree that is infected with the organism involved in sudden oak death. I use the bark for tanning skins. I'm working on a book right now on tanning with plant materials like bark, various leaves and pods and stuff like that. Writing, research and experiments around that project now consume most ofmy time, energy and thought. In the video I show a few pieces of leather tanned with oak bark, peel the bark, split the wood and clean it all up. There are few things I'd rather do with my time than that type of forestry work. Splitting wood, playing with wood, using my axe, burning brush to make charcoal, etc.. is all my idea of a good time! woo hoo! It's really hard for me to cut these videos down and focus them in. There are so many satellite topics I want to talk about! Definitely some stuff coming on axe use, wood splitting tutorials, forestry and forest ecology, and lots of tanning and skin working stuff.
https://www.youtube.com/watch?v=vNFZiu4mSts
https://www.youtube.com/watch?v=KX8g0Yt0ZmI
Two Sweet Crabs That Don't Pinch! Trailman and Centennial, Delicious Super Early Crab Apples,
https://www.youtube.com/watch?v=rV0EqNy7bw8
Here is my review of two crabs that fruited here on Frankentree for the first time ever. Centennial and trailman are very similar and seem to ripen at the same time. Both have good flavor and very good to excellent texture, even after a recent heat wave with consecutive days over 100 degrees, 101, 103, 103 in the shade.
I have a particular interest in crab apples that are edible out of hand, with good dessert quality and these two really fit that description. They are not only very good to excellent in eating quality, but they are also the second apples to ripen here, this year in the first two weeks of July. "First early" apples are usually low in sugar, grainy or mealy and just not that great for eating. Time will tell more, but I can already tell from just a few samples that these apples are a great find. I'll probably be breeding with these in the future as I think excellent dessert crabs are something that needs work and has great potential. These are super easy to eat, since you can eat the entire fruit with the core, seeds and all. The seeds only add to the flavor, like an almond flavor filled center.
A Video Tour of my Amateur Apple Breeding Project
A walk around looking at various parts of my apple breeding project. It doesn't look like much, but I think it's getting the job done. I spotted my first blossom while filming this. Way cool, that means I'll probably have some bloom next year, hopefully followed by fruit!
https://www.youtube.com/watch?v=X8EdnuyClkk
Amateur Apple Breeding Video Series Launched!
Yay! The apple breeding video series is off the ground! I really wanted to get it launched this year because I made a lot of pollinations this time around, and I'm not sure how many more years I'll be doing it.
The first two videos are published . They are basically the same video in two parts, of me talking about why I'm breeding apples and basically why I think more people should breed plants, apple breeding history, along with some gentle ranting (only had to bleep out one %$#*& word! Pat me on the head). The next videos will be thoughts on selecting parents and then onto the fun part, the first how to segment which is on pollination. The pollination segment is mostly done, and I think it really turned out beautifully with my new drastically improved video capabilities.
The concept of this series is to follow the entire breeding process starting from pollination, for many years onward, until those specific crosses bear fruit, and likely beyond that as the fruit is assessed over a number of years to see if it is worth naming and propagating. Also, we'll be following my progress with the whole project which is around 4 years in right now. I made my first pollinations in spring 2011, so I may get lucky and have some fruit as early as next year. One of my first seedlings is actually fruiting now, but it is just an open pollinated seedling of Wickson from my friends at The Apple Farm near here, so the pollen parent of that one is unknown.
My main goal with this video series to is to continue to incite creativity and deeper participation in what we are growing and eating, so please share so I can corrupt more people! mwaahhhahahahhhaaa...
Video on Removing Burr Knots
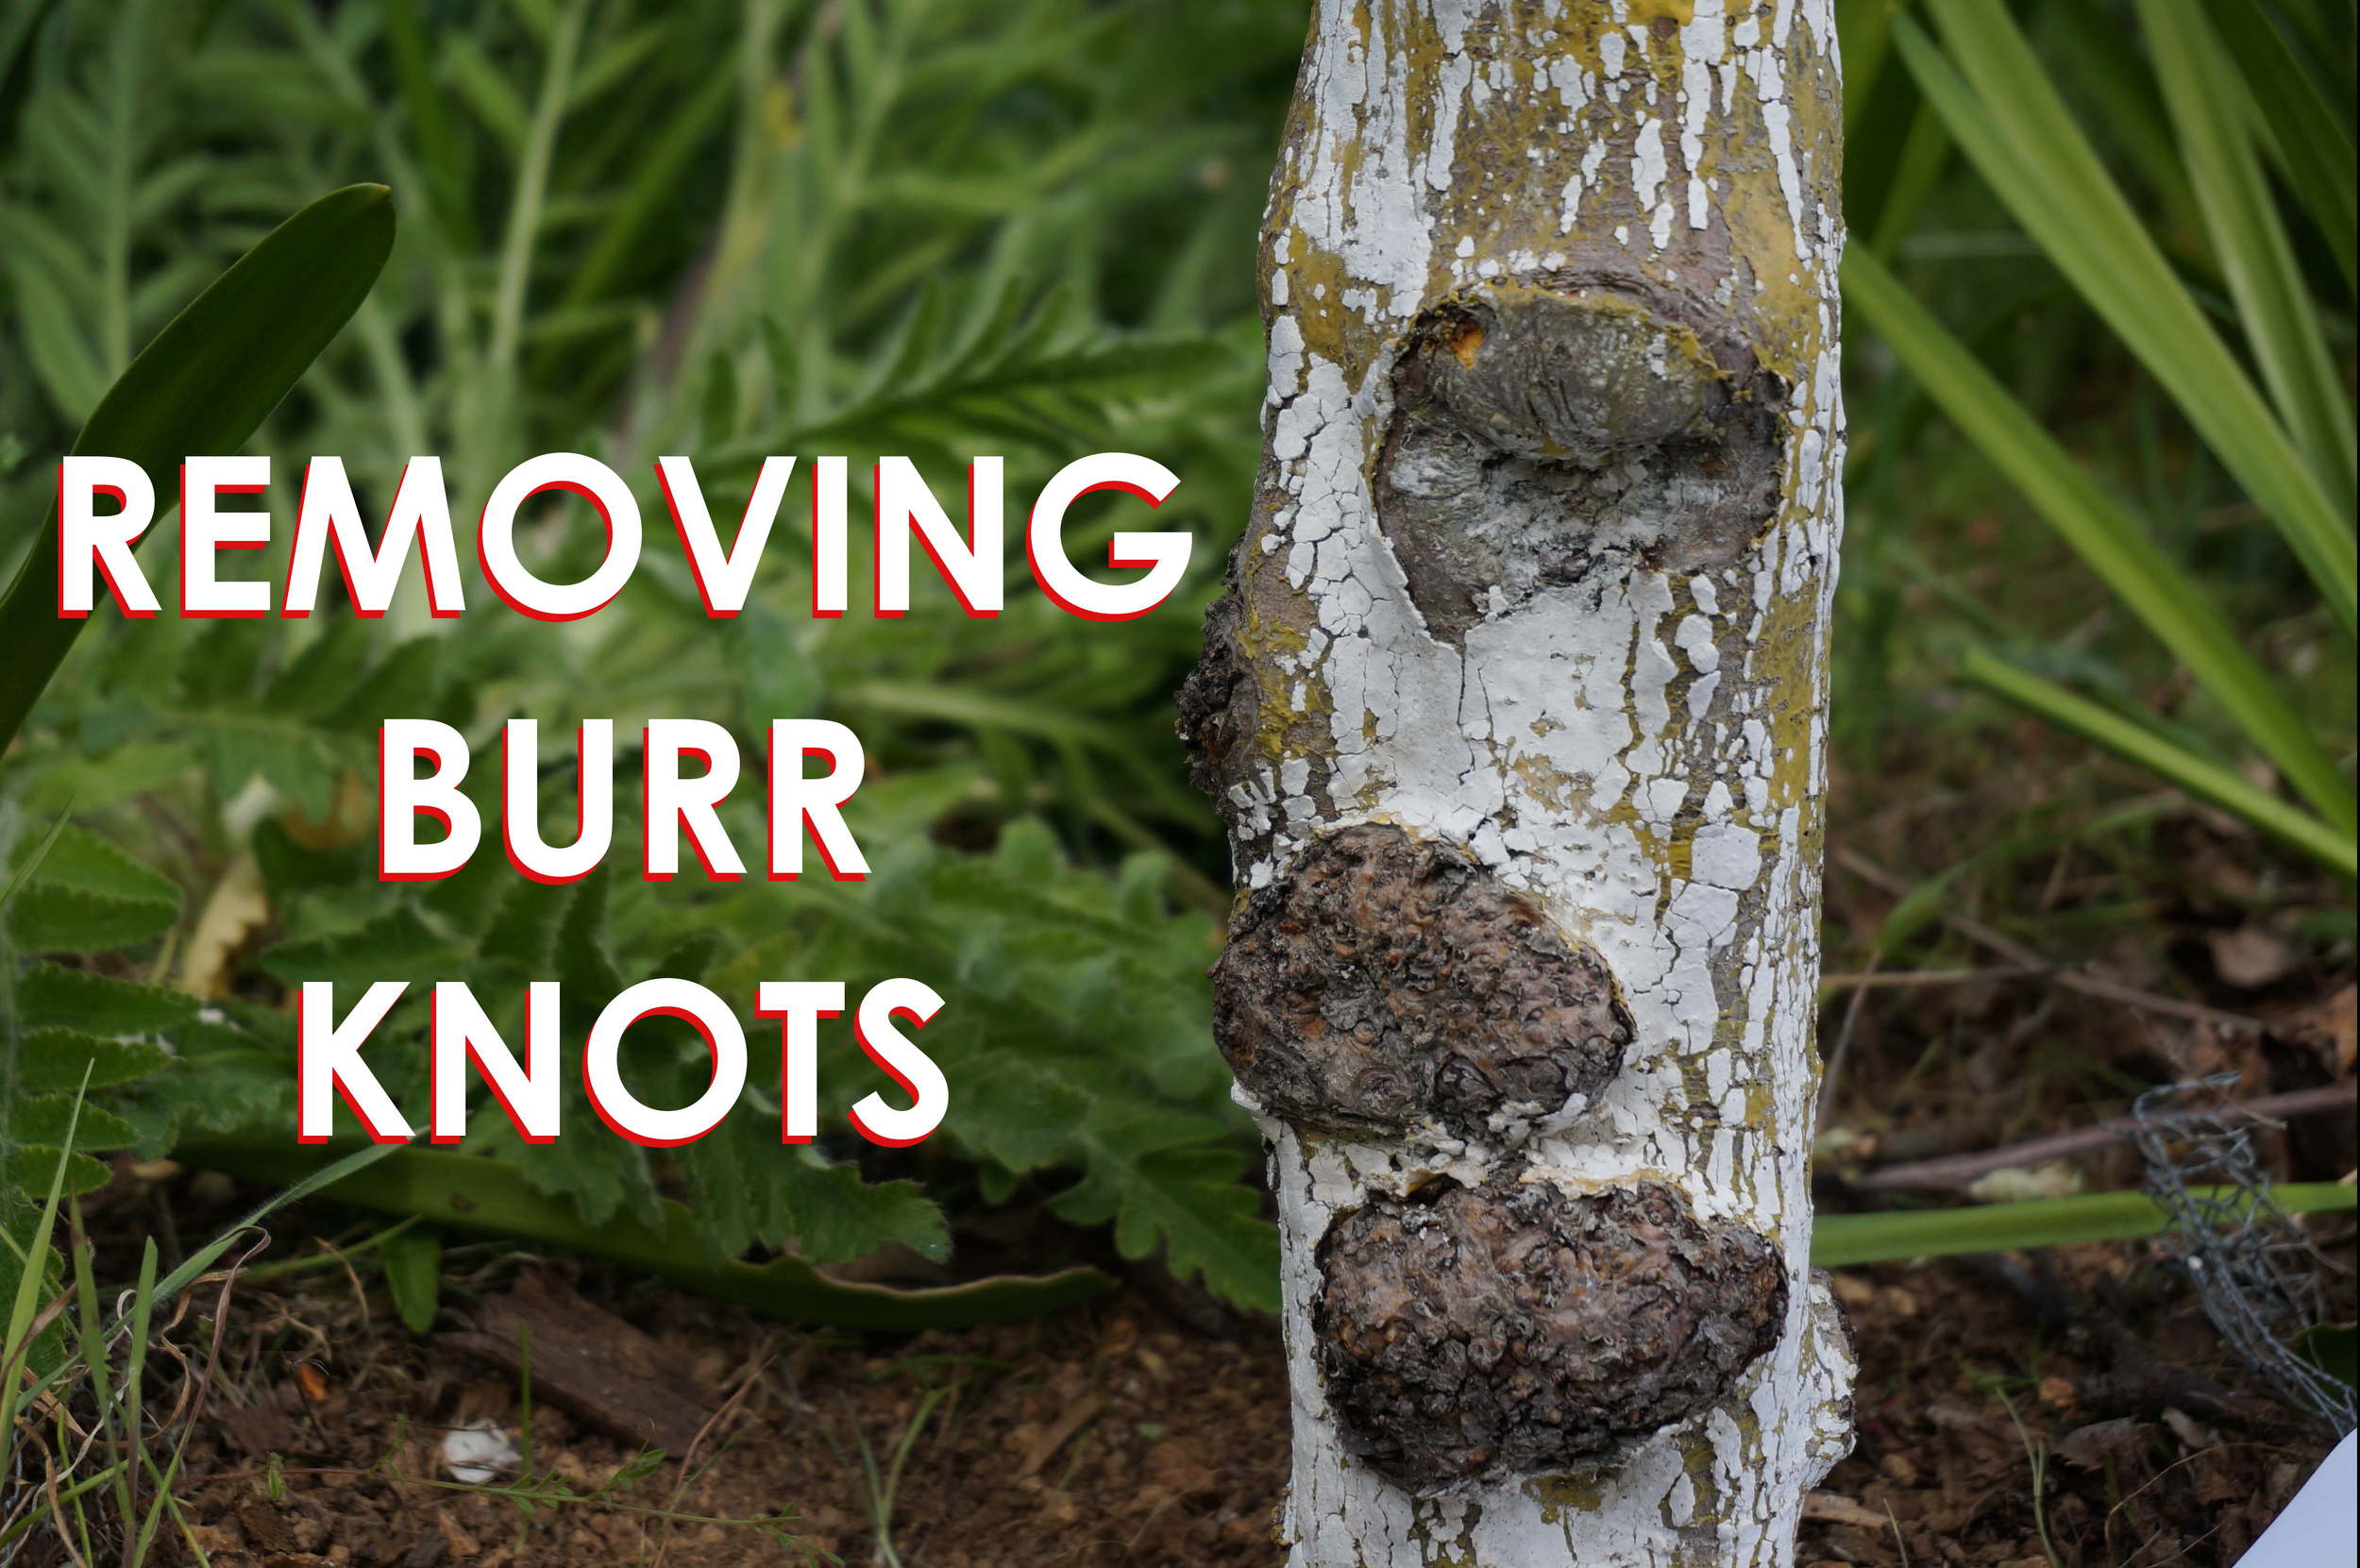
'Tis the season to do tree surgery- at the beginning of the growing season and after most of the rain. A short video here on my experience so far with removing burr knots (arial root balls) from apple trees and how/why I think it works. When I looked for information before trying this a few years ago I found almost nothing. I think there was literally one dude in the internet universe who was like "yeah, you can cut those off" (I'm totally paraphrasing). So, hopefully this will help a few people with those unsightly and, lets face it, unsafe burr knots. It looks pretty dope too, because I finally got a new camera! Now I have the potential shoot killer HD video with any lens that will fit on the camera, which is almost any lens actually. I'm still climbing a steep learning curve with audio, camera functions and all the details, like remembering what the hell it was I was going to say, but I think things are improving pretty fast. BTW, look up your root stocks to see if they are prone to Burr Knots and if so, plant them up to the graft union. Nobody told me that back in the day, but then again if they had, I wouldn't have got to make this video and dork out on burr knot theory.
Interstem Grafting Videos
Introduction to Frankentree Video
This is an introductory video I threw together to stoke people up on the idea of multigrafted trees. Quite a few fruit collectors use this technique and, while Frankentree is a more extreme example, I increasingly think that multigrafted trees with 3 to 30 varieties or so will serve the average person with a few trees much better than single variety trees do. Add to that the edifying character of the work, the increased involvement in one's own food supply and the neato factor and it seems like a pretty easy sell, except for the intimidation factor. I'd like to maybe think this out better and make a more refined version as well as a detailed video tutorial on some of the specific strategies and skills, but this will have to do for now. The original Frankentree post has a little bit of information on grafting with pictures of a couple of different grafts.
!FRANKENTREE! TRAILER...
!FRANKENTREE!
https://www.youtube.com/watch?v=WKE6t08wlBA
Simple Biochar Production, and Grape Reviews, a Few Videos
Yay, burn season is here! Just uploaded a few videos. A couple of short grape variety reviews, The pretty darn good Glenora and the excellent Reliance (of which I'm eating some right now, and they're super tasty!). And a somewhat long winded, but cool, video of burning a top lit open burn brush pile to make biochar (Which Kelpie of Backyardbiochar calls TLOB). This is one of the two charring methods I've been messing with, the slope sided pit (or container), and the open top lit piles. I think each has it's merits, but probably more importantly, each might be better suited to certain materials that people commonly have. Both can be scaled up and down in size and neither should produce a ton of smoke if the wood isn't either soaking wet or green. A pit burn video should be forthcoming. Hopefully I'll get better at shooting and editing video, learn to talk faster and develop a video personality at some point. In the meantime, pop some popcorn and check it out. No Guinea Pigs were harmed during the making of these videos, although some chickens were verbally assaulted.
https://www.youtube.com/watch?v=HVs75-A7PEo
https://www.youtube.com/watch?v=pOZ1XNtNRf4
https://www.youtube.com/watch?v=rARhQV7wmwI
Interstem Grafted Apple Tree Update, Year Four
It’s been 4 years since I grafted my first interstem apples. They were in the nursery for a year, and have been in the ground in permanent locations for 3 years. This is an update on my experience and thoughts so far. (Read the original post here)
A couple paragraphs for those who aren’t familiar with interstem trees: An interstem (a.k.a. double worked, archaic) tree is one that has an extra stem grafted between the rootstock and the upper portion of the tree. Sometimes the interstem (the stem between the roots and the tree) is there for the sake of compatibility and can be used when the fruit variety is not genetically compatible with the rootstock, but the interstem is compatible with both the top and the rootstock.... think of a kidney transplant, the donor and recipient have to be compatible or the graft will be rejected. Often though, and in my case, the technique is used to dwarf a tree. One problem with dwarf rootstocks is that they are weak. Sure they are small, which is what we want, but so are the roots. Interstem grafting allows us to select a large vigorous rootstock, that would normally grow a large vigorous tree, for the roots and a weak interstem to dwarf the tree... small tree big roots. That means, no staking of the tree, which would be required for a weak dwarfing stock. They also need less water.
Drought Tolerance: My primary motivation for grafting interstem trees has been drought tolerance combined with dwarfing, a pairing which I don't know of any other means of attaining. I’ve had a few of the trees get a little crispy in the end of summer, but over all, I think they are performing much better as m111 / bud 9 interstems than they would on any stand alone dwarfing stock. I do water them occasionally, but not a lot. I probably should ideally water a little more, but I want them to grow up tough and self sufficient, not expecting a drink whenever they want one... tough love. There is a second row of interstem trees that I will probably move, or just remove, which are not cared for nearly as well as the main row along the driveway. Most of these outliers have survived and, although they are not doing great, I doubt many would have survived the droughty conditions they are growing in if they were on a straight dwarfing stock like MM109 or bud 9. I probably won't water any of the interstems this season since my spring is lower than it's ever been at this time.Understory: The original vision for the main row of interstem trees was to establish an understory of flowering bulbs. The trees are along about 100 feet of the driveway as you drive into the main area, and I had envisioned masses of narcissus in the spring that I could hopefully sell some of at the farmer's market. I have an ongoing experiment using flowering bulbs to create fruit tree understories... specifically, plants that grow only in the winter and die back early in the summer leaving a mulch of dead leaves on the soil surface to prevent evaporation. I call this a dying mulch, but it’s more like a living/dying mulch. This plan was hatched specifically to deal with our seasonally dry climate which has virtually no summer rain. Two of the intertstem trees are now planted to Hybrid Amaryllis on 12 inch centers, but it will be some years before I really know how well that system works. Amaryllis is not as spectacular as narcissus and blooms in the late summer, but it is the plant that seems to be performing best in my trials and it’s probably more marketable as a cut flower than narcissus anyhow. I may plant every other tree for now. Having half of the trees as control subjects should show over time whether or not it works.
Root anchorage: The superior root anchorage has proved to be very nice. I’ve barely staked the trees and only to keep them growing straight, not because the roots weren't adequate. Trees this size (8’ x 8’ is the target size) normally require staking because the small and sparse roots simply don’t hold the tree up. Precocity: Interstem trees are precocious, most of mine bore some fruit the second year in the ground. That is a whole lot faster than when using your average M111 or larger rootstocks. Precocity is a great advantage. The trees grow fast to size, but start bearing early and then quit growing for the most part. Most would be nearly the size I want them already, if I hadn’t changed my mind and grafted most of them over to different varieties after the first year. The fruit quality seems good so far, and I think with careful thinning, it would be easy to grow jumbo sized fruits if that matters to you.
Size: One reason I got into this system is because I harvested some dwarfed apple trees and was so excited that I didn’t need a ladder! No ladders for pruning or picking. That’s pretty great. If you’re around 50 or over, no ladders and early bearing should be lookin’ pretty good! No one needs to fall off ladders, but for seniors, it's a big deal to break a hip, and coordination typically declines with age. It’s pretty nice to have a tree where I can reach almost everything. I might need to stand on a box once in a while, but not a ladder. I don’t mind working on ladders too much, but moving them around gets old pretty fast. Not that I would ever advocate planting only dwarfs. Standard trees live longer making them a great legacy, and they are just cool to have around. Still, there is a time for dwarfs, and for many of us, that might just be most of the time. The tallest trees are probably over 8 feet now, but I think I can keep them down once heavy bearing commences and growth slows. Re-grafting: Like I said, I changed my mind about the varieties I originally planted. I put in mostly cider trees figuring that I’d test them and work over the ones I didn’t like to other varieties. At some point, I realized that I have never had a single glass of cider made from swanky European varieties meant for cider only that was even good, let alone great. However, I’ve had a number of excellent ciders from blends and dual purpose varieties like Gravenstein, Ashmead's Kernel and Rome. I’m not saying I think you can’t make good cider with those fancy english apples, nor that they aren’t capable of making superior cider, just that I have to look at the big picture and go with my personal experience. If I can make very good cider from varieties that also make great eating, I've got versatility which is a great advantage. My last batch of natural yeast cider from Rome Beauty was freakin’ awesome (I haven’t planted Rome Beauty, and probably won’t, so this isn’t a recommendation. It’s not really a very good eating apple.). I think that the quality of fruit (hint, dry farmed= lots of sugar, flavor and tannin) and what is done with it, are probably more important aspects of cider making than using cider dedicated apples only. Sure, you can’t make a great wine from a concord grape, but you can make very good cider from many dual purpose apples and blends. I also have been drinking less as I went on various health pursuits :-/. So, I grafted all the cider-only varieties to dual purpose and dessert varieties, an approach which gives me a lot more versatility. If I want to make cider I can, or I can eat them, or sell them, or just press them for juice. I left the King David and Wickson trees, both excellent dessert/cider apples, but everything else got worked over to varieties that I’m excited about- Sweet 16, Katherine (Etter), Newton Pippin, Gold Rush, Kerry Pippin, Golden Harvey (turned out to be mislabeled), and a couple of the Etter red fleshed varieties. The grafts did great, with 100% success rate. Many are bearing fruit this year. This experience highlights the main reason that orchard owners should know how to graft, VERSATILITY. More on that in the future.
Suckering: The one big drawback I can see to interstem trees so far is that suckering is definitely increased. Suckers are a pain in the ass. Most of my other apples are on MM111 stocks and they have suckered very little. But over half of the interstem trees are producing suckers. It is generally better to tear suckers off the tree, because that removes the buds near the base of the shoot, improving the chance that it will not grow back. But many of these suckers are deep and have to be cut off, and they just keep growing back. Burying the union of the rootstock and interstem so that the interstem also grows roots is said to help reduce suckering. I didn’t do that, because the bud 9 I used as an interstem is susceptible to woolly aphid and M111 is not. I wish I had now though. I doubt the risk of major woolly aphid damage is outweighed by the bane of suckering. Besides, I’ve never seen woolly aphid here, although I am constantly told it is a major problem in the area. Even with some aphids on the bud 9 roots near the surface, the great majority to the root system will still be immune to them. Lesson learned. I should not have let fear stop me from planting at least half of them deeply. If done over, I would plant the MM111/Bud 9 unions a good 3 or 4 inches below the soil surface, and will if I plant any more of them. Interstem length: The foregoing brings up the point of interstem length. I was very sloppy when choosing the length of interstems. In fact, choose would be a strong word! They varied in length quite a bit. A cursory examination reveals that there is some noticeable effect on tree size, a longer dwarfing interstem creating more dwarfing effect. I would say though, that none of the trees look like they will end up too small. Given that fact, and that one would need adequate length to bury several inches of the interstem if planting deep to minimize suckers, I would probably tend to make them on the long side. You can get away with planting the interstem/rootstock graft below ground, but you definitely will lose much, if not all, dwarfing if the second graft, the interstem/varietal one, is buried and the varietal allowed to root. I scarcely remember how long my longest interstems were, but I’m thinking that 8 to 10 inches is probably about what I’d shoot for next time, planning to bury 2 or 3 inches of it in the ground. I don’t know that those numbers are best mind you, it’s just what I will probably try next time around The future: Aside from the suckering thing, which is a pain not to be underestimated, things are going smashingly. Right now it's more than enough to keep up with what I have planted, but if my health improves soon, I may plant some more interstem trees using my recently posted biochar pit latrine system to prepare the ground ahead of time. People are digging my apples at the farmers market, because I have done enough experimental work to be able to bring really unique and excellent fruit. I also think my growing conditions, basically scant on water, really improves the quality of some varieties. I have confidence in my ability to grow outstanding apples now, though I’m still refining culture and varietals. I feel pretty sure some of these interstem trees will be grafted over yet again as I hone in on the apples that really perform well in all areas, flavor, texture, cultural traits, disease, drought tolerance, sun tolerance and so on... oh yeah, maybe consumer preference, though I truly hope that I can sway market goers to buy any outstanding apple, regardless of size or external appearance. Summary: So, to summarize, I think interstem apples are great. Ease of maintenance is not to be smirked at, large fruit size is neat, drought tolerance seems very reasonable so far, precocity (early bearing) is extremely valuable, fruit quality seems very good so far, anchorage is awesome for a dwarfed tree. What’s not to like?... Well, suckering is not to like. In fact, suckering sucks. Thorns in paradise. So, I guess I'm recommending this technique based on experience. If you want a small tree, but with a wide foraging root system, drought tolerance and anchorage, interstem trees look pretty good so far. Interstem trees are hard to find. You might get someone to custom graft them for you, but my recommendation, as always, is to learn to graft them yourself. Grafting in one year: BTW, you can read my previous post on interstems for details, but all of these were grafted in one year, making both grafts at once with dormant wood on dormant stock. I did the same thing again this year, and again with 100% take. It does not take two years to make an interstem tree as is often asserted. You may not want to tackle two grafts on one tree when just learning, but you could always do the interstem graft the first year, and the varietal graft the second. Or you could just go for it and do them both at once. If one doesn't take, you might still be able to salvage it and regraft the following year.
Making Sicilian Style Fermented Green Olives
I'm going to tell you how to make delicious fermented green olives by the easiest curing method I know of. One of my many long term projects has been curing olives. I started because I love them and because they were too expensive for me to eat in the quantities I wanted to. I figured I could turn those olives growing all over California into something tasty. Some 20 plus years later, I have a pretty good grasp on the subject. I'm headed to an olive tasting event this weekend, the Olive Odyssey organized by olive curing champion Don Landis. I was going to print up recipe cards for sicilian style olives, but thought I'd just save paper and send people here instead. Besides, now people can bump into this awesome recipe on the web!
What's so cool about this recipe? Lotsa stuff. It is perhaps the easiest curing recipe I know for olives. There is no maintenance to speak of. There is no leaching with lye, or water, nor anything else. You stick 'em in a jar with brine, seal it up, leave it for months and open one when you are ready to eat them. And of course they taste hella good homeslice! Big fat juicy, lively, acidic, rich tasting olives... oh yeah.
The downside? You have to be patient! Wait, that's good for you, so get over it! Oh, and I only know one olive common in California that is really good for this process. If you're lucky enough to have access to this olive though, you've got a gold mine of potential hanging on those trees in the fall.
That olive is the Sevillano. It is also known as Queen olive in California, but Sevillano it is and should be. The Sevillano has been a very popular commercial cultivar, so it is pretty common. It is also easy to identify. If you find a tree with many sizes of olives on it, but some of them very large, it is very likely a Sevillano. If it also has some bunches of very tiny olives, like BB's, known as shot fruit, it is almost surely a a Sevillano. The olives are generally oval, but become rounder and plumper as they ripen, turning from a brighter grassier green to a more rich yellow tending toward straw color. It is okay to use them when they are just beginning to blush red too as in the picture below. The reason that these work well are several, but the key is the fact that they have a low degree of bitterness. The finished olives will have some bitterness for sure, but if made with most other varieties of olives, they would be inedible. The texture and flavor are also outstanding and they seem to have plenty of fermentable sugars. They also make very good lye cured olives in brine, kind of like the black olives in cans, but many times better. Yummy like sweet candy is to the unfortunate child of a staunch health food slingin', kale juicing mother. Seriously, and that lye ain't gonna kill ya, I promise. If I remember right they are ripe in mid November around here, probably earlier at lower elevations with warmer nights.
You want to harvest the fruits when they reach what is called the milk stage. When the olives are unripe, they are hard and green. The unripe olives just scream unripe. The light green color, the slightly bumpy, hard surface texture, the shape and the bony look they have. When they enter the straw/milk stage before turning black, the olives really plump up and become voluptuous with oil. The skin glows and smooths out and the color softens. The best test though is to pick one, stab into it with your thumbnail, and squish out some juice. if the olive is ripe enough, it will exude a milky liquor.
Pick the olives carefully to avoid bruising.
Wash the olives and sort over to remove those with olive fly damage. The olive fly lays it's eggs in the olive and the larvae eat it from the inside. Look for small holes and "pricks" in the skin. If in doubt, sacrifice some by cutting them open to see if there are larvae inside.
If you have a lot of olives, sort them by size and process the various sizes separately. The smallest ones should finish curing a little sooner than the large ones. Otherwise, it's okay to mix sizes.
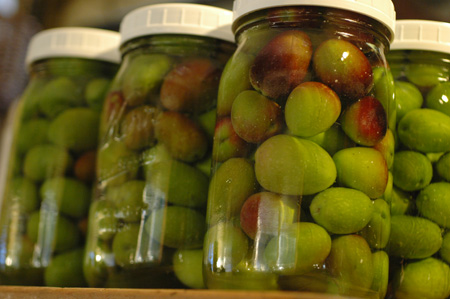
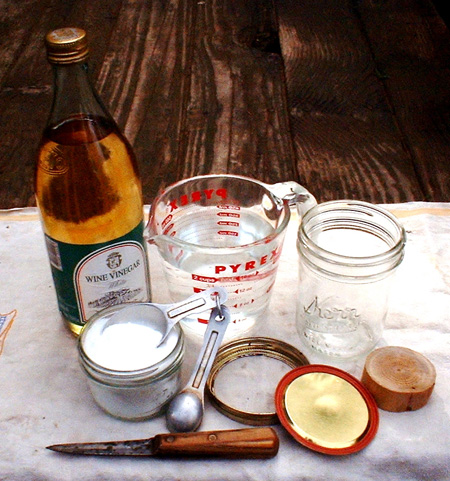
Wash the olives and pack into scalded mason jars within one inch of the top. By scalded I mean pour in boiling water, put the lid on the shake it up a bit. Turn the jar upside down for a minute to cook the lid real good too. The jars can be any size. I think you could ferment a single olive in a tiny jar if you could find a suitable jar that small! Fill jars to the rim with brine made of 1 quart water, to 1/4 cup salt, with 1/4 cup of white wine vinegar, rice vinegar or distilled vinegar. (The vinegar is optional, but it helps shift the ph well into the acid zone, which is safer and seems to kick off fermentation.) I don't think I've ever added any starter cultures to my olives. The proper bacteria and yeast seem to be prevalent enough on, or in, the olives. If you want to though, a splash of whey from the top of a newly opened container of yogurt, or a little juice from a lactofermented batch of vegetables shouldn't hurt, as long as the quality of the fermented food you get the culture from is high and the culture seems clean.
You can use a new jar seal, or a used one, but used seals should be in very good condition with absolutely no scratches. You can use a canning ring to seal the jar if that's what you have, but I much prefer to use a plastic lid and you should too if you have one. I buy these white plastic mason jar lids just for fermenting food in jars. They are fairly useless for most purposes, are not air tight and won't hold liquids, but they don't rust, so with a seal underneath, they are a better choice than a ring when it comes to fermentation. I use this system of: mason jar/seal/plastic lid for almost all of my fermenting now. It is simple, accessible and it just works for various reasons, which I'm sure I'll be writing about more sooner or later. If all you have is canning jar rings, just use them, but the salt and acids will eat them up. When you put the seal and lid on, the liquid should spill over a bit. You want to leave very little or no air in the jar. Screw the lid on firmly, but not super hard. It is possible to tighten the jar so much that pressure cannot escape, which is not good. I've been doing this for many years now and have never once had a jar break from built up pressure. It has to be tight enough to keep air from entering back in, but the pressure created by fermentation must be able to escape. Fortunately, there is a lot of leeway in how tight you make the lid.
Ok, now you're going to put that jar of pretty olives drowning in brine on a dish, because it's going to ferment and spill over. Leave it at room temperature for a month or so. Don't open it! The carbon dioxide formed during the ferment will push any remaining oxygen out of the jar leaving a blanket of inert carbon dioxide over the olives. The liquid level will diminish somewhat and the olives at the top will be left above the liquid. They are not sitting in air though, but in carbon dioxide. If you open the jar, you let in air, and most importantly oxygen. Organisms requiring oxygen will begin to grow in the jar and form a colony on the surface of the brine and on the olives. If you see that happening, usually as a white scum or film, you have air in the jar and you'll have to toss the olives. There is no really good reason to open the jar until the olives are done and you want to eat them, and plenty reason not to.
After about a month or so, the most active fermentation should be done with. Check the jars for any kind of scum growing on the surface of the olives/brine, rinse the jars clean, tighten the lids pretty hard, and put them away in a dark cool cupboard for another 2 months or more.
I think these olives really develop pretty quality pretty well by 6 months, but I have some that must be around three years old now and they are still excellent! They are not sterilized, they are not treated with preservatives, they are alive and kicking and full of beneficial bacteria. The reason the whole thing works is that they have been maintained in an anaerobic (oxygen free) environment with good bacteria and yeasts dominating the acidic salty culture. Pretty awesome if you ask me. Certainly don't open them sooner than 3 months after putting them in the jar.
I'm sure there is a lifespan to these tasty morsels, but I haven't encountered it yet. Eventually the lids will rust through, so that is something to think about. When you open the jar, be extremely careful not to get any bits of rust from the lid into the olives. Remove the lid carefully and then gently wipe the rim off well with a damp cloth.
The surface of the brine should not be covered in scum or white film, which would indicate air infiltration and potential spoilage. The olives and brine should smell, look and taste, bright and appetizing. The olives floating above the brine might be somewhat darker, but that's okay as long there is nothing else wrong with them. After passing the visual and smell tests, the olives should taste sharp, lively, and clean. The feel and the bite can be tender, but should not be mushy or soft or slimy. Trust your senses. If the olives failed to ferment at all, they will not taste acidic and probably will not look very good either. The fermentation is essential to out compete spoilage bacteria and create preservative acids, so if they aren't acidic, they should be thrown out, period.
Refrigerate uneaten olives, but use within a few weeks to a month or so. You don't want them sitting around long enough that you start seeing white scum forming on the brine surface. Adding some vinegar, or just replacing half the brine with a light colored vinegar, like distilled, white wine or rice vinegar will allow them to keep much longer because vinegar is just much more preservative than the lactic acid which dominates the brine. But I dont' think you'll need to, because they'll be so good, you'll eat them all. If you must save them for special guests or because they are just too damn good and special to eat, add some vinegar before storing int the fridge for a long time.
That's it. That seems like a lot of words for the simplest olive process I know, but I hope you learned a little more about fermentation options too. Fermenting in jars has the advantage of long storage in those jars, and means that you can put food up in small amounts that you can finish before the stuff goes bad. That is always my main message to people about fermentation, mason jars are the cat's knees.
I wrote this post in a hurry, so please let me know if I forgot anything important, or if you have any questions leave them in the comments below.
And a Frankentree in Every Garage
If I were president, the essay assignment goes when you’re in grade school. I remember thinking “but I don’t want to be president!” But... if I was, I don't think I'd promise a car in every garage, though I'd probably keep the chicken in every pot. When I moved here to Turkeysong, I had to decide what fruit varieties to grow. Inspired by friend and apple guru Freddy Menge, a scrappy young tree that was already here, was used as a framework to test out apple varieties. Before that it produced hard green apples. What started as an interest, grew into something like an obsession and the tree became more diverse every year starting with 25 or so varieties and ending now with about 140. My friend Spring dubbed it Frankentree because, at her house, that’s what they call anything cobbed together from odd parts. The name stuck. The term frankentree is also used for genetically modified tree varieties, but it has already taken off among apple collectors, so we'll just have to see who wins. And maybe someone searching for info about GMO fruit will run across our frankentrees and be ignited into constructive action instead of plunged into despair at how the world can be dumb enough that we take the risk of genetically engineering an apple just so it won't brown when cut.
Frankentrees are awesome! They may take a little attention to maintain, but the advantages are many. There are so many trees out there that provide too much fruit of one variety in too brief a period for the people that use them. Other trees just produce fruit that no one likes. These trees, if they are healthy enough and the form is not too wacky, are very valuable as a base to work from. A reasonably well formed healthy tree can come to yield nourishment in abundance, interest, variety, valuable information, and even self confidence and self reliance, over a long season.
This isn’t going to be a how to article, it’s more to kick you in the butt and get you started thinking and experimenting this year article. If you have a tree, or access to a tree that is not very exciting in the fruit department, why not try grafting on something new? Well, I’ll tell you why you should graft on something new, or actually more like somethings.
Apple trees are an ideal format in which to learn grafting and begin fruit collecting. Pears are a close second, and then plums. Apples are easy to graft, very useful, widely appreciated and there are many varieties to be had, thousands actually. They also are hard to beat in terms of seasonal length. I have very good to excellent eating apples from August to early February, and that is straight off the tree, not accounting for storage. You may not be able to get that in a very cold climate, but the season can still be quite long. The ability to have a long fruiting season is reason enough to make a frankentree, but there are many more motivations.
Frankentreeing will teach you something, and you can teach that to someone else. You’ll learn about different varieties of fruit, what their seasons are, what they taste like, whether they keep or not, and very probably their histories. You’ll learn the art of grafting, without which we would not have all these varieties of fruits in the first place. And you’ll learn what varieties do well in your area, which is extremely valuable.
You'll also end up as a keeper and preserver of variety, a sort of seed bank or scion repository that you can share out or trade from. No doubt some of those varieties will be very old. And old or not, more diversity in more places is assurance not only against permanent genetic loss, but also that diversity has a real place in our daily lives. We have to live our appreciation of variety and the romance of diversity in crops for it to be real and not just an abstract idea we picked up from a foodie book.
Multi-grafted trees are not only ornamental in their own strange way, but they’re also a great conversation piece, and a frankentree will make you look cool! Wait, screw that, if you make a frankentree, you are cool! Everyone who visits here loves frankentree!
You’ll very likely have more fruit on a frankentree. First of all, pollination will be great. Apples can self pollinate to a very small extent, but they really need pollen from other varieties in order to fruit. Your frankentree will be downright indecent in it’s public orgy of bees and pollen! But wait, there’s more! You’ll also get more fruit in the long run because you’ll inevitably end up with some that set fruit very readily and consistently, and some that avoid spring frost because they bloom late.
Your new skill is marketable as I’m finding out. How many people will pay you to make them a fruit tree that gives them four to six months of the most delicious apples adapted to your region? Let’s find out! I just did my first paying frankentree job (bride of frankentree) for my neighbors Dan and Leslie and they seem very pleased to try giving an old apple tree a makeover. It made good apples before, but it will make lots of different good apples now. I have another such job scheduled this spring too.
I’m a problem solver. I not only solve them, it order to be a good problem solver, I have to look for them constantly in everything. Just ask anyone who has had to live with me. So what’s the downside to a frankentree? There are very few really.
If the tree is too old and you have to cut down to large stubs, you could get some rot that will shorten the life of the tree. In many cases, that is not necessary though. I prefer to stay within cuts that are 3/4 inches and down, but you just have to weigh the value of the tree as it is and the value of it as a frankentree, or more usually the value of a certain form of the tree, because if it’s very overgrown, you’ll want to simplify the framework and probably bring the head down. That’s will make it easier to graft, maintain and harvest.
It takes time and energy. Sorry, but I see that as a good thing over all. It’s like saying it’s a lot of work. If you’re not totally stoked about making it happen, do something else. Otherwise, activity that gets you outside feeling interested, taking care of your own needs and building self reliance... that’s all up side!
You’ll have to maintain the tree a little more closely. Some varieties are really vigorous and grow large and some are small and weak, so you can sort of keep an eye out to check the big ones and maintain a little light for the weak. I lost sleep over that when I first started, but I didn’t need to, because it’s no big deal. You’ll also have to prune off some suckers here and there as the base tree sprouts a shoot once in a while. sometimes those shoots will be more vigorous than the grafts, almost like the tree would rather grow itself than be a frankentree, which makes sense. My guess is that the investment you have in the project will make you more interested in maintaining the tree well. Your personal investment means value to you. It’s.... well, personal.
You can introduce disease. The one that is most common is virus. It will cause the leaves of some varieties to turn into a mosaic of light and dark areas. It's not fatal and doesn't seem to affect most varieties here. I basically don't worry about it anymore. The affected leaves can become sun burned easily. Frankentree is infected and so are many of my other varieties. Probably many more than I know, since most show minimal to no symptoms.
That’s all I can think of. I may sound like a propaganda machine, but I want to be! That’s how stoked I am about the idea and my enthusiasm comes from the pleasure, interest and knowledge I’ve reaped from me experience in this realm, and the way I see people respond when they find out you can do this, or take the walk to the orchard to meet “frank”. I’ll hopefully be giving you more specific detailed resources for frankentreeing in the future. In the meantime, go to a scion exchange if there is one near you, or join the North American Scion exchange and trade by mail. You may not have much to trade now, but there are quite a few generous collectors out there, and once you get a few varieties, you can start trading. If you don’t know how to graft, check out the many youtube videos, and hopefully I’ll add one sometime as well. I’d even like to do a detailed video just on frankentrees to give you more specific information and tricks to increase your success rates in grafting. In the meantime, here are some basic ideas to keep in mind. And for you locals, remember, the Mendocino Permaculture group's scion and seed exchange is this weekend Feb 1st Saturday 9:00 am to 4:00 pm. It's free with free grafting classes and rootstock for sale. I'm teaching hands on grafting coaching after the main grafting lectures.
Keep the framework of the tree, but thin it out and bring it down in height and in toward the framework, especially if it’s poorly trained, neglected and rangy.
Try to make smaller cuts and graft into wood 3/4 inch and down when possible, but don’t graft to the outside of the tree. Try to graft in closer to large limbs. If you graft only to small outside wood, you’ll end up with a tree that grows out and out and the inside of the tree will all still be the original variety.
Learn cleft grafts. They are easy and good for grafting small sticks to large stubs, which is usually what you end up doing when reworking a tree.
Use grafting paint (“wax”) liberally (I use doc farwell's, hopefully it’s not too toxic :/). Use it to really seal the clefts left open after grafting, but also to paint the whole scion lightly. Painting the scion is helpful to keep moisture in until the graft heals and the tree can start sending moisture and food to the scion. You might have to paint the open ends of the clefts twice to make sure they are sealed well against rain infiltration. It's ok if a little wax gets into the cleft.
Keep your grafting knife sharp!
Use long scions of 6 to 9 buds or so. This will give you fruit sooner.
Thin the area near the graft of other shoots if possible. You want to direct growth energy into the new graft.
If apples form the first year, leave them! You don’t usually have to pull them off to favor growth like you do with a young tree, because the tree is driven by an established root system.
Don’t unwrap the grafts too early. The leafy shoot will act like a sail and can break the graft. Unwrap before the wood becomes constricted. If you are concerned, just re-wrap it till the end of the season.
When you unwrap them for good in the fall, paint the graft union with a thick coat of grafting paint so you can keep track of its location.
Always label! I use aluminum tags with copper, aluminum, or at least galvanized wire. soda cans cut with scissors work fine and sections of aluminum venetian blind strips and old aluminum printing press plates work great. Scratch the name in and write with pencil too.
So, if I’ve sparked your interest, just bust a move this year, even if it’s a small one. Get some scions from a neighbor or a local apple orchard and make a few grafts. You can wrap them tight with cut rubber band strips and paint them with thick latex paint so you don't have to invest in grafting supplies. You can use a utility (razor) knife or pocket knife if you don’t have a grafting knife. Practice on prunings a little until you can make flat cuts and grafts seem to fit pretty well. You’ll learn something and if your few grafts take, you’ll have confidence to move forward. Maybe I need to start a career as a motivational speaker. Are you stoked yet!
http://www.youtube.com/watch?v=QgXObaM9i2Q


