Posts filed under Tanning

Ground Shots Podcast Interview on Bark Tanning With Kelly Moody

I sat down with Kelly Moody and traveling podcaster to discuss bark tanning. Kelly is a tanner herself and we get into specifics about tanning with tannic acid and some related stuff. It was fun and maybe we’ll do the same with some other topics when she comes back through sometime. This was my first podcast guest spot.

https://www.ofsedgeandsalt.com/ground-shots-podcast

The Worst, Common Bark Tanning Mistake

On the road from raw skin to leather, there are many potential mishaps. Skins and plant liquors are potential food for bacteria, yeasts and fungus and growing the wrong ones, or too many, or for too long, can damage or blemish a hide. When dealing with natural materials, we typically have a sizeable degree of variability to contend with. It is very likely that home tanners are dealing with materials and quantities they aren’t familiar with.

One cluster of mistakes that all lead to similar results or scenarios stands out as the worst common error. Put most simply it is, that the hide is left for too long, in solutions that are too weak. This can come about in various ways and have differing effects, but it is super common. In this video, I lay out the typical scenarios and try to offer an approach to prevent them. This is an important video for anyone starting out in bark tanning, because this general area of understanding is so often lacking in the beginning. Nearly everyone seems to make these same mistakes, I know I did, and they need to be headed off intentionally.

Because there are so many variables in natural tanning, it is impossible to accurately quantify all of this. I can’t give out step by step instructions with times and quantities. It just doesn’t work very well that way with all the variables involved, not the least of which is tannin content by species, individual trees and condition of materials. What I can give is a general approach to this problem that will allow you to adapt to new materials and unknowns. That essentially involves observation and understanding the typical way things go as far as the hide tanning rapidly at first, then requiring a high enough level of tannin in the liquor to preserve the skin as it finishes tanning. Also, that some color in the liquor is not necessarily indicative that is has any tanning power left. There is a measuring device called a barkometer, but I don’t own one and find that I can judge when to add tannin by observing the liquor and behavior of the skin. Bullet points are…

*Always look at the liquor, before, after and during, just always; any time you add liquor or check the skin, or have a new batch of liquor. Pick it up in your hand and look at the color and density. All materials are different in color and how much tannin v.s. other coloring matter they contain, so you are making comparisons mostly with fresh, v.s. used and partially used samples of whatever you happen to be working with.
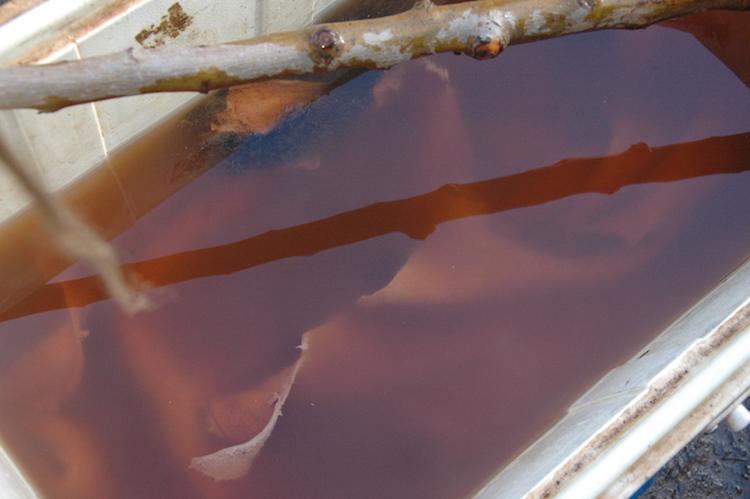
This fresh, strong bark liquor has a bright look and high color density

This fresh, strong bark liquor has a bright look and high color density

This solution, while retaining some color, has no tanning power left, or not enough to matter.  It will grow bacterial scum on top and the hide will decay slowly, because it is just starting to tan.  All color is not indicative of effective tannin. …

This solution, while retaining some color, has no tanning power left, or not enough to matter. It will grow bacterial scum on top and the hide will decay slowly, because it is just starting to tan. All color is not indicative of effective tannin. With a wll prepared skin in new starter solutions, this phenomenon can happen in one day. Unless you add a lot of tannin quickly, (which is sometimes okay) it will keep happening, but eventually it will slow way down and the solution can be left for long periods of time unattended.

*Understand that in the beginning, hides typically take up tannin very fast.

*If the skin is left for any length of time, the liquor needs to have enough excess tannin to adequately preserve it, and also to insure that tanning continues to progress.

*Be prepared to gather/prepare/add more tanning material as needed. Thoughts such as you used a “lot” or it “should” be enough are not really relevant. It’s either doing the job, or you need more. Sometimes that is a lot if the materials are not very rich in tannin, or it is something that is just hard to gather in enough mass.

*A healthy tan can smell quite strong and in a way unpleasant. I would characterize it as unpleasant, but kind of intriguing and not just flat out disgusting or vile. It is an odd smell that will cling to your skin for a time after touching it. While an element is unpleasant, there should also be a large measure of fermentation to the smell. All of that is normal. It shouldn’t just smell putrid or flat out offensive in the way that rotten food, a dead animal or an outhouse does. Some growth of stuff on the surface can be normal.

*Typically, tanning will progress very rapidly at first, then slow down a lot as the core of the hide slowly tans. Keep the solution rising in strength if anything during this initial phase, then leave it strong enough to maintain a healthy tan as it finishes. Common ways to fail at this objective are: Using low tannin materials, not using enough material, putting the hide in and leaving it without strengthening the tan, Judging by how much it seems like you’ve used instead of by how tanning is progressing (or not), and what the liquor is doing.

*A fairly reliable approach is to cook the material twice. Use the second cook liquor to start the hide, with some water add as necessary to cover the skin well. observe the liquor before putting the hide in. Add the stronger first cook liquor over the several days as you see the liquor depleting and the hide tanning. If you run out and it still seems to be drawing down the liquor, make more. I also talk in the video about dumping some of the liquor to bring the water level down and the tannin level up to get a solution you can leave the skin in. When it is no longer rapidly depleting, you can get the strength up and attend it less frequently. This approach gets most of the tannin out of the material, prevents any possibility of tanning the skin too rapidly in the beginning, is continually adaptable, and encourages familiarity with our materials and their tanning potential.

That is the quicky version, but it should be enough to avoid this worst common problem in bark tanning.

I’ll link two video playlists here. One is a lot of useful general tanning videos and the other is my strops from scratch series, which follows the tanning of a deer skin with oak bark.

Vegetable Tanning Materials, Tannin Rich Barks, Roots and Leaves Used to Tan Skins and Hides Into Leather

I am asked a lot about what tanning materials people should use in their part of the world. Well, be careful what you ask for he he. Here is a very large amount of information to address fill that gap. I had already typed up a partial list for a vegetable tanning book project that I have done some writing on which is mostly presented here (don’t hold your breath on me publishing it anytime soon). That information comes largely from Howe’s book on tanning materials, which I think is still in copyright. But I decided to list a bunch of full text excerpts on tanning materials from some other old out of copyright tanning books. To top it off, at the end there is a surprisingly long bibliography of publications on tanning materials put out by the USDA, with such fun topics as tannin content of some acorns, Tannin content of pacific coast trees, tanning materials in South Africa and the tanning industry of Washington state. There is still much more that could be dug up on the subject. If you want to research a specific material more, you can use sites like googlebooks.com and Archive.org Try different combinations of keywords such and as leather, tanning, tannin, the plant’s common names and the plants botanic name (or names, plural since they often change over the course of 100 years or more in order to keep botanists employed and make them look busy).

A Review of Tanning, Leatherworking and Skin Related Books in My Collection

Below are Tanning and skin working related books collected by myself and Tamara Wilder over the years.  The video version talks about these books and a little history and such.  Some of them are broadly recommended, and some are only for people with certain specific interests.

Many, many books on Tanning, Glue Making and Leather working that are not listed here are available as free downloads from the Downloads page, SkillCult.com/freestuff

51Y6BJ9E6CL._SX307_BO1,204,203,200_.jpg

Buckskin, The Ancient Art of braintanning, Steven Edholm and Tamara Wilder, 1997: 

The book I wrote with Tamara Wilder in 1997.  From what I've seen, it is probably the longest and most detailed book on home tanning to date, especially considering it's focus.  As of writing this, it is currently out of print with plans to revise and re-print in digital and print forms.  Covers wetscrape braintanning, with some satellite subjects like sharpening and dyeing buckskin with natural materials.  If you've read it, please consider leaving a review on Amazon.


513MHSX5GKL._SX300_BO1,204,203,200_.jpg

Deerskins Into Buckskins, Matt Richards, 1997: 

Published the same year as our book, this one also covers the wetscrape method, but focused on bucking, which is using alkali to soak the hide instead of water.  It is the best, if not only, book reference for that technique.  There is also a companion DVD.


lotta tanning.jpg

Traditional Tanning Leather and Furskin, Lotta Rahme, 2014:

This would probably be my number one recommendation of a book on general tanning covering a lot of ground and many methods.  It has lots of anecdotes and tidbits on traditional tanning from various parts of the world, and good basic information on tanning chemistry and theory.  If a person were interested in braintanning primarily, they should get a book on that subject.  This may be currently the best single book reference for vegetable (bark) tanning.  Lotta is an experienced, small production tanner, with her own micro-tannery, so she has real insight, skill and knowledge to offer.


61V66pz-kLL._SY344_BO1,204,203,200_QL70_.jpg

Fish Leather Tanning and Sewing, Lotta Rahme, 2006: 

Lotta's cool book on tanning fish skins.  This is a popular subject.  I keep hearing about and seeing more and more fish leather. Much of the information is also contained in her general leather tanning book, but there is also a lot of information specific to fish skin and various species of fish, though they seem largely to be species from her part of the world, Sweden.


Screen Shot 2018-02-18 at 7.09.20 AM.png
jim riggs .jpg

Blue Mountain Buckskin, Jim Riggs: 

My teacher and teacher of my teacher Jim Riggs.  Jim was largely responsible for disseminating braintanning knowledge, having learned from his teacher Buckskin Slim Scheafer, who's book is below.  This is the best all around reference on dry scrape braintanning.  Fun, thorough and insightful.  #1 recommendation for a book on dry scrape braintanning.

Jim died last year.  He was friend and mentor many and had a profound and enduring effect on the primitive skills movement.  Many people's live took radically different directions because of either contact with Jim, or with others infected with his knowledge and philosophy.  My buckskin book contains much of Jim and would not exist without him.  Blue Mountain Buckskin is an enduring slice of Jim in the best way.

Tribute page for Jim Riggs: https://www.facebook.com/pg/jimriggsmemories/community/


Melvin_Beattie_Skinning.jpg

The Tanning Spirit video, Melvin Beatty, click here to watch:

Mel is one of the best tanners I know to this day and has always produced the best quality wetscrape buckskin.  His tips helped me get to producing better wetscrape buckskin.  You can watch his video on the subject on youtube now.

Also visit mel at the following.  He posts tips and experience on braintanning at his facebook page.

www.Braintanbuckskin.com

And Facebook as BraintanBuckskin


Screen Shot 2018-02-18 at 4.11.12 PM.png

The Indian Art of Tanning Buckskin
"Buckskin Slim" Schaefer, 1973

Jim Rigg's teacher Slim wrote this book at Jim's urging.  It was published the same year as Larry Belitz' book, Brain Tanning the Sioux Way, those being the first two books specific to braintanning that I know of.  This book is out of print, but they show up on ebay and elsewhere now and again at not unreasonable prices.


belitz.png

Brain Tanning the Sioux Way, Larry Belitz:

This is a small book and lacking somewhat in detail. There is enough information to learn the process, but it will be more trial and error than when using a more in depth book.  I think a lot of braintanners in the 70's and early 80's probably learned at least partly from this book.


9780941531009-us.jpg

Making the Attikamek Snowshoe, Henri Vaillancourt:

Available on the Author's website, this book is fantastic.  It is exactly what it should be, a detailed documentation of a traditional art, with as much important detail as possible, recorded in quality images and insightful text.  Henri is part anthropologist and part craftsman, which is how it should be, but almost never is.  The section on hide working outlines interesting traditional methods common to moose country for tanning skins and producing rawhide, both very important skills in that part of the world.


8490.jpg

Home Tanning and Leather Making Guide, A.B. Farnham:

This guide has some useful information, but leaves something to be desired as a stand alone guide to tanning.  It is still one of the better references for vegetable tanning and well worth taking advantage of, all the more so, because it is out of copyright and can be download from tanning book collection


Hardings_Pleasure_and_Profit_Books_Home_Manufacture_of_Furs_and_Skins_10__30838.1450192916.386.513.jpg

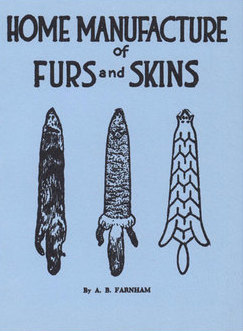
Home manufacture of Furs and Skins, A.B. Farnham, no date: 

A useful book when it comes to handling and dressing furs.  Available as a free download from tanning book collection


61pSFtkB0AL._SX325_BO1,204,203,200_.jpg

Home Tanning of Leather and Small Fur Skins, USDA, 1923:

Of limited use due to lack of detail, but worth reading.  Download from tanning book collection.


295352._UY475_SS475_.jpg

Primitive Wilderness Living and Survival Skills, John and Gerry McPherson, 1993:

This book contains John McPherson's small book on braintanning by the dry scrape method.  It is a competent and useful guide to that subject, and also contains lots of other great stuff on primitive living skills of all kinds.  A good and useful book worth the price of admission from some old friends back in the day.


Aboriginal Skin Dressing in Western North America, Arden Ross King, 1938: 

This book is unobtanium, and likely only available in a few large university libraries.


The art of leather manufacture, Alexander Watt, 1885:

One of the better old books on tanning, although the only digital version I could find is the later 1906 version.  Available to download from the tanning book collection.  Much of the better part may be derived from the De LA LANDE translation below, which is more recommended.


The Art of Tanning and of Currying Leather... Collected From the French of monsieure De La Lande and others, 1773:

or download in my tanning book collection here

Maybe the best all around old resource I've found, introduced to me by friend and tanning colleague Jason Leininger.  Unusually well written and exhaustive for that time period.  Anyone who reads french should go to the original text, as no doubt things are changed, left out, or lost in translation.


51ATZS12P7L._SX327_BO1,204,203,200_-1.jpg

Dictionary of Leather-Working Tools, Circa 1700-1950 R.A. Salaman,1986:

Another book primarily for the enthusiast, tool maker and researcher.  A jillion variations on leather working tools as well as some tools of the tanner and currier.  Helpful in identifying old leather working and tanning tools.


71ABI1d95uL.jpg

Secrets of Eskimo Skin Sewing, Edna Wilder, 1976:

Traditional patterns and techniques from the source.


glue book, dawidowsky.jpg

Glue, Gelatin, Isinglass, Cements and Pastes, Dawidowsky & Brannt, 1905: 

This is the book I learned most of what I know about glue making from.  It is a technical manual for manufacturers from the intersection of tradition and science at a time when hide glue was still king.  Dowload free from Glue Books Collection


41ZLXqzsHzL._SX276_BO1,204,203,200_.jpg

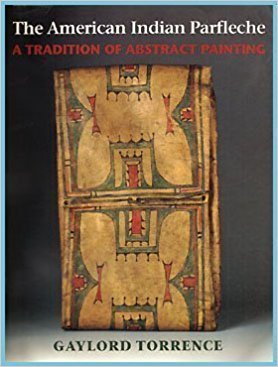
The American Indian Parfleche a Tradition of Abstract Painting, Gaylord Torrence, 1994:

An art book, packed full of art-speak.  There is some interesting history, and the small amount of functional detail it does contain helped me figure the process out eventually.  The photos are excellent.  This is a beautiful and unique practical art form that originally combined a functionality tailor fit to a singular lifestyle with expressive art.  Very neat book.


Bark Tannned Leather Clinic With Zack, Vegetable Tanning

graomomg booaoe.jpg

Zack Hribar came over to show me his first batch of bark tanned leather.  We shot an informal video talking about them and vegetable tanning options, troubleshooting the hides, stories and that sort of thing.  It was fun.  Zack is an enthusiastic new bark tanner, check him out on instagram as z._hriack_bar

Deer Leg Skins, Sinews, Hooves, Hide Fleshing and Processing Videos

I shot some footage to possibly use as support videos for my book, Buckskin, The Ancient Art of Braintannning which is in process for reprinting.  These are some videos I put together from that footage recently.  More for the archives.

Original Illustrations From My Book, Buckskin, The Ancient Art of Braintanning

In the 90's I wrote a book with the my partner at Paleotechnics and Wife at the time, Tamara Wilder.  We need to reprint and were sorting through the original copies so I made a quick video showing some of them.  We have a few copies of the book available on http://www.paleotechnics.com but I took it off of Amazon until we reprint, though some sellers may still have a few strays for a while and there will be the inevitable copies selling for hundreds of dollars claiming that it's out of print.  Which, I guess it almost is now.  Hopefully we'll have it back in print soon.

Axe Strops From Scratch #2, Fleshing the Hides and Some Tasty Poison

The Axe strop project is moving along.  Here is installment two wherein I flesh the hides out of the lime, refresh the lime solution and put them back.  Also making almond extract from wild bitter almonds growing in the local creek.  I use these same almonds to grow my own almond rootstock.

Posted on October 8, 2016 and filed under Tanning, tools.

Oak Gall Leather Tanning Experiments and the horrible horrors of Case Hardening

I picked some fresh oak galls to extract juice from this spring.  When fresh and green in April, our large oak galls from the California Valley White Oaks are very juicy and exude a clear liquid when squeezed.  I put a piece of skin in the straight juice to test it and it case hardened, a phenomenon where the skin is shocked by the extreme astringency, becoming shrunken and stiff.  In case hardening, the outside surface of the skin is so tight and contracted that the tanning stops or proceeds slowly because new tannin can't penetrate to the interior of the skin.  In the video, I discuss the fact that fear of case hardening often leads to just the opposite problem, which is far more common, not using enough tannin.  The experiment also provides a few other talking points.

Making a Black Jack, Traditional English Leather Mug, From the Ground Up

The mostly finished mug's virgin voyage.

The video for this post is the visually interesting short version.  I think it turned out really neat and hopefully entertaining, while still giving a glimpse of possibilities.  But it is not intended to be instructional or detailed beyond offering crucial supportive visual information for this post.  This written version on the other hand will be fairly long and rather utilitarian.  It is far from exhaustive, but basically written for people out there who actually want to do this, but who hopefully have some experience with the things involved or can learn some of the necessary skills involved on their own.  So, watch the video first and if you are sufficiently intrigued, you can read more.


I am somewhat fascinated with the idea of leather cups and bottles.  There was a time when leather mugs, pitchers and bottles or flasks of various kinds were rather common in Europe.  There is not a whole lot known about how they were all made, but there are some clues and the mystery just makes it more enticing to me.


The black jack was something of an English icon, and the use of leather mugs persisted beyond what seems reasonable from a practical perspective.  I think so anyway, maybe not.  Now that I’ve made one, I can say it is rather pleasant to drink from and seems pretty durable.  It’s probably not going to shatter if some drunk drops it on the floor, slams it on the table too hard at the end of a draught or uses it to keep time with a drinking song, or all three!  Or what if there’s like some really buxom barmaid with her mammaries threatening to breach her corset carrying a huge tray stacked with a pyramid of Bombards and black jacks and some red nosed drunkard spanks her butt as she’s walking by causing the whole arrangement to be scattered asunder, filling her cleavage with delicious foamy beer?  Maybe I’ve seen too many movies, but I think that shit could’ve happened on a regular basis!  My friend also just pointed out that they are probably a pretty good travel mug, light and not too fragile.  BTW, the first person I showed it to promptly dropped it on the floor, no harm done.  I'm just glad it wasn't full of precious beer!

Old leather vessels:  Black jack with silver rim, bombards (pitchers) and a leather bottle from John Waterer'sbook Leather and Craftsmanship


I did what research I could and found a couple of useful things.  Wayne Robinson uses a frame for stretching, but I simplified that into two boards, which seems to work fine and is much simpler.  I’m glad I ran into his page on black jacks and got that basic concept, because I had no clue how I would stretch the leather on the form.  His quotes and notes were also very useful.

Then I found Rex Lingwood and his article on working boiled or cooked leather.  He is a very experienced leather artist who hardens and shapes leather by cooking it.  What he does with leather is impressive and not at all expected.  I watched his demonstration on youtube and that was really the key to my relative success with this project. I’d like to thank him for putting information out there for other people to take up and run with.  Thanks!  Here is Rex’s article on Cuir Bouilli, "boiled" leather, also very helpful.

Leather vessel by Rex Lingwood


We do know that black jacks were made of vegetable tanned leather, that is leather tanned with tannic acid from plant sources like oak bark and many others.  I also think they were baked or boiled to harden them.  They were definitely coated on the inside with some sort of natural waterproofing, most references seem to say it was pitch.


It is the actual process of manufacture that is least well known.  I think it is a safe assumption that basic shaping was done before the sewing.  I also feel pretty sure that all sewing was done before any hardening.  The outside was probably treated with linseed oil and soot, though it may be somewhat more complicated than that.


I decided to shape the wet leather on a form, shape the base separately, dry the parts completely on the forms, then sew it all up, re-wet the whole mug, cook it, re-dry it, seal it with pitch on the inside, and then paint the outside with layers of linseed oil mixed with lampblack.  What I didn’t know till toward the end was how I would keep it from deforming in the cooking phase, but we’ll get to that presently.


THE LEATHER

I used some bull leather that I had tanned a few years ago with oak bark.  I would not recommend using any commercial leather unless the company is absolutely clear that there are no chemicals or metal salts used in processing at all.  I’m not just talking about not using chemicals to tan the hide.  They may be used in other parts of the process too, I think particularly in dressing the skin with oils which may contain solvents for better penetration, such as neatsfoot oil compound.  I’m not sure what is available out there for truly natural, traditional leather, but it is certainly not much.


I used the neck section, which has a loose fiber and is probably not the best choice.  But, I didn’t want to risk the best leathers that I’ve tanned in this first run.  I had pounded the leather previously and was wondering if any of the black jack leathers were pounded either on forms, or before forming.  I didn’t know, but it seemed like a really good idea to use the pounded stuff.  Pounding leather while it is damp compresses it greatly.  It might end up half as thick and that means twice as dense.  Pounded leather is really cool and something I just started playing with recently after reading things like this quote from an old translation from french:

“This dressing is of great service to the hide, and there is a considerable difference between the goodness of a hide well beaten, and that which has not been beaten; shoemakers who value themselves on the goodness of their work, beat their soles strongly and for a considerable time.”  The Art of Tanning and of Currying and Leather Dressing 1773

Pounded leather with stone sleeker and ironwood mallet.  The bit on the lower left is the same as the upper piece, but unpounded. 

So I used the pounded section and pounded the base piece as well, though not as thoroughly due to time constraints.  More from me on pounding leather in the future, but the short version is that it is awesome.  Use a heavy and very smooth faced mallet with rounded edges to beat the skin when it is in a slightly damp state, or on and off as it dries.


My leather also varied in thickness.  Commercial leather is often split down to an even thickness.  That is harder for me to do here and I didn’t have time to get it together and shave it down which is a sizeable project in itself.  Parts of the rim turned out a bit thinner than the rest and it tends to deform a slightly, but it’s not a big deal, and especially not for this first run.


FORMS AND CLAMPS

I had some nice fine straight, close grained fir lying about the yard that I used to make all the forms.  It was so nice that I was compelled to make the two clamping pieces from it instead of using scraps of 2x4 which would have worked fine.  The fir turned well enough on my lathe after roughing out with a hatchet.  I needed three pieces.  One for the main body, one for the bottom and a third to use as a form to shape a metal ring.  The ring is used in conjunction with the bottom mold piece to stretch the leather into shape and hold it while it dries.

Raw material roughed out to put on the lathe.


The forms bottom and accompanying ring, and the main form before I cut it all up.


The metal work was a bit of a diversion.  I had to find a piece of metal and set up a forge.  Setting up the forge was possibly the easiest part of that.  I cut a piece of metal tubing that was a little small, turned a piece on the lathe to form it on, set up a forge, grabbed some charcoal from a charcoal trench that I hadn’t emptied from last spring, heated the metal tubing, hammered it wider till it would start to fit over the form, heated it up nice and evenly hot and pounded it over the form to shape it.  Just in case it might want to warp, I cooled it on the form by quenching it in water so it would shrink down to the shape of the wood.  It went very smoothly all in all and could have taken a lot longer.  Back when these vessels were common they didn't have scrap piles with pieces of welded tubing sitting about.  A smith would more likely start with a piece of iron nothing close to the needed shape, beat it out into something they could use, weld it into a ring in the forge and then do what I did.  Not a difficult job for any smith, but more time consuming.


The metal ring form, post mortem

The body was turned with a flared base.  I like that look a lot and might even consider making the flare more pronounced in the future, though now that it is finished, and shrunken slightly, the flare is more pronounced.  As soon as the pieces were turned I oiled them up with some old lard that was sitting about to help slow or stop any checking (cracking) of the wood as it dried, being especially generous applying it to the end grain.  It was splattering me with moisture on the lathe, so it really was quite wet.


The clamps were hewn out of the split fir slabs with a single beveled hewing hatchet, and briefly planed smooth on the faces that would be next to the leather.  Pretty smooth anyway.  Then they were notched to accommodate the flare at the base of the form.  The edge that would be pinching the leather was slightly rounded.  That is one place where a 2x4 may not be so great since the edges are probably usually too strongly rounded as they come from the mill.

The clamp boards and the main body form.  Note the notch cut out for the flared base.  Very simple, but not wanting for effectiveness with a couple of good clamps.


I soaked the leather in warm water till it was completely wet through.  some of the work of pounding was reversed in soaking because the skin swells in thickness with water, but I’m sure that work of pounding was not all lost.  After a warm water soak, the thoroughly wetted leather was stretched on the forms using the stretching clamp boards and some nails.  I had to pull the nails once and re-pound them differently to stretch it tighter.  I just used a couple of clamps to tighten it down   I wish I had pulled the nails and redone them one more time to stretch the leather even tighter around the body form, but it turned out fine.   A welt (an extra piece of leather) was sandwiched between the two outside handle layers to increase the handle thickness. 


That metal ring for the base was very hard to pound on over the thick leather.  I lubed it up with some olive oil though and it went on eventually with much pounding.  With everything pounded and clamped together, I cranked up the woodstove, hung the pieces to dry overnight right next to the hot stove, and went to bed!


STITCHING

In the morning I took it all apart and trimmed the pieces close to where I wanted them.  To insure the pieces wouldn’t shift on me during sewing, I ended up glueing on the base to hold it during sewing and I also glued the three handle flaps together for the same reason. I put in a couple of temporary stitches at the top and bottom to hold it all while I got the first seam finished.  I used hide glue, which is water soluble, but again, only temporary.  I think I made this hide glue from pieces of this same skin.  I ended up using that batch of glue a couple more times during this project.  More on hide glue here.

Hide Glue Pieces


I have actually done very little of this type of stitching, so I was worried I would be lame at it.  The first seam, had to be the one closest to the body. I have a stitch marking tool, which is a little wheel that marks dots on the leather so you can make even stitches.  They are great.  It seemed like the stitches it marked were a little far apart though, so I doubled them by marking stitches in between resulting in a hole about every 1/8 inch.  That didn’t go too well. With the large thread, awl and needle sizes I was using, it just turned out pretty rough looking no matter how careful I was.  The rest of the stitches are not all perfect, but I’m satisfied.  I still think this stitch wheel is a little wide for this project at 1/4 inch wide, and would guess that 3/16 inch spacing might be closer to ideal.  But it worked fine and the liquid proof nature of a black jack is not from tight stitches, it’s from the pitch coating.

The stitches up against body in the first seam were definitely too close at 1/8 inch.  The look sloppier and cut into the leather easily.  1/4 inch maybe a little bit long, but workable and they look much better.  The mug still have a brown look now, but it will eventually be dead black as the layers build up.


I got to make a new awl for this project.  I make awls to sell that are basically designed for sewing buckskin.  They are stubby though and a longer handle is better suited to this type of sewing.  Mostly, I had to get that first row of stitches very close to the body, so I knew I'd need a long skinny handle.  I turned the new, longer handle out of some native oak on my lathe and wrapped the tip with sinew to keep it from splitting.  Hide glue was used to paint the area before wrapping and several times after wrapping with time left to dry in between.  After alternate sanding and re-coating with glue several times I put on a final glaze of glue, it is clean looking and very tough.  As long as it stays dry it should perform admirably.  Most leather sewing awls for this sort of thing are shaped like a diamond I think or maybe a triangle.  Anyway, they are faceted so that they cut the leather as they go through rather than just stretch open a hole by parting the fibers like my round awl bits do.  I thought I would compromise and make it faceted at the tip, but basically the same long tapered shape.  I would say it worked pretty good, and honestly, as long you can get the job done with reasonable effort, the less cutting of fibers that happens in leather sewing the better.  So, whether the facets I ground into the tip did anything or not, the awl worked well.

New awl

Sinew wrapping.  Some may understandably doubt the ability of this wrapping to keep the wood from splitting, but after shooting blunt practice arrows wrapped like this into stumps, rocks and dirt over and over again, I have no doubts at all.

This stitch uses one long thread and two needles.  The needles are passed through the same hole, from opposite sides, first one then the other.  The stitch lines were marked carefully with dividers and a stitching wheel to offer the best opportunity for keeping the stitches even and straight.


Normally this type of stitching is done in a simple wooden vice.  I have long wanted to make such a vice, but I decided that the cup’s shape was probably too awkward for the vice to be of much use anyway.  Without a vice, the stitching was extra slow.  It took about 1 minute per stitch at the very best, but that is after I got into the swing of it and not including problems or set up time, so two minutes per stitch is probably closer.  At a rough count of 198 stitches, 2 minutes is about 6.5 hours, which seems about right, if not low.  The basic process was to cut the handle to shape with a sharp knife, use dividers to mark the stitch lines, and run the stitch-marking wheel down the line.  This sewing method uses two needles and one long piece of linen thread.  The thread passes from both sides through the same hole.  I often needed pliers to pull it through.  That’s good, I wanted tight stitches anyway.  Once both threads are through, they are both pulled tight.  To finish off, the threads are back tracked down the seam through several holes and then simply cut off flush.I was up sewing till 3:00 am on day two, but the cup was ready for the next stage in the morning.


COOKING, FORMING, DRYING

I spent a lot of time in the morning reviewing whatever information I could find and finally decided on a plan of attack.  Watching Rex Lingwoods video helped me understand what I might be dealing with when the leather shrank in cooking.  What I decided was to cut the form into several parts, in this case 7.  The center piece would be tapered for easy removal.  That meant I had to cut the base off of the original form and will have to turn a new one with the same size and flared base if I want to use any of the rest of the form in the future.  I was torn between cooking the leather with the form in place or cooking and then stretching it back into shape.  I decided to go with cooking in hot water and then putting the form back in.  I soaked the mug and heated some water to 85º to 90º degrees celsius (185º to 195º F).  I think I could have cooked it longer, but it seems to have turned out fine.  Once the leather shrank quite a bit, I put the form pieces back in and drove them home.  I was really thinking it probably wasn’t going to work, but it did.  Whew! 


I had to push the shrunken leather back up the form and in retrospect would have liked to have done that more.  I just rounded the edge of a hardwood stick to do that.  A clamp of some kind would have really helped.  So, there it was. The form was back inside, though slightly smaller than it had been because the many saw cuts I made took away a little bit of the wood.  That was okay with me.  having a smaller form accentuated the flare at the base and made it easier to put the pieces back in.  I had to dry it fast, so I left it right up close to the very hot woodstove with a fan blowing on it, turning it often.

The cup dried on the split form.  The deer tail is incidental.


PITCHING THE INSIDE

While the leather was drying I started messing with pitch formulas.  I thought the pitch should be slightly flexible.  After trying many different mixes of pine pitch, rosin, beeswax and raw linseed oil, I ended up with a beeswax/pine pitch mix.  Now it seems a little soft when it gets warm and I removed it to be replaced with a straight pitch coating.  There is a difference between pitch and rosin.  Rosin is hard at room temperature and is made by driving off the volatile components of pine pitch.  Pine pitch is more gooey and sticky.  Rosin can also happen naturally when pitch sits long enough that the turpentine evaporates naturally.  I had pitch in all stages from fresh to rosin, but favored the stuff that was closest to rosin.  I think a fairly hard coating is probably what is wanted.  Something that is not at all sticky unless heated up, and these vessels are not used for hot liquids.  Pitch loses the solvent portion when cooked in my experience, so just heating it and melting it enough to strain out bark, bugs and pine needles makes it more hard and brittle.  I thought that the brittleness would cause the pitch to crack and flake off.  The mug was a little flexible, but as soon as the pitch cooled inside it, it was quite stiff!  I was surprised that the pitch offered so much to the structure of the mug, and now think stiff pitch will probably not flex enough to crack under normal use.  In truth, I would think that they require some maintenance no matter what anyway.  Since pitch is thermo setting, it can probably just be melted back together if cracked badly.  Or it could just be cleaned out competely and re-coated.


I poured the molten boiled pitch with about 1/5 to 1/4 beeswax mixed in, sloshed it around and dumped it back out a few times.  As the molten pitch cooled a little, it allowed me to get a thicker layer.  I'm not sure what it ideal, that will be learned over time I guess.


PAINTING THE OUTSIDE

The lampblack for the outer painting was made with a simple oil lamp arrangement covered with a stone plate.  You can read more about lampblack in this blog post.  It’s cool stuff.  The lamp black was mixed with linseed oil to paint the outside of the mug.

Simple arrangement for making lampblack.  A simple oil lamp with a stone plate set over it.

Accumulated lampblack

Accumulated lampblack


There is something that you read about in old technical and formula books called Japaning.  I imagine that term evolve from westerners trying to emulate the fine art of Japanese lacquer ware.  So far as I can tell, it involves various process, most of which use linseed oil, resulting in a shiny enamel like finish.  It was used on tea trays, cars and apparently on black jacks.  It is hard to tell from pictures if all black jacks had that sort of gloss finish, but some certainly did.  Linseed is a drying oil, which means that it cures over time by reacting with oxygen to form a sort of plastic-like film.  Older recipes for this type of finish often call for Japan drier, which is a solution of toxic metals that speed the curing time of the oil, the same metals found in what is now sold as boiled linseed oil.  I’m not going to use toxic metals on a food item, or probably on anything else, but there is a question I have not yet answered regarding whether the metals and other treatments of the oil, like heating it for a period of time in the absence of oxygen, just make it cure faster, or make it cure more thoroughly in the long run.  I plan to test that eventually if possible.  In the meantime, pure raw linseed oil, even the cold pressed food grade stuff from the health food store cures to the touch in a few warm days and seems fine for the things I use it for.   I think I’m going to go as far as I can using just the raw linseed oil and lampblack for now.  For a little more on linseed and other drying oils, see my video on oiling tool handles.


The goal is to eventually have a thick somewhat glossy outer finish.  My basic process for painting the outside will probably be something like, paint on a thin layer, let it cure, then add another and so on.  Maybe I can polish the outside once I build up and cure enough layers.  The oil is best spread thin and allowed to cure.  If it is thin, oxygen can reach it and it will cure faster than a thick layer will.


I put on two thick layers right off to get the oil to soak in as much as possible and a couple more the next day.  I wanted to get the oil into the skin pretty far so that it would eventually stiffen inside the fiber structure and help harden the mug.  I think I got quite a bit in there.  The layers of oil applied will soak in for a while, then at some point one of the coatings will not soak in all the way because the surface has been saturated and sealed.  This is the point at which you can start building up thin layers on the actual surface.  At least that’s how it works with wood.  This is new territory so we'll see.

Freshly coated


I put the mug near the open oven on low heat to drive the oil that was sitting on the surface into the leather.  That melted the pitch coating most of which ran out, especially on the hot side, which was basically left with no coating at all.  When I filled it, the mug leaked slightly where the pitch had drained away at the bottom seam.  Otherwise it seemed to work fine and it was actually quite nice to drink out of.  Boy that Racer 5 IPA tasted good after three days of frantic problem solving and work!  There was no off taste as I suspected there might be.  I don’t think I’d mind a little pine flavor in my beer anyway Pine is a common flavor component found in hops.  Actually, I may not have detected it since I was drinking IPA.  I missed the midnight deadline to enter the instructables leathercraft contest by 15 minutes waiting for my hastily patched together youtube video to finish uploading.  It’s probably just as well, because it is pretty rough with missing footage, typos and clips out of order.  The new video posted here is much better put together and contains footage missing from the first one.

Ye olde black jack bottom


THOUGHTS AND WHAT TO DO DIFFERENT NEXT TIME

I would like to eventually make a second black jack.  I could do it much faster a second time, especially on the same forms.  I would probably push the boiling further, and use leather that is pared down to an even thickness.  I might also try boiling it with the form in it as a sort of second boiling to set the shape better and harden the leather more.  Actually, I did try that, but I was having technical issues with my water heating apparatus and had to give up on it.  The other option would be to bake it on the forms.  This intrigues me as well and I’m curious enough to want to try it.


Other things I might try or do different.  I would experiment before hand with stitch length, but would guess that 3/16 is going to be about right.  Straight pitch as the coating, with no beeswax or oil.  cutting the handle closer to the stitches after the mug is sewn up (I just think they could be closer, but sewing them that close to the edge might be awkward).  I would make the rim too tall.  You can see in the pictures how it shrunk down making the rim taper down away from the handle.  It may be possible to push it back up enough to get it level, but not without a something to firmly hold it while it is being worked on.  If there were extra leather on the rim it could even be nailed in place to shrink and dry and then trimmed to the desired shape.  A wooden vice to hold the piece while working would be very nice, even if it only worked for some parts.  maybe a special vice to accommodate the fat cup body.  Proper leather stitching needles.  I ordered John James Saddlers stitching needles size 2 on recommendation of Youtube user Ian Atkinson I also just need to bone up on general leather working and stitching skills.  I'm still much more of a tanner than a leather worker, so I may also pick up these two books 1 2 that he recommends and work on those skills.  Lastly, I'm not sure about the outer finish and would like to do some more research and experimentation around "Japaning" with linseed oil to get that high gloss finish.


Another project I'd really like to tackle is a leather bottle of the short keg-like variety as in this picture.  They are so damn cute!  I have ideas on how to make those, but again, we don’t actually know how they were manufactured.  This experience was fun and just the kind of adventurous multi-disciplinary project that I like doing.  Trying to resurrect old technologies from available clues gets me all hot and bothered.  It was extremely time consuming though and ate up most of 3 days.  I think I can figure out the leather bottle thing and will certainly post that as well.  I’m also currently working on recovering the apparently lost art of making genuine old school apple butter, which is very exciting.  I have already compiled hours of research that I’ll be publishing, which probably constitutes, much if not most of the best available references relating to that subject.  I’m also amped up to make a throwing tomahawk out of wrought iron and steel forged and welded in the ground forge that I just built for this black jack project.

Must replicate adorable antique leather bottle!


Each of these projects takes many hours, or sometimes days, let alone the time required to write it all up, and to plan, shoot and edit video footage.  In order to keep doing all this and building an archive of information here, without having annoying advertising on the website or on my youtube videos, I need to have at least a small income.  If you appreciate this type of information, you can help me keep it up by using my amazon links.  Thanks so much to the people that are already using them, you guys rock!  If you bookmark this link in your web browser toolbar and use it whenever you shop at Amazon, I get a small advertising fee at no cost to you, regardless of what you purchase.  It is usually not much, but if a lot of people do it, it adds up.  I appreciate your support.  If you make a black jack, or have already made one, please let me know!

CHEERS!

Ira's Handmade Gourd and Rawhide Ukelele

Ira came to help out up here at Turkeysong today and showed me the Ukelele he's working on with a gourd box and rawhide drum skin.  It's pretty neat!  You can check out his new project at youngartistsactionleague.com  and  he taught this at Saskatoon Circle Gathering put on by some friends of mine in Washington state.  Thanks for the tune Ira, and thanks for the help!


Video Series on Making Quality Hide Glue


I'm shooting a video series on making high grade hide glue.  At least that is the goal, we'll see when I test the glue after it's finished, or maybe have it tested by someone else.  The third video, on liming, is uploading to YouTube as I'm typing this.  The approach is a sort of learn as you follow along kind of thing, going through the process of turning a cattle hide from Tamara's recent cattle processing class into hide glue.  Every time I go to work on the skin, I take some video and edit it down.  One section is sort of a lecture type deal with some chalkboard action, one is on fleshing and, aside from the liming one uploading now, the others will be de-hairing and de-liming, cooking and pouring, then finally cutting and drying.  Maybe at some point there will be one on testing the finished glue.

This hide glue series will be fairly long, but there are things in there to learn beyond making hide glue.  Little snippets about other stuff relating to tanning skins and such inevitably work their way in.  No process is an island after all.  So far these videos have been decidedly lacking in popularity and the total number of people that really get a lot out of this will probably not be that many.  But it will be there when people are ready for it, and that is most of the reason I do this stuff at this point, as a reference archive and so it doesn't all die with me one day.  Personally, I think it's really cool, even though I've so far mostly restrained myself from going on long tangents about multiple related processes and ideas.  Poking around looking at other hide glue videos on youtube, a lot (or most?) of them use rawhide chew toys cut up in pieces.  Nothing wrong with that in context I suppose, but that has never been what we, or the genesis of Paleotechnics, has ever been about.  I'm definitely bringing you something closer to the ground up version.

The link below goes to the main Playlist into which all videos in the series will be placed as they come out.  I think anyone with any kind of google account, like Gmail, can subscribe for updates.  My channel, for now, is a mixed bag of stuff I get up to.  I'm also currently also doing a series on amateur apple breeding, which will follow my progress over the years attempting to breed up some new red fleshed apples here at the Turkeysong experimental homestead.  For the hide glue series,  I'm in the dehairing/refleshing/deliming process now, so that one should be up soon.  When finished, I will probably sell the glue on Etsy.  If that works, maybe I'll add artisan hide glue making to my list of little income sources.  Artisanal hide glue for artisanal artisans, you know instrument makers, fine artists who use traditional materials, fine woodworkers that want their furniture to be fully repairable in the future and the likes of them.  People who are keepin' it real!  See ya...

glue#1thumbFINISHEDYELLOW

The Most Common Bark Tanning Mistakes: Pitfalls to avoid on your way to beautiful leather!

grain header

grain header

By Steven Edholm

UPDATED SEPTEMBER 2020

Hey!, the Buckeye Gathering barktanning class is coming up and I have bark on the brain.  This article is going to be awesome.  A lot of people ask my advice on barktanning and I see the same mistakes made over and over again.  I can help, because I’ve made them all too (and still sometimes do), so I know whereof I speak!  So listen up fledgling barktanners, because we can save you a lot of frustration, heartbreak and WTF moments.

PROCRASTINATION:  This is a common mistake in tanning in general.  I still do it all the time, unfortunately, but I shouldn’t and you shouldn’t either.  Bark tanning is more forgiving than some other types of tanning because some of the solutions the hide is put into can be preservative to a degree, but that shouldn’t be used as an excuse to keep putting off what needs doing.  The solutions used in liming and tanning are not foolproof and will not preserve the skin indefinitely, so try not to use their limited preservative power as an excuse for procrastination.  good luck with that.

procrastination can lead to problems such as this damaged grain, which has lifted from the main body of the skin.

procrastination can lead to problems such as this damaged grain, which has lifted from the main body of the skin.

USING CRAPPY HIDES:  For some reason, people tend to pick some crappy hide for bark tanning.  I don’t like to start any tanning project with a crappy hide.  It’s too much work to waste on something which can’t be better than the material which you are starting with in the first place.  If crappy hide is all you have and you want to experiment with bark tanning, working with just a small piece of it can be a great learning experience.  And in general, don't be afraid to "round out" scrappy skins, meaning trim off the rough stuff and tag ends, before tanning.  I also don't think it's a great idea to start with a really large hide.  Actually, squirrels are great and make a great starter project, and really nice leather.

This skin is scored. Try to start with decent skins, or use parts of them to experiment on rather than tanning the whole thing.

This skin is scored. Try to start with decent skins, or use parts of them to experiment on rather than tanning the whole thing.

LEAVING IN THE LIME OR BUCKING SOLUTION TOO LONG:  Leaving the skin in lime or a bucking solution too long is not uncommon.  The skin can stay in for quite some time and come out okay, or even great, but try to leave it in for a reason other than blatant procrastination!  This issue is dependent somewhat on the strength of the solution too.  Although long liming is sometimes used intentionally, and sometimes in weak lime, generally you want to keep the liquor strength up. In the beginning, you should probably process the skin when the hair slips out easily.  Overly long liming can weaken the skin and damage the grain. Keep the strength up by stirring or adding more lime as necessary. If using wood ashes, make sure they are strong enough to swell the hide well and again, keep the strength up as necessary. In either case, if the hide is not swelling a lot within a few days or the hair doesn’t start to slip within a week, bump up the strength. It is okay to use extra lime since only so much will dissolve into the solution at once. If there is extra lime, more dissolves when you stir it if the solution becomes “used up” by the skin.

NOT DE-LIMING ADEQUATELY:  Re-scraping to push out lime and dissolved tissue is called scudding. Rinse the skin thoroughly many times, and scrape over it on both sides between soakings. Use the tool backwards on the grain side so you don’t damage the grain and make sure there are no nicks in the blade. In other words, hold the tool just like you are going to flesh the skin, then turn it around so the underside of the edge just drags across the skin. This is also a better way to de-hair skins, see the video linked below. You will see a lot of dissolved crap, white lime and yellow gunk come out of the pores. You don’t have to scud the hair side every time, but do it once or twice until there is not much coming out. When the water coming out is mostly clear, and the skin has “fallen” back into it’s un-swelled, flaccid and floppy state, it is de-limed.  You can finish with bating or drenching (soaking in poop or fermenting bran respectively, but those are another story), or at least rinse with a splash of vinegar in water before tanning begins.

USING WEAK ASS MATERIALS:  It takes quite a bit of tannin to finish out a full skin from a medium sized animal, let alone something large like an elk or cattle skin.  There are tannins everywhere.  They are in most plants to some degree.  Finding sources rich enough, or abundant enough, to make good tanning solutions and tan hides safely and thoroughly is less common.  Don't use, old dead bark or dead leaves.  You need leaves or bark that have been gathered when fresh, and have not been rained on for a season, or worse.  Keep your eyes out for freshly fallen trees and get the bark when you can, storing it for later.  It is possible to use weak-ass materials, but it is not practical, nor very fun, and the results are likely to be disappointing.  In most cases, older trees have bark that contains more tannins than younger trees.  Stripping saplings may work, but be prepared to do a lot of it!  When you get that good material, chip it up fine.  Boiling large pieces is another common mistake.  You just can't tan a skin with some big chunks of bark floating in a tub... not gonna happen.

Gather fresh material whenever possible. Old dry bark that has sat out in the rain is poor in tannins. Be opportunistic as in this case, gathering bark from a tree that fell across the road.

Gather fresh material whenever possible. Old dry bark that has sat out in the rain is poor in tannins. Be opportunistic as in this case, gathering bark from a tree that fell across the road.

MAKING THE SOLUTION TOO WEAK:  This problem can happen for numerous reasons, some already covered above.  Many people are so terrified of case hardening, that they start with a very weak solution and then finally end up with a solution that isn’t even strong enough for a good start.  The skin can be put into a pretty strong tea in the beginning without adverse effects.  It can also be brought up in strength very quickly once the skin is partly tanned.  For instance, you can go from weak to medium over the course of a day and have the skin in a fairly strong solution on day two.  Case hardening is not common and in my experience must require a very strong solution.  I just threw some squirrel skins into a full strength tanoak tea and they came out soft and beautiful. (full strength meaning shredded tanoak bark just covered with water and boiled for hours, like the picture below.). Apparently, some materials cause case hardening more than others, but it is not hard to avoid and most err too much in the weak direction. It is only a problem in the beginning of tanning, so keep ramping up the strength as suggested next…

This bark liquor is awesome. It's hard to produce good rich liquor like this from tannin poor materials. It is possible in some cases, but be prepared to work at it by using the same water on two batches of material.

This bark liquor is awesome. It's hard to produce good rich liquor like this from tannin poor materials. It is possible in some cases, but be prepared to work at it by using the same water on two batches of material.

NOT STRENGTHENING THE SOLUTION ENOUGH DURING TANNING:  This is the most common, and possibly the worst, mistake.  The skin will use up tannins very quickly in the beginning!  No really. A well prepared skin will take up most, if not all of the tannin in any starter solution in just one day, or possible less, especially if it is agitated as it should be. The process slows somewhat until the skin is struck all the way through.  If the tan is agitated, the skin will tan quickly and the solution can be strengthened frequently to keep the process moving along.  The typical beginner scenario is to put the skin in a very weak solution to start with, and then just leave it there until the solution becomes completely used up, which can take only a day, or even just a few hours in some cases. But even putting it into a strong solution, it is remarkable how fast the tannin can be used up, requiring strengthening.

If the solution is not strong enough, the skin will begin to suffer damage and loss of substance.  Add concentrate frequently.  If you are using materials which are poor in tannins, you will need a lot of the stuff to tan a skin (a good reason to do smaller experiments before moving on to full skins).  Don’t judge by how much material you are using, judge by the strength of the solution and how the color is progressing through the skin.  Judging solution strengths is difficult and has to be learned by experience for the specific materials you are using, but I also just don't think it matters that much unless it's too weak, which will be fairly obvious with a little experience.  From what I hear from other people, and judging by my own experience, I’d say that a rule for beginners might be that if you think it’s strong enough, it could probably be a lot stronger.  After the color reaches the center of the skin, most of the tannin binding sites are taken, and the fiber takes up the solution only very slowly. But it can still benefit the leather to remain in strong solution to soak up as much as it can.

Every time you check on a skin or on a liquor, pick it up in your hand and look at it. Pour it out and look at it too. While different materials will look different, you need to start getting some idea of how to judge strength and this is the most accessible way.

This is one weak ass tanning solution, because the new well prepared skin has slurped up all the tannin overnight. There is basically nothing left in here to tan the skins. Color does not always equate to available tannin. Add concentrate frequently…

This is one weak ass tanning solution, because the new well prepared skin has slurped up all the tannin overnight. There is basically nothing left in here to tan the skins. Color does not always equate to available tannin. Add concentrate frequently in the beginning.

NOT MOVING THE SKIN ENOUGH:  This mistake is probably most important to avoid during the tanning phase, but it applies to any process where there is a liquor involved.  Any time a skin is put into a solution, stretch it over and move it around to be sure it is soaked all the way up in all areas.  Several visits may be necessary if the skin is not well soaked up to begin with.  Air bubbles trapped in the skin can also be an issue.   Many beginners stuff skins into a bucket or vat and just leave them.  The skins must have solutions contact all surfaces to be processed evenly.  It’s okay to fold or wad hides into containers, but there should be some room, and the skins should be stirred several times a day for the first few days and then occasionally until finished.  If not, they will not tan evenly and can finish uneven in color.  A good strategy for small containers is to remove the skins and put them back folded differently each time.  Just do it often enough. It is better to use large enough containers though. A bucket is hard to tan a deer skin well in, but an 15 or more gallon tub is pretty good.

This skin was dropped in the solution overnight and left there. Think what would happen if the skin was never moved? There are exceptions, but generally speaking, more the skin is moved, the more evenly and quickly it will tan.

This skin was dropped in the solution overnight and left there. Think what would happen if the skin was never moved? There are exceptions, but generally speaking, more the skin is moved, the more evenly and quickly it will tan.

DRYING THE SKIN WITHOUT OILING:  It is best to oil or fat-liquor the skin once it is tanned, and before it is dried out.  Otherwise the grain may be brittle and liable to crack on sharp bending.  Oil functions somewhat like moisture does in living skin, providing lubrication for the fibers and engendering suppleness. A skin dried without oil, or with just a little on the grain side should still be like leather. It should not be stiff or crunchy and the grain should not be very brittle to the point where it cracks when bent just a little bit. If that is the case, the skin was damaged in tanning, likely from long soaks in weak tanning solution.

Oiling the skin re-lubricates the fiber and makes for a more wear and bend resistant grain.

Oiling the skin re-lubricates the fiber and makes for a more wear and bend resistant grain.

OVER OILING: I’ve seen many hides that are over oiled. You don’t want the hide filled with oil. You want the fibers coated lightly with oil in most cases. It can be challenging to get oil into thick heavy skins, but just do your best and worry more about over oiling than under oiling.

BAD WATER:  Water with iron can make skins dark and brittle.  If you have to use high iron water, try to keep the time the skins are in the water to a minimum.   If you have very hard water,or especially if it contains iron, consider collecting rainwater for liming and bark solutions.  It is difficult to collect enough rain water for rinsing processes however.

Whelp, there are of course a lot more details to fill in but, given a basic working knowledge of tanning, that's actually most of the wisdom you need to know to successfully barktan skins!  If you know someone dabbling in barktanning, send them this post.  I rely mostly on word of mouth to get people here.  Please let me hear your experiences and experiments in the comments section.

Posted on April 13, 2013 and filed under Animal Parts, Tanning.