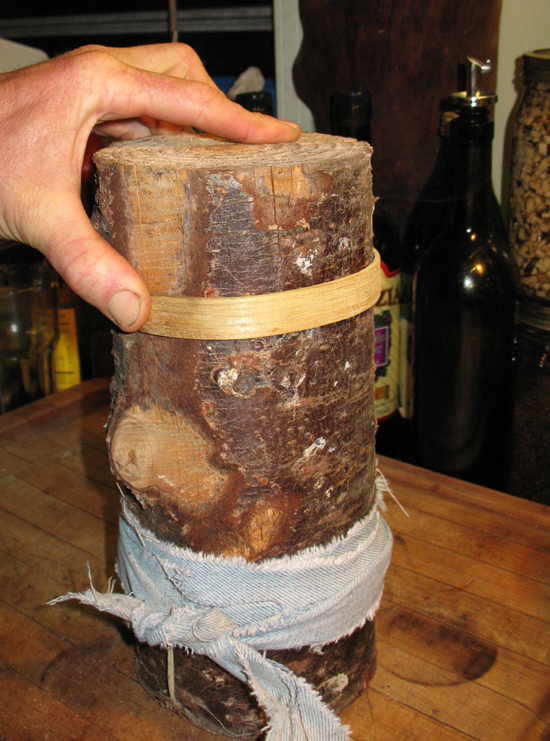
Why I stopped selling at the local Farmer's Market, due to red tape, health and new rule changes.
Some I'itoi Onion Bulbs Available for Subscribers
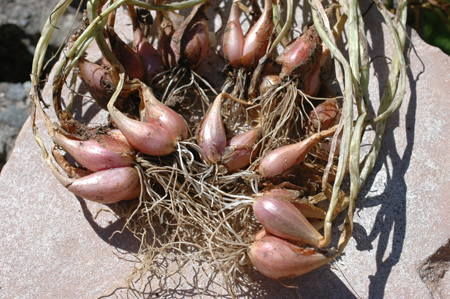
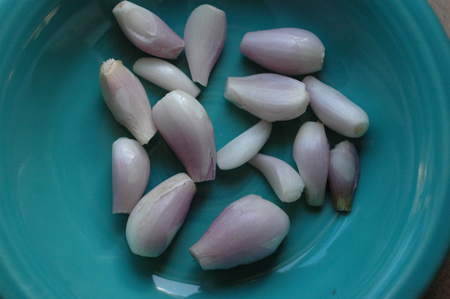
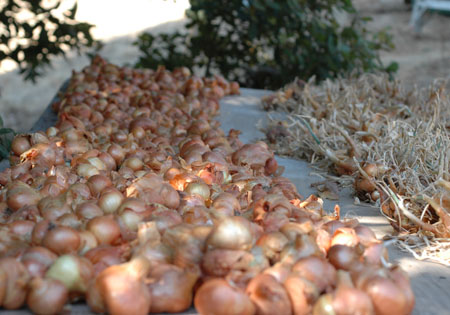
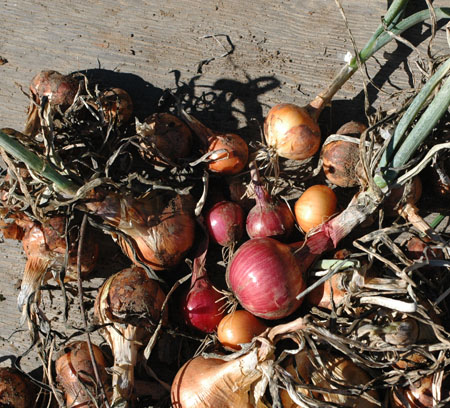
I’itoi (pronounced E-E-toy) are small and prolific multiplying onions. The story goes that they were acquired from the O’odham people in what is now Arizona and N. Mexico. They produce a very small Shallot like bulb that can be peeled and eaten, or they can be used as greens or pulled off during the growing season for “scallions”. They are very rare at this point and were put on the Slow Food movements Ark of Taste a list of endangered food varieties. I tossed a bag of old dried up ones that I thought were probably dead out in the rain a month ago, and a lot of them sprouted, so I thought I’d pass on what is left to readers of this blog rather than tossing them in the compost. These are the ones that were too shrunken to sell, though perfectly viable, and now they are just barely hanging on for dear life. They have a small core of viable bulb left and I think that if they are potted up soon most will still grow out. You really only need one as they are very good multipliers. I made up small packets of about 8 bulbs and tossed in a small sample seed pocket/packet of bulgarian giant leek seeds in each. There are about a dozen packets ready to ship, first come first serve if you pay shipping, which just $1.50 should cover. You can paypal that to me after contacting me through the contact link on this website. This is offered for people who are subscribed to my blog.

I don’t know much about cold hardiness of I’itoi. They certainly do fine with light freezes, but growing them outside in really cold climates is going to be a bit of an experiment. I'd appreciate any reports back on how they do. These bulbs are barely hanging in there, but they are tough little guys and still have a living core waiting to find some soil and water. Plant them immediately. In warm climates, plant in the ground now. In cold climates, I’d start them in a pot indoors and then plant out when warm weather arrives. They reproduce like crazy and even if only one survives, you’ll have plenty to share, replant and eat soon enough. I started with just a few and have sold and given away many hundreds of bulbs.
If left in the ground, they’ll form a dense cluster that can contain hundreds of small bulbs. If replanted singly and well tended, they will form much larger bulbs than if left alone, but again they are still quite small.
First come first serve. Contact me through the contact link on this page. Again, this is for people who are subscribed to my blog and they'll probably go fast, so don't contact me next week or next month or next year. I'll probably have them on ebay again this summer and I would think that they will be more widely available from seed suppliers soon.
A google search will turn up a little info on I'itoi onions, but there is only so much out there. This link is a good page to check out for more info.
And This video
https://www.youtube.com/watch?v=Uo6n9704vcE
Saffron Dreams: Musings and experiments in growing Saffron
I like to cook intuitively with what happens to be on hand, which means having a certain familiarity with my ingredients. Recipes are just guidelines in my world and not to be taken at face value, ever. I’ve never had enough Saffron around to become familiar with it to the point that I can use it with any confidence. When my mom brought me a small box of quality saffron from Spain, I had a chance to become a little more familiar. With Saffron now on my radar, I of course decided I should grow the stuff instead of buying it. I mean if we can grow the stuff here, why import it at 80.00 an ounce? Saffron seems to be capable of growing in a fairly wide variety of climates from England to Afghanistan. Then I could sell the bulbs and promote the idea of growing it and start a local industry and.....
A laptop surfing safari turned up a few small scale growers focused on high quality Saffron for local consumption, but none of them in California. Aside from these geeky boutique producers who have been bitten by the Saffron bug, saffron production seems to be left to areas where it has long been cultivated.
Saffron’s peculiarly unique flavor is subtle and pervasive at the same time. A few threads too many and it goes from enhancing your dish to ruining it. Fortunately, it’s intensity means that only a few threads are required and if it wasn’t so intense, no one would likely be able to afford to use it at all, nor probably bother to. The part used is the intensely red stigma of a pretty little purple/blue flower named Crocus sativus, the stigma being the female part that receives the pollen. The Latin name is probably pronounced like kroak-us sa-tee’-vus, or sat’-i-vus but no one really knows for sure because Latin is a dead language. So just say it however you want to and if anyone flicks you shit for pronouncing it wrong, just follow Jepson’s advice of The Jepson Manual: Higher Plants of California:
"... practice what sounds good to your ear; conviction is important." "When someone presumes to correct your pronunciation, a knowing smile is an appropriate response."
That's always worked for me :D
Soil Banking With Biochar: proposition for a migrating latrine system aimed at permanent soil improvement
"The idea is to have a sort of trench system that would serve both as a latrine, and as a means of permanently improving the soil."
This proposal is built around the concept of using charcoal to permanently improve soils. If you’re not familiar with that idea, a little reading on biochar might be helpful.
(EDIT: Ok, I just posted this yesterday, but the original title sucked, so I had to take action. The more I've thought about this idea today, the more I'm inclined to think that viewing it as just a latrine is way too limiting. A system of soil improvement like this could serve to accommodate all sorts of rubbish and organic refuse. I always thought that if I built a nice outhouse someday, that I'd make a sign for it that said Bank of Fertility (make a deposit:). I like that concept. I'm going to go with the term Soil Banking for the concept of a migrating soil improvement system using an open trench. While making daily deposits of doodie makes eminent sense for such a system, there are so many more things that could be tossed in the mix. All people who live in the country that don't have access to landfills, have rubbish heaps or pits of some kind. What I'm proposing is that we use that open pit, and the material added, to a high level of advantage toward the end of permanent soil improvement. At this point, I can only see a big open pit, placed in the right area, to be an outstanding opportunity. The idea of permanent soil improvement, made possible by the addition of charcoal, is really compelling. Dead animals and parts, rotten wood, old natural fiber clothing, shells, bones, ashes, seedy weeds that are best not put in to the compost, anything else that plants or soil life can feed on that the chickens can't eat, or that we don't want to put in the compost for whatever reason, and of course poo and charcoal, all added as they occur. And of course adding whatever other amendments, like lime, rock powder or trace minerals might make sense too, depending on circumstances. Over many years, this system could add up to an ever expanding bank of super soils that will probably continue to be superior for decades, if not for centuries. So there it is, Soil Banking. "What should I do with this dead maggoty possum?" "put it in the soil bank with a few scoops of charcoal and some dirt" "yeah, okay, I was going there to make a deposit anyway!" "righteous dude, high five!" Now back to regularly scheduled programing.)
I’ve been knocking this idea around in my head for a while. Actually, maybe it’s been knocking me around it just want's me to think that I'm knocking it around. It started when I was thinking about ways to use the pit after pit burning charcoal in a long trench. The obvious use was to bury the biochar in it instead of digging another hole for that. After all, it’s one thing to make all that char, but then you have to dig it into the soil, which is a butt load of work. In this climate, outside of irrigated garden beds, I think getting the char pretty deep is probably a good idea. After june, soil moisture is scant near the surface. If the char was buried lets say only 12 to 18 inches deep, that puts it in the zone where roots are mostly on idle for the summer. No moisture= no root activity to speak of. Charcoal is a great retainer of moisture, but it’s not that great. I’m talking about unirrigated areas for orchards and perrenials, or maybe for dry farming crops. If the char was more like 3 feet or 1 meter deep, it would be of much more benefit to plants in the summer season.
Once I thought about it for a bit, I realized it doesn’t make a ton of sense to keep digging new pits just to burn the charcoal in. it’s not like I’m probably doing the soil any favors by cooking it anyway. A central permanent burn area, with a more permanent pit arrangement would probably make more sense, or just burning by any number of methods wherever the wood happens to be. Charcoal is light, so moving it is not an issue. Moving brush and wood is a whole lot more work. In most situations, it’s probably not relevant how the wood is charred, the idea of using the burning pit as a latrine was just a path into this idea.
So let me just hit you with the basic idea and then we can bat the details around a little. The idea is to have a sort of trench system that would serve both as a latrine, and as a means of permanently improving the soil. Once the pit is dug, there are limitless possibilities for amendment with all sorts of substances, and for changing the soil’s physical composition. That’s pretty neat! Also, normally, it would be a fair amount of labor to mix in all of that stuff all at once. As a latrine though, you’d be mixing it in gradually day by day while doing something you have to do everyday anyway. Lets say you wanted to end up with about 20% charcoal in the soil. One poop, one scoop of charcoal, four scoops of dirt and small amounts of whatever other substances you might want to toss in there like lime, wood ashes, sand, phosphate fertilizers, trace mineral fertilizers, organic matter, etc. I’m already digging holes for the current pit latrine used here on the land, but this system would utilize part of that labor to a more useful end.
This system makes sense to me for soil improvement with biochar under my type of conditions. It seems likely that the terra preta soils of the amazon might have been made with some similar approach... like pits into which compostables, broken pots and excrement might be disposed of and covered gradually with dirt and charcoal. I'm not experienced enough with using biochar here to be totally convinced this method will be worth the effort, but I think there is a very high probability that the results will be awesome, easily high enough to jump right in and make the investment to try it.
I’ve never really gotten the latrine scene together here. We’ve always used a pit toilet- dig a pit, drop in a little dirt or organic matter here and there till it’s full, and move on. I’ve tried to put them where I want to plant a tree, but it doesn't always work out. The one site I have actually planted directly on, the tree died, twice even! That might just be due to drought, but suffice to say, it hasn’t worked out very well for me as a system. Also, I’m not convinced that even a pit full of manure is really a very permanent soil improvement, and it will have a limited window of fertility. I’ve thought to eventually build something like the Ecosan drying pit toilet system, but that could be some time away in the future. Thinking back now, 8 years of being here most of the time day in and day out, I could have improved a lot of soil using my new proposed system. The pits would fill up quickly, because so much dirt would be added back daily. It’s a lot of digging, but it’s easier to dig a wide trench than to dig a single deep and narrow pit. Also, it is assumed that soil improvement is an important goal, so the digging is not superfluous work. It is also spread out over much time. Consider digging char into a 40 foot long x 5 foot wide x 3 foot area all at once versus over the course of a year or so. The trench could be dug in sections as needed, or when convenient.
In the days before plumbed toilets, public latrines were a major issue in population centers. I’ve smelled enough latrines to know how horrid the stench must have been. It was proposed to use charcoal as a deodorant and the resulting sludge sold as fertilizer. I think this method was probably successful where implemented, but it wasn’t too long before they started washing it all away into rivers and off to the ocean, which of course we mostly still do today, just in a somewhat more refined, but also much more resource intensive way. Point being, charcoal is the ultimate deodorizer. Imagine an outdoor latrine with no odor.
Having been called on that day to attend a meeting of the Board of Health, held at the workhouse, I was at once struck with the intolerable and sickening effluvinm which, arising from the sewers, cesspools, and privies, pervaded every part of the establishment; and which, with the chlorine, which was being evolved in every direction for the purpose of correcting it, formed a compound of villanous smells, which no stomach but one accustomed to it could for a moment tolerate. Your very active and efficient inspector, Captain Hanley, told me that he had done everything that could be thought of, and had spared no expense to try and have the nuisance abated, but that all his exertions were useless. I then begged him to send down and purchase a few loads of peat charcoal, which were selling at the market; and having told the master how to employ it, the suggestion was at once adopted, and though the material was not of the best description, nor “ recently prepared,” in a very few hours the most delicate and practiced nose could not have detected the slightest offensive odour. Since then the master, with very praiseworthy attention, has had a large pit of the charcoal prepared every week, and by its occasional use through the grating of the sewers, and by sprinkling it over the nightsoil in the privies, the workhouse is, as far as entire freedom from every noxious and offensive effluvinm, a model to every other in the kingdom. In every respect the results have been most satisfactory. Instead of paying from five to ten pounds, every half year, for having the privies cleansed; and having itself and the whole surrounding neighbourhood at the same time poisoned for weeks by the intolerable stench ; the establishment has that task now performed by the paupers, without the slightest reluctance on their part;—and the contents of the sewers, cess-pools, and privies are now collected into inodorous and innoxious heaps, or mixed with the other refuse of the workhouse until removed by the contractor; which, before, he absolutely refused doing, but which he now considers the most valuable portion of what he contracted for.
Also, adding significant amounts of dirt on top of the daily deposits would completely cover them, so flies would not likely be an issue either. Ov course you could tweak the amount of soil added in order to either improve more soil in a shorter time, or to make the latrine last longer to the end of digging less. I’m seeing this more as a way to improve a lot of soil at this point, so thinking of finding the minimum amount of poo to maximum amount of dirt and charcoal added back, while still ensuring good results.
So, one issue with burying charcoal in the soil is that it is a nutrient magnet. The first time I did it, the lettuce I planted afterward failed to thrive. It was pretty bad, I mean it barely grew and produced nothing really edible. The most recent garden bed I amended with charcoal, I added a lot of chicken manure and compost teas to as it was being dug in, in order to charge the charcoal up so it wouldn’t just suck everything up leaving nothing for the plants. That bed is doing well in it’s first year. Once it’s charged up, this property of charcoal to catch and hold nutrients becomes a benefit rather than a liability, possibly the most important property of biochar, but it must be charged somehow. The latrine system should provide a nutrient rich environment to charge the charcoal up as it’s added. I would probably add stuff in this order:
poo
ash
charcoal
amendments
dirt
organic matter (if added at all, probably a little forest duff at least, if just for innoculation with diverse soil organisms).
The current outhouse structure can be carried by 4 people or rolled on logs by two, but it is far too heavy and awkward to be moved frequently by one person. I’m thinking that a more tent like arrangement would be better suited to my trench latrine plan. I though originally of some rails that the covering slid on, but I think that a more simple and elegant solution is needed. I’m thinking for my style a couple of planks with a space in the middle to use as a squatting toilet and a light frame covered with a section of plastic billboard tarp could be plenty cozy enough. The tent covering would need good anchorage from winds... maybe sand bags or cinder blocks which bungee to the frame? We’ll see. No need for a door most of the time, depending on the site I guess, but an old sheet should work okay.
The great majority of us are wasting the nutrients we excrete. This state of affairs makes not a bit of sense at all. For homesteaders, finding some way to utilize the nutrients that are leaving our bodies seems like it should be something of a priority. We can’t afford to hemorrhage nutrients out of our living systems and we shouldn’t even if we can re-import them from somewhere else. While saving urine to use as a fertilizer will catch the vast majority of the useful plant nutrients leaving your bodies, and is a great first start, doodie also has a lot of good stuff that can be turned to advantage. This system seems very promising to me. It’s going to be too much work for some people, but for tough and scrappy homesteader types and less “developed” cultures and areas, it is probably fine. The prospect of the opportunity to create super soil zones by utilizing immediately available resources and a trickle of labor from already daily activity, gets me all hot and bothered and would light a fire under my ass to go start digging if said ass wasn't glued to a chair most of the time. I mean that shit is exciting people!
My proposal is really for a system which modifies the soil to quite a depth, but I suppose it could be used in a shallower form too. For a system that required more upfront investment, but less labor over all, the ecosan system with charcoal added to the ash might be a good way to go. Briefly, the Ecosan system uses two pits. Urine is diverted out of the system and collected in containers for direct use. Each time a solid deposit is made, a handful of ash is added to cover it, help dry it out, and alkalize it, all of which kills off microorganisms. The collection chambers are ventilated to encourage drying. Once one pit is “full” it is closed off to dry completely, and the other side is used. By the time pit two is full, six months or more later, pit one is completely dry and innocuous. If charcoal was added, it would pre-charge the char as well and the whole lot could be pulverized as a very rich, fertilizer for use primarily on annual crops.
Here at Turkeysong I could see running both systems eventually. I’m pretty tough, and am used to inconvenience from years of re-training my entitlement set points. I'll spare you the details, but trust me, I have gotten through the worst of times with the most inconvenient toilet and living situations, like no toilets at all and extremely ill, rain or shine, day and night. But, um, honestly, tough or not, I’d rather sometimes have a close outhouse to visit! Inconvenience isn’t the goal or noble in and of itself. Sometimes simple solutions are still the most elegant ones though and being constantly besieged by convenience can make us into weak and whiny people.
I’m pretty opposed to the idea of indoor bathrooms. Digging little holes in the forest or crapping in a trench might seem crude, but pooping in your house just seems plain uncivilized to me. I could see both the Ecosan and trench systems eventually operating simultaneously in a place like this. The cozy, luxurious Ecosan, (maybe with a door, or a light and some reading material even! How about a stereo, wide screen t.v... wifi...) close to sleeping quarters for late nights and rainy days, and the biochar trench latrine for the rest of the time, or for special soil improvement projects.
I hope this idea will appeal to someone enough to try it out and we can see what the profits and pitfalls might be. Obviously, making a bunch of charcoal is in order, quite a lot actually. The good thing is that once it's made, it keeps forever. I managed this past winter and spring to experiment a little with the top down burn pile and pit methods of charcoal production. Both are easy and accessible and can be used with random scrappy brush. I’ll leave you with the super condensed version of both, but stay tuned for more on those in future posts or videos.
Top down piles: Pile brush in a tall narrow pile. A tall narrow pile is more work, but it burns better than a mound shaped pile. Light from the top which produces way less smoke. Throw unburned pieces from the outside into the center as burning progresses. When most of the wood is charred and no longer flaming, douse with water.
Top down pile, ready to light as soon as rains start. See this pile burn here!
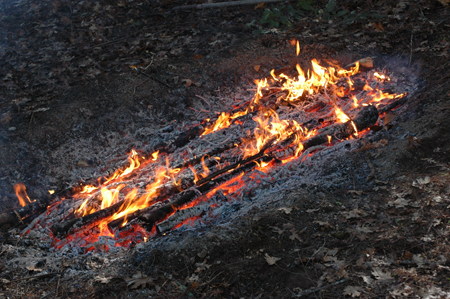
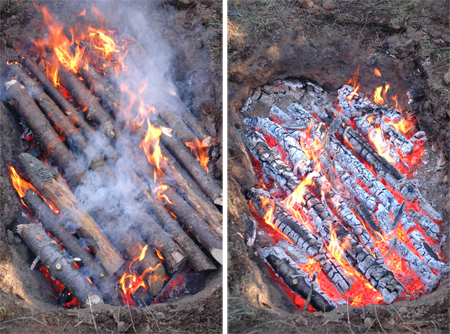
Pit: dig a pit with sloping sides. For long wood, dig a long pit so you don’t have to cut the wood. start a long narrow fire in the bottom. Add wood in layers. When burned down and not producing much flame, add a layer. try to cover the layer below well, but each layer should be only about one stick thick, not piled up. this system doesn't work very well with very tangly torturous type brush. Conifer limbs with the needles on are fine, but oak brush with branches pointing in every direction and taking up a lot of space in every direction needs to be broken down a bit. This system works by smothering the previous layers with new fuel. Just remember to try to have the new layer close down on the top of the old one to smother the coals below so they don't continue to burn. When very little flame is left and the pit is full, douse with water.
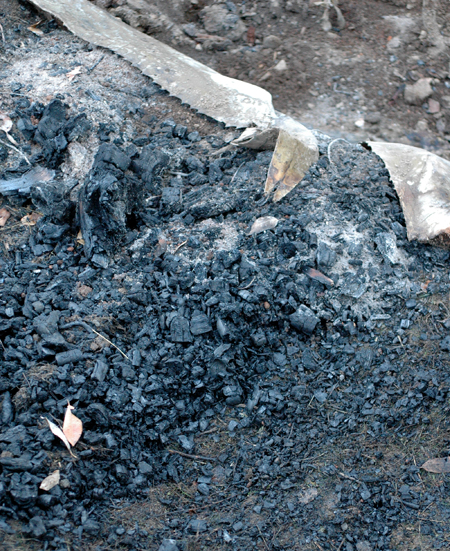
Burning charcoal in a trench. There is a trench, this is the end of the burn when it's full of charcoal. Video here.
I think the pit is probably more efficient in the wood used to charcoal produced ratio than the top down pile style--- but it seems to require a little more work and attention too. I’m not really sure yet. In both cases, don’t wait for every single piece of wood to be charred before extinguishing. You will end up with some un-charred wood, but you can always re-burn it. If you wait for every single piece to be charred before extinguishing it, the wood that is already burned down to coals is rapidly turning to ash, effectively reducing the total charcoal yield.
I’m somewhat annoyed with myself for not "having my shit together" already. But, when we have to always be pioneering new ideas and systems, it’s not always easy to get it together, and I have a lot of challenges to face so I'm cutting myself some slack. I’m convinced that urine diversion is the first step and anyone who has hung around this blog much knows I just won’t shut up about that. Next, something like the ecosan system and/or a system like I’ve just proposed that amends soil as it goes along, should make maximum use of our leavings. And that should be the goal. We are so fixated on disposal, and the idea of excrement being a valuable resource is so totally foreign, that it is often difficult to find language that can really get across the way we should truly be thinking about the issue. Like I said, it makes no goddamn sense to extract the very essence of the soil, that which plants make their bodies with, and then throw it away. Not only should homies like us be building our infrastructure around a new paradigm, but as a society, we should be thinking toward decommissioning our old systems and implementing new ones that honor our daily discharges as the very valuable resources they are. My trench latrine will certainly not appeal to the timid, but it can’t be that hard to come up with a design that tops the current practice of pissing and shitting in a ceramic bowl of water in the house! Like omg, that shit is nasty. And said bowl has to be cleaned by some unfortunate person, like ewwwwww.... If we can put people on the moon as they say...
Summary:
*Dig a trench or pit, up to a meter deep.
*Use a light moveable cover.
*I'll probably use planks for a floor with a space left open to squat over. An elegant solution and highly flexible.
*Add charcoal, dirt and/or other nutrients and amendments with each deposit. shoot for 15% and up of charcoal if possible.
*Find a poo to dirt and charcoal ratio that makes maximum use of droppings and fills the hole quickly.
*If a trench is used, expand the trench as the previous section is filled up.
*Be stoked that you've done something agricultural that may actually last for a really long time, unlike standard impermanent soil improvements.
http://www.youtube.com/watch?v=YV-1To9DkJQ
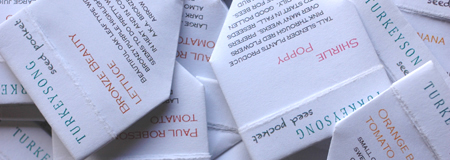
Turkeysong Origami Seed Pockets Video Goes Live!
At some point a year or two ago, I had to come up with a folded packet/envelope design so I could give away the seeds that I save at farmer's markets, scion exchanges and places like that. I like giving away seeds. I often give away too many and end up kicking myself, but it is so compelling for some reason! The first thing that came to mind was those little paper packets called bindles that cocaine used to come in back in the 80's. Learning to fold bindles was about the only real good I ever got out the stuff. Cocaine was around a lot back then, but I had little use for it. I think I was more interested in the bindles than the coke. I did so little of it that I couldn't remember how to make those little folded paper bindles almost 30 years later. So, anyway, no bindles. I had to improvise. I'm not sure why I didn't just look for instructions on the internet, but I'm glad I didn't.
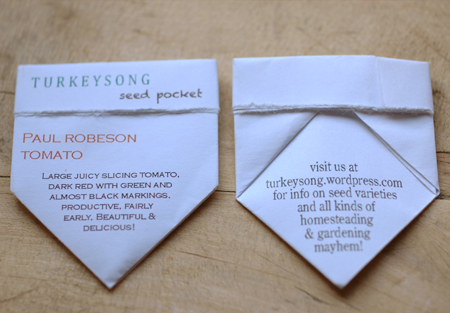
I had recently come up with an origami container for roasted baynuts that was pretty nifty, so I was emboldened to the task and began folding away fearlessly. I already knew I wanted it to be a quarter sheet or smaller. The result after a few minor adjustments is this origami dubbed "seed pocket" for obvious reasons. It came out with some neat unexpected features. The back tabs lock together in a really neat way to keep the packet closed. If stuffed super full it may open at the back (though it's still unlikely to spill seeds) but then you can just make a larger one out of a full sheet instead of a quarter sheet. I prefer to tear the paper after creasing, because the torn edges appear under the title, which looks cool and more handcrafted-like. there are also a lot of squares and half square triangles formed, so the proportions are pleasing to an OCDish person fixated on symmetry, like me. These are very seed tight and unlikely to leak even small seeds like poppy. In fact, I just packed up some tiny shirlie poppy seeds last night. I'm not so sure about super teeny weeny tiny seeds like tobacco and lobelia, but otherwise, they're pretty dang tight!
I've got one laid out in adobe illustrator for each of the seed varieties that I save regularly, with names, short descriptions and a nudge in the direction of my blog to pick up web traffic. They serve a little like business cards and are very popular. It's a lot of folding, but I actually like folding them while watching a movie or just thinking about stuff. It's sort of addictive. I've probably folded thousands by now.
I'm making the Adobe Illustrator template available as a downloadable file, so if you have access to adobe illustrator, you can leave the layout (which took a helluva long time to get right, so be careful messing with it!) and just change the text and fonts to suit your own farm name, variety names, descriptions and such. You may need to download the fonts I used if you want to keep them (Copperplate gothic light, Century old style standard, Cambria and Chalkduster). Putting some text on the inside of the packet is a possibility too, and I may add seed saving instructions for each vegetable eventually if I can get my stupid printer to stop eating so much paper. I kept it pretty simple, but one could add all kinds of things- colors, pictures, gardening quotes, fold lines...
This template is for four small seed pockets per 8.5 x 11 inch sheet. I haven't made a full sheet template, but I do use the same origami design for making an occasional large seed packet. If you use the template, I'd appreciate the small favor of leaving the blip on the underside of the flap so people can find the template and this post and my blog. Thanks!
So, save some seeds this year! If you haven't saved seed before, tomatoes are an easy place to start. They rarely cross with each other. Just take a non-hybrid tomato that you like, squish the seeds into a bowl, let it ferment for a day or two to dissolve the pulp, wash and drain several times to clean the seeds, and dry on a piece of paper in the shade until thoroughly dry.
This is the first video of what I hope will be many. Big thanks to blog reader lars for hooking me up with a video camera! Thanks dude!
http://www.youtube.com/watch?v=Ioub3uAsfSU
And don't miss my one other youtube video ever, the epic guinea pig munch off!
http://www.youtube.com/watch?v=vGqF63c6LZw
Manure Mats
“EDIT: I’m not sure how long ago I posted this, but I’m still totally into this method. It has worked awesome for me in many ways. Also, having just re-read this long post, I think it’s great. I feel always to need to be apologetic about discussing things beyond a “do this in these easy steps” sort of approach. That is because the modern mindset is increasingly about the short version of everything and it is only getting worse in the digital age. Successful homesteading and gardening is about adaptation, not paint by numbers.”
Preface-like paragraph: I have, over many years and with a lot of intention, slowly come to see the world around me as a sort of resource-scape, that is, as a world of potential resources. This can extend to people and ideas as well as physical objects and also phenomena of energy, like wind, or sun, or the action of an animal. Having made a pretty intense study of primitive technology as well as of other subsistence paradigms, I’ve been impressed deeply by the fact that different groups of people, given similar environments, or even the exact same environment, will do completely different things there and live very different lives. While we are guided by our environments, we are also very much guided by our cultural influences and what we know, or just as importantly what we think we know is and is not possible.
So? As a result of this perspective of resource consciousness, I tend to walk around constantly looking for unseen or undervalued potential that could be harnessed to make life better, more sustainable, or to make work more efficient and certainly a little just to keep myself entertained! While this view has resulted in way more ideas than I have energy to experiment with or turn into functional realities, having that view does serve me decently well sometimes. I’ve noticed in the garden that there are numerous resources that are underexploited and can be micromanaged into great usefulness. One of my main influences in this area is Farmers of Forty Centuries. It is a long, boring ass, pedantic book from the 40’s that is probably a good 100 pages longer than it needed to be. It is worth reading though for a few specific items of farming practice and, more importantly, the broader message of what can be done with resources that we might not even stop to think are useful in our modern society where views of work and resources are extremely skewed away from traditional ones. The picture painted by that book makes any western gardening I’ve ever seen seem absurdly sloppy and wasteful. We are spoiled, and that’s great in it’s way, but it blinds us to the potential around us when compared with the Asian cultures in that book who really had to figure out how to make use of every resource in the most efficient way they could come up with in order to survive their own high populations. Necessity is indeed the mother of invention. I just wanted to drop those general ideas on you before I start this specific story, because it’s somewhat relevant.
This way to geekage ---> There is a long path to get to the actual subject. But bear with me. The sights along the path set the context and this post isn’t actually just about one idea. There is an idea, but it could be summed up in a few paragraphs. But that idea evolved in a context which has specific real or perceived problems, and that context has other lessons and provides a framework for learning about the world we live in (or at least the one I live in!). And, there is more to glean than the end point idea, which after all is not an end point at all, but just part of a long evolution. It may be a good idea for me, while it may fail you utterly or be totally irrelevant to your life and work; but if we view it in a larger picture, we have more places to go from here and may find modifications, or other uses and ideas branching off of this one. So hang with me if you want to, or just go read the last couple of paragraphs.
The Pee era. I used urine as a fertilizer for over 10 years. At first I used it cautiously, but as my unfounded fears about the idea dissolved, it became the staple fertilizer. Suffice to say that it basically solved my fertilizing problems. A while back, doing farmer’s markets finally started to become a feasible reality. I can’t plan well enough to grow just how much I need, so there is always a lot of surplus, and it’s great to get something back for my work and prevent “waste”. But in order to start going to market, I had to stop using pee as a fertilizer for both ethical and presumably legal reasons, and so began a transition period.
Transition. Pee really had solved almost all of my fertilizing needs. The use of compost has always continued, but differently than I had used it up until moving to Turkeysong (more on that below). The compost is very useful as a fertilizer, but I in no way produced enough from kitchen and garden scraps here to keep everything in a large garden growing really well. Compost is an okay fertilizer, but rarely high enough in nitrogen to keep things really pushing vigorously through the season. Thus the pee. It was a semi-closed system and I learned a lot. But, with the new no pee garden, I now had a fertilizer problem. Chickens made a showing at a fortuitous time and there is now a thriving flock that is reproducing itself. They eat the food waste from the kitchen of a local hot springs resort along with whatever they can scratch up around the place. They poop a LOT! Most of it ends up all over the yard, and many times a day right on the door step. They are super poopers! Most of it dries up in the yard somewhere, but the new chicken coop has a screened false floor with a solid floor below that. So, the droppings, after falling through to the lower floor, which is well ventilated, dry out and can be accessed from both ends by scraping them out. It’s a pretty good system. No climbing into a crowded coop to awkwardly shovel out caked bedding from under the roost while breathing poo and feather dust. Yeah, right? Most people with chickens have been there and would rather not have been. Lately I’ve been feeding them their buckets of food scraps in the evening, so that they digest and poop all night in the coop. That’s the idea anyway.
The PoopCoop! This coop was my idea, designed and built by tonia. It has a 1x2 inch galvanized wire mesh floor and a wooden subfloor. The subfloor is well ventilated and can be accessed for poo removal from the front and back. There are boards screwed on the access points to keep the chickens from getting in there scratching around for bugs. I would make the access slots a little taller for easier access, maybe with doors instead of boards screwed on. Otherwise, it works pretty great. Make sure you orient the wire and the boards on the drying floor in the right direction for easy scrapping, otherwise you get a washboard effect.
Chicken Pee. So, I now have a fertilizer supply that I can use on my market garden. The chickens collect and concentrate nutrients into a reasonably convenient form and I can collect a bunch of it from the coop. Chickens are designed efficiently. They use the same hole for sex, egg laying, pooping and peeing, everything except eating and breathing. But of course they don’t actually pee at all. We pee out the vast majority of our nutrients, but with chickens it all comes out in one package. So, I really am still using pee, just dessicated chicken pee! I don’t have an endless supply, but I hope with careful use, and augmentation from other resources I have access to, I won’t have to import much of anything to keep the garden going; which would make me happy since I like to keep imports low. I’m also very hesitant to bring in manures from the outside as they almost inevitably have some seeds of weeds which I don’t yet have here in this somewhat remote location.
No dig, dig? Another part of this whole picture is that when I moved to Turkeysong, I also stopped regular digging of the garden beds. I quit digging because I was terrified of a small, root eating organism known as symphylans which had devastated my last garden. These little suckers are a true plague. Word on the street was that the best way to encourage the tiny centipede-like bastards was having high soil organic matter to feed them, along with a loose soil structure so they can move around easily. Well fuck me runnin’ backwards, those two things combined just happen to be the two holy grails of organic gardening dogma that I’d been trying to achieve for years! Take home point, I didn’t want to dig in tons of undigested organic matter anymore. I tried that in my last garden when I experimented with seriously adopting the bio-intensive method, which means lots of deep digging, and digging in lots of compost. It didn’t work out so well. The symphylans population exploded. It was also (biointensive propaganda notwithstanding) a ridiculous amount of work. Your mileage may vary.
The evils of soil crusting >:( Now this bit is really important to my story. Soil crusting has always been one of my major problems in gardening. When the soil structure is damaged by watering and cultivation, it crusts over when watered or rained on, sealing off the surface and preventing the exchange of air. Crusting also forms a barrier to water penetration making watering, inefficient and wasteful due to run off. Sometimes it seems to make watering almost impossible, yet the more you water, the more crusting occurs, drats! Furthermore, compacted soil is a pathway for water to travel up from below and be evaporated back into the atmosphere. It’s basically like a wick for removing water from the soil. These problems are really frustrating and have been an issue in virtually every soil I’ve worked with, from sandy loam to clay. Honestly, I’m surprised soil crusting doesn’t get more play. It is a key problem in gardening.
Organic matter my ass. One commonly proffered solution to crusting is to increase soil organic matter content. I’m going to go out on a limb here and say that’s bollocks. It’s not that it doesn’t work at all (you’ll see that it actually works for me presently), but I’ve never seen it work well when digging compost in, except when the organic matter content is quite high, which really entails digging in an enormous amount of compost... enter symphylans. That also usually means basically buying or composting a whole shit ton of something to build a soil that has a huge proportion of organic matter. Otherwise, whenever you dig the soil you pull up more low organic matter subsoil onto the bed surface, and you’re back to crusting. That’s my experience anyway. Also, exposing organic matter to oxygen allegedly increases oxidation ultimately lowering organic matter, so that's a losing battle.
Cultivation, is it really evil? The other solution to soil crusting is good old cultivation. That’s the typical solution and seems almost essential in large scale agriculture. Cultivation loosens the soil to break capillary action, stopping evaporation. It can also kill weeds and allow water to penetrate the surface. Problem is, the more you cultivate the more you smash the soil into fine particles (dust), destroying the structure, and the more easily it crusts again when watered. So, you just have to keep doing it. You ideally want the top 4to 6 inches or so of soil to be almost dust-like for the best moisture saving effect. Negative press aside, it’s not always the evil system it’s sometimes made out to be and has a place. I used regular cultivation the first year I was here and I was amazed at how far I could go between waterings if the soil was re-cultivated as soon a possible after watering and without fail. It was one of the best gardens I ever grew, though not just because of thorough cultivation. I’m not sure I’m done with cultivation gardening, and I just see it as a tool in the tool kit, though I have to admit, it seems somewhat less than friendly to the concept of soil building and probably a somewhat shoddy way to treat the land longterm.
This first year garden at Turkeysong was under surface cultivation. I returned from a several day trip with a friend during a multi-day, over 100 degrees f, heat wave and he was astounded at my perky butter lettuce which had been watered and cultivated just before leaving. This intervention only solves crusting if you do it soon after watering, every single time.
Mulch is god! I knew I had to solve the problem of soil crusting, and if I didn’t want to cultivate extensively, that left mulch. Mulch is GOD! Right? Just ask Ruth Stout, or a young and enthusiastic mulcher. Get in with a real mulch enthusiast with limited experience, and you’d think all your problems will be solved forever and that we are all just a few bales of straw and some lawn clippings and leaves away from solving all the problems of horticulture and maybe beyond. Combine mulching with gogi berries, biochar, blue green algae, perennial vegetables, and ducks and there’s no stopping perfect plant and human health and “no work” food production! Ok, I’m being a dick, but we deserve it. It is so tempting to see something as having the real potential to just sort of “fix” everything. I know well enough, because I’ve been that eager inexperienced mulch promoter. Most of these fairytale happy ending stories we tell ourselves have at least a grain of truth, and often much to offer us if we can actually see, or more often after we inevitably see, through experience, the limitations and pitfalls that are not visible in the theoretical realm, and which we don’t really want to see anyway. Mulch is not god. It changes the landscape in ways that are often very useful to us and to the health of the soil. It’s effects are sometimes super awesome. I’m a big fan and semi-regular practitioner, but some of those changes can conflict with our food producing and land care goals. Creating habitat for voles and insects came to my mind as particular problems in considering deep mulching for my garden. It’s bad enough in any garden where there is always some habitat for insects. Deep coarse mulch can create a veritable pest metropolis from which an army of insects can march a whole few inches to chow down on your carrot seedlings, or in which voles can find the rodent equivalent of mcdonaldsplayland to move into, complete with a food supply... weee! I do use deep mulch, and what I might call semi-deep mulch, here and there, but experience had already taught me that if I used it in the entire garden, I would have considerable negative issues to deal with. That may vary by environment, but enough said there. I’d also be out collecting the stuff all the time, because it takes a ton of material to do deep mulches in a large garden. That reason alone is enough to scrap the idea. No thanks Ruth.
Works pretty good. My eventual solution, partly influenced by some no dig gardener/writers, was to use finished compost as a mulch. Since I would be composting food waste and garden stuff anyway, and didn’t want to dig it in, this seemed like a good solution. I’ve used all my compost on the surface of the beds for something like 6 or 7 years now. It works pretty good for me. I don’t have as much as I want. Each time I plant something new it gets a sprinkle of compost, usually almost enough to cover the bed surface visually, so under 1/2 inch thick. Some washes away with runoff when I water, and I still get quite a bit of crusting. But overall, for my system and my soil, gardening style, and so on... it’s been pretty good. I do have to cultivate some when crusting gets bad enough in an area (usually due to running short on compost, loss during watering, rodents helping me do some digging, or having had to dig the area recently for harvesting roots and weeding). I use a hula hoe (aka strap hoe, stirrup hoe, reciprocating hoe, scuffle hoe) for cultivating, generally trying to slice below the soil an inch or so leaving the top relatively undisturbed. I wish I had more compost, but I get by. I sift it through a half inch screen and throw all the big stuff back into the next batch. That puts a lot of half digested material on the beds, and I prefer it that way, because larger bits of stuff cover the soil better. I’m kind of bummed if the compost gets so finished that most of it is very fine and not recognizable as pieces of plants and stuff, because it doesn’t do the main job I need it to as well as it would if it was in bigger pieces, and it washes away more easily. I also sometimes use coffee grounds picked up at a coffee shop in town, which adds to the effect and contributes quite a bit of nitrogen.
Soil layers. The compost makes quite a difference in crusting. One thing I’ve noticed, is that since I don’t dig regularly, the organic matter stays in the top layer of soil. It doesn’t just stay on the surface. Worms come up and grab pieces pulling them underground. moles voles and gophers do plenty of digging for me and I have to plant, harvest and occasionally cultivate. But a lot of it stays in the top inch or two of soil. I’ve noticed that even when I do get crusting, it is not as bad as it could be, and is somehow still permeable to water and air relative to the crust that forms on a dug soil. That’s because this top layer is quite high in organic matter, which builds up over the years. This effect simulates a natural soil profile more closely than a cultivated soil does.
Artificial, but how artificial?But, a garden is not a natural environment! My symphylans problem in my previous garden highlighted that fact. What I am after is an artificial environment that can pump up the plants to realize the potential bred into them through the ages to grow plump and juicy. But, I want that effect, without upsetting the balance so much that I create some unintentional problem that is going to bite me in the ass (in a bad way ;). Mulching with compost seemed like a good solution. I really could use more of it. I’d like to make more compost. Materials are abundant. I live on 40 acres of mostly forest, and organic materials supply is not an issue! There is also plenty of seed-free green grass to collect in season. Any farmer out of that super boring book Farmers of Forty Centuries that I mentioned earlier would be appalled at the lack of use of the resources available to me. But alas, energy is in short supply and I do have other things I want to do, like compulsively writing blog posts for hours and hours. Besides, like I said, it works pretty good the way I’ve been doing it.
Chicken pee tea. So, were getting close to my simple, but really cool idea (close is relative). Since I don’t dig the garden beds (see footnote *) my options are to use my chicken manure on top of the beds, or use it as a tea. Both work well and have advantages, and I’m using both currently. I’ve been sifting the dry chicken manure and applying the fine siftings to the beds. That works nicely and contributes to the prevention of soil crusting, while building organic matter in the top layer of soil as long as I don't dig. As the bed is watered and bugs and worms and microbes do their work, the nutrients leach into the soil over time. Direct application has it’s advantages, but manure tea also has advantages. Being full of soluble nutrients, manure tea gives a quick boost when it’s wanted. It can also be applied very evenly for efficient use. Using soluble fertilizers in general provides the potential to keep plants growing strongly with regular applications through the growing season. Soluble v.s. non soluble fertilizers is a whole can of worms, but I like to use both and it works for me.
Tree mats. I make manure tea by soaking the poo in water and then straining it out. The tea is diluted and then applied straight to the beds/plants and usually watered in immediately. Applications of course stop some time before food is harvested. I usually leach the manure several times over the course of some weeks before it is pretty spent. When I’m done I have this wad of left over half digested manure. I used to throw it in the compost. I had an idea a while back. I’m not sure if it’s at all practical for home production, but I have no doubt that the actual product would be pretty awesome once made. The idea was to make a sort of paper mat out of manure and pulped up cardboard and other fiber stuff like that. It would be a large, thick, probably circular mat for mulching trees. You could incorporate all kinds of fertilizers and nutrients and nutrient containing stuff in there like seaweed, bone meal, etc, which would leach out and feed the tree over the years. It would also provide a moisture conserving mulch and eliminate competition for a few years if it was thick and durable enough, which would really be it's main use. It could be a good use for all that cardboard and paper filling dumpsters everywhere. Practical to make or not, I’m convinced that it would be completely awesome, solving a bunch of problems in one item and allowing the quick establishment of trees with very little work and in many cases without watering, even in our dry summers.
We made it! It occurred to me at some point that I could make tree matts with my manure left over from making tea, but of course it’s probably too involved to actually do here practically speaking. I would need an outboard motor or the like to mix it all up. Besides, there isn’t enough manure. So, I just mixed the chicken poo sludge with water to form a sort of slurry and dumped it out onto a bed. With a little watering, the half digested slurry spread out pretty evenly, forming a solid mat of slow release fertilizing mulch! It’s true that much of the nutriment has been leached out, but some remains too and much of it locked into the undissolved organic matter. This method covers the soil almost completely if applied generously enough. It drastically slows evaporation compared to a compost mulch only bed, but won’t wash off at all. It provides food for worms and other bug dudes who work near the soil surface, opening the soil texture to allow penetration of air and water. It feeds the plants slowly, and also initially through a dilute, but still very substantial manure tea effect. It of course protects the soil from crusting due to watering and rain. And, it provides organic matter as it breaks down into fine bits and is slowly incorporated into the top layer of the soil. It uses the product of a process that is already underway, so there is no “extra” preparation work except stirring. It is easy to apply. The effect is durable; it’s thick enough to provide a substantial effect, but not so thick as to make deep multilayered habitat for an army of insects; so, it seems a good compromise between creating bug habitat and thoroughly covering the soil. It just seems pretty awesome! It doesn’t work for everything. I don’t use it on small seedlings. I couldn’t use it on carrots because it would just bury them. But it works great for larger plants such as squash, tomatoes, peppers, cole crops etc... and it seems ideal for onions and leeks. Burning plants is a non issue since it is already pretty well leached by the time I’m using it. I’ve been playing with this a bit for a few years, but now that I have to use a lot of manure tea, and have a lot of manure, I have more of the slurry to use and have applied much more this year. I’m pretty sold on the idea, though still have an eye open to the possibility of unforeseen issues cropping up. I’ve also used horse manure, which worked great, maybe even better because of all the pieces of stringy fiber in it.
The beginning of the end. Like I said, this doesn’t have to be an end to the evolution of ideas. Our accumulating knowledge, our input from other people, our observations of all kinds of things, an ever deepening understanding of the habitat we live in and modify, an ever increasing awareness of the resources available to us and the idea that there are more that we haven’t yet recognized, and maybe most of all, an awareness of the utility and beauty of the potential that exists to combine all these things into functional systems, can all come together to form a foundation for success in adapting to the places we’ve landed in and which eventually, through close association, come to be home to us. These ideas are very much at odds to most of what passes for modern life. Creatives, entrepreneurs, and many others do use this kind of thinking in the habitat of modern civilization, but many have no need in the paint by numbers lifestyles made available to us by industrial life. That doesn’t fly so well when you are trying to bring forth some kind of living on the land from available resources. Our lands and ecologies are unique and changing entities. They have their own characters which change with the seasons, over time, and with our inputs and the consequences of our habitation, intended or otherwise. This post has been largely an excuse to talk about those ideas and the specific ideas and things that I do surrounding, and leading up to this one simple expedient, which solves some problems that I face. Should you run out and find some manure and start using manure tea so you can have some slushy poop to dump on your garden beds so that you don’t have to dig and will have awesome soil that brings forth giant leeks flushed with the color of life giving nutrients? I don’t know. Maybe. Okay, probably ;), but that’s not really the point. The point is more that we can benefit from being aware that there are almost limitless possibilities, and be open to the evolution of integrated ideas that can lead to systems that work for our goals, lifestyles and resources.
The end of the end. I hope someone made it all the way through, and that this rather long discussion has been of some use in promoting, or reinforcing, some useful general concepts as well as offering some more directly practical information that might be of use to you and your situation. Tips and tricks are great, but I’m more and more convinced that our broader philosophies and beliefs can be the real impetus for our “success”. They form a foundation for our goals and inspiration, the choices that spring forth from the values we decide that we want to embody, and ultimately the specific things we manifest. They even largely define what we think success even IS. Specific systems can be shared out among us, but life on the homestead is not paint by numbers and a particular idea or method might serve as much or more as a stepping off place or stimulant of new ideas than something to be directly adopted.
(* footnote re: not digging beds: I rarely dig beds, but I’m not religious about it or anything. If a bed gets compacted I dig it, and I am trying a little digging prep for carrot beds to see if I can get the uniform roots the farmer’s market customers want (edit: It didn’t help. No real difference between carrots in dug and undug soil here). I do really try to avoid actually turning the soil over, unless I’m trying to work in some permanent amendment very deep, like when digging in biochar. I know people who are terrified of digging or turning the soil at all though, which just seems silly.)
And a Frankentree in Every Garage
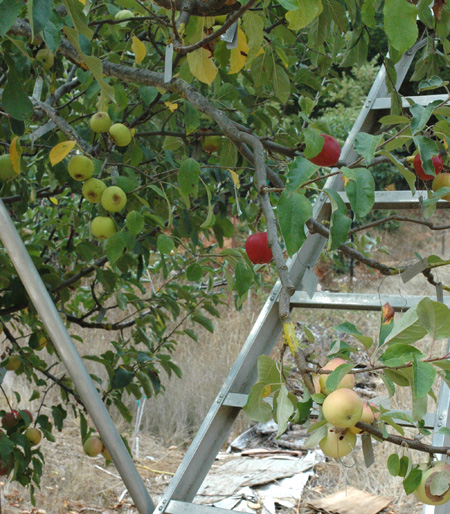
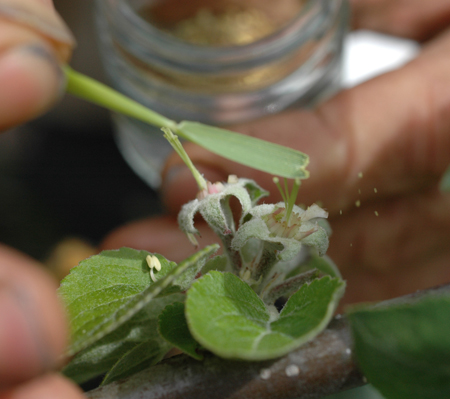
If I were president, the essay assignment goes when you’re in grade school. I remember thinking “but I don’t want to be president!” But... if I was, I don't think I'd promise a car in every garage, though I'd probably keep the chicken in every pot. When I moved here to Turkeysong, I had to decide what fruit varieties to grow. Inspired by friend and apple guru Freddy Menge, a scrappy young tree that was already here, was used as a framework to test out apple varieties. Before that it produced hard green apples. What started as an interest, grew into something like an obsession and the tree became more diverse every year starting with 25 or so varieties and ending now with about 140. My friend Spring dubbed it Frankentree because, at her house, that’s what they call anything cobbed together from odd parts. The name stuck. The term frankentree is also used for genetically modified tree varieties, but it has already taken off among apple collectors, so we'll just have to see who wins. And maybe someone searching for info about GMO fruit will run across our frankentrees and be ignited into constructive action instead of plunged into despair at how the world can be dumb enough that we take the risk of genetically engineering an apple just so it won't brown when cut.
Frankentrees are awesome! They may take a little attention to maintain, but the advantages are many. There are so many trees out there that provide too much fruit of one variety in too brief a period for the people that use them. Other trees just produce fruit that no one likes. These trees, if they are healthy enough and the form is not too wacky, are very valuable as a base to work from. A reasonably well formed healthy tree can come to yield nourishment in abundance, interest, variety, valuable information, and even self confidence and self reliance, over a long season.
This isn’t going to be a how to article, it’s more to kick you in the butt and get you started thinking and experimenting this year article. If you have a tree, or access to a tree that is not very exciting in the fruit department, why not try grafting on something new? Well, I’ll tell you why you should graft on something new, or actually more like somethings.
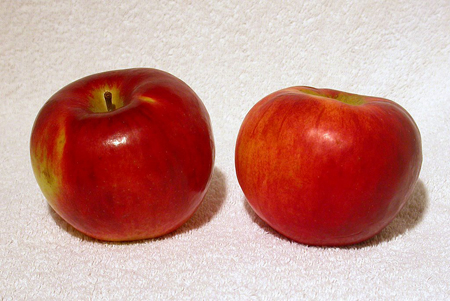
Apple trees are an ideal format in which to learn grafting and begin fruit collecting. Pears are a close second, and then plums. Apples are easy to graft, very useful, widely appreciated and there are many varieties to be had, thousands actually. They also are hard to beat in terms of seasonal length. I have very good to excellent eating apples from August to early February, and that is straight off the tree, not accounting for storage. You may not be able to get that in a very cold climate, but the season can still be quite long. The ability to have a long fruiting season is reason enough to make a frankentree, but there are many more motivations.
Frankentreeing will teach you something, and you can teach that to someone else. You’ll learn about different varieties of fruit, what their seasons are, what they taste like, whether they keep or not, and very probably their histories. You’ll learn the art of grafting, without which we would not have all these varieties of fruits in the first place. And you’ll learn what varieties do well in your area, which is extremely valuable.
You'll also end up as a keeper and preserver of variety, a sort of seed bank or scion repository that you can share out or trade from. No doubt some of those varieties will be very old. And old or not, more diversity in more places is assurance not only against permanent genetic loss, but also that diversity has a real place in our daily lives. We have to live our appreciation of variety and the romance of diversity in crops for it to be real and not just an abstract idea we picked up from a foodie book.
Multi-grafted trees are not only ornamental in their own strange way, but they’re also a great conversation piece, and a frankentree will make you look cool! Wait, screw that, if you make a frankentree, you are cool! Everyone who visits here loves frankentree!
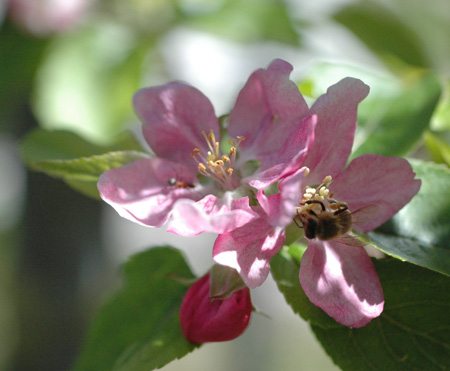
You’ll very likely have more fruit on a frankentree. First of all, pollination will be great. Apples can self pollinate to a very small extent, but they really need pollen from other varieties in order to fruit. Your frankentree will be downright indecent in it’s public orgy of bees and pollen! But wait, there’s more! You’ll also get more fruit in the long run because you’ll inevitably end up with some that set fruit very readily and consistently, and some that avoid spring frost because they bloom late.
Your new skill is marketable as I’m finding out. How many people will pay you to make them a fruit tree that gives them four to six months of the most delicious apples adapted to your region? Let’s find out! I just did my first paying frankentree job (bride of frankentree) for my neighbors Dan and Leslie and they seem very pleased to try giving an old apple tree a makeover. It made good apples before, but it will make lots of different good apples now. I have another such job scheduled this spring too.
I’m a problem solver. I not only solve them, it order to be a good problem solver, I have to look for them constantly in everything. Just ask anyone who has had to live with me. So what’s the downside to a frankentree? There are very few really.
If the tree is too old and you have to cut down to large stubs, you could get some rot that will shorten the life of the tree. In many cases, that is not necessary though. I prefer to stay within cuts that are 3/4 inches and down, but you just have to weigh the value of the tree as it is and the value of it as a frankentree, or more usually the value of a certain form of the tree, because if it’s very overgrown, you’ll want to simplify the framework and probably bring the head down. That’s will make it easier to graft, maintain and harvest.
It takes time and energy. Sorry, but I see that as a good thing over all. It’s like saying it’s a lot of work. If you’re not totally stoked about making it happen, do something else. Otherwise, activity that gets you outside feeling interested, taking care of your own needs and building self reliance... that’s all up side!
You’ll have to maintain the tree a little more closely. Some varieties are really vigorous and grow large and some are small and weak, so you can sort of keep an eye out to check the big ones and maintain a little light for the weak. I lost sleep over that when I first started, but I didn’t need to, because it’s no big deal. You’ll also have to prune off some suckers here and there as the base tree sprouts a shoot once in a while. sometimes those shoots will be more vigorous than the grafts, almost like the tree would rather grow itself than be a frankentree, which makes sense. My guess is that the investment you have in the project will make you more interested in maintaining the tree well. Your personal investment means value to you. It’s.... well, personal.
You can introduce disease. The one that is most common is virus. It will cause the leaves of some varieties to turn into a mosaic of light and dark areas. It's not fatal and doesn't seem to affect most varieties here. I basically don't worry about it anymore. The affected leaves can become sun burned easily. Frankentree is infected and so are many of my other varieties. Probably many more than I know, since most show minimal to no symptoms.
That’s all I can think of. I may sound like a propaganda machine, but I want to be! That’s how stoked I am about the idea and my enthusiasm comes from the pleasure, interest and knowledge I’ve reaped from me experience in this realm, and the way I see people respond when they find out you can do this, or take the walk to the orchard to meet “frank”. I’ll hopefully be giving you more specific detailed resources for frankentreeing in the future. In the meantime, go to a scion exchange if there is one near you, or join the North American Scion exchange and trade by mail. You may not have much to trade now, but there are quite a few generous collectors out there, and once you get a few varieties, you can start trading. If you don’t know how to graft, check out the many youtube videos, and hopefully I’ll add one sometime as well. I’d even like to do a detailed video just on frankentrees to give you more specific information and tricks to increase your success rates in grafting. In the meantime, here are some basic ideas to keep in mind. And for you locals, remember, the Mendocino Permaculture group's scion and seed exchange is this weekend Feb 1st Saturday 9:00 am to 4:00 pm. It's free with free grafting classes and rootstock for sale. I'm teaching hands on grafting coaching after the main grafting lectures.
Keep the framework of the tree, but thin it out and bring it down in height and in toward the framework, especially if it’s poorly trained, neglected and rangy.
Try to make smaller cuts and graft into wood 3/4 inch and down when possible, but don’t graft to the outside of the tree. Try to graft in closer to large limbs. If you graft only to small outside wood, you’ll end up with a tree that grows out and out and the inside of the tree will all still be the original variety.
Learn cleft grafts. They are easy and good for grafting small sticks to large stubs, which is usually what you end up doing when reworking a tree.
Use grafting paint (“wax”) liberally (I use doc farwell's, hopefully it’s not too toxic :/). Use it to really seal the clefts left open after grafting, but also to paint the whole scion lightly. Painting the scion is helpful to keep moisture in until the graft heals and the tree can start sending moisture and food to the scion. You might have to paint the open ends of the clefts twice to make sure they are sealed well against rain infiltration. It's ok if a little wax gets into the cleft.
Keep your grafting knife sharp!
Use long scions of 6 to 9 buds or so. This will give you fruit sooner.
Thin the area near the graft of other shoots if possible. You want to direct growth energy into the new graft.
If apples form the first year, leave them! You don’t usually have to pull them off to favor growth like you do with a young tree, because the tree is driven by an established root system.
Don’t unwrap the grafts too early. The leafy shoot will act like a sail and can break the graft. Unwrap before the wood becomes constricted. If you are concerned, just re-wrap it till the end of the season.
When you unwrap them for good in the fall, paint the graft union with a thick coat of grafting paint so you can keep track of its location.
Always label! I use aluminum tags with copper, aluminum, or at least galvanized wire. soda cans cut with scissors work fine and sections of aluminum venetian blind strips and old aluminum printing press plates work great. Scratch the name in and write with pencil too.
So, if I’ve sparked your interest, just bust a move this year, even if it’s a small one. Get some scions from a neighbor or a local apple orchard and make a few grafts. You can wrap them tight with cut rubber band strips and paint them with thick latex paint so you don't have to invest in grafting supplies. You can use a utility (razor) knife or pocket knife if you don’t have a grafting knife. Practice on prunings a little until you can make flat cuts and grafts seem to fit pretty well. You’ll learn something and if your few grafts take, you’ll have confidence to move forward. Maybe I need to start a career as a motivational speaker. Are you stoked yet!
http://www.youtube.com/watch?v=QgXObaM9i2Q
Sloping Pit Charcoal Kiln and Agave Roasting
 In the comments on the biochar experiment post, Lars mentioned Japanese cone kilns. I checked them out on Kelpie’s cool blog, Green Your Head and they do indeed look way cool. Although slapping a crude one together out of sheet metal would probably be pretty easy, Lars had just simply dug a pit in the same shape. I tried Lar's pit idea the other day, burned some charcoal in it, and learned a few things that I want to pass on. This is slightly premature compared to most of my post, which are typically backed by a bit more experience and contemplation, but I'd like to get this idea out there more. There is very little posted about it anywhere on the net, but it seems very promising, accessible and meets a lot of criteria for a good charcoal production system with very little effort.
Part one. Sage, Agave and fishes (which have little to do with charcoal production.) If you are interested in burning charcoal and have a short attention span from internet overstimulation, skip ahead!
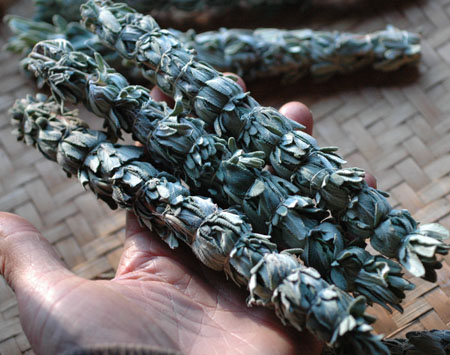
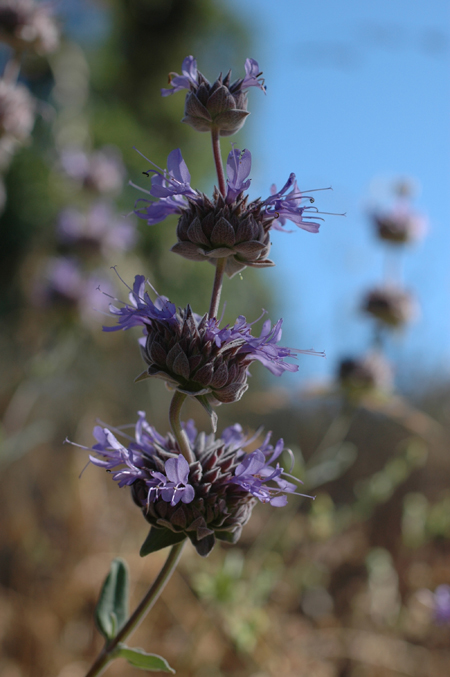
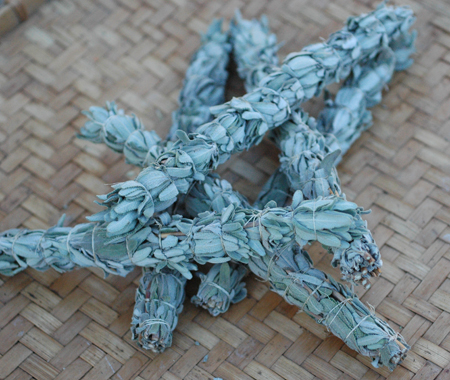
When I was in my 20’s I spent a lot of time backpacking out of Big Sur, on the coast of Central California. One of the common plants is Black Sage, White Sage’s little known, and much more potent sibling. I've always loved Black Sage and much prefer burning it to the white. When I moved here, I got some cuttings from someone and rooted them so I could have it around me. The scent still evokes a lot of fond memories from those good times out in the mountains. At the time, I lived in the Santa Cruz mountains and used to pick Black Sage and tie it into smudges. I now have quite a few plants growing, and tying Black Sage smudge sticks is one of many crafty cottage industry occupations that help bring in a little income around here. Most sage bundles are tied with cotton thread, wrapped in a spiral. That was way too domesticated for me back then, so I tied mine off with another plant I harvested in the Big Sur area, Yucca.
When I’d go out backpacking, I’d always harvest some yucca leaves on the way in to camp, pound them on a log by the river, and wash them clean of pulp to extract the long fibers. I’d twist those fibers into a cord, attach that cord to a stick, add a couple feet of fishing line on the end. The hook was nearly always a crude fishing fly I'd make by wrapping on whatever bits of feathers or fur I spotted on the hike in. My fishing kit fit in a tiny pouch, and that’s all I had to carry. My crude makeshift fishing rig worked awesome! Wow did those fish bite. Anything that remotely resembled a bug in the water got hit. That is elegance. extremely effective, low input, low cost, less junk to carry, connects me with the environment, builds skills, very little landfill material. Anyhoo, I always brought out some extra fiber or yucca leaves with me when I eventually made my way back to civilization, and ended up using yucca to tie up my sage bundles. The practice stuck.
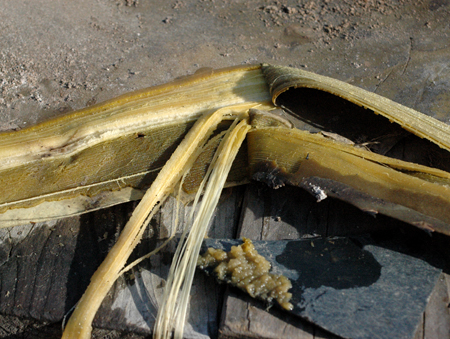
There are several ways to process yucca. You can pound it fresh with a wood mallet on a smooth log and repeatedly wash and scrape it. (the pulp is soapy, so you can wash your clothes or dishes while you’re at it.) The pulp is somewhat tenacious though, so it’s easier to clean off if it is softened by either cooking it, or rotting in water in a process known as retting. Retting in water is pretty easy, but it takes a long time, and boy does it stink! The fibers don’t absorb the smell at all, but hands sure do. If left soaking too long, the fibers are also attacked by bacteria and weakened.
Up around these parts, there isn’t any yucca, but my neighbor Rob grows a lot of Agave americana, a large plant related to yucca which is also used to make tequilla. Agave americana is not the best agave species for fiber, but it is decent and good enough for tying sage bundles. I recently harvested some leaves over at Robs garden, an impressive meandering wild affair built up on a bare skim of soil over a serpentine rock outcrop and consisting only of the toughest most drought resistant plants. I wanted to bake the leaves because the last batch I tried to ret didn’t work out that great, and it’s winter so it could take months to ret a leaf that is 2 to 3 inches thick in some sections.
Ok, on to the charcoal kiln: I couldn’t just build a cone kiln. As soon as I saw the shape of the cone, I knew I’d be spending a lot of time cutting wood to fit it. That is a problem with many charcoal making apparatus. Fuel sometimes has to be reduced to a certain size. I figured that the principal of the Japanese cone kiln ought to work just as well (and actually better for my purposes) if the shape were longer. With a longer kiln pit, much less wood cutting would be entailed. I don’t mind doing work to get what I want. I’m not workophobic. I like cutting wood. But I like getting shit done too, and cutting longer wood means more wood cut at the end of the day, which equals more charcoal. I also like efficiency.
So I put agave leaves and charcoal pit together. I could dig a long pit kiln, burn the long wood and use the residual heat to roast long agave leaves to soften them up for processing out the fiber.
Ideally the kiln would have been even longer for even less wood cutting (UPDATE: which I've now done and it was great for long unprocessed limbs with twigs and all), but I didn’t have a ton of wood set aside to fill it this time around, and didn’t need a huge pit to cook the leaves in. I think the opening was probably about 6 feet long and sloped down from there on all four sides. I didn’t screw around trying to make it nice, even though I had already generated ideas about how to best build and run such a pit. This run was all about observing what did happened, rather than second guessing exactly what was going to happen. I knew I’d learn something by just digging a hole and going for it. I lined the bottom of the pit with bricks to retain heat for roasting the agave. It is sometimes possible to use just the heat stored in soil to cook things in the ground, but I knew it wouldn’t be adequate in this case, especially since the ground was already wet. I had doubts that one layer of bricks would even provide enough mass for heat storage, but I just left it at that. I think more mass would have been better, but it worked okay.
The fire was built and maintained until the pit was fairly full. The coals were then raked out (most of them anyway) and a few scrappy sacrificial leaves laid on the bottom against the hot bricks and coals, followed by the remaining leaves. About a gallon of water was thrown on for steam, and the dirt was piled back on as quickly as possible. No really, as quickly as possible, like all out, fast as you can. (No pictures of putting the pit together, since I was rushing in order to retain precious heat.) The charcoal was quenched with water on the ground. A small brush fire was built on top of the pit for about 8 hours to keep heat in.
Here is some of what I learned.
The cone kiln concept works. The principal is so simple that I’m surprised I hadn’t heard of it before and almost surprised that I didn’t think of it myself. You start with a fire and establish a layer of coals covering the bottom. When each layer is almost burned to coals, another layer is added. Each new layer effectively uses up incoming oxygen before it can get to the coals below, thus putting them out, or causing them to barely burn. You can see this effect in a brush burn pile. Generally there is a good pile of unburned charcoal in a burn pile when the flames subside, and it takes up to a day or more to finish burning out. That is with piles that are managed for less smoke by piling stuff on one layer at a time as the fire burns, which is how I usually do it. I don't like making piles way ahead and burning them, because lizards, frogs, salamanders and snakes all move in and get burned up. A brush pile is a wildlife magnet. Kelpie builds brush piles and burns them from the top down to reduce smoke and produce char. The cone pit burns with very little smoke. Low smoke is a huge departure from most primitive charcoal making methods, and one of my criteria for a good system of char production. You could probably do this in many backyards without raising any eyebrows or calls to the fire department.
I think that using wood of similar size for each layer is important. Each new addition should burn down fairly evenly, that is with all pieces burning at a similar rate. If half the wood is one inch diameter and the rest is 3 inch, the one inch material is going to be burned to ash by the time the 3 inch stuff is burned down enough to add a new layer of fuel. This principal probably would also apply to differences in wood species and condition, i.e. oak mixed with pine, or green mixed with seasoned.
The layer of wood added should be tightly spaced and/or thick enough to adequately smother the fire below. Think of each layer of wood as an intercepting shield. the shield should adequately cover and protect the layer below from infiltrating air. I chopped the pieces to fit as necessary, and packed them pretty close together. I left just enough room between pieces to let a little air in between them to keep it all burning cleanly. More experimentation should be revealing as to what can be gotten away with. At some point too much attention to detail is going to cost more than it gains.
Square corners are an issue. I should have seen this one coming. Square corners create cold zones. Visualize fire in a rounded corner, v.s. in a square corner. The rounded corner creates no cold zone and heat is radiated back into the fire in a parabolic effect, like a satellite dish, or solar dish cooker. I had trouble filling the squared corners with wood in order to keep a hot fire in them. The corners also ironically tended to burn out underneath once they did get going due to too much oxygen infiltration. In short, they seemed hard to manage. Not horrible or anything, but they seemed unpreferable. I’m not sure one couldn’t effectively manage a pit with square corners, but it seems more finicky at the least.
The shallowly sloped walls are there for a reason. I mean duh, we’re dealing with Japanese technology here, elegant and effective. I think the shallowly sloped walls are there because they lead to more effective covering of the previous layer. Wood on top extends out past the previous layer shielding it from oxygen more effectively. I could tell I was having losses on one side that was dug with a pretty steep wall, making it more difficult to cover the lower layers adequately. That's what it seemed like anyway. Maybe some other reason will become apparent with more experience, but I think that is the reason.
Dirt is messy. I dug this pit, barely cleaned it out, raked the charcoal out onto the ground and dumped water on it. It was messy. Lots of rocks and dirt in the charcoal, and grass and leaves everywhere. It would have been much easier to get the charcoal out of the pit if the sides were smooth and clean. And, it wouldn’t hurt to have a clean area to rake coals out onto. Dirt and rocks can be washed out by throwing all the charcoal in a tub of water and swirling it around for a second. All the rocks and nails or whatever will fall to the bottom, and the charcoal is scooped out with a colander, but it’s a messy hassle.
I plan to test all of these observations and assumptions in the future. For now, I feel like I know where to go next. If you want to experiment with the cone kiln principal, here are some bullet points.
*Use shallowly sloping sides. Just like the free standing metal kiln in the picture above.
*If you dig a long pit, make rounded corners. More like a diminishing oval than a diminishing rectangle.
*Dirt can be dealt with and may not even be a significant hassle in some contexts, but if the kiln is to be used many times (as for biochar production) paving the sides with brick or pasting it over with a clay sand mix might be in order. Adding that mass would also make the pit into an effective oven as well. With the right sized pit and enough mass, you could cook large amounts of food, a whole animal, agave leaves, or whatever. It’s nice to be able to use all that residual heat for something, even if it's just to set a pot of beans in there overnight.
The metal cone kilns are way cool and have the obvious advantage of portability. But they are also expensive, if you can even find one to buy outside of Japan. You can probably have one fabricated out of stainless steel at a metal shop. You could also probably whip a decent one up out of sheet metal with a pop riveter and a pair of metal shears, which I hope to get around to (caution, don't use galvanized metal. Zinc is toxic when burned.) It doesn’t have to look good, though the seams might need to be reasonably tight to prevent air infliltration. The pit is very attractive as an idea. Anyone can dig a pit, and many could effectively line it with stone or masonry. A pit is going to be cheap or free, and you can use the residual heat to do other stuff. One idea I had was to build an above ground pit. Here I can only burn in the rainy season, so a lined “pit” built in a raised mound of well draining material like gravel or gravelly soil, would be ready to use all year, even when the ground is soaked.
My yield of charcoal to fuel burned seemed decent, and there were almost no unburned pieces remaining. I think there may be room for improvement in yield with better management or feedstock, but I'm happy enough with what I got out of it. I want to go other places with this concept eventually, with as much function stacking as possible. For instance, burnt clay is also a great soil amendment and could be produced by lining the pit with clay and chipping it off to add a new layer each time the pit is burned. Maybe a few shells could be added to make some agricultural lime while we’re at it. Wish I'd thought of that this last time around.
Many char producing systems will only take one size/shape of wood. In the cone system, it seems like each layer should be composed of pieces of similar thickness, but otherwise, there is a lot of leeway in fuel size and shape. Some methods also use up extra fuel in order to burn the charcoal. Not using extra wood to generate adequate heat, and being relatively efficient, are other good design parameters that the cone kiln, in spite of it's simplicity, seems to do pretty well with. In producing char, it is probably going to be best to have a variety of options here for the different types of feed stock that might be produced on 40 acres of varied species, combined with pallet and scrap wood, wood chips I can scrounge up, etc. For now, the cone kiln concept seems well worth pursuing further, and a great addition to the stable. I'm actually pretty excited about it, because it possesses a lot of good points, combined with simplicity/accessibility. I’ll leave you with some agave processing pictures.
(edit: Since writing this, I trailed some links back to find Josiah Hunt is doing something similar in Hawaii. His burning style is different, but pretty much the same concept. Check it out. https://groups.google.com/forum/#!topic/biochar-hawaii/ohoqDcuHMiQ )
10 Yellow Terrors!: dissolving myths and fears about using urine as a fertilizer:
" Keep in mind that by simply saving your urine, you will divert the great majority of the plant nutrients leaving your body from entering the waste stream. That is probably the most important and relevant nugget of truth to remember and spread, because it allows people to take a step now, rather than waiting for some hypothetical future when they will build, manage and use a composting toilet."
I've wanted to do a somewhat extensive post on using urine as a fertilizer, instead of just mentioning it all the time in other posts. The main problem in adopting it's use seems to be a plethora of the fears and misconceptions surrounding the idea, so I figured that addressing those concerns would probably be the most useful approach. What follows are largely my opinions, though some facts may be sprinkled in for entertainment purposes ;) Don't take my word for anything without thinking it out or doing research yourself to find your own comfort level. I'm just some guy out there that has access to the internet like everyone else, so why should you trust me? This information is based on a mix of practical experience and book learning, but the practical experience is the important part. I'm a keen observer and I like to push limits to see what happens. I used urine as my primary fertilizer in the home garden for many years. It's awesome. The only reason I stopped is because I wanted to start doing market gardening and it seemed inappropriate, and no doubt illegal.
In reading forums and articles I have seen the same concerns and misinformation about using urine as a fertilizer expressed over and over again. Gardeners like to get all worked up over things that are supposed to be bad for soil or plants, and then pass that common knowledge on without actually ever really putting it to the test. The use of Urine seems to have many pieces of that kind of common knowledge attached. I too believed and no doubt propagated some of the following items. This is my small attempt to correct some misconceptions, quell some fears, and give people the confidence to move forward with using this awesome source of plant nutrition. I would really like as many gardeners as possible to read this, because using urine makes so much sense for most of us. Hopefully we can evolve out of the dark ages here and move into the golden age of illumination.
#1 Neeeooooooooo !!!!!!!! Fresh urine will burn plants, aged urine is better!: In my experience it is aged urine which is more likely to burn plants if anything. If you put too much fresh urine on one spot plants will be stunted, burned or die, but it takes quite a bit to tip the scale from beneficial to destructive. Peeing one whole bladder full on one little plant might negatively affect it, but in general fresh urine seems safer than aged, though that is just my general observation and the thing could stand to be tested in a way that would be definitive. See also below...
#2 OMFG!! !! !!!! Aged urine will burn plants, urine must be used fresh!: If I’m right, aged urine may indeed be more likely to burn plants, but it definitely can be used when diluted with water. I have no real substantive proof of this, but aged urine seems to contain "hotter" compounds than fresh urine. In particular, I suspect this is due to the break down of complex proteins into ammonia, which may increase the potential for leaf and root burning. I dilute aged urine at least 2 to 1 water to urine apply to wet soil followed by watering in. Using too much at once can still burn plants but that's okay, because frequent small applications at intervals of 1 to 4 weeks is actually a better approach when using soluble fertilizers than putting it on all at once. I have used mostly aged urine because that's just how it worked out. Even if plants are burned, it is not generally fatal. Most will recover and grow on to be reasonably healthy. Just flush them with a lot of water and don't feed for a while. No reason to get your boxers all in a bunch.
(note: I actually did a test once upon a time, wherein I took two pints of pee, one aged and smelling of ammonia, and one fresh from the source, and dumped them each in one small area on some lentil plants. Neither suffered any visible damage, there was no noticeable difference between them. My main point, aside from acting like a dick and making fun of your unfounded fears, is that both fresh and aged urine can be used to good effect! :D)
#3 DIDN'T YOU KNOW?! EVERYBODY KNOWS!!!! Urine must be diluted at least 10 times with water in order to be safe for plants!!!! NEEOOOOO!, YOU’RE GOING TO KILL YOUR PLANTS!!!!!!!: Soluble fertilizers, including urine and more especially aged urine, are best applied to wet soils and then watered in. By doing so, you are essentially diluting the fertilizing solution a great deal, whatever it is. Dilution of 1:10 urine to water for actual application from a watering can is very inconvenient. With a 10:1 ratio I would have had to apply many more watering cans full compared to using the concentration of 1:2 which I customarily used! Screw that, it took long enough at 1:2! I sometimes even used a dilution of 1:1 especially with fresh urine, on plants that like lots of nitrogen just because its faster. I've even used it straight. It must be said though, that I've almost always "watered in" after application. Watering in not only further dilutes the urine, it spreads it out in the soil and washes it down to the plants' roots. Of course all of this is dependent on the strength of the urine. I used to drink water like a fool and pee clear all day. Now I've learned better than to flush out all my electrolytes, and my pee is a lot stronger than it used to be. You can also put too much or too little on, whether it is diluted or not. Bottom line for me is, I would never dilute more than 1:3, and always water in immediately. Anything more seems like a waste of labor.
#4 No worries. Its all good. Urine is sterile bro!: Human urine can occasionally contain infectious organisms in spite of the oft stated "factoid" that "urine is sterile". But ask a doctor or nurse if urine is safe, and they’ll often tell you that it’s sterile with little or no qualification. If it was always sterile, there would be no such thing as urinary tract infections! However, fresh urine is usually basically sterile, and safe enough for use. I think most people have more important things to worry about than the minimal risk posed by using urine in the garden. If final applications are kept away from edible parts for a at least a few weeks before use there seems little reason for concern when its "all in the family". Ecosan recommends using urine fresh in family situations, claiming that other modes of transmission of disease are more likely to take place within the group than handling the urine during application, or when eating the food from the garden. I would however be hesitant to let dirty smelly hippies who have been traveling in the tropics pee on my garden. Rotting urine is probably somewhat more of a health risk than fresh actually, since it has bacteria growing away in there. According to one study, urine stored for months (how many is temperature dependent) basically sterilizes itself by the production of ammonia, so that is an option to look at if you're concerned. I basically view this issue the same way I view animal manures. If I’m not afraid to shovel a bunch of homegrown chicken poo or other animal manure in various stages of yuckiness on my plants, then I’m not any more afraid to put on some rotten urine. Possibly less.
#5 Ahhhhhhhggggrrrgggaaahhhh!!!!!! The salts in urine will kill your garden!: I eat a lot of salt, no really. I used my urine in large amounts on my gardens for about 10 years and stuff grew pretty damn well! I can't say that one would never see any negative effects of the build up of various mineral salts in the soil. Almost any garden can be bigger, better, more productive. However, my garden kicked major ass powered by pee. I must say though that I have free draining soil and a fairly high annual rainfall. I might be more concerned if I had very low annual rainfall or a non-draining hardpan layer beneath the top soil. In the case of the low rainfall, extra water can be channeled onto the garden to wash away excess salts during the rainy season, such as from the house gutters. Either way, I would still encourage a person to at least set aside one bed and see what happens if it is fertilized regularly through several years with urine. Try is first, and then panic if stuff starts dying or doing poorly. Whatever happens soil salting can be rectified by soil flushing if the experiment is on a small scale.
#6 eewwww gross! Urine will make my garden smell like a subway :( Welp, it won't actually. if you pee on concrete it just sits there and supports a bunch of anaerobic bacteria that convert nutrients in the pee into nasty smelling compounds. If you pee on healthy soil there are gajillions of organisms just waiting to make use of those nutrients and break them down into useful fertilizing compounds. The clay in the soil will also hold and neutralize most of the smelly stuff. Peeing in hard lifeless environments like cities and bathrooms creates a problem that does not exist when peeing outside on the ground. As long as one doesn't pee in the same spot over and over and over, there won't be any appreciable smell. Urine collected in a bucket and then used in the garden can stink up the place pretty good, but that will dissipate quickly if the urine is watered in and shouldn't last beyond half a day, if that. Using fresh urine and applying before it starts getting funky should create no appreciable smell.
#7 Urine has too many soluble chemical thingies and will kill the soil life! SOLUBLE FERTILIZER BAAAAAAHD, ORGANIC MATTER GOOOOOOOD: Maybe urine could kill a few good guys in the soil because it is too soluble and too hot, hell if I know, but consider the following. What are you killing, maiming or breaking to pieces when soil is dug to mix in manure or other fertilizers? Ultimately what benefits are you gaining by incurring heavy plant and root growth by using a kick ass soluble fertilizer? What benefits are all those trace minerals, vitamins and nutrients ultimately doing for the life systems of your soil? I really don't know what urine does or doesn't kill when applied to soil, if anything. Maybe it would be good to have some science on this, but I doubt its out there and I don't feel like looking for it, and actually, it just doesn't matter, because when you use pee on your garden it’s going to grow like darned heck! And what are the alternatives? Lets consider the non-chemical alternatives:
Make compost instead: (maybe even with the urine) Everyone with experience knows that producing tons of compost for a large garden is a big chore. The compost also has to be dug into the ground to be really effective as an actual main fertilizer, unless you can use tons of it.
Import animal manures: (Which are usually full of urine by the way.) Manure is often full of weed seeds including noxious weeds that you may not have yet. Requires transportation. Inelegant. Dependent. If you have manure from your own animals, hell yeah, way to go! You get a gold star baby!
Buy a non soluble nitrogen source and use that: (blood meal, "feather" meal, alfalfa etc...). Usually have to dig it in. Dependent again. Costs money.
#8 All the drugs and chemicals in my pee are going to kill the soil life! Jeeze, maybe, but then aren't they also killing all your intestinal life too, and maybe you? I was on heavy continuous doses of antibiotics for two and a half years some time back. I did have some reservations about using that pee in the garden, but I did it anyway. I couldn't tell that it hurt anything much. Dunno, try to take less stuff I guess.
#9 You HAVE to keep a lid on the pee or use it FRESH or ALL the nitrogen will evaporate and be WASTED! Geeeeezzz.... (eyeroll): Ok, its probably true that some of the nitrogen can evaporate if the lid is left off of aging urine. With a little mental gymnastics though, the loss can be seen as a benefit. Urine is not the most balanced fertilizer ever, being fairly top heavy on the nitrogen for some crops. I have never found that to be a major problem in practical application, in fact, not at all, but it would be a theoretically more "balanced" fertilizer if it was lower in nitrogen. I grow a large garden here and have never used even 1/3 of the pee generated. Most of it was wasted or directly "applied" to a tree or something. Unless you have big crops, lots of trees etc, you're likely to have more than you need, so letting a bit of nitrogen evaporate is just not that relevant. you'll want to keep a lid on it anyway, because it smells, but don't lose any sleep over a little ammonia wafting away.
#10 If I pee on my plants my incipient ego force will wreak havoc on the living organism of my farm and turn my aura yellow! Screw that! As near as I can gather, around the neighborhood of the turn of the century, (the 19th/20th one) a mystic by the name of Rudolph Steiner, who claimed to have received, or perceived, intelligence from spiritual realms, gave a lecture or series of lectures on appropriate modes of agriculture that eventually became the bio-dynamic movement. Apparently, the use of human wastes directly on food crops is somehow discouraged or prohibited in this system. I'm not entirely clear on the reason, but you can try to interpret the quotes below. The stuff reads to me like the ramblings of a religious nutcase. Seriously, this stuff is really out there! I have no more reason to believe the ramblings of Rudolph Steiner than I do anyone else making random assertions based on exclusive intelligence received from invisible realms. Although I can't find anything specific to the use of urine on crops and don't want to waste any more of my precious hours here on earth looking for such a passage from Steiner (feel free to post in the comments if you know one, or want to attempt to enlighten us), there are some tasty quotes below which I hope will keep you from being discouraged by biodynamic religious dogma, because that’s all it is. Biodynamics is quickly gaining popularity supported by the general public who think it sounds great, but have no concept of its roots or the actual practice. It would totally suck if the spread of biodynamics keeps people from cycling human excrement back into food growing systems and puts us back at square one in regards to that practice, wherein we would be ruled by ignorance and superstition rather than benefiting from the kind of open inquiry and observation needed to solve the fertilizing problems we now face.
A position in opposition to biodynamics http://biodynamicshoax.wordpress.com/
Tasty Rudolph Steiner quotes: "Here you encounter a relationship which you will think most paradoxical, even absurd at first sight, and yet you cannot overlook it if you wish to understand the animal organisation — and the human too, for that matter. What is this brainy mass? It is simply an intestinal mass, carried to the very end. The premature brain deposit passes out through the intestines. As to its processes, the content of the intestines is decidedly akin to the brain-content. To speak grotesquely, I would say: That which spreads out through the brain is a highly advanced heap of manure! Grotesque as it may be, objectively speaking this is the truth. It is none other than the dung, which is transmuted — through its peculiar organic process into the noble matter of the brain, there to become the basis for Ego-development. In man, as much as possible of the belly-manure is transformed into brain-manure, for man as you know carries his Ego down an to the Earth; in the animal, less. Therefore, in the animal, more remains behind in the belly-manure — and this is what we use for manuring. In animal manure, more Ego potentially remains. Just because the animal itself does not reach up to the Ego, more Ego remains there potentially. Hence, animal and human manure are altogether different things. Animal manure still contains the Ego-potentiality. Picture to yourselves how we manure the plant. We bring the manure from outside to the plant root. That is to say, we bring Ego to the root of the plant. Let us draw the plant in its entirety (Diagram 19). Down here you have the root; up there, the unfolding leaves and blossoms. There, through the intercourse with air, astrality unfolds —the astral principle is added — whereas down here, through intercourse with the manure, the Ego-potentiality of the plant develops."
and...
"Silica came from the Cosmos into the Earth with a consistency similar to that of wax, and then it hardened. I described yesterday how pictures of the Cosmos arise in clairvoyant contemplation of this hard, rocklike substance. These pictures represent a more spiritual aspect of the phenomenon that was once concretely perceptible as a kind of plant-form in the portions of this transparent, waxlike silica emerging from the Cosmos. Any observer of Nature will know that in the mineral kingdom today records of an earlier age are still to be found. When you look closely at certain stones you will see something like a plant-form within them. But in that distant past a quite unusual phenomenon was that pictures were projected from the Cosmos into the albuminous atmosphere within the waxlike substance, where the pictures were not only seen but were reproduced, photographed, as it were, within this substance. And then there was a noteworthy development: the fluid albumen filled these pictures and they became still denser and harder; and finally they were no longer merely pictures. The silicious element fell away from them, dispersed into the atmosphere, and in the earliest Lemurian age there appeared gigantic,floating plant-formations which remind one of the algae of today. They were not rooted in the soil - indeed there was as yet no soil in which they could have taken root; they floated in the fluid albumen, drawing their own substance from it, permeating themselves with it. And not only so - they lit up, glimmered and then faded out; reappeared and again vanished. Their mutability was so great that this was possible. Try to picture this vividly. It is a panorama very different from anything to be seen in our environment today. If a modern man could project himself into that far-off time, set up a little observation-hut and look out on that ancient world, the spectacle before him would be something like this: he would see a gigantic plant-formation somewhat like present-day algae or palms. It would not appear to grow out of the Earth in springtime and die away in the autumn, but would shoot up - in springtime, it is true, but the spring was then much shorter - and reach an enormous size; then it would vanish again in the fluid albuminous element. A clairvoyant observer would see the verdure appearing and then fading away. He would not speak of plants which cover the Earth but of plants appearing out of the Cosmos like airy clouds, condensing and then dissolving - it was a process of "greening", taking place in the albuminous atmosphere. Of the period which would correspond more or less to our summer, an observer would say that it was the time when the environment of the Earth became "green". But he would look upwards to the greening rather than downwards. In this way we can picture how the silicious element in the Earth's atmosphere penetrates into the Earth and draws to itself the plant-force from the Cosmos, in other words, how the plant kingdom comes down to the Earth from the Cosmos. In the period of which l am speaking, however, we must say of the plant world: it is something that comes into being and passes away again in the atmosphere."
and...
"Man is in this way seized by the forces which, coming out of the earth, determine him; so that, if we picture these several points, we get a remarkable line. This line still holds good for our epoch. The spot in Africa corresponds to those forces of the earth which imprint upon man the characteristics of early childhood. The spot in Asia corresponds to those which give man the characteristics of youth, and the ripest characteristics are imprinted on man by the corresponding spot in Europe. This is simply a law. As all persons in their different incarnations pass through the various races, therefore, although it may be argued that the European has the advantage over the black and the yellow races, we should not be prejudiced thereby."
Rudolph Steiner
No need to hold it against all those asians and blacks just because they are underdeveloped and have to be reincarnated more times to achieve the superiority that comes with whiteness. Eyeroll. I guess he didn't notice that the Chinese invented like 90% of everything while his ancestors were probably still living in huts.
Whether I'm exactly right about all the details or not, the fact remains that my gardens have kicked some major butt fueled by pee. Fears abound, but the consequences of any complications that may arise are likely to be pretty minor rather than devastating. And not only is peeing on your garden not gross, it totally sexy. Just check out this gardening hottie at about 5 min 45 sec.
http://www.youtube.com/watch?v=xtbcYJPOVmM
So, pee in a bucket for a while, and do a few test plots to see for yourself. For more reading on using urine as a fertilizer, see the literature made available by ecosan. They’re on a mission to stop the waste, grossness and disease caused by the viewing of human manures as a waste product, aiming to bring them into use in the areas which need them most, and which also have the worst sanitation issues. Ecosan rocks, and their urine diverting composting toilet system makes the popular humanure system look clunky, labor intensive and unsafe.
Keep in mind that by simply saving your urine, you will divert the great majority of the plant nutrients leaving your body from entering the waste stream.That is probably the most important and relevant nugget of truth to remember and spread, because it allows people to take a step now, rather than waiting for some hypothetical future when they will build, manage and use a composting toilet.
Onion Braids: functional, symbolic, marketing ploy.
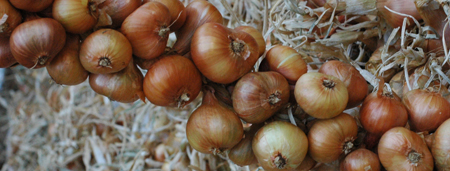 I often braid my onions, but my braids aren’t all neat and pretty-like. Stylish onion and garlic braids are nice, but I don’t have the time, energy and patience to sit around making something that I produce essentially for functional reasons look like I bought it at a country chic boutique. Last year though, we braided onions for the market. I spent a lot of time trimming the bulbs and making them look presentable, then dipping the dried leaves in water to re-soften so tonia could braid them neatly. We added dried lavender and stuff to spiff them up a bit. they turned out pretty nice and It was kind of fun, but it was also time consuming. A major motivator was that it allowed us to sell our onions for a lot more. If you really added up our time though, it was more like having another mediocre paying job to our lives, which is actually okay, but not high incentive. I liked our onions braids, but something never quite sat right about the whole thing. I think in a way we were diminishing the value of the food we grew by making it into something that may be viewed as art first and food second. Also, I couldn’t help thinking that we could have spent that time growing more food or making something more lasting.
Braiding onions is actually more fun when I’m doing it for functional reasons. I just start slapping them together and it usually works out good enough ("Good enough", a lot of jokes have been made that this is the Turkeysong motto.) The braids are kind of messy, more like onion dreadlocks, but I’m looking at some of them hanging in my room right now and they’re pretty neat looking after they cure well enough to knock off some of the dirty outer skins. Once you give up on making them all perfect looking, curing and storing braided onions is very practical. It doesn’t take very long to whip out a 15 or 20 onion braid when you have no significant commitment to cosmetics. Functionally speaking, the bulbs in a braid have good air circulation for curing, and they don’t take up a lot of space like loose onions do when spread out somewhere to dry. You can easily move a braid in or out of the shade, and move them inside when it gets damp out. There is no picking up of numerous loose onions one at a time and finding another place to spread them out flat, or looking for a container with good air circulation to put them in. You can store the braids in a cool dry place, and maybe bring in one at a time to hang in the kitchen, pulling onions off as you need them. Some say the onions keep better because the necks are sealed and less likely to be infected with rot. If an onion does rot, it's less likely to infect others if it's not piled in with them several onions deep in a crate or bag, and they are much easier to inspect. Onion braiding is a great system and that’s why people started doing it. And yeah, it does look neat.
But it doesn't just look neat. To me it is also symbolic of my choices and my lifestyle. Each year, the sight of onion braids reinforces my sentiments about them and what they represent to me; my efforts of the past seasons carrying me through the coming ones.
Making pretty braids is much less functional. It takes a lot of time to clean up the bulbs so that they look good, and unless they've cured for a while, that process often leaves very little protective skin on the onions. There are also a certain number of losses when curing onions that are just inevitable. I’m sure that more than one person took one of our nice market braids home, at a cost of like 5 onions for 8.00 dollars, or whatever, and hung them up to look at them for so long that some of the onions rotted. I mean, that’s why you really buy a pretty onion braid, to look at it. And that’s kind of sad. Ideally, people would make the food I grow into art and eat it, not just look at it as art until it goes bad.
I’m not totally anti-pretty-onion-braid. For most people though, onions are a staple food, and braids are a great way to store onions. I remember thinking last year how cool it would be to sell more strictly functional onions braids. I don't think that quick braiding is at all cost prohibitive for me as a way to cure, store and market onions, and may in fact be more efficient for the reasons I already outlined. I just need enough onions to bother doing it. If I can find a solid keeper that looks and tastes good, with good cultural traits and all that stuff, and grow a big mess of them, I could sell people braids of 8 to 20 onions at an affordable per-pound price.
Many things and acts are symbolic, but not always of what we want them to be. I think we would do well to step sideways and try to look at what we want things to mean and to say about us, v.s. what they actually do. A nice onion braid can mean a lot of things. For us here, it was a chance to turn something we manifested from the soil into art of sorts. To give it more life. But another part of it, is that we were just profiting off people grasping at something that we have that they don’t, yet which they recognize as somehow valuable. They want to buy a polished up phenomenon of rural life and I'm pimping myself and my precious onions to sell it to them (okay, wait, that's an awesome image, the onion pimp. Gold chains, platform shoes...) I’m actually all for romanticizing country life a little. I just think that we would do well to extract and celebrate the best and most real parts of it, and not just a dressed up aesthetic. If someone hangs one of those braids up and thinks it's too cool and expensive to actually use, then that disrespects the food I've grown by placing the aesthetic above it's potential to nourish and enrich someones life in a more real way. But then, if my braid is all that nice, I'm just asking for it.
Depending on how my onions cure out this year, I may invest more in growing onions for market next year. They are a good crop in that they will keep between markets and can be sold all winter. That’s good. I need crops that hold and store well since I can’t make it down the hill to market every week. I sort of blew it this past season by getting my onions in too late, but some still did well (*see footnote on varieties and stuff below). I think it would be cool as hell to show up at the market with a pile of somewhat knobby functional onion braids; braids that aren’t so pretty that people won’t actually use the onions. You see what I’m getting at here? The symbol was real before, but now it means something different. It is symbolic of something more tangible and close to home; something that is not just playing at a fantasy of real food and farm, so much as participating in it as part of a rhythm of daily life. I grow onions. I braid them. You hang them in your kitchen and pluck them off to nourish your family. I see you at the market next year. And while you use them they visually reinforce the choices you’ve made and remind that food is maybe something more than a thing that shows up magically at the store and which you trade money for. I think that’s a pretty cool relationship.
I have a lot of stuff I’d like to do, and I don’t have the energy, space, fertilizer and water to make a real dent in the onion consumption of Ukiah residents, but I can make a tiny dent, and do it in a way that allows people to take home a more real, and more meaningful, piece of life here at Turkeysong. I’m sure I’ll get better at braiding and make prettier braids than I usually do. I might even braid in some dried flowers or some herb and chilis. But, I'm not sure I want them to be too pretty. The goal is definitely functionality and not adding a lot (if any) in price to what should be an affordable staple crop. If I want to make some serious stacks of cash, I can grow a couple beds of cipollini onions. Those flat little gems sell for 5.00 or 6.00 a pound to people who want to spend their money on gourmet food, which is great. What better could they spend it on?
these are just a few thoughts I’ve had over some time now. I woke up at 3:30 AM as I so often do. I put on my headlamp and did a little hoeing under the interstem apple trees in preparation for fall potato onion planting. Then I thought I’d use some of my time while waiting to get sleepy again bringing in the onion braids and chili strings that have been curing and drying on the south wall of the lizard house. I’ve been meaning to do it for a week or so. The onions cured nicely in the gentle sun we have this time of year (remember I planted late so I harvested late), and only one bulb was lost to rot so far. Now it’s almost dawn and I have to go back to sleep so I can wake up all perky and replace the head gasket on my car. And you probably thought I was going to go plough a field with a wooden stick or something like that. Gotta have a way to get the giant pile of onion braids I’ll have next year down the hill somehow. They’re not going to hike down there by themselves. Take my advice and stick to urban homesteading unless you have some other reason to be out in the country other than that it’s pretty and private. That way you can probably get your onion braids to market without a car.
Oh yeah, how do you do it!? It seems to work better for both curing and braiding if the greens are not too green. I think it’s actually better if they are mostly dry, but I’m still deciding what I can get away with. If they are very green, they shrink a lot in drying and the braid can become loose or even fall apart. Dip dried leaves in water briefly to make them more supple. Form an X with the leaves of two onions. Lay the leaves of a third onion over the cross formed by the X and wrap it’s leaves once around the cross' intersection to secure the first two onions in place Then you just start braiding, adding an onion with every lay over. putting in a piece of twine toward the end can help strengthen the top of the braid. I usually braid out to the tips and then double the end over and lash it down to form a loop for hanging. If none of that makes any sense, just do a search for onion braiding. There are plenty of tutorials out there. I’m out of onions to do a photo series with this year.
These french onion sellers, known in England as Onion Johnnies, wrap their onions on a core of straw or rushes instead of braiding, but the bulbs are already fully cured out. Actually, this whole onion johnny phenomenon is really an interesting study. From what I've gathered (which should be suspect:) they found it cheaper, easier and more profitable to import their onions to England across the channel and sell them there door to door, rather than trying to get them to French population centers. Apparently the onion Johnnies were quite the phenomenon for a long while, but then slowly stopped coming till there were only a few left. The onions are sold in hanks door to door. If you look at the older pictures of the Onion Johnnies, the hanks are very nice looking, but pretty plain. There is currently a revival, but this time it's a little different. There are festivals and stuff and you'll see a lot of the onion shanks are very dressed up with flowers and grain heads and stuff. I think that people probably used to buy them mostly for the onions. Now, it's probably more of an idea and a symbol that people are buying. It is even alleged that the stereotype of the frenchman in stripped shirt and beret came from the English being familiar with these guys. Now at the festivals the guys wear the hat and demonstrate spinning up shanks of onions for sale. They have to sell their frenchness a little. I like to dress up my booth and I sell ideas like heirlooms and the more aesthetic parts of life here. It's an interesting thing to think about though, when are we degrading and pimping ourselves and over inflating an image, v.s. presenting an idea and aesthetic that will move people in a positive way while still making fat stacks of cash :O So here is the idealized version, though still maybe kind of squalid. I stopped short of finishing the building...
*variety and growing notes: Yellow of Parma from baker creek is looking very nice. It’s a round uniform onion and looks like a good keeper type, though we'll see about that. Most of the other onions I’ve trialed from baker creek did poorly, and many have had a tendency toward bifurcation. bifurcation is when the bulb divides internally into two or more bulbs with a papery sheath between them. They are harder to process and don't always keep as well as solid bulbs. The french braiding onion I bought from Baker Creek, Jaune Paille Des Vertus, and the German Storage oinion Stuttgarter, both had a high percentage of bifurcated bulbs. I met some folks from Sustainable Seed Company, who are based locally here. One of them was saying that bifurcation is a huge problem for them when trying to source quality seed. Seed growers make a lot more money if they plant a crop and just let it all go to seed. What they should be doing though is getting out in the fields and rigorously rouging out (killing) the “off types”. If they don’t, the seed quality runs down over a few generations. Borrettana Cipollini seed from Fedco and sustainable seed company is very nice and uniform, making cute, flat little onions with very little bifurcation. They look great braided, but I'm not sure how well they keep yet. I just ate some Borrettana Cipollini slow cooked in some killer turkeysong chicken broth with sage, bay, salt, pepper and dried black trumpets. All day cooked in the solar oven till the broth was reduced to the rich yellow fat. All I can say is, oh my fucking (lack of) god. Okay, I can also say sweet, fine textured, no sharpness, and wish I had some toasted bread to smash them on and a pint of guinness.
For you locals, I've had really good luck starting onions from seed in January to February. My target date is January 15th, but then through anytime in February seems to work well enough. I don't think I had a single seedling onion bolt this year, and that lack of seeding out is pretty much the norm when growing from seed. Seeding is common though when using starts that are grown somewhere else and shipped in, or especially planting those tortured little onion bulbs called sets. One market grower told me she only grows Candy onions because it's the only variety that doesn't bolt on her; but that's probably because she buys starts instead of starting them herself. Candy is a delicious onion though. I plan to start experimenting with some fall planting as well to see how that works for getting an early crop.
Lime Squad IV: The pets, straw clay lime kilns.
"None of these goals and design parameters will be considered in a myopic sense. Context must be considered with an assessment of cost benefit ratios in a holistic sense that includes values beyond convenience and control."
After taking lime burning in a steel drum as far as we felt we could without adding something to the drum. Tonia and I decided to venture off into building a kiln with available materials. That was one goal- to explore the possibilities of available materials. Another was to experiment with design changes in order to improve smoke and efficiency issues. We decided to add a grate and a fire box to see where that would lead us and how effective burning the fire separate from the shells might be. The metal drum taught us that we needed either insulation, or mass, or both together which I gave the silly, but relevant, name massulation. We thought of using some bricks that were around, but decided to go a little more primal using stuff we might be able to scrounge up anywhere. That meant having a base which could support a grate. We chose to use bricks for just the base because it was faster for our experimental purposes than mudding one up with cob, though the cob would probably have worked better. We slapped some mud onto the outside of the bricks to seal most of the air leaks. The base had a short firebox leading to a grate at the bottom of the column.
I got the idea for the kiln body material from a visit to Emerald Earth, a local community that does a lot of natural building. They use a wattle and daub system that replaces the stick wattle with bundles of straw dipped in clay slip. I decided that it would probably work for burning a kiln at least one time. It seemed like a lot of work, so to cut down, we just dipped the bundles of straw in slip and laid them up without any vertical supports. And it worked fine. We pulled up bundles of dry wild grass straw, dipped them in a rough clay slip made using some clay from a deposit here on the land, and just built it right up. The walls turned out about 3 inches thick or so. Since the straw is hollow, and the slip has substantial weight, this system gave us just the massulation that we were after with very little effort. Our friend Yoshi said it seemed kind of like a pet and the name stuck.
The shape of the body was somewhat constricted toward the top. Given no limitations in materials, I’d be inclined to build a kiln slightly bulged in the middle and constricted slightly at top and bottom, with the top considerably more restricted. Many traditional kilns are made this way. I can’t say why for sure, but I think it’s because the larger space in the middle would give the gasses and heat a place to sort of spread out and slow down, while the constricted top could further slow the gasses down. Also, if the inside is somewhat spherical or concave, the heat radiating from the heated walls would be radiating down and up instead of straight across, which would at least theoretically retain the heat longer as it bounce back and forth inside the curved walls of the kiln. That's what my intuition tells me anyway.
A small fire was kindled in the fire box to dry the kiln more quickly. When it was partially dry and firm to the touch we did a burn in it. Burning just the firebox, with no fuel in the kiln body was hopeless, as I suspected it would be. Maybe it could work if using a large burn chamber with a relatively smaller kiln and a ton of wood to really pump an intense amount of heat in there. Such an arrangement might also require more insulation than we had. While our straw/clay kiln body contained a lot of pore space, there was also a considerable amount of clay in the body which would suck heat away. Still, I don’t recall the outside of the kiln ever being super hot, so we were retaining most of the heat, or at least losing out the top as would be expected, rather than out the sides. Using alternating layers of fuel and shells, the firebox seemed of some assistance in getting the fire off and running with less smoke, but probably not enough to justify it’s existence. Overall, I would say that the firebox was a fail. The good news is that the percentage of thoroughly calcined shells did go up when doing mixed fuel/shell burns. Shells touching the side of the kiln were not destined to be under-calcined as they are when using a plain steel drum.
We burned at least 8 burns in the pet before it disintegrated. It was covered from the rain at all times. It became fragile after a few burns and was barely nursed along for the last 2 or 3. That seems like a waste of effort, but there are good points. I think the burned clay will make a great soil amendment, we didn’t have to buy anything, it was fun to build and we got a little exercise. In researching historic accounts of biochar in Europe and North America, I found a number of references to the great value of burned clay being used as a soil amendment. The clay burned from the pet is really neat. The straw burned away in most of it, leaving small tubes throughout. A nifty system might be to burn agricultural lime in a similar kiln, while producing charcoal if possible, and then putting the whole lot into the soil when the kiln is too burned out to use anymore. It may be quite a bit of work, but the charcoal and clay should be a permanent investment, not like a one time fertilizer application.
Pet version 2.0 was built at The Buckeye Gathering in 2012. We built this one with Bryce the blacksmith as a dual smelter/lime kiln, using a bale of wheat straw and clay slip. Bryce collected some iron ore to smelt and we thought we could maybe cook two birds with one kiln. this time we dug into the ground a little to make a gathering area for the slag. That didn’t work so well with the lime burning, and probably not for the smelting either. It just created a cool zone against the back of the kiln, in spite of adding 3 vent holes at ground level. The lime burned, but there was a high percentage of under calcined shells. The smelting also failed, but we were inclined to think that fail was due to bad iron ore rather than to the kiln design, or management. Lesson learned for lime burning, the air should come from the bottom of the kiln, not part way up. That may not be true in taller kilns, but for the micro scale kilns, I think it probably is very important to have the air enter at ground level. This kiln was only burned twice and was then abandoned on site, but it had more burns in it yet.
The pet’s straw clay concept is pretty cool. It’s fast to slap together and doesn’t require that you buy anything. Once burned out, there is no waste and, if anything, the leftovers are useful. I would recommend building it on a low cob base, or just on the ground leaving four vents at ground level created by two shallow, intersecting trenches crossing each other in the center. A slight constriction toward the top would probably be a good idea. If the kiln is taller than you can reach into from top to bottom, you would probably need to build in an archway at the bottom for cleaning it out. This design, which is basically like burning in a drum (see part one of this update), but with mass and insulation, does not solve the problem of excessive smoke. For that solution, it’s back to the drawing board. Smoke can be reduced a little by starting a fire before adding wood and shells in layers, allowing each layer to get underway before adding the next. Burning from the top is also an option, but probably would require extending the height considerably with some provisions for flaring off gases (see below for more on this concept.) Cob (a mixture of clay, sand and straw for those who don’t already know) could be used to build a kiln and would probably outlast a pet by a long stretch. It would also be a lot more work and still far from permanent. Cob would also be much less insulating than the pet’s clay coated straw construction. I have the good fortune to hang out a little with Kiko Denzer each year at the Buckeye Gathering. He is pretty savvy when it comes to fire stuff. One of his ideas was to use sawdust, or probably more like wood flour, mixed with clay to build a kiln body; he says this is how firebricks are made. The sawdust would serve as a sort of aggregate, but would burn out when fired, leaving a light, porous material. Another idea he tossed out was to try a technique used in firing pottery, where the wood and pots stacked together are wrapped with newspaper which is first dipped in clay slip. This forms a temporary kiln.
If energy and other priorities don’t get in the way (not unlikely), I’m hoping to explore home-scale lime burning some more. The objective is to keep kiln design simple and accessible in order to remain inline with homey goals, while increasing efficiency and decreasing pollution in the form of smoke. Raising the percentage of thoroughly calcined shells as close to 100% as possible is also on the agenda, but that really falls under efficiency. None of these goals and design parameters will be considered in a myopic sense. Context must be considered with an assessment of cost benefit ratios in a holistic sense that includes values beyond convenience and control. This is important (thus the bold italics ;). For instance I am not going to focus narrowly on 100% calcination if it means burning 50% more fuel. And what would I profit from a small gain in any goal if it means buying 500.00 worth of special manufactured insulating material or switching from wood to propane? The smoke issue will probably take priority for now. I’m interested in a concept called TLUD Top Lit Up Draft. I did one top lit burn in the pet using a piece of stovepipe to extend the kiln in order to provide draw. The TLUD concept also requires flaring off of unburned gasses which, for me, was provided by unsealed gaps between the top of the kiln and the stove pipe. The burn went Ok as I remember (though I'm not sure how well I do, I think I'd remember if it went very poorly), and with much less smoke. so I’m encouraged. The basic concept is that the draft comes in at the bottom (the air is often preheated by passing through a space between the inside container which holds the burn and an outside layer) and travels all the way through the kiln where it is consumed by the fire at the combustion zone. Since the fire is lit from the the top, it is not smothered by a giant pile of fuel and shells as it is in a bottom lit kiln. The fire is actually starved for oxygen in a way, but the extra gasses created by that are flared off at the top of the unit, consuming all of the smoke. The TLUD concept is used in gasification stoves and to produce biochar. I have some new metal drums to play with and already hope to be exploring this idea for making charcoal to use as a soil amendment. Finally, I’ve been interested from the start in exploring the possibility of producing biochar and lime at the same time. I have no idea if that can work yet, but I’d sure like to try. I hope to produce a lot of char anyway and it would be nice to use that heat for something. Since we have acidic soils here, lime is a necessary addition, though using char in the soil is supposed to help raise ph as well. I can get oyster shells by the ton for cheap or free (except gas and driving of course), so calcining a few shells while already producing a bunch of heat during charring sounds pretty awesome. If that works, I have a feeling it will be in a fast burning, high heat TLUD design with mostly wood and just a few shells. Those shells would still add up though when making a lot of char. Hopefully this will not be the last lime burning post. If anyone tries any of these ideas, please come back and let us all know how it went!
Experimenting with Biochar: pursuing the promise of charcoal as a soil ammendment
 I have this neighbor up here. He’s always saying sustainability and permaculture and stuff like that, but I was surprised in a recent conversation to find out that he did not know the term, or concept of, biochar. For others who don’t know, that’s a catchy marketable name for charcoal that is intended as a soil amendment, the claimed benefits of which I’ll delve into further on. I’m not even sure I like the term biochar. Why name something that already has a name? Maybe so you can market it? Charcoal with special properties? Anyway, I guess I thought it was more in peoples consciousness than it probably is, and since my sustainably hip neighbor was unfamiliar with the concept, I got to wondering how many other people haven't yet encountered the concept and thought I’d present some thoughts and information here in case I might be able to convince more folks to delve into experimenting with the idea.
I had seen some interesting, and even exciting, articles and videos on using charcoal as a soil amendment. But, all the references were based on the discovery of terra preta, which are these human modified soils in the Amazon containing a large amount of charcoal. The claim is that these soils are still highly fertile compared to the natural soils surrounding them, even after many hundreds of years of heavy Amazonian rains. The mysteries of terra preta are still being prodded and examined, but clearly charcoal is a major player, and likely the key ingredient. If it functions as advertised, adding char is a permanent improvement, unlike the treadmill of organic matter and nutrients that we add to our soils every year and which mostly flush away in the rain. I've seen what happens to gardens when they are abandoned. The fertility quickly declines remarkably fast and eventually disappears. The possibility of making really permanent improvement to gardens, orchards and pastures is very compelling and worth some great effort.
Having trained myself to be somewhat cautious and critical of new and exciting ideas, I was naturally slow to adopt. I was very interested though and began to save any charcoal I could for experimenting. One day while researching heirloom apples, I found a 19th century reference to using charcoal in potting soil, which gave me the idea to search google books for the terms - charcoal fertilizer - ,. I limited the search to the 19th century. Bingo! I found a bunch of very interesting references. Now that I had something besides the much recycled terra preta hype to fuel me, I was much more excited to experiment. If you haven’t read that post, you totally should. It’s quite fascinating. You can skip my usual rambling and go straight to the accounts. Biochar use in Europe and North America in the 19th century. Since most of you won't actually click the link and read it, here is a tasty extract...
The Farmers’ cabinet, and American herd-book, Volume 11 From the Farmer and Mechanic Comparative Merits of Charcoal and Barn-yard Manure as Fertilizers. In the year 1788, my father purchased and removed upon the tract of land in Hanover township, Morris county, N. J. The land, owing to the bad system of cultivation then prevailing, was completely exhausted, and the buildings and fences in a state of dilapidation. The foundation of the barn was buried several feet beneath a pile of manure, the accumulation of years: little or none ever having been removed upon the lands. Even the cellar, beneath the farm-house, was half filled with the dung of sheep and other animals, which had been sheltered in it. The former occupant of the farm had abandoned it on account of its supposed sterility, and taken up the line of march for the Valley of the Miami, along with the first caravan of pioneers who accompanied Judge Symmes.
The barn, before referred to, was removed to another situation soon after its foundation was uncovered, by the removal of the manure to the exhausted fields; and its site, owing to the new arrangements of the farm, became the centre of one of its enclosures. During the seventeen years which I afterwards remained upon the farm, the spot could easily be found by the luxuriousness of the grass, or other crops growing thereon; though the abatement in its fertility was evident and rapid. On revisiting the neighbourhood in the autumn of 1817, I carefully examined the corn crops then standing upon the spot, and was unable to discover the slightest difference in the growth or product, upon that and other parts of the field. This was about twenty-eight years after the removal of the barn.
Upon the same farm and upon soil every way inferior, were the remains of several pit-bottoms, where charcoal had been burned before the recollection of any person now in the vicinity, and most probably, judging from appearances, between the years 1760-70. These pit-bottoms were always clothed, when in pasture, with a luxuriant covering of grass, and when brought under tillage, with heavy crops of grain. Eleven years ago I pointed out these facts to the present occupant, and his observations since, coincide with my own, previously made; that they retain their fertility, very little impaired, a period probably of about seventy or eighty, certainly not less than sixty-five or seventy years. Here then is an excellent opportunity of observing the comparative value of charcoal and barn-yard manures, as a fertilizer of lands. The former has not, after at least sixty or seventy years exposure, exhausted its powers of production, while the latter lost its influence entirely in twenty-eight years, and most probably in much less time.
I have since had many opportunities of’ observing the effects of charcoal left in pitbottoms, upon vegetation, one of which only,. I will relate. The last season, in the northern part of Ohio, was one of uncommon frost and drought . In May, the wheat fields, when promising a luxuriant crop, were cut off by frost;—especially in the valleys, and very much injured in the high lands—which was succeeded by the most severe drought ever experienced in the West. The moiety which escaped both these scourges, was afterwards very much injured by rust. Near the village of Canton, upon a farm on high ground, which had been mostly cleared of its timber by its conversion into charcoal, it was observed that upon the old pit-bottoms, the wheat grew very luxuriantly—was clear of rust—and had ripened plump in the berry; while in the adjacent parts of the field it was short in growth, the stem blackened with rust, and the berry light and shrivelled."
All the results are definitely not in on using charcoal as a soil amendment. It is being sold as a panacea for the ills of the planet and human society, and large corporate interests are even becoming involved. The biggest claim is that charring gajillions of tons of woody debris and burying it can help mitigate climate change. About half of the carbon in woody material can be converted into charcoal, an extremely durable material capable, at least in some cases, of residing in the soil for thousands of years. Not only that, but if that buried charcoal increases plant growth and fertility, as it is claimed, the extra abundant growth on previously less fertile soil will absorb even more carbon which could then be charred as well. If the wood decays naturally, little of the carbon remains in the soil, but instead ends up back in the atmosphere. While it seems hard to believe we could char our way out of the enormous quantities of carbon we've released in the last 00 years of so of burning fossil fuels, that is the hopeful claim of many biochar champions. Other claims, relevant to us as gardeners, are increased water retention in the soil, reduced leaching of nutrients (because they bind strongly to the charcoal which is a virtual magnet for all types of substances) and therefore a decreased reliance on fertilizers, better and earlier soil warming, and Increased microbial activity (the miles of pore space and surface area in a piece of charcoal, rich with absorbed nutrients, providing a huge habitat for living things.). One issue though, is how char will work when applied to differing soils in various climates. The truth is that there is a lot we don’t know about the practical applications and benefits under varying circumstances. carefully designed long term studies might help, but If we wait for science, and possibly more relevant, its interpreters, we may be disappointed or behind the curve. Besides, there are so many climatic/gardening style/fertilizer and soil type factors to account for. You and I only have one agenda, to see if the stuff works in our soils and gardens. I suspect that it will work for some of us, so lets just find out on our own. It’s not really that hard to just try the idea out in small areas. If charcoal amended areas of our garden consistently grow the giganticest healthiest plants ever, that's probably a green light to keep burying charcoal.
The first idea I was able to reject in order to move on was the idea that I needed special charcoal, burned in a special way. The 19th century references were using whatever charcoal was available. Most of it was probably slow burned in piles since that was the common method, but I feel pretty sure that whatever charcoal we can come up with is probably worth trying, even if it isn't ideal, (which I've seen no compelling evidence so far to say it's not. Not that I've looked very hard). It takes a lot of charcoal to reach a soil content of 10% in a significantly large area. Save charcoal wherever you can get it. Avoid the moulded “charcoal” briquets that people use to barbeque. Those are made with coal and are actually “coke” briquets (coke is the term for the equivalent of charcoal made from coal). I have been partially successful at convincing others around here to save the charcoal from the woodstove every morning, which adds up over a winter. I also collect it from campfires and burnpiles. Once a burn pile is down to just embers, it can be spread out and/or doused with water to prevent the charcoal from burning all the way down to ash.
I’m also planning to produce charcoal intentionally. I have this friend that is always telling me about the newest best thing ever. Biochar is one of them. While this guy is much less cautious than me in accepting an idea as worth pursuing, while I was still getting excited about biochar, he was making 17 yards in one winter! The guy gets mad respect for GSD (getting shit done) and pursuing his goals for self reliance. Charcoal has traditionally been a very polluting activity producing enormous quantities of very dirty smoke. This friend burns his in a barrel with a flue on top, which burns much cleaner than traditional methods of smothering. He learned the method from this video. The technique could no doubt be refined, but it is where I’ll be starting. I'm also hoping to adapt the same kiln for lime burning, or making char and sea shell lime at the same time. My friend added a fan which feeds into the bottom of the barrel. Most other methods burn up some fuel all the way to ash in order to make the charcoal, but this kiln achieves two very important goals relatively well, efficient fuel use and low emissions. I have some barrels and, time and energy permitting, I’ll be setting up a couple of these kilns and charring some wood chips.
My soil amending experiments have just begun. This spring I ground up and buried some charcoal in a garden bed. I divided this long bed into three 7 foot long sections. Section one has about 10% charcoal in the top 10 inches of soil. Section two has 5% and section three has none. It is generally said that a certain percentage is required to start seeing real benefits, so adding a quantity to a small area rather than just spreading it out over a whole bed or garden seems like the way to go. Some say that the charcoal should be pre-charged with nutrients because it is so adsorptive of plant foods that it will deplete the soil at first until an equilibrium is achieved. I chose not to pre-charge to see what would happen, and so I could treat the control section the same as the charcoal sections. I also dug the no-char section just the same as the other two sections, even going so far as to go through the same motion of sifting in the char that wasn't there. I did add a sprinkling of woodash to the no-char section to try to imitate the small amount of ash present in the pulverized charcoal.
This experimental bed was planted to peas, spinach and lettuce, with the rows running the full length of the bed. At first things grew well, but as time went on, it was apparent that the more charcoal there was in the soil, the less the lettuce and spinach grew. The 10% charcoal end of the bed was a total loss as far as lettuce goes. The Peas did okay through the whole bed, but not great. It was difficult to discern much difference, but that was complicated by part of the pea row being attacked by birds and bugs. Anyway, it appears that it is probably true that the charcoal should be pre-charged or it will sap the soil of nutrients in the beginning. I would probably charge by mixing with compost or soaking in compost tea, except that sort of screws up the experiment of doing the same thing to all areas of the bed except for the charcoal content.
Although I’m very excited about biochar and plan to scale up production and experiments, I will approach it somewhat cautiously at first since it is a permanent addition and can’t be undone. I will continue to plant primarily test plots as outlined above, but with variations in depth and quantity of charcoal. Next I’d like to do a bed that has charcoal at varying quantity, up to 20%, but 24 inches deep instead of 12, and one with the same quantity of charcoal in each section, but dug in to various depths. I also plan to bury some in the meadow to see the long term effects there. finally, I’d like to see what happens if I just throw the stuff down on the meadow without burying it. I plan to do dug control plots in all cases, because that eliminates the possibility that it is just the act of digging that is making a difference. These few simple tests should yield up some fundamental information that can tell me whether to proceed to char everything I can get my hands on, or spend my time on something else.
If you can collect charcoal from burn piles, campfires or the woodstove, it doesn’t take all that much to put together a very small test plot. It probably should be used in adequate quantity per area. 10% would be something around one and a half inches deep dug into 12 inches of soil. I’m mostly planning to use 5%, 10% and 20%. Grinding the charcoal can be a problem. I have been using an old corn, bone and shell mill that someone gave me. It grinds the charcoal to pea sized and down, which is what I decided I want for now, though it could be adjusted finer or coarser. I’m tempted to do some tests with various sized grinds, and probably will eventually. a hammer mill of the garden variety chipper shredder type would probably work and I’ve thought about running it over with a car or a heavy roller of some kind.
My first experimental bed is now planted to leeks for the winter as it's second crop. I’ll continue to plant the whole bed uniformly to the same crops for comparison, and I hope by next growing season to be able to discern any obvious effects. When you realize how much charcoal it actually takes to amend 100 square feet at even just 5%, you may be discouraged, but remember that this is potentially a permanent soil improvement. Remember too that It can also be done in small sections as charcoal becomes available, so there is not necessarily a need for a heroic effort. If it really is as useful as we all hope, it is also quite possible that it will be worth buying the charcoal if need be, though it seems ideal to figure out how we can char whatever debris we might have on the home place, including crop wastes. Since the process produces quite a lot of heat, there seems to be great potential for working charring into home systems. For instance one could potentially heat water, boil bark for tanning skins, make lime, cook, can food, dry food, heat greenhouses, heat living spaces, etc... all while producing char. The trick is going to be figuring out char producing stoves and kilns of various kinds for these purposes, which use the fuel sizes and shapes that we have available. Once that is figured out though, charring, rather than being an extra job will be integrated into homestead life. That's a pretty neat vision.
The Mega Canner: Every serious canner needs one
Canning season is upon us. If you ever find yourself having a long day of boiling batch after batch of jars on the stove top, you need a bigger canner!

Many years ago in my blacksmithing obsessed days I was often found cruising metal scrap yards for treasures and steel stock. Every time I’ve moved, my accumulated scrap pile has come with me. One day I spotted a large stainless pool filter, complete with lid, at my favorite scrap yard. I knew right away that I wanted if for boiling large batches of oak bark for tanning hides. I figured it could be useful for other stuff too, so I bought it for a mere 20.00.
It took me many years and quite a few moves with the scrap metal pile in tow to finally get my bark boiler running. I put a scrounged copper pipe and a gate valve on the bottom outlet and fired it up to boil some bark. My suspicions that it was awesome were definitely confirmed. An open fire can be used directly under it which saves a lot of propane, and when cooking is completed, the liquor can be drained off from the bottom. Using the bark boiler is a huge improvement on boiling batch after batch of shredded bark on the stove top.
I had the boiler running for a year or so before it ever occurred to me that I could use it for canning food. I needed to pasteurize some fermented grape juice in the bottles and they wouldn’t fit into a canning kettle. So, I busted out the bark boiler. Amazingly, 19 champagne bottles can fit in the bottom layer, with room for another layer above that! The experiment went well, so the bark boiler donned its second hat, that of Mega Canner.
Tomato canning can be a big production around here. We shoot for about 100 pints a year and they come off the plants in large batches. Half the day in the kitchen blanching, peeling and packing into jars and then all those suckers still have to be water-bathed. Try this scenario on for size (I’m sure a lot of you have) Fit as many jars as you can in the kettle, boil the kettle for 45 minutes or more, turn off, allow to cool somewhat, remove jars, allow the water to cool a bit, add new jars, bring back to a boil, and repeat it all over and over again while dragging your timer around the property trying to get other stuff done. It’s often hot and the kitchen gets steamed out. The Mega Canner can fit hours and hours worth of water-bath canning into one firing that doesn’t take much longer than canning one kettle of jars on the stove top. The Mega Canner has room for a helluvalotta jars holmes! If it can fit 38 champagne bottles, imagine how many quarts or pints it can hold. I don't know. I've never come close to filling it up and I'm too lazy to bust out cases of jars to find out.
The Mega Canner/Bark Boiler could also be used for distillation with some very slight modification and to boil all manner of large batches of stuff. It started its life as a pool filter. Stainless pool filters are fairly common, but most are pretty small in size. This is the largest one I’ve ever seen, though it seems likely that they are made even larger. The walls are very thick, much thicker than a pot or a barrel. It has a perforated grate on the bottom which is mighty handy for both bark boiling and canning. It does still smell of chlorine a little. Steel is minutely porous and chlorine has probably bonded with the surface of the metal. I may at some point sand off a thin layer of metal from the inside to get rid of that. for now though, no food contacts the water or metal. There are various grades of stainless steel, and the metal composition of this one is unknown, so it may not even be food grade. Finally, the drain pipe and plumbing on the bottom are bronze and copper which are not food safe either. There are two drains on the bottom. One drain is plumbed already and the other has a bronze cap.
To use with a fire, I set the legs on 3 bricks or rocks to raise it a little. This system could use some improvement for efficiencies’ sake. A rocket stove furnace which it could be set over would be pretty ideal. A rocket stove would be cleaner (complete combustion), faster, and would use much less wood. That project however will have to wait for a permanent outdoor kitchen to be built. When its dry out and high fire season, which is almost half the year, a propane burner from an old smoker substitutes for the fire. The burner is super high output, so you can really crank it up for fast heating. A piece of aluminum flashing is used as a windscreen with the propane burner, which really helps keep the heat under the pot.
I have seen quite a few other pool filters at scrap yards and such since then. Most are pretty small, but some are large enough to be useful as canners. Craigslist has a lot of them, but most of them are not very useful shapes. A lot of them have lids that are as tall as the bottoms, which is fairly useless for canning. Some look as though they are made from other materials, and even the stainless ones are often painted, but persistence in hunting pays off and there must be more similar to mine out there.
I think a better option for a lot of people might be a full sized stainless steel beer keg. The larger size known as a half barrel is 16 x 23 inches, though it has less actual inside working room than that due to the standing rims on the top and bottom. Cut the top off, have some handles welded on, and you’ve got a good sized food grade stainless cooker that you can also use for scalding turkeys and chickens for plucking, and for who knows what else. I would add a heavy stainless or aluminum screen or perforated plate for canning as the jars must always stay off of the bottom of the canner. Stainless drums are fairly common too. They come in sizes from 15 gallons and up, A 30 gallon drum with copper/bronze plumbing for a bottom drain and a lid ought to make a fine large boiler that would fit almost any amount of stuff a body desired to boil at one time. Of course stainless isn't essential if you aren't cooking food or tanbark directly in it, so there must be other items out there of aluminum or steel that could suffice. The bottom drain is also not essential, just convenient... unless you want to put it on a stove top, then it's actually inconvenient.
not every one cans large amounts of jars at once since that requires large amounts of food to be canned, and I only do so a couple times a year. But, if you are into homesteading, or are serious about subsistence activities, you probably will sooner or later. I’ve often had two stove top canning kettles running at one time, and that helps with the time and hassle when processing a lot of jars, but Mega Canner still kicks major butt on that scenario if there are a lot of jars to boil, such as when processing a bumper tomato crop or canning juice. If anyone wants to take my bark boiling mega canner away, they’ll have to pry it from my cold dead fingers. If you do a lot of canning, or plan to in the future, put large metal containers on your radar! That is probably my best canning tip besides don't can stuff you don't eat.
Leak on Leek: Pee is the key to massive alliums
Everyone wants to grow big leeks. I get hits on my blog all the time from people searching the web for how to grow big leeks. Choosing the right variety, appropriate timing, a favorable climate and consistent water all help, but no leek will grow large without fairly heavy fertilizing over a long season. Manures work great, as do many other fertilizing stuffs, but just about the easiest and most effective fertilizer for leeks leaks out of your body every day... that's right, pee. This short post is an excuse to talk about using urine as a fertilizer, while focusing some traffic off the web for the commonly searched topics of growing large leeks and the occasional search for using urine to grow leeks and onions. Much of this has been said already in some form in other posts, but I have a lot of new readers and it never hurts to reiterate things that are awesome. I will be expanding on using urine as a fertilizer soon, with an emphasis on calming fears and busting myths.
There is increasing talk about soil mineral depletion and closing nutrient loops by returning human waste to the land instead of flushing it all away. We are essentially mining our soils of minerals and dumping them into the water, or putting them where they will do little good. Bad Human! You might be surprised to learn that the vast majority of nutrients useful to plants leave your body dissolved in urine. Most people are still hung up on trying to figure out composting toilets, which is a great idea and worth pursuing, but if we just divert our urine in the meantime, most of the problem of cycling the nutrients we consume is easily solved. Not only that, but compared to using human feces as a fertilizer, urine is much, much safer. Most recommendations are to apply it fresh with no treatment. I don't accept that it is 100% safe, but the fact is that I used it for years, and lets just say that I didn’t lose any sleep over the health risks.
The only reason I don't still use urine in my gardens is that I sell some of my produce at markets, and I don't think the bureaucracies that be, nor all customers would be stoked about that, besides which I can't be sure enough of the safety outside my family to expose quantities of other people without their knowledge. I’ll be looking at ways to “launder” urine before the nutrients make it back into the garden, like maybe applying to pasture and composting the resulting growth, or feeding the hay to stock to make manure.
You can do your own research on the subject and decide for yourself how safe it is. Ecosan, a group dedicated to making the shift from a waste paradigm to a resource paradigm regarding the stuff that leaves our bodies, is the best resource I've found out there and has a fair amount literature available. I use it either fresh or stale, it doesn't matter that much as far as the plant is concerned, though it may if you want to be picky about health concerns, but that will have to wait for another post. I don't eat very many leeks during the summer. They are mostly a winter and spring food supply. So, I tend to fertilize infrequently the further into winter we are, and not at all toward spring when the seem to do fine with the stores of nutrients available in the soil. Not that it matters a lot, since I always cook them and only apply fertilizer to the soil surface... not that I wouldn't eat them raw, just sayin'.
Ok, we're totally using the hold-it-out-in-front-of-you-to-make-your-fish-look-bigger trick, but that's still a pretty big damned leek! And the leeks were planted unusually late that season. Tonia, grower of corn, burner of lime and instigator of chickens, has left Turkeysong to pursue her passion for the sensible union of architecture, communities and building. She will be sorely missed. Wish her luck!
All three of the major plant nutrients N (nitrogen) P (phosphorus) and K (potassium) are well represented in urine with the balance leaning toward nitrogen. That's good, because the whole onion family, and especially leeks, are heavy nitrogen feeders. Also represented are an abundance of minerals, and all of it in a soluble form ready for plants to use. Finding out that pee is an awesome fertilizer was like the best gardening discovery ever! Suddenly I was completely free from worrying about scrounging for nitrogen sources, and most other fertilizers.
Since urine is soluble, it is somewhat more transient in the soil than some other more solid fertilizers. It doesn’t just flush right out of the soil though, as you might guess if you were to do some reading on soluble fertilizers. If your soil is alive with a decent organic matter content, all kinds of little guys in the dirt are going to snatch up those resources and start cycling them. If you way over water, it is possible to flush nutrients below the root zone, but it's not likely under most conditions. It still does need to be applied at intervals as the plants grow though. Growing large leeks takes a long season and using a soluble fertilizer is a great way to continue to pump those suckers up even if you’ve already added a bunch of stuff to the soil at the beginning of the season.
I don’t actually mix anything into my soil under normal circumstances. I throw some compost on top after planting as a sort of thin mulch, and also sometimes manure, seaweed and coffee grounds or whatever is around, but normally I rely on urine for most of the feeding ( or I did, now that is replaced by chicken manure tea which I have to say is much less convenient). If you could apply pee very diluted frequently, that would probably be pretty ideal, but I apply it at variable intervals when it’s convenient. Again, in a living soil, those nutrients will be cycled for a while. There is no need to over-think the thing or be on a obsessive schedule.
Leeks and onions can take a lot of nitrogen. I use a dilution that is between one third to one fifth pee, the balance being water, for general garden use. You can gauge by the health and growth of the leeks how much to use. Using urine on leeks is pretty fool proof, but it is a very strong fertilizer, and as such it is of course possible to over apply it. A watering can full of this mix can be put on a bed about 4 x 15 every few weeks, with some longer intervals here and there. You will have to get a feel for it over time. I’m not sure I’ve ever burned an onion or leek plant using too much fertilizer, and rarely see burning in other plants at this dilution, as long as it’s not applied too frequently, or in too great a quantity.
It is good to water in immediately. After all, if it’s not in the root zone, then the plants can’t use it. Apply enough water to flush the nutrients into the soil a distance. I’ll typically water for a while to get the soil wet, apply the fertilizer and then water a little more to flush it down into the soil and dilute it further. Early in the season, I dump it all over the plants, but as they get above about pinkie thickness, I start applying to the soil surface only, in order to prevent getting the stuff in the leaf bases where it’s hard to clean out. It helps a lot to have a well balanced long necked watering can like those made by Haws.
I own three quality galvanized watering cans and this one is overall the best hands down. One of the best investments I ever made. The water flow (high!) to fineness of drops/stream is amazing and it probably won't rust out in my lifetime. This is the largest one and I wouldn't want it any smaller. I use it more than anything for applying liquid manure, compost tea and urine to plants and beds, but they are also great for watering seedlings because the spray is so gentle. Sometime I'll review all of my cans and explain why this one rocks so hard. Expensive, but this is a serious quality gardening tool. Buy here and I'll get a small commission.
Urine, it's seriously the best kept gardening secret ever. Just try it, you'll be amazed at the results! Y Y Y Y Y Y Y
Related posts: How to Grow HUGE ASS LEEKS! and Leeks, Size Does Matter!
Apple Breeding part 2: Doin' it anyway.
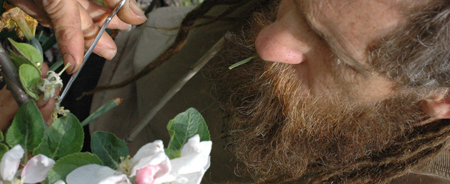 The awesome Photos of pollinating in this post are by tonia Chi
In part one I laid out some ideas and a little history toward the end of convincing you to try breeding new apples. Here I present the nitty gritty of pollinating the flowers and in Part 2 I'll cover growing the seeds out. Neither process is very difficult, nor particularly time consuming. Later on, grafting of the trees and growing them to fruition may require some skills that most people don't have, but those can be learned elsewhere, or may be covered in future posts here, so don't let that stop you.
SELECTING PARENTS: You can of course just plant some apple seeds from any apple you like, but the real fun is in selecting two apples that have something awesome about them and assisting them to procreate. Albert Etter’s success was based on extensive trials using over 500 varieties to find apples with the most promising characteristics to use as parents. In his own words....
"In selecting apples one has a double index to go by: he selects his mother variety and his "mother-apple" to take the seeds from. The immediate success, of my work may be attributed to the foundation I laid, and my ability to select the individual fruits that will develop superior progeny."
“I am sending a collection of some of my new varieties of apples... The whole problem is now as simple as breeding up a herd of good dairy cows when one has a good herd to begin with. “
“Some people wonder where it is possible to make any very decided Improvement over existing varieties of apples now in general cultivation. To my notion we have really only begun to improve the apple systematically. I admit I have opportunity to study first hand that which gives me an insight denied to others who think and work along other lines. Comparison is a wonderful means of discerning faint lines. By this simple mental process what seems as opaque as milk reveals lines of similarity undreamed of before."
Something else that interested Etter was taking chances on more primitive apples like crabs, and the red fleshed Surprise apple, to breed in exciting new characteristics. I would imagine that such a project can take a greater number of generations than working with more refined apples, but in his case it paid off. Fortunately, we can build on Etter's work. Wickson, which is probably destined to be Albert's most famous creation, is a case in point. It is a very small, and incredibly sweet, apple having unique and intense flavor coming from somewhere other than just the standard large varieties. Though newer apples seem to be diversifying, much of what has been done in breeding so far has been to try to improve on what people already considered to be a good, or archetypal, apple. We aren't in great need of any more of those! Apples with intense and diverse flavors, better textures over a greater range of seasons is something we can definitely use. I would say that instead of crossing apples that are just good, or even really good, cross apples that are really interesting. Not only will that give us interesting apples, but it just increases the chances that we will come up with something worth growing. If you come up with the most bubblegum flavoredest apple ever, then we'll all just have to grow it until a better bubblegum flavored apple comes along. If you're trying to grow a better Golden Delicious or Macintosh style apple, you're probably not going to compete with the many already released by all the advanced breeding programs out there.
My efforts select primarily for flavor and internal color, with keeping ability nudging in as an important third priority, though I'm also interested in better early apples. All of my crosses so far have been using Albert Etter’s red fleshed apple varieties as one parent, combined with other apples that I think are awesome.
I would encourage you to work only with apples that really inspire you. If you don't have any, consider collecting some. At the simplest, just take two awesome apples and rub their stuff together. It doesn't have to be that simple though. Some traits are dominant and some recessive. Dominant traits will express in the offspring even if only one parent carries that gene. Recessive traits will only express if both parents carry the gene. It only gets more complicated from there and I've yet to find and assimilate much of that information. The truth is that I'm dragging you with me down the path of apple breeding with very little of that knowledge. The only thing I know at this point is that the red flesh gene is dominant. So, I cross red fleshed apples in both directions. I also read something indicating that a columnar habit of the tree is dominant (columnar trees have few if any side branches, having instead single upright trunks). If anyone out there knows more about dominant and recessive apple traits, post something in the comments, or email me. I've looked for a simple list, or short treatment of dominant and recessive traits, but have yet to find one. For more on plant breeding on an amateur scale, including basic genetics, see Carol Deppe's cool book Breed Your Own Vegetable Varieties. (Carole Deppe is awesome and a huge cut above the average garden writer. Her book The Resilient Gardener is a must read for homesteader types.)
One thing you can pay attention to is who the parents of apples you like are and consider going back to one of those or using other apples which are the offspring of those same parents. If the parents are known, that information is not usually difficult to find. For instance, at least two promising apples here have Northern Spy as a parent. While I'm likely to use the offspring, I also may end up going back to the source.
(I edited out a section of the original post here misinforming people that patent law extends to pollen. I'm not totally clear on this, but I don't think it does in the case of vegetatively propagated plants)
A few apples, known as triploids, have sterile pollen. Although triploids cannot be used as pollen doners, they can be fertilized with pollen from another tree, so look up the apples you want to work with and if one is a sterile triploid, use it as the seed parent and not as the pollen parent. I can't find a full list of triploids anywhere, but if you google the name of the apple with the word triploid, you'll probably find out if it's a triploid easily enough... that's what I do anyway. Triploids are uncommon, but some popular and excellent apples are included in the group, such as: Orleans Reinette, Roxbury Russet, Ashmead’s Kernel, Suntan, Belle de Boskoop, Arkansas Black, Baldwin, Bramley’s Seedling, , Gravenstein, Holstein, Jonagold, Jupiter, Lady, McIntosh, Reinette du Canada, Rhode Island Greening, Ribston Pippin, Spigold, Stayman Winesap, Suntan and King of Tompkin's County. I've had some trouble pollinating triploids and getting their seeds to grow, but will continue trying.
NIGEL DEACON: I first learned how to pollinate apples from Nigel Deacon in the U.K. Who is also attempting to breed red fleshed apples. He cuts off the calyx with a special pair of scissors removing the pollen bearing anthers in one snip. Nigel’s method is very fast, but the apples grown after pollinating are sometimes slightly deformed due to the missing calyx. I prefer to remove the petals and anthers carefully with fingers and scissors. My method is slower, but leaves the apple to grow normally. I’m not sure one way or the other is really better, but I tend to subscribe to the idea that healthy plants make the best seed doners. Genetic coding is one factor in what a plant turns out like, but it is not set in stone and good genes are better expressed in healthy plants from healthy parents, so I err on the side of caution, even though if I had to guess I'd say it's probably not very relevant.
BALLOON STAGE: Apple blossoms are pollinated when they are in what is called the balloon stage. At this stage, the female parts of the flower in the unopened petals are already receptive to pollen, but insects can’t reach them to pollinate. At the same time, the Anthers, or boy parts, on which the pollen is produced, have not made any pollen yet, so the flower cannot have self pollinated either. If you open the virginal flower, you can pollinate it manually and remove all the anthers before they bear pollen, thus assuring that it is your chosen parent which fertilizes the flower. The balloon stage is when the flowers are blown up like a balloon and look like they will open in the next day or so. Look at a few clusters of flowers. If some are open and others are not, the best ones to open and pollinate are the ones with the biggest balloons. You can often pollinate over a couple of weeks, but it is best to pollinate earlier than to wait till later when there are only a few blossoms left.
COLLECTING POLLEN: Pollen must be collected a day or two before pollinating so that the anthers have time to dry and release the pollen. Open some flowers of the variety that you want to collect pollen from by carefully pinching away the petals. The pollen is made by the Anthers, which grow around the edge of the flower on little stalks. The 5 delicate center stalks are the female parts, which you can ignore for now unless you are pollinating the same flower that you gather pollen from. In fact, it is easier to just clip them off with the anthers when you are gathering pollen than it is to try avoiding them. The anthers will not have any pollen on them yet, but they will finish making pollen as they dry. Trim off the anthers into a small container with a sharp pointed pair of small scissors. Nigel Deacon uses a hair comb to comb them off. The anthers produce a small amount of pollen only. You don’t need a lot to do just a few pollinations, but collect anthers from at least 6 to 10 flowers or so. Allow the anthers to dry in a warm room until the pollen powders out. Nigel says the pollen can be stored for up to 3 years if kept very dessicated, but I haven’t tried that yet.
POLLINATING: The best time to pollinate is on a warm sunny day in mid morning to early afternoon, but just do it whenever you can make time. To pollinate a flower, pinch off any in the cluster that are open and any that are small leaving just 2 or 3 large balloon stage buds.
Carefully pinch or trim away the petals of the remaining flower buds.
With sharp pointed scissors, trim away the anthers around the outside edge of the flower, leaving the 5 center female "pistles" untouched. There are 5 five pistles coming out of the center of the flower and each one communicates to what will be one of the five seed cells in the mature apple. If any of these is damaged, use a different flower if you can. You may still get some seeds, but the tree is more likely to reject a partially fertilized apple.
Once all the anthers are removed, apply some pollen to the female parts. Use a piece of grass blade, a fine tiny paint brush, a glass rod, or even the tip of a finger. There is a slightly sticky tip on the pistle called the Stigma. Pollen will stick to the stigma easily.
You can see when the flower is well pollinated, because the stigma will have pollen stuck to it, but your odds will probably increase if you visit the flower again for a second pollinating the next day. I don't usually do so and seem to do Ok, although it is not uncommon to find only a few seeds in an apple. Triploids can be troublesome, so it might be well to visit them again. I've had poor luck with pollinating Suntan, a triploid, and even poorer luck growing out the few seeds I've managed to get from it.
BTW: I have a TERRIBLE time remembering the names of all these flower parts for some reason and am constantly looking them up again. It doesn't really matter though, just remember: girl parts in the middle need pollinating and boy parts on the outside need removing.
BAGGING V.S. NOT BAGGING: To be as sure as possible that the flowers you've chosen to pollinate are not pollinated with undesirable pollen by bees and other insects, you would have to bag the blossoms, or cage the tree. I choose not to. My rationale is that since the petals are removed, there is little to draw insects to the flower. Also, by that time I've already pollinated the blossom and the stigma should be crusted with pollen of my choosing. At worst a few of the seeds in the apple might receive some random pollen, but it seems unlikely, therefore I choose not to bother bagging because it would just increase the effort spent for a small degree of insurance.
LABELING: Always label! tie a marker around the flower cluster so you can identify it later, because all the other apples will look just the same. Only the genetic information in the seeds is different, while the fruit will look the same as the other fruit on the tree. I use neon colored plastic strips so they are easy to find later. Be sure to write what the crosses are on the tag with permanent marker. When the apples get to be about half grown, I actually write on the apple with a permanent marker so that if it is knocked off by birds or wind, I can identify that it is an apple which I pollinated, and which cross it is. The convention for writing crosses is Seed Parent X Pollen Parent.
The next post will be on growing out the seedlings, and someday I'll write about something besides apples again! promise...
Apple Breeding Part 1: Everyone knows you can't do it, right?
"...growers, shippers and retailers, who have been giving us food that looks great but often isn’t for over a century, have their own agendas."
When writing about apples and their propagation in both technical and popular literature, it seems almost compulsory for the author to assure us that if we grow an apple from a seed, that it will not be the same as the apple that we took the seed from. We are usually further assured that the chances of actually growing a toothsome new apple variety bursting with juice and flavor from those little seeds are extremely dismal. One might imagine, and sometimes we are even subject to descriptions of, the small, hard, green, sour, bitter and worm eaten result of such an experiment! In the past, I have been discouraged from making the experiment of growing apples from seed by this common knowledge, especially upon learning that modern apple breeding programs cull thousands of seedlings to find one gem worthy of propagation.
I will concede that under many circumstances growing apples from seed may not be the wisest course of action or the most likely to yield the greatest reward. Who wants to invest in the time and patience required for the growing of an entire tree only to find the secret unlocked from it’s genes by our roll of the dice is some hard green apples for the kids to throw at each other? Not I, not ye, not no one! I only know of one apple that is supposed to grow fairly true to seed and that is the Snow Apple A.K.A. Fameuse. Otherwise the chances are that a seedling will be at least somewhat unlike it’s parents. But then, this genetic variability is what really makes the apple able to give us the great variety that it offers.
The genes of the apple hold many secrets. Combinations and mutations of it’s genes have already yielded a remarkable array of attributes. Resistance can be found to many diseases. Northern Spy is nearly immune to the wooly aphid and breeders used it to bring us resistant rootstocks. Some trees do well in wet soil, some in drier soil. Some require a long chill in winter while others can bask in tropic heat with virtually no chill and not only grow and fruit, but also produce a delicious apple. And we all know that apples come in a great variety of shapes, colors, and sizes. Some will ripen in early summer and others can hang on the tree well into winter and even into the spring. Some must be eaten post haste before they begin to deteriorate while still others have kept in a common cellar for two years. What most do not know however, is the flavor potential locked within the gene pool of the apple.
Apples encompass an amazingly diverse range of flavors which most people never even have a chance to explore. banana, mango, fennel, berry, pineapple, citrus, cherry, rose, vanilla, spices, pear, wine, “apple”, jolly rancher’s candy and more all lurk in those genes. Probably the greatest variety of flavors contained within any fruit. While most post Red Delicious era consumers are obsessed only with the crunch of an apple, it is primarily the world of flavors contained in domestic Apples which drive the obsession of amateur grower/collectors like me and which makes the roll of the dice when growing out apples from seed seem not only worth the risk, but downright compelling!
I am no expert in the matter, but I have come to think that we have a better chance of ending up with something good from that seed than we are often told. Maybe the idea that seedling apples are a one-in-a-gajillion chance is one of those ideas that is repeated by one author after another becoming common knowledge with a life of it’s own... just minus the knowledge part. If the idea interests you, please read on, because previous to the turn of the century the vast majority of apples the world over were grown from random seeds, and we can do better than that.
In the 19th century, Johnny Appleseed (John Chapman) ran around planting apple seeds. Being a folk hero, he gets all the credit, but lots of people planted seedlings and seedling orchards, or collected seeds from fortuitous trees that bore good fruit. As a result, American Apple diversity absolutely exploded over a relatively short period. Most of them, even the named and propagated varieties were just not that great when held up against the best apples out there, old and new, but there is also no doubt that many valuable new varieties came into being from this upswelling of apple culture.
Keep in mind, that Apple breeding is a progressive process in which we build on the foundations laid before, so progress in the field should be continual, and our chances of breeding good apples should increase with each generation. I am all for preserving diversity, but I’m inclined to preserve diversity worth preserving. I’m sure it’s uncool to say this, but I don’t think it is worth our while to catalogue and preserve every single heirloom plant out there, Apple or otherwise. It is at once too daunting and too narrow minded. Gajillions of varieties have already come and gone before us to get us where we are now. we need a certain amount of diversity to work with in breeding up new stuff, but we just don’t need it all, and some varieties are simply not worth the effort. The point is really to move forward in a holistic sort of way.
What I am actually more interested in than mindlessly conserving everything that has gone before is increasing, or at least maintaining diversity. Sadly, the industrial food supply line is antithetical to the idea of diversity. If we leave it up to them, we will lose any apple that is not what apple breeders, growers and marketers think we want and is easiest to get to us. Thus would we lose our lovely russets and our lumpy, bumpy and otherwise unfashionable or uncomely, but delicious, apples. In order to preserve crop diversity in a way that is relevant, we have to live a culture of food in which those plants are important to our lives. Apples can still use improving and diversification, and I think that the layperson and fruit hobbyists can have a place in that process.
Here is an interesting piece of history. At the Geneva agricultural research station in 1898 and 1899 an experiment in the growing of new apples from intentional crosses was made. The experimenters claimed that up until this time, theirs was an altogether novel idea. The selecting of seeds from good apples was commonly practiced, but hand pollinating the flowers to cross two specific apples was, if we are to believe the authors, nearly unheard of. The operators grew what by modern breeding standards was a measly 148 seedlings of intentional cross pollinations using 10 different varieties of apples as the parents. Of those 148 seedlings, 125 survived and at the publication of their report “An Experiment in Apple Breeding” in 1911, just 106 of those seedlings had fruited. After which they proclaimed....
“all will be interested it is certain, in knowing how many of the progeny of these crosses seem to the writers to have sufficient value to name or test further.”
Well yeah! way to work the suspense... drum rollllllllllllllllll- out of the 106 seedlings, 13 varieties were deemed worthy of propagation and naming, those being Clinton, Cortland, Herkimer, Nassau, Onondaga, Otsego, Oswego, Rensselaer, Rockland, Saratoga, Schenectady, Schoharie, Tioga, Westchester, and 14 deemed worthy of further testing, but not worth naming. Wow!, they must have been stoked! At the time apple breeding was in its infancy and few apples had known parents although one parent was often known, claimed or at least suspected. The report, is detailed and I’m sure much was learned from the experiment regarding the breeding of apples... but times have indeed changed.
Most of those first apples selected at Geneva in their probably overly generous enthusiasm are basically unknown today, with cortland having notably stood the test of time. It is encouraging though that the apples they came up with in such a small lot were not just plain bad, but about 1/4 of them considered worth naming or at least considering. From there out, apple breeding became increasingly complex and the goals ever more narrow.
The Geneva station remains a full time apple breeding operation using traditional breeding as well as unnatural marriages of bacteria, insects and fungi with apple genes to create GMO apples. Something I read recently claimed a 1 in 10,000 ratio for seedling selection, meaning that out of 10,000 seedlings only one will be chosen to become a new marketed cultivar. The results of these programs will no doubt be more disease resistant apples that look really “good” on the shelf 6 months after picking. Many of them taste good as well and one can’t really argue with those results. There is a place for these apples (minus the GMO's in my considerable opinion) and these programs, but the selections are skewed by the intentions of the researchers.
Susan Brown, the head of apple breeding at Geneva breeds to make growers money. Like most research anymore, these programs are married to industry. While the products are sometimes great, I don’t see the soul of the apple in these efforts. Some of the most famously flavored apples relished and praised by millions throughout history would never be selected in this paradigm because they don’t look “good” enough or they lack disease resistance. It pains me to think of all the amazingly flavored apples that must be culled from these programs every year because they don’t meet the very long list of criteria that a modern cultivar has to live up to in order to make the grade in a commercial paradigm. There can be no doubt that out of 10,000 seedlings the one that tastes the most amazing and the one that looks the "best" are not going to be the same apple! But growers, shippers and retailers, who have been giving us food that looks great but often isn’t for over a century, have their own agendas. Their criteria are not only flavor, but good looks, storage ability, productivity, and lower labor and chemical inputs. Oh yeah, and Canadians have been laboring away quietly on a genetically engineered apple which doesn’t brown when it’s cut and is on the fast track to store shelves in the U.S. Now that's progress!?
So, my objection to modern apple breeding programs is that, while their results may often be very useful to us, their goals are in line with a culture based around supermarket consumers. What’s wrong with that? All kinds of things. First of all, the supermarket consumer paradigm discourages diversity. Brands are built up as recognizable entities, ideally (but rarely so) with uniform quality. In a way, that has always been the case, but on a local basis. These days shippers and marketers cover large areas, global actually, and global diversity is becoming lower as a result. Another issue is that, cosmetics are a goal that is placed above eating quality. Sure, breeders are making great strides in growing up apples that look good and taste good, but appearance is and always has been more important. Thirdly, another important goal is to make money. Growers have provided us with crappy apples for decades at least, because in the grocery store paradigm they have a dependent and basically captive customer base. I won’t go on, but let’s just say that, in short, the goals of consumers v.s. producers, packers, retailers, and ultimately the breeders that cater to them, are just not the same, and that we can’t predict the many ways in which that might affect us. One way though is that the majority of modern cultivars are bred from one of six cultivars deemed desirable by the industry, leading to a lack of diversity and inbreeding as this article points out.
"The author’s analysis of five hundred commercial varieties developed since 1920, mainly Central European and American types, shows that most are descended from Golden Delicious, Cox's Orange Pippin, Jonathan, McIntosh, Red Delicious or James Grieve. This means they have at least one of these apples in their family tree, as a parent, grandparent or great-grandparent.
Six apples as "ancestors" of the 500 examined varieties In 274 species (55% of those investigated) the six "ancestor varieties" are represented twice or more in the family tree, in 140 varieties (28%) at least three times, in 87 varieties (17%) at least 4 times and in 55 varieties (11%) 5 times or more."
H.-J. Bannier, Pomologen-Verein,
I’d like to expand for a moment on the cosmetic issue, because I think it is key. I love a beautiful apple as much as the next person, but what is a beautiful apple anyway? In the supermarket consumer paradigm our chances for comparison are limited. A couple of the apples I’ve seen that I would call most beautiful would be passed over without a thought in a modern breeding program because they are covered with a map of cracked russet (russeting, for those who don’t know is a sort of rough skin layer that covers more or less of some apples). There is a class of Apples called russets, which are heavily russeted. While many people might consider them to be less than attractive, I think the vast majority of people in America today have never even tasted one, even though they have been prized in the past as a group for containing varieties of exceptional quality of a specific type. We perceive our world with expectations and standards that are built up from many sources, judging, accepting and rejecting based on those ideas. While the uninitiated may view a rough yellow russet apple with suspicion, I think that the russet eating veteran sees these apples very differently indeed. Besides, heavy russeting is thought by some to contribute to the style of flavor this group of apples possesses.
JUST ASK ALBERT! One of my heroes is an apple breeder named Albert Etter. Albert is the source of some of the apples I’m using in my breeding efforts. He grew a lot of seedlings but, like the early geneva experiments, he was very encouraged with the results of intentional crosses. So, without further ado, in the interest of supporting my theory that it is worthwhile for amateurs to try growing a few apples from seeds, here is Albert’s experience as reported in the Pacific Rural Press 101 years ago, roughly contemporary with the Geneva breeding experiments.
”Mr. Etter's Work with Apples. To the Editor: Making good my promise, I am sending you another bunch of my new varieties of apples grown from selected seed. l am not saying much about these varieties yet, because they are too new and untried. Still, it might be as well for those interested to prepare for many new varieties of new and striking characters. I see that the publication of my personal note to you, in your issue of October 7, has aroused an interest in this branch of my plant-breeding work. This work has been under way for many years in a preliminary way, and now all is ready to try out thousands of seedlings. I will not say just how many, because I do not know. But, if facts uncovered as the work progresses justify it, there is ample room and facilities to try out several hundred thousand varieties in the next twenty years. Results obtained so far more than justify my plans for the future, which are to make haste slowly, and sell guaranteed stock under a registered or copyright label."..... “When I had figured out the lines of desirable variation in the dahlia species', as a boy of eighteen, I dreamed of taking up the apple trail. The best horticulturist I knew in that day, an old gray-bearded man, After listening to my dream frankly told me to forget it. The idea of trying to do that which trained men, with all the recorded knowledge of the world on the subject, could not do, or they would have done it long ago! But I could not forget it. As I remember, I kept thinking of it until I reached the conclusion that the apple varieties we have at this late day are a harum-scarum lot, to make the most of it, to represent possibly 4000 years of human endeavor. What Is more and worse, as apple breeders, we are making little progress.” [Mr. Etter's seedlings which we have examined with much interest and have kept on exhibition in our office since their arrival, certainly justify much more than he claims to have attained in his sketch of his preparatory work. They have very striking and novel characters, external and internal. In our judgment he has already attained things which generations of apple-growing have not developed. We are glad to put on record this early record of his work which will some day be looked upon as of great historic interest. — IMs.]
Apple Breeding. —A few seedling apples have already been fruited and there are also 1000 seedling grafts approaching fruiting age on the place and 1000 ungrafted seedlings, which it will take longer to try out. In this connection, Mr. Etter states in a recent letter: "My new apples are looking better every day. One is a Wagener that looks a great deal better than the Wagener and is better flavored, too. The other is a seedling of the Rome Beauty, and is a beauty beside its parent now, and as near as I can judge at this date is going to be considerably better flavored, too. "This apple breeding proposition now looks as though I am on the right idea, and, if such is the case, I will be able to do what I prophesied I was going to do over 20 years ago—produce more and better varieties of apples than the world possesses today. That is a big task, but if I am right, it will be comparatively easy. If I were not right, how could I get seedlings of the Wagener that outclass its parent the first time?" Such success with only a few seedlings indicates that better success will follow work on a more extensive scale, especially as the experience obtained will furnish a guide to future operations. Just here a few words on the origin of apple varieties is not unfitting. Without doubt practically all of our old standard commercial varieties, like the Bellefleur, Spitzenberg and Newtown Pippin, are the result of chance, not design. Seedlings came up by chance, fruited and their merit was recognized. Crossing of varieties for seedlings of merit was hardly done, if at all, and if done was not based on scientific principles. The seedlings of great merit have been carefully preserved and propagated, but the unknown possibilities of new varieties have not been explored. Then also, the joy of discovery of new varieties evidently warped the judgment of many discoverers, and an astounding proportion of the 500 named varieties grown are of as little merit as apples well could be. In fact the average of the seedlings grown purposely on the Ettersburg ranch is fully equal to the average of the 500, and the best of the seedlings is in the class with the best of the 500. In other words, the new apple breeding is being conducted along careful and systematic lines as compared with the raising of seedlings by chance and then finding which of the seedlings were good by chance also. Of the two methods, theory and results, both indicate that the systematic and scientific one is sure to produce in a short time varieties surpassing those obtained in a haphazard way through many generations.”
Note here several things about Etter’s experiments and comments.
One is that he thought most named varieties were not that great. My experiments here in growing out and fruiting many varieties confirm this idea. Apples could stand to be improved.
Secondly, the crossing of apples intentionally using quality parents is much more likely to yield good results. The explosion of variety in American apples was due to the growing and finding of random seedlings, and that worked tolerably well. We have a world population of 7 billion now. If .00001 percent of those grew a dozen apple seeds from selected parents, that would be 840,000 seedlings to pick some great apple varieties from! Exactly what the scientific lines Etter refers to I don't know, but I'm inclined to think that most of his success was due to his strong vision, a willingness to take chances, and taking the effort to collect and compare over 500 varieties before choosing the parents he would work with.
Thirdly, some old learned guy told him not to bother, but he did it anyway!
Albert came up with some excellent apples that are finally attracting the interest of small scale growers and collectors. The Wickson apple in particular is going viral in the last few years, and deservedly so.
Having an interest in apple breeding on a small home scale, I have always marveled at the numbers you hear regarding seedling to cultivar ratio like the 1 in 10,000 mentioned above. I'm undaunted though, because when you read older stuff like the Geneva report and Albert Etter’s reports, it is clear that they were not dealing in the thousands to one ratio to produce a fruit very suitable for eating, and they were not uncommonly an improvement on what was already available. That of course was a different time and goals were different, but those goals were more in line with those of homesteaders and foodies of today than most modern breeding efforts. We already know that increasing commercialization of the industry along with the requisite shift to home economies based on consumerism killed apple diversity which apple-collectors and enthusiasts around the world are now scrambling to save from extinction. In reading research material on apples from the 19th century, the trend toward commercialization to supply a society moving further and further from the farm is very apparent. Discussions among growers increasingly placed productivity, looks and keeping abilities above eating quality. The modern programs can help with that problem and they have by providing apples which will keep well and look good while flavors are steadily improving. However, taken as a whole, from the breeder to the farmer to the table the industrial food system is a fundamentally flawed one which never has, and never will have, the best interest of consumers and communities in the forefront. That's not so bad, if we don't neglect our responsibility to maintain diversity, and one way we can do that is to breed new apples building on the work of modern breeders, as well as by using heirloom varieties with special qualities.
And in the meantime, we would do well not to let our apple diversity pass into oblivion. Stephen Hayes, who is AWESOME, makes the argument that we should not spend our time trying to grow new apples from seed when there are so many heirlooms to be saved from extinction. But I respectfully disagree. I think all homesteader types who grow fruit trees should be growing heirlooms, but there is room for experimentation for the geekier among us, and I think we can have our apples and breed them too! a few apples grown from seed can be grafted onto existing apple trees to bear with very little time investment or, for the more committed, a small growing plot can be kept to grow the new apples out on dwarfing rootstock.
I guess to sum it up, apples could still use improvement, but if we leave apples to the hands of the big outfits with lots of resources they will continue to produce results that cater to the source of those resources. It is up to no one, except everyone, to preserve apple diversity and move the creation of new and exciting apples forward. Small scale breeding efforts such as anyone with a tree or two can do in their back yards, are where that battle can be fought. However, we should not let the apple industry set the standard, because their goals are different. I guess what I'm saying is that if we don't pursue unmarketable lines of apple improvement, apples will only develop along certain restricted lines.
I would encourage you not to think just in terms of your accomplishments, or lack of in a backyard breeding endeavor, but rather view your efforts as a part of a larger effort. Any of us may or may not breed apples that are really amazing and worthy of widespread fame and replication. However, taken together as a whole, we most certainly will!
Two springs ago, I spent maybe two or three hours hand pollinating flowers and produced a couple hundred seeds. Of those, over 100 sprouted in the greenhouse and were grown out in a small nursery bed. Last spring I pollinated a few more, and have further plans this spring. This month, the one year old seedlings were grafted onto dwarfing root stocks and planted in a nursery row. Next year they go into a trial plot planted close together, and in 4 or more years I may have some results to report. The total time devoted to this project has not been very great. In the next installment, I’ll show you how easy it is to pollinate a few apples and grow the seeds out. I have hopes that I can help nudge over the cliff others equally seduced by the chance to taste brand new apples that have never existed before. Pollinating a few flowers is the first step. Yes.... jump.... just do it.
Further reading on Albert Etter and his apples:
Albert Etter's red fleshed apples article by Ram Fishman foremost expert on Etter and his apples.
Informative Greenmantle Nursery page on Albert Etter's apples
Bending Wood: what you need to know
By Steven Edholm Bending wood is a useful, and sometimes necessary skill. In this post I am going to present a few pieces of information which are key to successful wood bending of any kind, paleo or otherwise. The most common need for bending wood in paleotechnology is for straightening wildcrafted shafting such as arrow shafts, hand drills and atlatl darts. There are, however, many other uses for a straight stick. There are also plenty of uses for curved sticks, such as in the making of hoops and basket rims. Wood bending can be dropped neatly into the skill set of anyone who can internalize the following ideas.
*Wet (or green) wood bends more easily than dry wood. Living wood requires a degree of flexibility to adapt to it’s environment, so green or wet wood is naturally flexible. Also, if the wood is heated to assist in bending, the heat will spread more rapidly into moist wood than it will in dry wood. Some items can be bent while green, or after soaking, without any heating.
*Very fresh green wood can be slightly more brittle than barely “wilted” wood. Usually only slightly, but worth keeping in mind. Heating very fresh wood will also effectively “wilt” it.
*Hot wood bends more easily than cold wood. Like way easier, no really.
*Scorched wood is inflexible and liable to crack on bending. Wood is easily scorched during heating over hot coals. Scorching changes the character of the wood making it at once more hard and more brittle. Ideally the wood should not color at all when heated.
*Give the wood time to bend (slower is safer). Taking a gradual approach, will give the wood fibers time to stretch and compress around the new shape. Rapid sudden bending is more likely to result in cracking.
*Wood does not bend evenly around knots or other variations in thickness. Even thickness is crucial to even bends. Some variations in shape and thickness can be worked around with the hands by applying more or less pressure to certain spots, but generally it is difficult and sometimes impossible to force wood to bend where it doesn't want to. Also, wood forced to bend around variations in thickness will often revert over time as the item is exposed to variations in temperature and humidity. Thick areas can often be thinned to allow even bending, but it is best to thin on the inside of the bend so as not to violate the grain on the back where the wood has to stretch.
*Thin wood bends more easily than thick wood.
*Violations of grain are risky. a trunk or stick is made up of concentric rings of growth. Cutting across the rings violates the grain and allows the wood to separate more easily along the growth rings. when using wild wood, it is ideal to leave the back of the bend at one growth ring, even if it means leaving knots intact and raised above the surface. Sometimes you have to cut across the growth rings whether you want to or not, just be aware that the wood is stronger if they are intact.
*Quarter sawn wood is safer to bend than plain or flat sawn wood. Plain sawn wood will show layers of violated grain on the broad face of the lumber. These violations of the wood grain are likely to result in de-lamination of the layers when bent. Quarter sawn wood will show grain lines that are tightly parallel on the broad face and is more likely to hold together under bending stress.
*Thickness of the wood is crucial. Take a 1 x 4 inch board. If it is bent with the broad face out, it will bend some. If it is bent on edge, it will barely bend, if at all. Very thick or deep wood is hard to bend because there is so much wood to compress on the inside of the bend and an equal amount to stretch on the outside of the bend. A 1/2 x 4 inch board will bend more easily and a 1/4 x 4 inch yet easier. But neither of the thinner boards will bend easily in the 4 inch dimension because that 4 inches is still a limiting factor.
*Sharp bends are more likely to crack in bending than gradual bends are.
*Retain the position while drying and/or cooling. Hold the bend until the piece is cooled (if heated dry) or dry (if steamed, soaked or green). Heating and moisture provide plasticity for easy bending, so leave the piece bent until plasticity is gone in order to retain the new shape.
Whelp, that is most of what you need to know to bend wood successfully! We’ve got some cool posts in the chute on stuff like paints, fire and barktanning so stay tuned!
Understanding Forms of Lime
 I've just done this short post on understanding the different types of lime and some of their uses on the Paleotechnics blog. I'm cross posting as I though that it would be of interest to some Turkeysong readers, so hop on over and take a look.
http://paleotechnics.wordpress.com/2013/03/04/understanding-lime-an-introduction-to-forms-of-lime-and-where-they-come-from/

