Trip to Lake County Fire Burned Areas

I recently took a camping trip with a friend to a very large fire burned area of Lake County California. We passed through at least two different fire zones probably burned two or three years apart. The main area was only burned in 2018, so the ecology had only this past summer to show the effects. It was very interesting to look at the response of the plants and strategies for survival. I have two videos from that trip now on YouTube linked here. I also have some pictures, which anyone that follows me on Intstagram has probably already seen.

The main purpose of the trip was to get high enough up into the mountains to find some Incense Cedar for friction fire boards. This is my favorite wood for that purpose. I’ve been meaning to get out there for literally years so that I can make fire kits to sell. I’ve sold these in the past. The idea is to put together known good, tested kits so that anyone practicing hand drill fire making can know that the kit is reliable and that if the fire isn’t happening, it’s a matter of working on technique, not continually trying new kits of unknown quality. On day two, after driving over 25 miles of rough dirt roads we reached about 4500 feet and started seeing new species of trees. It was dusk and I was like, okay, 15 more minutes of driving and it’s time to give up on the mission. 5 minuets later, the first cedar tree was spotted, and in a few minutes found a nice downed trunk, busted out the chainsaw, threw a bunch of rounds in the truck and drove home late into the night. It was also hunting season on public land, so I wasn’t crazy about hanging around there the following morning.

The cedar wood is seasoning and will be minced up with a bandsaw into 1/2 inch boards. I’ve found that a good cedar board will work with almost any good drill, and most cedar boards are better than good. Once I get some boards sawn up, seasoned out and kits tested, I’ll have them available in the store.

I also took 15 minutes to see how much charcoal I could pick up as free biochar. The result was about 2 cubic feet per hour, or 5 hours to amend a 100 square foot bed to 10% charcoal at 12 inches deep. I’m convinced I could at least double that collection rate though, using a rake and not worrying about dirt and leaves and stuff.

This is a terrible out of focus snap shot, but it’s an awesome tree. This is a sugar pine, one of the higher elevation trees. Huge cones with edible nuts.

This is a terrible out of focus snap shot, but it’s an awesome tree. This is a sugar pine, one of the higher elevation trees. Huge cones with edible nuts.

Mile after mile of burned trees. Some areas burned cool enough that most of the thick barked pines survived, but many large areas were left without a live trunk in site. it was eerie.

Mile after mile of burned trees. Some areas burned cool enough that most of the thick barked pines survived, but many large areas were left without a live trunk in site. it was eerie.

There were tons of new seedlings, especially Pine and Manzanita, but many other brushy species as well. Most of the new seedlings are there because there was a fire, not in spite of it. This is the strategy for many brushy species; they sprout like …

There were tons of new seedlings, especially Pine and Manzanita, but many other brushy species as well. Most of the new seedlings are there because there was a fire, not in spite of it. This is the strategy for many brushy species; they sprout like crazy after fires to re-colonize when there are nutrients and low competition. I saw tons of pine seedlings too though that would not have sprouted last winter if it weren’t for the fires.

It’s tempting to see these babies as buddies. While brushy species and tall tree species like this Ceanothus and Pine can interact in mutually beneficial ways, there is also a strong competitive factor. Brushy species often form the first colonies t…

It’s tempting to see these babies as buddies. While brushy species and tall tree species like this Ceanothus and Pine can interact in mutually beneficial ways, there is also a strong competitive factor. Brushy species often form the first colonies that end up nurturing tall tree species in their protective covering. Ceanothus also fixes nitrogen out of the air like a legume, benefiting soil fertility in general. Eventually, the tall trees can out-compete the shrubbery, shade them out, and ultimately cause them to die as the tree based forest gains ground. Competition for water can also be a real issue out here in this dry, stony, hot landscape. This soil is mostly gravel as you can probably see. Still, they look like they are doing pretty good here at the end of the dry season and just one year old.

A native monkey flower near a rushing mountain creek. I think this is Mimulus cardinalis, or probably similar/related.

A native monkey flower near a rushing mountain creek. I think this is Mimulus cardinalis, or probably similar/related.

P1240657.JPG
P1240561.JPG
In a single year, these rose plants grew back from the roots and fruited like crazy. There were tons of them under the pines. This fire was all good news for them. They get a rich nutrient release from the ashes, less competition and more light. The…

In a single year, these rose plants grew back from the roots and fruited like crazy. There were tons of them under the pines. This fire was all good news for them. They get a rich nutrient release from the ashes, less competition and more light. The tree in the back is not dead. The thick bark of Ponderosa Pines protects them in cool burns such as this particular block of trees experienced. About 80% of the Ponderosa Pine lived, which is good, since they don’t sprout back from the roots. Most of the adjacent thinner barked hardwoods like Black Oak and Madrone died back to the roots. But those hardwoods had already grown back 3 to 4 feet and even more. Some of those new shoots will be 8 feet tall with side branches by this time next year, backed by the root system of a full sized tree. Much of this growth is useful. I picked some of this regrowth for basketry, but passed up tons of redbud and Rhus Trilobata (sumac) shoots.

The goods, quartered with a chainsaw and ready for the bandsaw. Libocedrus decurrens Incense Cedar, a tough and very fragrant tree adapted to both dry and wet Pacific coastal mountains.

The goods, quartered with a chainsaw and ready for the bandsaw. Libocedrus decurrens Incense Cedar, a tough and very fragrant tree adapted to both dry and wet Pacific coastal mountains.

About the photographer… Cell-photo by Gretchen Immel. I wish I had more time on that trip to take pictures. I could see doing a photo book oriented around lessons in fire ecology and viewing the fires from a less human perspective than is usual. Yes…

About the photographer… Cell-photo by Gretchen Immel. I wish I had more time on that trip to take pictures. I could see doing a photo book oriented around lessons in fire ecology and viewing the fires from a less human perspective than is usual. Yes, the fires were devastating, but they are not abnormal here, quite the contrary. This is a fire ecology, period. It’s not if it burns, it’s when. We tend to look at the climax forest as good and everything else as secondary or not important at all. But many species and individuals are stoked on these fires. They get nutrients, reduced competition and light. Once the deer come back, the browse for them will be amazing for quite a few years to come. big trees may have died, but baby trees get their chance now without the overcasting shadows thrown by older generations to keep them weak from lack of light. If you look up it looks like a holocaust, but if you look down, the land is bursting with new life. Each player out here has a strategy for this. Thick fire resistant bark on the pines, or if that fails, post fire seed sprouting. The main manzanita that grows out here usually dies when the top is burned, but it sprouts by the thousands for seed banked in the soil in response to the same fire. Many other brushy species sprout from the roots, others from seeds, and some both. The decidous trees and almost all of the non-coniferous species, sprout back from the roots. Oak and madrone shoots grew back 3 to 4 feet and sometimes more in one year. If these species didn’t have strategies for dealing with fires, they simply would not still be part of the ecology.

Posted on October 16, 2019 .

Tasting New Red Fleshed Seedling Apples, From Apple Breeding Trials

I have over 50 seedling apples fruiting this year, most for the first time. The best way for me to do content on tasting these is to do it how I normally do it, which is go out there and taste my way through the rows.

There are some interesting and potentially promising ones and certainly some stuff to use in making a next generation of crosses. I’ve also observed though that I have probably been right all along that there is a group of undesirable traits for a dessert apple, which follow the red fleshed trait around. I am assuming that some of these traits can be teased out and eliminated while retaining a deep red flesh. The classic red fleshed apple is acidic, soft, and low-ish in sugar. I’m pretty sure there is a trend where the redder the flesh, the more those are likely to be present.

The only thing to do is take these new fruits and make second generation crosses. some will be with other red fleshed apples or crosses and some possibly with other dessert apples. I’ll be thinking about which crosses to make once I taste these all and get an idea of what they are like.

As for the average apple in the row, they are generally edible, if not always good. Spitters are uncommon, but there are a few. Many are as good or better than the average apple I have growing here, about 80% of which I will probably end up culling out for low quality. A lot of them have just a hint of pink in the flesh and others have none, even though the great majority have one red fleshed parent. I’m hoping that when crossing apples that both have red flesh, I can increase the percentage of seedlings that show the trait. Many are very sweet, but the more red flesh, the less sweet they tend to be I think.

Scab is very bad on some and common in general, but I have some nice apples that look scab resistant if not practically immune. Even apples with two very scab prone parents can turn out scab free I learned. That is encouraging. I have not made crosses with two scab free parents yet, but I’m suspecting that they won’t always be scab free. But I’ve really been trying to use more scab resistant genes, because it is a problem for me and others, and it must help to add it to the mix more. Also, many red fleshed apples, including I believe all the Albert Etter red fleshed apples I have grown, seem very scab prone on a scale of 1 to 5 I’d a say

Pink Parftait 4 to 5

Rubaiyat 5

Grenadine 3 to 4

I do have some not very scabby or scab immune seedlings that are quite red inside, so I don’t think scab susceptibility travels with the rest of that package of undesirable traits I mentioned earlier. If I’m even right about that trend but I think I probably am.

As the season progresses. I’ve been very busy with winter preparations and homestead life in general. I’ve also had to take some time to do other stuff for money, so that takes time away from making content and working on real stuff that matters.

Lumber Terminology Confusion, In a Living Language, There is No Authority

In this video I address some common terms used in describing lumber and lumber milling. More importantly, some ideas about language regarding it’s misuse and limitations. I’ll talk about grain orientation in this blog post, but the language stuff will mostly have to wait for another post sometime. It’s a pretty big topic to bite into and I’d rather wait until I have the time and mindset to articulate my views as well as possible. This video was totally off the cuff and I was actually on pain meds after my recent appendix surgery, so it could have been better, but it is what it is. I think the language portion of the video is extremely important and the ideas presented are foundational for me in my world view and how I think.


LET’S TALK ABOUT END GRAIN ORIENTATION

You can take a tree that has relatively homogenous properties as a wood, and cut two boards out of it that have very different appearances and properties. The difference has to do with growth ring orientation. We might describe the basic growth ring orientations in lumber as vertical, diagonal and horizontal. and obviously there are a lot of variations between them. See the diagrams below. Vertical grain is considered very desirable in many cases, but diagonal is preferred by some in some cases and even horizontal if a certain grain pattern is desirable. But in terms of stability, wood with about a 45º to 90º orientation is much more stable and less prone to cracking and cupping in seasoning or over time. The closer you get to horizontal, the less stable the lumber typically is.

Showing common end grain orientations and characters. vertical is the most stable orientation, and gives large, long flecks in woods such as Oak and Black Locust, which have prominent medullary rays. Diagonal grain is great and usually quite stable.…

Showing common end grain orientations and characters. vertical is the most stable orientation, and gives large, long flecks in woods such as Oak and Black Locust, which have prominent medullary rays. Diagonal grain is great and usually quite stable. The further diagonal grain gets toward horizontal the less stable and well behaved it is. Unless some specific look is wanted, horizontal grain lumber is not generally preferred, and even less so if it is from a small diameter log and the rings are very curved as on the bottom left. Of course there are many variations between these basic common examples.

Go look at an old wooden board fence. Typically you will see a clear pattern where any boards with horizontal grain are more cracked and more cupped than boards with diagonal or vertical grain. Boards that have diagonal grain but tending toward horizontal will have increasing problems. Boards with horizontal or close to horizontal grain will also have more tendency to not just crack, but to delaminate in layers along the growth rings. A fence is sort of a worst case scenario, because the boards are left exposed to repeated wetting and drying and hot drying sun. The wood shrinks and expands and if a board is going to show it’s hidden stresses and weaknesses, it will do so if nailed to a fence for years. If I were at a lumber yard buying fence boards, I would try to pick as many boards as possible with a grain orientation of vertical to 45º, with no knots or grain irregularities. Assuming the wood is a species suited to fence boards, that fence would last a long time, where my neighbors fence with randomly selected boards ranging from horizontal to vertical would have more cupped and cracked boards over the same span of time.

Grain orientation also affects the look of the wood quite a lot, especially in woods that contain pronounced medullary rays. Medullary rays are corky, dark structures in the wood that radiate out from the center of the tree. They can be very pretty if oriented certain ways in the board.

This triangular billet shows the 3 main grain patterns in Tan Oak by end grain orientation in the board. Note the long flecking of the medullary rays in vertical grain wood. If you look at the end grain of the vertical orientation, you’ll see the da…

This triangular billet shows the 3 main grain patterns in Tan Oak by end grain orientation in the board. Note the long flecking of the medullary rays in vertical grain wood. If you look at the end grain of the vertical orientation, you’ll see the dark medullary rays as lines running horizontally. They run from the center of the tree outward, like spokes and show on the face of diagonal boards as this flecking effect. These get shorter and eventually less interesting the more the grain tends toward diagonal. Vertical grain is also typically the most stable orientation. The only milling method that produces this orientation in 100% boards is what I call Rift sawing.

The diagonal has a nice grain pattern, but not the high level of interest invoked by the flecking in vertically oriented. It does look the same on all sides though and anything from 45º to 90º, and even somewhat less, is usually stable, quality wood.

Look how badly the horizontal face has cracked. There are possibly a few small cracks on the diagonal face and none at all on the vertical face. This illustrates how horizontal milled wood is typically more prone to cracking and also cupping and shrinkage. In many woods, you’ll see the growth rings show as a distinctive and familiar pattern on the face of horizontal grain boards, but tan oak doesn’t really show that pattern when cut this way.

If the tree is cut with perfectly vertical grain, as shown, the flecks of color which are the exposed rays will be of maximum length across the face of the board. On the edge of the board there will be no flecking at all.

Boards with horizontal grain will have no flecking on the face, but flecking will be present on the edges.

Lumber is often described as to the way it was sawn. The sawyers who cut out the boards use methods suited to the species, the mill and blade type, efficiency, log size or qualities and quality of finished lumber. Often the easiest methods don’t yield the most quality lumber, but may be perfectly functional and adequate, such as for rough building material, or the method may be economically efficient regardless of lumber quality. Look through the diagrams and the descriptions below, which describe different methods. Lets look now at common methods and terms for sawing logs into lumber.


SAWING METHODS

There are a lot of different and creative ways that boards are cut out of logs. For instance, although horizontal grain wood is generally more problematic from a practical perspective, there are methods that actually maximize boards with that grain orientation. The below however are some common ones that are relevant to this conversation.

PLAIN SAWING (aka, live, through or flat): It is typically easier for a sawyer to just run the log through a blade over and over with out resetting the log’s position. It is quick and easy. But it produces boards with every kind of grain, from vertical to flat, some very poor, some very good and some in between.

Scan+8.jpg
Quarter sawing.jpeg

QUARTER SAWING: Diagrams available on the net show two common quarter sawing techniques. In both strategies, the log is first quartered, then it is sawn in such a way that it produces just wood with vertical and diagonal grain, around 90º to 45º. Quarter sawing does not make the most wide boards possible, but it creates 100% high quality grain orientation. To do so, it requires much more time and effort, so it is usually reserved for higher quality wood or to create lumber for certain uses or grain appearance.

RIFT SAWING: The method most commonly termed rift sawing is even more hassle. It makes a lot of cuts in a way that makes no sense from the perspective of efficient lumber production, and actually wastes a few boards worth of wood! All in the name of getting as many perfectly 90º grain oriented boards out of the log as possible. But, clearly in some cases people are willing to accept those disadvantages to get all vertical grain or no sane person would do it.

Rift+sawing.jpg

SAWYER V.S. WOODWORKER NOMENCLATURE

The Sawyer has had his way with the log, and we already looked at how grain orientation affects the lumber appearance and stability, now on to language and the consumer. It is common to refer to boards by the supposed method used in sawing them, such as quarter sawn, rift sawn, or plain/flat sawn. In a recent video, I invoked the term rift sawn, and was told by a commenter that I used the term incorrectly, and that rift sawn lumber is actually lumber that has about a 45º degree grain orientation. (that comment thread is in the bottom of this post) The truth is that in lumber and milling terminology, there is no authority, and no consensus. As such, there is no correct or proper term. Here is a Duck Duck Go search that illustrates the diversity and confusion of terms.

duckduckgo.com/?q=rift+sawn&t=ffab&iar=images&iax=images&ia=images&iai=https%3A%2F%2Fcdn.protoolreviews.com%2Fwp-content%2Fuploads%2Fptr%2F3000.gif

There is also a strange divide between sawyers and the the lumber merchants and users which reveals a hard contradiction. If one wanted to do the work, a stint of historical research might yield an evolution of these terms that could create a basis for claiming that certain terms are more justifiably used for certain methods of sawing. To get woodworkers and lumber merchants to start using a “corrected” terminology seems like herding cats. Sure it would be of utility to adopt a common convention and that would avoid much confusion, but between the unlikelihood of effectiveness and the level of effort involved, it doesn’t seem important enough to bother. Regardless, I’ll make my argument for what a less confusing common convention might look like at the end of this article.

A board is what it is and is not the terms we might use to describe it. Even if 100% of people agree that a board is correctly and accurately described by the term quarter sawn, or rift sawn, it is still not either. The object, the board just is what it is. Unequivocal acceptance of terminology implies that there is somehow, somewhere a consensus, or authority, or that there is some absolute grounds for using a given terminology. I do not believe that any of those are true. If anything, I think we are confusing ourselves by referring to lumber by the method of sawing, because it is impossible to know what method the sawyer used in all cases. I often use these sawyer terms myself to describe lumber, but it really doesn’t make sense.

It is my best guess that the lumber terminology that refers to a board as sawn in a certain way, derives from sawyer terminology referring to the strategy used to cut up logs. For instance in quarter sawing, the log must first be quartered in order to pursue that strategy. But there are also two and quite different methods of sawing up those quarters, which are both commonly called quarter sawing, and more variations on one of them.

I think it is likely that the term and method which seems to be most commonly referred to as rift sawing (as a strategy, not as a grain orientation!) derives from riven lumber, which is split from logs rather than sawn. If you split a log into halves, then quarters, then 1/8ths, then 16ths etc, then hew those down into boards with an axe, you get about the same thing you get with what seems to be most commonly referred to as rift sawing; the end result being that all grain will be vertical. Some entomological and historical research might help support or call into doubt that theory, but I can’t be bothered. I just don’t think it matters that much. The only reason I’m talking about it so much is that I think it offers a window into our use of language and our attitude about words and definition, and the validity of convention and authority.

Grain orientation and sawing methods is an interesting study of language, because it involves two main parties, the lumberman and the wood consumer. The lumberman may sell the lumber merchant wood that is literally quarter sawn, which involves first cutting the log into quarters, thus the term. But in selling wood to consumers, all that really matters is the grain orientation, not the sawing method. The truth is you can get 90 degree grain boards out of a single log when sawn by any of the above illustrated three most common methods, and others; it’s just that you will get more or less of it. This creates a perfect storm for confusion. It makes a lot more sense to dispense with sawing terminology on the merchant/consumer end, and use grain orientation to describe lumber. It would make sense to use sawyer terminology if you were buying a whole log, or having a log custom milled, otherwise, it doesn’t matter how the log was sawn, just the end result.

The culture of wood consumers and lumber merchants it seems has somehow come to often use the term rift sawn to indicate lumber with a diagonal grain. But the most common use of the term rift sawing from the sawyers end is a method which produces zero diagonal grain boards! It’s sole purpose is to produce 100% vertical grain boards at any cost.

The term quarter sawn on the other hand commonly seems to indicate vertical grain wood in the lumber world, while the methods most commonly called quartersawn in milling produce both vertical and diagonal grain. So, if the terminology originally derives from sawyers and the mill, it could be argued that the lumber merchants and woodworkers have it sort of backward if anything. But are they wrong?

Language is not just manufactured, it’s a product of living, changing culture. I once read a thread where someone posted a picture of what almost anyone would call a hatchet and some guy said, that is not a hatchet, a hatchet is …. I don’t even remember what he said, some old type of chopping hatchet axe thing that was different. But if you walk up to 100 people on the street and say what is this and hand them a standard short camp hatchet, they are almost all going to call it a hatchet, with maybe a random person calling it a camp axe. So, basically it is now effectively known as a hatchet by majority use. Language is fluid and evolves over time. Which came first, the dictionary or the word? The dictionary attempts to maintain standards and conventions, but it is also there to document and legitimize new and changing language. And regardless of all of that, a board of whatever configuration just is what it is in spite of our monkey chatter.

The nomenclature around lumber and milling is very confused and confusing. Because of the contradictions in milling and lumber terminology, and because ALL of the most common milling methods produce vertical grain lumber and all but one produce diagonal grain, I think the best argument that can be made toward a more sensical standardization of grain orientation terminology, is to leave the sawyers terminology to those milling the wood. If woodworkers and lumber merchants were to stick to grain orientation and work toward a convention around that, much confusion could be avoided. Not only is it not possible to take a vertical or diagonal board and know what method was used to cut it, but it is also completely irrelevant to the user. The obvious exception would be if you are having a log custom milled. But, you’d better make sure that you and the sawyer are on the same page regarding terminology of sawing strategies.

Posted on September 7, 2019 .

Ground Shots Podcast Interview on Bark Tanning With Kelly Moody

I sat down with Kelly Moody and traveling podcaster to discuss bark tanning. Kelly is a tanner herself and we get into specifics about tanning with tannic acid and some related stuff. It was fun and maybe we’ll do the same with some other topics when she comes back through sometime. This was my first podcast guest spot.

https://www.ofsedgeandsalt.com/ground-shots-podcast

Hewing and Seasoning Oak Billets for Later Use

I have a set of videos today on processing the large, raw oak rails that I split out this past spring. I hewed them into smaller, shorter billets and put them away to cure for later use. There are some, important points on how wood shrinks, seasons and cracks in vid one. This information is not just relevant to this project, but is broadly applicable to seasoning wood in general. Part two is hewing and hewing tips

I’ve been putting up some smaller pieces of this tan oak too. Some for specific projects and some just to save some of this beautiful wood before it disappears, possibly forever as our Tan Oak trees are decimated by sudden oak death syndrome.

tan oak still.jpg
blocks of tan oak.jpg
Posted on August 12, 2019 .

Summer 2019 Updates and a New Early Wickson Seedling

A walk around video looking at projects and updates on biochar catch pit, apples ripe now, apple seedlings, grafts, tree training, nectarine growth etc...

I also appear to have a good new early ripening Wickson seedling that I’m just now assessing. That is pretty neat! It has some characteristics of my other Wickson seedling BITE ME! and some of the appearance of a third one from that same batch of seeds. The graft is not labelled, but I’m about 90%+ sure that it is a seedling which was taken off of a tree that was broken by a bear and re-grafted onto this other tree. I will graft it out elsewhere this year for future assessment. It only had a few apples on it this year. I’m going to say that it’s not astronomically good, but that it’s the 2nd or 3rd best ripe now, the other two good ones being William’s Pride and Kerry Pippin. I also didn’t see much scab on it.

I have now fruited and tasted 4 of the 4 original open pollinated Wickson seedlings that launched my apple seedling growing endeavors. The one that I named and have sent out scions for, BITE ME!, was the best eating apple of it’s season last year, another is okay, but just boring, a third was tiny, green and completely bland and this is the 4th. This new summer apple is definitely worth eating, but we’ll see how it shapes up as it matures and with weather variation over the years. All in all, that is pretty encouraging for a bunch of randomly pollinated apple seeds. I sent out hundreds of Wickson seeds last year. I can’t hardly imagine that some very good and interesting apples will not result. This year I will have more Wickson seed available, both open pollinated and pollinated.

Toasting Seeds in a Basket With Hot Coals, Grass seeds & Deadly Fungus

Having an interest in natural living, self reliance, survival etc., I have tried to learn what I can about about how native people around the world lived in the old days; uses of plants, technologies and all of that fascinating stuff. In every part of the world, local residents of traditional land based cultures develop technologies and strategies that stem largely from the environment and what there is to work with there. Growing up In California, I’ve learned as much as possible about how people lived here in particular. In the traditional lifeways, eeds and acorns were abundant and travel to resource sites through the seasons was fairly common. This set of circumstances gave birth to a rich culture of basketry and the heavy use of baskets in daily life. Baskets are light and resilient, while stone or clay pots are not. If you want to see the products of an amazing art form, look up California Indian basketry, an old, and still living tradition.

A shout out to any California Native people reading out there. In the cultural wash of Indian stereotypes your rich and fascinating art and culture don’t get enough play. And in particular to the cultural ambassadors like Julia and Lucy Parker, Corine Pierce, Edward Willie, Sage LaPena and many more past and present who represent and share living California Native culture with the world.

Two fascinating practices from this branch of the human family are cooking in water tight baskets with hot rocks, and toasting food in baskets with hot coals. To the uninitiated, these things might sound impossible, but they work. In this simple video, I talk about collecting some native grass seeds, and avoiding Ergot, a poisonous fungus that infests them. Then I demonstrate that coal toasting in a basket works, even though I really don’t know what I’m doing. I just wanted to show proof of concept and how neat and useful oak bark coals are.

This video is an offshoot of my previous one on oak bark as a unique fuel that makes long lasting coals.

Also, check out this wonderful old movie of traditional acorn processing!

Posted on July 31, 2019 and filed under bushcraft/woodcraft.

The Worst, Common Bark Tanning Mistake

On the road from raw skin to leather, there are many potential mishaps. Skins and plant liquors are potential food for bacteria, yeasts and fungus and growing the wrong ones, or too many, or for too long, can damage or blemish a hide. When dealing with natural materials, we typically have a sizeable degree of variability to contend with. It is very likely that home tanners are dealing with materials and quantities they aren’t familiar with.

One cluster of mistakes that all lead to similar results or scenarios stands out as the worst common error. Put most simply it is, that the hide is left for too long, in solutions that are too weak. This can come about in various ways and have differing effects, but it is super common. In this video, I lay out the typical scenarios and try to offer an approach to prevent them. This is an important video for anyone starting out in bark tanning, because this general area of understanding is so often lacking in the beginning. Nearly everyone seems to make these same mistakes, I know I did, and they need to be headed off intentionally.

Because there are so many variables in natural tanning, it is impossible to accurately quantify all of this. I can’t give out step by step instructions with times and quantities. It just doesn’t work very well that way with all the variables involved, not the least of which is tannin content by species, individual trees and condition of materials. What I can give is a general approach to this problem that will allow you to adapt to new materials and unknowns. That essentially involves observation and understanding the typical way things go as far as the hide tanning rapidly at first, then requiring a high enough level of tannin in the liquor to preserve the skin as it finishes tanning. Also, that some color in the liquor is not necessarily indicative that is has any tanning power left. There is a measuring device called a barkometer, but I don’t own one and find that I can judge when to add tannin by observing the liquor and behavior of the skin. Bullet points are…

*Always look at the liquor, before, after and during, just always; any time you add liquor or check the skin, or have a new batch of liquor. Pick it up in your hand and look at the color and density. All materials are different in color and how much tannin v.s. other coloring matter they contain, so you are making comparisons mostly with fresh, v.s. used and partially used samples of whatever you happen to be working with.

This fresh, strong bark liquor has a bright look and high color density

This fresh, strong bark liquor has a bright look and high color density

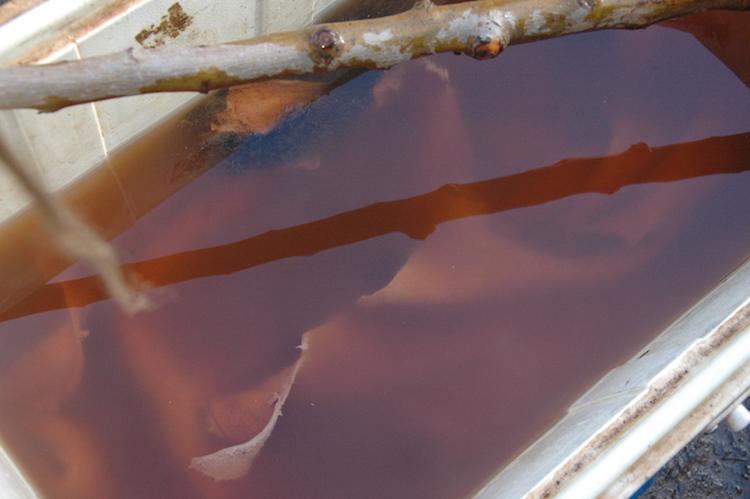
This solution, while retaining some color, has no tanning power left, or not enough to matter.  It will grow bacterial scum on top and the hide will decay slowly, because it is just starting to tan.  All color is not indicative of effective tannin. …

This solution, while retaining some color, has no tanning power left, or not enough to matter. It will grow bacterial scum on top and the hide will decay slowly, because it is just starting to tan. All color is not indicative of effective tannin. With a wll prepared skin in new starter solutions, this phenomenon can happen in one day. Unless you add a lot of tannin quickly, (which is sometimes okay) it will keep happening, but eventually it will slow way down and the solution can be left for long periods of time unattended.

*Understand that in the beginning, hides typically take up tannin very fast.

*If the skin is left for any length of time, the liquor needs to have enough excess tannin to adequately preserve it, and also to insure that tanning continues to progress.

*Be prepared to gather/prepare/add more tanning material as needed. Thoughts such as you used a “lot” or it “should” be enough are not really relevant. It’s either doing the job, or you need more. Sometimes that is a lot if the materials are not very rich in tannin, or it is something that is just hard to gather in enough mass.

*A healthy tan can smell quite strong and in a way unpleasant. I would characterize it as unpleasant, but kind of intriguing and not just flat out disgusting or vile. It is an odd smell that will cling to your skin for a time after touching it. While an element is unpleasant, there should also be a large measure of fermentation to the smell. All of that is normal. It shouldn’t just smell putrid or flat out offensive in the way that rotten food, a dead animal or an outhouse does. Some growth of stuff on the surface can be normal.

*Typically, tanning will progress very rapidly at first, then slow down a lot as the core of the hide slowly tans. Keep the solution rising in strength if anything during this initial phase, then leave it strong enough to maintain a healthy tan as it finishes. Common ways to fail at this objective are: Using low tannin materials, not using enough material, putting the hide in and leaving it without strengthening the tan, Judging by how much it seems like you’ve used instead of by how tanning is progressing (or not), and what the liquor is doing.

*A fairly reliable approach is to cook the material twice. Use the second cook liquor to start the hide, with some water add as necessary to cover the skin well. observe the liquor before putting the hide in. Add the stronger first cook liquor over the several days as you see the liquor depleting and the hide tanning. If you run out and it still seems to be drawing down the liquor, make more. I also talk in the video about dumping some of the liquor to bring the water level down and the tannin level up to get a solution you can leave the skin in. When it is no longer rapidly depleting, you can get the strength up and attend it less frequently. This approach gets most of the tannin out of the material, prevents any possibility of tanning the skin too rapidly in the beginning, is continually adaptable, and encourages familiarity with our materials and their tanning potential.

That is the quicky version, but it should be enough to avoid this worst common problem in bark tanning.

I’ll link two video playlists here. One is a lot of useful general tanning videos and the other is my strops from scratch series, which follows the tanning of a deer skin with oak bark.

Earliest of the Early Summer Apples, 5 Varieties in July

It is the last third of July and I have 5 apple varieties ripe here. Typically early apples are thinly flavored, not overly sweet, decline rapidly once picked and best for cooking. Before grocery stores and regular international shipping, early apples were probably a big deal. By summertime, old apples in storage, if any remain, are pretty sad by comparison. Early summer fruits would mean truly fresh fruit gracing the kitchen again. A couple of these stand out as worth eating out of hand too. Apples will ripen in June in some climates, but not mine. As much as people may think we have a salubrious, warm climate, it cools off at night, which typically stops things from developing as rapidly as they might in uniformly warm summer areas.

July Red: July Red is the first to ripen here, but it also has a very long ripening season, of probably 2 to 3 weeks. The quality has improved as the season progresses. The flavor is very nice. Even in the past few days since shooting the video on tasting these apples, I’ve had some specimens that are the best I’ve tasted, and which I would rate as very good. They have also gotten sweeter. Others are not good at all, so it is highly variable and fragile. The ripeness window is short before it softens and goes off. It is variable in size but ranging to large. The flesh is tender and coarse, without much crunch or crispiness, but in no way offensive. It is pretty juicy too. I suspect the juice would be very good, but the texture would make it hard to squeeze in a press. July Red was developed by a breeding program in New Jersey and released in 1962. It is also in the ancestry of Williams’ Pride, an excellent summer apple. The tree is a tip bearer with some spurs, but should definitely be pruned as a tip bearer.


Early Harvest: Early drop is more like it. This one caught up to July Red and dropped all the fruit at once. It is not flavorful, soft and really just not worth eating out of hand. It is listed commonly as dessert and cooking, but here it is not worth eating. It is always possible that mine is mislabeled, but fruit descriptions and results can sometimes be radically different depending on zone and culture. This is a very scabby apple.

P1220665 2.JPG

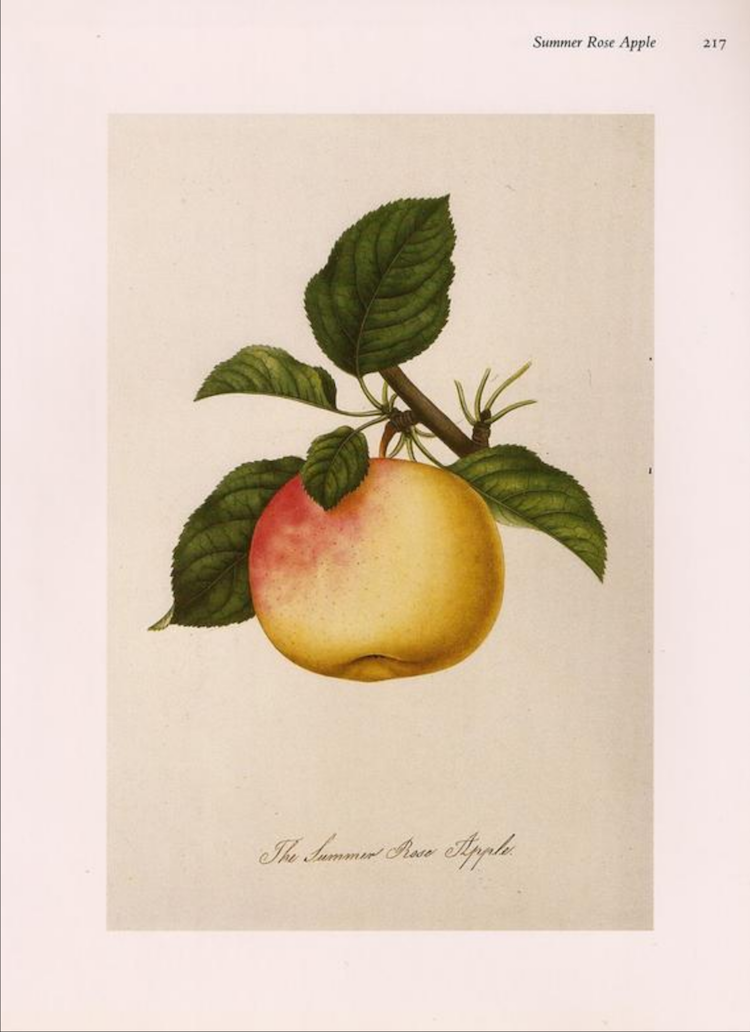
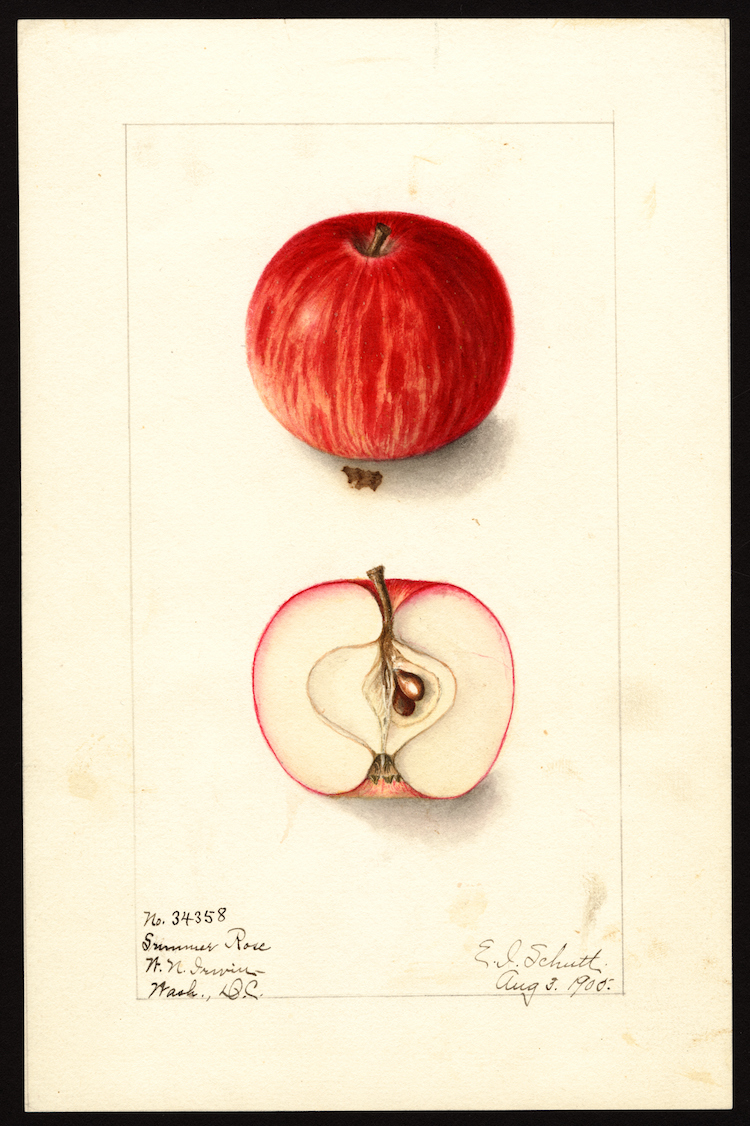
Summer Rose: Very similar in appearance to Early Harvest, to the point that I would suspect they might be related. I found several watercolors, one of which is a dead ringer for my fruits as you can see, and the others are a striped apple that is very different. It seems to ripen a bit later though. Very similar in character to early harvest as well. it also gets scab badly, though maybe not at the very worst level.

This Summer Rose looks remarkably like the one I have.

This Summer Rose looks remarkably like the one I have.

Clearly another apple altogether.

Clearly another apple altogether.

Summer rose. Very scab susceptible.

Summer rose. Very scab susceptible.


Red Astrachan: Does not live up to it’s reputation here and never has in around 10 years of fruiting. It is thinly flavored, soft and unremarkable in every way. Tim Bates of the apple farm says it makes great apple sauce. I made some this week and it’s good for sure, but not the best I’ve had or anything. It is the best thing I’ve found to do with them so far. It is not sweet, so lots of sugar required.

Red Astrachan

Red Astrachan


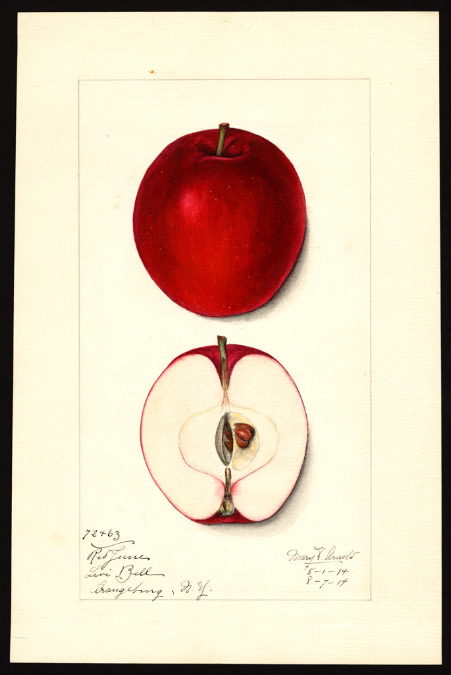
A watercolor painting of this apple from Early August 1914 under the name Red June. It has the same red flesh staining in the same location right around the calyx tube on the bottom end. The shape is very similar to those growing here.

A watercolor painting of this apple from Early August 1914 under the name Red June. It has the same red flesh staining in the same location right around the calyx tube on the bottom end. The shape is very similar to those growing here.

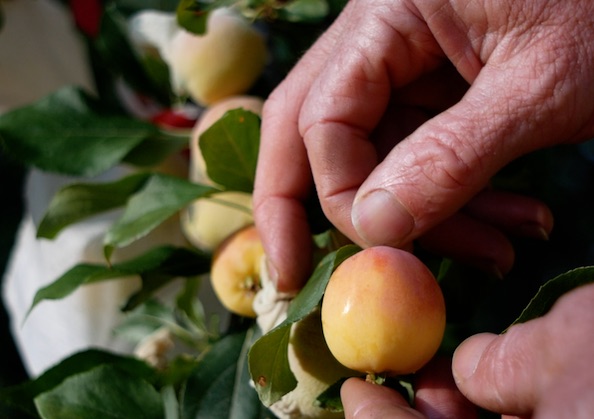
Carolina Red June: An old heirloom from the south alleged to date from before 1800. This apple has some nice flavor going. Again tender fleshed. It is worth eating out of hand and the flavor is pleasant if polite in mine. I’m hoping this year it will improve over the season as it is a gradual ripener with a long season. The apples are quite small and very red. The red pigment extends into the stem and into the flesh a little bit. That could make it a candidate for breeding early red fleshed apples, along with Williams’ Pride. This one is scabby, but not horrible. I don’t have a full sized tree, so it’s hard to tell what it’s nature is, but it seems to tend to bear on the ends of short shoots. It’s like a short tip bearer. Don’t prune off shoots that terminate in fat tips.

Carolina Red June

Carolina Red June

Carolina Red June seems to bear a lot on tips of short twigs, or spur-like structures on the ends of twigs, but also spurs along branches too. Be careful about not pruning off short shoots that terminate in fat tips.

Carolina Red June seems to bear a lot on tips of short twigs, or spur-like structures on the ends of twigs, but also spurs along branches too. Be careful about not pruning off short shoots that terminate in fat tips.


Without cooking all of these apples in various ways to test that aspect, the ones I’m most interested in keeping are July Red and Carolina Red June, because of flavor. I think both perform slightly better in the scab department as well.

The next group of apples to ripen will generally be a significant improvement in richness, flavor and texture. Trailman Crab will probably be next, then Kerry Pippin, Williams’ Pride and Chestnut Crab. Most of these second early summer apples typically ripen in August

Next to ripen will probably be Trailman Crab, which I’ve had in July before, but also in August.

Next to ripen will probably be Trailman Crab, which I’ve had in July before, but also in August.

I should be posting some more photos and historical info about some of these apples to Instagram over the rest of this month.


DIRT ROAD HACKS: Designing for Low Maintenace, Eco Friendly, Cost Effective Graveled Roads

When I moved here, the road was 4 wheel drive only most of the winter. It was an old roadbed that was poorly maintained, rutted, with various slippery and mushy spots. The road was built at some point, maintained a few times, but I would say that it had never been designed.

The previous owner suggested that we look into fish friendly roads; Basically designing roads to reduce sediment load in streams and rivers where it clogs the clean gravel beds that Salmon and Steelhead lay eggs in. If the gravel beds become too sedimented, it smothers the eggs and they die.


Download this book here

Danny Hagans of Pacific Watershed Associates, made a study of this problem and where the sediment was coming from and found that rural ranch and logging roads were a huge contributor. Over time, he put together a philiosophy and a set of design tools and practices to keep the sediment on the road and prevent other related erosion. Well, it just so happens that keeping dirt and gravel from washing off your road surface or out of gullies is pretty much what all of us land owners want too. We have a good example on the property of what happens when poorly designed dirt roads are abandoned. Due to the old road bed, a huge amount of water used to flow down the road to near my garden where it dumped off the side. It carved a huge gully that is probably 15 feet deep and 30 feet wide at the largest point. I don’t think there was even any waterway there before at all! At most, maybe a low spot. This was no doubt prime planting ground and would now be orchard and garden. It also drains ground water out of the adjacent landscape. It’s a huge pain the butt just to get through or around it. That soil never comes back and replacing it is impractical. It’s good to build these things not just for you, but to not fail when you are gone.

The original road was a rough, rutted mess for the most part, 4wd only in the winter with some mushy, slippery areas, like this spring coming up in the road.

The original road was a rough, rutted mess for the most part, 4wd only in the winter with some mushy, slippery areas, like this spring coming up in the road.

For the first couple of years, I learned about roads and made important observations. We went on a tour with Danny Hagans of roads they had re designed and installed, roads in the process of reworking and some examples of poorly designed failing roads. I got the book Handbook for Forest, Ranch and Rural Roads which you can download for free at that link, and read that thoroughly. Another very important thing I did was to observe roads as I drove them and see how they worked and didn’t work. Recognizing clear patterns on other roads and redesigning them in my head gave me a lot of confidence to redesign mine and to contradict what the road builders preferred to do.

Then came clearing preparations, mapping and designing the road. Trees were trimmed and removed, the map was filled in with design features and slopes and the road was flagged at critical design points like pitch changes, profile changes, culverts and rolling dips.

We hired a guy that we knew could build good roads and installed the road in a couple of weeks. It was a bit daunting to stand up to the operators who had their own standard ideas of what to do. They were good builders, but along more traditional lines. I was able to hold my ground though, because I had done so much observation on my road and on other roads. Whereas they would want to put ditches in everywhere, I only put them where I thought they were needed. As a result, I have a wider road with way less ditch to maintain. The problem with ditches is that they collect water. Once water is concentrated, it has the potential to do damage. It also has to be dumped somewhere in quantity. so you usually need a culvert, which is expensive to buy and install. All of that can be avoided where ditches are unnecessary, by sloping the road from one side to the other to drain off one side only. This road profile is called outsloping and it works some places and not others. Where it does work, there are numerous advantages as stated above, including no ditch to clean out. They actually cut a full ditch along a long section and I had them fill it back in. I agonized over that decision, but in the end I knew it was right and time has proven that I was right and I have been very happy with the results.

IMG_2098.jpg

so, eleven winters later I’m super happy with my road. It is in amazing condition except for a few short problem areas. The only serious problems have been caused by work done by the neighbors which messed up what we installed, and a section that was not made how I wanted it due to other reasons. I’m happy with all of my decisions in the context that they were made and I don’t expect to have any maintenance work done on the road for at least another 10 years. If anything gets done, it will be to rework and ditch a section of road that was lightly graded and graveled the first time around because the neighbor didn’t want the road disturbed too much near her house.

Building an armored crossing for a seasonal creek. This solution can be better than a culvert sometimes, and often a lot cheaper.

Building an armored crossing for a seasonal creek. This solution can be better than a culvert sometimes, and often a lot cheaper.

Water can be incredibly destructive if not controlled. This is the spillway for the seasonal creek with an armored crossing after a heavy rainstorm, otherwise a perfect storm for headward erosion. I finished the spillway the night before this was ta…

Water can be incredibly destructive if not controlled. This is the spillway for the seasonal creek with an armored crossing after a heavy rainstorm, otherwise a perfect storm for headward erosion. I finished the spillway the night before this was taken, just in time.

Aside from watching my video, here are some suggestions for those maintaining, driving and designing dirt access roads:

LEARN: about road design and progressive road design principals. Download the book and read it. If you happen to live in NorCal, you might be able to attend a workshop by Pacific Watershed Associates. If they still do them, it’s worthwhile.

OBSERVE: Soil, slope and water behavior. Especially observe the site during and right after heavy rains or snow melt. Equally important is to observe every dirt road you drive on to look at how it fails and how it could be improved to get water off fast while keeping the road surface in place.

MAP: Even if your road is already built, map it out and redesign it. That way if you ever have work done, you can fix problem areas or rework the road to be more stable and lower maintenance. This practice will really get you looking closely at your road and how it works or doesn’t.

Good rock and enough rock are a huge factor, but road design and shape should be priority one.

Good rock and enough rock are a huge factor, but road design and shape should be priority one.

FIND ROCK: Find local rock if you can, so you can use enough to matter. Shape is first priority, rock won’t fix everything, but it sure helps to have enough and the right kind. You can always add more later. A source of 6” & down quarry run rock is especially useful. We were fortunate to get rock from our awesome neighbors, which made a big difference in certain areas.

Rick is a maestro on these machines and knows how to move dirt fast. Some things I saw him do blew my mind.

Rick is a maestro on these machines and knows how to move dirt fast. Some things I saw him do blew my mind.

FIND A GOOD OPERATOR: get a good operator with all the tools they need. They’ll do a better job and do it faster. When machines are costing you over 120.00 an hour to operate (probably a lot more now), you want people that know what they are doing. Selecting someone randomly out of the phone book and cutting them loose on your property to build a road is a worst case scenario. Many guys that will build roads know almost nothing about road design and are just capable of running the machines. I’ve seen terrible installations and “maintenance” that made roads much worse. If possible get personal references and even look at roads they’ve built or worked on. Tell them what you want to do and make sure they are willing to do it the way you want it. Ideally, find someone that understands these modern road building principals. That is not possible most places, but it is in others. Finally, make sure you take advantage of the knowledge and wisdom that your operator does have, especially if cutting an entirely new road. They know things you don’t and they know how to actually move the dirt.

DRIVE BETTER: There are multiple reasons that my road is in great shape, but as important as anything is the way I drive it. I drive the entire road surface to keep it flat. You can maintain your road with your car instead of damaging and deforming it. That is something of a revelation. It helps if the road is wide enough to traverse completely, so your tires can reach all the way to the center of the road. If I didn’t drive my whole road surface, we’d have had a grader in here a while ago and the road would be in much worse shape. Best road hack ever. Get in the habit!

I have notes for a lecture to complement this video and also outlines for a full series that is more planned, complete and concise, but this will have to do for now. It may not be perfect, but it could be very useful to anyone driving, designing or maintaining a dirt road. https://youtu.be/DLG566dod4I

Quite an accomplishment for a couple of new homesteaders, but well worth all the effort, thought, expense and time to have reliable, easy, low maintenance access. Still going strong 11 years on with no foreseeable problems.

Quite an accomplishment for a couple of new homesteaders, but well worth all the effort, thought, expense and time to have reliable, easy, low maintenance access. Still going strong 11 years on with no foreseeable problems.

Apples, the Second Thinning and Orchard Notes

I’ve already done a video (embedded below), and a long blog post on thinning apples. This is just a quick video with the head cam doing the second thinning to catch missed clusters and removing damaged fruit. It’s that time of year, so I hope these notes are helpful, especially for new growers. It’s can be hard to remove enough fruit, and it’s still hard for me sometimes. Thinning in two or more passes allows the amount of fruit left on the tree to become more obvious as they become larger.

And below is my first video on thinning apples.

Late Spring Fruit Tree Training and Project Progress Reports.

I’m almost done with the first pass of apple thinning and I can see the light at the end of the tunnel for major spring activities. I did a walk around video with the idea of watching the progress of various projects that we looked at in a previous walk around video. I kind of like the idea of following some of these things through the year every month or two, so that might happen. In this video, I checked in on the pear tree that was started in an early spring/late winter video on fruit tree training with notching and disbudding. I ended up working on the tree and talking about it enough that I cut that segment out and made it a stand alone video.

The short story is that now that the shoots are grown out a bit, I trained the branch angles open as needed to avoid very narrow crotch angles. I also checked that the shoots I already chose as the tree’s main scaffold branches are not being dominated by any of the other shoots. Only one of them was as short as the shoots around it, none were shorter and 3 out of 4 were significantly longer than surrounding shoots. That is due to notching above the buds. Between removing buds that I didn’t want, and notching those I wanted to grow as the main scaffold branches, I am getting essentially exactly what I wanted and everything is going according to plan.

I’m pretty excited about the potential for applying these training techniques broadly. Reports from others so far indicate success with various species and the only major complaint has been that it isn’t working on sweet cherry, which is exactly what I found. It is worth nothing that no tree really wants to grow this way, so there is not such thing as 100% reliability. Here too is the original video in which this pear tree’s was training was started.


In this one I look at the status of the “dying mulch” tree understory system in late May. I talk about and demonstrate some apple thinning technique and also attitude, things you need to cope with getting extensive fruit thinning done. I think I get a little faster at thinning every year and much of that has been attitude adjustment. I check in on the apple frankentree grafted at the beginning of may. 18 to 20 days after grafting, it looks like all but 3 grafts took, and two of those scions that didn’t take were actually stored in the fridge for over a year, so no wonder. I also check in on the columnar trees and talk about ideas for breeding for that trait. I don’t remember what else I talked about, but here is the project report video from before this one. which I reference a few times and the video of grafting this new frankentree.

Posted on May 28, 2019 .

🍎 From 1 Apple Variety to 21 🍏 Grafting Demonstration, Frameworking v.s. Topworking, More Variety, Earlier Fruiting and Healthier

I now have a video action cam that produces decent video, so expect more run and gun content to fill in spaces between more involved productions. This one is on reworking a small apple tree to 21 new varieties. Of the various missions I’m on, promoting multigrafted trees is one of my oldest and dearest. I hear back from people all the time now who are grafting frankentrees and trading scions. This tiny tree easily took these 21 varieties placed as well spaced laterals, each with plenty of room to grow. And that is with one branch basically missiong which would have added another 4 or so. As the tree grows out it will create opportunity for more additions and 25 to 30 will fit very comfortably.

I hope someday people think of multigrafted trees as normal and accessible. They are so much fun and offer so much opportunity for customization. A chicken in every yard and a frankentree next to every garage.

Homestead Walkaround Video, 50+ Apple Seedlings Blooming!, Project Updates, Bulb Understories for Fruit Trees

Pretty much all of my productive time is taken up right now by grafting, weeds and other spring stuff. However, I do have a much better action cam now, with clear picture, amazing stabilization and acceptable sound. That device will allow me to do more run and gun, spur of the moment, off the cuff videos. In this one, I just hit some projects and talking points around the property, mostly projects in process.

For one thing, there are over 50 apple seedlings blooming this year! That is a huge jump from probably under 25 that have ever fruited previously. There are also a number of combinations that have not ever bloomed yet, like king david, maypole, cherry cox and sweet 16 all crossed to rubaiyat and some crosses made using the red fleshed columnar Maypole. I’m very much looking forward to what the season brings us in that department and hoping that bears don’t get in the garden again, which could be an epic disaster in those seedling trial rows. I about peed myself when I saw there are 4 Rubaiyat x Cherry Cox blooming.

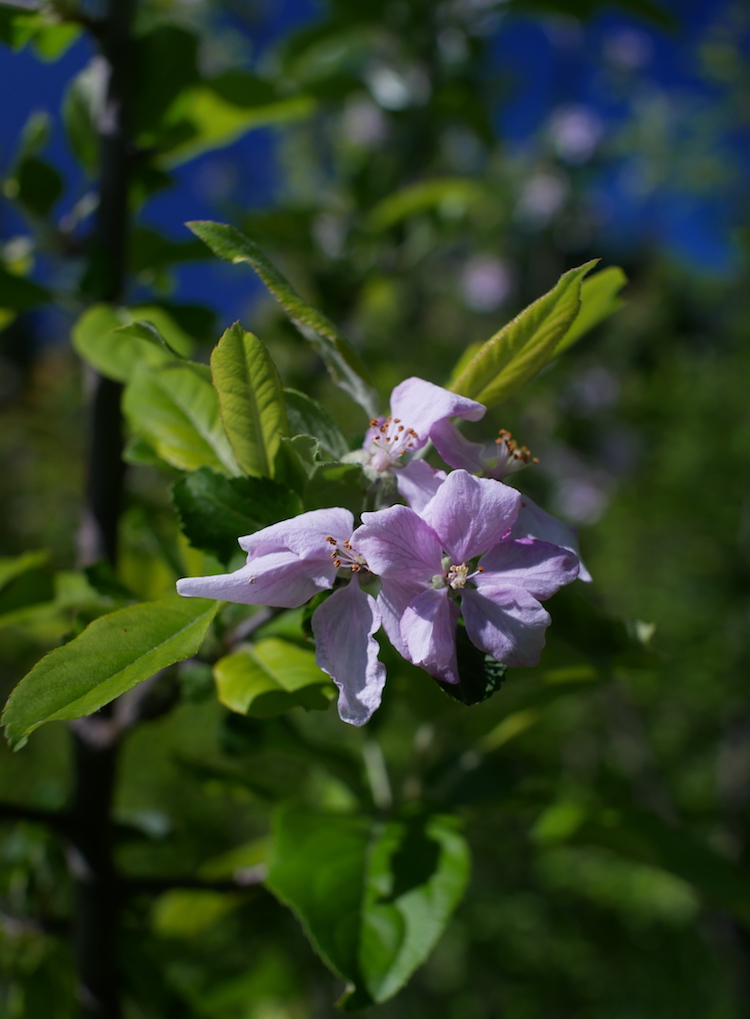
Pinker than average blossoms on a Rubaiyat x Cherry Cox seedling seems like a good omen. Cherry flavored apple, meet fruit punch flavored apple. May your offspring be blood red to the core and delicious.

Pinker than average blossoms on a Rubaiyat x Cherry Cox seedling seems like a good omen. Cherry flavored apple, meet fruit punch flavored apple. May your offspring be blood red to the core and delicious.

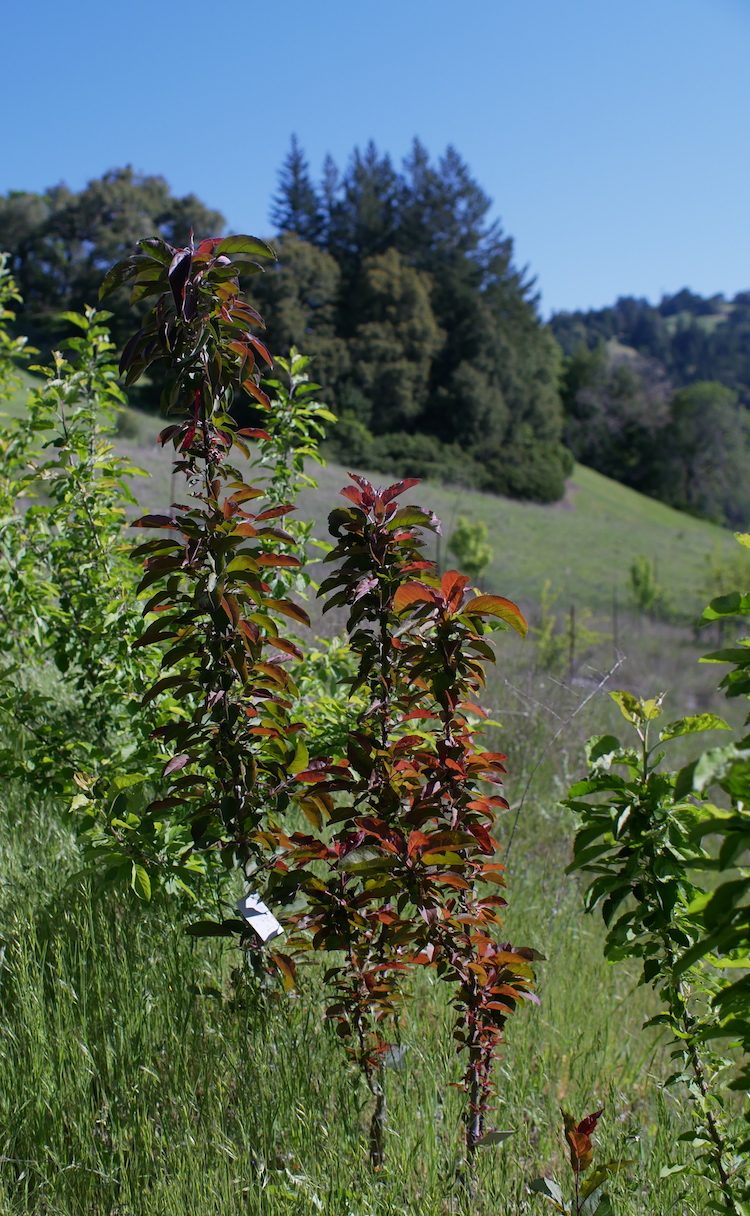
Many of my Maypole crosses are showing this columnar trait. They will produce short, compact trees that grow upward with few side branches and fruits clustered along the stems. The buds are spaced very close together. This can be a valuable trait fo…

Many of my Maypole crosses are showing this columnar trait. They will produce short, compact trees that grow upward with few side branches and fruits clustered along the stems. The buds are spaced very close together. This can be a valuable trait for restricted spaces. Given how many seedlings are expressing this habit with only a single columnar parent, it should be easy to breed for. Three of these seedlings are blooming this year, and they are the only trees blooming in this youngest block of seedlings, so apparently they are precocious as well, which is nice in a plant that usually takes so long to come into bearing. Oh, AND they take up less space than the other seedlings, so could potentially be planted even closer in trial rows, both in row spacing and between row spacing. I have one other columnar-ish tree, but it’s more like a dwarf. But there are others out there and I think there is a lot of potential here for both backyard and cider production with these compact, pretty, easy to maintain trees. I would not be surprised to get a decent cider apple out of this first generation of Maypole crosses using Wickson and Chestnut Crab pollen.

This Grenadine x GoldRush seedling showed some promise last year, but only produced one apple. This year there are hundreds of fruitlets, and it will require heavy thinning. It wasn’t really that good last year, but often trees will have to become e…

This Grenadine x GoldRush seedling showed some promise last year, but only produced one apple. This year there are hundreds of fruitlets, and it will require heavy thinning. It wasn’t really that good last year, but often trees will have to become established before producing exemplary fruit, so I’m keeping an eye on it.

I don’t think I’ve ever talked about my flower bulb understory for fruit trees experiment as much as I do in this video. Introducing that project is one of those videos that has been on the back burner, but never seems to get done. I started it a long while back with a couple of blog posts. This system shows promise, but long term comparative trials are critical to an assessment of it’s actual field worthiness and real world performance. Proof of concept is established and the project is ready for phase two. I may be able to set up those trials in the next couple of years using a block of trees that could be used for at least a whopping FIVE different trials at once: trialing seedlings, tree paint, tree training, interstem suckering prevention and bulb understories! Now that is some stacking! Hey, why not add some biochar trials to that! Maybe it really is finally time to look for some help. Those trials could yield a great amount of useful information.

One of my early bulb understory experiments now well established and pretty much out competing all weeds. It is already dying back and will be pretty flat and not really using any water by mid May. It will also leave a nice mat of dying mulch on the…

One of my early bulb understory experiments now well established and pretty much out competing all weeds. It is already dying back and will be pretty flat and not really using any water by mid May. It will also leave a nice mat of dying mulch on the ground for the rest of the dry season. I would guess that there are enough bulbs in here now to plant at least 8 more of these, and the project is ready for phase two, long term trials. There are probably also other plants out there which could serve this purpose, but very few and they may be hard to suss out.

My tree collard, Peasant King, is sill performing admirably. It is bigger, purpler, fatter stalked, and straighter than all others in that seed grown population. Not only that, but out of all the first batch of seedlings, it is one of only two which have never flowered, the other being a sad looking runt of a thing. Infrequent flowering is one of my selection criteria for this plant. My last batch of cuttings did very poorly, but I have a new batch rooting (I hope) and more cuttings growing. I may try air layering them this year. That means wrapping some rooting medium and plastic around the stem while the cutting is still on the plant, then cutting it off after roots have formed. Ideally, I would propagate many cuttings and sell them in the coming years. If not, I hope to at least get them to people who will.

Peasant King Leaves.

Peasant King Leaves.

I gave what remained of my original Montenegran tree collard seeds acquired from Sophia Bates to Chris Homanics, plant collector, enthusiast, breeder, hunter, preserver and cataloger. He will grow them out and use them in his tree kale breeding project, which you may be able to be part of by growing out seeds: https://www.experimentalfarmnetwork.org/project/14

Or: https://mariannasheirloomseeds.com/seed-catalog/special-crosses/chris-homanics-seeds/homesteaders-perennial-kaleidoscopic-kale-grex-new-2016-detail.html

And here is a Podcast interview with Chris on his work: https://www.cultivariable.com/podcast-8-chris-homanics/

And Website for Chris’ apple farm, Queener Farms, in the Willamette Valley Oregon: https://www.queenerfarm.com/

And now I’m off to graft the many very interesting apple varieties that Chris Homanics brought me this winter. Now that I’m ready to cull out many of the varieties I’ve collected that have failed to perform adequately, I may do one more collecting push this coming winter and re-graft many of those losers over to trial a last batch of promising apples.

Posted on May 1, 2019 .

Apple Pollen Available, Plus New Apple Pollen Medleys and Hurray for Genetic Chaos!

P1210325.jpg

I now have this years apple pollen available in the web store. I was going to wait and sell it in the winter for next year, but I know there must be some of you who can still make the pollination window this spring. Here only one variety isn’t blooming yet and most blossoms are now on the other side of fresh. I’m just making my last pollinations in the next couple of days except for and pineapple flavored Court Pendu Plat.

There is more on the product page, and some instructions and stuff on storage will be sent out with orders, but a few points here and a shortened discussion on the upside of apple diversity and genetic chaos.

This year I have new black paper packets and black cotton swabs for application. This is a much better system and I’m finding that the pollen dries at a nice even, slow rate in the paper, so I can actually ship it before the anthers have even dried and dropped the pollen. It is MUCH easier to see the yellow pollen on these black surfaces.

P1210331.jpg

I have a lot more variety this year. I’ve processed a lot of blossoms of a lot of varieties and have much of the stuff I didn’t have enough of last year. I’m also excited to offer blends this year, which I’m referring to as Medleys. One medley is apples that I have used for breeding, or think are promising. there must be over 20 types in this blend, including a few red fleshed types. The other is a red fleshed medley, which lots of the Etter reds Pink Parfait, Rubaiyat, Grenadine and Christmas Pink, plus a few other odds and ends in small quantities. At first I thought maybe blends don’t offer enough control, but I’m super into the idea now. I think the gambling aspect is a little bit compelling. I also like the idea of wildcard crosses that we might not think of making normally. I tend to think of some apples as not particularly compatible as far as the offspring they might produce. But who really knows? A cross between Golden Russet and Sweet 16 might sound weird, but maybe it could be amazing. The medleys allow people to get just one packet, but still get a lot of diversity. Not only that, but each blossom pollinated will have more than one pollen parent, because there are lots of girl parts in one flower to pollinate. So, it is a given that any blossom pollinated with these blends will produce seeds with many different fathers. I think it’s the best idea since sliced apples. A little chaotic, but I’m kind of in favor of that.

There was an explosion of North American apple diversity which occurred over 200 years or so and resulted in thousands of varieties. If I recall right, some estimates may have been something like 15,000 named varieties. Whatever it was, it was a LOT! Some of those were imported, grafted types from Europe of course, but many were not. My theory is that a large part of this diversity, perhaps the majority, came from planting seeds for root stock. Cloned root stocks, which are genetically identical duplicates of the same plants are a relatively new phenomenon, at least on a broad scale. Previously, random seedlings were generally used. Sometimes crab apples, but often seeds from any apple. Such an orchard might have hundreds or more trees with root stocks growing under them that were genetically unique. if the top broke off, or the tree was neglected or damaged and suckers emerged from the base. These could fruit in a few years, and be propagated and named if it were any good. Between that, growing seedlings just to see if they would be any good, and hedgerow seedlings dropped by birds and people all over the place, many, many new varieties were discovered. I would more or less like to see a return to that frenzy of apple seedling production.

Since we don’t have seedling root stocks anymore and we have been assured by misguided authors and large breeding outfits that it is a fools errand to plant apple seeds hoping for a good fruit, that explosion not only ground to a halt, but we’ve lost most of those thousands of varieties. And to make it much worse, industry began to favor only a very few types, so that limited the diversity of the seedlings that do manage to find a place to root and come to fruition. Even further, the same fruits have been used over and over in breeding, also narrowing the gene pool.

But many of those apples that were found and named were not actually awesome. To an apple connoisseur especially, they could fall pretty flat. Albert Etter said something to the effect that the average of the 500 apples he grew in trials to find both breeding stock and just suitable varieties to grow in his orchards for market fruit, were rather disappointing. I always recommend that that people plant at the very least a seed from a good apple, but if possible, consider controlling both parents. The idea of apple pollen medleys is awesome, because it throws a large gene pool out into the world and creates numerous new genetic lines from any one apple pollination. In the future, I hope to wax further on the potential awesomeness of this genetic upheaval in the new fruit renaissance, but that is the gist of it there.

I envision the potential for more focused pollen medleys, such as blood apples, cider apples, extra flavorful or novel flavored apples, early apples, cooking apples and late hanging apples. Imagine the diversity you would get by for instance applying an early apple pollen blend to an early tree such as Gravenstein or Trailman crab..

Link to web store.

Happy pollinating!

P.s. Ive also made a seriously huge number of intentional cross pollinations of apples this year. I actually got around to making most of the ones I wanted to, so look forward to a large and diverse offering of apple seeds in the fall, including some made with pollen from a couple of my seedlings.

Posted on April 24, 2019 .

Splitting Axe Handle Blanks From a Windfall Tan Oak Log

Recently I was driving out my road and had to stop in the rain and shovel ditches out. I got so wet that I went back home to change my clothes, but within the hour or less I was out, a large Tan Oak fell down in the road.

tree+in+road.jpg

I had been eyeing this group of trees already as potential wood working fodder, but this one just succumbed to heart rot and fell over. While cutting it up, I spotted one straight section and saved it aside to split up later. In this video I’m splitting it into 12 parts to stash away for woodworking projects.

tan oak group before.jpg

You really don’t need much to split a log. A maul and disposable wedges can be made almost anywhere, usually from the trunk and limbs of the same tree. There are a couple of pointers here about making wedges, the use of boys axes as a one handed hatchet and methods to keep your splits going with the grain. Also basic wood splitting theory regarding run out, which is perhaps the most relevant problem in splitting rails like this.

making wedge.jpg
wedging whole copy.jpg
active split copy.jpg

I have begun slowly processing these rough split staves down into billets one or two at a time, by removing the rotten heart and the bark. I’m also chopping off about 3/4” or more of sapwood, which is more brittle, weak and rot prone than the pinker heartwood. I’ll be washing the outsides of each billet with a borax solution to prevent insect attacks by powder post beetles, which are populous here, especially with the abundant food available to them with the big Tan Oak die off that is occurring now. They are very destructive to certain woods, Bay and Tan Oak being among the most affected. I’ll also dip the ends into paint, or seal them with fat or pine pitch to prevent the ends from cracking due to rapid drying. After that I’ll just try to dry them at a reasonably slow rate to minimize warpage and cracking.

staves and quarter copy.jpg
staves .jpg

While watching this video footage, It occurred to me that I could have made a really neat drum out of that log, or two or three actually! Also that I should try making a barrel out of tan oak. I may save some of the short ends from this log and others this year to have a stash of well seasoned wood for a possible small keg project. Maybe a Calvados keg, hmmm….

Lessons from Established Fruit and Nut Trees, Training Mistakes and Remedies

This video is a walk around to look at the lessons that can be learned from some of my fruit and nut trees that have been growing for a while. Between careful and not so careful training, lack of training, regular maintenance or neglect, we can see how things go right or wrong and how important early shaping and training are to avoid future problems. I also taste some Lady Williams Apples off the tree, still good in March! These apples, while especially late this year, demonstrate I think that it will be possible to eventually have apple varieties that routinely hang on through winter and ripen in spring. Two new terms I’ve coined are Winter Hanging Apples and now Spring Hanging Apples, because these are classifications we need, beyond winter apples or storage apples. Next steps in that direction are finding more winter hangers and spring hangers if possible and making intentional crosses between them for new seedlings. Another step is simply promoting the idea and phenomenon in general, which will be easier as more of them are discovered or created. Also important is to test more of these apples in various climates to see how cold they can go, or how other climate factors affect them.

The long reach pruner I’m using in this video is a pretty neat tool. It is not cheap, but it can nearly obviate a ladder if trees are pruned yearly and are under 15 feet tall. That is pretty a major boon, especially if trees are spread out like they are here on myu homestead. I rarely use a ladder to prune anymore. They are also still cheaper than a good orchard ladder, even an 8 foot one. They can cut green wood up to about 3/4 inch if cut at an angle. For older people (or those that will be older soon lol) it could save a lot of clumsy ladder moving and setting up and ultimately could prevent a fall and the complications that often come with broken bones past 70. We got my mom one and I’m going to try to convince my 82 year old friend to get one. He is still climbing rickety old step ladders in the backyard. There is a short review on my amazon store page and full video review coming soon.

Training a Pear Tree to Modified Central Leader with Notching and Dis-Budding, Watch Before You Chop Off Your New Fruit Tree

I have two more videos on training fruit trees before I move on to other things. I’d like to do a couple more, but at this point, I have to give up on geeky independent research type of content because it doesn’t get enough views to get by on. More below on that. But this year I wanted to take advantage of this nice long pear whip to demonstrate notching and disbudding again, as it is ideally carried out, because I think it is important that if we are to move toward better trained trees by modified central and delayed open center, that we have tools to get there that actually work.

The crux of the problem is that, while the strong and sensical modified central leader and delayed open center tree forms have become more and more commonly recommended, they are rarely achieved, because the methods used to train fruit trees are best for the open center vase form and not much else. In the 1920’s a long study was done that first asked orchardists what tree forms they thought were best, and then looked at what caused premature death of trees. They aimed to determine how failures and successes were caused by early tree training. Those failures and successes were both in the success at attaining the desired form and tree lifespan, short or long. In this preliminary work they discovered some interesting things. One discovery was that most orchardists expressed a preference for central leader trees, but often ended up with open or vase forms instead, because they were heading back the tree to a short single stem on planting. What is perhaps most interesting is that while the training methods were clearly failing to achieve stated goals, they continued to be recommended and used almost universally. This bit tells us something important about human nature and conservatism in these sorts of things. They also were able to associate the failure of older trees by the mechanisms of rot and branch breakage, to early training mistakes. Next they organized and carried out fairly large scale experiments on a few varieties of apple trees to come up with a new training system. It is a brilliant, pragmatic and contextual study, but as far as I can tell, it did little good. In their review of existing literature going far into the past, they found that the same recommendations to head back leaders and scaffolds at planting had existed for a very long time, and it continues to be the main practice today. The fruit of the entire study was to recommend against that practice and offer more effective alternatives.

I favor the modified central leader and delayed open center for good reasons. Most trees can be trained to them successfully, though some may require more maintenance to keep them there than others. But regardless of the form you’re after, notching and disbudding are powerful tools to shape trees and should be in much wider use. I just heard from the brilliant experimental orchardist Eliza Greenman, that she has become a convert to disbudding, and is planning to write about it on her blog soon. We are going to chat about it and see what we come up with for potentially moving these ideas forward. I hope to influence other people to start trying this stuff as either a full on system of steps to achieve specific forms, or applied randomly as needed. Ultimately my goal is full reform of fruit tree training for homescale growers and reform to industry where it is applicable, though exactly what those methods and implementation look like is not at all clear at this point. I would like to do a full on lecture and articles outlining where I think we are at with fruit tree training and what needs to be done to move forward with updating the stone age methods currently favored. This would involve a lot of writing, some research and communication and one or two lecture videos. I would do that this month if possible because I’m fired up about it, but it is a week, if not weeks, of focused effort. The next logical step after that is a large plot of different species and varieties of fruit trees grown just to test out methods and systems to determine success rates. Such a preliminary experiment would probably cover 1/4 to a full acre over 5 to 10 years, and would no doubt illuminate follow up studies related at least to how nurseries and growers, either individually, or combined, could actually implement progressive methods. If I can’t ever do that myself, I would like to outline what experiments and research I feel need to be done so that someone else might pick it up and do it, either a private individual or an organization with adequate funding, such as a university. The other possibility is to lead a dispersed, semi-organized, private citizen research project where amateur breeders, amateur orchardists and small scale commercial orchardists who are puttiong in new plots, test some of these ideas out and report back to a central hub.

Unfortunately, since starting this blog and my youtube channel I’ve ended up in debt to friends and family and have to rethink my approach and content to favor income over edification. I’m not getting nearly enough views to put a sizeable dent in just basic monthly needs, let alone extra for any larger projects requiring time, labor and materials. Use of my amazon links is down (you can always find them here! :) , and patreon income is about half of what it once was, largely due to an exodus of users over a recent political controversy. Youtube views are up as well as subs, but not enough to amount to much. As much as I’d like to do what I do best as an independent privately funded researcher, it just isn’t working out. My plan for now is to prioritize more mass consumable videos (not bad, just not as geeky ha ha) and work on marketing for as long as it takes to get back in the green and actually generate enough of a surplus to be able to afford to work on influencer and thought leader projects that may generate a lot of social change by influencing some of the right people, but will probably never get enough public attention to generate much income. I can see my influence on some subclutures already, which is the prime directive, but not enough is coming back to make financially viable the kind of content that I think is most important, or will ultimately have the largest ripple effect. In the meantime, I've been selling stuff off on ebay to deal with the most urgent debts and to get by until the strategies I hope to implement start bringing in more income. The good news is my energy budget has increased a little bit lately and I’m hopeful that trend with continue. I’ve proably said that 100 times in the last 20 years, but I still hope it’s true this time.

The next video will be a tour of some of my trees to look at what went right or wrong in training and how early training is critical to the continuing life and health of trees.

When it Rains it Pours, Minor Rain Emergencies, Tree Down, Creek Blockage and Overflowing Ditches, La Vida Homestead

When it rains a lot, stuff goes wrong. I had three issues to deal with at the same time and shot some go pro video. I manage to squeeze in some talking points about road design. Working it the rain is kind of fun, at least for a while. It could have been much worse timing, but having a tree fall in the road over an hour period when I was out was not super convenient.

Posted on March 1, 2019 and filed under Homestead Lifestyle, Homesteading, roads.

The Blood Zone, Common Mistakes In Splitting Firewood On the Ground With Axes

blood zone header.jpg

Since releasing my video on splitting axe cut wood on the ground with axes, I have seen people engaged in what I consider to be risky behavior when engaged in this potentially very dangerous activity. Ben Scott, new head of the axe cordwood challenge project noticed the exact same thing and released a video pointing this specific problem out about the same time that I recorded this one. This is already an awkward and difficult to learn skill without having to stand in strange positions, but standing just any old place when ground splitting wood is something like driving around blind corners and relying on hope that no one is coming the other way. The difference is that we have some control of the tool and ability to read the circumstances. But we are not reliably accurate and faultless machines and that has to be accounted for. The main problem I see is that I don’t think people understand exactly what can go wrong and how serious the consequences might be, and and pointing those things out is the most important aspect of this video.

For learning ground splitting, for instance if working with a group of scouts, you could literally draw a line on the ground and place the firewood in such a way as to form these good visual habits until they stick. Name one side the blood zone and the other the safe zone.

A backing log for the buckstop could be an axecellent axecessory for training this method. Axeidents can easily happen when learning this technique. I’ve seen in happen. It could also make a good fixture in a longer term camp, so that anyone at any …

A backing log for the buckstop could be an axecellent axecessory for training this method. Axeidents can easily happen when learning this technique. I’ve seen in happen. It could also make a good fixture in a longer term camp, so that anyone at any skill level can split wood for camp, or practice unsupervised. Flatten the bottom of the log and cut 5 or 6 notches. But, use it to teach good habits and the importance of direction of cut. Also realize that it is not a 100% guarantee of safety, because the buckstop can only be made so tall before the axe handle will be struck against the top edge.

For learning to split against a back log, the buckstop can be used until axe control is developed and direction of cut is understood. Using a buckstop with an accessory backing log tucked up against it could also be useful in a fixed camp where a number of people at different levels of skill, could safely split wood for camp. A backing log alone is not enough. A friend of mine cut her foot trying to learn to split against a back log, because she wasn’t able to learn direction of cut quickly enough and the axe popped over the log.

Flatten the bottom side for stability and to insure the log is low enough.

Flatten the bottom side for stability and to insure the log is low enough.