Historical Care Package from a Pennsylvania Viewer, 1850's Shoemaker Ledger Pages, Leather and Tools

P1190702 2.jpg

I received a pretty amazing care package from a long time YouTube viewer Davey Jo of Pennsylvania. He is a lifetime cabinet maker, leather and metal worker. and accumulator of tools. In spite of his apparent humble attitude, I have a feeling anyone could learn a great deal from Davey about woodworking and such practical shop stuff. His Great, Great Grandfather Joseph was a shoemaker and farmer in that state. He sent some interesting pages from Joseph’s Ledger about goods and services purchased, sold and rendered. Sometime I might sit down and analyze those documents a bit for whatever insights they have to offer about life in the mid 19th century. For instance with a cursory going over, it looks like a new pair of handmade shoes or boots were about $1.25 to $1.75. He also sold 3 bushels of potatoes from his farm for $1.50 and purchased cords of oak for $2.00 each. There is also a contract for an apprenticeship in shoe making. I’ll include a few pictures here. The writing is sometimes hard to decipher and it would be a bit of a project to sort it all out and attempt to translate it in historical context. There is also an edge of bark tanned leather from probably the mid 1800s from Joseph’s shop and a very nice looking piece of leather that Davey tanned with sassafras bark following my instructional videos on bark tanning.


1847 firewood prices. About 100% of today? Oak was bought in at 2.00 a cord, but Hickory (which appears to be spelt Hickery) was 3.00 a cord. Likely at that time it was either bucked into long fireplace logs with an axe or saw, or bucked into shorte…

1847 firewood prices. About 100% of today? Oak was bought in at 2.00 a cord, but Hickory (which appears to be spelt Hickery) was 3.00 a cord. Likely at that time it was either bucked into long fireplace logs with an axe or saw, or bucked into shorter woodstove sized sections with a frame bucksaw. From the other entries in this ledger, you could calculate how many cords you would have to cut in order to buy some staple foods for winter, oats, corn and potatoes, and a pair of shoes.

Aside from some logging of shoe repairs and sales, this page contains a contract discussing a term of apprenticeship, an annuity, room, board, washing and mending of clothes, and a provision for a promise of three weeks farm labor at harvest time.

Aside from some logging of shoe repairs and sales, this page contains a contract discussing a term of apprenticeship, an annuity, room, board, washing and mending of clothes, and a provision for a promise of three weeks farm labor at harvest time.

Davey’s grandfather’s uncle Mr. Bachman was a tanner. Here is a receipt for bags of hair. Hair was used as an addition to lime plaster and no doubt for other things. It was commonly collected and sold by tanneries. Mr. Bachman appears to have attend…

Davey’s grandfather’s uncle Mr. Bachman was a tanner. Here is a receipt for bags of hair. Hair was used as an addition to lime plaster and no doubt for other things. It was commonly collected and sold by tanneries. Mr. Bachman appears to have attended a trade school and advertised those credentials on his invoice.

This glue pot was given to Davey by his mentor John Grott, a woodworker, shoemaker and all around skilled man by the sound of it. I’m honored to be thought worthy of such a gift, which I can actually use as I have no glue pot. Most of them are also …

This glue pot was given to Davey by his mentor John Grott, a woodworker, shoemaker and all around skilled man by the sound of it. I’m honored to be thought worthy of such a gift, which I can actually use as I have no glue pot. Most of them are also too large for my purposes, and as a cabinet maker, Davey found this one too small for his needs. It is essentially a double boiler, which serves two purposes, keeping the glue from burning and keeping it warm while it is being used away from the stove.

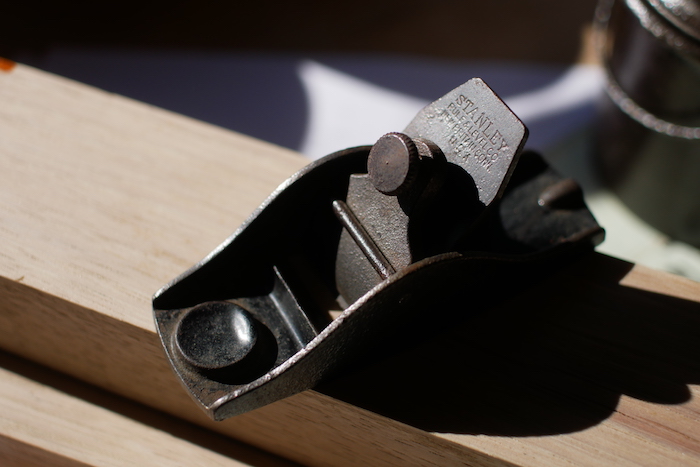
A miniature “finger” plane. There are not a lot of tools on my wants list anymore, but this was certainly one of them. Also some nice air dried Hickery harvested by Davey and seasoned for years. It appears to be very stable, which is an often overlo…

A miniature “finger” plane. There are not a lot of tools on my wants list anymore, but this was certainly one of them. Also some nice air dried Hickery harvested by Davey and seasoned for years. It appears to be very stable, which is an often overlooked factor in handle material. If I have my way with it, there will be an extensive blog post and video soon on handles and handle material, what matters and what doesn’t. Stability matters a lot and is often not considered or attended to.

Notes for Seed, Scion and Pollen Customers, Storage, Planting, Grafting, Pollination

I have about 50 orders of apple seeds, scions and pollen ready to ship out! It’s pretty neat to send all that interesting genetic material out into the world to proliferate. Here are a few notes on using and storing them. If you dont’ want to watch the whole thing, here is a video index to each and other useful videos and series’ are embedded below:

Scions

Seeds

Pollen

The BuckStop is Here! Training ProphylAXis For Bucking Firewood Safely

P1180921.jpg

I came up with this simple, but very cool idea for safely learning to buck logs with an axe. Here are the whys and whats and a few options for building one.

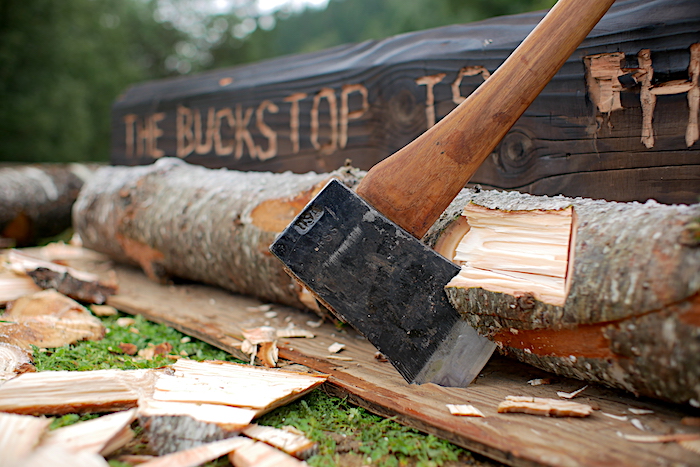
Watching people learn to buck in person and on video has been fairly horrifying at times. Most of the injuries we’ve seen during the cordwood challenge over the past two years were cuts made while bucking logs. This simple concept could allow people to train in bucking more safely, and just as important, to progress in that training more rapidly. I just came up with this idea a year or two ago and finally got around to trying it. The device is a simply a low guard wall that can be slapped together with some junk that might be lying around. I put together four different versions in about an hour including running around looking for materials. To make just one out of materials laying around would probably be about a 10 minute job.

This low wall should stop the axe should any cut go over the top of the log or through it, thus protecting the user from injury. This idea comes from the practice of using a backing log to buck, as recommended by Mors Kochanski and others. Using a larger log behind the log you are chopping can be very helpful, especially in preventing the axe from coming all the way through the work and continuing to the other side where we are standing. The Bucking Wall is taller and flatter than a log, so it should be more effective in preventing the axe from coming over the top of the log. It also allows one to stand closer to the work, which to me is preferable with a short handled axe. It is also lighter than a log. Finally, it can be built with a floor of plywood to catch the axe in case of over reaching strikes that would normally cause the toe of the axe blade to end up in the dirt.

P1180931.JPG

Consistent results and physical competence with an axe requires a certain amount of time served swinging one. They also require a certain amount of confidence to use well. The tool needs to be taken in hand and used with enough confidence to keep it under control and it is hard to be accurate and effective when timid and hesitant. It is possible to be so cautious and physically stiff that mistakes are increased or amplified. But how do we have confidence before being habituated to the tool? We don’t, which is why the learning phase is so dangerous. Observe the following quote from The Axe Manual of Peter McLaren published by the Plumb tool company.

“The danger of an axe is largely a mental hazard. The user is fearful; he stands so far from his work that his axe is not under control, forgetting that if he misplaces a stroke, or hits a glancing blow, the axe will always come home to him.

“Safety lies in learning to swing correctly and in placing your strokes accurately. Then stand within easy swinging distance and chop with confidence.

“Of course, there is always a careless man who minimizes any risk and chops more with abandon than with skill. In his hands the axe (or any edge tool) is dangerous. Play safe! But do not fear your axe. Instead--- Master it.”

Celebrity Axeman of old, Peter McLaren’s Manual of axe work put out by the Plumb Tool company. Download for free here…https://scoutmastercg.com/the_axe_manual_/

Celebrity Axeman of old, Peter McLaren’s Manual of axe work put out by the Plumb Tool company. Download for free here…https://scoutmastercg.com/the_axe_manual_/

It is a lot easier to have that confidence once a reasonable degree of physical competence is gained. We don’t want to have false confidence, but ultimately McLaren was right. As a dangerous tool, it needs to be taken charge of and used confidently, with commitment and purposeful intent to do the work at hand.

But he recommended that we learn to use the axe, then use it with purpose and confidence. When each swing feels utterly lacking in said confidence as to where it will end up, or whether it will bite or bounce off, and we are not sure how to gauge distance from hands to the blade, how do we learn to use it safely? A certain amount of time must be spent with the tool before it begins to feel natural and go where we want it to. Enter the Buckstop

Because it is vertical and not round like a backing log, it is even more likely to prevent the axe from coming over the back board and hitting the user. So, at a certain height, it is almost 100% sure to prevent deflected and follow through cuts to the legs while bucking. So, there is the obvious advantage in terms of just preventing accidents, but I think the benefits will extent further. With the fear of injury essentially gone, now we can chop with some impunity, which means any timidity caused by being uncertain of striking our target is no longer at play. This may be a significant factor in allowing one to relax a little and chop with more confidence while working on physical technique. A new user can experiment with things like wrist torque for increasing speed, without increasing danger. In order to chop at their best, the lighter axes that I would typically recommend people start with need to be used with a little snap to create adequate head speed. But experimenting with that head speed is the last thing I would want to see a very new user doing. Using the bucking wall though, you could experiment with that acceleration and with tweaking style and technique in general, without fear of injury. Finally, when you do screw up, it is pretty obvious and I would hope that every time the axe hit’s the wall or wooden base, it stimulates the question of what would have happened if that wall wasn’t there. Even when making the final severing cut at the end to separate off the round of wood, the axe hitting the wall means the axe would be coming through, and if we look at footing position it should give some idea of whether we were at risk for injury.

I think this simple device is a solid idea, and could fill a very important need in the learning phase until confidence and skill are gained. I also think it could build that confidence and skill faster if used with intent. It’s not forever, it’s just a training aid. Many axe competitors habitually wear chainmail socks in both training and competition. Safety is good. But, I would recommend not using this indefinitely, because it could very easily foster bad habits and a false sense of security, which brings me to the down sides.

The two caveats I would say are, first that the buckstop should not be used as an excuse to be sloppy and complacent. One should still concentrate primarily on technique and aim, with a relaxed style, and not on speed and power. Ultimately speed and power are earned over time and more importantly they are nearly useless without a good level of accuracy. Forcing speed and power under normal conditions is dangerous, but even with a backing wall, they still will tend to cause aim to suffer and should be pursued intelligently with an aim to improvement of overall effectiveness, of which power is not the main ingredient as every experienced axeman will tell you. I do however, as I said above, think that using the bucking wall could allow one to progress more quickly into not just speed and power, but efficient speed and power by liberating the trainee to experiment more without putting limbs at risk. Which leads to caveat number two.

One could easily develop bad habits and a false sense of security if released from the fear of injury. I actually think it will be hard not to do so, and it is probably even inevitable. If I were training someone from scratch, I would probably approach it as two different stages, where in the second stage with no Buckstop, they have to learn new important habits and reboot the brain into danger mode. There is, of course, the opportunity to learn some safety lessons if you are continually watching that back wall and every time you hit it asking whether or not you would have lost a toe or two, but that requires a sort of intent or presence of mind that many of us aren’t going to have. Try to use the barrier consciously with the intent of hitting that backing wall as little as possible and not as an excuse to flail away with impunity. When the wall is gone, certainly more awareness and presence of mind around possible errors is going to be essential. Regardless, I would try to make the switch from buckstop to no buckstop as consciously and soberly as possible.

As far as design goes, watch the vide All of them work. You can just use a log that is larger than the piece you are bucking, but the wall should work better than a log in that it easier to move around, often easier to come up with, more transportable and allows one to stand very close, which I tend to do in bucking with the short handled axes I use. It is probably also safer, since it is both taller and flatter. If the device is made with a wooden platform for the log, it will also protect the toe of your axe from sticking into the dirt. @watch.your.follow.through on Instagram pointed out that if there is no base at the front for the log to rest on, it allows the device to be moved easily along the back of the log as chopping progresses. That is true, but it is also probably easier to slide a log along a piece of plywood. In a design with no wooden platform at the front, you can just jam a piece of plywood under the section to be cut to protect the axe, though it may not be as effective. Given that this is a training device and not a long term tool, any minor convenience issues like those only matter so much.

I would encourage making something that is super easy to throw together with common materials or junk that is lying around. I like elegant solutions, which means making and using the simple, easy, cheap thing that works. I am very resistant to keep tweaking the thing and turning it into a design project. Many tweaks could prove useful or clever, but the device that works and is actually built because it is so easy to put together is the best one, because that is the one that will actually be in use. Keep it simple and start using it, worry about tweaks later if they really seem compelling for some reason. If you have a saw and either some nails and a hammer or a screw gun, building one should be very fast. So fast in fact that it shouldn’t be a big deal to build an entirely new one or cannibalize the first to build a new one if it seems worthwhile.

I made them at different heights and it looks like 10 to 11 inches will be best. One I made with a 2 x 12 board had to have the front edge chamferred off as I hit the handle on it a few times. If the back stop is plywood, it probably wouldn’t damage the handle. Unless it needs to be shorter for portability, I think that for cutting 16 inch firewood lengths, 5 feet (150cm), or 6.5 feet (200cm), are going to be the magic numbers, with a 5’ wall, you can safely and comfortably cut 3 notches before moving it along and with a 6.5’ wall, you can make 4. But I would not hesitate to use almost any length if it’s easy or what you happen to have on hand.

As far as using the buckstop to train yourself or anyone else, here are my thoughts. First of all, this is so awesome! I’ve not had the opportunity to train someone from scratch, but I’ve often shuddered at the though of teaching someone to buck for the first time. This tool makes that so much easier. We can both exhale a sigh of relief and work on aim and a relaxed technique without worrying about safety. We can also work on the mechanics of acceleration and other technique stuff that would be much more dangerous to toy with otherwise. If used consciously, we can also get some good feedback on when the axe comes through or over the log and whether it might have hit a body part, trying to form good habits regarding body placement. Footing placement should be conscious as otherwise students might tend to stand right behind the cut with feet together, rather than in a safer wide stance. I think in a long term group or fixed camp such as scouts or a multi-day class it might be good to have one for each student. That way every cut in the board adds to a personal history. The wall could also be painted initially so that cuts show up better. Not every cut to the wall really indicates an accident, but it means something. For a more formal training for kids, I could see having a graduation test at some point where you have to buck so many feet of log with a freshly painted wall and if you make no cuts in the wall or base and meet some other criteria, you get to burn the thing ceremoniously and move on.

It could also be very useful for the student to carry out comparative lessons about such things as chopping styles and angles of cut. Also for trying different grinds and tools, but it can all be done safely. You can not only show people what can go wrong, you can have them do it, which will drive the point home much better, without driving the axe into their leg.

I do think that when it’s time to ditch the thing there should be a hard reboot on safety and awareness. I noticed just testing it briefly that I became very lax about footing placement and edge awareness. If you’re working on your own, you have to be your own bad guy, which is not always easy. If training someone else, be the eyes they need to help them cultivate that constant awareness of the edge and of follow through in relation to their body parts. When it’s time to move on, there really will need to be an emphasis on the fact that the game just changed and there are now real consequences and you can’t just hit NEW GAME after a serious accident.

As I said, I don’t think this should be a long term solution. I think it should be used to the best effect, then gotten rid of or it will cultivate bad habits and dependence. Switching back and forth could prove dangerous, because the two mindsets will be quite different. It is also more work to have it available, to move it to the logs or the logs to it. A skills over gear mindset doesn’t accommodate unnecessary accessories. Make a crappy one out of whatever cheap or free junk is available, don’t fix it unless it’s causing you problems, use it mindfully, then get rid of it and reboot your brain into high safety alert mode.

I think this device is going to prove very useful in certain contexts if it is used with intent. Let me know here or on YouTube if you try it, as I would like to get some feedback. As always stay safe and keep the red stuff inside.

Apple Seeds, Scions and Pollen Available Feb 7th

DSC05929.jpg

Apple seeds and scions will be available this year starting Feb 7th. As usual, they are available early to Patrons. The webstore will be password protected for patrons until Thursday February 7th at midnight. Patrons, see member posts for the password if you didn’t get a notice by email already.

I don’t have a lot of scions, because my trees don’t always grow a lot since they are not pampered. It was also a pretty good apple year, so they put more resources into fruiting than into growing wood. They are also often on the small side, though I don’t send out anything I wouldn’t graft. In fact, if anything, I don’t send out a lot of wood that I would graft myself and usually keep the smallest scions for my projects. The good news is that my scions are cheaper than most places.

I do however have a lot of seeds. I actually have quite a few intentionally cross pollinated apple seeds this year. These are crosses that I think are promising for some reason. I can’t grow many more seedlings, so this is a way to get crosses that I think are promising out into the world. The usual caveats apply. Even with intentional crosses, you just don’t know what you are going to get. Some will be bad, some good and probably the great minority will be worthy of further propagation. I also use some fairly primitive genes in the red fleshed apples, which very likely reduces the overall success rate. The Open Pollinated seeds, those that have an unknown parent pollinated by bees, are even more of a gamble. They might be pollinated by any of 100 or more random varieties. Of course the high variability of apples is what makes them appealing to grow from seed as well, because with that randomness comes a lot of possibility.

The pollen is from last year, stored in a freezer. I can’t vouch for it’s potency or viability. I’ve kept pollen at room temperature for a year and used it successfully before, but not frozen. Freezing should keep it better, but it’s an experiment and I’ll be assessing the potency and viability of this frozen pollen myself this year. I may just collect pollen, freeze it and sell it the following year from now on, since it’s hard to get it all picked, dried and sent out in time for use the same spring.

International shipping: Scions I will send to the lower 48 United States and Alaska only. I will ship seeds and pollen internationally, but I won’t be responsible for the shipments not arriving if they are seized by customs, and I won’t lie on the customs forms about the contents. It is very expensive to ship seeds internationally, I remember recent seeds being about 13.00 U.S. Dollars to send. If you live outside the U.S. place your order in the webstore and check out, then I’ll figure out the postage and we’ll adjust the cost.

Here is the link to the webstore: http://skillcult.com/store/


Posted on February 5, 2019 .

Pruning and Training Chuck's Apple Franktree, Year 4 from Grafting

I’ve managed to make an update video every year of grafting and training my friend Chuck’s apple frankentree. The tree has grown quickly into a well balanced, classic Modified Central Leader form. The Main scaffold branches look pretty good and most of the laterals have been set. That only took 3 years. This 4th year, I just notched a few more buds to get the last few laterals where I want them and the rest is mostly maintenance with light training. If I were to do this now, I would approach it with even a little more intent to get exactly what I want, possibly even a little quicker. To understand the tree form a little better and how to get it, watch the video below on tree forms. I like this tree form a lot. It is not the only game in town, but it is good for making long lived, well balanced trees that are relatively easy to control. It is popular with fruit tree enthusiasts for a reason. It also looks very nice, making a somewhat spreading tree with reasonably good light distribution if well maintained.

This is probably the last training and pruning video of chucks tree as the videos are becoming redundant, but the form is in place and from here on it’s mostly thinning excess growth, and then shortening what is left. maybe we’ll check in on fruiting and maturity in a couple/few years. A playlist with all previous videos of chucks tree is also linked below if you want to follow it’s development from the beginning.


The full playlist… https://www.youtube.com/playlist?list=PL60FnyEY-eJCwRV46RC-aoybNgDRjCAw4


The video explains a couple of very good common tree training forms, the delayed open center and modified central leader.

CordWood Challenge 2019, New Leadership and Expansion

This year, I have turned over leadership of the challenge to a young, enthusiastic and very intelligent guy named Ben Scott on the other side of the Atlantic. Though relatively new to the game, he is level headed, confident and truly curious. He posts more to the cordwood challenge facebook page than anyone, including me and has been hammering out axe related YouTube content, much of which shows insight from experience. A lot of that experience and insight comes from doing the cordwood challenge last year where he cut 4 ricks of wood. I think he will not only do a good job, but a much better job than I at facilitating the project, taking it forward into new territory, and being consistently focused and involved. We chatted on skype for quite a long time and have very similar visions and ideas about the cordwood challenge concept and where to potentially go in the future. Pretty early on in the challenge I think I realized the potential and the need to grow or centralize a community and information source around practical axe work. I even took out a domain name, which I’ve offered to Ben if he wants to run with the idea.

I can see clearly the need for such an internet destination that is strictly focused on practical axe work and design and specifically avoids a sort of axe fetishism centered around collecting which tends to take over axe groups and discussions. I think such a project could be run and funded by members, and could house a database of sorts. This might provide a mutually supportive community that learns at an exponential rate and that is instrumental in welcoming novice axe users to facilitate their progress and understanding of the tool and it’s safer use. Ben has also already added some other challenges that could make the project more accessible to people that don’t have access to a forest, or that are doing axe-centric building projects.

I feel like this is really the best case scenario right now. I am also very sure that I know the best place to put what energy and time I can into engaging with the axe community by providing content on axe use, safety and theory. That also has to compete with the many other subjects I want to cover, but I’m quite sure the content I have planned on axe stuff is extremely important, and will do a lot of good and will very likely remain viable into the future. As popular as axes are, my take on them as a practical user who generally buzzkills gearheadism, collecting and fetishism is not very popular, but I feel almost obligated to produce that content, especially in support of the cordwood challenge project.

Any axe head should subscribe to Ben’s YouTube channel. People just interested in the Axe CordWood Challenge in general, or who just want to be supportive of the project are welcome to join the FaceBook page, which Ben is now an administrator of along with myself.

If you want to know more about how my messed up life and health have compelled me to forego this project this year and are limiting my activity, you can watch the video below. My life is pretty messed up lately and I’m having a hard time maintaining anything resembling focus to carry through projects.

As always stay safe choppers.

Tasting Some Late Hanging Apples and Late Seedlings From Breeding Trials

One of my main interests when it comes to collecting and breeding apple varieties is the very late hanging/ripening types. I’ll be heard to proselytize about them frequently and I am not sure why everyone else is not as excited about them as I am. While most would normally think of winter apples as being eaten out of storage, certain varieties can be ripened and held on the tree through at least all of January assuming the climate is suitable. This video is a walkaround checking out what is still hanging as well as tasting the remaining late ripening seedling apples from the breeding trials. I wrote a whole post about late hangers, but I decided to put off posting it until I can make a video that makes an argument for growing them more, ferreting more of them out, and beginning to test the climatic limits of hanging late fruit. Clearly there is going to be a cold limit and folks in places like Michigan will not be able to grow them. But chances are that they can be taken advantage of in much of Cascadia, the southern belt east to west, and other places that you can’t go ice fishing without falling through. Not doubt too there are going to be varieties that are more durable to the cold than others. Unfortunately, many of these late hanging varieties are quite rare and I usually have very limited scion wood available. I will have some this year, quite a bit of some of them and none of others. Scion sales will begin soon and I’ll post when they are available.

Formula Books, The Treasure Chest of Free DIY, Self Reliance Information You Need to Know About

formula books header.jpg

While I’m inclined to ignore the holidays for the most part, I have a gift for you. Christmas can be downright disturbing in it’s materialism and focus on over consumption. Well, my gift to you is a knife in the corrupted festering heart of that particular Santa of commerce, a downloadable treasure trove of DIY information from a very different time, from a time when DIY was a necessary way of life and not an internet niche. The very fact that we call someone a do-it-yourselfer, indicates that those people are novel in an age where products for almost anything can be bought ready made.

This is about formula books, a phenomenon from the past that would now be a quaint piece of history to most if they even knew about them at all, but which the self reliant minded, and technologically curious, can find immensely helpful and fascinating. I think the reason that these great books are no longer common, is that they were a product of a different time. Cue history fable…

Once upon a time, there were no letters. No, not letters as in I wrote you a letter, I mean the characters that make up words. Ideas spread verbally were slow and limited in range, and culture and community knowledge existed on a smaller scale, with much less homogeneity between geographic groups. Then people invented writing, which gradually grew in scale. At first, few knew how to read and books were only produced as one offs or had to be copied by handwriting and illustrating. Then printing began, followed by more efficient printing, and eventually by more people learning to read. In that era, previous to transmittable media such as radio and television, printed books and periodicals were what allowed ideas and information to be spread broadly. Books were popular enough, but so were periodicals. Periodicals were the way that groups of people with similar interests or professions interacted in their niches with others around a country, or even between continents. It may seem painfully slow in this age of internet forums, instant news and comment threads, but aside from in person meetings, that was what was available. Editorials and reader interaction via letters to the editors were an extremely important mechanism of communication and evolution of understanding among these niche groups. Some of those periodicals were not sent out very often, but it provided a place for readers of similar interest to write in and offer experience or tips and recipes. Being an inveterate researcher of antique information, I have gleaned a lot of knowledge from these periodicals. So there is one piece of our context, and here is the next...

Going back far enough, circumstances determined that people made a lot of stuff from scratch. Not just individuals, but professionals. Most pharmacy items were probably compounded by the pharmacist, not purchased pre-made. Real compounding pharmacies are the exception now, and most just buy finished products and re-package them. Artists mixed most of their own paints, sometimes from the raw minerals, preparing specialty oils, etc. The supermarkets, hardware stores and drug stores with miles of diverse products would drop the jaws of someone in the 19th century. Professionals used books and periodicals for information on how to formulate items for their trades, and average people often compounded raw materials to make what they needed.

I think it’s likely that these two circumstances eventually lead to the phenomenon of formula books. I imagine that at some point, some enterprising individual went through and compiled a bunch of these general formulas and tips from various sources or from their own periodical, and printed them in a book. Many of these collections were compiled and printed well into the 20th century. Some are intended more for the home market, others more for practical “shop dudes”, technical entrepreneurs and inventors. Others were specific to an industry or interest.

books on end.jpg

Imagine in a time where your access to a store might even be limited, and when you did go to a store, the products were also limited and expensive. Even raw materials might need to be special ordered from an in-store catalogue or the Sears and Roebuck catalogue, and waited on for weeks. A book like this could prove extremely valuable to have around the house to compile these and common household materials to useful ends. Now it seems that problems are practically invented to sell products. These books are also full of general tips for daily household, farm and shop life.

Keep in mind when perusing these offerings, that whomever printed the book you are reading didn’t actually try all that stuff out! Many of these would be untested recipes from essentially random sources. Just because K.W. Micklemaus from blington New Jersey wrote into a periodical once and sounded like he knew his business when it comes to lubricating an old watch with rattlesnake oil, doesn’t mean he was right. These recipes should be read with a very critical mindset. Another thing you will notice is that they use a lot of toxic stuff. Lead and Benzine were staples, and many other toxic substances. Some of these can be substituted and some cannot, but the recipe may still give you some ideas on making something of your own devising.

oilskin quip.jpg

There will also be a lot of materials that you have never heard of. Further, you may not know which form of the material is referred to, or which name a material refers to. For instance, it is difficult to determine for sure what is meant by Plumbago, which seems to usually refer to graphite can be confused with Galena, a lead ore which looks similar. The name Plumbago is derived from the word for lead and many recipes will call for “black lead” when they mean powdered graphite. but which one is called for in your stove polish recipe? I’ve had this exact problem when trying to figure out if the recipes for stove blacking I’ve been looking at are referring to lead or graphite. According to Wikipedia, some guy actually invented the term graphite, now the dominant term, in order to avoid confusion caused by the terms black lead and plumbago.

An example of ambiguity regarding the different forms of substances would be lime. Lime is often called for in recipes, but it is rarely specified whether the reference is to lime putty, which was once very common, or dry lime hydrate. They have similar properties, but would be measured out very differently. Usually if quicklime is called for it will be called either quicklime, freshly burned lime, or maybe lime shells. Freshly slaked lime probably refers to lime putty, but it could conceivably refer to dry hydrate. Having been interested in this sort of archaic information, I have a glossary in my brain of quite a few of these terms, but like learning botany and all it’s specific terminology, newcomers will spend a fair amount of time looking up unfamiliar terms and trying to sleuth out what is actually meant by them. I used to have to do that secondary research in other old books in my collection, but now we have the internet which makes it much easier.

upright cyclopedia.jpg

It’s worth keeping an eye out for these in print. I was introduced to them a long time back when some practical artist friends Scott McGrath, Todd Barriclow and Spring Maxfield busted out a copy as if they were showing me some holy book. It was a big enough deal that I still remember the event lol. More like they were unlocking the door to a technical candy store. You can read most of the old formula books online for free and I’ve set up a file where you can download them. You can also always find the links by going to www.skillcult.com/freestuff With modern search functions, it is easy to find what you are looking for in them... well, sometimes. These books are in PDF form, which is imperfect. When converting a very old book from scans and PDF’s to plain text like kindle’s mobi or to epub, the print character recognition software often misinterprets many letters or runs the characters together into compound words. So, the search functions may or may not find what you are looking for regardless of the digital format. Sometimes (possibly even often, although I’m loathe to admit it :) I find myself looking for the search function while reading an actual book or piece of paper! Search is absolutely awesome as a tool. Most books, especially older ones, have terrible indexes if they have any at all. But, in spite of the lack of a search function, sitting down with an old, yellowed copy of The Scientific American Encyclopedia of Receipts, Notes and Queries is an entirely different experience than skimming through photos of it on an ipad. Unless you go out and search for these books though, you won’t just run into many of them. I just did some quick searching and it looks like ebay is probably the best place to look for them and maybe check out Etsy too. Some were printed later in the century, but they gradually fell out of popularity. There is still a niche of weirdos like me (and I hazard to guess you too :) that will find them fascinating and useful. I own physical copies of Henleys, The Scientific American Cylopedia of etc, etc…, Standard Book of Formulas, Techno-Chemical Receipt book and The Materials of the Artist. Those were collected randomly at bookstores and flea markets over the past 25 years. All but the last are in this digital collection I put together. I’m sure there are more, but these are the ones I could find, some of which I’ve barely looked at. Also, keep in mind that there are many, many more niche books of this sort for specific trades. For instance, there are a boatload of old pharmacy compounding books and many painters books.

Yesterday was the shortest day of the year, so we are on the right side of that equation now, yay! Last night was the coldest night so far, and here the teeth of winter are really just starting to bite. A couple of days ago I ran through all the formula books looking for stove blacking recipes as I make moves to restore a rusty woodstove I’m trying to get installed. Now I just have to figure out if they mean graphite or lead when they say plumbago! Best wishes to you and yours in this new year and heartfelt thanks to all the people that have supported me from sharing content, to comments, to the thank you notes I receive from complete strangers almost every week, and for the much needed financial support. Things have been very difficult lately to put it mildly, and my ability to produce good content is at a low ebb. I’d like to report that I expect that to improve, but my hope for resolving the chronic health issues that I’m severely hobbled by is also at a low ebb, and unfortunately, I think justifiably so. My plan remains the same though, to continue at whatever pace I can, the work I set out to do from early in my life, which is essentially the pursuit and dissemination of practical knowledge and practical philosophy with a focus on self reliance and archaic skills that I believe still have relevance. Formula books have been exceedingly useful in that pursuit and I hope they are to you as well. <3

And here is a plug for www.archive.org Wow, what a fantastic resource this is. I’ve used google books for a lot of my research of this type in the past, but archive.org has become my go to resource for digging up old books and information. They are a non-profit with the goal of creating universal access to information, including books and periodicals, photos, film and audio. They are in a fund raising drive right now and have a 2 x matching grant. Try it out for a subject you are interested in. The books and periodicals available have generally run out their copyright protection, which I believe is defined by the life of the author, plus 50 years, so the great majority of it is from long ago, which is just what I’m usually looking for. I recently used it to do research on the medicinal uses of turpentine and found a huge number of references going as far back as the 1600’s. So cool!

Here is an example a text search of the entire archive for the term blacksmithing this is using the search text function. The search titles field will turn up fewer results.

By using the lower search field, you can search within a book or periodical.

Well, I either just enabled you to go down endless impractical rabbit holes full of endless wheel spinning information, or offered you the most amazing tool to further your personal development. Which one it will be is probably largely up to you :) Just remember that book learning is only really very useful as part of a trinity composed of INFORMATION, EXPERIENCE and CONTEMPLATION. I might add communication in there as #4, but that is sort of covered by both contemplation and information. In a very real way, information is not knowledge.

DOWNLOAD THE FORMULA BOOKS HERE

boiled linseed page.jpg
Posted on December 24, 2018 and filed under Books, Homesteading, Self Reliance.

Test Tasting 12 New Apple Seedlings

I had quite a few new apple seedlings fruit this year. Some were still not ripe as of December 10th, while others were over ripe. The overview is that none of them seem super promising, though there are about 4 I’ll be keeping my eye on for the next few years. One had pretty strongly red flesh, several had very light blushing and one was approaching 50% pink mottling. The percentage of apples that come up with some red flesh, may be approaching 30%, but most of those just have a light blush here and there. Many of those that fruited this year are Lady Williams offspring, as those seem to be more inclined toward early fruiting. Some of those are definitely not ripe yet, because Lady Williams is super late ripening and most of them seem to have inherited that trait.

The most interesting are:

Grenadine x Goldrush cross measuring at 25% sugar

Grenadine x Goldrush cross, which has the deepest red flesh, medium sized and very attractive it measures at 21% sugar.

A small Rubaiyat x Wickson cross, also 25% sugar.

And a Grenadine x Golden Russet cross, which picked up a little of Golden Russet’s rusetty flavors, but not a lot.

of those, only the first was probably picked the best time, the rest being picked late as I had some dental trouble right about when they should have been picked and tested. As a result they were about 3 weeks over-ripened on the tree.

While I didn’t find any of these super compelling (more like potentially interesting) it has to be kept in mind that they could improve going forward. For one, the conditions they are growing under are awful. They are very crowded, often shaded and with very little food or water. It’s like a disaster camp in there! As I start to cull some of the trees, it will make room for the remaining ones. Any apples that seem very promising, I will probably eventually graft out onto an established tree, to give them more of a chance to grow and produce fruit that could be closer to reaching their full potential. Another factor is that as grafts or new trees mature, they seem to often start producing better fruit. Hopefully next year I’ll get to taste these again, and better samples of them, along with more new varieties that have not come into fruit yet.

Axe Handle Breakage, Designing For Resiliency, Weak Links and Stress Distribution

An axe head with a wooden handle has some inherent problems. The head and handle are made of very different materials that behave differently. Steel has a very high density compared to wood. Wood is much more flexible than steel and will dent and break more easily. When using an axe, these differences can cause problems, such as the wood being damaged by forceful contact with the hard unyielding metal head, or the relatively high density of the steel head behaving differently than the handle, thereby putting stresses on the weaker wood. Breakage just below the eye is a very common occurrence. This article and video are an attempt to explain some common reasons why axes frequently break near the eye, having to do with design, or perhaps lack of design in some cases. Breakage in the main body of the handle can of course also occur, but I’m not really dealing with that here. I’m pretty sure that the greater percentage of axe handle breakages are initiated right where the handle meets the bottom of the eye, or within the first few inches of handle, especially if the breakage is not due to wonky grain or other defects. Shear stresses seem to be particularly high in this part of the handle.

In this article, I will be assuming that we are dealing mostly with American axe head patterns, which tend to have thinner eyes than European and Scandinavian axes. Even though American axe styles migrated back to Europe (many axe patterns on that side of the pond are actually American or modified American patterns) the axe eye sizes largely remained bigger than American axe eyes. This is an important point when we look at overall handle design, because with any given axe head, the eye shape just is what it is, and the size and shape of the wood where it enters the eye is therefore pre-determined. Some of these problems are obviated by the use of tapered axe eyes, in which the handle feeds in from the top and fits by friction, but that is a separate subject also. The assumption here is that we are dealing with American style patterns that are wedged from the top. For whatever mix of cultural and practical reasons, these axes have pushed the limits of strength and resilience of the wood used in handles, by evolving toward a small eye.

Aside from the size of the axe eye being fixed, there are two other things that are pretty much givens as well.

One is that the section of handle just below the eye, lengthwise (poll to blade) is wider than the rest of the handle. If the whole handle was the same front to back dimension as the eye length, it would be unusable, so the body of the haft has to slim down soon after leaving the eye.

Predetermined factor number two is that we need a slight flair in handle thickness just below the eye at the back of the handle, as well as on both sides, so that the head seats firmly around the bottom as it is driven on. The front edge of the handle can come straight out of the eye if desired, with no rise, but the other three sides need at least some flair, though not very much. In my view, it is always unnecessary, and also a detriment, to come out of the front of the eye and then immediately outward, forming a shoulder. I see no reason to do that, and every reason not to. If the handle isn’t completely straight coming out of the front of the eye, the rise is best made as a gentle transition.

WE CAN CONSCIOUSLY WORK AROUND THESE FIXED PARAMETERS. IN OTHER WORDS, DESIGN AROUND THE THINGS WE CAN’T CHANGE.

Vegetable Tanning Materials, Tannin Rich Barks, Roots and Leaves Used to Tan Skins and Hides Into Leather

I am asked a lot about what tanning materials people should use in their part of the world. Well, be careful what you ask for he he. Here is a very large amount of information to address fill that gap. I had already typed up a partial list for a vegetable tanning book project that I have done some writing on which is mostly presented here (don’t hold your breath on me publishing it anytime soon). That information comes largely from Howe’s book on tanning materials, which I think is still in copyright. But I decided to list a bunch of full text excerpts on tanning materials from some other old out of copyright tanning books. To top it off, at the end there is a surprisingly long bibliography of publications on tanning materials put out by the USDA, with such fun topics as tannin content of some acorns, Tannin content of pacific coast trees, tanning materials in South Africa and the tanning industry of Washington state. There is still much more that could be dug up on the subject. If you want to research a specific material more, you can use sites like googlebooks.com and Archive.org Try different combinations of keywords such and as leather, tanning, tannin, the plant’s common names and the plants botanic name (or names, plural since they often change over the course of 100 years or more in order to keep botanists employed and make them look busy).

Tools You Need to Bark Tan Hides & Skins Into Leather at Home; Traditional Vegetable Tanning

DSC01244.jpg

In this blog post and new video, I cover all the essential tools needed to make good bark tanned leather as well as a few non-essentials. Tanning materials will have to be treated separately and I will try to revisit many of these tools and their making in the future.

Real natural vegetable tanned leather is that which is tanned with tannic acid sourced from plant materials. While there are excellent sources of tannin in not just barks, but in roots, leaves, pods, fruits, nuts and wood, tree barks are the most used sources, thus the common term bark tanning. There are only a few tools and materials that could be considered essential to the process and none are complicated. In fact, if you strip it down to the real essentials, you need very little. Adding a few simple tools will improve your experience though, and in some cases your leather.

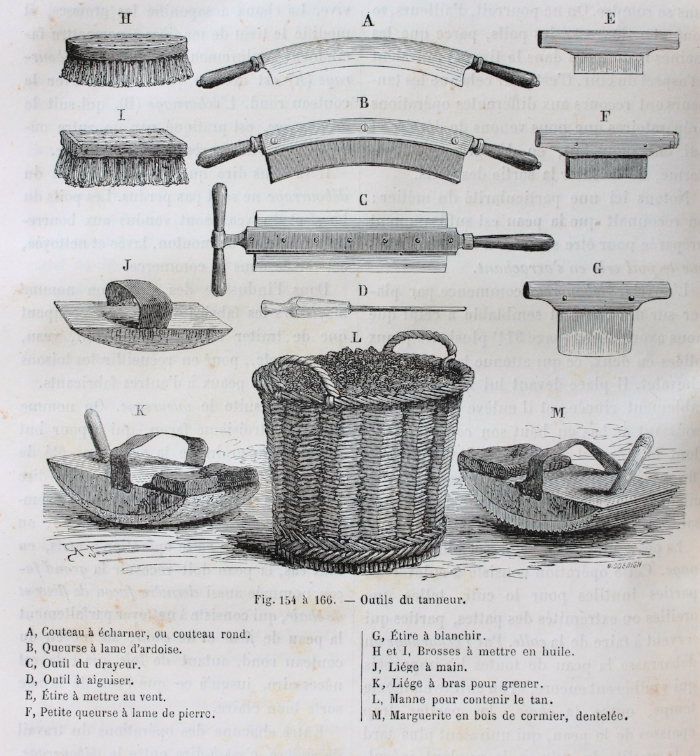
Some tools of the Tanner and Currier, most of which are discussed in this article. The slate bladed two handled knife B is especially intriguing. I need to make me one of them.

Some tools of the Tanner and Currier, most of which are discussed in this article. The slate bladed two handled knife B is especially intriguing. I need to make me one of them.


FLESHING KNIFE

The tanner’s knife, or fleshing knife, is the most important multi-tasking tool of the tanner. In a typical vegetable tanning process, I will use this tool for fleshing, dehairing, re-fleshing, scudding, removing excess water and stretching open the skin. It is also handy when re-soaking dried hides to work open dry spots so that they rehydrate faster. Many new models are available on the market, but a lot of home tanners get by well with homemade tools. Read my blog post on fleshing knives, and watch the Fleshing Knives 101 video for more than you probably wanted to know about them. I just received the Wiebe 12” Fleshing knife in the Mail so I can review it for you guys. I like the overall form a lot for general use, and was told by a dealer that it is actually tempered tool steel, not mild steel. Aside from the potentially weak, narrow and probably short tangs, it looks promising, but I haven’t had a chance to use it at all yet. Aside from unknown potential steel/tempering issues and iffy tangs, as a general purpose home tanning knife it seems likely to be a good choice for under 30.00 shipped.

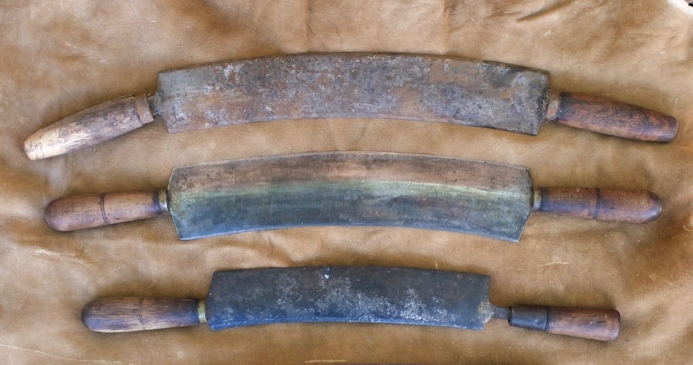
A collection of tanner’s knives

A collection of tanner’s knives


BEAMS

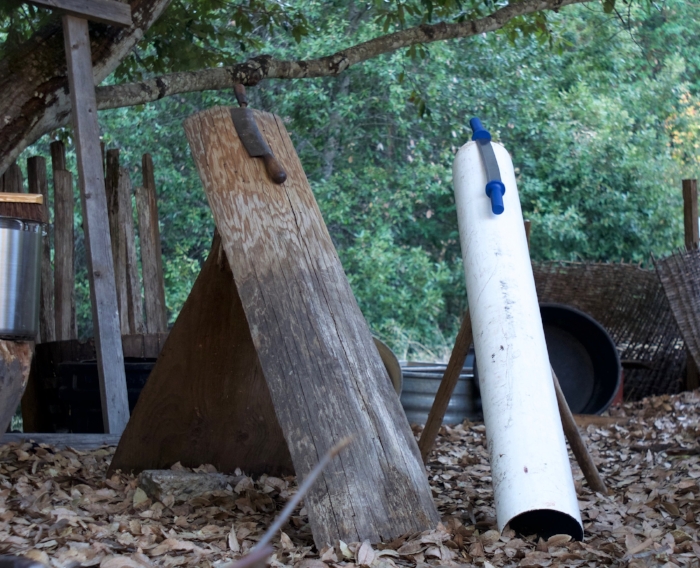
Wood and plastic beams. Left is the outside cur from a log mill and the other is cheap ABS, though PVC would be much better, thicker, more durable and heavier. I haven’t used plastic beams much, but I can see why people might need to use them.

Wood and plastic beams. Left is the outside cur from a log mill and the other is cheap ABS, though PVC would be much better, thicker, more durable and heavier. I haven’t used plastic beams much, but I can see why people might need to use them.

The tanners all purpose scrapping knife is of no use without a beam. For most, a beam around 6 to 6.5 feet long will do well. I’m currently using. 6.25 foot beam, which is just about right for me. It can be of wood or plastic pipe. If wood, it is best to have a smooth work area that is free of knots, large cracks, grain tears or other major blemishes extending at least 18 inches down from the top. I would try to stick with 8” diameter and larger, but to get started, or in emergencies, you can use a smaller diameter beam. If the diameter is very small, you can flatten off the working area to a larger radius. A very small radius results in a small area of contact between the tool and the beam surface. For most vegetable tanning related beam tasks, a larger surface contact between beam and tool is preferable. Large logs should be at least split in half, or even hollowed on the underside to thin them. Most of my old beams were hollowed out on the underside with a hatchet to reduce weight and discourage cracking. Taking the center of the log out by splitting it in half will reduce both the incidence and severity of cracking. Reducing the thickness further will reduce that risk even more. It doesn’t have to look pretty, just chop out some of the wood to form a hollow on the underside.

A good source of nearly ready made beam material are the round sided slab cuts from the outsides of logs removed in milling lumber. You may be able to get some from a local mill, or small custom miller. Check the phone book (under lumber, milling?) or ask about local portable mill owners at your chainsaw dealer or repair shop.

If making a beam out of lumber, choose vertical grain like this over plain sawn face grain if possible as it will be less likely to crack. This is never a choice with a round or split log.

If making a beam out of lumber, choose vertical grain like this over plain sawn face grain if possible as it will be less likely to crack. This is never a choice with a round or split log.

I haven’t done it, but I suspect a pretty good beam could be made by radiusing the working area of a 2x12. I don’t seen any good reason it wouldn’t work. If so, try to choose one that has edge grain on the working face and not face grain. that is to say that the rings of the tree run from about 45 degrees or more toward straight through the thickness of the board. This is usually referred to as vertical grain and will be much less prone to cracking than plain sawn wood faces.

Now that I’m thinking about it, an edge grain (if you can find that good of a board these days) 2x12, backed by another 2x12 could make a pretty nice beam. I would leave a slot in the backing board for a plywood stand, augmented by two 4x4’s firmly attached with lagbolts similar to the arrangement pictured below. For a firmer union, wedges could be used to afix the plywood in the slot.

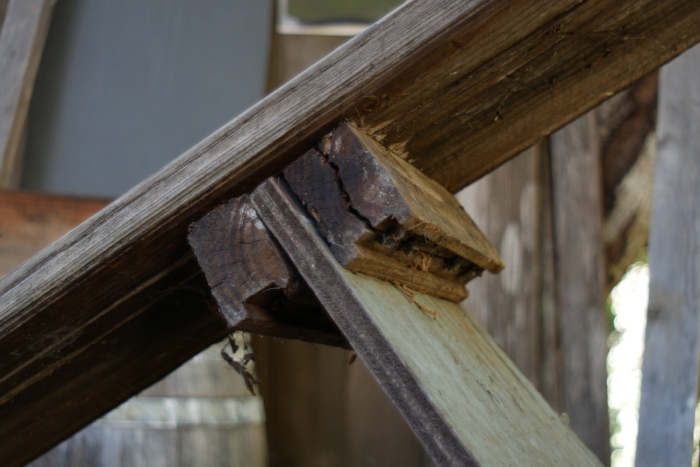
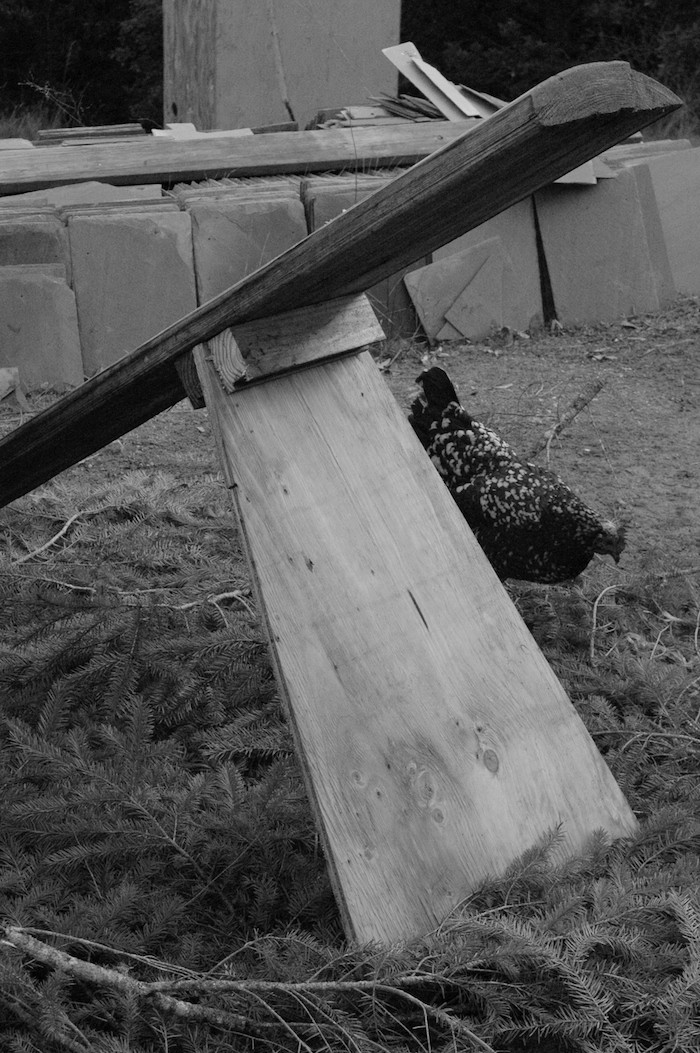
You can do many different things to put legs on the beam. A good option is to drill large holes, about 2 inches in diameter and plug in round wooden staves for supports. My current beam has two closely spaced boards screwed to the bottom on edge, just far enough apart to slide in a piece of plywood as a support. It works well enough.

Simple support that is easily taken down for transport. I would use 4x4’s next time.

Simple support that is easily taken down for transport. I would use 4x4’s next time.

DSC_0235.jpg
Screen Shot 2018-10-15 at 2.52.50 AM.png

DRAW KNIFE AND SPOKE SHAVE

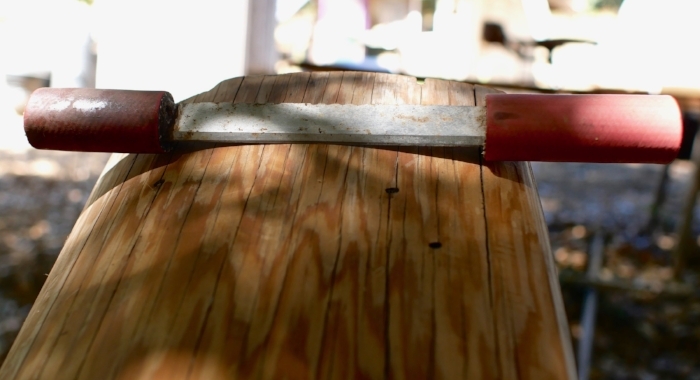
Maintenance tools. The drawknife is probably more versatile and essential than the spokeshave.

Maintenance tools. The drawknife is probably more versatile and essential than the spokeshave.

These tools are used for creating and maintaining, a smooth beam surface. It is ideal to have both. The draw knife is best for major wood removal and repair, and the spoke shave for maintenance and smoothing. You can get away with just one of them though, in which case the draw knife is the more versatile of the two. Draw knives are also handy for peeling tan bark from logs if it is not slipping off easily. If you intentionally shred the bark off of the log in small, thin slices, you may not have to chop it any finer for extracting the tannins.

When shopping for used draw knives watch out for two things, wear on the blade and rounded bevels on the back side. Old draw knives can sometimes suffer severe wear. Look to see that the blade is about the same width it’s whole length. It should also be flat on the back with a bevel on the top side only. Either by long wear, or by mis-sharpening, the back is sometimes not flat. In a very well used knife the back may be subtly dished or rounded off, but if it has an obvious bevel or extreme wear, steer clear.

I would not recommend buying a spoke shave that has only one screw to adjust and no fine adjustment screws. The type shown is common and works well.


WATER AND HOSES

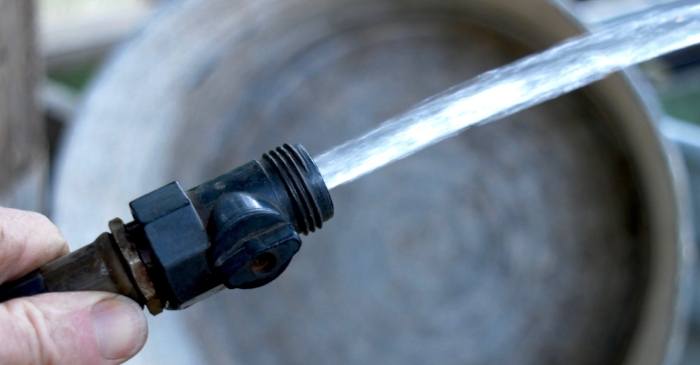
Water is not just a material, it’s a tool for cleaning things off. Skins, tools, boots, hands and tubs need frequent rinsing You will use a lot of water, and the more convenient and available it is the better. I usually use a standard hose end shut off valve to control flow. I like these valves better than most purpose made sprayers, because when opened wide the flow is fairly high, which is nice when you are filling containers with water a lot. If opened only part way, the shut off valve makes a reasonable sprayer for cleaning things off. As far as I have seen, craftsman rubber hoses are the best deal going when they are on sale in the spring, which they usually are.

Better than any sprayer I’ve tried when you want high flow.

Better than any sprayer I’ve tried when you want high flow.

Passable spray pattern and volume if not as good as a purpose made sprayer.

Passable spray pattern and volume if not as good as a purpose made sprayer.


BRUSHES

A stiff cleaning brush will be found almost indispensable for tubs, aprons, beams and tools. You may also need a finer brush to scrub bloom off of the grain side of skins. Bloom is a whitish deposit that forms on the grain surface during tanning. It is more common with certain tanning materials and also when layering or pit tanning is used.

Stiff brushes for cleaning tubs, tools and beams are almost essential

Stiff brushes for cleaning tubs, tools and beams are almost essential

Surface on the right shows bloom deposited in the tanning process. The section on the left has been scrubbed clean with an old hair brush with medium bristles. The dark stain in the center is where the skin floated above the surface of the tan liquo…

Surface on the right shows bloom deposited in the tanning process. The section on the left has been scrubbed clean with an old hair brush with medium bristles. The dark stain in the center is where the skin floated above the surface of the tan liquor :-/


PROTECTIVE CLOTHING

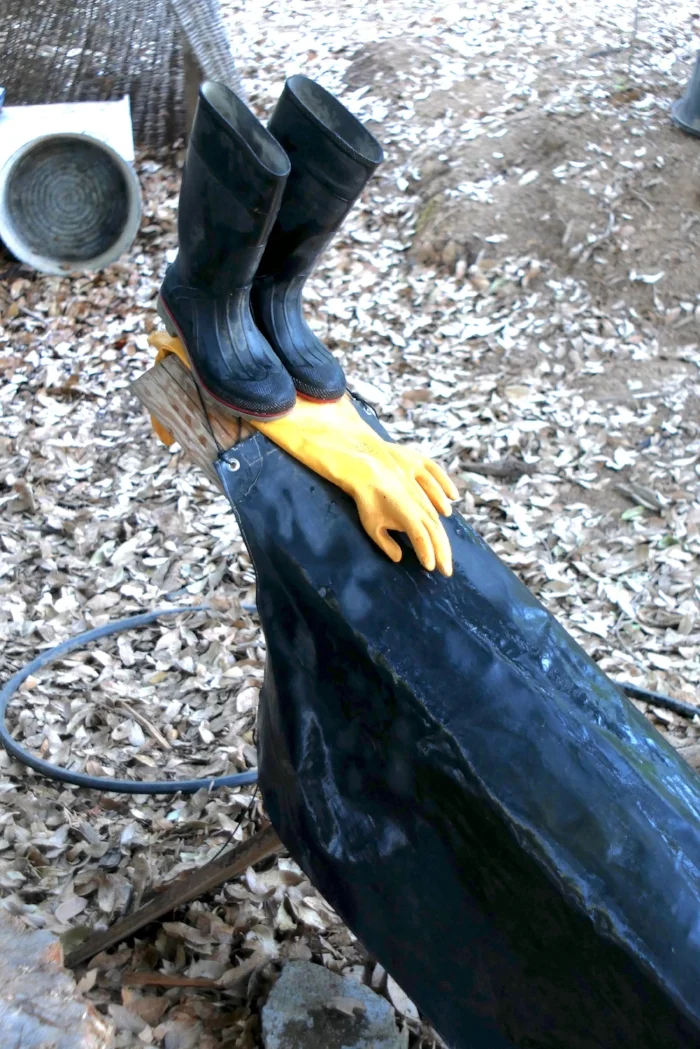
BOOTS: Rubber boots are very nice to have if you do a lot of tanning. If you don’t wear them, the hide will inevitably drip all over your feet as you stand at the beam working.

GLOVES: I tanned without gloves for years, but I love my elbow gloves now. Don’t bother with dishwashing gloves, or any other short gloves. You will inevitably reach into a solution and they will fill with smelly liquid. I use these affordable Atlas gloves, which have held up okay. When they die, I may invest in a more heavy duty glove.

APRON: I would avoid buying very cheap aprons. I am still using the same two heavy duty black, rubberized cloth aprons that I bought used at a yard sale over 20 years ago. You can make one from a sheet of vinyl or plastic of some kind, or tie a trash bag around your waist, but if you tan a lot, the protective gear is really nice to have. Hip waders are great if you already own them.

Non-Essentials, but so nice to have!

Non-Essentials, but so nice to have!


CONTAINERS

Vegetable tanning requires certain kinds of containers. Materials that can be safely used for all the processes are wood, plastic and rubber, ceramic, stainless steel and enamel ware. I use galvanized tubs, but only if there is no rust at all on them, and for liming and rinsing only. Aluminum I’ve used for rinsing only. I know aluminum and ashes don’t mix well but I don’t know about lime. While I have no idea if aluminum is safe for tanning liquors, I’ve avoided it. Anything that rusts is out of the question for all processes related to vegetable tanning except for dyeing the skin black. Any rust or iron will darken the skin permanently.

The common rectangular plastic storage tubs with lids are the most versatile. Choose designs that can be rained on without funneling any water into the tub if possible. Some do not have that kind of overhang on the lids, or have holes of some kind o…

The common rectangular plastic storage tubs with lids are the most versatile. Choose designs that can be rained on without funneling any water into the tub if possible. Some do not have that kind of overhang on the lids, or have holes of some kind on the edges. All of these others also get used, but none are particularly better than rectangular tubs.

The ubiquitous 5 gallon plastic buckets are handy to have around for various uses, but tanning anything over the size fur bearers in buckets is unpreferable. Large rectangular plastic storage tubs of 15 gallons and up are very useful as are other large tubs of various sorts. I have used wooden wine barrels cut in half quite a lot. They look really great, but aesthetics aside, they have their down sides. Wooden barrels need to be kept filled with water, or they dry out and fall apart. Since they need to be full of water, they breed mosquitoes unless you dump them regularly and they are quite heavy when full. You can tan hides up to the size of deer in half wine barrels very easily and sometimes large hides if you get creative. The size of the container should be adequate for the size of skins you are tanning. Without getting into specific details, an 18 to 20 gallon tub is adequate for deer, goat and similar sized animal skins. I’ll usually cut cattle and other large hides into sides and bellies, and those pieces can be tanned in a half wine barrel or large rectangular tub easily enough.

Rectangular tubs are an advantage over round ones, when layering, a technique where you put layers of shredded bark between layers of hide and let it sit for a month or three. I can layer a deer hide well in an 18 or 20 gallon tub, by carefully folding it up with layers of bark between all the folds, but if layering a larger hide, or even a very large deer skin, you’ll need to size the tub up. For liming, rinsing, or tanning the skins in liquors, round containers have the slight advantage in being easy to stir, but that is not important enough to favor buying them over the more versatile rectangular tubs. Use what you have or can get cheap or free if it works, but if you buy something storage tubs with lids are probably the best all around. If you are tanning cattle, elk, moose, horse or buffalo skins, and want to keep them whole (not a very good idea unless you really need it that big), start keeping your eye peeled for larger containers. However, too large is too large. You don’t want to have to use excess amounts of liquid to tan, rinse or lime a hide.


BARK CHOPPING

Primitive and slow, but effective enough. The benefits are that it makes you slow down and chill out, and it’s good hatchet practice.

Primitive and slow, but effective enough. The benefits are that it makes you slow down and chill out, and it’s good hatchet practice.

Some materials, like sumac leaves are easy to use, but you will generally have to cut up barks, roots and woods. I have almost always used a hatchet on a block of wood. I lay out a tarp to catch the chips and start hacking away. You could use a small axe, but for most people, an average sized hatchet is a good weight to start with. A heavy hatchet or axe can lead to repetitive strain injuries like carpal tunnel much faster. Just ask my tendons about that.

Hatchets can also be used to “raze” off the outer dead portion of the bark, which was sometimes so removed in traditional tanning as it was considered unnecessary or even injurious to the leather.

Chipper/shredder machines can be very effective. Garden chippers are often under-powered for thick heavy bark, but they are nice when they work. If necessary, you can break the material up into smaller pieces, or try shredding it while still fresh and softer. If there is a lot of rust in the chipper, it could contaminate and darken your liquor. Consider running some branches and leaves through the unit to clean it out.


COOKING POTS

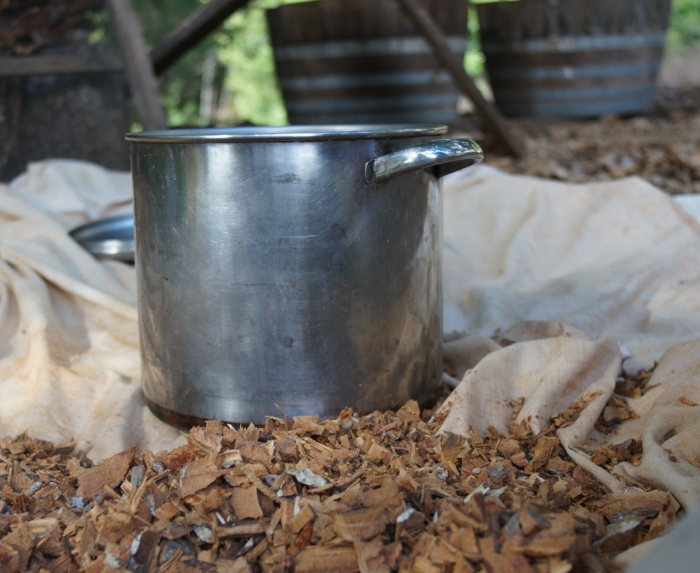
It is possible to extract the tanning materials from plants with cold leaching, but it is much faster to cook it out. Even though I don’t know that it isn’t safe, I have always avoided aluminum. That is easy for me to do though, because I have large stainless steel pots from 3 to 5 gallons. Enamel pots could work, but be sure there are no rusty spots where the enamel has chipped away. Copper was used at one time, but large copper containers are expensive and uncommon. Large thin walled stock pots with thin bottoms can be very cheap and are fine for cooking bark, but will easily burn food if you are not careful. Try to get at least 16 quart and preferably 20 quart or larger. I find large stock pots like this to be indispensable tools in my lifestyle and they are a lifetime investment. When shopping key points to look at are thickness, build quality (especially handles) and steel quality. Some stainless imports are made of inferior metal. Read reviews carefully. When I won some fancy all clad cookware in a contest, I sold it on ebay and bought a Tramontina stock pot, which I’m happy with.

A 3 gallon stainless stock pot. Get 20 quarts or larger if you can afford it or better, repurpose a stainless beer keg.

A 3 gallon stainless stock pot. Get 20 quarts or larger if you can afford it or better, repurpose a stainless beer keg.

You can also modify an old beer keg, which many home brewers do for cooking beer mash. Full sized Kegs are 15.5 gallons and a 1/4 keg is 7.5 gallons.

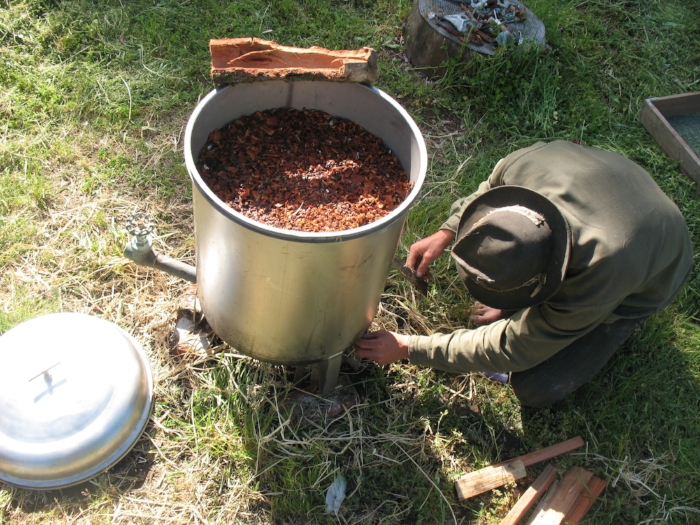
I also own a large pool filter housing that must hold around 25 to 30 gallons. I set it up with a valve and cook large batches of canning jars and bark in it. I have never seen a comparable one. In most units the lid is nearly as tall as the body, making them of limited use.

My pool filter housing bark boiler, aka the MEGA CANNER.

My pool filter housing bark boiler, aka the MEGA CANNER.


Happiness is tan liquor on tap. It doesn’t get any better than this folks.

Happiness is tan liquor on tap. It doesn’t get any better than this folks.

SLICKING TABLE OR BOARD

To use the following two tools, the slicking iron and slicker, you need a large flat surface of some kind. The skin is stretched, smoothed and flattened with this trio. These are only used if you want to dry the skin smooth and flat. If the hide is to be softened you dry it in some way that is less involved. A good technique for drying hides flat is to paste them down to the board with fat applied to the flesh side. This technique allows us to finish the grain out perfectly smooth and then leave it on the board to dry slowly. Just put it where your chickens can’t walk on it! You can also nail the skin to a wall to stretch it, or lace it into a frame, but for leaving hides well flattened and finished, you probably can’t beat the slicker and slicking Iron on a smooth slab. If you are doing thick skins, you can get away with something that has a rough surface, such as unfinished plywood. When working thin skins on a slab, the surface should be smooth or the texture of the surface will show through on the grain, much like the technique of rubbing a piece of paper placed over a textured surface with pencil or charcoal. I use plywood and a large slab of thick salvage plastic. Traditionally, stone tables have been used. If you run across a large surface that is very smooth, water resistant and 4 feet or more wide, grab it.

A large sheet of salvaged structural plastic that I use as a slicking board.

A large sheet of salvaged structural plastic that I use as a slicking board.

Cattle leather oiled and pasted out to boards to dry with the slicker. When working with thick skins, the board texture will not show through. When finishing thin skins, you will need a smooth surface unless the skin is to be softened later, or the …

Cattle leather oiled and pasted out to boards to dry with the slicker. When working with thick skins, the board texture will not show through. When finishing thin skins, you will need a smooth surface unless the skin is to be softened later, or the wood grain will show through on the hide’s grain surface.

The skin can be pasted to the board with a coating of fat on the flesh side. It will stick well enough if it is dried slowly. When pasting thick skins to boards, you must use wood for thick skins or the skin may mold from drying too slow. For thin skins you can get away with pasting them to a non breathable surface like plastic, but make sure they still dry out within a couple of days. I use this technique a lot. I also often use it if I’m going to use the graining board to soften the skin (see below), but in that case, it is okay to use a rough piece of plywood, because the grain is going to be wrinkled and reworked anyway so the texture of the board showing through the skin is of no consequence.


SLICKER

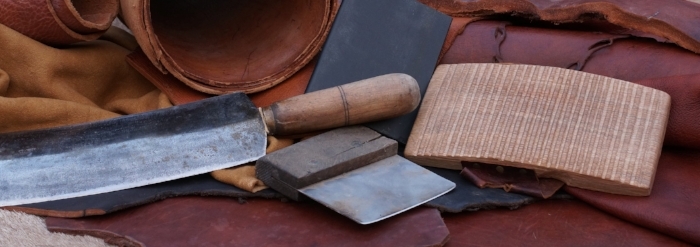
This tool is usually made of stone or glass and you can make your own with a piece of slate. it is a slab of hard material, with one rounded smooth edge, and and smooth rounded corners. A handle is nice, but not necessary. The tool is used to smooth and even the grain side of the skin and to paste it down onto a slicking table or board with fat for slow drying. You could probably have a glass shop make you one out of a 3/8” glass. A shop that works with stone tiles should be able to make you one as well, or at least cut a slab for you if they don’t already have some spare tiles of the right size. If you want to make one, cut a piece of slate or other clean hard stone and grind the edge round on a slab of cement or sand stone. Use water as a lubricant. If the stone is hard, add sand with water to make a slurry. Slate is fairly soft and easy to work. This method will even work with hard stone or glass if you are patient. It can be finished and polished with diamond sharpening hones and/or sand paper. A belt grinder would also be very handy, but the dust will mess up your lungs. Silicosis fibrosis anyone? Glass grinders are lubricated with water to prevent dust. You can also still buy slickers new, since a few leather workers use them for polishing. I have also used hardwood and moose antler in a pinch.

Size should be around 4x5 inches and 1/4 inch or more thick, with the long edge being the rounded working edge.

Vintage slickers from the museum area of the Muir McDonald Tannery in Dallas Oregon, now sadly closed. Both are slate. In the tool on the left, it appears that there may be screws for clamping the slate into the handle.

Vintage slickers from the museum area of the Muir McDonald Tannery in Dallas Oregon, now sadly closed. Both are slate. In the tool on the left, it appears that there may be screws for clamping the slate into the handle.

Glass plate in a leather working machine. This partly replaced and augmented the slicker. This may be the scariest machine I’ve ever seen in operation. Muir McDonald Tannery, used to polish the grain of tooling leather.

Glass plate in a leather working machine. This partly replaced and augmented the slicker. This may be the scariest machine I’ve ever seen in operation. Muir McDonald Tannery, used to polish the grain of tooling leather.

Smoothing the grain and flattening.

Smoothing the grain and flattening.

Home made slate slicker 1/4 inch thick and a slab of repurposed jade with the edges polished

Home made slate slicker 1/4 inch thick and a slab of repurposed jade with the edges polished

ideal slicker edge is evenly radiused and polished.

ideal slicker edge is evenly radiused and polished.

The slicker at work dealing with wrinkly edges. This tool is always used with fat as a lubricant.

The slicker at work dealing with wrinkly edges. This tool is always used with fat as a lubricant.


SLICKING IRON

My current ideal slicking iron prototype. I would favor a thick blade. This is a tool where weight and rigidity can be advantageous.

My current ideal slicking iron prototype. I would favor a thick blade. This is a tool where weight and rigidity can be advantageous.

This tool is similar to the slicker in size and shape, but it is a metal scraper with a dull edge. It is used on the flesh side of the skin to even out wrinkles and smooth and stretch the skin out toward the edges, before turning it over to use the stone or glass slicker. The slicking iron should not be super wide, about 5 inches wide at most. If I made one to my specifications right now, it would as in the diagram. It would have a very, slight radius across the working edge. I would also add a generously sized hardwood handle that is slightly drop shaped in cross section, copper riveted, and saturated in raw linseed oil. Regular carbon steel is okay to use, but always check it for rust and clean before using. Never leave it resting on the skin.

A serviceable homemade sicking iron and a cheap dough scraper. The dough scraper is on the thin side, is already rusting and should be modified to narrow it. It is probably better to check in with local scrap yards, metal fabricators and sheet metal…

A serviceable homemade sicking iron and a cheap dough scraper. The dough scraper is on the thin side, is already rusting and should be modified to narrow it. It is probably better to check in with local scrap yards, metal fabricators and sheet metal workers.

Dough scrapers can be used if modified. Most dough scrapers are wide and could stand to have an inch or more removed from their width to make them 4.5 to 5 inches wide, which you can do with a hacksaw and files. Use a file to sharpen and modify. The corners should be rounded off well to a 1/4 inch radius and the whole thing sharpened from both sides to form a fairly obtuse edge (not too thin) and then dulled enough that it won’t cut the skin. The edge should be of such a dullness that it will easily grab the skin and pull it when the tool is used, but will not cut or gouge it. If shopping for one, look at reviews to make sure it is not too thin. Cheap scrapers will bend under the high stress applied to this tool under normal use. I bought this one and it is barely thick enough. It is also already showing some rust as cheap stainless steel is prone to do. Here are a few that look like they may be thick enough, but it’s hard to say until you see them in person. pizza cutter, RSVP, OXO. Keep in mind that they will still be better if modified by narrowing them, so dropping by your local sheet metal worker or metal fab shop first is probably smarter. They usually have lots of scrap around and all the tools to make something like this quickly, minus the handle. If you have a file, a drill and a saw to cut a kerf in a wooden handle, just have them cut out a slab for you and do the rest yourself. If you have a good metal salvage yard around, look there for scrap stainless.

This paunchy spot was eventually flattened completely by persistent work with the slicking iron and slicker.

This paunchy spot was eventually flattened completely by persistent work with the slicking iron and slicker.

You may very well be able to use some sort of household item or kitchen tool in place of the slicking iron, for instance a thick stainless spatula. You can also do some of this work on the beam with the fleshing knife, like stretching the skin our toward the edges. At times though you may wish you had the slicking iron for dealing with tough wrinkles and lumps in heavy hides. I would definitely say it is more necessary and useful when dealing with big thick skins. It’s not a tool you have to have to start tanning. You will know when you need it. Checkout this image of Talcon working down a paunchy spot in a bark tanned bull hide. That spot ended up totally flat in the end. This is the kind of application where the slicking iron shines.

The same hide flattened, smoothed, pasted with fat to the board and left to dry slowly.

The same hide flattened, smoothed, pasted with fat to the board and left to dry slowly.


OTHER OPTIONS FOR STRETCHING AND DRYING

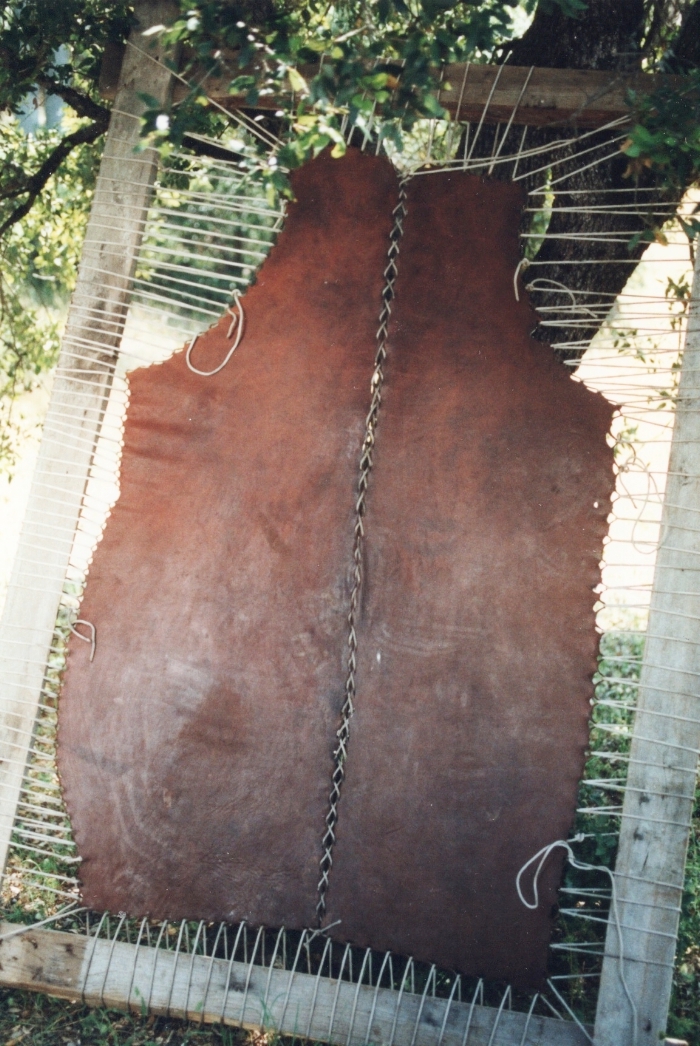
If you do not have a slicking table, and need to stretch a skin out to dry, you can use a frame with ropes. Cut many holes, parallel to the edge and lace the skin evenly and tightly. This will not always remove wrinkles and paunchy spots like slicking out on a flat surface can. Framing a hide is also a lot of work and wastes skin around the edges. Similarly, you can stake the skin out flat just off the ground. A better option than both for most people will be to nail the skin out to a large board or wall. Use hot dipped galvanized box nails if you can. Any nail that will rust is not recommended and nails that are already rusty are a sure way to leave black stains on your hide.

Horse sides framed for drying. Not the best solution in terms of labor and material conservation. It also does not provide the best options for flattening and smoothing the skin.

Horse sides framed for drying. Not the best solution in terms of labor and material conservation. It also does not provide the best options for flattening and smoothing the skin.


PALM AND ARM BOARDS

Old engraving of a Currier at work with an arm board. If you look closely, you can see that the artist illustrated the wooden teeth on the sole of the board

Old engraving of a Currier at work with an arm board. If you look closely, you can see that the artist illustrated the wooden teeth on the sole of the board

Skins can be softened by rolling on a table with the hands and forearms. These tools are used to make that job easier and work the skin a lot harder.

The soles are designed to grip the skin’s surface. One type has a wooden face with ridges carved into the sole from side to side for when the tool rides on the flesh side of the leather. Boards with cork glued to the soles are used when the tool will contact the grain side.

There are two basic sizes, a hand board, sometimes called a pommel, and an arm board. The hand board is short, 8” or less, with a strap that goes over the hand. The arm board rests along the forearm and has a strap at the back and a peg at the front for a handle. The difference is size and scope of work. Any home tanner ought to do fine with hand boards.

If the skin is worked folded grain side to grain side, the result is a pleasing wrinkled grain surface since the grain is crushed and compressed. The process of creating that grain effect is called graining, thus the term graining board. In this case, the sole of the tool touches the flesh side only and the teeth cut into the wood provide excellent grip.

Postion for graining process. Note the ridged graining board contacts the flesh side only.

Postion for graining process. Note the ridged graining board contacts the flesh side only.

Surface produced by graining

Surface produced by graining

DSC00568.jpg
DSC00575.jpg

If a board is used with the skin folded flesh side to flesh side, the grain surface is left smooth because it is stretched instead of compressed. The cork soled board is used in this case to prevent denting and damage to the grain surface.

An antique cork faced arm board from the Muir McDonald Tannery in Dallas Oregon. Note that the cork is partially worn off on the front of the tool

An antique cork faced arm board from the Muir McDonald Tannery in Dallas Oregon. Note that the cork is partially worn off on the front of the tool

Fancy Antique cork soled board.

Fancy Antique cork soled board.


MALLET

In some cases, we may want the skin to be compressed and hardened, not softened and broken loose. The tool for this is a wooden mallet with a polished face, which is used to condense the leather when it’s in a damp, but not wet state. The face can be close to flat, but the edges have to taper off and round out gently. If you are leaving any kind of dents in the skin, then you need to either hit the leather flatter, or refine the edges. The leather should be smooth when finished. Use the heaviest wood you can, mine is probably iron wood and is extremely dense. Polish the face to a gloss finish. In the past, both Iron and brass/bronze mallets have been used, but make sure they are very clean and polished, with zero rust or oxidation. Even so, you are risking staining the skin with a steel hammer, so I recommend sticking with wood.

The mallet for compressing and firming leather should be dead smooth. Use the densest wood available. The hide underneath in the foreground has been pounded leaving it about 1/3 thinner, much denser, stiffer and polished. Otherwise, it was exactly t…

The mallet for compressing and firming leather should be dead smooth. Use the densest wood available. The hide underneath in the foreground has been pounded leaving it about 1/3 thinner, much denser, stiffer and polished. Otherwise, it was exactly the same as the top piece.


STAKE

This is a dull metal blade set into a post that is used for softening and breaking open the fiber of skins. They are useful if you are trying to get skins really soft and for working furs. Unless you are doing one of those two things, it’s not a very essential tool. I find them more useful in braintanning buckskin and working furs of any kind. The post can be permanent or in a stand of some kind for portability. The blade should be rounded at the corners and they usually have at least a very slight radius. The width of the blade can vary. For any kind of large skins, a wider blade would be better. 5.5 inches with the edges rounded to a 1/4 inch radius and a very, very slight radius to the whole edge would be good for general home tanning work of all kinds. A lot of dough scrapers are 6 inches wide, so that might be a good source of material for a blade. It should be stainless if possible, so you can leave it wet or in the weather. Use stainless steel screws as well.

A simple portable stake used for classes. A fixed stake or one on a heavy base is better if you’re going to use it a lot.

A simple portable stake used for classes. A fixed stake or one on a heavy base is better if you’re going to use it a lot.

Use stainless steel screws

Use stainless steel screws

A good stake blade design for the home tanner.

A good stake blade design for the home tanner.

This blog post and similar content is informed by almost 30 years of research, experience and communication with other tanners. You can support my efforts to bring back and preserve these traditional self reliance skills and arts by sharing content to friends, forums and social media, with general financial support on patreon.com/skillcult, or with one time donations using the link in the side bar. I also now keep separate accounts for earmarked donations toward research in tanning and apple/plant breeding. If specified, donated funds will be used for things like tools and materials, and outside labor solely related to either endeavor. Thanks for reading :)

Spoiler Alert, BITE ME Delivers the Goods! Early Oct 2018 Apple Variety Taste Testing, With New Seedling Apples

In my latest apple tasting, Sunrise and my own seedling BITE ME! rose to the top of the heap out of 18 tested. I also taste tested 3 new seedlings, out of which one is decidedly mediocre, one pretty good and one incredibly sweet, even though it is still ripening. Some others were bad others I am ambivalent about.

Rubinette: Intense anise flavor this year with high flavor, sugar and good acid balance. I am still not a big fan of this one for whatever reasons, but it’s very popular. If I approached apple tasting analytically for the most part, I might like it more, but I don’t, and I don’t.

Norcross Red Flesh: Got this from apple collector Nick Botners some years back. It is not very good. Light, juicy, tender, barely any red flesh, low sugar, low flavor.

Sunrise: This was one of the stars of the show in this tasting. Everything comes together really well in this apple. Very juicy, very crisp, good sugar levels, good acid/sugar balance, unoffensive skin and mild, but tasty flavors. More of a modern crisp type of apple than anything else in this tasting. It’s downfall may be a lack of distinctive flavor, but I want to eat them and that’s the best acid test.

Reinette Thounin: I got this from the USDA I believe. It is a true spitter. Totally inedible, bitter, tannic, low sugar. Honestly doesn’t even seem suited to cider, maybe just for the tannins.

Zabergau Reinette: Pretty good, always kind of tart, dry flesh, interesting but not sensational flavor. Could take it or leave it. Alleged to improve in storage.

St. Edmund Pippin: This one was no good when tasted a couple of weeks ago off of another branch on another tree. This time, some small stunted apples off of another tree were quite good, juicy and crunchy enough, with nice flavor and no discernible pear taste like the last ones had.

Tydeman’s Red: Or so it’s labelled, unconfirmed. Large lopsided apple. Open texture, juicy, crisp, tasty enough, more like a cooker and seems like it’s probably great for sauce.

Sweet 16: This year has none of the beloved cherry and almond flavors, but it has anise flavor that is seriously all up in your face. Not my favorite flavor. This apple can really vary drastically from year to year.

Mannington Pearmain: This apple has always cracked badly, but this year it didn’t too much. It’s not very good though and I still won’t keep it. It’s not bad, just not anything I’d recommend for any use.

Saltcote Pippin: the presentation is a little thin, lowish sugar and fairly acid. Good flavor though. probably would be a good sauce apple.

Coe’s Golden Drop: Intense candy flavor, said by some to be “pear drop”. Definitely does have a pear taste, but with more going on too, making it a very singular apple. It is small, dry, hard fleshed, tannic, thick rough skin, and still very intriguing. I think better specimens are coming down the pipe as it ripens more.

Peace Garden: small, stripped red apple. Outstandingly boring in every way.

Seedling, Grenadine x ? (proably Goldrush) 11/4: Kind of boring, a bit tannic, nothing really very wrong with it, just a generic yellow apple. Probably will not make the grade

Seedling, Grenadine x Goldrush, 11/17: A very healthy looking seedling that stood out for scab free, healthy green foliage early in the season. Apples are small for the most part, fairly round, often with flesh protruding out of the stem well, like an outy belly button. Small speckles, yellow skin. Flesh is fine grained and a little chewy. Flavor unremarkable yellow apple flavor. Sugar seems very high! As it is chewed, the fine chewy flesh gradually releases a rising flood of sugar. It also still had a bit of starchiness to it, so the sugar will probably continue to rise even further. Thanks to Mike of Walla Walla’s contributions to my apple breeding project fund, I just purchased a brix refractometer. That measures dissolved solids, which in fruit juice is more or less indicative of the sugar content. So, I’ll get to test this apple next week.

Seedling, BITE ME!: This was the first apple I ever fruited. Read more about BITE ME! here. In this tasting it is probably tied with Sunrise for me, though Bite me has the more interesting flavor for sure, Sunrise is a very pleasant eating experience and has outstanding texture. I’m thinking a Wickson Sunrise cross could be good. Mild flavors as always, with the special crab flavor component inherited from it’s mother Wickson. Any specific analysis and description aside, I want to stuff them in my face and chew them up to get that awesome flavor out. Sugary and low acid, thin skin. Flesh texture can tend toward what is called melting in fruit tasting terminology, or kind of chewy and tender. At least this one was. The downside to BITE ME! is probably going to be apple scab, which is had very bad last year.

Seedling, Wickson, OP, 2010: Red skin, very pretty, with crazing, like the surface of an old cracked oil painting. It has watercore this year, which makes it hard to test. The bits I found without watercore were not super remarkable, though perfectly good. As a small apple, it kind of needs to perform very well as a dessert apple to justify it’s existence, unless it’s some kind of amazing cider apple. Not as promising as I thought earlier in the season. I’ll give it a couple more years and hopefully it will outgrow the watercore.

I hope to have scions of some of my best apples available in the web-store this winter.

The Venerated Golden Harvey, A Late Keeping, Heirloom, Dessert and Cider Apple of Alleged Surpassing Quality

Screen Shot 2018-09-28 at 11.01.13 AM.png

I have spent a lot of time researching apples. I used to spend hour after hour searching online for references in old books and magazines. I keep notes and quotes which I still add to occasionally. Of the more exciting and intriguing apples I ran across was the Golden Harvey, aka Brandy Apple. Since I started doing this type of research online, there are even more references that have been scanned and digitized. Below are the relevant references I’ve found on the Golden Harvey, which I’m making available here with links to the original texts in the hopes of saving some others the time it takes to dig up this stuff. There are a lot of them, more than can be found for most apple varieties.

Screen Shot 2018-09-28 at 4.21.42 PM.png

Aside from the apple in question, there are a few references comparing it to others, and most interesting, some references to it’s several offspring. A certain Mr. Knight seems to have been very taken with the Golden Harvey and a few other varieties, and used it in breeding new sorts. Most of those offspring are probably lost for good, unless someone hunts them down and saves any remaining trees. The only one I can find any current reference to is the Bringewood Pippin, which was recently found in an old orchard. It is also in my friend Nigel Deacon’s Collection in England. I’ve also heard of two current amateur apple breeders using Golden Harvey as a parent.

The Golden Harvey came to America along with several other interesting apples including Downton Pippin (on my want’s list), Cornish Gilliflower (have it!), Bringewood Pippin, Bittersweet Harvey. These were sent to the Hon. John Lowell of Massachusetts. Both Bringewood and Bittersweet Harvey were bred by intentional cross pollination by Mr. Knight of England, who you will read more about below.

Alas, I obtained a scion of Golden Harvey, grafted it, grew it for years until it fruited and it turned out to be a useless red apple of unknown variety. If anyone out there has the real Golden Harvey, feel free to send me a scion! I’m very interested in this apple for sugar content, quality and extreme storeability.


The Australasian Fruit Culturist: Containing Full and Complete Information as to the History, Traditions, Uses, Propagation and Culture of Such Fruits as are Suitable to Victoria, New South Wales, South Australia, Queensland, Western Australia, Tasmania and New Zealand, David Alexander Crichton, 1893

Golden Harvey (Brandy Apple).—An old English variety, with small nearly round fruit. Skin roughly russety on a yellow ground, with a tinge of red on the cheek. Flesh yellow, juicy, sub-acid, with an aromatic flavour. Ripens late, keeps fairly well; a good dessert, and first-class cider Apple. Tree moderate in growth, but bears freely.

https://archive.org/details/australasianfrui00cricrich/page/n161


British Pomology Or the History, Description, Classification and Synonymes of the Fruits and Fruit Trees of Great Britain, Robert Hogg, 1851

Fruit, small; oblate-cylindrical, even and free from angles. Skin, entirely covered with rough scaly russet, with sometimes a patch of the yellow ground color exposed on the shaded side, and covered with brownish-red on the side next the sun. Eye, small and open, with very short, reflexed segments, set in a wide, shallow, and slightly plaited basin. Stalk, half-an-inch long, inserted in a shallow cavity. Flesh, yellow, firm, crisp, juicy, sugary, with an exceedingly rich and powerful aromatic flavor.

This is one of the richest and most excellent dessert apples; it is in use from December to May; but is very apt to shrivel if exposed to light and air as most russety apples are.

The tree is a free grower, and perfectly hardy. It attains about the middle size and is an excellent bearer. When grown on the paradise stock it is well adapted for dwarf training, and forms a good espalier.

Independently of being one of the best dessert apples, it is also one of the best for cider; and from the great strength of its juice, the specific gravity of which is 1085, it has been called the Brandy Apple.

Bringewood Pippin: Flesh Yellowish, firm, crisp and sugary, with a rich and perfumed flavor. An excellent, though not first rate, dessert apple, in use from January to March. It’s only fault is the flesh being too dry… This is one of the varieties raised by Thomas Andrew Knight, esq., of Downton Castle Herefordshire, and which he obtained by impregnating the Golden Pippin, with the pollen of The Golden Harvey.

Siberian Bittersweet: This remarkable apple was raised by Mr. Knight from the seed of Siberian Crab, impregnated with the pollen of the Golden Harvey. I cannot do better than to transcribe from the Transactions of the London Horticultural Society, Mr. Knight’s own account of this apple. “The fruit contains much saccharine matter, with scarcely any perceptible acid: and it in consequence affords a cider, which is perfectly free form the harshness which in that liquid offends the palate of many, and the constitution of more: and I believe that there is not any county in England in which it might not be made to afford, at a moderate price, a very wholesome and very palatable cider....”

When the Juice is pressed from the ripe, somewhat mellow fruit, it contains a very large portion of saccharine matter: and if part of the water it contains be made to evaporate, in a moderately low temperature, it affords a large quantity of a jelly of intense sweetness, which to my palate is extremely agreeable: and which may be employed for purposes similar to those to which insipissated juice of the grape is applied in France. The Jelly of the apple prepared in the manner above described, is, I believe, capable of being kept unchanged during a very long period in any climate: the mucilage being preserved by the antiseptic powers of the saccharine matter, and that being incapable of acquiring, as sugar does, a state of crystallization. If the juice be properly filtered, the jelly will be perfectly transparent. [edit: should be good for the real no sugar added, shelf stable traditional apple butter recipes]

The tree is a strong and vigorous grower: a most abundant bearer, and a perfect dreadnought to the woolly aphis.

Siberian Harvey: “Specific Gravity of juice, 1091 [edit: a specific gravity of 1091 is almost 22% sugar! the only higher sugar apple I have heard of is Wickson bred in the early 20th century by Albert Etter, which has been claimed to reach a whopping 25%]. A cider apple raised by T.A. Knight Esq., and along with the Foxley, considered by him superior to any other varieties in cultivation. It was produced from a seed of the Yellow Siberian Crab, fertilized with the pollen of the Golden Harvey, the juice of this variety is the most intensely sweet, and is probably, very nearly what that of the Golden Harvey would be in a southern climate, the original tree produced it’s blossoms in the year 1807...

THE SIBERIAN HARVEY. Check out the RHS collection of apple watercolors here! https://www.rhs.org.uk/education-learning/libraries-at-rhs/collections/library-online/heritage-apples/hookers-paintings

THE SIBERIAN HARVEY. Check out the RHS collection of apple watercolors here! https://www.rhs.org.uk/education-learning/libraries-at-rhs/collections/library-online/heritage-apples/hookers-paintings

Hulbert’s Princes Royal:

A seedling from the Golden Harvey, but larger ; flesh more tender, and equally rich. It is a small dessert apple, of first-rate quality; and ripe in May.

https://archive.org/details/britishpomology00hogg/page/92


The fruit manual; containing the descriptions and synonymes of the fruits and fruit trees commonly met with in the gardens & orchards of Great Britain, with selected lists of those most worthy of cultivation. By Robert Hogg, London, Cottage Gardener Office, 1860.

Small, nearly round. Skin roughly russety, on a yellow ground, tinged with red next the sun. Stalk half an inch long, slender. Eye small, open and shallow. Flesh yellow, rich, aromatic and sub-acid flavour. A first rate dessert apple. December to June.

https://archive.org/stream/cbarchive_39329_apples1860/apples1860#page/n17/search/golden+harveu


Pyrus Malus Brentfordiensis:, or A CONCISE DESCRIPTION OF SELECTED APPLES BY HUGH RONALDS, F.H.S. 1831

GOLDEN HARVEY, or BRANDY APPLE.

A dessert apple not larger than the Golden Pippin; the eye broad; the stalk long and slender: colour light yellow with a flush of red and embroidered with a rougish russet. It is called Brandy Apple from the superior specific strength of its juice: is of remarkably close texture, very rich in flavour, and will keep till April or May. The tree is of slender growth, and does not bear well for the first two or three years, but after that time it seldom fails. Blossoms small: colour lilac and white.

https://archive.org/details/pyrusmalusbrent00ronagoog/page/n106


POMONA HEREFORDIENSIS; CONTAINING COLOURED ENGRAVINGS OF THE OLD CIDER AND PERRY OF HEREFORDSHIRE. BY THOMAS ANDREW KNIGHT, ESQ., 1811

THE GOLDEN HARVEY, OR BRANDY APPLE.

Three different varieties of Apples are distinguished by the name of Harveys in Herefordshire, the Golden, the Russet, and the Scotched: of these the Golden alone, which has derived its name from the bright yellow colour of its pulp, is valued for the press. It is doubtful whether the writers on fruits of the 17th century, were acquainted with this Apple: though Evelyn states, that some persons preferred the Cider of the “Harvey Apple (being boiled),” to all other Ciders; and the Harvey Apple, and Russet Harvey, are both mentioned by Worlidge. For if the Golden Harvey had been known to Worlidge, its excellence for the dessert, would have caused it to be cultivated in every part of England; and to be every where esteemed, as it is in Herefordshire, the best fruit of its species. The Cider afforded by the Golden Harvey, generally possesses very great strength, with little richness; and it has been thence called the Brandy Apple: in a very warm situation and season it, however, sometimes affords a most exceedingly rich and fine Cider. The fruit may be preserved for the dessert, in perfection, from December till May, and even later. The trees of this variety still possess a considerable share of health and vigour; and for culture, in the garden only, it is not much impaired by age. The specific gravity of its juice, considerably exceeds that of any other Apple which I have yet had occasion to describe, being about 1085.

https://ia902808.us.archive.org/13/items/pomonaherefordi00kniga/pomonaherefordi00kniga_djvu.txt


THE POMOLOGICAL MAGAZINE; OR, FIGURES AND DESCRIPTIONS OF THE MOST IMPORTANT VARIETIES OF FRUIT CULTIVATED IN GREAT BRITAIN VOL. I, 1828

This is by some supposed to be an Apple of very ancient date. Trees of considerable age are said to be growing on the Cotswold Hills, in Gloucestershire. By others it is doubted whether the writers on the fruits of the 17th century were acquainted with it, though Evelyn says, that some persons preferred the cider “of the Harvey Apple (being boiled)" to all other ciders ; and the Harvey Apple and Russet Harvey are both mentioned by Worlidge. These doubts are very much strengthened by the fact that the Golden Harvey is even at the present day but little cultivated in comparison with its surpassing merits. It is, perhaps, the very best of all our fruits, on which account it is probable, that if of an old origin, it would have been by this time more universally known. It is not to be supposed, that because Worlidge names two sorts of Harveys, this must necessarily be one of them; for in the cider counties there appear to be three distinct kinds under that name, and the Harvey Apple of Norfolk is a sort totally different from either of these three.

A most excellent variety, bearing in great abundance in many situations, ripening in December, and keeping till May, or even longer. Its flavour is more rich and agreeable than that of any other variety of Apple. No garden, however small, should be without it.

It is much esteemed as a cider fruit, on account of the quantity of sugar it contains. The cider made from it is very strong, but not rich, for which reason it has acquired the name of the Brandy Apple. The specific gravity of its juice is said, in the Pomona Herefordiensis, to be 1085.

Wood weak, erect, downy at the extremities, olive green, a little spotted.

Leaves ovate, acuminate, finely serrated, appearing early, but slightly downy in any part. Stipules subulate, smooth.

Fruit small, quite round, often growing in clusters, free from angles or irregularities of surface. Stalk short. Eye small, contracted. Skin dull russet, with a bright yellow ground, often breaking through the russet in patches. Flesh firm, breaking, very rich, juicy, spicy, and high-flavoured.

https://archive.org/details/pomologicalmagaz00lind/page/n165


Journal of the Royal Horticultural Society of London, Vol 10, 1888

Golden Harvey (Wheeler), D. Small, conical, open eye, light russet, flushed red, sometimes streaked, flesh firm, yellow, rich, sweet, mid-season ; first quality.

https://archive.org/stream/journalofroyalho1018roya#page/n1


HINTS ADDRESSED TO PROPRIETORS OF ORCHARDS

The Golden Harvey, or Brandy Apple, This variety is generally esteemed in Herefordshire the best fruit of its species, and I think with reason. Its season commences in November, and it remains in perfection, with proper attention, till May. This variety has long been cultivated, and it has, consequently, passed the period of youth and vigour, but it is still perfectly well calculated for gar- den culture. A coloured plate of this variety is given in the eighth number of the Pomona Herefordiensis, with that of its offspring, the Siberian Harvey, to which alone it is inferior in richness and in the high specific gravity of its juice. It is of little value, except for the press.

The Siberian Harvey. This variety is the offspring of a seed of the yellow Siberian crab, and the pollen of the last mentioned, and it possesses the hardy character of the former with the saccharine juice of the Golden Harvey: the gravity of its juice was .1091.

The Court of Wyck Pippin. This is a fine thriving variety and not an old fruit, it is much cultivated in Somersetshire, and is highly prized. This appears more like the Golden Harvey than any other apple, and I should think, is really an improvement on that fruit. I brought some of the fruit to London, and on giving it to several persons who are judges, it was pronounced one of the best apples. This, as well as the golden Harvey, partakes much of the nature in all respects, of the old golden pippin, except in colour the golden Harvey has a fine yellow russet on a red, and the court of Wyck is so much like it, that except in its being a more freely growing tree, and the fruit somewhat larger, no one I think could tell any great difference in the two.

https://archive.org/stream/hintsaddressedto00sali#page/124/search/golden+harvey


The Illustrated London Almanac, Jabez Hogg, James Glaisher Illustrated London News, 1859

Golden Harvey,—"No garden which can contain ten trees should do without one of this —it is one of the richest and most excellent of our dessert apples, and will keep until May. Parkinson mentions it, probably, in 1623, as "The Harvey apple, a fair, greatly good apple


The Penny Cyclopedia of the society for the diffusion of useful knowledge Vol 2, 1834

Of table apples, the varieties are endless; but by far the greater part of the local sorts, and of those commonly cultivated, is of only second-rate quality. The finest variety of all is the Cornish gilliflower; no other equals this in excellence, but it is unfortunately a bad bearer. Of those which combine productiveness and healthiness with the highest quality, the six following must be considered the best: golden Harvey, old nonpareil, Hubbard's pearmain, Ribston pippin, Dutch mignonne, Court of Wick. Finally, the best selection that could be made for a small garden, so as to obtain a constant succession of fruit from the earliest to the latest season, would be the following, which are enumerated in their order of ripening, the first being fit for use in June, and the last keeping till the end of April.

https://books.google.com/books?id=tP5eAAAAcAAJ&pg=PA190&dq=%22golden+harvey%22+apple+variety&hl=en&sa=X&ved=0ahUKEwjC4Z69ptrdAhV6GDQIHZtbA6Y4ChDoAQg4MAM#v=onepage&q&f=false


The book of the garden, Volume 2, W. Blackwood, 1855

Golden Harvey.—Colour russet and yellow; form roundish; size under medium; quality first-rate. In use from November till Juno. One of our best dessert apples, having a peculiar flavour of brandy, hence often known as the brandy apple. It is much cultivated in the west of England, even in elevated localities, for the purpose of making the best quality of cider, as well as for tho dessert. It is, however, by no means a hardy tree, yet succeeds well at Dalkeith as a dwarf standard.

https://books.google.com/books?id=xkJJAAAAMAAJ&pg=PA432&dq=%22golden+harvey%22+apple+variety&hl=en&sa=X&ved=0ahUKEwia0OupptrdAhU1JTQIHZqoDlAQ6AEIWjAJ#v=onepage&q=%22golden%20harvey%22%20apple%20variety&f=false


The English Cyclopaedia: A New Dictionary of Universal Knowledge, Volume , By Charles Knight, 1859

England is celebrated for the excellence of its cider; a beverage which perhaps acquires its highest degree of excellence in Herefordshire, and the neighbouring counties. In those districts, it has been found that the best varieties are the foxtwelp, a worn-out sort, much used for mixing with other kinds, to which it communicates strength and flavour; the red must; the hagloe crab, which, however, is only good in a dry soil, on a basis of calcareous stone, in a warm situation and season; the grange apple; the orange pippin; the forest styre, which is supposed to produce a stronger cyder than any other, but is not a good bearer; the yellow Elliot; the Bennett; the Siberian Harvey; Stead't kernel; the friar, which is very hardy; and above all, the golden Harvey, or brandy apple. The specific gravity of the juice of these varieties has been stated by Mr. Knight to be as follows:— Besides these, the coccagee and the Siberian bittersweet are in much estimation.

https://books.google.com/books?id=vHdBAAAAcAAJ&pg=PA437&dq=%22golden+harvey%22+apple+variety&hl=en&sa=X&ved=0ahUKEwia0OupptrdAhU1JTQIHZqoDlAQ6AEIOjAD#v=onepage&q=%22golden%20harvey%22%20apple%20variety&f=false


The Gardeners' Chronicle: A Weekly Illustrated Journal of Horticulture and allied subjects, Vol XL, Third Series, 1906

BRANDY APPLE This is a small Herefordshire Apple called also Golden Harvey. It is globular in form, obscurely five angled, round, with the deep eye and with deep basin in which the short stalk is set. The skin is smooth, deep crimson; the carpels are acute. Flesh white (yellow in Golden Harvey), crisp; sweet with a marked aromatic flavour. Hogg's Manual, fifth edition, p. 88, describes the skin as russety, so that probably our specimen is not correctly named, though in other points it agrees quite well with Hogg's description. It is a good dessert Apple and is stated to be an excellent cider Apple, owing to the strength of its juice.

https://books.google.com/books?id=zlACAAAAYAAJ&pg=PA439&lpg=PA439&dq=hogg+brandy+apple+golden+harvey&source=bl&ots=uUARos9ZjU&sig=_7Y1ZvFlQVtJ5nkKAL2-cFAQhuU&hl=en&sa=X&ved=2ahUKEwiAlKGMh9vdAhXRIjQIHaelB98Q6AEwC3oECAMQAQ#v=onepage&q=hogg%20brandy%20apple%20golden%20harvey&f=false


The Apple, In Orchard and Garden, James Groom, 1883

Golden Harvey, 3 size, 1 quality. December to May. A beautiful fruit, one of the very best

https://archive.org/stream/appleinorcharda00groogoog#page/n6/search/%22golden+harvey%22


A Handbook of Hardy Fruit, More Commonly Grown in Great Britain, Apples and Pears Edward A Bunyard FLS, 1920

GOLDEN HARVEY. (Brandy Apple, Round Russet Harvey.) Dessert, till May, small, 2 by if, flattened, round, even. Colour, greenish-yellow with dull red flush, covered with thin russet. Flesh, firm, yellow, very sweet and rich. Eye, open in a shallow basin, Stem, moderately long, in a small cavity. Growth, moderate; fertile. Leaf, rather small, nearly flat. Origin, English ; known early in the seventeenth century. The original tree was at the Royal Horticultural Show, at Chiswick, in 1821. One of the good old sorts which have been neglected.

https://archive.org/stream/handbookofhardyf01bunyrich#page/n5/search/%22golden+harvey%22


The Fruit Cultivator, John Rodgers, 1834

Golden Harvey. — Ripe in December, and keeps till June. This is one of the excellent apples, of which mention is made in the Herefordshire Pomona; and highly extolled by the first orehardist in the kingdom, T. A. Knight, Esq., who has caused not only this, but many more superior kinds of fruit, to be brought into notice and general cultivation. This apple is small, round, and of a handsome shape; the colour a russet yellow, tinted on the sunward side with bright red. The pulp is yellow, breaking and crisp ; abounding with a high-flavoured juice, which remains long unexhausted. The tree is of moderate growth and size, healthy, hardy, and a good bearer. It falls in among the second grade of orchard trees; and, if worked on the paradise stock, no one answers better for either dwarfs or low espaliers. This apple in fine seasons produces the strongest cider; hence it is called the "Brandy Apple", where that liquor (cider) is manufactured. No collection or orchard should be without a few trees of this excellent fruit.

https://archive.org/stream/perkins73098663#page/n83/search/%22golden+harvey%22


A Guide to the Orchard and Kitchen Garden, George Lindley FRS, 1831

Fruit small, quite round, generally about five inches in circumference, and free from angles or irregularities of surface. Eye small, open; the segments of the calyx narrow, very short and diverging, placed in a flat, very shallow, slightly-crumpled basin. Stalk half an inch long, slender, not protruding beyond the base. Skin dull russet, with a bright yellow ground, often breaking through the russet in patches, and marbled on the sunny side with a lively shaded red. Flesh yellow, firm, breaking, very rich, juicy, spicy, and high flavoured.

A most excellent and beautiful dessert apple, ripening in December, and keeping till May or June. The tree is not a large grower, but very hardy; a great and constant bearer, and no garden, capable of containing ten trees, ought to be without one of it.

There are different varieties of the apple cultivated in Herefordshire under the name of Harvey: the Golden Harvey derives its name from the bright yellow colour of its pulp.

In order to keep some of the more valuable Apples in a perfect state to a late period of the season, they should hang till they can be readily detached from the tree. They should then be placed in casks or boxes, as they are gathered, beginning with a layer of thoroughly dry pit sand in the bottom, then a layer of Apples, placed close to each other, then another layer of sand, just sufficient to cover the fruit, and no more, and so continuing alternately, till the cask or box is full, finishing with a covering of sand. These should be placed in the fruit room; where they may remain undisturbed till the others of the same kind kept on the shelves are nearly done. This method has been practised many years ago at Holkham, where I have tasted the Golden Harvey Apple and some others, so kept, in as high a state of perfection in the month of May

https://archive.org/stream/guidetoorchardfr00lindrich#page/n9/search/%22golden+harvey%22


The Gardeners Assistant, William Watson

Golden Harvey. — Dessert. December-May. An excellent table Apple. Tree of moderate growth but healthy and forms an excellent small tree on the Paradise stock, bearing freely. Fruit small, round, flattened, yellow and russety, flavour exceptionally rich.

https://archive.org/stream/gardenersassista04thom#page/n0/search/%22golden+harvey%22


The New American Orchardist, William Kenrick, 1833

A dessert apple not larger than the Golden Pippin; the eye broad; the stalk long and slender; color light yellow, with a flush of red and embroidered with a roughish russet. It is called Brandy Apple from the superior specific strength of its juice: is of remarkably close texture, very rich in flavor, and will keep till April or May. The tree is of slender growth, and does not bear well for the first two or three years, but after that, it seldom fails. Blossoms small: color lilac and white. Specific gravity of its juice 1.085. A tree of this variety was sent by Mr Knight to the Hon. John Lowell in 1823, and has been by him distributed to all who have applied.

https://archive.org/stream/newamericanorch05kenrgoog#page/n62/search/%22golden+harvey%22


Science and Practice of Farm Cultivation, James Buckman FLS FGS, 1865

Golden Harvey, spec. grav. 1085, a first-rate cider fruit. No orchard should be without this.

https://archive.org/stream/cu31924080031127#page/n7/search/%22golden+harvey%22


The Apple, it’s History, Varieties and Cultivation, D. T. Fish,

Golden Harvey or Brandy Apple. —Fruit small russety, flesh compact, firm, rich, and highly aromatic. This is a valuable little apple for dessert, and also for stewing in syrup, to be served as a sweet. The solidity of its flesh enables it to keep its form when treated in this way.

https://archive.org/stream/apple00fish#page/8/search/%22golden+harvey%22


The Gardener’s Magazine and Register of Rural and Domestic Improvement, Vol IV, 1838

Apples : Golden Harvey (perhaps the richest table apple)

Some years ago, a valuable dessert apple, to which the name of Cornwall pippin has been given, was raised from seed at this place. The appearance of the fruit induces the supposition that its parents were the golden Harvey and the golden pippin, but its real origin is unknown. — October 12. 1837.

...very fine fruit of the golden Harvey and nonpareil apples, in illustration of his manner of keeping fruit of this description. The apples were found, upon trial, to have preserved their flavour in great perfection.

https://archive.org/stream/gardenersmagazi10loudgoog#page/n3/search/%22golden+harvey%22


A pictorial Monthly Magazine of Flowers Fruits and General Horticulture, Thomas Moore, FLS, FRHS, &C. 1876

COX’S REDLEAF RUSSET APPLE.

This Apple was raised from seed by Mr. Cox, of Redleaf, who thus speaks of it:—“The Redleaf Russet is ostensibly, according to my own manipulation, a cross between the Golden Knob and the Golden Harvey, but there is a possibility that I was anticipated by the bees, as a tree of the Old Nonpareil grew near by; and I am the more confirmed in this because the fruit possesses three of the characteristics of the Old Nonpareil—namely, the shape, the long stalk, and the tenderness of flesh. The colour of the skin is that of its parent, the Golden Knob. The yellow colour of the flesh would seem to be derived from the Golden Harvey, while the growth of the tree and manner of bearing resemble both Old Nonpareil and Golden Harvey more than the Golden Knob. When in perfection the flavour is most delicious and peculiar to itself, and it may be considered in perfection from February till the end of May, after which, although keeping sound till the end of July, the flavour gradually deteriorates.

The following description of the Redleaf Russet is from Hogg’s Year-Book (1876, p. 119):—“Fruit round, inclining to oblate; in appearance very like Golden Knob. Skin entirely covered with bright cinnamon-coloured russet, which is thinner on the shaded side, where it exposes a little of the yellow ground. Eye partially open, with flat segments set in a pretty wide and deep saiicer4ike basin. Stalk three-quarters of an inch long, pretty stout, set in a round cavity. Flesh yellowish, tender, crisp, very juicy, and sweet, with a rich flavour and pleasant aroma. An excellent dessert Apple, in use from December to February.

This was raised by Mr. John Cox, gardener at Redleaf, near Pens- hurst, Kent, and received a First-class Certificate from the Royal Horticultural Society, January 20, 1875.” This Apple will undoubtedly prove a most valuable addition to our high- flavoured very late table varieties. The entire stock is in the hands of Messrs. W. Paul and Son, Waltham Cross, Herts, who will be prepared to distribute it in November next.

REDLEAF RUSSET, POSSIBLE OFFSPRING OF GOLDEN HARVEY

REDLEAF RUSSET, POSSIBLE OFFSPRING OF GOLDEN HARVEY

https://archive.org/stream/floristpomologis1876unse#page/n0/search/%22golden+harvey%22


My Garden, It’s Plan and Culture, Alfred Smee, FRS, 1872

Apples which are fine in texture and rich in flavour are selected for the purposes of the table, of which the Irish Peach, the Ribston Pippin, and the Golden Harvey are notable examples.

January produces the large Reinette du Canada (fig. 244), which is generally a good bearer, and gives a large fine apple with excellent flavour. The Golden Harvey (fig. 245), a small apple, ripens about this time.

https://archive.org/stream/mygardenitsplanc00smeerich#page/146/search/%22golden+harvey%22


Fruits and Fruit Trees of America, A.J. Downing 1845

An excellent, high flavoured little dessert apple from England, which bears well, and retains its character with us. It is rather adapted for the fruit garden than the orchard — as the tree is of slender growth, and it would not be a popular market fruit here.

Fruit small, irregularly round, and about two inches in diameter. Skin rather rough, dull russet over a yellow ground, with a russety red cheek. Calyx small, open, with stiff segments, and set in a very shallow basin. Stalk half an inch long, and rather slender. Flesh yellow, of remarkably fine texture, with a spicy, rich, sub-acid flavour. The fruit should be kept in a cellar, or it is apt to shrivel. December to April.

https://archive.org/stream/fruitsandfruitt02downgoog#page/n129/search/%22golden+harvey%22


Hooper’s Western Fruit Book, A compendious collection of facts from the notes and experience of successful fruit culturists, E.J. Hooper 1857

Remarks. — " Unworthy." — Dr. Warder, one of our best Western Pomologists.

[EDIT, In this case western referred to the Midwest, as in Ohio. As you can see from this photo, these pomologists were not messing about when it came to the serious business of fruit.]

Screen Shot 2018-09-28 at 9.29.40 AM.png

https://archive.org/stream/hooperswesternfr00hoop#page/n17/search/%22golden+harvey%22

American Pomology, Dr. John A. Warder, 1867

[Note. This is the Same Warder that condemned the this variety as simply “unworthy” 10 years earlier in the above Hooper’s Western Fruit Book.]

This highly flavored English apple is often referred to, but is rarely seen in American collections ; but as it may be interesting to some, I quote Downing's brief description :

" Fruit small, irregularly round ; Skin rather rough, dull russet over a yellow ground, with a russety red cheek; Flesh yellow, of fine texture, with a rich sub-acid flavor. The fruit is apt to shrivel."

Tree of slender growth.

https://archive.org/stream/americanpomology00ward#page/n5/search/%22golden+harvey%22


The Fruit Cultivator’s Manual, by Thomas Bridgeman, Gardener, Seedsman, and Florist 1847

A dessert apple, not larger than the Golden Pippin ; colour light yellow, with a flush of red, and embroidered with a roughish russet. It is called Brandy Apple from the superior specific strength of its juice, being 1085; it is of remarkably close texture, very rich in flavour, and will keep till April or May.

https://archive.org/stream/fruitcultivators00bridrich#page/n5/search/%22golden+harvey%22e


Deutchland’s Apfelsorten, DR. TH. Engelbrecht, 1889

Golden Harvey auch llranily Apple

Gestalt 54: 47 — 48, stark uligestumpft liinfrliclirund, raittelUancli. Hälften gleich.

Kelch offen, gross, gelblich, locker behaart. Blättchen ziemlich schmal, am Grunde getrennt, lang, aufrecht, nach aussen gebogen, fein gespitzt. Einsenk. ziemlich tief, weit, etwas ausgeschweift, eben, yuersehn. rund.

Stiel holzig, dünn, etwa IHtnm 1., dunkelbraun, kahl. Höhle massig tief, weit, eben, zuweilen mit Fleisehwulst, brotizefarben berostet.

Schule glatt bis fein rauh, ziemlich glänzend, in der Zeitigung goldgelb, sonnenw. rariuoisin, fast blutrolh überzogen, nicht oder nicht deutlich ge.streift. l’unkte zahlreich, niitteldick bis dick, auch eckig, braun. Anflüge bräunlich gelben Kostes nicht selten. Hie Frucht welkt in einigen Gegenden zienilich stark, (ieruch fehlt. >

Kernhaus 33:27, zwiebelförm. Kammern etwas tiefsitzend 10:14, stielw. stumpf gespitzt, kelchw. abgerundet, fast glattwandig, geräumig, ge- schlossen oder sehr wenig offen. Achsenh. schmal. Kerne meistens zu 2, mittelgross, vollkommen, eiförmig, gespitzt, ka.stanienbraun.

Kelchböhle triehterfVirmig, mit oft recht flacher Mündung, '/j zur Achsenh. Pistille ziemlich kurz verwachsen, am Grunde fast kahl, in der Theilung etwas behaart. Staubfiiilen wenig über mittelständig.

Fleiscb gelblichweiss , fein, fest selbst gegen Ende der Zeitigung, saftig, edel rcinettenartig gewürzt, etwas vorherrschend sehr angenehm weinig, nicht viel weniger süss.

Hie Früchte erhielt ich von Kolbe -Langwarden (Oldenburg) und als Brandy von Hoesch-Hüren, sie waren getrocknet sehr schmackhaft.

Htt H iwOflTuiifcl (Kog.) Almost OOl + t, January to May.

(THE WACKY DIGITAL TRANSLATION BELOW. GERMANS, FEEL FREE TO SEND ME A BETTER TRANSLATION!)

Golden Harvey also Brandy Apple

Figure 54: 47-48, severely uli-stomped liinfrliclund, raittelUancli. halves equal.

Goblet open, large, yellowish, loosely hairy. Leaves quite narrow, on Basically separate, long, upright, bent outward, finely pointed. The immerse. pretty deep, wide, a bit out of sorts, even, yuersehn. round.

Stalk woody, thin, about 1st grade, dark brown, bare. Cave massively deep, wide, even, sometimes with Fleisehwulst, rusted britzizefarben.

Skin smooth to fine rough, rather shiny, golden yellow in the evening, Solstice. rariuoisin, almost blood red coated, not or not clear striped. There are numerous, thin to thick, even angular, brown. Approaches brownish yellow Kostes not infrequently. The fruit withers in in some areas it is strong, (it is missing

Kernhaus 33:27, bulbous. Chambers a bit deep sitting 10:14, stielw. dull tipped, kelchw. rounded, almost smooth-walled, spacious, closed or very little open. Achsenh. narrow. Cores mostly to 2, medium-sized, perfect, ovate, pointed, ka.stanienbraun.

Kelchböhle TriehterfVirmig, with often quite flat mouth, '/ j zum Achsenh. Pistachio rather short, at the base almost bald, in division a bit hairy. Dusting a little above medium.

Fleischb yellowish white, fine, firm even towards the end of the Zeitigung, juicy, noble rincette-like spiced, slightly predominantly very pleasantly vinous, not much less cute.

Hie fruits I received from Kolbe -Langwarden (Oldenburg) and as Brandy from Hoesch-Hüren, they were dried very tasty.

https://archive.org/stream/bub_gb_tR4EMgEACAAJ#page/n619/search/%22golden+harvey%22


The Book of the Garden, Charles M’Intosh, 1855

Golden Harvey. — Colour russet and yellow; form roundish ; size under medium ; quality first-rate. In use from November till June. One of our best dessert apples, having a peculiar fLavour of brandy, hence often known as the brandy apple. It is much cultivated in the west of England, even in elevated localities, for the purpose of making the best quality of cider, as weU as for the dessert. It is, however, by no means a hardy tree, yet succeeds well at Dalkeith as a dwarf standard.

https://archive.org/stream/cu31924051991929#page/n431/search/%22golden+harvey%22


The Florist and Fruitist, 1859

Class E. — Premiums of 1/. and ]0*\ for the best and second best six of any other dessert Apple in season, excepting old Nonpareil. The first prize was awarded to Mr. James Holder, of Reading, for Golden Harvey, from a standard; soil very rich, subsoil sandy loam, over gravel. Fruit fine coloured, very richly vinous, and sugary in flavour, and, but for being somewhat shrivelled, — probably owing to having been somewhat too early gathered, — they would have been, in every respect, one of the best dishes ever laid before the society. — The same variety was also sent by Mr. Simpson (gardener to Lady Molyneux, Stoke Farm, near Slough). Very plump and juicy, but small and slightly astringent.

https://archive.org/stream/floristfruitistg59lond#page/54/search/%22golden+harvey%22


The Horticulturist, 1860

Golden Harvey, syn. Brandy apple. Small, roundish, yellowish russet, firm, exceedingly rich, and high flavoured; in this respect a fruit of the very highest excellence; December to May; the tree is slender, upright, and a moderate bearer.

https://archive.org/stream/cu31924002832552#page/n3/search/%22golden+harvey%22


MONTHLY NOTICES OF PAPERS AND PROCEEDINGS AND REPORT OF THE ROYAL SOCIETY OF TASMANIA FOR 1879

Mackintosh's Book of the Garden, Vol. II. , p. 345, may assist in throwing some light on the subject. After describing the moth, he goes on'to state that it invariably selects the finest apple in which to lay its eggs, knowing instinctively that these will be most palatable to its future progeny. (In Tasmania the Golden Harvey is most affected).

https://archive.org/stream/papersproceeding1879roya#page/n5/search/%22golden+harvey%22


The Practical Gardener and Modern Horticulturist, Charles McIntosh, 1828

Brandy Apple, Golden Harvey. — Fruit small, resembling a golden pippin in shape, yellowish russet color, fine flavor ; in use from January till March. Is much esteemed in Herefordshire, where it has been long cultivated. Tree handsome habit and extremely hardy.

https://archive.org/stream/practicalgarden00mcingoog#page/n493/search/%22golden+harvey%22


Tilton’s Journal of Horticulture and Florists Companion, J.F. Tilton, 1870

Notwithstanding the efforts which the late Mr. Thomas Andrew Knight made to cross existing varieties of the cultivated apple with the Siberian Crab, they all failed to produce a result which has been of any real benefit. Mr. Knight's object in thus crossing these individuals was, as he states, to obtain such fruits as vegetate very early in spring by introducing the farina of the Sibe- rian Crab into the blossom of a rich and early apple, and by transferring, in the same manner, the farina of the apple to the blossom of the Siberian Crab. At the time Mr. Knight wrote this, the trees so produced had ngt yet borne fruit ; but he observes, 'The leaf and habit of many of the plants that I have thus obtained possess much of the character of the apple, whilst they vegetate as early in the spring as the apple of Siberia, and appear to possess an equal power of bearing cold.' But what was the result of these carefully performed experi- ments ? From this crossing we got the Siberian Bittersweet, which, Mr. Knight himself says, is wholly worthless, except for the press, that is, for cider making. Then the Siberian Harvey has a juice so intensely sweet,' that it, too, can only be used, mixed with other apples, for cider. Both of these were raised from the fruit of the Siberian Crab fertilized with the Golden Harvey, one of our best dessert apples.

https://archive.org/details/tiltonsjournalof71870bost/page/n7?q=%22golden+harvey%2

Early Fall Apple Tasting, September, 2018- New Seedling + New and Heirloom Varieties

On September 18th I got to taste a few apples, including a new seedling apple. Some were over the hill and some were not yet ripe, but here is the report.

SKINNER’S SEEDLING: I have some doubt about the identification of this apple, just because it was not very good and reports in the old literature are glowing. Mine also have a lot of red stripping and the descriptions don’t really indicate that as much as they emphasize the yellow background with light striping or just a blush on the sunny side. The birds hit them pretty hard in spite of my covering them with footsox. Birds like large fruit, just like a lot of people do. I’ve been waiting for this variety to bear fruit for a long time. It was grown from a seed of Newtown Pippin brought to California via Wagon by Judge Henry Chapman Skinner in 1849. It is one of only two seedlings that survived out of 13 seeds and was planted on the banks of Coyote Creek in San Jose California. Out of only two seedlings that were allowed to grow, he considered both worth keeping, and this one became somewhat famous, at least in California, where it was even planted by some commercial orchardists.

Funny thing, I used to live right near the site of the original tree when I was just starting my first few years in school. We lived in a crappy, stuccoed, pink duplex. My parents managed to raise three kids on a low income while my mom rode her bike to nursing school. Across the street was a large walnut orchard, and the valley, once a great agricultural area with deep, fertile soil, was still dotted here and there with orchards and fields with solitary large old two story farmhouses defiantly standing their ground. By now, even more of that outstanding agricultural land has been paved over with cheap tract housing. Judge Skinners place was probably quite large and is now all dense housing. We used to explore and catch crawdads in the same Coyote Creek that Skinner’s Seedling was planted along, only about 15 blocks from where we lived. At that time, the creek was full of old tires, shopping carts, trash of all kinds and huge numbers of what are still to this day the largest crawdads I’ve ever caught. We used to go there with some neighborhood kids that sniffed glue on a regular basis. They seemed like about the dumbest people I ever met at the time and probably were lol. As dirty, rough and probably dangerous as that city environment was, we kids still wandered and played as we pleased. I think a lot of parents don’t give their kids that same kind of free reign these days. I think Judge skinner would be shocked and saddened at the defiled state of that once beautiful, prime farm land, though he was unknowingly paving the way for that eventuality.

This apple was very highly regarded. Check out the following quotes:

"Santa Clara King: Fruit large to very large; form, oblate, conic, slightly mixed; color rich lemon yellow, faintly striped with bright red; flesh, yellowish white, very tender, juicy, sprightly, mild subacid; quality best. Season, September and October. This is the best very large apple we have seen. Said to be a good grower and productive."

“It is one of our best summer apples. The color is a light yellow, quality good and sells well. The tree is a good grower and almost wholly resists blight.”

“form, oblate, conical; size, large; color, light green, blushed: flesh. texture fine, tender, juicy ; color, white ; flavor, subacid : quality, very good to best: use, dessert, kitchen, market: season. August.”

“The Skinner seedling as it is popularly known by thousands of consumers, or Skinner's pippin as it was named by the Horticultural Society, is one of the meritorious products of the Santa Clara valley, as well as having the"distinction of originating here. Its popularity increases as it becomes more widely known, for it undoubtedly suits the taste of more people during its season than any other apple grown in California. Ripening as it does during the warm, sunny weather of the first week in August. it must be picked at the right time and carefully protected from the weather in order to preserve its delicate flavor which evaporates and passes away rapidly when exposed to sun and wind. Its history is quite interesting and is about as follows.On March 29, 1849, Henry Chapman Skinner left Milwaukee, Wis., and crossed the plains to California, taking with him some Newtown pippin apples. On the long trip across the plains most of the apples decayed, but one was saved, which contained thirteen seeds, a lucky number in this instance. The seeds were carefully saved. Judge Skinner settled in San Jose in April. 1850, at what is now known as the Sweigert place, corner of Fifteenth and Julian streets. In the fall he planted thirteen apple seeds. Seven of them grew, but were all discarded but two. One of these proved to be a sour apple of good quality, and the other was Skinner's seedling. The tree grew thriftily, as is its nature, and in September, 1857, the first fruits, thirty-two in number were exhibited at the annual fair of the Santa Clara Valley Agricultural Society. The last record of the original tree was in 1878. It was then still standing at the back of the place near the Coyote creek, and in full bearing.”

“Skinner's Seedling is but little known in this country, but is destined to be the greatest money maker of any other apple grown in this section ripening as it does ahead of the Gravenstein. The tree is of a very hardy stock and a sure cropper. The apples are large, well formed, of splendid flavor and unusual shipping qualities. The color is of a clear, transparent, yellowish green, with a slight blush where it is kissed by the sun. Theo. Heiss, who lives northwest of Browns Valley, has a dozen or so of old trees of the above variety which bore a heavy crop of splendid apples this year and sold for a handsome price in Vallejo and was preferred by those who had used them to the Gravenstein or any other apple. The wood of the limbs is very tough and can hardly be broken. [This statement is rather surprising to us as we have long considered the wood of Skinner's Seedling as exceedingly brittle, especially- the wood of the spur which is very apt to come off with the fruit. Are we mistaken in that matter? —Editor.]”

Notes for the horticultural society meeting in November 1887 indicate that Skinner’s Seedling was so named instead of the name Santa Clara County King. E.J. Wickson, author of California Fruits apparently disagreed with adding seedling to apple names, which I tend to agree with. It was agreed to hereafter call the apple known both as Skinner's Seedling " and the "Santa Clara County King" by this former name….. but Mr. Coates and Mr. Wickson both protested against tacking the word seedling after names. Mr. Wickson urged that this practice was condemned by the American Pomological Society. Mr. Coates praised the practice of Mr. Hatch, which is to find original and characteristic names for new varieties.”

My own samples, if they are indeed Skinner’s Seedling, seemed to ripen about the right time, but I got them late and they had gone soft. The ones I tasted earlier were not very promising either, but I may have missed a magic window. It sure does sound promising in the old literature though.

GRAVENSTEIN: It’s hard for me to ever get this apple past the birds. It’s pretty good eating at it’s best, but it’s most suited to cooking. The flavor I can’t really describe, but it’s good and somewhat unique. This year I discovered the earlier Viking, which bears surprising similarities, but seems perhaps more intriguing and more complex in flavor, if more thin and acidic. There is a similarity between the flavors of the two apples somehow. I don’t believe there is any Gravenstein in Viking’s genes, but they seem like siblings in everything from appearance to leaning toward acid and the style of flavor.

MOTHER: Mother is very good this year. It has a rich flavor, fruity, on a background of “red apple”. In the best ones there is what I usually refer to as a fruit candy flavor, because my reference point growing up was not flavorful apples, but artificially flavored fruit candy from the corner store. That’s kind of sad, but I know most people are probably in the same boat these days. Mother is worth growing and has a long reputation as an exceptional early apple. Overall mother get’s two thumbs up for productivity, beauty and flavor this year.

SUNRISE This year Sunrise lived up to it’s usual reputation, being mild, sweet, unoffensive, easy to eat, pleasant, but perhaps a little boring. I think they are still a week or more away from being at their best though and I have hopes that they will become a little richer and sweeter if hung longer in the sun. I grafted a branch out in a sunny spot some years ago and it’s really just starting to bear well, so I’m hoping to taste more good specimens over the coming weeks.

ST. EDMUND’S PIPPIN (aka st. edmund’s russet): Early in the season, this apple tasted thin and acidic. By now it is soft and insipid. It is the most pear-like apple I think I’ve ever had. It has the grainy texture of an under ripe pear, pear flavor and pear-like russet skin. The flesh is very dry and the fruit is very light in weight. Overall it is a disappointment here and will probably be grafted over. Originally it seemed to hold promise as a good early russet, but it’s also not as early as I was hoping. I will probably graft it over to an earlier apple like.

HOLLOW LOG: An old southern apple. Looking at the description in Lee Calouns book Old Southern Apple, it may be mislabeled, since neither the season or the description match. It is not quite ripe yet, but seems somewhat promising. It is hard and dense. I think another one to three weeks for this one to ripen.

WICKSON SEEDLING #3 2011: In 2011, I planted open pollinated seeds of Wickson from a box of apples given to me by some friends after I helped them lay concrete block for a root cellar. I think by then I was already partially inspired by Albert Etter, early 20th century apple breeder who bred the Wickson apple. I remember thinking that this apple was so good that it had to produce a certain percentage of good apples from seed. In fact, it was hard to imagine the seeds producing bad apples. I was aware of the common assertion that you can’t grow apples from seed, but, when it comes to information, there is not much I take at face value. out of the seeds I planted, I ended up grafting 4 or 5 of them onto already established trees, and 3 of those lived and fruited. This is the final one of those seedlings to fruit, the others being the seedling that I named BITE ME! and a tiny flavorless, acid-less green crab the size of a large marble.

Open pollinated Wickson seedling #3, 2011

Open pollinated Wickson seedling #3, 2011

This seedling fruited last year, but it wasn’t that exciting. There was nothing wrong with it, it was just unremarkable. This year it seems much more promising. There is definitely some of the unique flavor type possessed by Wickson, which is also found in Wickson relatives and other crabs. Though still subtle, but I’m hoping that flavor will develop more as the apples ripen further over the next one to three weeks. Some of them have watercore, but that is not uncommon in young trees, especially in arid conditions like mine. Many varieties will outgrow it eventually. Overall, the best specimens this year so far, which are still not quite ripe, compete well with the best apples that I tasted in this session, and are certainly above the average apple in my large collection. I will go out on a limb and say it is not going to be as good as Bite Me!, the first apple to bloom out of the this group of Wickson seedlings, but it looks promising. Sometimes trees have to fruit a few times to come into their best quality. That seems to go for not just new seedlings and new grafted trees, but possibly even for branches grafted onto established trees. I’m not sure why that would be. It’s just a casual observation.

This apple is rather dense and firm fleshed, unlike Bite Me! which has a more open, juicy and easy to eat texture. It also has thicker skin. The resemblance to Wickson is apparent, though it is somewhere in size between Bite Me and that apple. It is not tiny, but it is small. As long as the quality is there, size is not that important. A mediocre small apple is much less interesting however, so it better shape up. I have quite a few apples on the branch this year. Hopefully I’ll get some good representative fruits in the coming weeks, and you’ll probably hear more about it before the season is over.

Even though the fruits are covered with foot sox for protection, they are still a gorgeous deep red color. Uncovered spots that get more light are even darker in color. The conic shape is reminiscent of wickson, but it averages quite a bit larger.

Even though the fruits are covered with foot sox for protection, they are still a gorgeous deep red color. Uncovered spots that get more light are even darker in color. The conic shape is reminiscent of wickson, but it averages quite a bit larger.

The Tanner's Knife, An Essential Multipurpose Tanning Tool for Fleshing, Dehairing, Scudding and Frizzing

P1160238.jpg

The fleshing knife as it is commonly known, but probably more appropriately known as a tanning or tanner’s knife, is the primary tool of the tanner. This versatile knife can be used for fleshing and re-scraping the flesh side of the skin, de-hairing, removing the grain (frizzing), scudding out liquids to flush unwanted moisture and loose material from inside the skin structure, moving the hide on the beam and trimming the edges of the skin. While there are specialized two handed knives for some of these tasks, they can all be performed with the same tool if it’s within certain design parameters, which is what will serve most home tanners best. In this Blog post and video, I go over some of the different types, both commercial and homemade with some tips on weight, length, styles, making your own, and other such things.

The focus here will be on the home tanner working on beams about 8 to 12 inches wide. Keep in mind that most new models are designed by and for fur trappers, most of whom do not do a lot of general tanning work. The amateur tanner can get by with tools that are much less than ideal, so there is no need to overthink the problem too much, or find the perfect tool just to get started. You can always upgrade later if you want to.

Length: The typical professional tanners knife of the European style is quite long and not really best suited to the home tanner. Samples I have range from 3 to 3-3/8 inch wide. 16 inches is a typical working edge length. These long knives were often used on very wide beams with shallow curves. The strong, experienced men using these tools, combined with the large area of contact formed between the gently curved edge of the tool and the wide beam, would make for very efficient and quick work. I think the ideal length for home tanners working a variety of skins on narrower beams is about 20” long in total with 11” working edge and 4.5” handles. A working edge up to 12 inches and down to 10” with 4.5 inch handles is also fine. With such a length, the tanner can comfortably do all manner of work from very large hides, down to fur skins. Wider beams require wider knives and/or the edge of the tool may need to protrude out in front the handles. I would not recommend working edges much smaller than about 10 inches, and then only out of necessity. It is not just the working edge though, but also the space between the handles, which allows for comfortable work.

Styles: Nearly all traditional styles seem to be curved. The classic European style of tanning knife that is most common is wide, curved and dished. The compound curves of the cup and the arc combine to strengthen the tool, allowing it to be fairly thin, and yet still very rigid. The concavity of the underside seems to offer some geometric advantage in scraping. The concavity also means that the tool can be used flat on the hide without rubbing on it, which I suspect might be part of the impetus for the design, although I have rarely used them that way. Professional tanners who worked hides day in and day out would probably be able to get away with doing things that the rest of us can’t, such as using sharper tools at lower angles. These traditional, wide, dished knives are very nice to use, though if I were designing one from scratch for home tanners who are doing many different types of skins and tasks, I would probably make it considerably narrower than they usually are and no wider than 3 inches. The back edge is sometimes kept very sharp and can be used for tough spots, gaining access under tough membranes, or as a sharp slicing knife for trimming the skin during fleshing. I have also read of tanners filing teeth into the back of the knife so it can be used to pull skins up the beam to reposition them for scraping without using the hands. You can do this maneuver on small skins without cutting teeth in the back of the tool, and I do, but on large heavy hides, I can see why they would make this modification. The option is to let go of the tool with one or both hands to readjust the skin on the beam as each area is worked over, which is much slower.

Traditional style knives. From the top down, A cheaper modern version @ 16”, W.H.Horn & Bro’s England 15” edge-3-3/8” wide- 27” total length, Horn Brand cut down to a 12 inch blade by someone who probably thought 16 inches was too long. I just saw a…

Traditional style knives. From the top down, A cheaper modern version @ 16”, W.H.Horn & Bro’s England 15” edge-3-3/8” wide- 27” total length, Horn Brand cut down to a 12 inch blade by someone who probably thought 16 inches was too long. I just saw a picture online of one cut down exactly the same way. It even had a similar handle. Just goes to show, those super wide tools are for use by professionals in a professional setting and not suited to everyone and every task.

W.H. Horn fleshing knife from ends.jpg

Other tools are narrower and usually thicker, sometimes with only one working edge. This type is good for home tanners with a surprising number of models and brands available new. Newer ones are often sharpened on the back as well and many are fairly flexible compared to older ones I’ve seen.

Width: A versatile knife for the home tanner would probably be anywhere from 1.5 to 3 inches wide. Though still very usable, extremely wide tools can be less stable when it is required to push very hard as is sometimes necessary when graining (frizzing) un-limed buckskins or fleshing very difficult skins. My two favorite tools currently are a shortened traditional cupped knife that is worn down quite a lot to about 2.5 inches wide. More relevant though, is that the concave curve, which is the main working edge, has been worn back closer to the handles, making it more stable to use when pushing very hard. A full width knife however is fine as well, but if I designed one from scratch it would probably be under 3 inches wide.

Another favorite tool I have was forged out of a wagon leaf spring and is about 3/16 inch thick and 1.5” wide, which makes for a durable, versatile tool of a good weight. Tools as narrow as 1 inch can be fine too depending on material and use. There is a type of knife that is very thin and flexes to conform to the curve of the beam, but I have never had a chance to examine, let alone use one. If the tool is both narrow and short, the handles may get in the way, necessitating the use of a very narrow beam.

For whatever combination of reasons, these are the tools I’m most likely to grab first. The. traditional wide knife is worn back, making the edge closer in line with the handles, which is more stable when doing hard work. The second is forged from a…

For whatever combination of reasons, these are the tools I’m most likely to grab first. The. traditional wide knife is worn back, making the edge closer in line with the handles, which is more stable when doing hard work. The second is forged from a wagon leaf spring, 3/16” thick, 20” long, 1.5” wide. The working edge is only 9.25”, but there is plenty of working room between the handles. If I made a knife like this again it would have a 10” or 11” working edge. the handles are antler.

If the tool is too short and narrow, you will not be able to use it on wide beams like this one, because the handles will interfere. It also doesn’t give you a lot of real estate to work with on the edge. If the hands are held too close together, it…

If the tool is too short and narrow, you will not be able to use it on wide beams like this one, because the handles will interfere. It also doesn’t give you a lot of real estate to work with on the edge. If the hands are held too close together, it can become less ergonomic to work. The wider your shoulders, the wider the tool could be.

Thickness and weight: Wider tools are generally relatively thin in order to avoid excessive weight. Narrower tools are often a lot thicker, though many of the newer, higher end tools are thinner than the older ones were. A range of weights are usable, but tools can be both too light and too heavy in my opinion. I’d much rather a tool was too light, but some weight offers stability and the advantage of momentum in some scraping processes.

Straight v.s. curved: Straight tools are perfectly serviceable. I do prefer a curve and would never design the perfect tanning knife with straight edges, but if material is available to make a straight tool, I would not hesitate. I’ve used straight planer blade tools for countless hours and endless square feet of hide scraping. Once I started using a curved tool, I was sold instantly, but I could go back easily enough. I think the main advantage of curved tools is that it is easier to incorporate tilt and slide techniques in scraping.

Tilting the knife edge slightly off of perpendicular is an important refinement to scraping technique. Imagine a straight edged fleshing knife held at a slight angle by putting one hand slightly away from you, and one hand slightly back toward you. If the tool is pushed straight forward while tilted askew like this, there is a slight advantage in scraping, something akin to a slicing action, though not quite the same. You can achieve the same effect with any cutting edge in wood, such as a plane, spokeshave, knife or draw knife by tilting it. This subtle difference in technique can have a large effect. Curved tools, when held slightly to the left or right, create this effect automatically without having to hold the tool askew at all, or at least less so.

Sliding the tool side to side very slightly in a slicing motion as the tool is pushed forward is another very important subtle refinement of the hide scrapers art. Combined with tilt, it is even more effective. Since tilt is already built in to a curved knife, it is easier and more ergonomic to achieve this combination of techniques when using a knife with a curved edge.

The radius of the curve should not be too drastic. Shown are some curved tools to give you an idea of what some look like. A factor in degree of curvature, or lack of curvature, is that the radius of the beam combined with the radius of the knife determine how much of the tool contacts the beam. That contact width has everything to do with how much work is done with each stroke and how hard it is to do that work. In one extreme case, you might be scraping off the grain from the tough neck skin of a deer, which is going to require a narrow area of contact. If the width of contact between beam and knife is wide, you will have a very tough time of it. Still, with an 8 inch beam and a very moderately curved knife, you should still be okay. For general work, I prefer a beam around 12 to 14 inches wide with a moderate curve. Coupled with a curved knife, that makes for a reasonably wide area of contact resulting in efficient work for most processes. If I used a 6 inch wide beam with a high crown and a straight tool, I would be at my work much too long when doing most of the relatively easy processes that I engage in most often, such as fleshing and dehairing, simply because the strips I would be scraping off would be so narrow.

If a straight line is drawn from one corner of the edge to the other, the distance from that straight line to the tool edge at the center of the tools are as follows Top to Bottom:9” long, 5/16” to edge,15” long, 3/4”16” long, 3/4”12” long 1/2”Botto…

If a straight line is drawn from one corner of the edge to the other, the distance from that straight line to the tool edge at the center of the tools are as follows Top to Bottom:

9” long, 5/16” to edge,

15” long, 3/4”

16” long, 3/4”

12” long 1/2”

Bottom tool, not measured

The bottom line is that I prefer a moderately curved tool for general work. The curve I would start with as a prototype for testing would arc in an even radius, with a rise of about 3/8” at the center of the tool on an 11” blade.

Material: The cheapest knives are made from cheap mild steel which cannot be tempered to keep an edge. This type of budget tool can work, but they are not preferable and will require more frequent sharpening. Better knives are made of tool steel and tempered to take and hold an edge. If at all possible, I would recommend something that will hold an edge. Stainless tools are nice to have when working around water and salt, but If tools are taken reasonable care of, regular carbon steel is fine. Planer blades, discussed below are rust resistant, but not stainless. For making tools at home, you can use a number of common pieces of steel.

Miscellaneous steel items that could be used to make a tanner’s knife. Left to right, a set of car leaf springs, section of leaf spring, chainsaw bar, lawnmower blade, planer blades

Miscellaneous steel items that could be used to make a tanner’s knife. Left to right, a set of car leaf springs, section of leaf spring, chainsaw bar, lawnmower blade, planer blades

Leaf springs from cars are good. If possible, find a set that is narrow. Almost every junk car has a full set of springs under it waiting to be salvage with the removal of a few bolts. The steel is temperable and already hard enough to work well enough. If you can find a narrow spring, you could grind out a tool and retain the temper if you are careful and patient.

Chainsaw bars seem like a great source of steel of a good thickness. I’ve never used them, but I understand they are carbon steel of some kind, and would already be hardened and tempered to hold their shape under hard use. Once worn, they are of no use on a chainsaw and should not be hard to find in any rural area in the states.

Lawnmower blades: are fairly common and seem like reasonable stock to work with. They have a propeller twist which would have to be removed, necessitating heating, forging and preferably re-hardening and tempering afterward.

Large files are a good source of tool steel,and could be used. I would grind or file out all the teeth though. They are too hard as is, so making a good tool with one would entail at least heating to anneal (soften), grinding to shape and preferably re-tempering. If you’re going to do all that, you might as well forge it out into a better, wider, curved tool.

Misc mild steel bars can be used, but will not hold an edge well. In a pinch, you can even use a square edge, instead of a more knife like beveled edge.

Planer blades of high speed steel make very nice scrapers. They are extremely hard, tough, rust resistant and hold an edge incredibly well. Another advantage is that since they are straight, some will have two usable edges. I use two tools or edges of varying sharpness during the processing of most hides into bark tanned or braintanned leather, so having two edges of different sharpness on one tool is great.

Tools made from planer blades. The top three are made from narrow blades and pretty short. The top two have handles made of wood covered with rubber or vinyl tubing. the third is antler handled and the fourth is a short blade tied into a slotted woo…

Tools made from planer blades. The top three are made from narrow blades and pretty short. The top two have handles made of wood covered with rubber or vinyl tubing. the third is antler handled and the fourth is a short blade tied into a slotted wooden handle, giving a longer working edge on a short blade.

The steel in planer blades is too hard to drill with normal tools, but can be ground easily enough with a 4 inch grinder, belt grinder or bench grinder. [EDIT: Melvin Beattie, one of my tanning teachers, Just wrote me the following: “Yes you can drill planner blades, files, etc.. Here are the drills that work, I have used them many times putting handles on planer blades. If I am using a hand drill start with a 1/8 “ then use 1/4” but you have a drill press just use the 1/4’’ and a good drill lube.” ] Handles for planer blades can be of two pieces of half round wood with rubber or vinyl tubing or epoxied wood (rough up and clean the metal surface before applying epoxy).

Planer blades can’t be drilled or sawn easily. To shorten, grind from both sides until thin, clamp in a vice, then break off.

Planer blades can’t be drilled or sawn easily. To shorten, grind from both sides until thin, clamp in a vice, then break off.

P1160275.jpg
Vinyl tubing with wood. Grind handle section down to 1” wide. Wood 1” wide. Vinyl tubing 1” available by the foot and many hardware stores. total length 4” to 4.5” Some will just pound tubing over the flat wide handle, but it’s very uncomfortable fo…

Vinyl tubing with wood. Grind handle section down to 1” wide. Wood 1” wide. Vinyl tubing 1” available by the foot and many hardware stores. total length 4” to 4.5” Some will just pound tubing over the flat wide handle, but it’s very uncomfortable for protracted use. The wood can be any easily split straight grained wood. There is no reason to use hardwood.

Antler handles are also very nice and may be the best option if the planer blade is only 12 to 14 inches long. You need at least 1.5” stuck into the antler, preferably more. Grind the end of the tool that will go into the handle to fit within the antler pith as shown in the photo below. Smooth and round off all sharp edges and grind the end into a slight wedge. Soak the antler overnight then boil for 15 or 20 minutes. Clamp the blade in a vice if you can and pound the antler handle onto it. Don’t drill the antler, just pound it onto the end of the blade. Allow the antler to dry completely before using it at all or you will loosen the union. Finding comfortable pieces of antler that are not too curved or too small can be a trick, but you can end up with very nice handles. Antlers vary in the amount of pith they have and general density and strength. If the antler is not too pithy, this method can also work for narrow tangs.

Antler handles set while wet and boiling hot at least 1.5” deep, deeper is better.

Antler handles set while wet and boiling hot at least 1.5” deep, deeper is better.

The width of the blade should roughly match the width of the honeycombed pith.

The width of the blade should roughly match the width of the honeycombed pith.

Grind the end of the bar to a slight wedge and round off all sharp edges.

Grind the end of the bar to a slight wedge and round off all sharp edges.

Grinding out tools: If you have a piece of stock that is already tempered, such as a chainsaw blade or car leaf spring, it is possible to grind and or file it to shape without changing the temper. If you overheat a hardened and tempered tool in grinding, it will become soft, a mistake commonly referred to as “burning” the steel. If you see colors appearing on the edge of the tool during grinding, you are flirting with danger. For something the hardness of a tanning tool, avoid letting the steel turn anything darker than bronze color, after that it will turn a purplish color, then light blue. Dark blue is pretty much dead soft, so stay well on the right side of that color. Using a high speed bench grinder, 4 inch angled grinder or belt grinder, it is very easy to overheat steel, especially when thinning the edge. Work in very short spurts, with frequent water cooling and watch for those colors with unfailing vigilance. For a tanning knife, one of two soft spots are not likely to cause you huge problems, but do your best to prevent them.

So, what is the ideal tanning knife for home users? I would definitely be a compromise in some way, but that would also be it’s strength. I have drafted up some plans and I hope to someday experiment with some prototypes. So many projects, so little energy :-/ for a fairly simple tool, I would say a good place to start would be a moderately curved, 3/16” thick, 1.5” to 1.75” wide, 11” working edge and 4-1/2 inch handles for a total of 20” long. Such a tool could be filed or ground out of a chainsaw bar, or forged from leaf spring or a large file. I would put a bevel on the back, to keep sharp for trimming skins during fleshing and other tasks. The bevel on the front concave edge should be at least 45 degrees, but thinner would be better, maybe something like 20 to 30 degrees?

As far as new knives go, there are a lot on the market. On the low end, the Wiebe 12” knife is as cheap as 20.00 before shipping from some dealers. According to Dakota Line Snares, a Wiebe dealer, “The steel on all three of the fleshing knives (8”, 12” and Elite) is 3CR13: Hardness Hrc52-55. The Elites are sharpened in the U.S.”. I think the Wiebe 12” flesher might be a very good budget option for new home tanners. Reviews on Amazon are good, but it’s hard to know what people are doing with them or how many of them are experienced enough to judge. In some pictures I’ve seen, it appears to be bent just in the middle in the classic dog leg formation common in cheap knives instead of forming a long gradual arc. In others it appears to be bent off center, or not much at all. I would not expect too much quality wise. They are produced in China with Chinese steel. A step up from that class of tool, there are the Wiebe elite, Neckers of various models, the caribou and Au Sable are in the 65.00 to 95.00 range and generally get good reviews. Many of them may be more flexible than would be ideal for a home tanner, so shop with caution. I have the Necker 600 and am not crazy about the handle design or the down sloped handle angle, but I actually haven’t used it yet. It is also more flexible than I’d prefer. The wider necker 700 looks interesting but it’s a little more costly at 95.00

Also in the mid range, there are affordable imitations of the European style knives that are sold in the U.S. According to one supplier they are stainless. The 12 inch version (which I would recommend over the 16 inch) is about 45.00 to 50.00 My guess is that the tangs will be the weak link in these English knife copies. There are also new real English Sheffield knives by J. Adams which have separately attached tangs that run all the way through the handles. They are expensive at about 145.00 for the 12” model. This is the high end of new tanning knives, outside of custom made tools. I would hunt ebay for an old european style knife before purchasing the new Sheffield knives. The problem with the antique ones is that they are usually on the long side for a home tanner. Exercise caution in shopping for new English knives as the American made copies are sometimes unscrupulously marketed as being from England or Sheffield.

Typical of old school quality, the two tools at the top have heavier, thicker tangs forge welded onto the blades, while the lower tool has a thin tang that is cut out of the same metal the body is made from. As a result, the thin, sharp edged tang h…

Typical of old school quality, the two tools at the top have heavier, thicker tangs forge welded onto the blades, while the lower tool has a thin tang that is cut out of the same metal the body is made from. As a result, the thin, sharp edged tang has split the handle. The sad thing is, it’s much easier with modern welding to weld separate tangs on.

The older tools have full thick tangs that go through the handle to the end where they are pounded over like a rivet, making for much stronger handles that put less stress on the wood. I don’t think this is one of them, but I suspect that the new pr…

The older tools have full thick tangs that go through the handle to the end where they are pounded over like a rivet, making for much stronger handles that put less stress on the wood. I don’t think this is one of them, but I suspect that the new production Sheffield, English knife copies sold in the U.S. probably have these these type of cheap flat tangs. I may try to modify this tool to make is shorter with thicker tangs and handles that come more nearly straight to the sides instead of arcing downward. I’m thinking some small metal parts and some JB Weld…

For me to buy and test all of these tools would be quite expensive obviously. I also don’t tan enough currently to put them to the kind of test needed to sort them out really well. None are what I would design from scratch, but again keep in mind that most of these are designed by and for fur trappers, whose only job typically is fleshing furs.

For used tanning knives, ebay is the best market, although they do show up on Etsy now and again. Obviously you can hunt old junk and antique stores, but you will be lucky to find one at all, let alone at a reasonable price in good condition. Avoid the cheapest and very common knives that are bent in the middle instead of in a continuous arc. These cheap tools usually have wire wraps on the handles, but some have solid ferrules. They are made of mild steel. They will work, but get something better if you can afford it. With the Wiebe 12” budget knife being tempered steel, there is hardly an excuse to buy a mild steel tool.

The common very cheap tools of mild steel like these should be avoided if you can afford something better.

The common very cheap tools of mild steel like these should be avoided if you can afford something better.

Quality vintage tools of both the old school thin wide cupped European type and the thicker narrow type tools come up on ebay, but they are often over priced. Patience is key. Look at ended auctions to see what has and hasn’t sold in the past and for how much, as well as what has been re-listed recently or lowered in price. There is a W.H. Horn and Brothers knife, just like mine, in nice condition for 85.00 plus shipping on ebay right now. Last week it was listed for 150.00

Some August Apple Tasting

In this video I taste some usual suspects, Kerry Pippin, Chestnut Crab and Williams' Pride, and a couple of newer ones, Viking (very interesting) and Salem June (meh...)

Apple Mosaic Virus, Susceptible Varieties in My Collection

P1160113.JPG

Having a lot of apple varieties gives me a chance to make some observations.  One of those observations is which varieties show signs of apple mosaic virus and which do not.  I can make this observation because I have a tree with many varieties that is infected with the virus.  The disease virus is systemic, so any variety grafted to that tree has it.  However, only a certain percentage will actually show it.  I went through the whole collection and observed which varieties show symptom of the disease. 

Of approximately 150 different apple varieties on !Frankentree!, the following are those that show visible signs of the mottling effect on the leaves that can be induced by the virus, also noted is the degree to which they are affected this year:

  • Rubinette, Medium
  • Katherine, High
  • Red Astrachan, High
  • Sam Young, Medium
  • Cherry Cox, Low
  • Sweet Sixteen, Medium
  • Lyman's Summer, Low
  • Pitmaston Pineapple, Medium
  • Hudson's Golden Gem, Medium
  • Pink Parfait, Medium
  • Kandil Sinap, Medium
  • Whitney Crab, Low
  • Bullock's Pippin, Low
  • Mollie's Delicious, High
  • Ribston Pippin, Low
  • Cox's Orange Pippin, Low

There are also 3 or more varieties on the tree which are unlabeled, but affected.  All information considered, it would appear from the limited data I have that something in the neighborhood of 15% of varieties show signs of infection.  Walking around the rest of the property, I see no other trees that show any sign of infection, including the the varieties that are on the above list, but which are also growing as separate trees or cordons.  Most of those duplicates were either grafted a long time ago, or I went out of my way to source scions from elsewhere.  Also, there is none of the disease in my apple seedlings, which is expected, since the virus is not transmitted in the seed.

P1160090.JPG

I don't know a lot about the pathology of the disease.  The only way I can tell a tree has it is if the leaves turn partly white or cream colored and some leaves will turn partially brown and crispy as well, possibly from sunburning on the white parts?  I have seen branches affected pretty strongly, but over all Frankentree seems healthy and vigorous and bears well on good years.  Apparently, it also affects other species. 

I think that the free trading of scions by fruit enthusiasts must be contributing to the spread of Apple Mosaic Virus.  I don't send out scions of anything that I know is infected unless it's so rare that it can't be obtained anywhere else, and the receiver is aware of the disease status of the material.  I would suggest that others do the same.  Even so, since something like over 80% of varieties show no sign of infection, it is likely that we will end up trading scions that are infected anyway.  it is possible to graft a very susceptible variety onto a tree to see if it shows signs, but I would let it grow for more than one season before assuming the host tree is clean.  Other than that, it is probably going to continue to proliferate among fruit collectors.

Nectarines over Almonds, Grafting Onto Seedling Almonds With Summer Chip Budding

almond roots 2.jpg

No, the title of this blog post, Nectarines over Almonds..., does not refer to some kind of dietary cult belief.  I'm simply trying to take advantage of the qualities of almond rootstock to grow an outstanding nectarine variety.

Grafting has it's detractors, and maybe they are right about some of their arguments.  But there are some decided advantages to grafting.  I'm taking advantage of a few of those advantages in this project.  For one, I can secure a new tree very quickly.   It will also probably come into bearing sooner than a seedling tree.  Most important though, is that I'm choosing the roots of the tree by their special qualities.

Almond trees are almost the same tree as peaches and nectarines, which are in turn even more similar to each other.  Almond trees, however, are known for being drought tolerant and resilient under stress, while peaches and nectarines are decidedly not.  So, the thought of grafting a new Nectarine tree onto Almond rootstock, naturally occurred to me when it was time to plant one of my catch pits.  The tree will grow on an 8 foot by 3 foot pit backfilled with layers of charcoal and whatever soil improving goodies manifested on the homestead over a year or more.  This is a special tree site, so I picked a special tree, one tested for decades by a local fruit explorer and veteran plantsman.

Stribling's White Free Nectarine is a gem of a variety that now languishes in obscurity.  My friend Mark Albert has grown and tested a lot of prunus and it is his best, most reliable stone fruit.  The fruits are delicious and good for drying, while the tree itself outgrows the yearly attacks by peach leaf curl that many varieties are set back badly by.  While not immune to the curl, as some varieties are, it does outgrow it reliably without spraying, and that is good enough.  You are not likely to easily find a grafted Striblings White, so it's only for those that take the time to graft.

From Mark:  “Stribling’s White Free Nectarine, a proven gem for our inland climate for 30 years, ripens in July, and has outperformed all other stone fruit varieties. It dependably grows right through the Spring peach leaf curl and makes luscious, white fleshed, freestone nectarines for fresh eating and easy drying. No longer sold by nurseries, only known by collectors now. Must be grafted.”
Wickson looks a little stodgy, but he had a pretty good sense of humor brewing under that stern countenance.

Wickson looks a little stodgy, but he had a pretty good sense of humor brewing under that stern countenance.

I found very little on the internet about grafting peaches onto almond stocks.  But I did find a reference in California Fruits, by E.J. Wickson, which you can read online by following that link.  Our old friend Edward Wickson, left an inestimable legacy in California Agriculture.  Among many other achievements, he edited the important agricultural journal  Pacific Rural Press. for over two decades, so he had his finger on the pulse of California agriculture.  He reports in the later 1920 edition of California Fruits that I own:

"The Hand Shell and Sweet Almonds have long been used as a stock for the peach.  It is held that they give a stronger, hardier root in dry coarse soils especially, but neither have been largely used."

Well, that was good enough for me to make the experiment.   BUT, this just in!  While looking for that quote just now, I found these references to using almond stock  in an older edition of California Fruits:

“The success of Nectarine worked on Almond stock, as has been demonstrated by the experience of many, has led to the grafting over of a good many unprofitable almonds to nectarine, though this has not been done to the extent to which the french prune and some other plums have been worked on old almond stocks.”
“The almond is successfully grafted over with the peach, and this course has been followed with thousands of unproductive languedoc almonds during the last ten years.”
“Trees are changed from one fruit to another, as with thousands of unproductive almonds, which have been worked over into plums, prunes and peaches.”

Well, there ya go.  Looks like I made a good call.  In starting the stocks this time, I did what I always do.  I shelled and soaked the almonds and planted way too many.  Over-planting allows me to select the best stock in the end.  Planting the seeds directly in the ground where they will grow allows the formation of a deep, natural root system.  I’m after a self sufficient, drought tolerant root network.  I want the trees to go deep to look for water in the dry summers, when I don’t always have a lot of water to spare.

I was more or less planning to graft these stocks to dormant scion wood in the late winter, but I decided that since I had some Striblings White Nectarine branches on a nearby tree, I would go ahead and graft one of them with a small chip of wood.  When I contacted  Mark to ask him something about Striblings, he suggested that I chip bud it now, which I had just done.  But, he also offered to shoot a chip budding video at his place, which we did and that video will be out as soon as it's edited.  I went ahead and grafted the other two stocks as well.  Even if the buds don’t take (though it’s likely that all three will take) I can still revert to dormant grafting this winter.

Chip budding with Mark Albert

Chip budding with Mark Albert


Ironically, this may be one of the few trees that I end up pampering, but the almond roots will be just fine with that.  In the case that I don’t, I’m hoping that having planted the trees on a huge pit back-filled with charcoal and other goodies, combined with the tough almond stock, will give me a reasonably resilient and productive tree.  In general, peach and nectarine do not thrive on neglect.  They are very domesticated trees and prefer regular watering, fertile soils and pruning.  But, as the rolling stones said, you can’t always get what you want.  While I may not get what I want, a productive, drought tolerant nectarine tree that will produce reliably even with low inputs, the potential reward is worth the risk.  Possibly more important is the information the experiment might yield in the long run.