Leek Starts and Apple Pollen

When I shot the giant leek project video, I accidentally planted some of my older seed, so I can't use those plants and had to re-sow using 2014 seed.  There is nothing wrong with the starts, they are just a generation behind as far as my selections go.  The germination was excellent, and they are nice healthy looking little guys. I'm all out of the newer 2014 seed, but, now I have a flat of these leek seedlings that I can sell. They are in the store and probably available for a few weeks.  They will be dug as ordered, washed, bundled in groups of 50 to 100, trimmed and shipped.  4.00 for 50 or 7.00 for 100  See those here...

I also put up some varietal apple pollen just as an experiment to see if people might be interested in acquiring some pollen from the varieties that I use in breeding.  Cross pollination is easy enough.  Here is my video on making pollinations for breeding.

That's all.

Posted on April 9, 2016 .

April Apple Breeding Update, Seedlings and Blooms!

A short video update showing some red fleshed traits in seedlings and the new blossoms in the trial rows. I'm finally going to get some fruit out of these guys!  More below...

The seedlings are mostly up now and ready to plant out, though there are still a few stragglers.  Many of the crosses I made with Maypole, an intensely red fleshed apple that shows pigmentation throughout the plant, are showing obvious red pigmentation.  Not all of them though, some seem to be taking after the other parent, whatever that might be.

One of the seedlings is showing pinker blossoms than the others.  I'm hoping that means it will have redder flesh.  We'll see in a few months, or maybe many months since it is a Lady Williams cross and Lady Williams won't be ripe for over 10 months!  Wow.

Since several people have asked about getting pollen from me.  I decided to add it to the store to see if that is a service people might use.  Here is the link.  I only have a few varieties this year, but If it seems like people will buy it, I'll have more next year of all the varieties that I like and use in breeding.

Sinew Wrapped Axe Handle Experiment

This experiment is to see what the advantages and limitations are of using a sinew with hide glue wrapping as a method to protect axe and hammer handles from incidental damage.  Sinew is the tough fiber that connects bones to muscles to effect movement.  When applied to wood with hide glue it makes a tough and resilient layer that can prevent splintering when wood is under heavy stress. This method has been used in some of the strongest traditional bows in the world.  It is something like fiberglass, but the fibers are much stronger.  Hide glue is also remarkably tough and resilient.  Just try to break a sheet of it sometime.

The experiment is to see how the sinew holds up under impact and abrasion and also how well a coating of linseed oil will protect the water vulnerable wrapping and hide glue from moisture under normal use.  The known advantages of sinew are that it is strong, shrinks on drying and can be applied in such a way as to have a very low profile.  The result is little added thickness and a smooth transition from the handle to the wrapping.  I have experience using it on bows and for wrappings on arrows.  If wrapped on the tip of an arrow it prevents nearly 100% of damage to the tips of arrows shot into logs, dirt and rocks.  I think there are probably better alternatives, or perhaps sinew combined with other materials would be good.  I know I've used it on a handle before, but it's been so long, I can't remember what happened!  I hope to get around to more experiments around this subject sooner than later.

Since there are strong proponents of the double bit axe for splitting wood, including my buddy Wylie Woods, I hope to test it's advantages and limitations this year.  The axe in this video is an old plumb I got at a yard sale.  The bit is very fat, which I have found to be common in Plumb axes and hatchets.  it would need a lot of work to use for chopping, so I've been splitting with it, for which I imagine that is an advantage.  For now, I reserve judgement...

My homies the Vidos are worth your time: Axe Connected website  and  Scythe Connection Website


Buckin' Billy Ray Smith:  https://www.youtube.com/watch?v=K5TfKdsYycg  Keep in mind this wood is as he says is in very nice splitting condition.  Dudley Cook recommends this method in

 Hide glue series playlist:  https://youtu.be/39EaMNL56w0?list=PL60FnyEY-eJCPd_eQyiP4JE6RLtCgmNxE

Posted on April 6, 2016 .

Cool Axe and Hatchet Technique for Small Diameter Wood

Okay, this is a simple technique for wood up to around 2 inches in diameter.  It is very effective and reasonably efficient, especially when you consider maintenance and cost of a chainsaw.  Cutting up small wood with a chainsaw can be dicey too, especially if it's crooked.  It can fly all over and cause the saw to snag and kick back.  This technique is probably faster than using most, if not all, hand held manual saws and it is certainly a lot funner.

One Cord, One Year, Cutting All of My Firewood With an Axe This Year.

Greetings internetians.  There is just something about axes and hatchets that gets some of us all worked up.  If you’re one of those types, I have an interesting project to talk to you about.

I’ve been interested in and using axes and hatchets for a long time.  It’s something I enjoy thoroughly.  If at any given time I think, what would I like to do if I could do anything, running out to the woods with an axe and chopping wood is right up near the top of the list!  Seriously, I think that all the time.  But I rarely do it.  There is no time, it takes too long, I have other important things to do, blah blah blah… so when I need firewood, out comes the chainsaw.

I started out as a complete novice with only some books, like Kephart’s Camping and Woodcraft, and others in that genera.  Later I met Mors Kochanski and picked up his excellent book Northern Bushcraft.  I almost hurt myself many times, broke handles, replaced handles, broke them again, made my own handles and generally picked up the basics in the school of hard knocks.  I’m not a rank amateur, but I’m no pro either, and by any traditional standards I’m still probably a complete and utter dorkus with an ax.  Why?  Because I don’t use them often enough, or consistently enough.  I use hatchets a lot more for small tasks around the place, and running around in the woods doing other stuff, but axes find less day to day use.  I do a lot of my limbing with an axe, but not a lot of felling or bucking.  Well, I’m over that.  I’m feeling better these days than I have in a while and as always making ridiculously optimistic plans, like cutting all my cordwood this year with an axe!

To some, that may sound like a nightmare, or like the least fun thing ever, but to me it sounds like just about the FUNNEST thing ever!  I’ve already started.  Best idea ever.  Now, I will be forced to dial in my gear, clean up, profile, make handles for, haft and sharpen all those axe heads that have been languishing coated in rust for years.  I’ll also develop even more personal, contextual opinions about handles, profiles and blade shapes than I already have, and chop my way through enough wood to be entitled to opinions about any of it.  Yep, fun galore, and not probably as hard as it may sound.  

Most people that have swung an axe have not exactly had a great experience.  There are a lot of factors that go into efficient and effective axe use and few of them are typically in play in the average scenario.  Sure, if we start with a dull axe, that has a fat bit and a thick handle, and if we have no practice, don’t understand the necessary strategy, strike at the wrong angle, can’t hit what we’re aiming at and start out expecting to make progress if we just give it a huge effort, it’s going to suck and we are mostly going to end up tired and discouraged with very little work done, if not injured or with a broken axe handle.  Honestly, even starting with a sharp axe will not help that much if everything else is not dialed in pretty well.  A good sharp axe in effective hands, if used to make careful, measured cuts, is effective and fun to use.  Watch a lumberjack competition sometime.

When I first was thinking about doing this project, I found the idea daunting.  Now I don’t.  One of the things that encouraged me was reading that a good hand in the old days could put up two cords of wood a day with an axe.  Two cords is a well stacked pile 8 x 4 x 8 feet.  YEAH RIGHT!?  Here is a quote from a random account I was reading the other day out of the 19th century.  It is an instructive letter to the editor about not using too heavy an axe.  Full text below: 

“When night came we piled up our wood and measured it. Joe's pile measured one and a half cords, mine only three-quarters of a cord…..  The next morning I felt lame and stayed at home. Joe put in his cord and a half, as usual.”  The farm implement news, volume 7 1885

Now, it doesn’t say what length the wood was cut to in those things, and that could make a very big difference.  Cutting 24 inch fireplace logs, 4 foot logs for transport, or arm-span lengths for a furnace of some kind is a good bit different than cutting the 16 inch logs I need for my wood stove.  200 feet cut into 24 inch lengths is roughly 100 cuts, while at 16 inches it’s 150 cuts.  That is very significant.  The other woodstove on the property takes logs about 12 inches and down.  I’m not cutting for that one :)

Another encouraging thing was hearing Mors Kochanski saying in this video that he could drop a 12 inch 50 foot tree, limb it and cut it into arm span lengths in guess how long?  10 to 15 minutes, maybe less!   skip to 11:00 min for that part.  https://www.youtube.com/watch?v=2aijEY9njOw

You just don’t get that good, or any good at all, whackin’ at a few trees or logs on the weekend.  Nope, as I’ve said about other things, if you want to get good at something and really understand it contextually, put yourself in a position where you do it as a lifestyle thing.  I need to cut wood this year.  If I decide that this year it’s axes only for felling, limbing, chopping and splitting a certain amount of wood, I’m going to learn a lot very fast!  Immersion! that’s what it’s all about!

Axes have become very popular.  That is really cool.  It is heartening to see the upsurge in interest in interacting with natural environments and using basic tools and materials.  Because of that, there is an increasing amount of information out there, but very few people that can actually use an axe effectively.  Of those of us who are not complete novices, fewer yet are anything like experts.  And it’s no wonder.  How many people chop enough wood with an axe to even get good, let alone very good?  Not very many.  That is an inevitable consequence of our modern way of life.

Well, one Person’s work is another’s play I guess.  As long as I have the energy to do it joyfully, effectively and relatively safely, chopping wood is fun as hell.  Using an axe, or splitting wood, or doing anything that requires skill and focus is very similar to a challenging sport.  And boy does using an axe require focus!

Axes and hatchets are extremely dangerous.  An axe is nothing to play with and chopping anything with an axe is a time for humility and sharp focus.  At first it is clumsy and tiring and seems futile, but as you gain skill, it becomes increasingly an extension of you and you can get into a groove, or zone as they say in sports.  The danger inherent in using an axe has a good and bad side.  On the one hand, danger makes us focus and adds an element of immediacy, much like a competition sport or a hunt does.  But, then it is also just dangerous and there is no way around that.  It can be more or less dangerous, but it is still dangerous to everyone, all the time, not matter how much experience they have.  And it’s especially dangerous when we’re learning.  

I was planning to do a cordwood challenge where I challenged people to cut a chosen amount of wood with an axe.  I decided to put that off.  Putting yourself on a deadline with only two months to go (done by june first is my goal, so there is time for drying) is not safe when doing something dangerous and unfamiliar.  My personal goal this year is just a cord, which is 4 x 4 x 8 feet stacked neatly.  I’d kind of like to do more honestly, but I actually don’t even need to cut a cord to get through next winter.  Honestly, I have a lot of wood now and may not need to cut any at all.  I might make charcoal out of some of my left over wood just to make room!  I probably don’t usually burn much more than a cord most years and often less.  I thought it could be a one cord challenge, but that is unreasonable for a lot of people and it seems better to just challenge people to pick an amount, even if it’s small, like a quarter of a cord (One quarter of a cord equals 4x4x2 feet stacked).

A person, could end up with an expensive hospital bill using an axe, or worse be maimed for life.  You could cut yourself where there is no one around and bleed to death.  We face these kinds of possibilities every time we pick one of these things up.  If you lack experience with an ax entirely, or with using similar long handled tools, a year of gaining familiarity might be in order.  That is a challenge in itself, so no hurry.  I’m just suggesting that this could be an edifying experience for some people.  There are many ancillary skills required too that one might not pick up if not pressed a little to do so in order to accomplish a goal.  An axe needs be sharp to be safe and effective.  It also needs a good handle.  Novices often break them.  I've broken many.  We all do.  Or you may have an axe with an old, weathered or warped handle that needs a new one.  Every axe user should be able to replace an axe handle, and it’s ideal to be able to make one.

As far as resources for learning go, I’m not sure I’m up to the task of teaching you how to use an axe, though I will certainly be sharing stuff and talking about the things that I learn or improve at.  I’ll try to spend some time on YouTube collecting some stuff worth watching.  Maybe I’ll make a playlist of them all, we’ll see what I come up with, but honestly, most of it is either not very useful, if not actually dangerous.  Book wise, Mor’s Kochanski’s Northern Bushcraft is a great read and probably the best thing going when it comes to axe safety.  I’ve also read the axe book by D. Cook this year and like it very much.  Both authors are thorough and thoughtful.  most importantly, their knowledge is something they own out of experience.

So, axe interested parties experienced or not, give some thought to taking on my challenge next year.  If you are inexperienced, it will be a journey.  You’ll need to acquire an axe which may or may not need renovation.  Spend the next year learning about axes and getting your gear dialed in, practicing etc.  Then when next late winter/spring rolls around, you’ll be primed to improve rapidly and succeed.  There is much to be learned and skill to gain.  Axes and hatchets can be very versatile tools.  Using one requires a lot of energy, but it is also great exercise.  Compared to using a chainsaw, an axe will greatly increase your coordination and strength.  It is also a more intimate way to interact with wood.  You have to pay attention.  Enough said for now.  I’m hoping to have my cord cut by June 1st so it has time to season.  I’m sure you’ll be hearing more from me about this project and various axe related things in the coming year or more.

The Axe Book by Dudley Cook:  http://amzn.to/1WQYhJe

Mors Kochanski's Bushcraft, great for axe use and safety  

Horace Kephart's Camping and Woodcraft, read free!  


full text of  Light versus Heavy Axes.
A correspondent of the Albany Cultivator describes his experience with axes, which we give in part as an item of interest to our readers who rely so much upon work with these tools:
"My first axe weighed 4-1/2 pounds, being the heaviest one I could find at the time. I was fresh from a class in natural philosophy, knew all about inertia, and had learned something of the force of gravity and the laws of falling bodies; had rightly guessed that chopping wood might be hard work, and determined that my knowledge of physics should help me out. I would have a heavy axe, a long handle—would move slowly, and take strokes that would count when they fell. My axe handle was 34 inches in length, the longest one in the store. I had hired a tough little French Canadian, weighing about 120 pounds, to help, he brought an axe—a mere toy I called it, which weighed 2-1/2 pounds, with a handle only 26 inches long. I told him I had a fair-sized job for him, and thought it would pay him to buy a full-grown axe. He smiled and said he gussed his would do. I had decided that we would work separately during the first day or two, in order that I might show what I could do. As I began to swing my axe I felt proud of its ponderous blows that rang through the woods, and rather pitied the poor fellow who was drumming away with his little axe, taking about two blows to my one. Presently I had to stop to rest, and then again, and still again; but my man, kept pecking away quietly, steadily, and easily, and seemed perfectly able to do all necessary breathing without stopping his work for the purpose. When night came we piled up our wood and measured it. Joe's pile measured one and a half cords, mine only three-quarters of a cord.
The next day I felt lame and stayed at home. Joe put in his cord and a half, as usual. When I went to the woods again we worked together. Not many days passed before I found an excuse for buying a lighter axe and a shorter handle. And every axe and handle that I have bought since, has been lighter and shorter than its predecessor. Whenever I use an axe now I select one very much like Joe's, both in weight and length of handle. I can use this without getting out of breath, and can hit twice in the same place. The result is that I can do more and better work and save a vast amount of strength.
Posted on March 26, 2016 and filed under firewood, Forestry, tools.

Bulgarian Giant Leek Project

It can literally take only about 10 to 15 seconds to get from the soil to this point due to the tall growing habit and resultant lack of any major dirt cleaning.  The larger one there is over 2 feet long.  Of course the greens can still be saved for cooking or stock.  It does take a long season to get them really big though.

This is a video project I just started to follow my progress while growing a crop of Bulgarian Giant Leeks, selecting the best specimens and saving seeds.  I have just a few 2014 seeds available this year in the web store and I’ll have the seeds from this project in fall of 2018.  Yeah, that’s a long time!  Unfortunately, I just noticed yesterday that I planted the wrong seed in the video!  I sowed 2009 seed instead of the 2014 seeds.  I re-sowed with 2014 seed yesterday, but it will set me back many weeks.  The original seedlings are already over a month old and doing well, but they are a generation back, so using them would really be a step backward.  I’m really putting myself on the spot here with this project.  I have performance anxiety.  Will my leeks grow big enough?  Will they be too skinny or too short and fat?  Will they shrivel and droop in the cold winter snows?  Can I really satisfy all those youtubers out there clamoring for giant leeks?  I think so, but I’ll have to be on top of watering and feeding to make sure this project goes off well and I can deliver the big ass leeks I’m promising.  Well, whatever happens, we're sure to learn something!

For those who dwell in Europe, you can check out Real Seeds.  They carry Bulgarian Giant and have one of my pictures in the description.  Their Mezier's leek also looks interesting.

Posted on March 20, 2016 .

Tips for Frankentreeing and Framework Grafting Apple Trees

The original Frankentree in 2015 with over 85 varieties in fruit, out of about 150 total grafts.  Video at end of post.

I get a lot of questions and interest about building frankentrees and frameworking.  I'd like to do either a book or high quality in depth video either this year or next, but, in the meantime, here are the most important points for success.  All of this is covered elsewhere, I just thought I’d put it all in one place with photos to make it more accessible.  This is applicable to pears and apples. Plums are also pretty easy and should be more or less the same.  Cherries I’ve had mixed luck with, but haven’t worked with them a lot.  Most of my cherry trees are still single varietal. for now…  For scions check out the North American Scion Exchange trading site.  It is awesome!  I've also just put scions in my web store.  I am mostly sold out for this season, but there are a few left.  I should have more quantity and variety next year.

When to graft.  I actually don’t know when you should graft.  I know what I can get away, but I’m not sure what people in colder climates deal with.  And so your journey begins!  Go forth and find that out!  I can tell you that it’s okay to graft during bloom.  Once the tree is really growing vigorously, grafts will still often take, but many times they will not grow much in that season, if at all.  They may just actually sit there dormant till the following season.  I've grafted dormant scions in July with some success, but they didn't grow until the following year.  It is also bad for the tree to butcher it all the way back after spring growth is well underway, so don’t wait too late.  Early in the bloom season before growth really gets cranking is still an okay time.  I can graft from anytime in February on into spring.

Topworking v.s. Frameworking:  Topworking basically means cutting into larger limbs and adding a few scions to each stub in order to grow an entire new top to the tree.  Frameworking retains the framework of the tree and adds more scions here and there in order to replace just the smaller branch structure and fruiting wood.  The advantages to frameworking are pretty compelling.  Quicker fruiting, less trauma to the tree and you can add more variety at one time.  The advantages to topworking on the other hand are that it requires less work, less time and fewer scions.  A topworked tree should grow back pretty fast, but it will still take some years.  If the top worked tree had a good form to start with, then that all has to be regrown and trained with lots of pruning.  I think frameworking is usually preferable when it is feasible, and the work can be spread out over years if need be, or as scions become available.  In a small home orchard or back yard situation, it is rarely necessary to resort to the brutal practice of topworking.

This tree had to be grafted into a large stub after is was snapped off by a bear. 

The same hacked off tree a year later showing the still very open wound.  Note also the water collecting and the black color from bacteria or mold.


Graft placement and Tree preparation:  Whether the tree is grafted all at once or in stages over years, there are a few points that are important to keep in mind.  You want the tree to have a good form that is physically strong, fruitful and easy to manage and harvest.

    *Height and shape:  If a tree is very large, but has good form, don’t butcher it to make it smaller unless it is of little value for some reason.  Trees which are neglected (or never trained at all) and grow into poor forms with a lot of very tall upright sections that are way out of reach without a huge ladder, often need major surgery to bring them down to a manageable height.  They will usually need major thinning as well to get an open branch structure.  It is important to have light inside the tree.  Very dense trees lose the ability to fruit on the inside of the tree and fruit quality is poorer without sun.  Keep in mind that the bigger the cuts, the longer the healing time and the more risk of introducing infection into the tree.  Big cuts often have to be made though and the decisions are not always easy ones.  At some point though, you just have to start cutting.


Take a look at the tree in these pictures sent by reader Joe Holthaus which he inhereted and plans to frankentree.  In terms of structural strength, fruit production and maintenance/picking, this tree is poorly trained.  This shape is inherently weak, though it may be fine for a long time yet.  The top has been cut off mostly at one level 3 or so years previous, probably to bring the height down.  You can see where it was cut off and clusters of large shoots have grown up. It has been allowed to grow back freely from the cuts making those tall upright shoots.  I would remove most of those new growths at the top, bringing it down to where it was hacked off a few years back.  Then graft into the remaining few shoots after shortening them to stubs.  After that, if the tree is pruned every year to to shorten the previous year's growth, it can be maintained roughly at that height, like an annual haircut.  The branches that do grow horizontal already can be pruned back to stubs retaining the main framework.  Sometimes you will retain only the main scaffold branches, and sometimes you will retain side branches too.  It just depends.  In a lot of cases, most of the wood 1 inch and larger will be retained if it is well placed, and removed completely if it is not.  yI would trim those big stubs back to the trunk so they can heal over and prune the suckers flush with the trunk as well.  When new suckers grow back in the spring, they can be pulled off early and through the summer as new ones emerge.  Pulling them off will discourage regrowth more than cutting them to stubs during the dormant season the way they are in the picture (numerous sucker stubs low on the right hand trunk).


    *What to cut off and what to leave.  I like to prepare the area or the whole tree and then graft.  Whether you are just adding a scion or re-grafting a whole tree or section, you generally need to thin out some competing wood.  What I can say that you don’t want to do is keep adding things to the outside of the tree.  Lets say I have an apple tree that I like well enough and want to keep, but also want to put on another variety for some reason, like for better pollination or just for variety.  Think of the branching structure of the tree more or less as wood that produces fruit and wood that doesn’t.  In frameworking, you more or less want to keep the structural wood and replace the fruiting wood.  Now this will vary with all sorts of conditions, but generally, larger wood stops producing fruit after a time.  I would say that on average I’m grafting into wood between 1/2 inch and 3/4 inch, though not infrequently smaller and larger depending on the situation.  If I add just to the smaller wood on the outside of the tree, the tree keeps growing outward and there is a limit to that.  It is better to go into the tree a little further.  By grafting in closer to the main scaffold branches, you prevent the undesirable phenomenon of the tree creeping ever larger outward, and you also insure that everything beyond the graft is the new variety.

Bride of !Frankentree! at my neighbor's place.  The limb in the background is mostly prepared, though I didn't end up grafting to every stubs on there.  Some of these are spaced a little bit too close together, but can be thinned later.  You can see that I've pretty much kept the main branches and then reduced the fruiting wood to stubs.  See further down the page for photos of this tree after a seasons re-growth.

    *Thin it out, space and spacing:  Thinning of existing wood can be done for several reasons.  Many trees just have too much congestion to make good fruit.  The tree will produce the best and sweetest fruit if the interior of the tree has light.  Air circulation is also good.  There is a mindset that natural is always better.  When it comes to growing trees, I disagree with that view.  The way trees grow naturally works from an evolutionary standpoint, but that does not mean it is ideal, or that it is best for their health, and certainly not for our needs.  I've come to see the growth of a tree as an adaptive but somewhat chaotic process in which it basically competes with itself.  Just like some of our behaviors, it has served the tree well enough to survive evolutionarily speaking, but it does not serve them best in every case.  Left to their own devices, trees will often shade out their own interiors, over compete with themselves, become clogged with dead wood, and very often form weak structures that can break under weather, snow or fruit load. 

For our purposes here, we also are concerned with the allotment of energy within the tree structure.  More leaf and twig area means fewer resources for each section, branch or twig, so we can direct energy into the new grafts or wherever we want it by removing some wood and leaving other wood.  (We won’t get into it here, but you can also do that with bud selection.)  So, the short version is this.  When you add a graft, remove any wood near it that is not valuable to give the new graft space and direct energy from that area of the tree into the new graft.  Thus the graft has less competition, but also gets more light, which will allow it to grow more.

    As far as how much room, a good rule of thumb is at least inches apart along the limb on larger structural wood.  And not 12 inches on one side, but staggered side to side.  So, from one graft measure 12 or more inches and put a graft on the other side of the limb.  That way each graft on any side of the limb is about 2 feet from the last.  That may seem like a lot, but it is not.  Once those new grafts grow out some side branches, they only have to grow 12 inches to the side before running into each other.  That is just a rule of thumb.  You don’t want bare sections of branch exposed to the sun either, or they will sunburn.  And convenient stubs to graft onto never occur exactly on a spacing.  So, just think in terms of about an average of 12 inches staggered and it will work out fine.  You can do some closer for sure, and put on extra for insurance, but plan on removing some of them later.

    To prepare all at once, or gradually?:  If the tree is healthy, I have never found it necessary in frameworking to leave any of the old variety to grow on the tree.  But then I have a high percentage of success on my grafts and a confidence born of experience.  It may be different with very old and weak trees, I don’t have enough experience to tell you that.  If the tree is healthy and I have enough scions, I’ll cut everything off.  If it makes you feel better, you can always leave a percentage of the old tree for insurance.  If you are just beginning at grafting, I would just do some random grafts here and there to get a feel for your ability and how well your grafts are taking.  You can then proceed as you gain confidence, and nothing is lost if any graft fails.  Even if you go for it though and half the grafts fail, it will probably be just fine.  I used a lot of difficult side grafts on the original frankentree and about half of them didn't make it.  Even though I had cut the entire tree back, it was perfectly fine.  The tree does need something to grow into.  It has to produce leaves and gather energy to survive.  If a lot of grafts are put on, then it can grow plenty of leaf area pretty fast.  In Topworking, where you chop off most of the tree and graft on only a few scions to each stub, “nurse” limbs are often left to feed the tree while it regrows it’s top and those are cut out after a year, or maybe two years.  In Frameworking this doesn't seem to be necessary, probably because the tree regrows so much leaf area the first season.

Bride of Frankentree sequence.  Starting to prepare the uncut tree.

The prepared tree.  The unfinished section on the left was left to the old variety, though it was pruned back more after this picture was taken.  Not every stub that was left was used, but the tree was more or less ready to graft here.

The mostly grafted tree.  Note some grafts are probably 12 inches long.

Leafing out first spring.

Just a single seasons vigorous regrowth.  The tree bore fruit the second year, though not a ton.


Scion length:  I like to use longer scions for frameworking.  They have the potential to produce fruit a little sooner.  They don’t always do so, but they have the potential anyway and do sometimes.  I will typically use scions with 8 or more buds if I have them and up to around 12 inches long.  Different varieties will grow in different ways, but typically 2 or 3 buds near the tip of the scion will grow into long shoots and the others will either sit there, grow into short shoots (which sometimes bear at their tips), darts, or fruit buds.  Sometimes those extra buds just sit there and do nothing, but at least there is a chance and you can sometimes have fruit the year after grafting.  It is fine to use short scions too with only one or two buds if that is all you have.

Bud facings:  You can use pruning to choose buds to retrain the tree to grow as you want it to.  The bud at the tip of the scion is usually the one that will grow the most vigorously.  If grafting on a downward facing branch, you might choose to prune the scion back to an upright facing bud (or just graft it on in a way that the last bud points up) so that the branch will start growing upward again.  If grafting to upright stubs, choose buds that face outward into an open space.  In subsequent years, you can keep choosing outward facing buds to encourage more spreading growth.

Which Grafts to use:  It doesn’t matter too much what kind of grafts you use if they take and grow.  I use cleft grafts, whip and tongue and bark grafts for the most part.  Bark grafts are made by slitting open the bark and tucking in a scion.  They are better for large stubs than cleft grafts because there is no need to split the wood.  They also create a lot of cambial contact and that is always good.  The bark has to be slipping, but that happens pretty early.

Here is a bark graft.  The part of the scion facing the wood is cut to a long sloping cut.  Of course it is wrapped tightly and sealed up as in the photo near the top of the page.  This is better when grafting large wood than splitting the wood itself open.  They are easy and seem to take very well.  The bark must have enough sap to slip easily from the wood though.

A healing whip and tongue graft showing the form.  If you can make it look like this and there are no major gaps when you squeeze it together, you're good to go!  For people that are not used to using a knife, this can be a challenge and is probably the biggest hurdle for most beginning grafters.

If you need to add a branch in a section of bare wood, you can try a side graft.  The branch is cut upward so that water will no collect in the cut.  The scion is cut in such a way as to wedge into the side cut and is jammed in forcefully.  If done right, no wrapping is needed, but it is probably good to seal the whole area with grafting paint.  I do so anyway.  The Grafters Handbook, by R. J. Garner is where I learned a lot of this stuff and about frameworking as a distinct concept.  http://amzn.to/1pGXG23He also recommends another graft that does not require wrapping called the stub graft, which I have used a little, but am still getting comfortable with.

A side graft.  The cut is made upward so as to not collect rain water.  If made properly, it needs no wrapping or nailing in place.  I will usually paint the whole cut area thick with grafting paint, though I didn't here.  These are a gamble.  Mine fail quite a bit, but they heal up pretty fast if they fail.

A healed side graft.

Wrapping and sealing:  Grafts should be wrapped tightly.  Especially if the scions are long.  You can use a lot of different things.  White PVC budding tape, green plastic landscaping tie tape, strips of heavy plastic bags.  But, whatever you use, make sure you can put some stretch on it and stretch it as you wrap.  wrap several layers up and down the graft area.

I like to seal my grafts along the whole length.  At the very least seal the end, but sealing the whole length is easy to do and is good insurance.  If you are just experimenting, you can use white glue cut with a small amount of water, or just latex paint.  I use Doc Farwell’s grafting wax, which is basically like a very rubbery latex paint.  The tree buds are very strong and should be able to push through any of those coatings as long as they aren’t applied just ridiculously thick.

Aftercare:  I will usually let the new grafts grow as they will the first year.  You can encourage certain buds to grow out into shoots though by notching just above them through the bark and into the wood slightly.  Other than that though, I would pretty much leave them alone.

Along about July sometime, you may need to unwrap the grafts.  They should be fine by then, but if you live in a very windy area, you may want to rewrap them till the end of the season.  Unwrapping and rewrapping is fine. If I don’t want to rewrap, I’ll just cut down the side of the wrapping with the grafting knife and the wrapping falls off.  You have to cut into the bark a little, but it will heal up very fast, so no biggie.  What you don’t want is to see the wrapping constricting the growth of the branch, so always unwrap before that happens too much.

A graft that was never unwrapped and constricted growth.  At best, you slow the growth of the branch and at worst, the branch can break at that weak point.

If a graft fails to take, a shoot will often spring up at the base of the old stub and can be left to grow out for grafting onto in the following year.  Otherwise, most growth from the old variety should be removed as it sprouts from invisible dormant buds during the spring and summer.

In subsequent years:  If your grafts take and the tree is healthy, it will regain a “normal” look in a pretty short time.  Make every cut just above a bud and think about which bud you are cutting to and which direction that will make the tree grow in or if it will make the new shoot grow down, or up.  On long new shoots, you can select the buds which you want to grow out into new branches and in late winter/early spring, you can notch just above those to make them extend into shoots for fruiting laterals or for whatever purpose.  Notching is a very effective technique on apples.

I can’t go into pruning here. I’m already approaching 3000 words!  Some general principals though.  You want light and air inside the tree.  At the same time, you should also strive to shade the main branches and trunk, because they can be sunburned easily causing necrosis (tissue death) and inviting boring insects (yawn...).  cut out or shorten crossing branches and thin out dense growth.  Typically, once you reestablish the permanent structural wood you will shorten all new wood each year.  Shortening makes future pruning easy and controls the height of the tree.  The most important exception being with trees that bear on the tips of shoots like Granny Smith, Kerry Pippin and Bramley’s Seedling.  Some of them bear on both tips and on spurs along the branches and others bear almost all on tips of the previous year’s growth.  If you prune those tip bearers short every year, you won't get any fruit, but that’s a whole ‘nother ball of wax there.

The above is the information you most need to know strategy wise to successfully pull off frameworking.  If you’re just starting to learn grafting, how you proceed is really up to you and the value you place on the tree you are working with.  Starting gradually to build skill and confidence is fine, or if the tree is not valuable, you could just go for it.  If you start small, you are not likely to do any serious damage.  Trees are resilient and adaptive.  They are used to being broken by snow, wind and falling trees, ravaged by bears, chewed on by rodents, attacked by fungus and insects.  You should not be losing sleep over cutting a few branches back and making some grafts to experiment or practice.

Look at grafting information and practice on some scrap prunings until you can make good fitting grafts that show no light and match up well when squeezed tightly.  You can use a sharp pocket knife or sheath knife, or a razor/utility knife if it is of a type that the blade doesn’t wobble.  If you want a real grafting knife, this one below is affordable and it is what I use most of the time.  Whatever you use, it should be sharp.  Learning to sharpen and use a knife is where this battle is won honestly, and those are skills worth having, and that you can use in so many different arenas.  Get out there and make it happen!  Good luck!

Posted on March 18, 2016 .

How to Clean Out a Horizonatally Drilled Spring or Well

This under 4 minute video is about cleaning my horizontally drilled spring.  The spring was drilled into the hillside at least 30 feet at a slight upward angle long before I moved here.  The first ten feet of pipe are solid and the rest is perforated to allow water to seep in.  When I moved here, it only ran about 1/2 gallon per minute all year, but the owner said he thought it used to run more in the winter time.  I called the local driller and he told me how to clean it.  Once cleaned, the spring gushed 10 gallons a minute for hours as it let off the built up pressure, which it does now every time I clean it.  They often will slow down over a long period of time.  One of our neighbors actually drilled a new well because they thought their horizontally drilled spring was just drying up and didn't know that it could be cleaned out.  Mine needs to be cleaned about once every year or two.  This time it was nearly clogged to the point of going dry while the previous two years it didn't need cleaning at all, maybe because of the drought?  With all the rain we're getting this year, the drought, worst in most people's memory, is over.  Yay for water!  If this spring wasn't here, I probably wouldn't be either.

The first time I cleaned the spring.  I was surprised and pretty happy!

Posted on March 10, 2016 and filed under Homestead Lifestyle, Homesteading, water.

Apple Breeding Series: Planting the Seeds

Here is my installment of the apple breeding series which deals with planting the seeds.  Written version below.

https://youtu.be/_dOSZneuBv0

Apple seeds generally require stratification in order to break dormancy and begin growing.  Think of stratification as a clock or timer of sorts.  After accumulating X number of hours below a certain temperature, the seeds believe they have gone through winter and it's okay to grow now.  Stratification is not difficult.  If you harvest the seeds in the fall and put them into cold storage, then they will be ready to plant in late winter or spring.  Apples which are stored in cold storage must certainly contain seeds that are stratified enough to be ready to grow too, but I haven't tried it.  I would assume so though.  The other option is to simply leave the seeds outside.  You can sow them in the open ground and let the cold weather work on them, or you can sow them in flats and put those outside.  Whatever you do, I don't think you need to think about it too much.  I haven't, and it works well for me.  Just keep them cold when up until you are growing them out.

I like to start mine if rich flat mix in the greenhouse in later winter.  Anytime between about the end of January and the middle of Feb is good.  Later is okay too, just don't wait too terribly long.  The flat mix I use is 2/3rds of old flat mix, with 1/3rd new sifted compost.  I just keep the same stuff cycling year after year.  Some of the mix gets planted out into the beds when plants are transplanted out into the ground, but the new compost addition each year replenishes that.  I use this same mix for all my vegetable starts and most everything else that I pot up.  I also add some handfuls of coffee grounds and wood ashes, and if I have it, oyster shell flour.  It's good stuff and grows great seedlings!  For more see my old blog post on planting flats and flat mix.

The seeds are stored in small plastic bags, labeled with their identity, see the video on that step here.  I like to use some sawdust in the bag to moderate the environment.  Sawdust also has some antimicrobial properties, unlike paper.  Don't use paper!  The sawdust should be damp, not wet.  If the seeds begin sprouting, that is just fine, just poke a hole and stick the root down in there.  the unsprouted or barely sprouted seeds I plant 1/2 inch deep.  If the seeds are dry, I can't tell you much, because I haven't grown out dry seeds, so you'll have to look elsewhere for that information.

If you are new to growing seeds in general, it is important not to over water or the seeds and seedlings may be attacked by decay.  Some say that the surface of the soil should dry out between watering.  Just don't let them dry out too much and don't keep them sopping wet.  You should however water them well the first time, but then allow the flat to drain and dry for a few days.  As long as the soil is moist, the seeds should be okay.  Roots like air.  A damp mix with air space is ideal, not a wet mix where all air space is filled with water like a sponge.

You can also plant the seeds in the open ground.  Just prepare the site well first and put a layer of fine material such as compost, coffee grounds, sawdust, etc.. over the bed surface to prevent the crusting that is caused by rain and water.  That way the seeds can come through easily and the exchange of air in the soil will not be unduly hampered.

After getting a healthy start in the greenhouse, the seedlings are planted into a nursery bed outdoors to grow for the season.  I would say the ideal time to transplant them varies by their progress and the weather.  I think anything between 2 and 3 inches tall is pretty good, but they can be transplanted earlier or later depending on the weather etc.  If they are to be grown in pots, especially in a greenhouse, they can be transplanted when very small, if care is taken, at almost any time really, but I'd probably wait till you have at least a couple of true leaves on them.

One parting warning.  Almost every spring I have mice in the greenhouse, and almost very spring they eat some important plants before I remember that this happens every year and set traps.  This year, the first night I lost about 15 of the already sprouted seeds, including most of the Cherry Cox x Sweet Sixteen seedlings and a bunch of the Sweet 16 Wickson crosses.  Now I have 3 traps set and have killed 3 mice in 4 or 5 days.  Next year maybe I'll remember to do that pro-actively!  Same thing happened last year. :-/  With multiple traps and good bait (roasted bay nuts for me, but almost any roasted nut or nut butter is good) it is almost entirely preventable.

That's it for now. I'm sure we'll revisit these seedlings when it's time to plant them out in the garden.

I will am getting my first blooms this year, so in all likelihood, we'll have some fruit to look at later in the year.  Isn't that exciting!  Who knows what will reveal itself...

Posted on March 5, 2016 .

Tricking Chickens Into Laying Where You Want Them To.

I’ve had pretty good luck getting free range chickens to lay where I want them to.  It certainly helps to get them laying in certain places before they bond with some random spot in the firewood pile or in a shed behind the shovels which they then refuse to abandon.  I made this short video when I was enticing my hens into laying in a coop where I can easily get the eggs.  I thought I’d outline some more complete thoughts below.


Laying and nesting/brooding behavior are basically still centered around hatching eggs and raising chicks, even when the hens are not broody.  We have got them laying tons of eggs through the year by breeding for that trait, but the natural behavior that is all based on is still centered around reproduction.   The great majority of the penned chickens I ever kept were not that inclined to brood chicks.  But my completely free range hens are a totally different story.  They go broody very frequently, sometimes half of them in a year.  Broody behavior complicates this whole situation.  If the hens were not ranging and doing as they please all day long, I could set up some boxes in one place and service a number of hens.  But when one goes broody, they might take over a popular site and the other hens start having to look elsewhere.  Or, they will go seek some secluded spot, start laying there and telling other hens to lay there and I may never find it.  Outside, where I can’t lock them up, they are vulnerable to predators and probably 50% of the time they won’t make it through the brooding process because a raccoon or some other predator finds them.  I hear them screaming in the night and run out with a flashlight and shotgun in my long johns hellbent on murderin’ me a varmint, but alas, it’s usually too late :(

Sometimes, especially if you do it early in the process, you can move the hen and her eggs to a new place.  Do the moving at night when they might just think it was a bad dream.  If they are locked in somewhere in the dark for a couple of days in a new nest, they will often stay there, though some are too bonded with the original site and will abandon the eggs.

For those reasons, I like to have multiple sites set up to lure them into, places where I can lock them up, or at least know where they are.  So….

How do we get them to lay where we want.  There are some behaviors and preferences we can exploit to that end.  One is the site.  They like something that is a little out of the way.  Occasionally they will lay or go broody in odd places where people are walking around and such, but usually they’ll pick something slightly out of the way, but not usually too far.  Put it in the zone that they frequent the most.  For instance, my chickens spend a lot of time way out by the compost pile down the driveway, but they’ll usually brood closer to the main living area where their coop is located.  They also seem to like buildings and concentrations of stuff, like around or in the woodshed or in the stuff around the outside of a building.  And, like us, they like the inside of buildings too.  I’ve many times found them laying in my bed when I’ve left the door open.

Elevation seems preferred.  I have a lot of chicks brood on the ground, but they’ll often express at least a slight preference for elevated laying sites.

Enclosed.  They like a little bit of cover, preferably above and below.  Boxes are great.

Other hens lay there.  They like to lay in the same spots.  I have 3 or 4 laying in the spot I just set up, probably all the hens that are currently laying are laying there.  You can use a couple of old eggs that are marked for identification, or dummy eggs made for that purpose.  This really makes a difference once bonded to the site, they’ll usually keep laying there whether you take all the eggs away or not, but it really helps to get them started in a spot.  If I ever get my lathe set up again, I’d like to make wooden dummy eggs painted with milk paint to sell.  I usually just use old eggs though and that works well as long as the shells are strong.  Some people use golf balls.  I don’t have a lot of experience with that.

Stuff they like.  I usually put some new straw or leaves in and a round the site to get them scratching around.  They like food!  a handful of grain tossed in some leaves will get all the chickens around scratching and exploring.  After that, when a hen spots that laying site and it has everything going on just right, they’re going to take notice.  Even if that doesn’t get them laying in a spot right away, having a few spots set up and in waiting will draw most of them in when they decide to go broody.

That’s about it.  It is pretty simple really.  Something like a box or brooding hutch set up with a little padding and some dry leaves or straw is often all it takes.  If you have hens poking around frantically into every nook and cranny and making a lot of noise, you can up your game a little and try to get them hanging around your chosen site with a little food and fun stuff to scratch around in.  They are simple and their needs and desires are simple.  They are the most dedicated and fiercest of mothers.  They have no fear for themselves, but they like security for their chicks.  They like food!  They love to scratch!  Mine are overstuffed lately with literally piles off all the human food scraps they can eat.  In spite of that smorgasbord, they still spend a lot of time scratching around.  Chickens scratch, period.

Well, all that works for me.  But they are stubborn and recalcitrant creatures, so just make sure they think it’s their idea!  You know when you’re a kid and everything that is potentially covered a or enclosed a little is a potential fort or clubhouse?  Think like that on a smaller scale.  I have a set up a couple more sites this week as it is very spring like and any day now a switch is going to flip in one of those hens and she’s going to go broody and start looking for another spot.

If you like chickens, I did a whole post on just Chicken pictures one year.  You can read that here....


Posted on February 25, 2016 .

Homestead Life Episode 2: A day on the Homestead

Just a day on the homestead running around doing stuff.  It is basically spring here already this year and I had a lot going on, so I thought I'd try this experiment out.  The pace is less frantic than some of my other videos, on purpose.  It's still cut fairly tight with some good bits of information here and there, though that isn't really isn't why I made it.

After receiving some comments referencing reality shows, I'm kind of thinking in that direction a little bit.  I'm the type of person they contact for reality or re-enactment type shows and some of my friends have been on them or contacted about it like George Michaud, Cody Lundin and Tom Oar.  My ex and I were approached about being on Wifeswap a couple of times, ha!  I'm not likely to be interested as those are often very skewed and the subject may have little control over how it's all done once the footage is shot and it hits the editing room.  When we shot a brain tanning segment for Modern Marvels (season 13 episode 9) their whole attitude was basically "is it good TV?" accuracy was not really much of a consideration.  A lot can be done in editing and even an awesome and authentic person, like Cody Lundin on Dual Survival, can be diluted by the fake drama and manipulation of directors, producers and editors.  My other homie Wylie Woods has been trying to get something together for a while with various producers and keeps getting jerked around and cancelled and told he can do it how he wants, but then maybe not so much.  Screw that.  I have potential access to millions of people who are hungry for something authentic and I can do it any way I want.  Someone commented that I could have my own reality TV show.  Well I do, and here it is!  I'm sure I'll get better at it, but I think the production and even some of the content is secondary to authenticity in this type of thing.  So, basically I'll interject some lifestyle/day in the life stuff sprinkled in with the down to the nitty gritty how to stuff and projects and all with occasional thought viruses, the transmission of which is why I'm here as much as anything... to influence the way people think about and perceive the world and what is possible.

Splitting Wood by Hand, #5, Just Splitting Some Wood.

This is #5 in my wood splitting video series, but it's being released out of order.  After shooting the footage for segments3 and 4 on technique and strategy, and trying to explain it all, the gears in my brain really started turning.  I feel like I can do a much better job of explaining and demonstrating those things now.  Having put it all into language in my head I also feel like I have a better personal understanding too and can probably further refine my technique.  So the technique and strategy videos will be re-shot this year, although I'm putting a few bullet points and a teaser below.  Also below are a list of other wood splitting videos worth watching.

I also have better slow motion capabilities now, which I can use to make a study of the mechanics of splitting.  Some of the important stuff that I'll be talking about in the technique video is presented in this segment as subtitles.  I'll make blog posts with photos explaining segments 3 and 4, but this video stands on it's own more or less, and it is intended for visual learning anyway.

I just spent a couple of hours looking for a few decent wood splitting videos to link in this one, and I can tell you, my stuff is top shelf compared to the vast majority of what's out there.  Hopefully people will actually see it.  I'm still ranking low in the search engines.  Comments, likes and shares anywhere help me reach more people.  I'm very excited to make the next two videos and get deeper into the details that matter and which could really help people increase their splitting effectiveness!  The previously released videos, along with this one, are in my firewood playlist.


Some notes and bullet points.

You'll notice that I don't favor using a splitting block for the most part.  Splitting on the ground requires a tool with a pretty obtuse edge for strength, but it has some benefits as follows.

*We don't have to move the wood to the block, especially important with big rounds.

*We don't have to pick up pieces and set them on (or back on) the stump.

*We don't have to set the tool down to pick up wood

*We have better mechanical advantage (more speed can be generated if target is lower)

*It is safer, since the work is closer to the ground.

*Less interruption to the work flow.

I've come to think that the equation Mass+Speed= Inertia/Momentum/Power is a core principal here.  I believe that any energy transfer to the target after contact is negligable compared the energy embodied before impact.  By having a low target and tightening the radius of the swing into a shorter arc at the end of the stroke, you can generate a tremendous amount of speed which equates to stored energy.  I know there is more involved than just that, but I suspect that things like the shape of the head, angle of attack and any twisting or manipulation of the head is really secondary to that equation.  Even if twisting, the head, at the moment of impact to open the split, you are still using mostly that stored energy, you're just sending it off in a different direction.  Aim and Strategy are of course also extremely important.  But, assuming you know where to strike and can hit the target, being able to embody a great deal of energy in the maul or ax head will most certainly serve you well, even if you don't need it all the time.

These video stills helped me understand my technique better and will no doubt lead to further refinement.  They are evenly spaced and shot at 24 frames per second, so covering just 9/24ths of a second.  Notice how much faster the maul head travels from frames 4 to 6, due to a tightening of the radius of the swing. It is hardly visible in frame 6, too fast for the camera to catch. 

After frame 5, the arc revolves around my fixed wrist position.  Between frames 5 and 9, my wrists move very little, but the head moves 4 feet or more.  I'm not pushing the head through the wood, I'm whipping it on the end of this long handle to throw it through the wood.  The force generated by this technique can be very powerful.  It's about taking the mass you have to work with and accelerating it very fast using simple leverage.

Also, note that because of that tighter radius, the angle of attack is significantly toward me.  If the round were up on a block, that could put the mauls edge pointing dangerously at my ankles or feet... not to mention that I would have less time and distance in which to generate speed unless I'm 7 feet tall.  A low block is an option, but requires moving each round onto the block.  Of course, this much momentum is often unnecessary.  Splitting blocks are great sometimes, but I've come to use them less and less for the type of splitting I'm usually doing around here.

Other youtube videos worth watching

Wood splitting videos worth checking out.  I had to sift through a load of crap to find these few gems!

*Damn, can anyone say badass?  I like the splitting horizontal pieces on the ground.  Been playing with that for smaller pieces.  https://youtu.be/ZMTnhDr8Wa4  

*And another bad ass!  A serious professional. https://www.youtube.com/watch?v=17HnpyMPFJA

*Score one for the badass ladies.  115 pounds of hellcat!  https://www.youtube.com/watch?v=3kTIS15oa7o

*Delicate and graceful, but effective.  And splitting over rocks even.  Just beautiful.  this is one of the Vido Daughters.  I have communicated with them about scythes and other self reliance/tool stuff.  Lovely people, check out their youtube channel, scytheconnection for some amazing videos, and also the scythe connection website. These people are the real deal!  When they talk, people should listen.  https://www.youtube.com/watch?v=7fWo0P0MdJM

*This guy split professionally with a relatively light and very thin axe he designed just for splitting.  Entirely different than my generally heavy handed maul approach.  Here he races a hydraulic splitter. https://www.youtube.com/watch?v=95Z2UXEFUIw

*Eustace Conway, subject of the book The Last American Man.  I met him when I was 19.  He blanked out a piece of wood for me with his hatchet.  I was trying to make a bowl out of it, but I only had a dull swiss army knife.  It was the first time I saw anyone use a hatchet with any proficiency, a Eureka moment for sure.  I've been in love with axes and hatchets ever since.  Anyway, his technique is interesting.  Poetry in motion!  https://www.youtube.com/watch?v=FHk6jn4c_FE

*I like this guy's video.  His wood is easy splitting and sounds/looks frozen, which makes it even easier, but he's using a small short handled axe and he clearly knows what he's doing.  He's got the speed building rotation around the wrists thing going on too.  Also, very interested in his hit overhanging the far edge of the round technique.  I'll definitely be playing with that.  https://www.youtube.com/watch?v=H10hVHCb-Ts

*This guy is great.  he's got a big old axe and is just totally berserk, but very effective and deadly accurate!  I'd love to see what he could do with that axe on some of the harder wood I split around here.  It's nice to use an axe when it does the job it just sort of slides on through, unlike the fat maul bits I use most of the time, but when axes jam up, the narrow bit sinks in deep and is a lot harder to pull out.   https://youtu.be/P32JDvu0b-0   Watch beginning of part 2 as well.  https://www.youtube.com/watch?v=YyWvBi-4QhIAgain with the very straight, grained soft, easy splitting wood though.

2015, the Year in Pictures and Video

My life is often full of beautiful and interesting things and happenings.  For your perusal ladies and gentlemen, the year in pictures and video!  (Applause cue)  Previous years are cataloged on this page.

I got a new camera in 2015, which brought the potential for much improved quality in both video and still photos.  The video footage is so good, that I frequently lift stills that look like photographs.  I am amazed at what these small cameras are capable of in such a small package, and it gets better every year, freeing us up to create stuff.  This is a time of unprecedented opportunity for creativity in media, of which the outlet of all outlets is now accessible to much of the world's population to do as they please.  The resulting revolution is having a profound impact on culture, and I think positive for the most part.  Like a democratization of popular culture where any content has a chance to compete, not just whatever people with the money to produce and air stuff decide to put out.  Amazing.  I think I said in last year's year end post that I planned to take good advantage of that opportunity.  I think I have and plan to continue to.  I'm also realizing how much more far reaching it all is than I had realized.  Onward.

Most of this is taken with older manual lenses adapted to my sony digital camera.


Black oak with rainbow.  Yet another large section of this tree just fell off and is going to take some creative and thoughtful planning to clean up safely.  Should make a good episode for my new Homestead Life category, being for snippets of life and incidents here.  Also should provide some nice wood for making stuff and some bark for tanning.  The early tanning industry in California was apparently using Black and White Oaks.  Later they switched over to Tan Oak which is what I mostly use now.  My use of Black Oak has so far been promising.

Long term “slow art” project.  I planted a ton of narcissus following the drip line of this oak tree.  It looks great, but the different varieties are in clusters.  The plan is to dig them all up, mix them together, and replant all the way around the tree in a wider band.  It should end up with about a two month blooming season and will likely outlive the tree by a long stretch.

Exhausted pollen covered bee that was trapped in this Oriental poppy flower.  It ate some honey, cleaned itself off and flew away.  Video someday.

Weary bee sipping some honey on a poppy pod.

Bee cleaning itself.  The procedure is something like this:  rub furry body on flowers to collect pollen, clean pollen off of fur with comb-like structures on legs, stick together with sugary bee spit, store in pollen baskets on the back l…

Bee cleaning itself.  The procedure is something like this:  rub furry body on flowers to collect pollen, clean pollen off of fur with comb-like structures on legs, stick together with sugary bee spit, store in pollen baskets on the back legs to take home.

This year's crop of healthy cross pollinated apple seedlings for apple breeding project.

The first incarnation of my charcoal rubbish trench soil improvement conception.  The basic idea is to create lasting soil improvement by making a handy place to throw stuff that you don’t want in the compost.  Throw in animal guts, weedy seeds, use it as a latrine, or whatever else, add charcoal (or just burn it in the pit as I am here), add soil in a certain proportion as you go, dig another one when it’s full, or keep a long trench going by digging off the end of the old one as it fills up.

Hide scraps, meat scraps and rotten eggs in the trench.  I’ll bet the artichoke I just planted here grows a minimum of 10 foot diameter.  The hope is that the awesomeness will persist, unlike most soil interventions.  Stay tuned.  This simple project is one of the most exciting to me because of the ramifications.  You'll be hearing more about it, both conceptual and implementation.

A species of large flowered native Hemizonia.

Bark tanned bull leather pruner sheath in progress.

Finished sheath with my favorite clippers, Barnel B808.  I will review these eventually, but bottom line is they are ergonomic, very well built with tight tolerances, heavy chrome plated blades, light weight, cushioned grips, oiler bolt, dainty blades that get into tight places and there is an awesome squeeze to open feature.  They are also affordable compared to similar quality pruners.  I can recommend them with few reservations after a couple years of use.

Betcha can't guess.  Answer at the bottom of the page.

Not-so-black black trumpet mushrooms.  A staple of turkeysong cuisine.  Video on how to clean and dry quickly here.

Narcissus headed to the farmer’s market.  They sell well, probably better than produce.  Also, the investment in fancy modern varieties with heavy substance paid off. they are impressive and popular and last longer.  I had to quit the market this year for personal reasons, rule changes and a low tolerance for life smothering bureaucracy, but I’m tempted to re-join to sell flowers.  There has to be a better way though…

Laying Buddies

Basking Buddies

Slate tree weight and spreaders.  What can I say, heavy metal homestead!  pushing the branches closer to horizontal changes the hormones, causing the tree to produce more fruit.

A primitive form of artichoke.  The scales are nothing to write home about, but the hearts are large and tasty.  And they look cool, though they are spiny little suckers.

Research time.  Probably something about some kind of glue.  All of these are probably available to read online for free, but that isn't the same as a book and an espresso.

A book and an espresso :)

Tan Oak blooms.  The bees love these.  On hot days in early summer they fill the air with a heavy scent something like mushrooms or semen, similar to the smell of chestnut blooms, to which they are related.  This is a foundational species here, unfortunately dying out from Sudden Oak Death Syndrome.

This tree is planted over an 8 x 2.5 foot circular pit back-filled with 5 to 15% charcoal.  There are also some deer guts too and blue the cat was buried here.  The tree has outperformed similar aged trees by a long stretch.  The leaves are large and deep green and it has skated gracefully through two years of the worst drought in memory, this year without a drop of supplemental water.  It would look much fuller, but I pruned it late after it had already started growing, which set it back some.  These initial results are promising enough to expand this practice to see what happens.  Yes, it’s a lot of work, but if this tree grows this well and produces for decades, there is no question that the effort will be repaid many times over.  Better to plant fewer trees and put in more effort like this.  There is only so much you can do modifying and improving soil from the top down.  I know, I’ve tried.

Thinking about upping my game on leek breeding and selection and maybe selling the seed instead of just giving it away as I have for many years.  This is a truly outstanding variety, but the seed I started with is run down and obviously has not been carefully selected for a while.  The seed I have now is 3 or 4 generations into selection for certain traits, and I think it has made a difference

Shakin' it out before a good crow.  Randy the rooster was a handsome fellow, but I finally got sick of listening to him and ate him.  it was like when I got on the phone or started recording video it was his cue to show up and start crowing.  One of the best decisions I made all year.

Pollinating an apple blossom

Pollinating an apple blossom

Pollinated fruitlets tagged with the pollen parent names.

Maypole, red apple and red immature seeds

Apple tree re-grafted after a bear attack.  This is a rind graft, where the scions are inserted into the space between the bark and wood.  See the year in video for some quick footage on how it's done.

Centennial crab apple.  Sweet and delicious in July!  Adding it to my breeding stock and thinking of grafting a whole tree.

New graft showing signs of healing.  This is far enough along to conduct nutrients, but still very fragile and must be re-wrapped for another month or two for support.

Adorable little owls.  These tend to be very tame.  I'm recording video footage of them only about 12 feet away by headlamp.  The footage was lost :/

Graining board for softening and raising the grain of leather.

Graining board, or "arm board" in progress.  This one will have a cork face for use on the delicate grain side of the skin.

Deer grain raised with the graining board.  Not the only way to do it, but the best way I've tried.

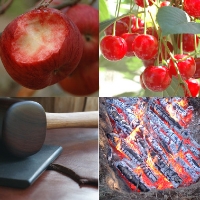
Pounded leather, half the thickness, twice the density.  The mallet is ironwood, extremely dense.  The slate is used to smooth and even the surface after pounding.  pounding is done on damp leather

Potential tanning materials for tests.  The skin samples are ready, just haven't gotten around to it yet.  I probably have over 25 materials collected.  Should have some results early this year.  video on this project here

Ye olde tanning beam.

Ax porn for a website header.  This is the image on my credit card.  Yes, my credit card is that cool.

Can't have too many

One of my old forges, good for coal, needs modification for charcoal.

An old forge left here by a logging crew.  From an era where the average group of workmen probably had in it some guy that was handy with a hammer and a pair of tongs.  Town was 10 miles down bad unpaved roads, and ten miles back up, so why hold up work when you can fix stuff on site?

Starting the woodstove.  I don't use paper and haven't for a long time.  My friend Hal, my elder no less, one upped me though.  He starts his with a hand drill, and uses bits of charcoal instead of tinder.  I think these kinds of practices will teach you a lot fast.  If you want to get good at something, put yourself in a position where you need to do it to get through the day. 

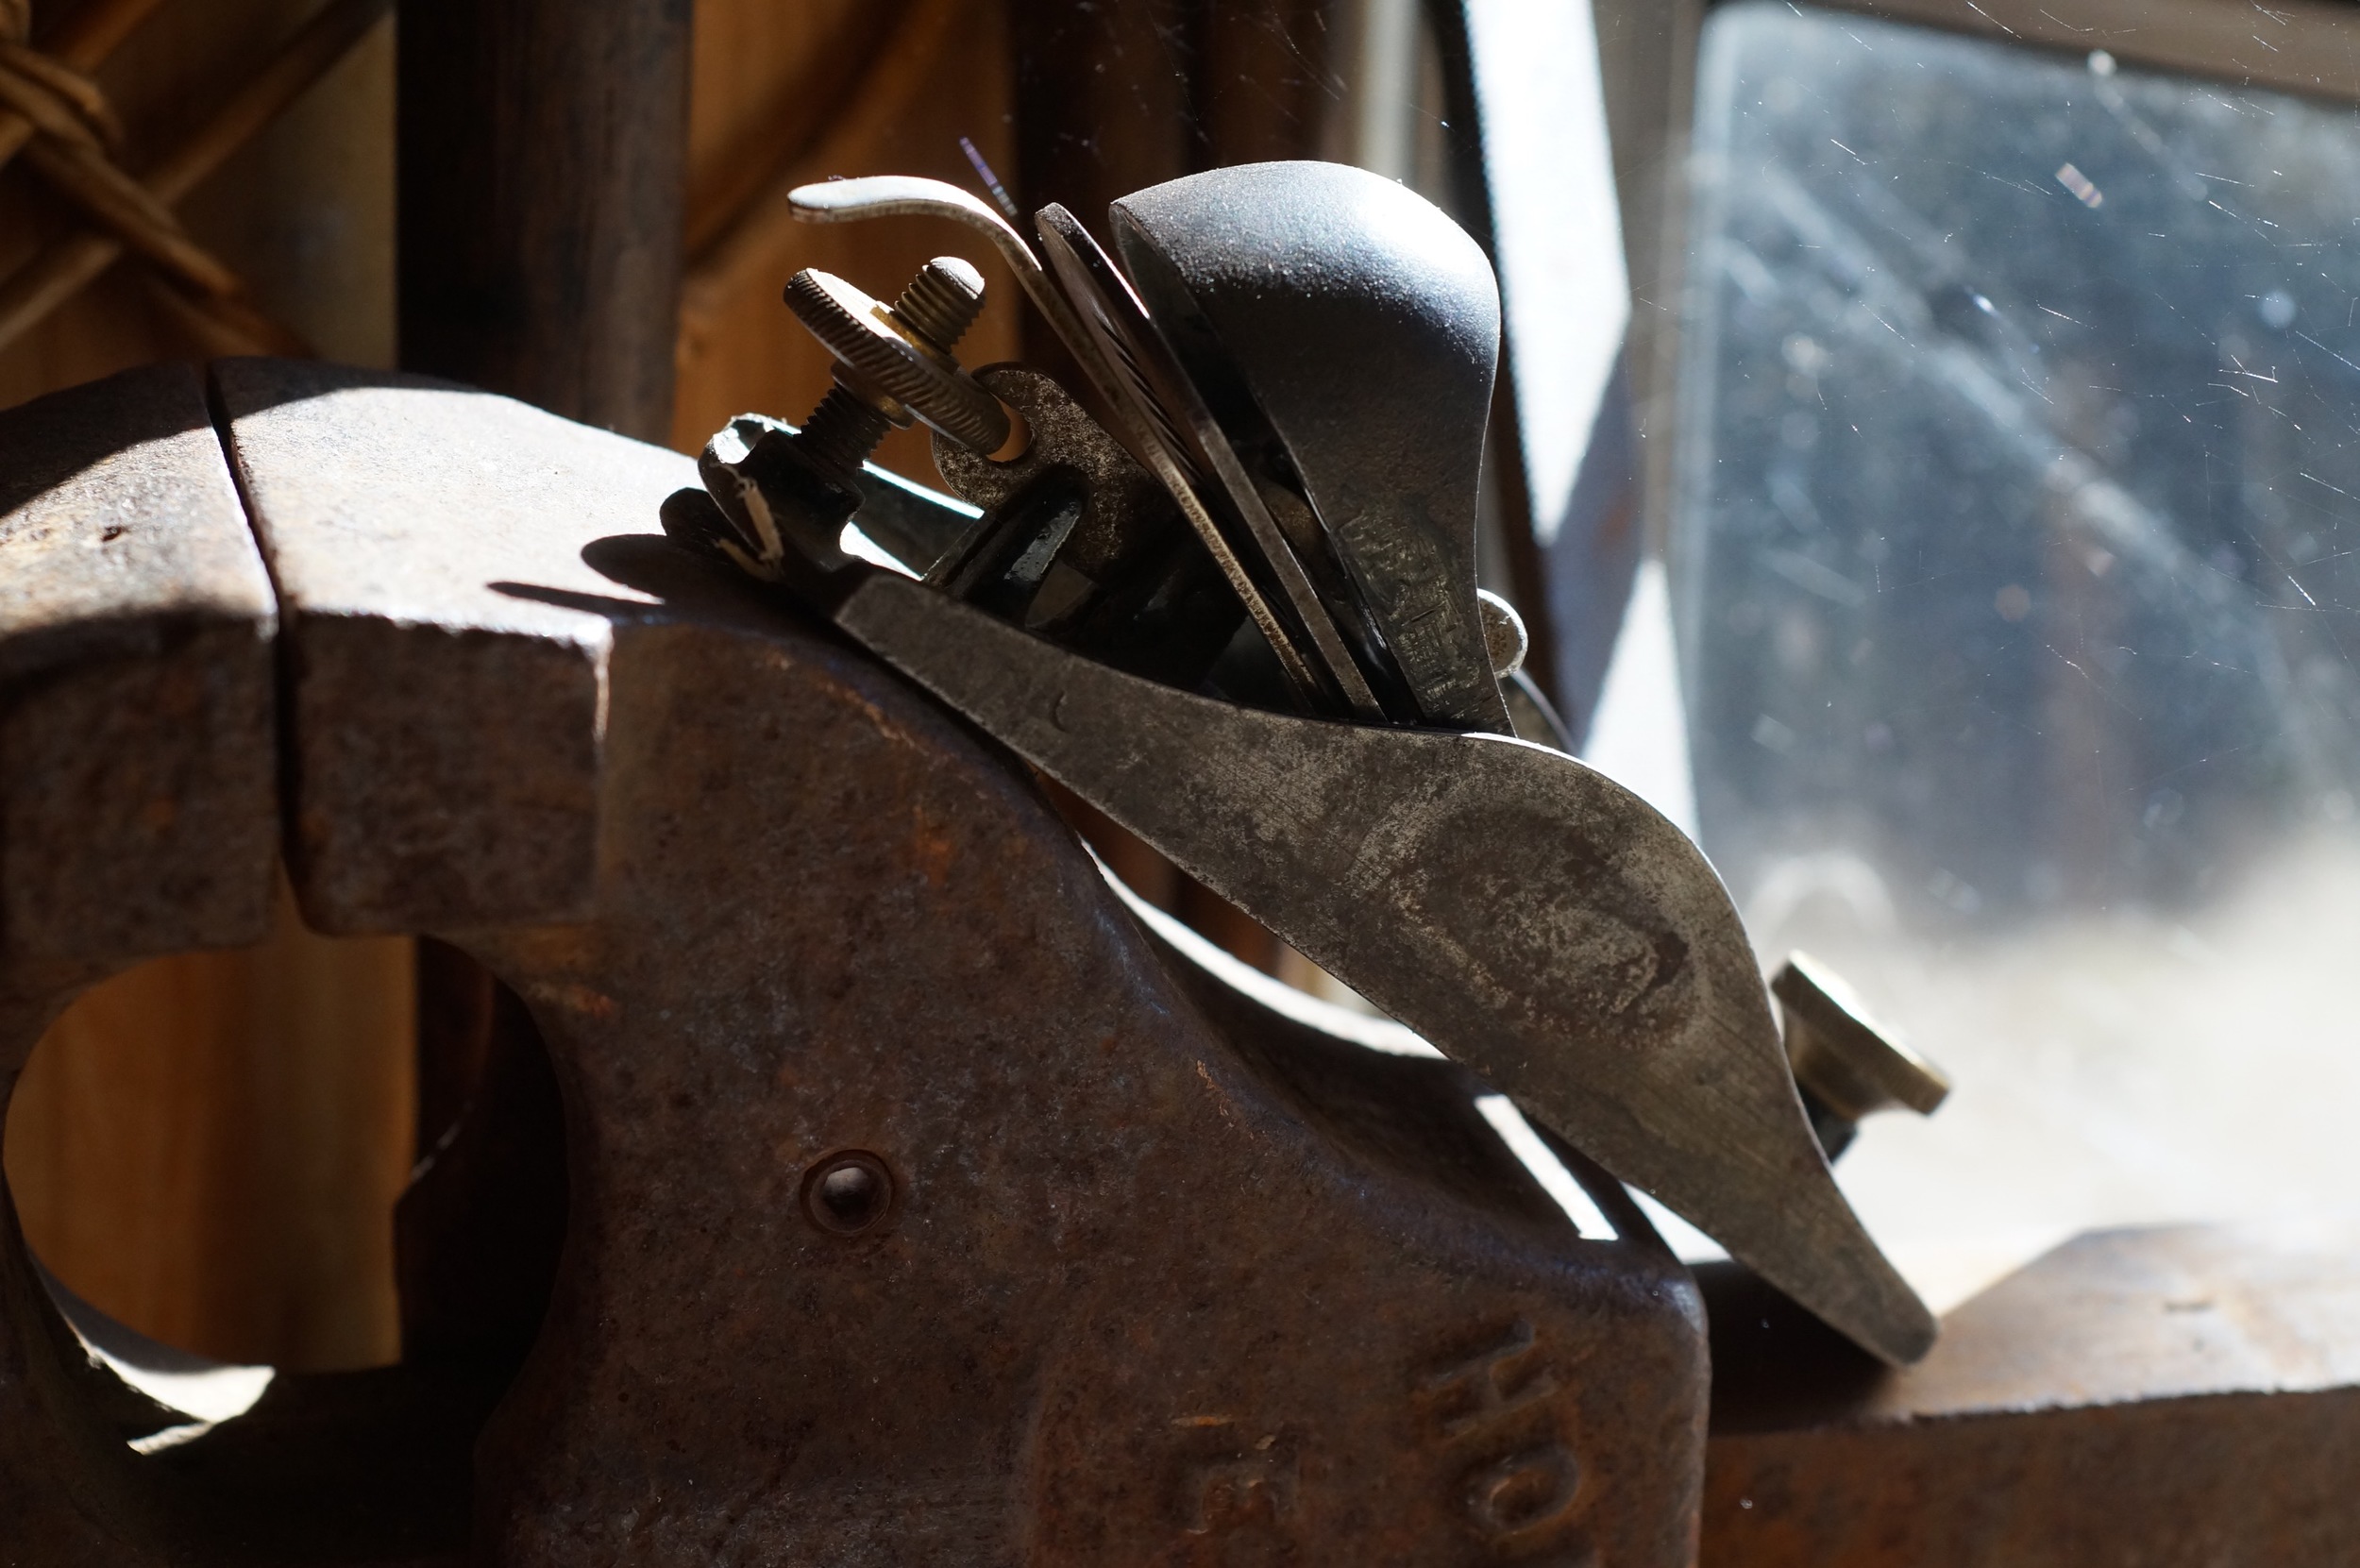
My Stanley no. 9 1/2 plane.  A small quality block plane like this is a great starter plane and really handy for small projects.  This one has been a companion for over 25 years.  I love it.

My Stanley no. 9 1/2 plane.  A small quality block plane like this is a great starter plane and really handy for small projects.  This one has been a companion for over 25 years.  I love it.

A big fir tree at my neighbors that I hope to make some stuff out of in 2016.  It isn't fine old growth quality, but it's pretty good and big enough to get some nice vertical grain planks out of.

A small hewn and planed fir plank from the tree above, made to test the feasibility of hewing some of it up into boards for a project.  I'd like to build a door with it.  We'll see.  I would learn a lot, and so would you if you follow my progress.

Queen of the night Tulip.  The bokeh on this beat up 5 dollar thrift store Minolta 58 mm f1.4 lens is bizarre but neat, like a watercolor painting.

Witchypoo practicing enlightened levitation on a san pedro cactus.  Do not try this at home, she is a professional!

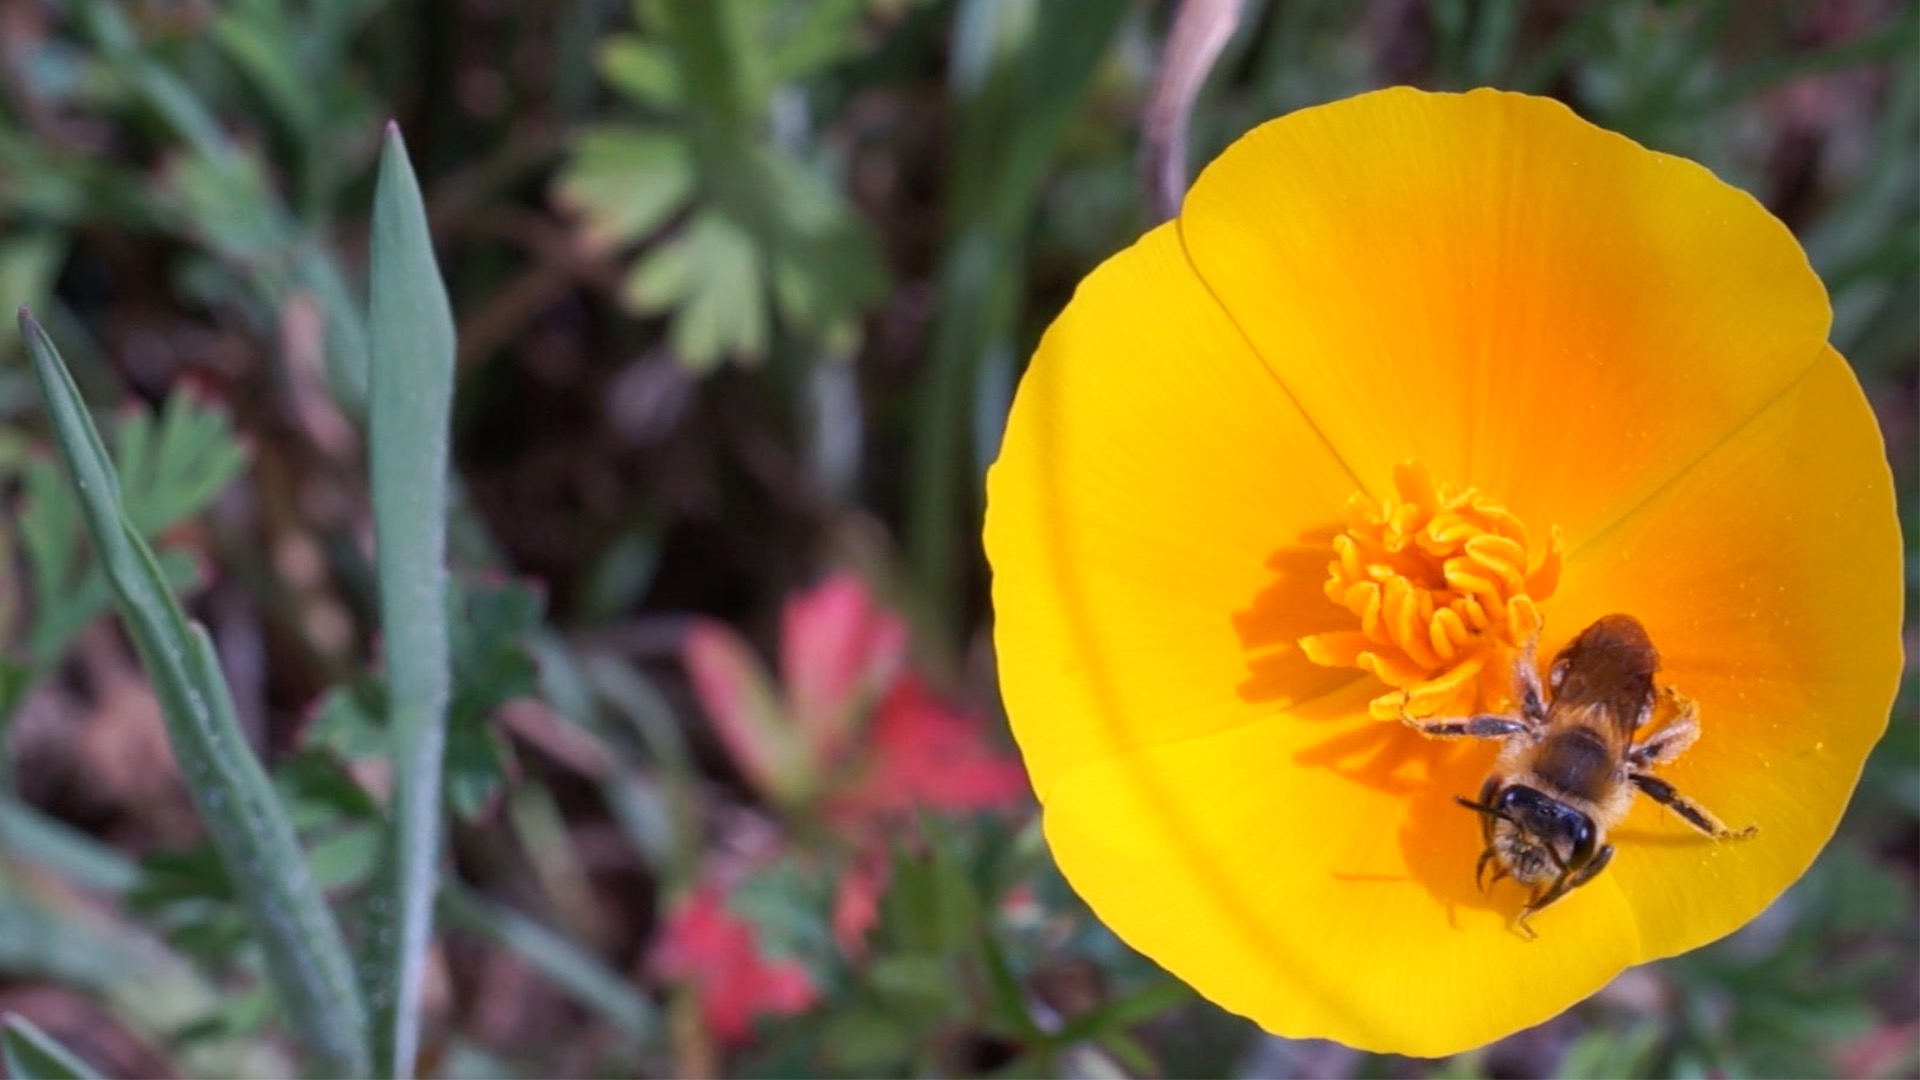
This species of bug hangs out on california Poppies in the spring.  I'm pretty sure the black and white bands mean DO NOT F*** WITH ME!  The antennae wave wildly in the slightest breeze.  I had some amazing macro video footage of these, but it was all lost.

Furled California Poppy.  One of my favorite photographs of the year.

Native Iris Macrosiphon

View out the front door.

Chicken tracks on my car.

Bees getting a drink at the spring.

Deep soil amendment with large quantities of charcoal last spring.  One half of one bed is 33%.  Another bed is about 25%.  Only time will tell how they do.  If nothing else, I replaced the worst rock and low nutrient sandy soil, totaling 1/3rdwith a substance that holds water and nutrients and aerates the soil.

Charcoal.

A scene on my drive to and from town.

A lone buckeye on my drive to town.  I remember the first time I ever came up this road it is so uniquely beautiful.  Then I used to drive up here once in a while and look longingly down the road I live on thinking "I want to live down there!"  I'm so fortunate!

Semaphore, an extremely rare grass.  This species only grows in something like 15 known locations, one of them next door.  Ironically, the neighbors dug up the ground to build their ceremonial sweat lodge on the site.  It worked out okay in the end and it's coming back.

California newt.  I bothered this poor guy for like 20 minutes to get the perfect video footage, which, again, was lost.  Damn you new version of imovie!

Daffodil spider.  Strong enough to catch honey bees.  They are yellow on yellow flowers and white on white flowers.  I guess they change color.  This one has a small native bee.

100 subscribers June 6th

My first ever daffodil seedling.  Well, it looks better close up ;)  It may improve though as it matures.  I had two last year and expecting more this year.  I f I get anything really good, I'll propagate it and sell them on the website here.  I just do it for fun though. It takes very little time and effort as you can read about here.  I named this photograph "What Daffodils do in the Dark"

Hungry?

Black Sage

Out the front door one morning.  I'm not sure what species it is, but I know they like to eat my chickens.

Firecracker Lily.  A unique local wildflower.

Daffodil seedpods, from hand pollinations

A stunning Native wildflower.  Forgetting the name!

Cicada on an apple branch, which they cause a lot of damage to by laying eggs in slits the cut.

Loquats!  Large, delicious variety.

Black sage again.  I love taking pictures of this plant.

Probably the largest loquat I ever ate, came off of one of my trees this year.

A freshly hatched cicada.  This is the type that hatches every year.

Taken with a 5.00 lens from the thrift store.

Itsy bitsy spider

Old spring house on the neighbors place.  A spring house is like a root celar.  The spring runs through it to keep it cool.

Potato onion seedling trials.  I was down to 15 this fall and tossed a few more last week because they rotted in storage.  Potato onion video series here.

inter-stem dwarf and diagonal cordon apple trees in a nice fog filtered light

inter-stem dwarf and diagonal cordon apple trees in a nice fog filtered light

Best cat ever!  This is the closest I've ever gotten to it.  Don't have to feed it, don't have to listen to it, but it still kills rodents in the garden!  I should name it shadow.  I guess it was just too cozy to get up and run away this time.  It's a stray.

Maypole, a red fleshed apple that shows red pigment throughout the whole tree.

Artichoke leaves drying for tanning experiments.  Hope it works!

A dew-bedraggled Brodiaea flower.

A dew-bedraggled Brodiaea flower.

Lizard playing king of the hill... with itself.  But it's winning!

The talented Ira showing off his gourd and rawhide ukelele.  Video here.

A poet-type narcissus

Ugly burr knots on M111 stock.  Plant those clonal stocks deep!

An idea I've been toying with, making leaf impressions in leather.

An idea I've been toying with, making leaf impressions in leather.

Wild "cucumber" or Mara, a native plant with an allegedly enormous root.

Another view of where I get to live.

A copper nail made for a project I abandoned.  I would have had to make about 90 of them.

This tiny crab apple was sent to me some years ago by my friend Becca Munro.  It is slightly astringent but delicious eaten whole seeds and all, something like crisp cherries.  It's going to get grafted out somewhere with more room to grow, and I'll probably use it as a breeding parent this coming season.  The flesh is very yellow and crisp.

A wood and leather seam with rawhide stitching.  An experiment for another abandoned project.

The leather mug project.  My most popular video to date.  Got me a massive number of views and subscribers overnight when someone shared it on Reddit.  Thanks!

Saffron!  Trust me, however much it costs, the person getting screwed is not the consumer!  Only three threads per flower, pulled out one flower at a time.

I decided to try bundling them like this as some fancy saffron comes.  I think this once was enough!  Although it would make a great gift like this, tied with a golden thread.

A new batch of leather working awls, getting an oil treatment.

A pair of dewclaw anklets I made.  Braintanned buckskin, bark tanned deer skin and deer dewclaws.

Pieces of cattle hide processed and dried for making hide glue

Skin pieces cooking to make glue

Fresh glue drying on the counter

The finished product available somewhere soon.

Chicken processing day.  Unwanted roosters.  Young roosters are excellent eating.

Mother, an old American apple of high repute.

Fruit tree understory experiment using amaryllis belladona hybrids (basically the same as naked ladies, ((the flower, not the real thing))  I post pictures of the progress of this experiment every year.  The last two years there have been literally only two or three weak weeds under this tree.  The amaryllis smother everything else, then die back around June 1st leaving this protective layer of mulch.  I won't know much more till I get to observe a lot of trees for a long period of time, but it's promising enough that I am propagating probably thousands of bulbs from seed and have planted 7 other trees to them.

This is the flower.  They are pretty popular at the farmer's market.

A batch of bark for tanning and wood for burning.  Tan Oak.

Manzanita

The fire kit I made for my stone age "no tools" fire making video.

I love this hoe and the company, Rogue Hoe, is a really cool idea.  They use recycled plough disks to make the tools.  I'm not sure about all the designs, but this one is great and the handle is very nice quality.  A high grade tool, hand made in the states and pretty affordable for being that.  Amazon link here.  this is the 5.5 inch version.

My beautiful road, untouched by a grader in 8 years since it was finished and not in need of it.  I studied progressive road design and made careful observations for a couple of years, but a few basic principals applied can save you tons of money, inconvenience and maintenance.  Someday I'll do a detailed treatment of road building concepts.  If you leave it up to a contractor, you will almost surely end up with a less than ideal road.  Small improvements can also be made as the road is worked on over time.

When I planted the seed for this apple years ago, I couldn't imagine that a fruit grown from this variety could turn out really bad.  It didn't.

Those fruitlets grew into this.  Thin skinned, nice texture, refreshing, pleasant apple.  Maybe not the next best thing ever, but quite nice and compelling eating.  I named it BITE ME! (capitals and exclamation point mandatory!) for all the naysayers.

Penelope

kniphophia, or is it kniphofia?  whatever.  Hummingbirds like it.

Drying Anaheim chilies.  I use most of them to make chili powder that is simply amazing.  Video coming someday.

My video on making traditional fermented hot sauce was well received, and I won a prize on instructables.com for it!

My video on making traditional fermented hot sauce was well received, and I won a prize on instructables.com for it!

Sunset colors off a point known to all the neighbors as Rob's Knob.

Teaching hide tanning stuff at the Not So Simple Living Fair in Boonville California.  This fair is great, teaching skills for self reliance.

My first dollar earned on Amazon affiliates.  The easiest way to support me without paying anything extra.  I currently make about 25.00 to 40.00 dollars a month on this, which is the only money I make on my online endeavors.  Given t…

My first dollar earned on Amazon affiliates.  The easiest way to support me without paying anything extra.  I currently make about 25.00 to 40.00 dollars a month on this, which is the only money I make on my online endeavors.  Given that I probably spend 20 to even 40 hours a week producing content, that is obviously unsustainable.  Bookmark and use my link, thank you, I totally love you, you link using person!  OMG, you are so awesome!!!

Best Garden I've had for a couple years.  Not as big and awesome as I want it to be, but not bad.  Video tour here.

Chestnut Crab.  As tasty as it is beautiful.  See my review of7 summer apples, including this one.

My little table at the very small, very local roadside farmer's market, basically a few of us selling whatever we want, no paper work, no fees, just people who have stuff and people who need stuff.

Kid walking his pet rock at the farmer's market.

Diagonal cordon trees.  18 inch spacing, very productive, quality fruit and only occupies about two feet of width!  Amazing system for small spaces or growing a lot of variety in a small space.  There are at least seven varieties in this short space, but there are more out of the picture because most are grafted to two varieties

!Frankentree! had at least 85 varieties in fruit this year.  Tour video here

Even good pears have to go to Pearison. 

Beautiful King David

Laden King David interstem grafted tree

A spring I restored after it was damaged during road construction.  I planted all those giant ferns from tiny "seedlings".  Also horsetail and wild ginger.  It has a way to go, but considering it was bare dirt, it is doing pretty good, and the ferns are already reproducing.

Misc. late apples for apple butter experiment

Apple butter experiment a success!  And I also won a prize for this one on instructables.

Beautiful delicious red fleshed apple juice

30 pounds of sausage!  Hello biscuits and gravy in the morning!

Smoking bacon

Smoking bacon

Emergency roof repairs in the rain.

Ice in the stem well of a Cripps Pink (Aka Pink Lady) on new years day.  I don't think they would have lasted much longer, but it was very tasty!  Winter Apple tasting video

1000 subscribers on my birthday, 900 in 6 months, yay!  Not a lot by YouTube standards, but a great milestone.  I'm hoping for 10,000 by this time next year.  I will probably have to start running ads on my videos soon sadly.  There is a new YouTube subscription service though that allows you to skip them.  At least there is that.  This is a difficult decision for me.  Random advertising is antithetical to what I'm trying to do here.  But, I can't keep producing content without an income.

This is my keyboard.  I work hard writing, editing and answering lots of comments and emails.  6 months ago you could still read the I O F and R keys.  And it has already been completely replaced once!  Eventually I will have to buy a new one.  You can help me succeed in my endeavor to build a public archive of useful self reliance skills and continue experimenting and running project here at on the experimental homestead by sharing my stuff wherever people will appreciate it and again by bookmarking and using my amazon affiliate link whenever, if ever, you shop there.

I'm not screwing around.  Does it look like I'm screwing around?  I'm not.  This is my not screwing around face.  Lots of killer content in 2016!

Lets rock 2016 y'all!  I think it's going to be a good one.


*That honey comb looking thing up there is a bark tanned goat stomach!  not very durable, but it sure looks cool.

Posted on January 29, 2016 .

The Pet Lime Kiln Burn, Written Version

I made it to 1000!  1062 YouTube subscribers and counting! :)

I did a written instructable on the Pet straw/clay kiln and lime burn.  As of writing this, it is already closing in on 2500 views!  I put this whole lime kiln project together to enter a contest over there called brave the elements, which is for projects dealing with, or taking advantage of, the four elements.  If you’d like to read a written version of the lime kiln and lime burning project, visit instructables, where you can also vote for my project at the top of the page.  The grand prize is a go pro action cam that I could really use.  I worry about my cameras and all the stuff they are exposed to, so more of them is better!  Plus this is an action cam, so I can put it on a silly helmet and run around doing stuff like chopping up trees or climbing them, or hunting or whatever.  Seems almost essential for some of the stuff I plan to do.

Instructable

Posted on January 24, 2016 .

Burning Shell Lime in a Primitive Straw/Clay Kiln

Tomorrow/Today is my birthday.  As I sit here at 11:58 pm, sipping tequila out of a bottle, trying to trap a loud and pesky mouse that is rolling bay nuts around the trailer and finishing up posting this project so I can move on to the next one, I want nothing more than to top the 1000 mark on my YouTube subscriptions today.  I have 959 subscribers, so only 41 to go!  If you can share this video somewhere that you think people will truly enjoy it and help me top 1000 subs by the end of the day, I will be just really happy about that.  Small victories you know.

I have two bottles of champagne.  One for reaching 1000 subs and another one for my first really mean and stupid YouTube comment!  YouTube comments are notoriously retarded.  Other YouTubers do entire episodes devoted to the stupid comments that they get, yet I have none!  I feel left out!  Clearly I need more exposure :)

This project was so fun :  I love burning lime, and now I'm thinking about how cool it would be to build something larger using a method similar to the straw kilns I show in these videos.  Something like this ancient style of coiled straw/clay Mexican granary that was the indirect inspiration for my kiln design, via friend and natural builder Michael Smith who saw these in Mexico and then innovated a straw/clay wattle wall system.

Super neat Mexican granary design utilizing straw and clay in a coiled pot type of form.  This would almost surely use much more clay than I'm using.  I'm intrigued though by the idea of using a mix more similar to the pet to build somethi…

Super neat Mexican granary design utilizing straw and clay in a coiled pot type of form.  This would almost surely use much more clay than I'm using.  I'm intrigued though by the idea of using a mix more similar to the pet to build something larger, like a pigeon cote, a smoker, or maybe a bedroom...


I made two videos.  One is the short accessible version and the other is longer and more detailed.  It also introduces two of the new series or categories I've been dreaming up which are intended to make content more navigable and allow people to find the content they want to see more easily. 

The Buildzerker! series houses the short version.  It is a series for shorter general interest versions of projects I do.  For every person out there who is ready to know how to burn and slake lime in some detail, there must be hundreds that just think it's interesting to watch, or who might be influenced in some positive way simply by seeing it happen.  Buildzerker! is a way to entertain people, while planting seeds that may someday grow.  When anyone is ready, the long version is there.  I'm very happy with this effort.  It is fast paced, visually interesting and even beautiful, while covering a subject that is truly interesting.  I tried as hard as I could to make it worth 7 minutes of almost any persons life.

BuildCult is for more detailed how to versions of projects intended to transmit more knowledge.  This one is also fast paced, but packs a ton of information into 20 minutes, while still having all of the visual interest of the simple version.

I like both of them, and am really looking forward to making more.  I feel like I'm doing what I should be doing, and that's always good.  I hope you have a great day.

Home Leather Tanning Basics: De-hairing Skins

In this video I go over some of the basics of dehairing skins for tanning and rawhide.  What I mean by dehairing is removing the hair and the very thin epidermal skin layer which is only a few cells thick.  This is not the same as graining or frizzing as is done with buckskin and chamois leathers.  In those processes the grain is also removed.  The grain is the shiny smooth layer on most shoe leather, belts, wallets, etc…  In dehairing, that layer is left intact.  In fact, this video is mostly about insuring that the grain does stay intact and is not damaged in any way.  It is a simple process, but it is also easy enough to screw up if you haven’t already made all the usual mistakes and then actually learned from them (I’m appalled at the length of time it took me to put all this together now that I look back!  What a dumb ass! ;-).  Not all of these precautions are always necessary, but they are good insurance.  Liming comes before this step.  I haven't done a lesson like this for liming yet, because I do these when the opportunity arises, but I do cover it somewhat in the second video below.


Posted on January 16, 2016 .

Potato Onions Part 2: Planting and Culture

This is installment number two on growing, storing and eating potato onions.  All of this is pretty much covered in writing elsewhere, and then some.  Here is a link to posts tagged with Potato Onion if you want to know a lot more.  I'm playing around with logo/branding ideas, just trying this one on for size.  The concept is basically kid-with-a-stick which is kind of the genesis of what it's all about to me.  And honestly, I think in a lot of ways part of me will always be a kid with a stick!  Let's hope so anyway.  It's brushed with some ink I made from soot (lampblack) and hide glue.  I'm not much of an artist, but I actually think I like the unpolished effect here and I like doing all my own illustrating with homemade art materials.  I'm also liking the black and white color scheme.  Now I'm looking into making my own fonts.  Yes, you can do that!  The point is to have an instantly recognizable look to all my thumbnails and stuff, so no matter how small or buried in other content they are, I'll stand out instantly.  Feel free to comment.  I like input and constructive criticism, because the way I perceive what I do is not the same as how you guys perceive it and you're doing most of the perceiving!  Cheers!

In Pursuit of the Real Oldtime Apple Butter, Shelf Stable, Delicious and All Apples

At some point I figured out that Apple butter as we know it is not what it used to be.  Old School apple butter was made to keep without canning or refrigeration and probably pre-dates canning jars.  I wouldn't be surprised if it entirely predates even the concept of heat canning.  I have had this idea on the back burner for a long time; the idea to find out everything I could about what apple butter used to be and to learn to make it, which I finally got around to this year.  The truth seems better than I had hoped.  The video below is the short, pretty version, the first half, being the process, is only about 4 minutes long and then I talk a little bit.  This post will be the long geeked out version, with thoughts and speculations and such.  And this instructable is the medium version, with a little more than you need to know, but not too much (I'd like to place in their heirloom recipes contest over there.  You can help by voting for me here..).  Finally, the post I put up yesterday is a compilation of all the relevant research that I collected, most of it from before 1900.  That's the best bit to me.  I love that stuff!

If you try making/storing/eating this type of apple butter, please report back.  Even if it is years from now, I'm sure I'm not the only one that would like to hear how it goes!

High definition/full screen recommended!

So, I already somehow knew that apple butter predated canning in jars, but I didn't know much else.  So, I did research to find what I could about real apple butter in general and the process of making it.  I actually found more and better stuff than I expected.  Basically, it seems that apple butter at it's best is not only delicious, but can keep for years without refrigeration or canning.  The news could hardly get any better than that!  I found numerous accounts of it's deliciousness and several claiming very long keeping, up to 25 years!  Not only that, but one account says it improves with age!  Wow, the news just did get better!

Of course there are many variations, but I think it's fairly safe to say that the old school apple butter is a product of boiling down a large quantity of cider with some peeled and cored apples added to make a smooth stiff mass.  Just how stiff is open to experimentation at this point, but on a spectrum of apple sauce to fruit leather, it is certainly supposed be closer to the fruit leather end.  I made three somewhat different consistencies, which I will probably save for a year or more to see how they keep.

I started this project too late to get a large quantity of apples without buying them, so I was only able to make a couple of very small batches this year.  I'm hopeful that they will keep well and I'm already thinking of seriously scaling way up next year.  It was easier than I thought and not that time consuming either for reasons I'll divulge presently.

The typical process and equipment for making apple butter was to boil cider down in a copper pot, then add peeled and cored apples and cook it down while stirring for 10 or more hours with a wooden paddle on the end of a large stick.  This traditional equipment is still in use by individuals, church groups and at apple butter festivals across America, but I couldn't find a single reference to anyone making the old style product.  The new apple butter tends to be closer to a very thick applesauce and, typically at least, must be preserved by canning.  I started my research by looking through the 1800s.  After I extracted all the good stuff from that era, I did a search through the first quarter of the 20th century.  There is an obvious change that happens after about 1900.  The new USDA recommendations were to can apple butter.  Recipes started using more apples and sugar and less cider, in short, short cuts began to creep in.  Since it would be canned anyway, there was no reason to cook it down so far, which meant less time, less stirring and resulted in more product (although just because it contained more water and fiber).  I think it was already on the decline in the late 1800's as this quote indicates:

“Making Apple butter is almost one of the lost arts”
Vick's Monthly Magazine, Volume 10, 1887

The old copper kettle and long wooden paddle.  Do not use copper, it was known to be toxic even then, but iron was unsuitable and copper was the go to metal for many processes for which iron was unsuitable.  The next best at the time was probably tinned copper, but I think that is toxic too. photo from Old Time Gardens, Newly Set Forth, Alice Morse Earle 1901

rockin't it old school baby!  photo from Old Time Gardens, Newly Set Forth, Alice Morse Earle 1901

An old advert for an apple butter paddle

So why bother making it the old way?  I just like skills that give me independence.  Apple butter can be made with just apples and be stored in random containers from ceramic to glass to wood.  I also hate buying canning seals. They are expensive and just another source of plastic contacting my food and leaching who knows what into it.  Sure, there are alternative jars that use rubber seals, but do a little shopping and see how much it will cost to re-tool your entire canning jar collecting over to fancy European jars with rubber seals.  In the end. I do what works for me and I preserve what I actually want to eat.  I'm not really a ludite.  I'm not going to dry and pickle everything just so I don't have to buy canning seals, but if I can make a truly outstanding product that I actually really want to eat by this very simple method and then store it for years?  Just let me say, OH HELL YES HOMESLICE!

So lets get down to it here.  This is the super short recipe version based on a compilation of experience and the various references I read.  Consider it a starting point only.  I'll elaborate, on some points below.

*Use a ratio of juice to whole apples between 1 to 1 and 1 to .75

*Boil the juice down while you peel and core the apples

*If the juice and apples don't seem very sweet, consider adding some sugar.

*Add the apples to the juice and cook, leave the lid off so it continues evaporating.

*Put a ceramic plate in the refrigerator for cooling test blobs on.  The butter cannot be tested hot, it stiffens a lot on cooling.

*When the apples are cooked and the liquid is getting thicker and is more than half reduced, grind it all smooth with a blender or immersion blender.

*Cook down at a steady boil stirring enough to prevent sticking and caramelization (burning or browning of the sugars).  As it cooks down it will require more stirring.

*Eventually it will start to have more body and stick to itself, start testing it as soon as you see it changing character like this.  It may appear to start acting more like toffee or caramel.  Keep stirring, don't let it caramelize.  Smear a bit on the cold plate and test it for consistency.  I went for a product that was just soft enough to spread with a little effort, like somewhere between cold and warm butter.  See the video for example.

*Pack into jars while hot.

*Possibly put paper, waxed paper or baking parchment directly over the apple butter before tying paper tightly over the top.  I don't remember any of the old references saying that it should be sealed in any way, such as with wax.

*Where to store?  The warm place?  The cool place?  I don't know, let me know what happens!


Spices are optional and sugar is added if the apples are not sweet enough.  After reading all the recipes and accounts that I found, I basically decided that a proportion of juice to whole apples somewhere between1 to 1 & 1 to .75   is probably in the ballpark.  The apples are measured whole, and subsequently peeled and cored.  For a large amount, I would definitely use a hand crank peeler/corer device.  They are awesome.  I'm also going on the working assumption that since using more juice means more sugar and less fiber, that it's best to err on the side of more juice.  I made two very small batches because I didn't have many apples and couldn't find any free ones late in the season.

I believe that the stirring was a combination of preventing burning, as well as a social rallying point of sorts, and necessary to reduce the apples to smitherines, which would not happen if they were just left to stew. I found that by reducing the apples to a smooth consistency with an immersion blender, I didn't actually have to stir it very much at all.  While I can't know for sure if there is benefit to stirring a large batch for 10 or 12 hours over an open fire unless I try it, I tend to doubt it will make a ton of difference and using the immersion blender saved me a lot of probably unnecessary effort.  On the other hand, the whole apple butter party scenario and keeping the fire going with constant stirring is really pretty neat and I think it survived because it has some special appeal to us as social beings.  I'd love to host one of those sometime- keep people busy stirring paring and pressing.  I like parties with a purpose!

The water content must be reduced for the product to be stored without canning.  Descriptions of apple butter's texture are not that helpful, but one compared it to butter (makes sense given the name right?) and another to cheese.  Many accounts though say it was spreadable.  So, I figured if I made it just barely spreadable this time, I could always make it softer in the future and see if it would still keep.  The first batch was too stiff.  It has to be sort of cut with a butter knife.  For the second batch I did one jar softer than the other.  One of those is spreadable, but somewhat stiff.  I'm guessing it is just about right.  We'll see how they all hold up.

There are accounts that seem to support both storing cold and storing in the garret or attic, which must certainly be warm to hot sometimes.  The most compelling accounts are from the Pennsylvania Dutch and taken altogether, it sounds like they both stored in the garret and kept the stuff for years.  I'm inclined to think that if it is made properly (whatever that may be) and kept from absorbing moisture, that it will keep well regardless of temperature.  But that is just speculation at this point.

Stiff, but definitely spreadable

There is some mention of other fruit, especially pears and one mentions quince as a flavoring.  My friend Erica makes something called Membrillo which is a similar quince paste.  There seems to be much possibility in using other fruits and I'm sure the lines between fruit spreads, butters, preserves and jams can't always be drawn cleanly.  But apple butter just sort of makes sense.  Apples are versatile and typically grown in larger quantity than other fruits by American subsistence farmers and homesteaders for that very reason.  And if the legendary keeping qualities prove to be legitimate, what a great way to use a bumper crop of apples and insure food for years to come in case of crop failures.

Speaking of keeping qualities again, I'm more or less assuming for the purposes of moving forward with experimentation, that the primary factors in keeping ability will be sugar and water content.  Diminishing the water and increasing the sugar will make the conditions increasingly unfavorable for spoilage organisms.  That is well known stuff.  A third factor could be acidity from concentrating fruit acids.  And, an outside possibility could be copper content from cooking in the old copper pots.  I'm putting my money on the first two though, because those are already well known factors in the food preservation world.

There is a class of apples, sweets or sweetings, that contain high sugar and were used for processing into various products and as stock feed.  They were sometimes added to cider, cooked (since they requiring no added sugar), and apparently made into apple butter.  The only 4 apples that I ran across as recommended for making apple butter pre-1900 all have the name sweet or sweeting in them.  The Pound Sweeting, Pumpkin Sweet, Tender Sweeting and the Red, or Sweet Pippin.  I think that says a lot.  I'll be collecting some of those now, but they are a much neglected group of apples and I would imagine most of them have been loss to time and neglect.

This post is sort of the "finish" of my old school apple butter project, but also just the start, and hopefully the start of yours too.  I don't think we need anything much more in the way or research, but it may take any one of us more or less time to decide what works well in terms of apple varieties, apple ripeness, and moisture content of the finished product.  And who knows what unforeseen vexes to navigate and pearls to collect await us.

Sometimes people, or societies, reject things for good reason and sometimes not.  Often, things are rejected categorically or just fizzle out when necessity no longer dictates form.  In my observation, and to my way of thinking, categorical rejection is a plague.  To assume for instance that a machine or mechanical contrivance is always better than a body/hand powered tool is folly, even if the machine does the job faster and with less energy expended by the user.  Things have to be assessed in a larger more holistic context.  I won't be simply assessing apple butter by "it's more work" or "it's the old fashion way so it's better" or even "it tastes better so I'll make it at any cost!"  I'm too lazy/busy and practical to do something for long if it doesn't "work" for me in a broad sense.  Old fashioned apple butter, no matter how romantic the notion, will have to run the gauntlet of my life, preferences, values, desires and needs, just like everything else.  And we shall see if it makes the cut.  I have certain food products I make, like canned tomatoes, artichoke hearts, hot sauce, pepperoncini, canned apple and grape juice, frozen roasted eggplant and peppers, dried chilies, dried black trumpet mushrooms- things that have stood the test of time and work for me.  I put them up almost every year that they are available, and I eat them all.  They only sit in the cupboard collecting dust if I have a huge bumper crop or have to ration them so I don't run out.  Given the small quantity of this apple butter that I made, I've only actually eaten a very small amount.  Regardless, given the quality and the fact that the preparation is not particularly difficult, I have a feeling this old fashioned apple butter is going to be join the ranks of those awesome favored foods already populating my cupboards on a yearly basis.

Small Beginnings.  Next year I get serious  >:-[ 

Posted on December 30, 2015 .