A Video Tour of my Amateur Apple Breeding Project

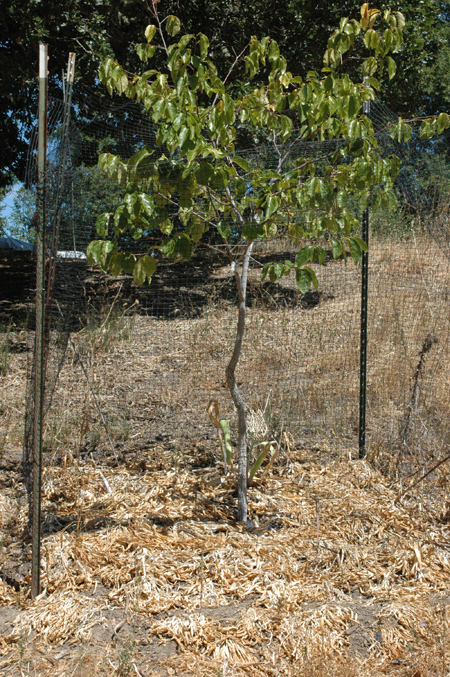
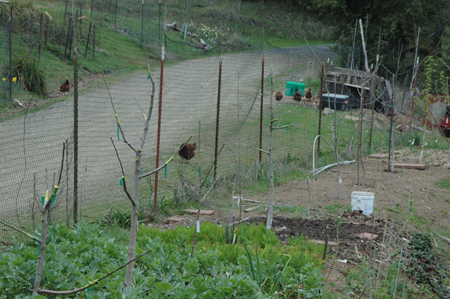
A walk around looking at various parts of my apple breeding project.  It doesn't look like much, but I think it's getting the job done.  I spotted my first blossom while filming this.  Way cool, that means I'll probably have some bloom next year, hopefully followed by fruit!

https://www.youtube.com/watch?v=X8EdnuyClkk

Virtual Garden Tour and Seed Packet Give Away for Subscribers

https://www.youtube.com/watch?v=ZZqScKgvX0Q

Here is a quick tour of my garden this early summer (not super quick, but my version of quick relative to the hours I could have spent).  It is not what I’d like it to be, but it’s pretty tidy and growing well, much better actually than the last two years.  We are in year two of a pretty bad drought, but I think the ever flowing spring is going to trickle on through this one too.  So, I am undaunted.  Of course many of the things touched on in these videos will be revisited in future videos and blog posts.

Video Series on Making Quality Hide Glue


I'm shooting a video series on making high grade hide glue.  At least that is the goal, we'll see when I test the glue after it's finished, or maybe have it tested by someone else.  The third video, on liming, is uploading to YouTube as I'm typing this.  The approach is a sort of learn as you follow along kind of thing, going through the process of turning a cattle hide from Tamara's recent cattle processing class into hide glue.  Every time I go to work on the skin, I take some video and edit it down.  One section is sort of a lecture type deal with some chalkboard action, one is on fleshing and, aside from the liming one uploading now, the others will be de-hairing and de-liming, cooking and pouring, then finally cutting and drying.  Maybe at some point there will be one on testing the finished glue.

This hide glue series will be fairly long, but there are things in there to learn beyond making hide glue.  Little snippets about other stuff relating to tanning skins and such inevitably work their way in.  No process is an island after all.  So far these videos have been decidedly lacking in popularity and the total number of people that really get a lot out of this will probably not be that many.  But it will be there when people are ready for it, and that is most of the reason I do this stuff at this point, as a reference archive and so it doesn't all die with me one day.  Personally, I think it's really cool, even though I've so far mostly restrained myself from going on long tangents about multiple related processes and ideas.  Poking around looking at other hide glue videos on youtube, a lot (or most?) of them use rawhide chew toys cut up in pieces.  Nothing wrong with that in context I suppose, but that has never been what we, or the genesis of Paleotechnics, has ever been about.  I'm definitely bringing you something closer to the ground up version.

The link below goes to the main Playlist into which all videos in the series will be placed as they come out.  I think anyone with any kind of google account, like Gmail, can subscribe for updates.  My channel, for now, is a mixed bag of stuff I get up to.  I'm also currently also doing a series on amateur apple breeding, which will follow my progress over the years attempting to breed up some new red fleshed apples here at the Turkeysong experimental homestead.  For the hide glue series,  I'm in the dehairing/refleshing/deliming process now, so that one should be up soon.  When finished, I will probably sell the glue on Etsy.  If that works, maybe I'll add artisan hide glue making to my list of little income sources.  Artisanal hide glue for artisanal artisans, you know instrument makers, fine artists who use traditional materials, fine woodworkers that want their furniture to be fully repairable in the future and the likes of them.  People who are keepin' it real!  See ya...

glue#1thumbFINISHEDYELLOW

Amateur Apple Breeding Video Series Launched!

spread the love baby (you have to read that in the voice of Issaic Hayes;)

Yay!  The apple breeding video series is off the ground!  I really wanted to get it launched this year because I made a lot of pollinations this time around, and I'm not sure how many more years I'll be doing it.

The first two videos are published .  They are basically the same video in two parts, of me talking about why I'm breeding apples and basically why I think more people should breed plants, apple breeding history, along with some gentle ranting (only had to bleep out one %$#*& word!  Pat me on the head).  The next videos will be thoughts on selecting parents and then onto the fun part, the first how to segment which is on pollination.  The pollination segment is mostly done, and I think it really turned out beautifully with my new drastically improved video capabilities.

The concept of this series is to follow the entire breeding process starting from pollination, for many years onward, until those specific crosses bear fruit, and likely beyond that as the fruit is assessed over a number of years to see if it is worth naming and propagating.   Also, we'll be following my progress with the whole project which is around 4 years in right now.  I made my first pollinations in spring 2011, so I may get lucky and have some fruit as early as next year.  One of my first seedlings is actually fruiting now, but it is just an open pollinated seedling of Wickson from my friends at The Apple Farm near here, so the pollen parent of that one is unknown.

My main goal with this video series to is to continue to incite creativity and deeper participation in what we are growing and eating, so please share so I can corrupt more people!  mwaahhhahahahhhaaa...

This link is to the playlist into which all the videos in this series will be dropped.

Video on Removing Burr Knots

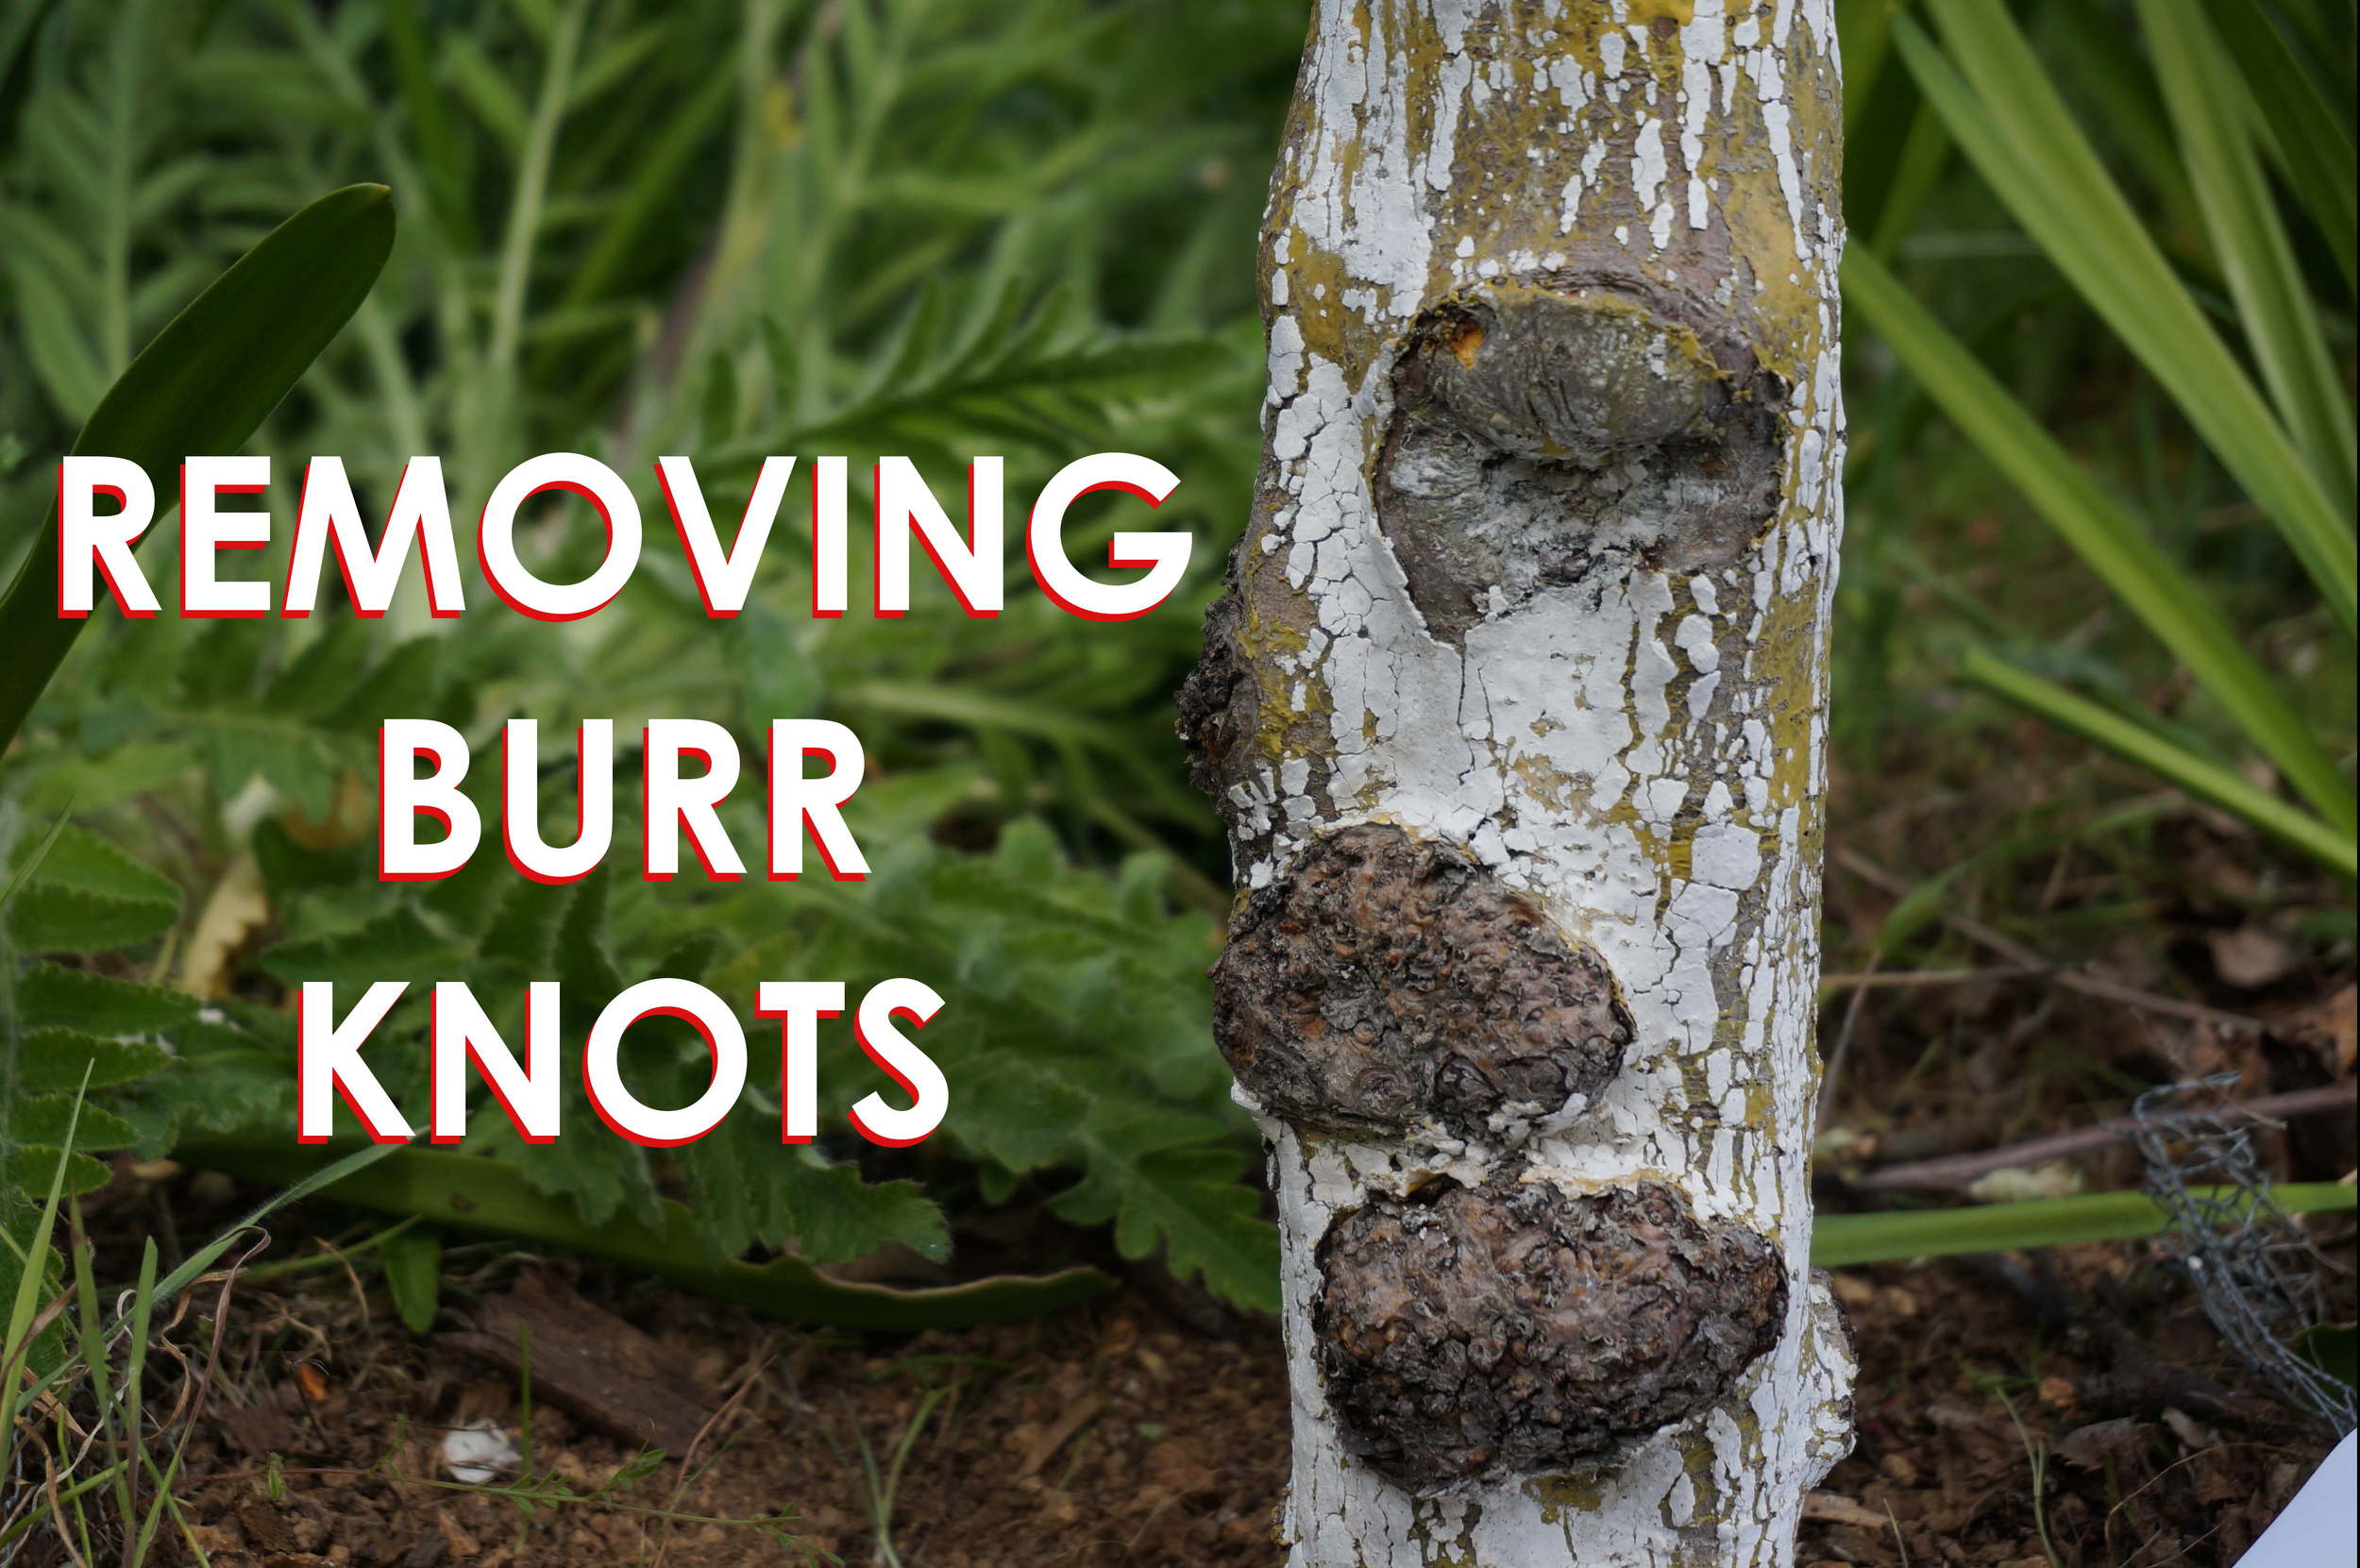
'Tis the season to do tree surgery- at the beginning of the growing season and after most of the rain.  A short video here on my experience so far with removing burr knots (arial root balls) from apple trees and how/why I think it works.   When I looked for information before trying this a few years ago I found almost nothing.  I think there was literally one dude in the internet universe who was like "yeah, you can cut those off" (I'm totally paraphrasing).  So, hopefully this will help a few people with those unsightly and, lets face it, unsafe burr knots.   It looks pretty dope too, because I finally got a new camera!  Now I have the potential shoot killer HD video with any lens that will fit on the camera, which is almost any lens actually.  I'm still climbing a steep learning curve with audio, camera functions and all the details, like remembering what the hell it was I was going to say, but I think things are improving pretty fast. BTW, look up your root stocks to see if they are prone to Burr Knots and if so, plant them up to the graft union.  Nobody told me that back in the day, but then again if they had, I wouldn't have got to make this video and dork out on burr knot theory.

BURR KNOTT THUMBNAIL

Interstem Grafting Videos

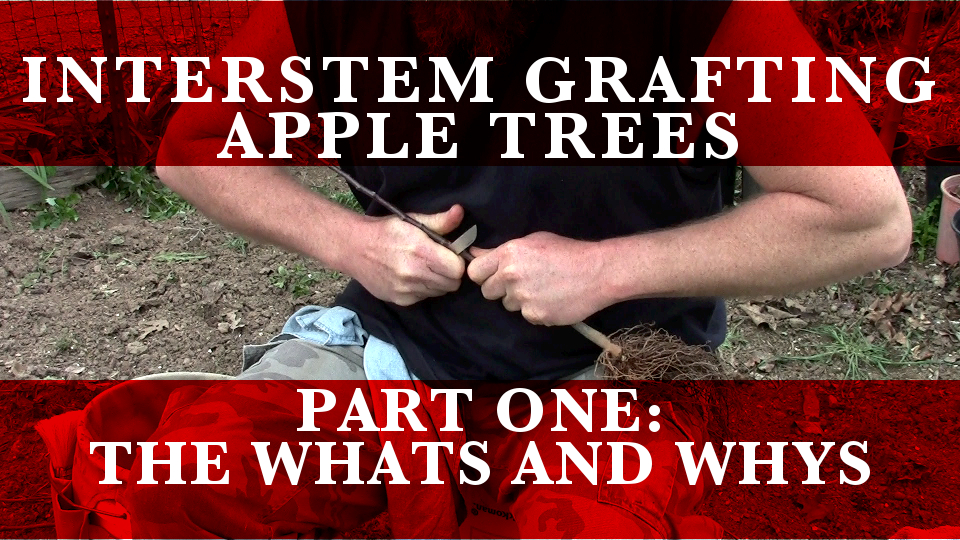
I just posted up a series of videos on interstem grafting.  This is most of what I know about interstem grafting Apple trees, growing them out, and their advantages and disadvantages.  Maybe a little late for this grafting season, but it's never too early to start planning for next year! interstem thumbnail ONE

Some News, and Videos on Scion Storage and Cleaning Black Trumpet Mushrooms

A couple of videos and a little news on apples and flowers! It's grafting season.  A lot of people have probably already finished their scion trading, but here is my take on storing and shipping scions.  I was so caught up in the details that I kind of forgot the basics, like store them in the refrigerator.  If it were more comprehensive, it would also include storing the scions without refrigeration, which maybe I'll do later, but same basic concepts apply.  Mostly, I was trying to address the potential of excess water and the use of paper to cause problems.

https://www.youtube.com/watch?v=Bx5UwS3SmlU

And for those of you who are lucky enough to have black trumpet mushrooms in your neck of the woods, this video is on how I clean them really fast, and dry them. It also includes a (what in my opinion is an all too short) rant on efficiency and work as a symbolic activity.  It is a long video for how to do something really fast, but I think the stuff about intention and mental attitude is just as important as the physical part, and it will save your a lot of time in the long run if cleaning large quantities.

https://www.youtube.com/watch?v=6iezTiOBXDc

DOOOOODS!!!  Two flowers from the first batch of Daffodil Seedlings grown from seeds pollinated in 2011 have put forth flower buds!  The bulbs arestill rather small, so I wouldn't be surprised if they are under-developed, but that's still pretty exciting, especially considering that I haven't taken stellar care of them.  I figured I was at least another year off from seeing anything.  I seem to pick breeding projects that take a long time.  Daffodils typically take about 4 years or more, and apples 5 or more years.  They should open within the week, at which point I may have to update the Daffodil Lust series with a new post.  Even more exciting, one of the seedlings is from Young Love, the daffodil that inspired it all!

Young Love seedling
Young Love seedling

I just recieved 50 apple rootstocks in the mail for grafting up my latest round of red fleshed apple seedlings, and last year's pollinations are sprouting up in the greenhouse.  Good news, I just talked to my friend Freddy Menge, who is sort of my apple guru or early inspiration.  We talk about apples on the phone about every other year.  He's getting results from his apple seedling trials, which I believe are mostly open pollinated, but he has a good collection of quality hand selected varieties growing, not just some random stuff.  He say that he gets more apples that are worth eating than ones that aren't.  That's just what I suspected when I started my breeding project and what Albert Etter seemed to be saying.  It also is totally at odds with what passes for common "knowledge".  He has sent me two of his seedlings that I'm trying out, one I've been calling King Wickson (not sure if he has a name for it) which he thinks is a King David x Wickson cross.  The other selection is Crabby Lady a small, more intensely flavored version of the latest ripening apple here, Lady Williams, also thought to be crossed with Wickson crab.  Crabby Lady ripens at the same time as Lady Williams, and sounds like a real improvement on an already very good and super late apple, so that really got my attention.  I'm hoping King Wickson will fruit this year, but I just grafted Crabby Lady this past week.

Freddy also said that about 1/4 to 1/3rd of his red fleshed apple seedlings have red flesh.  I was hoping for a little higher percentage than that, but such is life.  I may do some crosses between red fleshed apples this year to try to reinforce the red fleshed trait.  Another amateur plant breeder just contacted me through the blog who is also gearing up to do some red fleshed apple breeding.  Yay for grass roots apple breeding for the masses!

I'm off to get ready for the farmer's market in the morning.  Not much in the way of vegetables to sell anymore, but I cleaned up selling Erlicheer narcissus flowers on Valentines day and have a new batch ready to go.  It's nice to have that plan working out.  The Erlicheer are planted along both sides of a row of oblique cordon apple trees, so they require no extra care other than what I already do in taking care of the apples.  By the time the apples are leafing out, the flowers are thinking about going to sleep, so they have nearly opposite seasons

Flowers for market.  !Kaching!
Flowers for market. !Kaching!

Some I'itoi Onion Bulbs Available for Subscribers

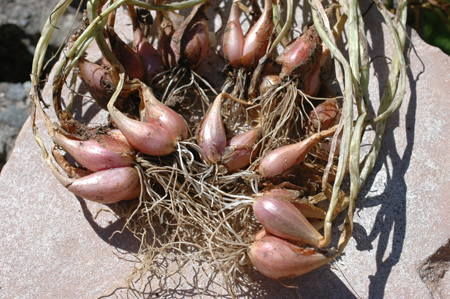
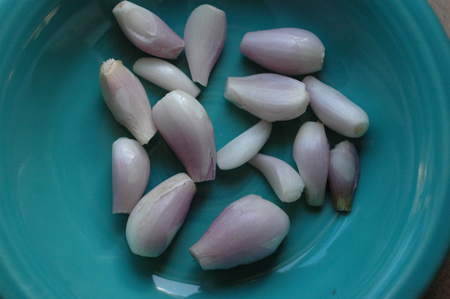
I’itoi (pronounced E-E-toy) are small and prolific multiplying onions.  The story goes that they were acquired from the O’odham people in what is now Arizona and N. Mexico.  They produce a very small Shallot like bulb that can be peeled and eaten, or they can be used as greens or pulled off during the growing season for “scallions”.   They are very rare at this point and were put on the Slow Food movements Ark of Taste a list of endangered food varieties.  I tossed a bag of old dried up ones that I thought were probably dead out in the rain a month ago, and a lot of them sprouted, so I thought I’d pass on what is left to readers of this blog rather than tossing them in the compost.  These are the ones that were too shrunken to sell, though perfectly viable, and now they are just barely hanging on for dear life.  They have a small core of viable bulb left and I think that if they are potted up soon most will still grow out.  You really only need one as they are very good multipliers.  I made up small packets of about 8 bulbs and tossed in a small sample seed pocket/packet of bulgarian giant leek seeds in each.  There are about a dozen packets ready to ship, first come first serve if you pay shipping, which just $1.50 should cover.  You can paypal that to me after contacting me through the contact link on this website.  This is offered for people who are subscribed to my blog. I'itoi peeled and whole

I don’t know much about cold hardiness of I’itoi.  They certainly do fine with light freezes, but growing them outside in really cold climates is going to be a bit of an experiment.  I'd appreciate any reports back on how they do.  These bulbs are barely hanging in there, but they are tough little guys and still have a living core waiting to find some soil and water.  Plant them immediately.  In warm climates, plant in the ground now.  In cold climates, I’d start them in a pot indoors and then plant out when warm weather arrives.  They reproduce like crazy and even if only one survives, you’ll have plenty to share, replant and eat soon enough.  I started with just a few and have sold and given away many hundreds of bulbs.

This is one cluster of I'itoi grown in about 3 or 4 months.  They are very prolific.

If left in the ground, they’ll form a dense cluster that can contain hundreds of small bulbs.  If replanted singly and well tended, they will form much larger bulbs than if left alone, but again they are still quite small.

Peeled I'itois.  Good if you have the patience.

First come first serve.  Contact me through the contact link on this page.  Again, this is for people who are subscribed to my blog and they'll probably go fast, so don't contact me next week or next month or next year.  I'll probably have them on ebay again this summer and I would think that they will be more widely available from seed suppliers soon.

If you have the patience, peeled I'itoi onions are nice for dishes where they are left whole, such as Risotto or in stuffing.  These are frying in chicken fat.

A google search will turn up a little info on I'itoi onions, but there is only so much out there.  This link is a good page to check out for more info.

And This video

https://www.youtube.com/watch?v=Uo6n9704vcE

Posted on January 12, 2015 and filed under Uncategorized.

Turkeysong, The Year in Pictures and Video, 2014

The short version of this year:  Felt like crap most of the year, didn't get a lot done, stopped growing stuff intentionaly for the farmer's market due to unreliable health and too many wasted crops, switched most of my energy and time over to trying to figure out health issues which occupies about 2 to 4 hours or more of research on most days and much of my thoughts.  But, even though I sat on my ass for about 80% or more of the great majority of my days, the pictures I took this year do show that I did get out a little bit. I'm in a full on war to regain my health.  It takes a lot of thought and time, so I haven't done as much cool stuff as usual.  Once I figure that out, I hope to be a fountain of useful output, but until then I'm running on fumes.  This year, I was really just getting by most of the time with little spurts of energy here and there which I generally use to do something interesting so I don't go completely crazy, often with piles of dishes and laundry as a result.  Give me a choice between a pile of dirty laundry with a pile of charcoal and, well... I'll just be adding some charcoal stained clothes to that dirty laundry pile son!  Let me tell you, a life of leisure is just not for me!

The spring ran on through the worst drought anyone can remember.  It was pretty slow, but there was still more water than I ended up using.  The spring really does make it all possible.  I feel like I should build a shrine or something.  Seriously amazing.

I actually got around to filling my deer tag this year!  Skippy the deer is mostly eaten up now, and good riddance.  He was busting down fences, messing up fruit trees and generally being a juvenile delinquent.  I was half expecting to find graffiti somewhere... DEERZ RULEZ! on the water tank or something.  The plan was to do a year long educational video series following the processing of Skippy into all kinds of cool stuff, but it proved too large of a challenge to pull off on my own and just getting him cleaned and in the freezer was enough at the time.  Maybe next year.

My ex partner and currently business and land partner Tamara Wilder has been back more this winter bringing some help in the form of work traders and such.  It's a bit of a challenge to have people here after living in solitude for a year and a half or more and I'm generally not up for managing anyone, but maybe some stuff will get done.

I've been a little more focused this year on video and hope to continue that trend. I still want a better camera, but I have an okay consumer camcorder I can use for now.  I am pretty excited about the great potential of video and the opportunity to reach a lot of people around the world with it.  You can visit my fledgling youtube channel here.  It's always helpful to get comments, likes and subscriptions, hint hint!  So this year it's two for one, The Year in Video and The Year in Pictures.  Or more like two for none, what a deal!

I'll let the images and captions tell the rest.

Watch in HD if your rural connection is fast enough.

https://www.youtube.com/watch?v=k6Vfg3EHQMk

_______________________________________________________________________

Edward's Winter apple re-grafted to a better (better here anyway) variety by frameworking.  Frameworking is generally superior to topworking, a more usual method, and I will be pushing this idea more in the future.  The Amaryllis flower bu…

Edward's Winter apple re-grafted to a better (better here anyway) variety by frameworking.  Frameworking is generally superior to topworking, a more usual method, and I will be pushing this idea more in the future.  The Amaryllis flower bulbs growing beneath the tree are part of my tree understory experiments.

The same tree in August, harvesting amaryllis flowers for sale at the farmer's market.  You can see the growth is pretty good on the new grafts.  It almost just looks like a normal tree.  The few fruits are from a few remaining branch…

The same tree in August, harvesting amaryllis flowers for sale at the farmer's market.  You can see the growth is pretty good on the new grafts.  It almost just looks like a normal tree.  The few fruits are from a few remaining branches of the old variety.

More fruit tree understory experiments with amaryllis belladona.  This tree literally had only 2 or 3 weeds under it this year. (edit, the following year it had 3 weeds,  so the weed suppression part is definitely working!)

More fruit tree understory experiments with amaryllis belladona.  This tree literally had only 2 or 3 weeds under it this year. (edit, the following year it had 3 weeds,  so the weed suppression part is definitely working!)

The same tree as above in the summer time showing dense mat of dead leaves protecting the soil.

The same tree as above in the summer time showing dense mat of dead leaves protecting the soil.

My neighbors hired me to turn this apple into a frankentree for them.  I think we put on about 30 varieties, all tested by me for this area.  It was dubbed !Bride of frankentree!

My neighbors hired me to turn this apple into a frankentree for them.  I think we put on about 30 varieties, all tested by me for this area.  It was dubbed !Bride of frankentree!

The tree prepared and ready to graft.  One section on the left was retained as the original variety.

The tree prepared and ready to graft.  One section on the left was retained as the original variety.

All the grafts finished and labeled

All the grafts finished and labeled

Some regrowth

Some regrowth

I carved some spoons and spatulas this year from maple and madrone.  When I come across some nice wood, I blank out billets with my hatchet and store them for later use.  The rough shape is made with the hatchet and finished with a knife, rasp and s…
I carved some spoons and spatulas this year from maple and madrone. When I come across some nice wood, I blank out billets with my hatchet and store them for later use. The rough shape is made with the hatchet and finished with a knife, rasp and sandpaper. They sold pretty well, but I don't really do it for the money, because it doesn't pay that well when using hand tools. A bandsaw would speed it up, but where's the fun in that?
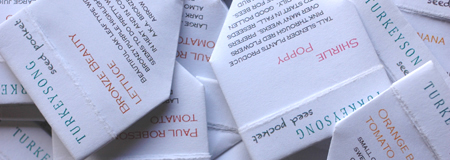
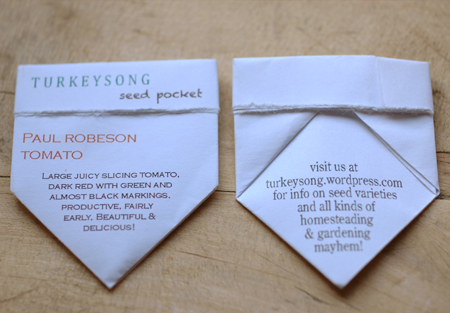
this year I got it together to print all my seed pockets and post a how to video on Youtube.  I may redo the video at some point, as the quality is not so great, but it works.
this year I got it together to print all my seed pockets and post a how to video on Youtube. I may redo the video at some point, as the quality is not so great, but it works.
Seeds of Ruby Streaks, a red Mizuna type mustard green.  This hasn't turned out to be a very good market item, but I eat quite a bit of it sauteed in butter.
Seeds of Ruby Streaks, a red Mizuna type mustard green. This hasn't turned out to be a very good market item, but I eat quite a bit of it sauteed in butter.
Bulgarian Giant Leek seeds.
A nice batch of leeks on the way to market.
One of my best customers hamming it up.
I continue to be amused by frequent hits on my How to Grow Huge Ass Leeks post from people searching for huge ass porn, or how to grow a huge ass.  Hopefully some of those people have been edified somehow by running across this blog.
I continue to be amused by frequent hits on my How to Grow Huge Ass Leeks post from people searching for huge ass porn, or how to grow a huge ass. Hopefully some of those people have been edified somehow by running across this blog.
Possibly the funniest thing I've seen all year.
Newly dug bed for trialing red fleshed apple seedlings. The white color is from ashes and oyster shell.

Newly dug bed for trialing red fleshed apple seedlings. The white color is from ashes and oyster shell.

Beautiful healthy apple seedling from my red fleshed apple breeding experiments headed for the trial rows.

Beautiful healthy apple seedling from my red fleshed apple breeding experiments headed for the trial rows.

Planting the seedlings.  I went for a very close 12 inches apart.
Planting the seedlings. I went for a very close 12 inches apart.
the new crop of apple seedlings overgrown in the flats as usual.  These will be grafted onto dwarfing stock this year.  I just planted the seeds from last year's pollinating.  I'm not sure how many more batches I'll do.  I may just do one more year …
the new crop of apple seedlings overgrown in the flats as usual. These will be grafted onto dwarfing stock this year. I just planted the seeds from last year's pollinating. I'm not sure how many more batches I'll do. I may just do one more year and call it good. I've only got so much room and resources to grow out apple seedlings, but there are a few more crosses I'd like to make.
this was a tree planting site on which I did a charcoal burn. I dug a large pit, burned the charcoal in the pit, crushed it and re-buried it in the pit as it was refilled.

this was a tree planting site on which I did a charcoal burn. I dug a large pit, burned the charcoal in the pit, crushed it and re-buried it in the pit as it was refilled.

Reburying the pit with charcoal mixed in.  The tree has done very well in spite of a serious drought.  It was plump and flushed deep green all year.  I did mix in some urine as I went to charge up the charcoal.  otherwise, it will soak up all the ni…
Reburying the pit with charcoal mixed in. The tree has done very well in spite of a serious drought. It was plump and flushed deep green all year. I did mix in some urine as I went to charge up the charcoal. otherwise, it will soak up all the nitrogen during the first year leaving none for the tree.
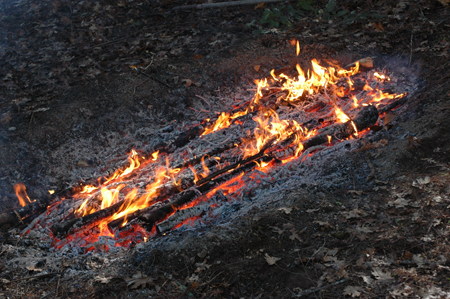
More trench burning of charcoal from the youtube video I posted on the method. I'm stoked about it. It seems to work very well, and it's fun.

More trench burning of charcoal from the youtube video I posted on the method. I'm stoked about it. It seems to work very well, and it's fun.

People are often skeptical about the alleged durability of charcoal.  I've found charcoal buried deep in the ground and probably associated with artifacts thousands of years old.  Anyway, this seems to prove the point pretty well.  It's a fossil tha…
People are often skeptical about the alleged durability of charcoal. I've found charcoal buried deep in the ground and probably associated with artifacts thousands of years old. Anyway, this seems to prove the point pretty well. It's a fossil that my friend found with both petrified wood and pieces of charcoal embedded in a stone matrix.
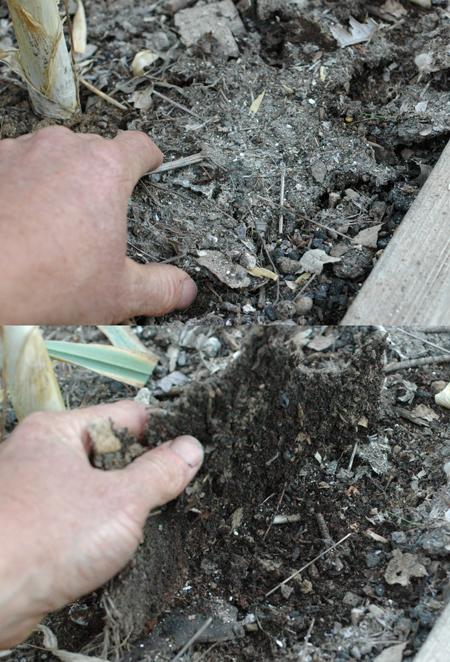
Digging biochar into a bed. This bed performed very well compared to most of the rest of the garden. In fact, my other biochar amended bed and this one were the best performing beds. This one was done as an experiment. Half is 10% charcoal to 20 inc…

Digging biochar into a bed. This bed performed very well compared to most of the rest of the garden. In fact, my other biochar amended bed and this one were the best performing beds. This one was done as an experiment. Half is 10% charcoal to 20 inches deep and the other half is 20%, but only dug in 10 inches. In otherwords, same amount of charcoal in each end of the bed just mixed shallower or deeper. No observable differences so far. I have quite a bit of charcoal stockpiled and hope to get a couple more beds prepared this spring. I'm planning more char to greater depth on the next bed and it will be prepared all at once by digging everything out to at least two feet and re-assembling it in layers. That may seem like a lot of work, but given that it should result in a permanent improvement it doesn't seem so bad. Especially given the large amounts of organic matter that people dig into their beds yearly and which disappears yearly. Not that charcoal is a total replacement for organic matter, but it does have some important functional similarities and will probably ultimately either reduce needed inputs, or result in better use of them.

Carrots at the Farmer's Market
One year of growth on an apple tree after dis-budding and notching to select branches. This method appears so superior to what is commonly recommended that I am anxious to do an article or video on it. It may be a little hard to visualize in 3 dimen…

One year of growth on an apple tree after dis-budding and notching to select branches. This method appears so superior to what is commonly recommended that I am anxious to do an article or video on it. It may be a little hard to visualize in 3 dimensions from a 2 dimensional picture, but this tree gave me 4 branches in four different directions in just one year. I haven't taken a current picture, but the tree will be grafted over since the scion wood was mislabeled. It was supposed to be Golden Harvey, a super sweet long keeping cider/eating apple that I was all stoked up to find. It turned out to be some bitter foamy cider apple of no account.

This picture shows the more rapid progress of a bud which has been notched.  note that it is further along than the other buds.  Supposedly that is because the notch disrupts signals from the top of the tree which otherwise would inhibit it's growth…
This picture shows the more rapid progress of a bud which has been notched. note that it is further along than the other buds. Supposedly that is because the notch disrupts signals from the top of the tree which otherwise would inhibit it's growth, but also possibly because it directs nutrients into the bud instead of letting them pass up the tree. Whatever the physiological mechanism, it works. After taking this, I removed the buds I didn't want as scaffold branches. This is a sour cherry. Sweet cherry has not responded at all well to notching and dis-budding.
This jar of olives was about 4 years old when I opened it and took the olives to the Olive Odyssey festival.  They were very good.  This is one great advantage to fermenting and then storing in the fermenting jars.
This jar of olives was about 4 years old when I opened it and took the olives to the Olive Odyssey festival. They were very good. This is one great advantage to fermenting and then storing in the fermenting jars.
Said olives looking tasty.
Chicken broken down into potentially edible parts.  I was experimenting for a minute with eating as much of a chicken as possible.  Those two things on the table to the left of the chicken that look like dead salamanders taste awful.  Don't eat thos…
Chicken broken down into potentially edible parts. I was experimenting for a minute with eating as much of a chicken as possible. Those two things on the table to the left of the chicken that look like dead salamanders taste awful. Don't eat those. I don't know what they are, but they taste like chicken poop smells. I also made several attempts to process and eat the intestines , but they also taste like chicken poo. I gave up on them. The actual sphincter is quite tasty though. Ultimately, that still leave the great majority of the chicken imminently edible. A lot of chickens have been on death row for a while as they have grown beyond the carrying capacity of the land. Lucky for them I haven't had enough energy to get around to slaughtering very many of them. I accidentally shot one of the hens though, because a bout of uveitis had affected my vision to the point that I thought it was a similar looking rooster. A tragedy maybe, but a tasty one!
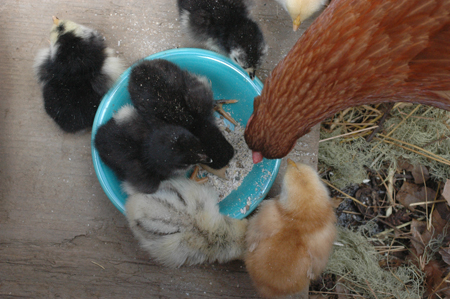
Have to have at least one picture of cute baby chicks.
Finishing some oak tanned leather that was started in 2013.  Here I'm scraping over the flesh side one last time to remove bits of tissue and oak bark.
Finishing some oak tanned leather that was started in 2013. Here I'm scraping over the flesh side one last time to remove bits of tissue and oak bark.
My friend Talcon oiling the flesh side of the leather with tallow before we paste it down to a piece of plywood for finishing and drying.
In this step, the leather is smoothed out with a rounded polished slate.  This removes wrinkles and dents.  It also sticks the hide to the board because of the tallow pasted over the flesh side.
In this step, the leather is smoothed out with a rounded polished slate. This removes wrinkles and dents. It also sticks the hide to the board because of the tallow pasted over the flesh side.
After setting the skin to dry up on saw horses, the chickens walked all over it, so I had to re-slick it with the slate to smooth it back out.  otherwise it would dry with these permanent marks, just like when leather is tooled to form patterns.
After setting the skin to dry up on saw horses, the chickens walked all over it, so I had to re-slick it with the slate to smooth it back out. otherwise it would dry with these permanent marks, just like when leather is tooled to form patterns.
The finished leather drying slowly in the winter sun.
I'itoi onions (pronounced E E toy) which I started selling on ebay this year.  They are exceedingly rare at this point, but the many packages I sent out this year should help change that.  It is a very small onion that was grown by the O'odam in the…
I'itoi onions (pronounced E E toy) which I started selling on ebay this year. They are exceedingly rare at this point, but the many packages I sent out this year should help change that. It is a very small onion that was grown by the O'odam in the southwest. Thought to be brought by the Spanish invaders, it is well adapted to the droughty South West. It quickly forms large clusters of very small shallot like onions which can grow perennially as chives or be harvested and replanted to make small onions. They are awful small, but they're pretty cool and very tasty.
I made quite a few batches of bay nut toffee this year.  about 50/50 pasture fed butter and sugar, a little salt and vanilla, and bay nuts.  I'm still refining recipes, but it has been declared very good by all tasters.
I made quite a few batches of bay nut toffee this year. about 50/50 pasture fed butter and sugar, a little salt and vanilla, and bay nuts. I'm still refining recipes, but it has been declared very good by all tasters.
Bay nut toffee
Bay nut toffee
These are not chocolate, they are ground roasted bay nuts with sugar and orange peel.  They look like chocolate and melt like chocolate.  They also taste more like chocolate than anything I've ever tried, but they are still very different.  These tu…
These are not chocolate, they are ground roasted bay nuts with sugar and orange peel. They look like chocolate and melt like chocolate. They also taste more like chocolate than anything I've ever tried, but they are still very different. These turned out great, but they undergo a process of degredation and separation the same as chocolate will when not subjected to certain processes of tempering, and usually with the addition of lecithin as an emulsifier. Eventually most of the fat coalesced together leaving the dry powder separate. I hope to work on experimenting with tempering it like chocolate, but I need access to a muller and hopefully a tempering machine, though I could do that by hand with enough patience.
Bean trellis in the morning.
Netted bed of lettuce and scallions going to seed.  I have to net most of the greens here.  This is mosquito netting, which is pretty cheap, but it hasn't held up that well in the sun.  Otherwise, I like it.
Netted bed of lettuce and scallions going to seed. I have to net most of the greens here. This is mosquito netting, which is pretty cheap, but it hasn't held up that well in the sun. Otherwise, I like it.
Montevideo Iris.  I thought these would do better at the market, but they were not that popular.
Montevideo Iris. I thought these would do better at the market, but they were not that popular.
Titan's Glory iris.  This iris does everything big.  It has large rhizomes that spread quickly and large flowers that bloom profusely.  All around an excellent variety.
Titan's Glory iris. This iris does everything big. It has large rhizomes that spread quickly and large flowers that bloom profusely. All around an excellent variety.
I don't recall the name of this iris, but it's awesome.  I wasn't too keen on it at first, but now it's become my favorite.
I don't recall the name of this iris, but it's awesome. I wasn't too keen on it at first, but now it's become my favorite.
Oriental Poppy.  I planted 3 varieties of these as experiments in tree understories.  They haven't performed that well in that capacity, but they are still very cool and extremely rugged.  I tried to kill some and the just keep coming back.
Oriental Poppy. I planted 3 varieties of these as experiments in tree understories. They haven't performed that well in that capacity, but they are still very cool and extremely rugged. I tried to kill some and the just keep coming back.
getting OCD with some artichokes.  These were made into canned artichoke hearts.
getting OCD with some artichokes. These were made into canned artichoke hearts.
William's Pride.  This is a very promising early apple.  Here photographed in July it is in eating late July and early august here.  It is surprisingly good for that early of an apple competing with chestnut crab for best early apple, though that is…
William's Pride. This is a very promising early apple. Here photographed in July it is in eating late July and early august here. It is surprisingly good for that early of an apple competing with chestnut crab for best early apple, though that isn't really a fair comparison since they are so different. It is quite large, very crunchy and crisp, has a surprising amount of tannin and pretty complex flavor. As you can see, it takes a high polish too.
Madrone billets for making stuff on the lathe.  I got my lathe up and running and managed to make a few awls and willow cleaves before the space it was in got repurposed as living space.  These madrone billets were split out of a neighbors fallen tr…
Madrone billets for making stuff on the lathe. I got my lathe up and running and managed to make a few awls and willow cleaves before the space it was in got repurposed as living space. These madrone billets were split out of a neighbors fallen tree, hewn into a rough shape with a hatchet, rough turned on the lathe and then oiled with tallow for seasoning. I stock up on wood like this when it's available.
This is a willow cleave made from the above madrone.  It is for splitting willow into 3 strands used in certain types of basketry.  Not a tool that many people need.  I wouldn't be surprised if I'm the only person making them in the states.  They ar…
This is a willow cleave made from the above madrone. It is for splitting willow into 3 strands used in certain types of basketry. Not a tool that many people need. I wouldn't be surprised if I'm the only person making them in the states. They are for sale on Etsy.
Madrone awl.  I started an Etsy account for Paleotechnics and listed my awls, willow cleaves and some jewelry type stuff.  These are ideal for buckskin and a lot of the type of leather work I do.
Madrone awl. I started an Etsy account for Paleotechnics and listed my awls, willow cleaves and some jewelry type stuff. These are ideal for buckskin and a lot of the type of leather work I do.
Strange moth in the garden taking flight from an artichoke leaf.
A bedragled dandelion.
Black Sage flower spike.  I like these, they have a cool architecture.  Bugs love them too.  The latin is Salvia mellifera, thousand flowers, and it lives up to the name.
Black Sage flower spike. I like these, they have a cool architecture. Bugs love them too. The latin is Salvia mellifera, thousand flowers, and it lives up to the name.
Diabrotica, or Cucumber Beetle, on Artichoke flower.
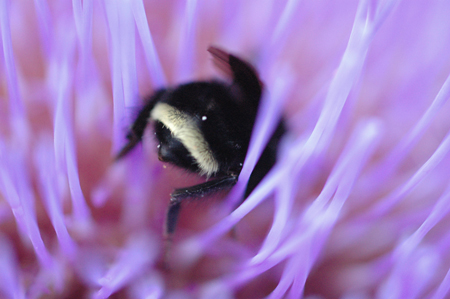
guess what?  Bee butt!
guess what? Bee butt!
Leezard.
Leezard.
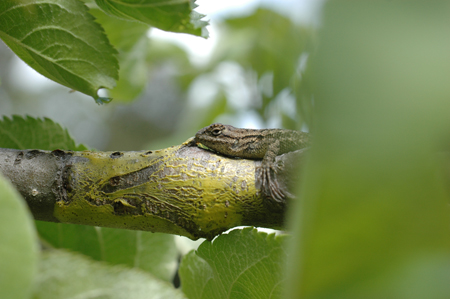
chillin' in an apple tree
Baby fence lizard.  They start coming out in July.  They are born with large heads so they can start eating right away.
Baby fence lizard. They start coming out in July. They are born with large heads so they can start eating right away.
The ever productive and healthy English Morello cherry tree.
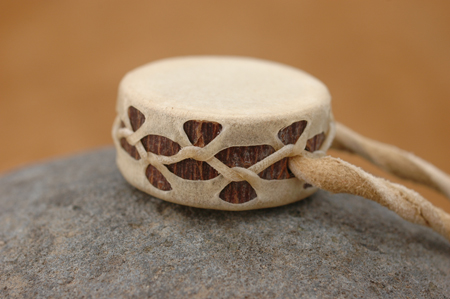
a miniature drum necklace, a little bigger than a quarter.  goat rawhide, elderberry wood and brain tanned buckskin.  More Etsy product
a miniature drum necklace, a little bigger than a quarter. goat rawhide, elderberry wood and brain tanned buckskin. More Etsy product
Reliance grape, which I'm increasingly impressed with.  Short video review HERE.
Reliance grape, which I'm increasingly impressed with. Short video review HERE.
large store egg v.s. small turkeysong egg.  I'm always shocked when I see how sallow and pathetic store eggs are.  Organic and "free range" account for very little in store eggs.  The yolks are undersized, pale and contain more inflammatory fatty ac…
large store egg v.s. small turkeysong egg. I'm always shocked when I see how sallow and pathetic store eggs are. Organic and "free range" account for very little in store eggs. The yolks are undersized, pale and contain more inflammatory fatty acids DHA, Arachidonic acid and omega 6 fats from a steady diet of grain. They probably aren't capable of supporting life, a chick's or ours. I was running low on eggs, so I bought a dozen, but I ended up just eating the whites and tossing the yolks. I set up a light on a timer to trick the hens into starting to lay again and got three eggs today and yesterday...whew!
Finally getting some pears.  The big red one is Souvenir Du Congres.  it was very good.  The others are bartletts grafted from an old homestead tree at the top of the driveway. I'm getting some asian pears too and a few winter pears the name of whic…
Finally getting some pears. The big red one is Souvenir Du Congres. it was very good. The others are bartletts grafted from an old homestead tree at the top of the driveway. I'm getting some asian pears too and a few winter pears the name of which escapes me just now.
The first soil enrichment, biochar, latrine, experimental pit/trench/hole is finally dug and slowly accumulating otherwise unused organic matter.  Yay, progress!  I had some help digging, thanks to Will and Gretchen.
The first soil enrichment, biochar, latrine, experimental pit/trench/hole is finally dug and slowly accumulating otherwise unused organic matter. Yay, progress! I had some help digging, thanks to Will and Gretchen.
Vulture hangin' around the compost pile on a convenient roost.
Another vulture taking flight.  He was sunning himself on the garden gate.  They scrounge through the food waste after the chickens are done.
Another vulture taking flight. He was sunning himself on the garden gate. They scrounge through the food waste after the chickens are done.
View from up the drive a bit, showing the type of country here, which is pretty diverse.
Dusk view toward the coast on the other side of the ridge about 300 feet out the back door.
Venison sushi, my new favorite way to eat venison.  The meat is previously frozen, which should take care of parasites.  I'll be cleaning my deer more carefully next year to maximize sashimi potential.  I'm making some for lunch in a few minutes, yu…
Venison sushi, my new favorite way to eat venison. The meat is previously frozen, which should take care of parasites. I'll be cleaning my deer more carefully next year to maximize sashimi potential. I'm making some for lunch in a few minutes, yum.
Honey mushroom detail.
Honey Mushrooms at a great stage for eating, which I of course did!
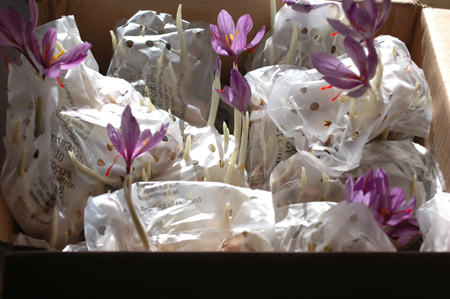
I scored some incredibly cheap saffron bulbs this year.  I sold some on ebay to pay for the order, planted some in random field plantings as an experiment to see how long it takes the gophers to eat them all, and put some in a garden bed to multiply…
I scored some incredibly cheap saffron bulbs this year. I sold some on ebay to pay for the order, planted some in random field plantings as an experiment to see how long it takes the gophers to eat them all, and put some in a garden bed to multiply for later. As you can see, I was a little tardy in planting them.
This is a knife that an intern/helper gave me.  I was already considering buying this exact knife for carving the flutes in my willow cleaves.  I've been geeking out on knife handles and had this idea for carving the handle for increased grip textur…
This is a knife that an intern/helper gave me. I was already considering buying this exact knife for carving the flutes in my willow cleaves. I've been geeking out on knife handles and had this idea for carving the handle for increased grip texture.
Detail of above
Detail of above
My friend brought over this knife to make a sheath.  I've got an outline made for a video on knife handle design and had to entirely reshape the handle first, which turned into a video segment.  The sheath is made from 4 different leathers, stiff ba…
My friend brought over this knife to make a sheath. I've got an outline made for a video on knife handle design and had to entirely reshape the handle first, which turned into a video segment. The sheath is made from 4 different leathers, stiff bark tanned wild boar on the inside, soft goat on the outside, a horse hide welt to protect the stitching and braintanned buckskin sewing thong. It turned out pretty sweet. I'm not a big fan of this mora style of blade for general purpose knives, but that puts me in a minority among the primitive skills crowd.
Barktanned bracelet, more Esty product

Some stuff I think is cool this year:

Gokhale method of posture.  This is different that any other kind of exercise, stretching, yoga etc... It is based on the idea that there is a basic correct type of posture for humans (which is probably a little different than what you've been told), and it really more to do with how you sit, lie, walk, live and move your body than exercises, though there are exercises.  It also requires an attitude adjustment.  Everyone I've turned on to it has been very enthusiastic and it has helped me a lot.  This is really for almost everyone, but certainly people with any kind of posture/pain/joint issues should check it out. Classes aren't cheap, but the book is excellent and a great place to start.

Ray Peat.  Ray peat might best be described as a renegade biologist and science historian.  He has his mind in all kinds of things, but with a focus on nutrition and hormones, with metabolism being at the center of the picture.  Peat is one smart cookie and possesses a vast store of knowledge that he can pull out on demand.  It he always right?  I doubt it, and I'm very unsure you should eat like him, but prepare to have a lot of things you assume to be given truths called into serious question by someone with a rare mind that thinks way outside the box.  Try on for size: CO2 is much more than a waste gas of metabolism and you should make and retain as much as possible, serotonin and estrogen are primarily destructive substances in the body and there is no such thing as estrogen deficiency, and essential fatty acids are not only not essential, but essentially toxic and more of an unfortunate natural occurrence that we have to adapt to.  Often includes the history of where science/medicine went wrong in adopting a certain dogma, and the influence of industry in corrupting scientific research and medical practice.  This is not light reading and listening, but he dumbs it down for us as much as possible.  Warning, Ray Peat can be a deep rabbit hole and lead to food neurosis and extreme self experimentation in a certain type of personality.

Michael Mews.  This stuff is absolutely fascinating.  There are several dominant theories on the prevalence of modern facial malformation and poor dental development, which has become nearly universal these days.  How many kids do you know that are not getting braces around age 13?  I can't think of any.  The genetic explanation is pretty much bullshit, but convenient to point to for medical professionals who don't know the answer.  Michael Mew's point of view deals with oral habits and environment.  The third common view is diet via Weston Price, which probably has considerable substance, but is clearly not the total answer.  Michael Mews is really putting out some amazing stuff about an issue that now affects nearly all modern people.  If you have kids under 18, this is a must watch before subjecting them to the mutilation and idiocy that is standard practice orthodontics.  It's also just plain interesting.

See you around homies!  Have a great and productive year!

Introduction to Frankentree Video

This is an introductory video I threw together to stoke people up on the idea of multigrafted trees.  Quite a few fruit collectors use this technique and, while Frankentree is a more extreme example, I increasingly think that multigrafted trees with 3 to 30 varieties or so will serve the average person with a few trees much better than single variety trees do.  Add to that the edifying character of the work, the increased involvement in one's own food supply and the neato factor and it seems like a pretty easy sell, except for the intimidation factor.  I'd like to maybe think this out better and make a more refined version as well as a detailed video tutorial on some of the specific strategies and skills, but this will have to do for now.  The original Frankentree post has a little bit of information on grafting with pictures of a couple of different grafts.

!FRANKENTREE! TRAILER...

!FRANKENTREE!

https://www.youtube.com/watch?v=WKE6t08wlBA

Simple, Efficient, Cheap, Flexible Biochar Trench Video, and Frankentree Trailer

Coming next weekend!  I guarantee the actual video is less exciting than the trailer, but it is much more edifying!  This video will just be an introduction to the idea, and the benefits of frankentreeing.  I will certainly put together a much more technical video in the future.

https://www.youtube.com/watch?v=FoVp4eMrYXo

Below is my second fast motion video on the two simple biochar methods I've been experimenting with.  A few notes...

Fuels:  I suspect that pieces larger than about 3 inches are better either split down or charred by another method, and chips might be better done in a TLUD or some such device.  I haven't tried either in the trench though, so that's just speculation.  I doubt that large wood will char well in the trench because it takes so long to char all the way through, but chips might be just fine if fed pretty constantly in thin layers.  As long as everything you're putting in turns to charcoal and you're not getting a lot of ashes or a lot of smoke with it, you're doing well.  I've done green and dry wood.  Dry is better of course.  I think the jury is still out on green wood.  The one I did mostly with pretty green wood was a very hot, large pit and the wood was brushy allowing for the ingress for large amounts of air.  It was still pretty sluggish and I'd certainly tend to let the stuff dry for a summer first if possible.

Wood size and shape:  It's hard to say without actually measuring things, but the trench seems to have a very efficient conversion ratio (wood to charcoal with low ash production) if the material is of a nature that it can be laid thickly and flat onto the coals, and of course if it is tended adequately.  This method takes a little more effort than last week's open burn, since you have to dig a hole, but it handles certain materials better.  I've done a number of these now and have found that they don't handle tangly brush all that well.  I did pretty good with douglas fir limbs, but not with oak, madrone and similar branches that have a lot of twigs poking in every direction.  The fir limbs are pretty linear and stack into the trench closely enough to get by.  If the fuel doesn't lay into the trench well, it will allow too much oxygen to reach the coals and result in more ash formation.  So, really tangly stuff that takes up a lot of volume of space might be better burned in an open pile, or reduced in size and shape to fit into the trench better.  When I take trees down, I typically limb up the 2 1/2" to 3" branches and larger, setting them aside, while anything smaller is brush for burning.  So, I'll usually end up with a pile of each, larger stuff with little to no brush for the firewood pile or the trench, and small tangly stuff for the open pile method.

A trench burn using mostly untrimmed douglas fir limbs worked adequately well.  Better than very spreading tangly type branches, but not quite as well as lengths and chunks of wood without any small branches.
A trench burn using mostly untrimmed douglas fir limbs worked adequately well. Better than very spreading tangly type branches, but not quite as well as lengths and chunks of wood without any small branches.

Trench v.s. Pit Shape:  You could just dig a round pit, and that might be good for small wood, and especially small chunks like lumber cutoffs, but the long shape allows burning of long wood without cutting it up which can be a huge savings if long wood is what you've got.  It of course works fine for short wood too.  I haven't done a burn in just one end of the trench, but it seems like it should work fine as long as the open end of the fire has wood added to it same as the top.  If nothing else, the trench could be blocked with dirt of bricks for small burns of short stuff.

Other options:  FYI, this is based on the Japanese Cone Kiln concept, and you can also do it in other containers, like a webber BBQ for micro scale (be sure to seal any holes on the bottom).  I think you could also use an old wheel barrow body.  You can see Backyard Biochar for more on the cone kilns and other simple methods.

The burn requires maintenance, but not constant maintenance, so bring a book or a project to work on.

Summarizing:Between this and the open burn pile method in last week's video, a lot of wood types that most people have access to can be charred easily, with a minimum of preparations, planning or technology.  Considering the simplicity and low inputs of these two methods, there seems little reason not to turn the woody resources that accumulate around a homestead, or even backyard, into charcoal instead of ash.   That is my main message here.   You could of course turn smaller stuff into compost, but since charcoal can serve some of the purposes of organic matter in the soil (nutrient reservoir, microbe housing, moisture holding and soil texture changes)  but permanently with a one time applications, it's worth considering charring it in your webber for a while, or some of it at least.  It's not a complete substitute for organic matter, but it should, in theory, help you get more out of the organic matter and other nutrients you add to the soil in the future.  I add some organic matter to the soil, but I consider the most important the plant roots that are left behind after every crop.  

Anyway, that's more than enough said.  Most of what you need to know is in the video...

https://www.youtube.com/watch?v=I1jAo7qd_Q8

Posted on October 4, 2014 and filed under BioChar, Forestry, Garden Stuff.

Simple Biochar Production, and Grape Reviews, a Few Videos

Yay, burn season is here!  Just uploaded a few videos.  A couple of short grape variety reviews, The pretty darn good Glenora and the excellent Reliance (of which I'm eating some right now, and they're super tasty!).  And a somewhat long winded, but cool, video of burning a top lit open burn brush pile to make biochar (Which Kelpie of Backyardbiochar calls TLOB).  This is one of the two charring methods I've been messing with, the slope sided pit (or container), and the open top lit piles.  I think each has it's merits, but probably more importantly, each might be better suited to certain materials that people commonly have.  Both can be scaled up and down in size and neither should produce a ton of smoke if the wood isn't either soaking wet or green.  A pit burn video should be forthcoming.  Hopefully I'll get better at shooting and editing video, learn to talk faster and develop a video personality at some point.  In the meantime, pop some popcorn and check it out. No Guinea Pigs were harmed during the making of these videos, although some chickens were verbally assaulted.

https://www.youtube.com/watch?v=HVs75-A7PEo

https://www.youtube.com/watch?v=pOZ1XNtNRf4

https://www.youtube.com/watch?v=rARhQV7wmwI

Seasoning Bones: How to avoid cracking in drying bones

bone seasoning header

Typical cracking along the grain of the bone. Bone, like wood, has a grain direction.

Bone is a beautiful and useful material, but if you pick up any random bone from the yard, or one that has been buried, it may very well be cracked.  That is because bones contain quite a bit of water and, like wood, when drying bone is subjected to stresses caused by shrinkage.  Something has to give if the stress is high, and the bone will start to come apart along the grain forming “checks”.  Rules similar to those for drying wood without checking can be applied to bone.

Size matters:  Like a large piece of wood, a large bone is more liable to crack than a small one.  Small bones will often dry without cracking regardless of how they are dried.  If I bury a leg and dig it up a year later, none of the small toe bones will be cracked, but most of the larger leg bones will have checks in them.

Speed matters:  Drying things fast causes more stress than drying things slow.  That is because when things dry they shrink.  As the outside, which is drying faster, shrinks, it has to shrink around the plumper, slower drying interior and cracks are liable to form in the outside.  It helps quite a bit that bones are hollow.  One way to decrease checking in wood is to bore a hole through the center.  But, most bones already have that.

Bone is very dense:  Dense materials tend to check more easily than less dense materials.  Very heavy dense woods are more liable to cracking in general than light porous woods for instance.  So, even though bones generally have the advantage of being hollow, they still have a strong tendency to check if not dried in a controlled way.  If a bone was as thick as a tree or as a split piece of wood, I doubt there would be much that you could do to prevent checking, or at least it would take extreme measures.

Control drying:  The best way to avoid checking is to control the speed of drying, and there are several ways to do this.      

*Humid environment:  Drying in a humid environment slows moisture loss, and that’s what it’s all about.  If the moisture loss is gradual, moisture from the interior of the bone has time to redistribute throughout the bone, resulting in more even moisture loss, which translates to less stress on the bone’s structure.      

*Slowing drying of the exterior with a coating:  Coating the bone with something to slow the drying of the exterior will also allow the whole bone to dry at a more even rate, greatly reducing the likelihood of checking.  Using animal fat is easy and effective.  Fat can also seep into the bone replacing some of the water.

This bone was not oiled, but just dried in the shade. It didn't crack because the oil from inside it, the marrow oil, seeped into the bone, replacing the water. it was also dried in the shade.

      *Boiling:  I actually don’t know if this works for bone for sure, but boiling wood can reduce checking.  I think it works by breaking down the cell structure of the plant allowing water to move from the inside of the wood to the outside.  It seems to me that boiled bones have less tendency to check when drying, but that is a very casual observation and one I’m not willing to stand behind.  Boiling a bone definitely removes some of the protein material that cements it together, so I don’t recommend long boiling for the most part, since it may weaken the structure, though I suppose it depends on what you are planning to use it for.  Further experimentation is definitely needed.  I would say that if other methods are used carefully boiling is unnecessary, but could be an alternative and is interesting regardless and who knows if it might be useful someday.

This bone is heavily checked from repeated wetting and drying as well as baking very dry in the sun. Also, there is no oil left in the bone after so much time and weathering. Bone, again like wood, prefers to have a little oil in it.

If you only want a small piece of bone, just go out and find one and break it or cut it up.  Examine it VERY CLOSELY for any checks if you are about to invest any significant amount of effort into making something nice.  I speak from experience :-/   Bones, like wood, have a grain that runs longwise.  If the bone is checked and it is cut across the grain, whatever you make might very well fall apart.

If I want a bone completely unchecked for making tools or jewelry or something like that, here is what I usually do and it seems to work very well. Like wood, fresh bone can form checks very quickly in hot dry weather, and I mean within minutes, not hours, so don’t leave them in the sun, and don’t procrastinate too much.  Again, this depends on the bone’s character, size, thickness, the weather etc... but just be warned that it can happen very fast. Saw off the ends if you don’t need them.  Clean out the marrow with a stick. This allows the interior of the bone to dry along with the outside, which means even moisture loss and less checking.  Plenty of marrow oil will usually stay inside the hollow portion of the bone. Scrape the outside of the bone clean with a knife, a stone flake or a piece of broken glass. Oil it heavily, preferably with a heavy tallow type of oil such as that from deer, goat, elk, moose, sheep, antelope or cattle.  Put it on really thick.

Deer bone from this year oiled with Deer tallow, which is so thick that it acts almost like a wax, resulting in very slow drying.

If using a lighter oil, like lard, bear, raccoon etc, or if the bone is very large and thick, you may want to put the bones in a plastic bag for extra insurance.  Don’t seal the bag.  Leave it very slightly open, or poke some holes in it to let moisture escape slowly.  This may not be necessary, but is good insurance and easy enough to do. Keep out of the sun or very hot areas, to assure slower drying. I’ve seasoned many bones successfully this way and actually can’t recall any failures.  By contrast, bones left lying about will generally form checks unless they are very small or thin. I have a small collection of seasoned bone that I keep around.  When I run across a really nice thick walled bone that I might want to use for something later, I’ll season it out as above and store it for eventual use.

It's also good to know that fresh bone is much easier to work that seasoned bone. If you just keep a little oil on the bone and work in the shade, you can make your item out of fresh green bone and then oil it to season out when you're done.

A few of my stash of seasoned bones for making stuff. I wish I had some pictures of all the cool bone stuff I've made over the years, but I don't.

Posted on September 18, 2014 and filed under Animal Parts, materials.

Saffron Dreams: Musings and experiments in growing Saffron

I like to cook intuitively with what happens to be on hand, which means having a certain familiarity with my ingredients.  Recipes are just guidelines in my world and not to be taken at face value, ever.  I’ve never had enough Saffron around to become familiar with it to the point that I can use it with any confidence.  When my mom brought me a small box of quality saffron from Spain, I had a chance to become a little more familiar.  With Saffron now on my radar, I of course decided I should grow the stuff instead of buying it.  I mean if we can grow the stuff here, why import it at 80.00 an ounce?  Saffron seems to be capable of growing in a fairly wide variety of climates from England to Afghanistan.  Then I could sell the bulbs and promote the idea of growing it and start a local industry and.....

A laptop surfing safari turned up a few small scale growers focused on high quality Saffron for local consumption, but none of them in California.  Aside from these geeky boutique producers who have been bitten by the Saffron bug, saffron production seems to be left to areas where it has long been cultivated.

Saffron’s peculiarly unique flavor is subtle and pervasive at the same time.  A few threads too many and it goes from enhancing your dish to ruining it.  Fortunately, it’s intensity means that only a few threads are required and if it wasn’t so intense, no one would likely be able to afford to use it at all, nor probably bother to.  The part used is the intensely red stigma of a pretty little purple/blue flower named Crocus sativus, the stigma being the female part that receives the pollen.   The Latin name is probably pronounced like kroak-us sa-tee’-vus, or sat’-i-vus but no one really knows for sure because Latin is a dead language.  So just say it however you want to and if anyone flicks you shit for pronouncing it wrong, just follow Jepson’s advice of The Jepson Manual: Higher Plants of California:

"... practice what sounds good to your ear; conviction is important."    "When someone presumes to correct your pronunciation, a knowing smile is an appropriate response."

That's always worked for me :D

Interstem Grafted Apple Tree Update, Year Four


UPDATE:  See my video series on Interstem grafting apples here!

UPDATE: See my video series on Interstem grafting apples here!


It’s been 4 years since I grafted my first interstem apples.  They were in the nursery for a year, and have been in the ground in permanent locations for 3 years.  This is an update on my experience and thoughts so far.  (Read the original post here)

A couple paragraphs for those who aren’t familiar with interstem trees: An interstem (a.k.a. double worked, archaic) tree is one that has an extra stem grafted between the rootstock and the upper portion of the tree.  Sometimes the interstem (the stem between the roots and the tree) is there for the sake of compatibility and can be used when the fruit variety is not genetically compatible with the rootstock, but the interstem is compatible with both the top and the rootstock.... think of a kidney transplant, the donor and recipient have to be compatible or the graft will be rejected. Often though, and in my case, the technique is used to dwarf a tree. One problem with dwarf rootstocks is that they are weak.  Sure they are small, which is what we want, but so are the roots.  Interstem grafting allows us to select a large vigorous rootstock, that would normally grow a large vigorous tree, for the roots and a weak interstem to dwarf the tree... small tree big roots.  That means, no staking of the tree, which would be required for a weak dwarfing stock.  They also need less water.

b
b

Drought Tolerance:  My primary motivation for grafting interstem trees has been drought tolerance combined with dwarfing, a pairing which I don't know of any other means of attaining.  I’ve had a few of the trees get a little crispy in the end of summer, but over all, I think they are performing much better as m111 / bud 9 interstems than they would on any stand alone dwarfing stock.  I do water them occasionally, but not a lot.  I probably should ideally water a little more, but I want them to grow up tough and self sufficient, not expecting a drink whenever they want one... tough love.  There is a second row of interstem trees that I will probably move, or just remove, which are not cared for nearly as well as the main row along the driveway.  Most of these outliers have survived and, although they are not doing great, I doubt many would have survived the droughty conditions they are growing in if they were on a straight dwarfing stock like MM109 or bud 9.  I probably won't water any of the interstems this season since my spring is lower than it's ever been at this time.Understory:  The original vision for the main row of interstem trees was to establish an understory of flowering bulbs.  The trees are along about 100 feet of the driveway as you drive into the main area, and I had envisioned masses of narcissus in the spring that I could hopefully sell some of at the farmer's market.  I have an ongoing experiment using flowering bulbs to create fruit tree understories... specifically, plants that grow only in the winter and die back early in the summer leaving a mulch of dead leaves on the soil surface to prevent evaporation.  I call this a dying mulch, but it’s more like a living/dying mulch.  This plan was hatched specifically to deal with our seasonally dry climate which has virtually no summer rain.  Two of the intertstem trees are now planted to Hybrid Amaryllis on 12 inch centers, but it will be some years before I really know how well that system works.  Amaryllis is not as spectacular as narcissus and blooms in the late summer, but it is the plant that seems to be performing best in my trials and it’s probably more marketable as a cut flower than narcissus anyhow.  I may plant every other tree for now.  Having half of the trees as control subjects should show over time whether or not it works.

d
d
a
a

Root anchorage:  The superior root anchorage has proved to be very nice.  I’ve barely staked the trees and only to keep them growing straight, not because the roots weren't adequate.  Trees this size (8’ x 8’ is the target size) normally require staking because the small and sparse roots simply don’t hold the tree up. Precocity:  Interstem trees are precocious, most of mine bore some fruit the second year in the ground.  That is a whole lot faster than when using your average M111 or larger rootstocks.  Precocity is a great advantage.  The trees grow fast to size, but start bearing early and then quit growing for the most part.  Most would be nearly the size I want them already, if I hadn’t changed my mind and grafted most of them over to different varieties after the first year.  The fruit quality seems good so far, and I think with careful thinning, it would be easy to grow jumbo sized fruits if that matters to you.

no matter
no matter
f
f

Size:  One reason I got into this system is because I harvested some dwarfed apple trees and was so excited that I didn’t need a ladder!  No ladders for pruning or picking.  That’s pretty great.  If you’re around 50 or over, no ladders and early bearing should be lookin’ pretty good!  No one needs to fall off ladders, but for seniors, it's a big deal to break a hip, and coordination typically declines with age.  It’s pretty nice to have a tree where I can reach almost everything.  I might need to stand on a box once in a while, but not a ladder.  I don’t mind working on ladders too much, but moving them around gets old pretty fast.  Not that I would ever advocate planting only dwarfs.  Standard trees live longer making them a great legacy, and they are just cool to have around.  Still, there is a time for dwarfs, and for many of us, that might just be most of the time.  The tallest trees are probably over 8 feet now, but I think I can keep them down once heavy bearing commences and growth slows. Re-grafting:  Like I said, I changed my mind about the varieties I originally planted.  I put in mostly cider trees figuring that I’d test them and work over the ones I didn’t like to other varieties.  At some point, I realized that I have never had a single glass of cider made from swanky European varieties meant for cider only that was even good, let alone great.  However, I’ve had a number of excellent ciders from blends and dual purpose varieties like Gravenstein, Ashmead's Kernel and Rome.  I’m not saying I think you can’t make good cider with those fancy english apples, nor that they aren’t capable of making superior cider, just that I have to look at the big picture and go with my personal experience.  If I can make very good cider from varieties that also make great eating, I've got versatility which is a great advantage.  My last batch of natural yeast cider from Rome Beauty was freakin’ awesome (I haven’t planted Rome Beauty, and probably won’t, so this isn’t a recommendation.  It’s not really a very good eating apple.).  I think that the quality of fruit (hint, dry farmed= lots of sugar, flavor and tannin) and what is done with it, are probably more important aspects of cider making than using cider dedicated apples only.  Sure, you can’t make a great wine from a concord grape, but you can make very good cider from many dual purpose apples and blends.  I also have been drinking less as I went on various health pursuits :-/. So, I grafted all the cider-only varieties to dual purpose and dessert varieties, an approach which gives me a lot more versatility.  If I want to make cider I can, or I can eat them, or sell them, or just press them for juice.  I left the King David and Wickson trees, both excellent dessert/cider apples, but everything else got worked over to varieties that I’m excited about- Sweet 16, Katherine (Etter), Newton Pippin, Gold Rush, Kerry Pippin, Golden Harvey (turned out to be mislabeled), and a couple of the Etter red fleshed varieties.  The grafts did great, with 100% success rate.  Many are bearing fruit this year.  This experience highlights the main reason that orchard owners should know how to graft, VERSATILITY.  More on that in the future.

c
c
a
a
a
a

Suckering:  The one big drawback I can see to interstem trees so far is that suckering is definitely increased.  Suckers are a pain in the ass.  Most of my other apples are on MM111 stocks and they have suckered very little.  But over half of the interstem trees are producing suckers.  It is generally better to tear suckers off the tree, because that removes the buds near the base of the shoot, improving the chance that it will not grow back.  But many of these suckers are deep and have to be cut off, and they just keep growing back.  Burying the union of the rootstock and interstem so that the interstem also grows roots is said to help reduce suckering.  I didn’t do that, because the bud 9 I used as an interstem is susceptible to woolly aphid and M111 is not.  I wish I had now though.  I doubt the risk of major woolly aphid damage is outweighed by the bane of suckering.  Besides, I’ve never seen woolly aphid here, although I am constantly told it is a major problem in the area.  Even with some aphids on the bud 9 roots near the surface, the great majority to the root system will still be immune to them.  Lesson learned.  I should not have let fear stop me from planting at least half of them deeply.  If done over, I would plant the MM111/Bud 9 unions a good 3 or 4 inches below the soil surface, and will if I plant any more of them. Interstem length:  The foregoing brings up the point of interstem length.  I was very sloppy when choosing the length of interstems.  In fact, choose would be a strong word!  They varied in length quite a bit.  A cursory examination reveals that there is some noticeable effect on tree size, a longer dwarfing interstem creating more dwarfing effect.  I would say though, that none of the trees look like they will end up too small.  Given that fact, and that one would need adequate length to bury several inches of the interstem if planting deep to minimize suckers, I would probably tend to make them on the long side.  You can get away with planting the interstem/rootstock graft below ground, but you definitely will lose much, if not all, dwarfing if the second graft, the interstem/varietal one, is buried and the varietal allowed to root.  I scarcely remember how long my longest interstems were, but I’m thinking that 8 to 10 inches is probably about what I’d shoot for next time, planning to bury 2 or 3 inches of it in the ground.  I don’t know that those numbers are best mind you, it’s just what I will probably try next time around The future:  Aside from the suckering thing, which is a pain not to be underestimated, things are going smashingly.  Right now it's more than enough to keep up with what I have planted, but if my health improves soon, I may plant some more interstem trees using my recently posted biochar pit latrine system to prepare the ground ahead of time.  People are digging my apples at the farmers market, because I have done enough experimental work to be able to bring really unique and excellent fruit.  I also think my growing conditions, basically scant on water, really improves the quality of some varieties.  I have confidence in my ability to grow outstanding apples now, though I’m still refining culture and varietals.  I feel pretty sure some of these interstem trees will be grafted over yet again as I hone in on the apples that really perform well in all areas, flavor, texture, cultural traits, disease, drought tolerance, sun tolerance and so on... oh yeah, maybe consumer preference, though I truly hope that I can sway market goers to buy any outstanding apple, regardless of size or external appearance. Summary:  So, to summarize, I think interstem apples are great.  Ease of maintenance is not to be smirked at, large fruit size is neat, drought tolerance seems very reasonable so far, precocity (early bearing) is extremely valuable, fruit quality seems very good so far, anchorage is awesome for a dwarfed tree.  What’s not to like?...  Well, suckering is not to like.  In fact, suckering sucks.  Thorns in paradise.  So, I guess I'm recommending this technique based on experience.  If you want a small tree, but with a wide foraging root system, drought tolerance and anchorage, interstem trees look pretty good so far.  Interstem trees are hard to find.  You might get someone to custom graft them for you, but my recommendation, as always, is to learn to graft them yourself. Grafting in one year:  BTW, you can read my previous post on interstems for details, but all of these were grafted in one year, making both grafts at once with dormant wood on dormant stock. I did the same thing again this year, and again with 100% take.   It does not take two years to make an interstem tree as is often asserted.  You may not want to tackle two grafts on one tree when just learning, but you could always do the interstem graft the first year, and the varietal graft the second.  Or you could just go for it and do them both at once.  If one doesn't take, you might still be able to salvage it and regraft the following year.

Part One: Interstem Grafting of Apples

Interstem Grafting videos

Soil Banking With Biochar: proposition for a migrating latrine system aimed at permanent soil improvement

"The idea is to have a sort of trench system that would serve both as a latrine, and as a means of permanently improving the soil."

This proposal is built around the concept of using charcoal to permanently improve soils.  If you’re not familiar with that idea, a little reading on biochar might be helpful.

(EDIT: Ok, I just posted this yesterday, but the original title sucked, so I had to take action.  The more I've thought about this idea today, the more I'm inclined to think that viewing it as just a latrine is way too limiting.  A system of soil improvement like this could serve to accommodate all sorts of rubbish and organic refuse.  I always thought that if I built a nice outhouse someday, that I'd make a sign for it that said Bank of Fertility (make a deposit:).  I like that concept.  I'm going to go with the term Soil Banking for the concept of a migrating soil improvement  system using an open trench.  While making daily deposits of doodie makes eminent sense for such a system, there are so many more things that could be tossed in the mix.  All people who live in the country that don't have access to landfills, have rubbish heaps or pits of some kind.  What I'm proposing is that we use that open pit, and the material added, to a high level of advantage toward the end of permanent soil improvement.  At this point, I can only see a big open pit, placed in the right area, to be an outstanding opportunity.  The idea of permanent soil improvement, made possible by the addition of charcoal, is really compelling.  Dead animals and parts, rotten wood, old natural fiber clothing, shells, bones, ashes, seedy weeds that are best not put in to the compost, anything else that plants or soil life can feed on that the chickens can't eat, or that we don't want to put in the compost for whatever reason, and of course poo and charcoal, all added as they occur.  And of course adding whatever other amendments, like lime, rock powder or trace minerals might make sense too, depending on circumstances.  Over many years, this system could add up to an ever expanding bank of super soils that will probably continue to be superior for decades, if not for centuries.  So there it is, Soil Banking.  "What should I do with this dead maggoty possum?"  "put it in the soil bank with a few scoops of charcoal and some dirt"  "yeah, okay, I was going there to make a deposit anyway!" "righteous dude, high five!"  Now back to regularly scheduled programing.)

I’ve been knocking this idea around in my head for a while.  Actually, maybe it’s been knocking me around it just want's me to think that I'm knocking it around.  It started when I was thinking about ways to use the pit after pit burning charcoal in a long trench.  The obvious use was to bury the biochar in it instead of digging another hole for that.  After all, it’s one thing to make all that char, but then you have to dig it into the soil, which is a butt load of work.  In this climate, outside of irrigated garden beds, I think getting the char pretty deep is probably a good idea.  After june, soil moisture is scant near the surface.  If the char was buried lets say only 12 to 18 inches deep, that puts it in the zone where roots are mostly on idle for the summer.  No moisture= no root activity to speak of.  Charcoal is a great retainer of moisture, but it’s not that great.  I’m talking about unirrigated areas for orchards and perrenials, or maybe for dry farming crops.  If the char was more like 3 feet or 1 meter deep, it would be of much more benefit to plants in the summer season.

Tree planting site, modified by digging a large pit to 2 feet deep, burning charcoal in it, crushing the charcoal and mixing it in as the pit was re-buried.

Once I thought about it for a bit, I realized it doesn’t make a ton of sense to keep digging new pits just to burn the charcoal in.  it’s not like I’m probably doing the soil any favors by cooking it anyway.  A central permanent burn area, with a more permanent pit arrangement would probably make more sense, or just burning by any number of methods wherever the wood happens to be.  Charcoal is light, so moving it is not an issue.  Moving brush and wood is a whole lot more work.  In most situations, it’s probably not relevant how the wood is charred, the idea of using the burning pit as a latrine was just a path into this idea.

So let me just hit you with the basic idea and then we can bat the details around a little.  The idea is to have a sort of trench system that would serve both as a latrine, and as a means of permanently improving the soil.  Once the pit is dug, there are limitless possibilities for amendment with all sorts of substances, and for changing the soil’s physical composition.  That’s pretty neat!  Also, normally, it would be a fair amount of labor to mix in all of that stuff all at once.  As a latrine though, you’d be mixing it in gradually day by day while doing something you have to do everyday anyway.  Lets say you wanted to end up with about 20% charcoal in the soil.  One poop, one scoop of charcoal, four scoops of dirt and small amounts of whatever other substances you might want to toss in there like lime, wood ashes, sand, phosphate fertilizers, trace mineral fertilizers, organic matter, etc.  I’m already digging holes for the current pit latrine used here on the land, but this system would utilize part of that labor to a more useful end.

This system makes sense to me for soil improvement with biochar under my type of conditions.  It seems likely that the terra preta soils of the amazon might have been made with some similar approach... like pits into which compostables, broken pots and excrement might be disposed of and covered gradually with dirt and charcoal.  I'm not experienced enough with using biochar here to be totally convinced this method will be worth the effort, but I think there is a very high probability that the results will be awesome, easily high enough to jump right in and make the investment to try it.

I’ve never really gotten the latrine scene together here.  We’ve always used a pit toilet- dig a pit, drop in a little dirt or organic matter here and there till it’s full, and move on.  I’ve tried to put them where I want to plant a tree, but it doesn't always work out.  The one site I have actually planted directly on, the tree died, twice even!  That might just be due to drought, but suffice to say, it hasn’t worked out very well for me as a system.  Also, I’m not convinced that even a pit full of manure is really a very permanent soil improvement, and it will have a limited window of fertility.  I’ve thought to eventually build something like the Ecosan drying pit toilet system, but that could be some time away in the future.  Thinking back now, 8 years of being here most of the time day in and day out, I could have improved a lot of soil using my new proposed system.  The pits would fill up quickly, because so much dirt would be added back daily.  It’s a lot of digging, but it’s easier to dig a wide trench than to dig a single deep and narrow pit.  Also, it is assumed that soil improvement is an important goal, so the digging is not superfluous work.  It is also spread out over much time.  Consider digging char into a 40 foot long x 5 foot wide x 3 foot area all at once versus over the course of a year or so.  The trench could be dug in sections as needed, or when convenient.

This walnut tree, flanked closely by two latrine pits is starting to take off this year.  I think the roots have probably hit pay dirt.  Overall though, planning to plant trees over latrine sites hasn't worked out that well, and it's a short term so…
This walnut tree, flanked closely by two latrine pits is starting to take off this year. I think the roots have probably hit pay dirt. Overall though, planning to plant trees over latrine sites hasn't worked out that well, and it's a short term soil improvement.

In the days before plumbed toilets, public latrines were a major issue in population centers.  I’ve smelled enough latrines to know how horrid the stench must have been.  It was proposed to use charcoal as a deodorant and the resulting sludge sold as fertilizer.  I think this method was probably successful where implemented, but it wasn’t too long before they started washing it all away into rivers and off to the ocean, which of course we mostly still do today, just in a somewhat more refined, but also much more resource intensive way.  Point being, charcoal is the ultimate deodorizer.  Imagine an outdoor latrine with no odor.

Having been called on that day to attend a meeting of the Board of Health, held at the workhouse, I was at once struck with the intolerable and sickening effluvinm which, arising from the sewers, cesspools, and privies, pervaded every part of the establishment; and which, with the chlorine, which was being evolved in every direction for the purpose of correcting it, formed a compound of villanous smells, which no stomach but one accustomed to it could for a moment tolerate. Your very active and efficient inspector, Captain Hanley, told me that he had done everything that could be thought of, and had spared no expense to try and have the nuisance abated, but that all his exertions were useless. I then begged him to send down and purchase a few loads of peat charcoal, which were selling at the market; and having told the master how to employ it, the suggestion was at once adopted, and though the material was not of the best description, nor “ recently prepared,” in a very few hours the most delicate and practiced nose could not have detected the slightest offensive odour. Since then the master, with very praiseworthy attention, has had a large pit of the charcoal prepared every week, and by its occasional use through the grating of the sewers, and by sprinkling it over the nightsoil in the privies, the workhouse is, as far as entire freedom from every noxious and offensive effluvinm, a model to every other in the kingdom. In every respect the results have been most satisfactory. Instead of paying from five to ten pounds, every half year, for having the privies cleansed; and having itself and the whole surrounding neighbourhood at the same time poisoned for weeks by the intolerable stench ; the establishment has that task now performed by the paupers, without the slightest reluctance on their part;—and the contents of the sewers, cess-pools, and privies are now collected into inodorous and innoxious heaps, or mixed with the other refuse of the workhouse until removed by the contractor; which, before, he absolutely refused doing, but which he now considers the most valuable portion of what he contracted for.

Also, adding significant amounts of dirt on top of the daily deposits would completely cover them, so flies would not likely be an issue either.  Ov course you could tweak the amount of soil added in order to either improve more soil in a shorter time, or to make the latrine last longer to the end of digging less.  I’m seeing this more as a way to improve a lot of soil at this point, so thinking of finding the minimum amount of poo to maximum amount of dirt and charcoal added back, while still ensuring good results.

So, one issue with burying charcoal in the soil is that it is a nutrient magnet.  The first time I did it, the lettuce I planted afterward failed to thrive.  It was pretty bad, I mean it barely grew and produced nothing really edible.  The most recent garden bed I amended with charcoal, I added a lot of chicken manure and compost teas to as it was being dug in, in order to charge the charcoal up so it wouldn’t just suck everything up leaving nothing for the plants.  That bed is doing well in it’s first year.  Once it’s charged up, this property of charcoal to catch and hold nutrients becomes a benefit rather than a liability, possibly the most important property of biochar, but it must be charged somehow.  The latrine system should provide a nutrient rich environment to charge the charcoal up as it’s added.  I would probably add stuff in this order:

poo

ash

charcoal

amendments

dirt

organic matter (if added at all, probably a little forest duff at least, if just for innoculation with diverse soil organisms).

The current outhouse structure can be carried by 4 people or rolled on logs by two, but it is far too heavy and awkward to be moved frequently by one person.  I’m thinking that a more tent like arrangement would be better suited to my trench latrine plan.  I though originally of some rails that the covering slid on, but I think that a more simple and elegant solution is needed. I’m thinking for my style a couple of planks with a space in the middle to use as a squatting toilet and a light frame covered with a section of plastic billboard tarp could be plenty cozy enough.  The tent covering would need good anchorage from winds... maybe sand bags or cinder blocks which bungee to the frame?  We’ll see.  No need for a door most of the time, depending on the site I guess, but an old sheet should work okay.

Ye 'ol outhouse, a loo with a view.

The great majority of us are wasting the nutrients we excrete.  This state of affairs makes not a bit of sense at all.  For homesteaders, finding some way to utilize the nutrients that are leaving our bodies seems like it should be something of a priority.  We can’t afford to hemorrhage nutrients out of our living systems and we shouldn’t even if we can re-import them from somewhere else.  While saving urine to use as a fertilizer will catch the vast majority of the useful plant nutrients leaving your bodies, and is a great first start, doodie also has a lot of good stuff that can be turned to advantage.  This system seems very promising to me.  It’s going to be too much work for some people, but for tough and scrappy homesteader types and less “developed” cultures and areas, it is probably fine.  The prospect of the opportunity to create super soil zones by utilizing immediately available resources and a trickle of labor from already daily activity, gets me all hot and bothered and would light a fire under my ass to go start digging if said ass wasn't glued to a chair most of the time.  I mean that shit is exciting people!

My proposal is really for a system which modifies the soil to quite a depth, but I suppose it could be used in a shallower form too.  For a system that required more upfront investment, but less labor over all, the ecosan system with charcoal added to the ash might be a good way to go.  Briefly, the Ecosan system uses two pits.  Urine is diverted out of the system and collected in containers for direct use.  Each time a solid deposit is made, a handful of ash is added to cover it, help dry it out, and alkalize it, all of which kills off microorganisms.  The collection chambers are ventilated to encourage drying.  Once one pit is “full” it is closed off to dry completely, and the other side is used.  By the time pit two is full, six months or more later, pit one is completely dry and innocuous.  If charcoal was added, it would pre-charge the char as well and the whole lot could be pulverized as a very rich, fertilizer for use primarily on annual crops.

Here at Turkeysong I could see running both systems eventually.  I’m pretty tough, and am used to inconvenience from years of re-training my entitlement set points.  I'll spare you the details, but trust me, I have gotten through the worst of times with the most inconvenient toilet and living situations, like no toilets at all and extremely ill, rain or shine, day and night.  But, um, honestly, tough or not, I’d rather sometimes have a close outhouse to visit!  Inconvenience isn’t the goal or noble in and of itself.  Sometimes simple solutions are still the most elegant ones though and being constantly besieged by convenience can make us into weak and whiny people.

I’m pretty opposed to the idea of indoor bathrooms.  Digging little holes in the forest or crapping in a trench might seem crude, but pooping in your house just seems plain uncivilized to me.  I could see both the Ecosan and trench systems eventually operating simultaneously in a place like this.  The cozy, luxurious Ecosan, (maybe with a door, or a light and some reading material even!  How about a stereo, wide screen t.v... wifi...) close to sleeping quarters for late nights and rainy days, and the biochar trench latrine for the rest of the time, or for special soil improvement projects.

I hope this idea will appeal to someone enough to try it out and we can see what the profits and pitfalls might be.  Obviously, making a bunch of charcoal is in order, quite a lot actually.  The good thing is that once it's made, it keeps forever.  I managed this past winter and spring to experiment a little with the top down burn pile and pit methods of charcoal production.  Both are easy and accessible and can be used with random scrappy brush.  I’ll leave you with the super condensed version of both, but stay tuned for more on those in future posts or videos.

Top down piles:  Pile brush in a tall narrow pile.  A tall narrow pile is more work, but it burns better than a mound shaped pile.  Light from the top which produces way less smoke.  Throw unburned pieces from the outside into the center as burning progresses.  When most of the wood is charred and no longer flaming, douse with water.

Top down pile, ready to light as soon as rains start.  See this pile burn here!

Top down pile, ready to light as soon as rains start.  See this pile burn here!

Top down pallet pile.  Notice how little smoke there is.

Top down pallet pile.  Notice how little smoke there is.

Pit:  dig a pit with sloping sides.  For long wood, dig a long pit so you don’t have to cut the wood.  start a long narrow fire in the bottom.  Add wood in layers.  When burned down and not producing much flame, add a layer.  try to cover the layer below well, but each layer should be only about one stick thick, not piled up.  this system doesn't work very well with very tangly torturous type brush.  Conifer limbs with the needles on are fine, but oak brush with branches pointing in every direction and taking up a lot of space in every direction needs to be broken down a bit.  This system works by smothering the previous layers with new fuel.  Just remember to try to have the new layer close down on the top of the old one to smother the coals below so they don't continue to burn.  When very little flame is left and the pit is full, douse with water.

Burning charcoal in a trench. There is a trench, this is the end of the burn when it's full of charcoal.  Video here.

Burning charcoal in a trench. There is a trench, this is the end of the burn when it's full of charcoal.  Video here.

I think the pit is probably more efficient in the wood used to charcoal produced ratio than the top down pile style--- but it seems to require a little more work and attention too.  I’m not really sure yet.  In both cases, don’t wait for every single piece of wood to be charred before extinguishing.  You will end up with some un-charred wood, but you can always re-burn it.  If you wait for every single piece to be charred before extinguishing it, the wood that is already burned down to coals is rapidly turning to ash, effectively reducing the total charcoal yield.

I’m somewhat annoyed with myself for not "having my shit together" already.  But, when we have to always be pioneering new ideas and systems, it’s not always easy to get it together, and I have a lot of challenges to face so I'm cutting myself some slack.  I’m convinced that urine diversion is the first step and anyone who has hung around this blog much knows I just won’t shut up about that.  Next, something like the ecosan system and/or a system like I’ve just proposed that amends soil as it goes along, should make maximum use of our leavings.  And that should be the goal.  We are so fixated on disposal, and the idea of excrement being a valuable resource is so totally foreign, that it is often difficult to find language that can really get across the way we should truly be thinking about the issue.  Like I said, it makes no goddamn sense to extract the very essence of the soil, that which plants make their bodies with, and then throw it away.  Not only should homies like us be building our infrastructure around a new paradigm, but as a society, we should be thinking toward decommissioning our old systems and implementing new ones that honor our daily discharges as the very valuable resources they are.  My trench latrine will certainly not appeal to the timid, but it can’t be that hard to come up with a design that tops the current practice of pissing and shitting in a ceramic bowl of water in the house!  Like omg, that shit is nasty.  And said bowl has to be cleaned by some unfortunate person, like ewwwwww.... If we can put people on the moon as they say...

Summary:

*Dig a trench or pit, up to a meter deep.

*Use a light moveable cover.

*I'll probably use planks for a floor with a space left open to squat over.  An elegant solution and highly flexible.

*Add charcoal, dirt and/or other nutrients and amendments with each deposit. shoot for 15% and up of charcoal if possible.

*Find a poo to dirt and charcoal ratio that makes maximum use of droppings and fills the hole quickly.

*If a trench is used, expand the trench as the previous section is filled up.

*Be stoked that you've done something agricultural that may actually last for a really long time, unlike standard impermanent soil improvements.

http://www.youtube.com/watch?v=YV-1To9DkJQ

Some very cool films on Acorn and Buckeye Processing

There are lots of ways to process acorns.  These amazing old films show traditional processing in enough detail for a person to really learn something.  Processing of the California buckeye is much less common, but this video shows how it is done.  The buckeye nuts are poisonous raw, but they are not hard to process and it shouldn't be overly intimidating.  It's also just really great to watch these ladies at work with their deft hands, and listen to the singing, which is,  for lack of a better description, very grounding.   Thanks to the wonders of the information age, these once very hard to get films are now available to see.  Check 'em out!  

http://www.youtube.com/watch?v=-kQ9sA5ONxA


https://www.youtube.com/watch?v=zhqNTgMaJIc


https://www.youtube.com/watch?v=cxoOCHyOO_Q


https://www.youtube.com/watch?v=VMSStfqEhsU

Posted on June 6, 2014 and filed under food.

Turkeysong Origami Seed Pockets Video Goes Live!

seed pocket header
seed pocket header

At some point a year or two ago, I had to come up with a folded packet/envelope design so I could give away the seeds that I save at farmer's markets, scion exchanges and places like that.  I like giving away seeds.  I often give away too many and end up kicking myself, but it is so compelling for some reason!  The first thing that came to mind was those little paper packets called bindles that cocaine used to come in back in the 80's.  Learning to fold bindles was about the only real good I ever got out the stuff.  Cocaine was around a lot back then, but I had little use for it.  I think I was more interested in the bindles than the coke. I did so little of it that I couldn't remember how to make those little folded paper bindles almost 30 years later.  So, anyway, no bindles.  I had to improvise.  I'm not sure why I didn't just look for instructions on the internet, but I'm glad I didn't.

I had recently come up with an origami container for roasted baynuts that was pretty nifty, so I was emboldened to the task and began folding away fearlessly.  I already knew I wanted it to be a quarter sheet or smaller.  The result after a few minor adjustments is this origami dubbed "seed pocket" for obvious reasons.  It came out with some neat unexpected features.  The back tabs lock together in a really neat way to keep the packet closed.  If stuffed super full it may open at the back (though it's still unlikely to spill seeds) but then you can just make a larger one out of a full sheet instead of a quarter sheet.  I prefer to tear the paper after creasing, because the torn edges appear under the title, which looks cool and more handcrafted-like.  there are also a lot of squares and half square triangles formed, so the proportions are pleasing to an OCDish person fixated on symmetry, like me.  These are very seed tight and unlikely to leak even small seeds like poppy.  In fact, I just packed up some tiny shirlie poppy seeds last night.  I'm not so sure about super teeny weeny tiny seeds like tobacco and lobelia, but otherwise, they're pretty dang tight!

seed pockets front and back

I've got one laid out in adobe illustrator for each of the seed varieties that I save regularly, with names, short descriptions and a nudge in the direction of my blog to pick up web traffic.  They serve a little like business cards and are very popular.  It's a lot of folding, but I actually like folding them while watching a movie or just thinking about stuff.  It's sort of addictive.  I've probably folded thousands by now.

I'm making the Adobe Illustrator template available as a downloadable file, so if you have access to adobe illustrator, you can leave the layout (which took a helluva long time to get right, so be careful messing with it!) and just change the text and fonts to suit your own farm name, variety names, descriptions and such.  You may need to download the fonts I used if you want to keep them (Copperplate gothic light, Century old style standard, Cambria and Chalkduster).  Putting some text on the inside of the packet is a possibility too, and I may add seed saving instructions for each vegetable eventually if I can get my stupid printer to stop eating so much paper.  I kept it pretty simple, but one could add all kinds of things- colors, pictures, gardening quotes, fold lines...

This template is for four small seed pockets per 8.5 x 11 inch sheet.  I haven't made a full sheet template, but I do use the same origami design for making an occasional large seed packet.  If you use the template, I'd appreciate the small favor of leaving the blip on the underside of the flap so people can find the template and this post and my blog.  Thanks!

seed pockets side
seed pockets side

So, save some seeds this year!  If you haven't saved seed before, tomatoes are an easy place to start.  They rarely cross with each other.  Just take a non-hybrid tomato that you like, squish the seeds into a bowl, let it ferment for a day or two to dissolve the pulp, wash and drain several times to clean the seeds, and dry on a piece of paper in the shade until thoroughly dry.

This is the first video of what I hope will be many.  Big thanks to blog reader lars for hooking me up with a video camera!  Thanks dude!

http://www.youtube.com/watch?v=Ioub3uAsfSU

And don't miss my one other youtube video ever, the epic guinea pig munch off!


http://www.youtube.com/watch?v=vGqF63c6LZw

Manure Mats

EDIT: I’m not sure how long ago I posted this, but I’m still totally into this method. It has worked awesome for me in many ways. Also, having just re-read this long post, I think it’s great. I feel always to need to be apologetic about discussing things beyond a “do this in these easy steps” sort of approach. That is because the modern mindset is increasingly about the short version of everything and it is only getting worse in the digital age. Successful homesteading and gardening is about adaptation, not paint by numbers.


Preface-like paragraph:  I have, over many years and with a lot of intention, slowly come to see the world around me as a sort of resource-scape, that is, as a world of potential resources.  This can extend to people and ideas as well as physical objects and also phenomena of energy, like wind, or sun, or the action of an animal.  Having made a pretty intense study of primitive technology as well as of other subsistence paradigms, I’ve been impressed deeply by the fact that different groups of people, given similar environments, or even the exact same environment, will do completely different things there and live very different lives.  While we are guided by our environments, we are also very much guided by our cultural influences and what we know, or just as importantly what we think we know is and is not possible.

 So?  As a result of this perspective of resource consciousness, I tend to walk around constantly looking for unseen or undervalued potential that could be harnessed to make life better, more sustainable, or to make work more efficient and certainly a little just to keep myself entertained!  While this view has resulted in way more ideas than I have energy to experiment with or turn into functional realities, having that view does serve me decently well sometimes.  I’ve noticed in the garden that there are numerous resources that are underexploited and can be micromanaged into great usefulness.  One of my main influences in this area is Farmers of Forty Centuries.  It is a long, boring ass, pedantic book from the 40’s that is probably a good 100 pages longer than it needed to be.  It is worth reading though for a few specific items of farming practice and, more importantly, the broader message of what can be done with resources that we might not even stop to think are useful in our modern society where views of work and resources are extremely skewed away from traditional ones.  The picture painted by that book makes any western gardening I’ve ever seen seem absurdly sloppy and wasteful.  We are spoiled, and that’s great in it’s way, but it blinds us to the potential around us when compared with the Asian cultures in that book who really had to figure out how to make use of every resource in the most efficient way they could come up with in order to survive their own high populations.  Necessity is indeed the mother of invention.  I just wanted to drop those general ideas on you before I start this specific story, because it’s somewhat relevant.

This way to geekage --->  There is a long path to get to the actual subject.  But bear with me.  The sights along the path set the context and this post isn’t actually just about one idea.  There is an idea, but it could be summed up in a few paragraphs. But that idea evolved in a context which has specific real or perceived problems, and that context has other lessons and provides a framework for learning about the world we live in (or at least the one I live in!).  And, there is more to glean than the end point idea, which after all is not an end point at all, but just part of a long evolution.  It may be a good idea for me, while it may fail you utterly or be totally irrelevant to your life and work; but if we view it in a larger picture, we have more places to go from here and may find modifications, or other uses and ideas branching off of this one.  So hang with me if you want to, or just go read the last couple of paragraphs.

The Pee era.  I used urine as a fertilizer for over 10 years.  At first I used it cautiously, but as my unfounded fears about the idea dissolved, it became the staple fertilizer.  Suffice to say that it basically solved my fertilizing problems.  A while back, doing farmer’s markets finally started to become a feasible reality.  I can’t plan well enough to grow just how much I need, so there is always a lot of surplus, and it’s great to get something back for my work and prevent “waste”.  But in order to start going to market, I had to stop using pee as a fertilizer for both ethical and presumably legal reasons, and so began a transition period.

Transition.  Pee really had solved almost all of my fertilizing needs.  The use of compost has always continued, but differently than I had used it up until moving to Turkeysong (more on that below).  The compost is very useful as a fertilizer, but I in no way produced enough from kitchen and garden scraps here to keep everything in a large garden growing really well.  Compost is an okay fertilizer, but rarely high enough in nitrogen to keep things really pushing vigorously through the season.  Thus the pee.  It was a semi-closed system and I learned a lot.  But, with the new no pee garden, I now had a fertilizer problem.  Chickens made a showing at a fortuitous time and there is now a thriving flock that is reproducing itself.  They eat the food waste from the kitchen of a local hot springs resort along with whatever they can scratch up around the place.  They poop a LOT!  Most of it ends up all over the yard, and many times a day right on the door step.  They are super poopers!  Most of it dries up in the yard somewhere, but the new chicken coop has a screened false floor with a solid floor below that.  So, the droppings, after falling through to the lower floor, which is well ventilated, dry out and can be accessed from both ends by scraping them out.  It’s a pretty good system.  No climbing into a crowded coop to awkwardly shovel out caked bedding from under the roost while breathing poo and feather dust.  Yeah, right?  Most people with chickens have been there and would rather not have been.  Lately I’ve been feeding them their buckets of food scraps in the evening, so that they digest and poop all night in the coop.  That’s the idea anyway.

The PoopCoop!  This coop was my idea, designed and built by tonia.  It has a 1x2 inch galvanized wire mesh floor and a wooden subfloor.  The subfloor is well ventilated and can be accessed for poo removal from the front and back. &nbs…

The PoopCoop!  This coop was my idea, designed and built by tonia.  It has a 1x2 inch galvanized wire mesh floor and a wooden subfloor.  The subfloor is well ventilated and can be accessed for poo removal from the front and back.  There are boards screwed on the access points to keep the chickens from getting in there scratching around for bugs.  I would make the access slots a little taller for easier access, maybe with doors instead of boards screwed on.  Otherwise, it works pretty great.  Make sure you orient the wire and the boards on the drying floor in the right direction for easy scrapping, otherwise you get a washboard effect.

Chicken Pee.  So, I now have a fertilizer supply that I can use on my market garden.  The chickens collect and concentrate nutrients into a reasonably convenient form and I can collect a bunch of it from the coop.  Chickens are designed efficiently.  They use the same hole for sex, egg laying, pooping and peeing, everything except eating and breathing.  But of course they don’t actually pee at all.  We pee out the vast majority of our nutrients, but with chickens it all comes out in one package.  So, I really am still using pee, just dessicated chicken pee!  I don’t have an endless supply, but I hope with careful use, and augmentation from other resources I have access to, I won’t have to import much of anything to keep the garden going; which would make me happy since I like to keep imports low.  I’m also very hesitant to bring in manures from the outside as they almost inevitably have some seeds of weeds which I don’t yet have here in this somewhat remote location.

chicken poo.  A common sight at turkeysong.  Good stuff when it's not on your shoe.
chicken poo. A common sight at turkeysong. Good stuff when it's not on your shoe.

No dig, dig?  Another part of this whole picture is that when I moved to Turkeysong, I also stopped regular digging of the garden beds.  I quit digging because I was terrified of a small, root eating organism known as symphylans which had devastated my last garden.  These little suckers are a true plague.  Word on the street was that the best way to encourage the tiny centipede-like bastards was having high soil organic matter to feed them, along with a loose soil structure so they can move around easily.  Well fuck me runnin’ backwards, those two things combined just happen to be the two holy grails of organic gardening dogma that I’d been trying to achieve for years!    Take home point, I didn’t want to dig in tons of undigested organic matter anymore.  I tried that in my last garden when I experimented with seriously adopting the bio-intensive method, which means lots of deep digging, and digging in lots of compost.  It didn’t work out so well.   The symphylans population exploded.  It was also (biointensive propaganda notwithstanding) a ridiculous amount of work.  Your mileage may vary.

The evils of soil crusting >:(  Now this bit is really important to my story.  Soil crusting has always been one of my major problems in gardening.  When the soil structure is damaged by watering and cultivation, it crusts over when watered or rained on, sealing off the surface and preventing the exchange of air.  Crusting also forms a barrier to water penetration making watering, inefficient and wasteful due to run off.  Sometimes it seems to make watering almost impossible, yet the more you water, the more crusting occurs, drats!  Furthermore, compacted soil is a pathway for water to travel up from below and be evaporated back into the atmosphere.  It’s basically like a wick for removing water from the soil.  These problems are really frustrating and have been an issue in virtually every soil I’ve worked with, from sandy loam to clay.  Honestly, I’m surprised soil crusting doesn’t get more play.  It is a key problem in gardening.

Organic matter my ass.  One commonly proffered solution to crusting is to increase soil organic matter content.  I’m going to go out on a limb here and say that’s bollocks.  It’s not that it doesn’t work at all (you’ll see that it actually works for me presently), but I’ve never seen it work well when digging compost in, except when the organic matter content is quite high, which really entails digging in an enormous amount of compost... enter symphylans.  That also usually means basically buying or composting a whole shit ton of something to build a soil that has a huge proportion of organic matter.  Otherwise, whenever you dig the soil you pull up more low organic matter subsoil onto the bed surface, and you’re back to crusting.  That’s my experience anyway.  Also, exposing organic matter to oxygen allegedly increases oxidation ultimately lowering organic matter, so that's a losing battle.

Cultivation, is it really evil?  The other solution to soil crusting is good old cultivation.  That’s the typical solution and seems almost essential in large scale agriculture.  Cultivation loosens the soil to break capillary action, stopping evaporation.  It can also kill weeds and allow water to penetrate the surface.  Problem is, the more you cultivate the more you smash the soil into fine particles (dust), destroying the structure, and the more easily it crusts again when watered.  So, you just have to keep doing it.  You ideally want the top 4to 6 inches or so of soil to be almost dust-like for the best moisture saving effect.  Negative press aside, it’s not always the evil system it’s sometimes made out to be and has a place.  I used regular cultivation the first year I was here and I was amazed at how far I could go between waterings if the soil was re-cultivated as soon a possible after watering and without fail.  It was one of the best gardens I ever grew, though not just because of thorough cultivation.  I’m not sure I’m done with cultivation gardening, and I just see it as a tool in the tool kit, though I have to admit, it seems somewhat less than friendly to the concept of soil building and probably a somewhat shoddy way to treat the land longterm.

This first year garden at Turkeysong was under surface cultivation.  I returned from a several day trip with a friend during a multi-day, over 100 degrees f, heat wave and he was astounded at my perky butter lettuce which had been watered …

This first year garden at Turkeysong was under surface cultivation.  I returned from a several day trip with a friend during a multi-day, over 100 degrees f, heat wave and he was astounded at my perky butter lettuce which had been watered and cultivated just before leaving.  This intervention only solves crusting if you do it soon after watering, every single time.

Mulch is god!  I knew I had to solve the problem of soil crusting, and if I didn’t want to cultivate extensively, that left mulch.  Mulch is GOD!  Right?  Just ask Ruth Stout, or a young and enthusiastic mulcher.  Get in with a real mulch enthusiast with limited experience, and you’d think all your problems will be solved forever and that we are all just a few bales of straw and some lawn clippings and leaves away from solving all the problems of horticulture and maybe beyond.  Combine mulching with gogi berries, biochar, blue green algae,  perennial vegetables, and ducks and there’s no stopping perfect plant and human health and “no work” food production!  Ok, I’m being a dick, but we deserve it.  It is so tempting to see something as having the real potential to just sort of “fix” everything.  I know well enough, because I’ve been that eager inexperienced mulch promoter.  Most of these fairytale happy ending stories we tell ourselves have at least a grain of truth, and often much to offer us if we can actually see, or more often after we inevitably see, through experience, the limitations and pitfalls that are not visible in the theoretical realm, and which we don’t really want to see anyway.  Mulch is not god.  It changes the landscape in ways that are often very useful to us and to the health of the soil.  It’s effects are sometimes super awesome.  I’m a big fan and semi-regular practitioner, but some of those changes can conflict with our food producing and land care goals.  Creating habitat for voles and insects came to my mind as particular problems in considering deep mulching for my garden.  It’s bad enough in any garden where there is always some habitat for insects.  Deep coarse mulch can create a veritable pest metropolis from which an army of insects can march a whole few inches to chow down on your carrot seedlings, or in which voles can find the rodent equivalent of mcdonaldsplayland to move into, complete with a food supply... weee!  I do use deep mulch, and what I might call semi-deep mulch, here and there, but experience had already taught me that if I used it in the entire garden, I would have considerable negative issues to deal with.  That may vary by environment, but enough said there.  I’d also be out collecting the stuff all the time, because it takes a ton of material to do deep mulches in a large garden.  That reason alone is enough to scrap the idea.  No thanks Ruth.

Works pretty good.  My eventual solution, partly influenced by some no dig gardener/writers, was to use finished compost as a mulch.  Since I would be composting food waste and garden stuff anyway, and didn’t want to dig it in, this seemed like a good solution.  I’ve used all my compost on the surface of the beds for something like 6 or 7 years now.  It works pretty good for me.  I don’t have as much as I want.  Each time I plant something new it gets a sprinkle of compost, usually almost enough to cover the bed surface visually, so under 1/2 inch thick.  Some washes away with runoff when I water, and I still get quite a bit of crusting.  But overall, for my system and my soil, gardening style, and so on... it’s been pretty good.  I do have to cultivate some when crusting gets bad enough in an area (usually due to running short on compost, loss during watering, rodents helping me do some digging, or having had to dig the area recently for harvesting roots and weeding).  I use a hula hoe (aka strap hoe, stirrup hoe, reciprocating hoe, scuffle hoe) for cultivating, generally trying to slice below the soil an inch or so leaving the top relatively undisturbed.  I wish I had more compost, but I get by.  I sift it through a half inch screen and throw all the big stuff back into the next batch.  That puts a lot of half digested material on the beds, and I prefer it that way, because larger bits of stuff cover the soil better.  I’m kind of bummed if the compost gets so finished that most of it is very fine and not recognizable as pieces of plants and stuff, because it doesn’t do the main job I need it to as well as it would if it was in bigger pieces, and it washes away more easily.  I also sometimes use coffee grounds picked up at a coffee shop in town, which adds to the effect and contributes quite a bit of nitrogen.

Soil layers.  The compost makes quite a difference in crusting.  One thing I’ve noticed, is that since I don’t dig regularly, the organic matter stays in the top layer of soil.  It doesn’t just stay on the surface.  Worms come up and grab pieces pulling them underground.  moles voles and gophers do plenty of digging for me and I have to plant, harvest and occasionally cultivate.  But a lot of it stays in the top inch or two of soil.  I’ve noticed that even when I do get crusting, it is not as bad as it could be, and is somehow still permeable to water and air relative to the crust that forms on a dug soil.  That’s because this top layer is quite high in organic matter, which builds up over the years.  This effect simulates a natural soil profile more closely than a cultivated soil does.

Artificial, but how artificial?But, a garden is not a natural environment!  My symphylans problem in my previous garden highlighted that fact.  What I am after is an artificial environment that can pump up the plants to realize the potential bred into them through the ages to grow plump and juicy.  But, I want that effect, without upsetting the balance so much that I create some unintentional problem that is going to bite me in the ass (in a bad way ;).  Mulching with compost seemed like a good solution.  I really could use more of it.  I’d like to make more compost.  Materials are abundant.  I live on 40 acres of mostly forest, and organic materials supply is not an issue!  There is also plenty of seed-free green grass to collect in season.  Any farmer out of that super boring book Farmers of Forty Centuries that I mentioned earlier would be appalled at the lack of use of the resources available to me.  But alas, energy is in short supply and I do have other things I want to do, like compulsively writing blog posts for hours and hours.  Besides, like I said, it works pretty good the way I’ve been doing it.

Chicken pee tea.  So, were getting close to my simple, but really cool idea (close is relative).  Since I don’t dig the garden beds (see footnote *) my options are to use my chicken manure on top of the beds, or use it as a tea.  Both work well and have advantages, and I’m using both currently.  I’ve been sifting the dry chicken manure and applying the fine siftings to the beds.  That works nicely and contributes to the prevention of soil crusting, while building organic matter in the top layer of soil as long as I don't dig.  As the bed is watered and bugs and worms and microbes do their work, the nutrients leach into the soil over time.  Direct application has it’s advantages, but manure tea also has advantages.  Being full of soluble nutrients, manure tea gives a quick boost when it’s wanted.  It can also be applied very evenly for efficient use.  Using soluble fertilizers in general provides the potential to keep plants growing strongly with regular applications through the growing season.  Soluble v.s. non soluble fertilizers is a whole can of worms, but I like to use both and it works for me.

Tree mats.  I make manure tea by soaking the poo in water and then straining it out.  The tea is diluted and then applied straight to the beds/plants and usually watered in immediately.  Applications of course stop some time before food is harvested.  I usually leach the manure several times over the course of some weeks before it is pretty spent.  When I’m done I have this wad of left over half digested manure.  I used to throw it in the compost.  I had an idea a while back.  I’m not sure if it’s at all practical for home production, but I have no doubt that the actual product would be pretty awesome once made.  The idea was to make a sort of paper mat out of manure and pulped up cardboard and other fiber stuff like that.  It would be a large, thick, probably circular mat for mulching trees. You could incorporate all kinds of fertilizers and nutrients and nutrient containing stuff in there like seaweed, bone meal, etc, which would leach out and feed the tree over the years.  It would also provide a moisture conserving mulch and eliminate competition for a few years if it was thick and durable enough, which would really be it's main use.  It could be a good use for all that cardboard and paper filling dumpsters everywhere.  Practical to make or not, I’m convinced that it would be completely awesome, solving a bunch of problems in one item and allowing the quick establishment of trees with very little work and in many cases without watering, even in our dry summers.

We made it!  It occurred to me at some point that I could make tree matts with my manure left over from making tea, but of course it’s probably too involved to actually do here practically speaking.  I would need an outboard motor or the like to mix it all up.  Besides, there isn’t enough manure.  So, I just mixed the chicken poo sludge with water to form a sort of slurry and dumped it out onto a bed.  With a little watering, the half digested slurry spread out pretty evenly, forming a solid mat of slow release fertilizing mulch!  It’s true that much of the nutriment has been leached out, but some remains too and much of it locked into the undissolved organic matter.  This method covers the soil almost completely if applied generously enough.  It drastically slows evaporation compared to a compost mulch only bed, but won’t wash off at all.  It provides food for worms and other bug dudes who work near the soil surface, opening the soil texture to allow penetration of air and water.  It feeds the plants slowly, and also initially through a dilute, but still very substantial manure tea effect.  It of course protects the soil from crusting due to watering and rain.  And, it provides organic matter as it breaks down into fine bits and is slowly incorporated into the top layer of the soil.  It uses the product of a process that is already underway, so there is no “extra” preparation work except stirring.  It is easy to apply.  The effect is durable; it’s thick enough to provide a substantial effect, but not so thick as to make deep multilayered habitat for an army of insects; so, it seems a good compromise between creating bug habitat and thoroughly covering the soil.  It just seems pretty awesome!  It doesn’t work for everything.  I don’t use it on small seedlings.  I couldn’t use it on carrots because it would just bury them.  But it works great for larger plants such as squash, tomatoes, peppers, cole crops etc... and it seems ideal for onions and leeks.  Burning plants is a non issue since it is already pretty well leached by the time I’m using it.  I’ve been playing with this a bit for a few years, but now that I have to use a lot of manure tea, and have a lot of manure, I have more of the slurry to use and have applied much more this year.  I’m pretty sold on the idea, though still have an eye open to the possibility of unforeseen issues cropping up.  I’ve also used horse manure, which worked great, maybe even better because of all the pieces of stringy fiber in it.

x
x
x
x
f
f
s
s
s
s

The beginning of the end.  Like I said, this doesn’t have to be an end to the evolution of ideas.  Our accumulating knowledge, our input from other people, our observations of all kinds of things, an ever deepening understanding of the habitat we live in and modify, an ever increasing awareness of the resources available to us and the idea that there are more that we haven’t yet recognized, and maybe most of all, an awareness of the utility and beauty of the potential that exists to combine all these things into functional systems, can all come together to form a foundation for success in adapting to the places we’ve landed in and which eventually, through close association, come to be home to us.  These ideas are very much at odds to most of what passes for modern life.  Creatives, entrepreneurs, and many others do use this kind of thinking in the habitat of modern civilization, but many have no need in the paint by numbers lifestyles made available to us by industrial life.  That doesn’t fly so well when you are trying to bring forth some kind of living on the land from available resources.  Our lands and ecologies are unique and changing entities.  They have their own characters which change with the seasons, over time, and with our inputs and the consequences of our habitation, intended or otherwise.  This post has been largely an excuse to talk about those ideas and the specific ideas and things that I do surrounding, and leading up to this one simple expedient, which solves some problems that I face.  Should you run out and find some manure and start using manure tea so you can have some slushy poop to dump on your garden beds so that you don’t have to dig and will have awesome soil that brings forth giant leeks flushed with the color of life giving nutrients?  I don’t know.  Maybe.  Okay, probably ;), but that’s not really the point.  The point is more that we can benefit from being aware that there are almost limitless possibilities, and be open to the evolution of integrated ideas that can lead to systems that work for our goals, lifestyles and resources.
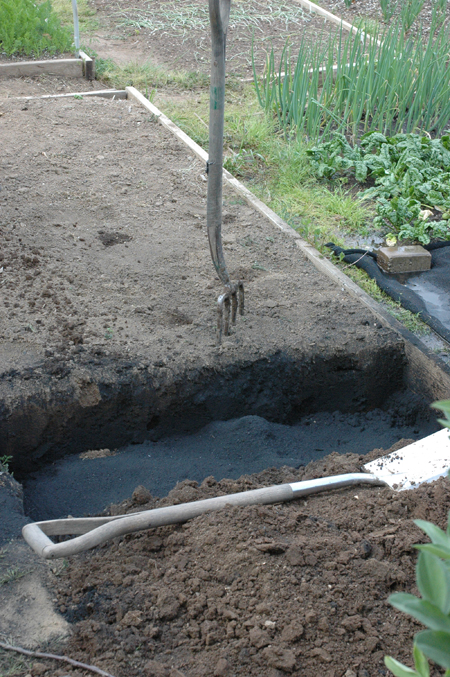
The end of the end.  I hope someone made it all the way through, and that this rather long discussion has been of some use in promoting, or reinforcing, some useful general concepts as well as offering some more directly practical information that might be of use to you and your situation.  Tips and tricks are great, but I’m more and more convinced that our broader philosophies and beliefs can be the real impetus for our “success”.  They form a foundation for our goals and inspiration, the choices that spring forth from the values we decide that we want to embody, and ultimately the specific things we manifest.  They even largely define what we think success even IS.  Specific systems can be shared out among us, but life on the homestead is not paint by numbers and a particular idea or method might serve as much or more as a stepping off place or stimulant of new ideas than something to be directly adopted.

(* footnote re: not digging beds: I rarely dig beds, but I’m not religious about it or anything.  If a bed gets compacted I dig it, and I am trying a little digging prep for carrot beds to see if I can get the uniform roots the farmer’s market customers want (edit: It didn’t help.  No real difference between carrots in dug and undug soil here).  I do really try to avoid actually turning the soil over, unless I’m trying to work in some permanent amendment very deep, like when digging in biochar.  I know people who are terrified of digging or turning the soil at all though, which just seems silly.)

Posted on March 2, 2014 and filed under Garden Stuff, Uncategorized.