Canning Tomatoes: How I do it and why it works for me.

canned tomato header Tomato season is finally on here at 1800 feet in coastal Northern California.  Having just mentioned canning tomatoes in the Mega Canner post, as well as also having recently been enjoying my few remaining jars of them, it occurred to me that my method of canning tomatoes might be of some use to other people.  Over the years, I gradually devolved toward a very simple tomato canning system that is not too much work and leaves me with a very versatile product.

My mom made tomato sauces and such, but what I really remember was the whole canned tomatoes.  I would sometimes beg a jar of them, open it, and just eat them out of the jar with a fork.  Yum, they were so good!  Home canned tomatoes are so much better than store bought!!!  I don’t care what brand you buy, there is just no comparison, because the commercial tomatoes are always bred for processing rather than flavor, and are harvested too early... just what we should expect from an industrial model.  One day I was thinking about what I wanted to eat.  I thought spaghetti sounded good.  I got the pasta water going, got the pasta cooking, saute’ed some onions and ground meat, then rummaged in the cupboard.  NOOOOO!!!! I was out of home canned tomatoes!  I was already salivating and could taste those yummy sweet tomatoes as they oozed into the spaces between the noodles, topped with slowly melting shreds of Asiago cheese.  But wait, there was a can of storebought tomatoes, that would have to do.  Nope, they were soooooo lame!  Total buzzkill :-/

Since horking down cans of my moms tomatoes at 12, I have sometimes made sauces and paste, but anymore I only can whole peeled tomatoes.  Aside from fond memories, the main reason I do so is versatility.  I don’t have to figure how many cans of sauce I’ll use, or what kind of sauce I want to make, or anything like that.  My whole canned tomatoes can be reduced to small pieces in the jar with a butter knife in a matter of seconds, or tossed in the blender to make pizza sauce, dropped whole into a casserole, or dumped straight into a pot of minestrone.  I can use them in Asian food, Mexican, Italian etc and so on.  There are no skins to get in the way, and the extra juice in the jar tastes amazing with a splash of hot sauce, perfect to sip on as an appetite stimulant while cooking, or as a treat to share with someone.

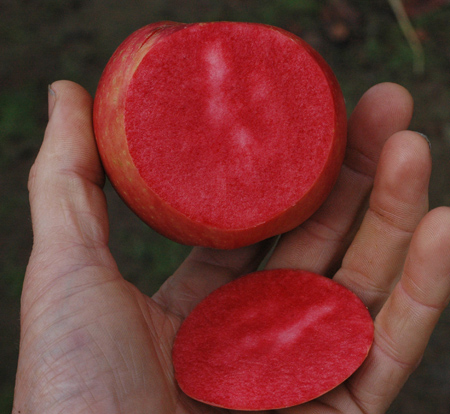
c'mon, this is the sexiest tomato you've ever seen.

I’m not against other forms of canned tomatoes, but I’m an adventurous cook.  I can’t put Italian spaghetti sauce in my chili, but I can make spaghetti sauce with my whole canned tomatoes when I need to.  Using whole canned tomatoes is more like cooking with fresh ingredients.  They are on the watery side, but I can put them in a pan on high heat and have them reduced to a sauce by the time the rest of the meal is cooked, if not before.  Diced tomatoes, as a reader recently pointed out, are similarly versatile.  I have made diced canned tomatoes, but it just seems like more work than is necessary since whole canned tomatoes are so easily reduced in the jar with a butter knife.  And I do occasionally want the whole tomatoes, though admittedly not often.  The basic method I use could be adapted to make diced canned tomatoes just as well if one wanted to.

There are times when a long cooked thicker sauce is where it’s at.  Long cooking can develop deep rich flavors.  But most of the time I’m after a less tortured, less concentrated flavor from my tomato dishes, and I can get that with whole canned tomatoes.  I’ll admit that it’s less instant and convenient than sauce that is already cooked down and flavored and ready to go out of the jar, but I’ll also wager that sauce made with the same ingredients, cooked down with fresh herbs just before dinner from whole canned tomatoes, will be a cut above a precooked and pre-flavored canned sauce.

So here’s how I do it.  Maybe you can put up a couple of jars this season and see how you like them.

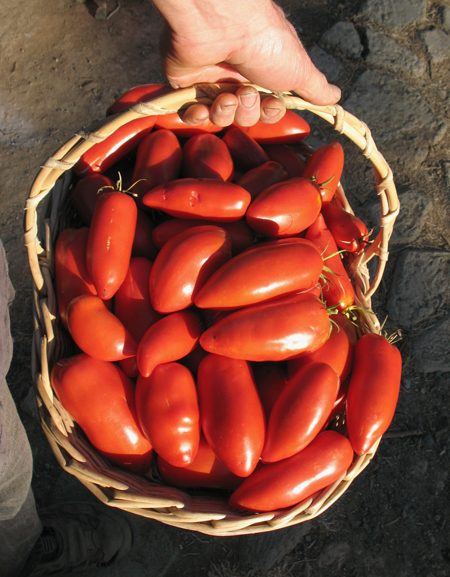
Good sized, dense fleshed, sparsely seeded tomatoes like these are best for canning.  I grow them on purpose, but I'll generally use whatever I have extra of as well.

What tomatoes to use:  First, USE RIPE TOMATOES!  Ripeness makes all the difference, and is your main weapon in superiority over commercially canned tomatoes.  I prefer to use canning tomatoes, but will can any excess slicing types too.  My favorite is probably Orange Banana (available from Fedco), a small yellow canning tomato with a very sweet fruity flavor.  It is not suited to every dish because it has less of a classic tomato flavor, so I grow reds as well.  I haven’t really settled on a red canning tomato yet, but there are lots to choose from out there.  I think Blue Beech is in the lead for flavor so far (also available from Fedco... I'm a big Fedco fan if you can't tell).  It is a large tomato, few seeds, dense, tasty and reasonably productive.  Polish Linguisa produced like mad giving over 50 pounds off one plant in one picking, but the flavor lagged behind blue beech and others.  I’m planning to can some Zapotec this year.  It is a deeply pleated tomato with amazing flavor and seems fairly dense, though it’s a great slicing tomato.  One red canning tomato that is popular is San Marzano.  San Marzano gets a lot of press, but the year I grew it, this popular tomato seemed like a just above average commercial processing type, bred for holding in the field and to withstand lots of handling.  My guess is that it is basically a gourmet industrial processing tomato, but that’s kind of like saying "gourmet non-dairy whipped topping".  I also did not like Speckled Roman as it has too much stringy fibrous stuff in it.  Early Girl makes a pretty decent canned tomato, though it is more watery and less dense than some canning types.   Basically, I’ll can whatever I’ve got at the time, but it’s really worth it to grow one each of a bunch of different processing types and then taste test them after canning.  Large tomatoes process much faster.  Processing 20 pounds of small orange bananas is a lot of work (though it’s worth it!).  (Edit:  I forgot to mention that some tomatoes, notably canning/processing types, have a small stem end so they don't require coring out of the tops like most slicing tomatoes and heirlooms do.  It really is a lot less work to prepare canning tomatoes which peel easily and have those small ends.  Heirlooms, especially the big slicers, often have folds and pleats, cracks and scabby areas that have to be dealt with.  Early Girl has a pretty small stem end, much like a processing type tomato.)

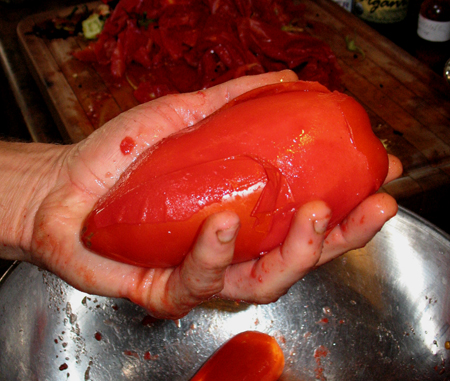
Bigger is better as long as flavor isn't suffering.  This tomato will probably filled an entire pint jar.  Note the huge pile of skins in the background.

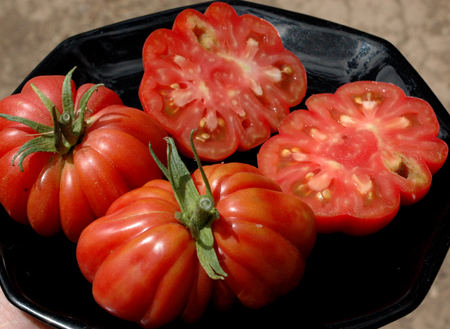
Zapotec.  This outstanding tomato is quite meaty.  It's not as meaty as some processing types, like Blue Beech (which has so few seeds that one of Fedco's seed growers calls it Blue Bitch) but it's pretty darn meaty.  It tastes fabulous with a very rich tomatoey flavor.  If it peels Ok, with it's pleatedness, I'm thinking it will make a pretty great dual purpose tomato for market, fresh eating and canning.

I add two other ingredients to almost all of my canned tomatoes- ripe roasted peppers and basil.  It might seem like basil is limiting in that it is not suited to all cuisines, but I have not found that to be the case.  I use only a small amount of fresh leaves stuffed in the top of the jar, and it seems to go fine with everything.  Since I use a small amount, I don’t even really miss it when it’s not there and it should definitely be considered totally optional.  I don’t even have a single basil plant this year, so I won’t be using any.

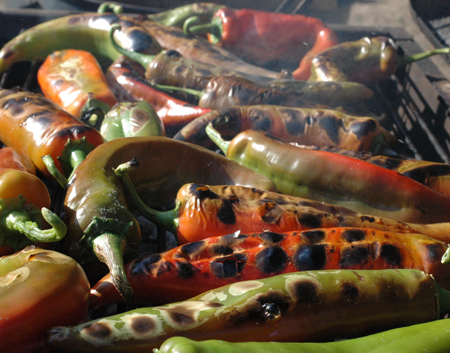
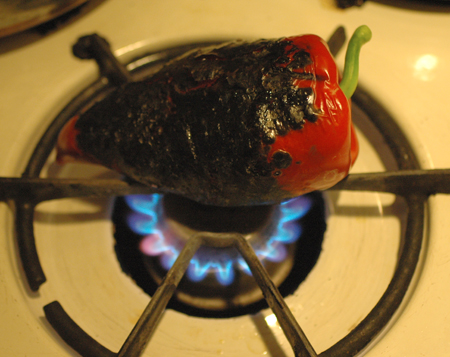
The pepper is roasted over an open flame, or better yet over hot coals, until blistered and a little charred.  Drop the blistered hot peppers into a paper bag, or wrap them in a towel for a few minutes to sweat and loosen the skins.  Slice them open, de-seed, scrape off most of the skin (a few remnants won’t hurt anyone) and cut into pieces.  I probably put the equivalent of a roughly 2x2 inch square in each jar.

Peppers roasting over charcoal.  These will definitely taste better than gas roasted peppers.

roasting on a gas stovetop works well enough but usually leads to excessive charring as here.  A gas grill would be an improvement.

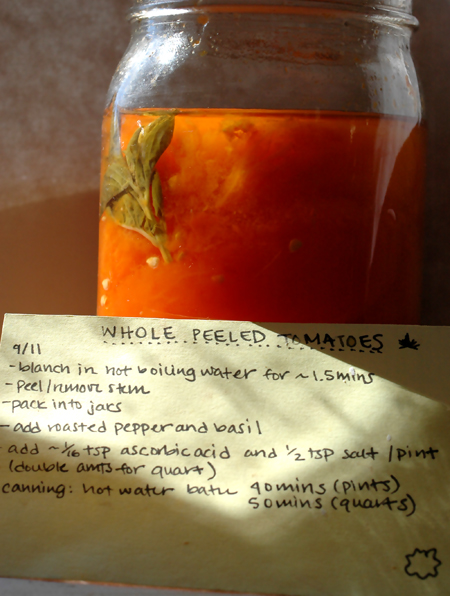
To prep the tomatoes, bring water to a boil and blanch them for just a minute or two.  All you want to do is loosen the skin.  If over cooked, some of the tomato will come off with the skin, and if under cooked, they will not peel easily.  Ease of peeling varies from variety to variety.  At their best, the tomatoes will just about slip right out of the skin.  I use a large stock pot with a colander insert.  When they are done, the colander is plunged into cold water briefly to halt cooking and cool the tomatoes off enough to peel easily.  Bring the water to a boil between each scalding.

Throw the peeled tomatoes into a big bowl until you have a bunch of them.  I like to line up a dozen or more jars at a time so I can add ingredients systematically without missing any.  Clean your jars, or whatever you do.  I just make sure they are washed clean.  If they are clean off the shelf, I don’t even wash them.  That’s what the sterilizing process is for. I use a lot of pints and some quarts, but it bears keeping in mind that quarts do save on buying lids, which are rather expensive when you add up the season's canning.  Stuff the tomatoes into the jars leaving just a little space at the top since they will sink quite a bit in the canning water bath.   Add the roasted pepper and basil, and for each pint use 1/2 tsp of salt and about 1/16 teaspoon of ascorbic acid.

About the ascorbic acid.  I started using it because some sources claim that tomatoes are not always acidic enough to prevent the formation of botulinum toxins in the jars after canning.  I actually don’t think that’s a problem, but my partner at the time always insisted on it and I didn’t think it hurt anything.  Eventually I decided it tastes better though, and a taste test of commercially canned tomatoes done by COOKS Magazine came to the conclusion that those brands with added acidity (usually citric acid I think) were just better.   It’s good stuff to have around anyway.  You can add it to juice when your sick, and use a wash of ascorbic acid and water for rinsing fruit to keep it from oxidizing, useful for drying and canning.

After the jars are packed, wipe the rims clean and screw on the lids.  I screw my lids on pretty firmly, but not super tight.  Put into warm or cold water, just not so hot as to crack the jars.  The jars should be resting on a grate to keep them off the bottom of the pan, and should be completely covered with water.  Bring the pot to a boil with a lid on it.  As soon as it begins boiling, you can set the timer.  Boil hard for 40 minutes for pints and 50 minutes for quarts.  I don’t remember where I got those numbers, but that’s how I do it.  Allow the kettle to stop boiling and wait about a minute before removing the jars.  If you remove them while too hot, they will boil over.  You may or may not need to snug the lids down as soon as they come out, I usually do.  Allow to air cool, check the seals, remove the rings, rinse the jars, label with the year, and with the variety for future taste testing if applicable, and stow away.  If you have a ton of them to process, check out the Mega Canner post.

Orange Banana, yum.

I’m not convinced that this is the very best way to do tomatoes, but I do know that it is a system that has served very well here with almost limitless versatility and I see little reason to tweak it in any way.  These canned tomatoes have contributed to countless delicious meals here at Turkeysong.  The rough number of canned tomatoes I try to shoot for in a year, assuming two people and occasional guests, is 100 pints.  There are usually some jars left over when the canning season rolls around, but that is good since no one knows what the next year will bring.  I am thinking of putting up some tomato juice this year if I have enough tomatoes because I like drinking the juice off the tomatoes so much.  I can any left over juice that accumulates in the bowl of peeled tomatoes with a little salt and ascorbic acid added, but that only amounts to a quart or two a year.  Probably the easiest way to preserve tomatoes is by freezing them whole.  The skins slip off easily when the frozen tomatoes are run under the tap for a few seconds.  But I usually prefer my canned tomatoes for most uses.  Please tell us about how you preserve tomatoes, in the comments.

Drying tomatoes is pretty easy.  I just find that I don't use that many.  I'd like to, but I haven't caught the dried tomato bug.

Apple Head: from punk to the plunk of falling apples

punk appleOur society has little of use to offer kids when they are coming of age. Whatever the reasons, our lack of any kind of real transition into adulthood is not consistent with traditional cultures.  When I was about 18 and trying to figure myself out I couldn’t see that there was nothing in my human environment that I could use to move toward a life that made any sense to me.  I had become increasingly interested in ancestral skills and learning about nature.  The things I wanted to learn were very obscure and the life path offered to me by convention extremely distasteful.  I had read about Native American youth doing multi-day fasts as part of coming of age trials, the so called vision quest, and decide to go on a four day fast in the woods to help me sort out my path.

crass

I had been very much a social discontent from a young age.  I was raised to ask questions and I latched onto the rejection stance of punk rock.  If there was one message to take home from punk it was that everything was not okay.  This was at a time of false optimism in America.  Ronald Reagan’s head was bobbling around on television telling us everything was great, except that there was an evil empire called Russia that wanted to wipe us out and we might all be blown to bits at any moment by them, or by ourselves, or more likely both.  We walked around thinking any day could be the day the bombs started flying and the world ended.  (BTW, For all we know, that's still the case.)  I wore inappropriate clothing and slogans, went to protests and was just generally making sure people knew things were not alright damnit!  It didn’t take long for me to start realizing that whining was not a very useful tool for social change and that symbols such as clothing, music and language did not take the place of action.  In fact, being whiny and contrary turned out to be less fun than one might imagine!

This is me with Ali and Pete on a rock climbing field trip in high school.  It was GW's birthday (now president's day) and I just thought I should remind everyone that he was a slave owner.  You can find all kinds of apologist crap online trying to excuse him a little because he was good to them niggers, (though accounts vary as to his treatment of his slaves) but it still makes him an asshole first and the president second.

hear-nothing-see-nothing-say-nothing-a

Somewhat earlier when I was even younger, influenced by some of the punk bands I was listening to like Crass, Crucifix and especially the song They (lyrics) by Antisect, and also just because it was logical, I found myself more and more convinced that there was no solution to the worlds ills that made any sense other than changing the way that I actually lived.  Switching my view of problems from a primarily external view to a more internal view gave me a chance at some kind of empowerment rather than wallowing in helplessness at the hands of the Ronald Reagans of the world, or whomever.  In other words, change the things you can change and get your ducks in a row, which is more than enough to stay busy!  This epiphany lead to an interest in self reliance.  At about 16 I traveled across the country with some of my family.  I remember looking in every book store that I could find in various cities for any books on homesteading and related topics.  One store was an anarchist book store.  I was not impressed.  If anarchy was sitting in a stuffy bookstore wearing black clothes and reading philosophy and politics I’d pass.  I came home empty handed.  My sister and I also visited the punk scenes of D.C., Boston, Quebec, Atlanta and Austin that summer and while it was fun, they seemed to consist mostly of a bunch of drunkbag wheelchair butts on the fast track to burning out.

From dehumanization to arms production for the benefit of the nation or it's destruction...  One of my favorite punk bands, Crucifix, like the vast majority of punk bands, mostly piled responsibility for the worlds problems on others.  Easy to do when you are a seemingly powerless kid.  Still, they were mostly right, it's just better to concentrate on the stuff you can actually do something about.  Otherwise, what credibility do we have to complain?

So that sets the stage for my vision quest.

I walked up a small redwood sheltered creek in a desolate State Park that I frequented.  I had my sleeping bag and some supplies.  I hung my pack in a tree, took out my contacts (which meant I couldn’t see shit unless it was right in front of my face, another level of isolation) and with my sleeping bag and a water bottle sat down in a circle of logs and such which I arranged so that I would have definite boundaries.  I drank water from the creek as much as I wanted, but otherwise I stayed put and ate nothing.  This was not a strenuous exercise like many traditional coming of age ordeals are, but for a relatively privileged kid to make a real effort to go through discomfort for personal growth is worth something anyway.  I didn’t know what to expect.  I have never been inclined to be religious, so I wasn't expecting something mystical to happen, but I think I figured a profound epiphany of some kind would be convenient.

It is remarkable how being hungry and having no distractions can focus the mind.  The key word there is HUNGRY, because what grew in my mind the most in those 4 days was a mini food empire.  I thought of every food plant I could, making mental lists over and over so I would remember them.  I thought about how and where I would plant them and how many.  I visualized a farm or homestead dripping with fruit and nuts, crawling with animals and stocked with preserved foods (There was definitely some thought into where to put the skateboard ramp too).  I’m sure I worked out some personal stuff as well, but I don’t recall because it was ultimately food self reliance which was the core of the vision that grew up in me.  Dude, self reliance was where it was at!  I wasn’t content to be livestock and that's just what I felt like being dependent on an industrial food supply.  Nothing could have been more clear.  Food bearing trees played a major part in this mental edifice which was, I realize now, the early stirrings of a life long interest.

All around the country there are groups of fruit enthusiasts who get together periodically to trade fruitwood cuttings and rootstocks and such.  Some people collect cars, guns, ceramic statues of cute animals... we collect fruit and nut varieties.  Although my interest in this area was born largely out of practical goals and a desire to affect my life through action (and still is), I’d be a liar if I said I wasn’t driven also by motives that might be considered less practical.  That's  okay, we all need some passionate interest to get us through the day.  Mine, lately anyway, (ok, one of them) is apples.  We have lots of other fruits here at Turkeysong.  I’ve planted well over 100 fruit and nut trees, vines and shrubs in 6 years and more are on the way.  There are almonds, walnuts, chestnuts, pears, nectarines, peaches, plums, persimmons, cherries (yum), feijoa (A.K.A. pineapple guava pronounced fay jo ah with a soft J), figs loquats, grapes and I’m sure I’m forgetting some... but mostly apples.  I have somewhere around 200 unique varieties of apples growing and more being grafted this year.  Apples!  No dude!, Apples!  I want to grab you and shake you until it sinks in  A...A....A....A...A...A...A...P...L...L...L...L...L...E...S....S...S...S DUDE!

King David

This has basically been written before.  Back when people took their fruit very seriously.  Paragraphs and essays extolling the virtues of the apple bespeckle the literature of the last couple centuries and were, I feel sure, well received.  Now I’m not a religious man to say the least, but it is apparent there is some comfort in the converted being preached to in order to affirm that yes belief X or god X, or whatever, is indeed righteous or to be feared, and so on.  I personally love to read essays on the virtues of the apple and will now try to channel the inspired persons of the past who spoke of apples with the gratitude and reverence due them.  Forgive me any errors or inconsistencies.   The truth occasionally falls casualty to something more interesting.  So without further delay, I present to you some unabashed apple propaganda...

Dear Ladies and Gentlemen, cats, dogs, hogs, cattle and poultry of various descriptions.  raccoons, opossums, bears, mice, deer, packrats, voles and birds of many kinds.  I have not been asked here today at all, let alone to speak on a subject which others before me have eloquently and thoroughly addressed.  Yet I find myself compelled to address our subject nonetheless, for if I plumb the depths of my motives I feel unsure that it is not necessary; that there may not be some persons in the audience who yet remain lost and in need of a light to find the path; that there may not have been something missed which I might point out or remind one of; and more selfishly, I admit that I simply desire to add my humble voice to the throng in order that I shall not have to contain my own malignant enthusiasm.

Apples.  What more virtuous fruit of temperate regions?  I wager there is none!  The apple: possessed of more flavor variations, a longer season, a greater variety of legitimate uses and broader form in shape and color than any other fruit outside of the tropic regions, and possibly including them.  It can be cooked in savory and sweet dishes alike, dried for the winter, drained of it’s saccharine juice, fermented to cider, distilled into brandy, soured into vinegar, boiled into syrup,  cooked down into apple butter, canned as sauce, and of course eaten out of hand.  Other fruits can be treated the same, but not with the versatility of the apple.  During our partnership with the Apple, we have developed its possibilities to a greater degree than any other temperate fruit.  We could make perry from the luscious pear, squeeze the poor plum of its juices for wine, dry the berry and tuck the cherry into a crust of pie; some may even exceed the apple in a sort of sensational deliciousness, but no other fruit matches the apple for its breadth of suitability for various uses, and it is an imminent suitability at that.  Some Apples are tart, some are sweet, some hold their shape when cooked and others fluff into a delicate froth, all to be chosen from for conformation to our tastes and desires.

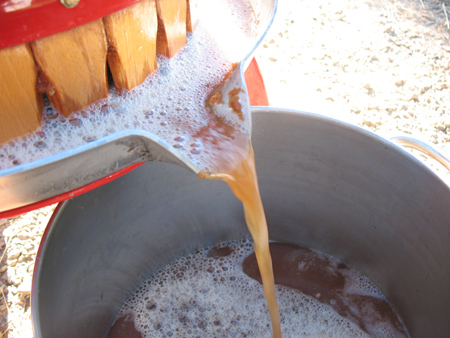
Just grind and squish.  It seems too easy!

Nor is the apple so cloying as many fruits.  Where the peach the pear the cherry and the grape, can cloy in their rich juicy sweetness, the apple invites eating over a longer season with less tendency to wear out its welcome on the palate.  Large quantities can be consumed, especially if met with at the dining table as well as eaten bite by bite fresh from the hand.  The apple is wholesome food.

Contributing yet more to the welcome which the apple finds with humanity is its breadth of variation in flavor.  Hidden in the genes of Apples are a broader range of flavors than in any other temperate fruit.  Flavors of banana, mango, fennel, almond, strawberry, raspberry, nuts, pineapple, citrus, cherry, rose, vanilla, spices, herbs, pear, wine, “apple”, melon and more can all be found in apples accented with more or less of acidity and sugar.  These flavors, sugars and acids wait to be further mixed together, by breeding and by chance, into infinite combinations to both suit and broaden our tastes.  From the easy edibility of the understated yet harmonious flavor of the Golden Delicious, to the epiphany of the balanced rubinette, to the sensational cherry bubblegum of Sweet 16, to the compelling symphony of flavor in a perfect Golden Russet or the fruit punch flavor of Grenadine, we have them not only in one species of fruit, but with grafting we can have them from just one tree!  Can any other fruit boast this palate of flavors?  I think not.

Newton Pippin

And all of this over a longer season than any other temperate fruit.  Beginning as early as June in some regions, apples can be plucked ready to eat from the tree from early summer through late winter and probably further on.  While the fine flavored Kerry Pippin is a fond memory of August heat, the Granny smith still clings steadfastly to the tree in mid winter accumulating sugar and flavor.  Granny’s fair daughter Lady Williams clings yet longer to the branch being unsuitable for eating until the end of January.  These fruits and more like them show clearly the possibilities inherent in the apple for an increasingly extended season of fruit straight from the tree.  Add to this already long season the outstanding keeping ability of many of our winter apples and we can, with a little planning and good storage, have quality apples for most, if not all, of the year.  Many of our apples can keep through the winter safe in their protective skins.  Some will keep into spring and even until the following harvest.  The breeder is hard at work developing ever later keeping apples which will come out of long storage in the finest condition and who knows what the limit may be.

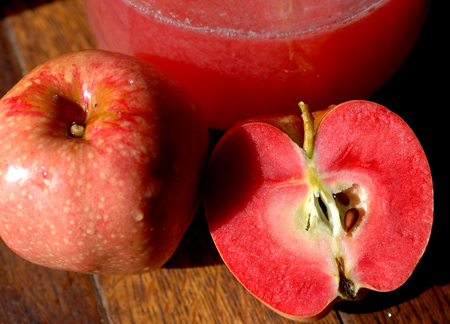
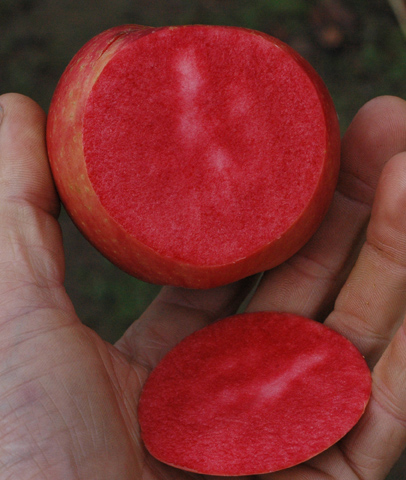
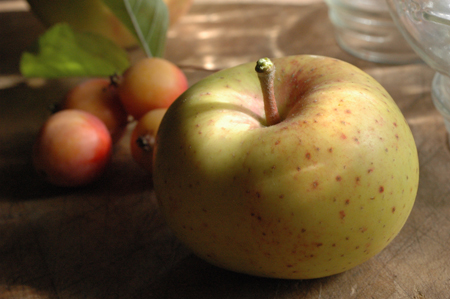
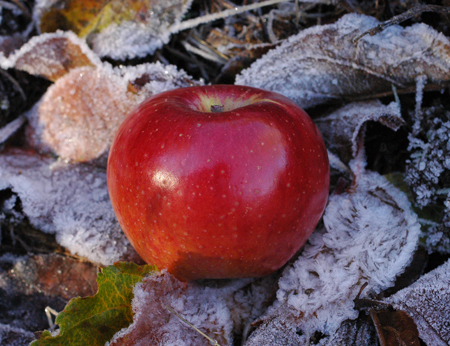
In our apples we also have an unprecedented range of form and color.  Solid colors in red, yellow and green.  variously striped with pinks, oranges and reds, washed with flushes and blushes, possessed of sublime translucency or impenetrable opacity, unblemished skins smooth and shining, hanging in un-presuming matte or covered in dusty bloom, overspread with russet and speckled with dots large or small.  The King David demands attention in its redness, the Yarlington mill invites examination with it’s watercolor layers of translucency and cracked map of russet, while the intense red flesh of the Grenadine shines pink through a thin skin covered in speckles.  Artists have time and again been moved to capture the beauty of the apple, It’s bending and refracting of light, its depth and its colors.  Just google apple painting if you doubt me.

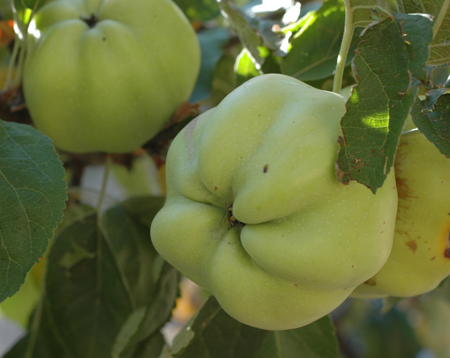
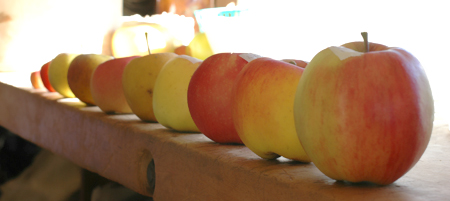
Ribbed, smooth, round, lopsided, oval, flat, green, red, yellow, speckled, striped and all manner of nifty...

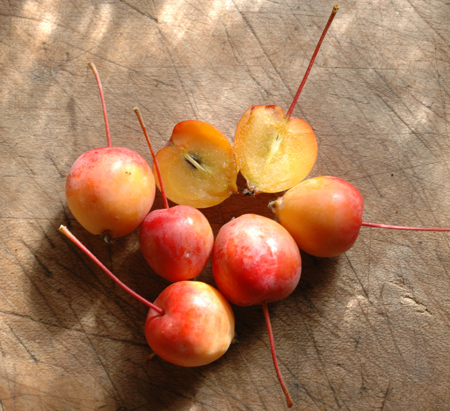
In these varied colors we have apples which can weigh a pound or more, apples the size of large grapes, and everything in between.  They droop from the twig variously in the shapes of cones, pears, ovals as if pulled by gravity, ovals as if to defy gravity, flattened like a doughnut, or merely round.  They are symmetrical or lopsided, ribbed, or blocky.  Long stems or short stems, clinging to branches or hanging at the ends of drooping twigs.  The trees are willowy or stubby and short jointed, a few feet tall to tens of feet tall.  The smallest ones give us dwarfing rootstocks on which to grow miniature trees.  The bark varies nearly as much as the fruit in color and form as does the outline and growing habits of the tree, from a single spire 2 feet in diameter to spreading branches which may even grow downward, instead of horizontal, let alone upward.  They provide us with pleasant shade and deep intriguing orchards that have lured and moved poets, lovers, scientists and children.

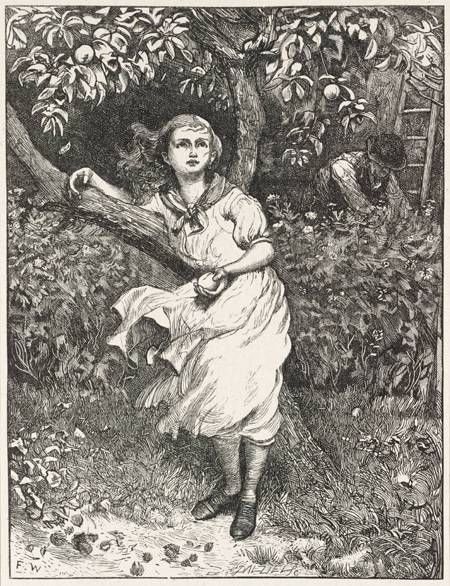
Yes, the Apple.  It represents wholesomeness and good things in American culture, a symbolism which is not arbitrary, but which has grown naturally out of it’s virtues.  One could go on cataloging the Apple’s traits and virtues but that could only suggest the possibility of the poetry of the apple, a poetry that we can feel, but which our attempts to express must be mostly inadequate.  We may be better satisfied to hint at the romance of apples rather than to attempt outright description.  Flowery and detailed renditions will likely fail to impress and we had better stick to tracing the subtle, sublime edges-- delicately suggesting the outline of a feeling and leaving the imagination to fill in the rest or to just wonder.  Still, spreading trees hanging with fruit or dressed in spring blossoms,  dappled light, tantalizing memories of juicy crunching flesh, washes of vibrant flavor, juice flowing from presses and scents of all kinds stir the feelings and can move one to communicate with our limited symbols so that others might see the beauty and value we have witnessed. Autumn Days, engraved by the Brothers Dalziel published 1882 by Frederick Walker 1840-1875 The Apple, guided by man’s hand for millennia into ever more varied form and function is at once servant and king, a humble savant, dripping with abundant beauty, inspiration, pleasure and utility in return for so little!  We chop it’s branches and it grows the more.  We throw filth and waste on its roots and it bears forth a miracle of abundance; each dropping fruit bursting with sugar and juice, a miracle in its own beautiful and practical package.


Apples survive in their variety only with our thoughts and our actions.  We either live a culture of meaningful food, or lose it.  Thousands upon thousands of varieties of apples are already lost forever and we lose more every week to the bulldozer, to neglect, to age, or with the passing away of the only person who remembered the name of that old tree by the woodshed, or even cared.  But the bulldozer, the physical neglect, and the fact that we die are not the real enemies of the apple , it is more that we have stopped cohabiting with the apple.  What was once like a spouse, a lover, a child, a sibling, a grandparent, a friend, with which we lived intimately and relied upon, is now reduced to a commodity.  The apple will not thrive without our love and respect, but will instead be reduced to prostitution, it's production banned to the industrial farm, painted in bright colors and put on the shelves where we can buy her in an attempt to find the love we’ve lost.

photo by Peter Howe

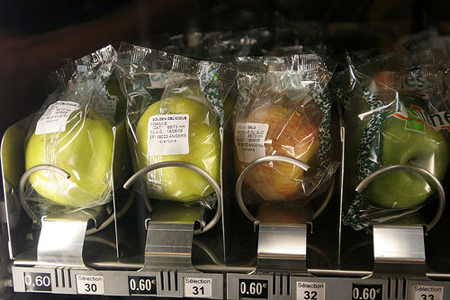
The apple has fed us and made our lives better for eons, and it is a tragedy that we have all met with so many poor specimens, and even more so that poor apples have simply become the norm.  If apples do not improve, we are at risk of losing our faith in them, as some already have.  But the truth is that when properly selected, grown and handled, the apple is awesome.  If you think you don’t like apples so much, I don’t blame you given what is usually available for sale, but maybe you haven’t met the right one at the right time.

Photo by RasksoS

An apple renaissance is afoot and promises to make available to us more and much better apples.  Don’t wait for them to come to you.  Seek out new and interesting apples.  Engage in the simple act of talking about them with friends and strangers.  Support the farmer taking a chance on growing small lumpy apples that taste amazing.  If the apples at the store are no good, don’t buy them, but demand better.   Best of all, Improve your life, improve the lives of others, take care of those who come after you, plant an apple tree.

I stoled this picture off the innernets... sorry.

Posted on August 18, 2013 and filed under Food and Drink Making, Food Trees Fruits and Nuts.

The Mega Canner: Every serious canner needs one

Canning season is upon us.  If you ever find yourself having a long day of boiling batch after batch of jars on the stove top, you need a bigger canner! smiley underdog firing up the bark boiler full of shredded tan oak bark for tanning goat skins.

Many years ago in my blacksmithing obsessed days I was often found cruising metal scrap yards for treasures and steel stock.  Every time I’ve moved, my accumulated scrap pile has come with me.  One day I spotted a large stainless pool filter, complete with lid, at my favorite scrap yard.  I knew right away that I wanted if for boiling large batches of oak bark for tanning hides.  I figured it could be useful for other stuff too, so I bought it for a mere 20.00.

It took me many years and quite a few moves with the scrap metal pile in tow to finally get my bark boiler running.  I put a scrounged copper pipe and a gate valve on the bottom outlet and fired it up to boil some bark.  My suspicions that it was awesome were definitely confirmed.  An open fire can be used directly under it which saves a lot of propane, and when cooking is completed, the liquor can be drained off from the bottom.  Using the bark boiler is a huge improvement on boiling batch after batch of shredded bark on the stove top.

The bottom of the Mega Canner.  The elbow fitting is bronze, the pipe is copper and the gate valve is bronze.  The gate valve eventually failed, but i don’t think it had anything to do with inappropriate use.

I had the boiler running for a year or so before it ever occurred to me that I could use it for canning food.  I needed to pasteurize some fermented grape juice in the bottles and they wouldn’t fit into a canning kettle.  So, I busted out the bark boiler. Amazingly, 19 champagne bottles can fit in the bottom layer, with room for another layer above that!  The experiment went well, so the bark boiler donned its second hat, that of Mega Canner.

Pasteurizing grape juice

Tomato canning can be a big production around here.   We shoot for about 100 pints a year and they come off the plants in large batches.  Half the day in the kitchen blanching, peeling and packing into jars and then all those suckers still have to be water-bathed.  Try this scenario on for size (I’m sure a lot of you have) Fit as many jars as you can in the kettle, boil the kettle for 45 minutes or more, turn off, allow to cool somewhat, remove jars, allow the water to cool a bit, add new jars, bring back to a boil, and repeat it all over and over again while dragging your timer around the property trying to get other stuff done.  It’s often hot and the kitchen gets steamed out.  The Mega Canner can fit hours and hours worth of water-bath canning into one firing that doesn’t take much longer than canning one kettle of jars on the stove top. The Mega Canner has room for a helluvalotta jars holmes!  If it can fit 38 champagne bottles, imagine how many quarts or pints it can hold.  I don't know.  I've never come close to filling it up and I'm too lazy to bust out cases of jars to find out.

One days canning.  There are over 50 pints here.  That represents many batches in a stove top canner.

The Mega Canner/Bark Boiler could also be used for distillation with some very slight modification and to boil all manner of large batches of stuff.  It started its life as a pool filter.  Stainless pool filters are fairly common, but most are pretty small in size.  This is the largest one I’ve ever seen, though it seems likely that they are made even larger.  The walls are very thick, much thicker than a pot or a barrel.  It has a perforated grate on the bottom which is mighty handy for both bark boiling and canning.  It does still smell of chlorine a little.  Steel is minutely porous and chlorine has probably bonded with the surface of the metal.  I may at some point sand off a thin layer of metal from the inside to get rid of that.  for now though, no food contacts the water or metal.  There are various grades of stainless steel, and the metal composition of this one is unknown, so it may not even be food grade.  Finally, the drain pipe and plumbing on the bottom are bronze and copper which are not food safe either. There are two drains on the bottom.  One drain is plumbed already and the other has a bronze cap.

It even came with this handy perforated grate!

To use with a fire, I set the legs on 3 bricks or rocks to raise it a little.  This system could use some improvement for efficiencies’ sake. A rocket stove furnace which it could be set over would be pretty ideal.  A rocket stove would be cleaner (complete combustion), faster, and would use much less wood.  That project however will have to wait for a permanent outdoor kitchen to be built.  When its dry out and high fire season, which is almost half the year, a propane burner from an old smoker substitutes for the fire.  The burner is super high output, so you can really crank it up for fast heating.  A piece of aluminum flashing is used as a windscreen with the propane burner, which really helps keep the heat under the pot.

Propane burner and windscreen for dry weather use.  Don't worry, I'm not going to fire it up in that dry grass!

I have seen quite a few other pool filters at scrap yards and such since then.  Most are pretty small, but some are large enough to be useful as canners.  Craigslist has a lot of them, but most of them are not very useful shapes.  A lot of them have lids that are as tall as the bottoms, which is fairly useless for canning.  Some look as though they are made from other materials, and even the stainless ones are often painted, but persistence in hunting pays off and there must be more similar to mine out there.

I think a better option for a lot of people might be a full sized stainless steel beer keg.  The larger size known as a half barrel is 16 x 23 inches, though it has less actual inside working room than that due to the standing rims on the top and bottom.  Cut the top off, have some handles welded on, and you’ve got a good sized food grade stainless cooker that you can also use for scalding turkeys and chickens for plucking, and for who knows what else.  I would add a heavy stainless or aluminum screen or perforated plate for canning as the jars must always stay off of the bottom of the canner.  Stainless drums are fairly common too.  They come in sizes from 15 gallons and up,  A 30 gallon drum with copper/bronze plumbing for a bottom drain and a lid ought to make a fine large boiler that would fit almost any amount of stuff a body desired to boil at one time.  Of course stainless isn't essential if you aren't cooking food or tanbark directly in it, so there must be other items out there of aluminum or steel that could suffice.  The bottom drain is also not essential, just convenient... unless you want to put it on a stove top, then it's actually inconvenient.

not every one cans large amounts of jars at once since that requires large amounts of food to be canned, and I only do so a couple times a year.  But, if you are into homesteading, or are serious about subsistence activities, you probably will sooner or later.  I’ve often had two stove top canning kettles running at one time, and that helps with the time and hassle when processing a lot of jars, but Mega Canner still kicks major butt on that scenario if there are a lot of jars to boil, such as when processing a bumper tomato crop or canning juice.  If anyone wants to take my bark boiling mega canner away, they’ll have to pry it from my cold dead fingers.  If you do a lot of canning, or plan to in the future, put large metal containers on your radar!  That is probably my best canning tip besides don't can stuff you don't eat.

I harvested over 50 pounds from one Polish Linguisa plant in that season.  It isn't the best tasting tomato out of the lot though.  My favorite is the little yellow ones in front, Orange Banana.  They have a sweet fruity flavor.  The reds tend to have more a tomatoey flavor, which is good for some uses, so I grow both.

Posted on July 20, 2013 and filed under Food and Drink Making, Uncategorized.

Hide Glue part I : Meet Hide Glue

about hide glue headerThis is the first part in what will hopefully be a two or three, or even four, part series on Hide Glue.  Very few people are making really high quality glue these days.  The plan is to provide a solid introduction with practical steps to making high quality glue, and to cover the basics of using it.  Following posts will have to wait for time, energy and pictures.  You can subscribe on the right to receive notification of new posts via email so you don't have to stay glued to your screen.

Collagen Glue, aka hide glue or animal glue, is made from the parts of animal bodies which contain large amounts of collagen.  Collagen is abundant in animal bodies, but certain parts are highly concentrated sources of relatively pure collagen of the type useful for making glue.  Commonly used glue materials are skin (including fish skins), sinews (the fibers which connect bones to muscles) and antler.  Fish air bladders have been used to make an especially strong glue.  The common practice of using skin scraps to make glue has given us the term Hide Glue, which is generally used for all collagen glues regardless of the raw material used to produce it.  The materials are cooked long and slow to dissolve the collagen, followed by drying the resulting gelatin which is then reconstituted in water as needed.

There is a misunderstanding that glue is made from hooves.  The horny outer covering of hooves does not contain useful collagen.  Hoof sheaths and horns are more physiologically related to hair and are primarily composed of keratin which does not go into solution when cooked in water.  The bones and ligaments inside the hoof do contain a lot of collagen and have commonly been used to by glue boilers to make glue and neatsfoot oil.  Making glue from the whole lower legs is not generally a good choice for home producers due to contamination from fats and other unwanted substances.  If you try to make glue from the hoof sheath itself, it won't work.  I know, I’ve tried.  Instead, I recommend extracting some of the glue making parts from the lower legs and feet and then using just those, but that is for another post.

The gelatin used in cooking (jello, etc...) is just a refined grade of collagen glue.  Meat stocks that gel on cooling, also do so as a result of dissolved collagen.  Gelatin is a very nourishing food.

Hide glue has many traditional uses.  It is a very strong glue when well made and properly used.  Hide glue always remains water soluble, meaning that the joint will come apart if the glue reaches a certain moisture content.  As one can imagine, the water solubility of hide glue is often inconvenient and is one of the major factors in it’s replacement by modern moisture resistant glues.  Although sometimes inconvenient, hide glue’s water solubility can be an advantage.  It is still used in making fine musical instruments and by a few forward looking fine furniture makers, because the item can be completely disassembled with the application of steam to the joints.  Easy disassembly allows for repair without incurring any damage to the wooden parts.  Imagine the crime of repairing some amazing 300 year old violin using a permanent glue.  It would be severely damaged a hundred years from now when it requires repair again.

This old desk top is hide glued.  It was left in the rain and delaminated readily when wet.  If wetted evenly whole sheets could be pulled off of it.

Aside from water solubility, another factor in the replacement of hide glue by modern glues is the inconvenient fact that it must be used while hot.  Glueing up projects may be stressful even with modern glues, requiring speed and accuracy, but working with hide glue is much more exacting.  The glue should remain liquid until the joint is set and clamped, which means that it must remain warm.  Unfortunately, it is not advisable to apply hide glue to hot wood in order to keep the glue warm, because it can cause the wood to absorb all the glue.

The final blow to hide glue in modern industry and arts is that it does not store well in it’s wet state.  The old glue must be thrown out frequently and a new batch prepared.  Rotting glue loses it’s strength rapidly.  Attempts to make preserved hide glues that could be stored in a ready to use state have been made, but results have never been quite up to the traditional product.  So, real hide glue is just not convenient.

One other place where hide glue has retained some use is in the arts for sizing and gilding with gold leaf.

In paleotechnology, hide glue has many uses and is the strongest glue that we can make.  It is used to hold sinew wrappings in place, to size over paintings, as a binder for paint pigments, to glue materials together, and to glue the sinew backings or other coverings onto bows.  Making fine quality hide glue is well within the means of homescale technologists like you!

RECAP

Making: Hide glue is produced from Collagen sources in animal bodies such as skin, sinew and antler.  Accomplished by dissolution into hot water by long cooking, followed by drying the resulting gelatin and then reconstitution in water.

Advantages of hide glue:  accessible (you can make it!), easy to make, strong, easy repairs, nontoxic.

Disadvantages of hide glue:  must be used rapidly before it cools and jells, joints come apart when moist, glue rots easily once made.

Posted on July 20, 2013 and filed under adhesives, Animal Parts.

Leak on Leek: Pee is the key to massive alliums


Everyone wants to grow big leeks.  I get hits on my blog all the time from people searching the web for how to grow big leeks.  Choosing the right variety, appropriate timing, a favorable climate and consistent water all help, but no leek will grow large without fairly heavy fertilizing over a long season.  Manures work great, as do many other fertilizing stuffs, but just about the easiest and most effective fertilizer for leeks leaks out of your body every day... that's right, pee.  This short post is an excuse to talk about using urine as a fertilizer, while focusing some traffic off the web for the commonly searched topics of growing large leeks and the occasional search for using urine to grow leeks and onions.  Much of this has been said already in some form in other posts, but I have a lot of new readers and it never hurts to reiterate things that are awesome.  I will be expanding on using urine as a fertilizer soon, with an emphasis on calming fears and busting myths.

There is increasing talk about soil mineral depletion and closing nutrient loops by returning human waste to the land instead of flushing it all away.  We are essentially mining our soils of minerals and dumping them into the water, or putting them where they will do little good.  Bad Human!  You might be surprised to learn that the vast majority of nutrients useful to plants leave your body dissolved in urine.  Most people are still hung up on trying to figure out composting toilets, which is a great idea and worth pursuing, but if we just divert our urine in the meantime, most of the problem of cycling the nutrients we consume is easily solved.  Not only that, but compared to using human feces as a fertilizer, urine is much, much safer.  Most recommendations are to apply it fresh with no treatment.  I don't accept that it is 100% safe, but the fact is that I used it for years, and lets just say that I didn’t lose any sleep over the health risks.

The only reason I don't still use urine in my gardens is that I sell some of my produce at markets, and I don't think the bureaucracies that be, nor all customers would be stoked about that, besides which I can't be sure enough of the safety outside my family to expose quantities of other people without their knowledge.  I’ll be looking at ways to “launder” urine before the nutrients make it back into the garden, like maybe applying to pasture and composting the resulting growth, or feeding the hay to stock to make manure.

You can do your own research on the subject and decide for yourself how safe it is.  Ecosan, a group dedicated to making the shift from a waste paradigm to a resource paradigm regarding the stuff that leaves our bodies, is the best resource I've found out there and has a fair amount literature available.  I use it either fresh or stale, it doesn't matter that much as far as the plant is concerned, though it may if you want to be picky about health concerns, but that will have to wait for another post.  I don't eat very many leeks during the summer.  They are mostly a winter and spring food supply.  So, I tend to fertilize infrequently  the further into winter we are, and not at all toward spring when the seem to do fine with the stores of nutrients available in the soil.  Not that it matters a lot, since I always cook them and only apply fertilizer to the soil surface... not that I wouldn't eat them raw, just sayin'.

Ok, we're totally using the hold-it-out-in-front-of-you-to-make-your-fish-look-bigger trick, but that's still a pretty big damned leek! And the leeks were planted unusually late that season. Tonia, grower of corn, burner of lime and instigator of ch…

Ok, we're totally using the hold-it-out-in-front-of-you-to-make-your-fish-look-bigger trick, but that's still a pretty big damned leek! And the leeks were planted unusually late that season. Tonia, grower of corn, burner of lime and instigator of chickens, has left Turkeysong to pursue her passion for the sensible union of architecture, communities and building. She will be sorely missed. Wish her luck!

All three of the major plant nutrients N (nitrogen) P (phosphorus) and K (potassium) are well represented in urine with the balance leaning toward nitrogen.  That's good, because the whole onion family, and especially leeks, are heavy nitrogen feeders.  Also represented are an abundance of minerals, and all of it in a soluble form ready for plants to use.  Finding out that pee is an awesome fertilizer was like the best gardening discovery ever!  Suddenly I was completely free from worrying about scrounging for nitrogen sources, and most other fertilizers.

Since urine is soluble, it is somewhat more transient in the soil than some other more solid fertilizers.  It doesn’t just flush right out of the soil though, as you might guess if you were to do some reading on soluble fertilizers.  If your soil is alive with a decent organic matter content, all kinds of little guys in the dirt are going to snatch up those resources and start cycling them.  If you way over water, it is possible to flush nutrients below the root zone, but it's not likely under most conditions.  It still does need to be applied at intervals as the plants grow though.  Growing large leeks takes a long season and using a soluble fertilizer is a great way to continue to pump those suckers up even if you’ve already added a bunch of stuff to the soil at the beginning of the season.

I don’t actually mix anything into my soil under normal circumstances.  I throw some compost on top after planting as a sort of thin mulch, and also sometimes manure, seaweed and coffee grounds or whatever is around, but normally I rely on urine for most of the feeding ( or I did, now that is replaced by chicken manure tea which I have to say is much less convenient).  If you could apply pee very diluted frequently, that would probably be pretty ideal, but I apply it at variable intervals when it’s convenient.  Again, in a living soil, those nutrients will be cycled for a while.  There is no need to over-think the thing or be on a obsessive schedule.

Leeks and onions can take a lot of nitrogen.  I use a dilution that is between one third to one fifth pee, the balance being water, for general garden use.  You can gauge by the health and growth of the leeks how much to use.  Using urine on leeks is pretty fool proof, but it is a very strong fertilizer, and as such it is of course possible to over apply it.  A watering can full of this mix can be put on a bed about 4 x 15 every few weeks, with some longer intervals here and there.  You will have to get a feel for it over time.  I’m not sure I’ve ever burned an onion or leek plant using too much fertilizer, and rarely see burning in other plants at this dilution, as long as it’s not applied too frequently, or in too great a quantity.

It is good to water in immediately.  After all, if it’s not in the root zone, then the plants can’t use it.  Apply enough water to flush the nutrients into the soil a distance.  I’ll typically water for a while to get the soil wet, apply the fertilizer and then water a little more to flush it down into the soil and dilute it further.  Early in the season, I dump it all over the plants, but as they get above about pinkie thickness, I start applying to the soil surface only, in order to prevent getting the stuff in the leaf bases where it’s hard to clean out. It helps a lot to have a well balanced long necked watering can like those made by Haws.


I own three quality galvanized watering cans and this one is overall the best hands down.  One of the best investments I ever made.  The water flow (high!) to fineness of drops/stream is amazing and it probably won't rust out in my lifetim…

I own three quality galvanized watering cans and this one is overall the best hands down.  One of the best investments I ever made.  The water flow (high!) to fineness of drops/stream is amazing and it probably won't rust out in my lifetime.  This is the largest one and I wouldn't want it any smaller.  I use it more than anything for applying liquid manure, compost tea and urine to plants and beds, but they are also great for watering seedlings because the spray is so gentle.  Sometime I'll review all of my cans and explain why this one rocks so hard.  Expensive, but this is a serious quality gardening tool.  Buy here and I'll get a small commission.


Urine, it's seriously the best kept gardening secret ever.  Just try it, you'll be amazed at the results!    Y    Y    Y    Y  Y    Y    Y

Related posts: How to Grow HUGE ASS LEEKS! and Leeks, Size Does Matter!

Posted on July 14, 2013 and filed under Uncategorized.

Marinated Artichoke Hearts From Scratch

artichoke header
artichoke header

I already posted about marinated artichoke hearts briefly in my !ARTICHOKES! post a few years ago, but I thought I would revisit it in a slightly expanded and more visual post.  I did a little surfing to see if I should bother writing this up (as in maybe it has been covered well enough already), and was surprised to find that almost everyone recommends using canned or frozen artichoke hearts!  We live in a society besieged by convenience.  If you have the will and inspiration to make your own artichoke hearts, consider doing it from scratch all the way, and even planting some artichoke plants to have them to can in the future.  It's not that bad to process a pile of artichokes.  Just make sure your knife is the right kind and plenty sharp, put on a movie or a book on tape, or just sit in the shade and let your mind wander.  The more you do this kind of stuff, the better you become at it, and that includes that part of falling into a different rhythm of work where time slips away and is measured against quality of life instead of against money.  I wanted to write a detailed post that walks us visually through the steps.  I hope that this post might attract adequate search engine hits to compete with the average short, un-detailed recipes out there using frozen and canned hearts, but it's difficult to compete with sites like ehow which rank high in the engines even though they are often fairly useless. If you find this article really useful, please leave a comment.  Posts with lots of comments rank higher in search engine results which should make it easier to for others to find in the future. Home canned artichoke hearts from scratch are really good and if you have a lot of artichokes, they are hard to beat as a way to preserve what you can’t eat fresh.  I like artichokes a lot but there were way more artichokes than I could keep up with eating fresh this year, so I canned almost 40 half pints.  Your marinated artichoke hearts will be excellent, better than store bought.

Marinated artichoke hearts from the store are often fibrous and may even contain a few weak spines.  That does not have to be the case.  When you can your own, and you can make the highest quality hearts, picked young and peeled down to only the tender parts.  The artichokes must be picked at the right stage though and processed carefully by hand.  the artichokes sold in stores are very mature having hard stems with the scales and base well developed.  The choke, or hairs, in the center of store artichoke are also well developed.  For marinated hearts, you need to pick them when the choke is still soft and edible.  Picking cues may vary by variety, but I look at several things....

Size:  Size is relative, because the artichokes become smaller as the season progresses, but it is still a good que as long as you keep in mind that each time you pick, the average size will probably be a little smaller than the last time.

Scales:  As the artichoke matures, the scales at the base can open out more rather than laying tightly against the bud.

Stem:  the stem on a less mature choke is still somewhat rubbery.  Bend the stems on several immature and mature specimens to get a feel.  Pick chokes that have still rubbery necks.  They don’t have to be super rubbery, but I find that the stiffer they get, the more likely it is that the choke is too far developed.  This is my best que for when to pick, but I use all three parameters listed above.

this photo shows three artichokes at different stages of maturity.  The on the left is suitable for canning.  Note the level of development of the hairs, or choke, in all three.
this photo shows three artichokes at different stages of maturity. The on the left is suitable for canning. Note the level of development of the hairs, or choke, in all three.

Varieties:  I don’t recommend green globe at all.  It is the most common artichoke variety, but it has always grown poorly for me being disease susceptible, small and unproductive.  If you are canning any number of hearts, you need big, healthy plants that can produce a lot of artichokes.  I grow two varieties.  I like Imperial star, and an unknown variety of a small spiny type that I have grown for many years.  Both are large healthy, vigorous plants that produce lots of buds, 30 and up per plant.  For now, I can recommend the widely available Imperial star with some confidence.

Numbers:  If you want to can a significant amount of artichoke hearts, I’d recommend growing 3 or more of these vigorous types, so you can harvest enough buds at one time to make it worth your effort.   5 plants is working well for me, but I’d prefer a few more and will probably be expanding soon since they are low maintenance.

Paring the buds down:  The following photos illustrate how to prepare the buds.  Use a small sharp knife.

Slip the knife under one of the lowest bud scales so that you are cutting through a few of the lowest scales when you cut the base off.
artichoke 1
artichoke 1
Peel off most of the scales.  There is a knack to snapping them cleanly off downward with a pushing motion.  I can’t describe it well, but ideally you would like to snap the bud scales off without leaving any part of them behind.  The first couple o…
Peel off most of the scales. There is a knack to snapping them cleanly off downward with a pushing motion. I can’t describe it well, but ideally you would like to snap the bud scales off without leaving any part of them behind. The first couple of rows will not usually snap off so clean, but you can trim off any bits of the scale bases that are left behind. Snap off scales until there is very little if any green color showing on the remaining scales. You can pull off a scale and bite it to get an idea of whether you are down to the tender scales. You should be able to bite the scales off easily at least half way up the scale, if not a little more. it may not be super tender, but still easily bitten through with the teeth.
Pare out the tip of the bud with a sharp knife tip.  this step may not be absolutely necessary, but it just takes a few seconds and insure that there will be no spines or fibrous parts left and it wastes hardly anything.
Pare out the tip of the bud with a sharp knife tip. this step may not be absolutely necessary, but it just takes a few seconds and insure that there will be no spines or fibrous parts left and it wastes hardly anything.
I like to cut the hearts into sixths or eighths so that they are already in good bite sized pieces straight out of the jar.  Don’t cut them until you are ready to proceed with adding the vinegar and stuff to the jar, and work quickly to minimize oxi…
I like to cut the hearts into sixths or eighths so that they are already in good bite sized pieces straight out of the jar. Don’t cut them until you are ready to proceed with adding the vinegar and stuff to the jar, and work quickly to minimize oxidation.
Pack the hearts into jars about 1/2 inch from the tops. I like to use 1/2 pint jars. Anything larger is likely to not be used up in one or two meal. Add white wine or rice vinegar to fill about half of the jar. Fill the rest of the jar with water to…

Pack the hearts into jars about 1/2 inch from the tops. I like to use 1/2 pint jars. Anything larger is likely to not be used up in one or two meal. Add white wine or rice vinegar to fill about half of the jar. Fill the rest of the jar with water to about 1/2 inch from the top. sprinkle in some Oregano and add a small piece of bay leaf to each. 1/4 teaspoon of salt, some fresh ground black pepper and a teaspoon or two of olive oil floated on top complete the marinade. I’ve found this simple marinade to be excellent, complementing the subtle flavor of the artichoke hearts rather than overpowering it with heavier herb or garlic flavors.

Wipe the jar rims and place the lids on, screwing them down moderately tight.  Place the jars in cold water, completely covered and bring to a boil.  Once boiling, boil hard for 50 minutes.  50 minutes is longer than they need to cook for canning safety purposes, but they still need to cook that full amount of time to become adequately tender.

Once the time is up.  Turn off the heat for a couple of minutes until boiling completely subsides.  Remove the jars and allow to cool before removing the rings, rinsing the jars and labeling.  If giving the jars away as gifts, don’t be afraid to ask for your jars back.  They are expensive, and most people won’t use them again, which is just wasteful.

Mostly I use my artichoke hearts in salads.  They are also good on pizza, to nibble on with bread, cheese and olives, topping a simple pasta, minced in tapenade or other spreads or just eaten straight out of the jar.  The marinade makes a pretty good salad dressing too.  Making your own marinated artichoke hearts is not only tasty and indicative of good wholesome values, but it will also enrich your life and make you sexier and more popular; so what are you waiting for!

Happy canning, and happy eating!

towerng artichoke hearts

The Most Common Bark Tanning Mistakes: Pitfalls to avoid on your way to beautiful leather!

grain header

grain header

By Steven Edholm

UPDATED SEPTEMBER 2020

Hey!, the Buckeye Gathering barktanning class is coming up and I have bark on the brain.  This article is going to be awesome.  A lot of people ask my advice on barktanning and I see the same mistakes made over and over again.  I can help, because I’ve made them all too (and still sometimes do), so I know whereof I speak!  So listen up fledgling barktanners, because we can save you a lot of frustration, heartbreak and WTF moments.

PROCRASTINATION:  This is a common mistake in tanning in general.  I still do it all the time, unfortunately, but I shouldn’t and you shouldn’t either.  Bark tanning is more forgiving than some other types of tanning because some of the solutions the hide is put into can be preservative to a degree, but that shouldn’t be used as an excuse to keep putting off what needs doing.  The solutions used in liming and tanning are not foolproof and will not preserve the skin indefinitely, so try not to use their limited preservative power as an excuse for procrastination.  good luck with that.

procrastination can lead to problems such as this damaged grain, which has lifted from the main body of the skin.

procrastination can lead to problems such as this damaged grain, which has lifted from the main body of the skin.

USING CRAPPY HIDES:  For some reason, people tend to pick some crappy hide for bark tanning.  I don’t like to start any tanning project with a crappy hide.  It’s too much work to waste on something which can’t be better than the material which you are starting with in the first place.  If crappy hide is all you have and you want to experiment with bark tanning, working with just a small piece of it can be a great learning experience.  And in general, don't be afraid to "round out" scrappy skins, meaning trim off the rough stuff and tag ends, before tanning.  I also don't think it's a great idea to start with a really large hide.  Actually, squirrels are great and make a great starter project, and really nice leather.

This skin is scored. Try to start with decent skins, or use parts of them to experiment on rather than tanning the whole thing.

This skin is scored. Try to start with decent skins, or use parts of them to experiment on rather than tanning the whole thing.

LEAVING IN THE LIME OR BUCKING SOLUTION TOO LONG:  Leaving the skin in lime or a bucking solution too long is not uncommon.  The skin can stay in for quite some time and come out okay, or even great, but try to leave it in for a reason other than blatant procrastination!  This issue is dependent somewhat on the strength of the solution too.  Although long liming is sometimes used intentionally, and sometimes in weak lime, generally you want to keep the liquor strength up. In the beginning, you should probably process the skin when the hair slips out easily.  Overly long liming can weaken the skin and damage the grain. Keep the strength up by stirring or adding more lime as necessary. If using wood ashes, make sure they are strong enough to swell the hide well and again, keep the strength up as necessary. In either case, if the hide is not swelling a lot within a few days or the hair doesn’t start to slip within a week, bump up the strength. It is okay to use extra lime since only so much will dissolve into the solution at once. If there is extra lime, more dissolves when you stir it if the solution becomes “used up” by the skin.

NOT DE-LIMING ADEQUATELY:  Re-scraping to push out lime and dissolved tissue is called scudding. Rinse the skin thoroughly many times, and scrape over it on both sides between soakings. Use the tool backwards on the grain side so you don’t damage the grain and make sure there are no nicks in the blade. In other words, hold the tool just like you are going to flesh the skin, then turn it around so the underside of the edge just drags across the skin. This is also a better way to de-hair skins, see the video linked below. You will see a lot of dissolved crap, white lime and yellow gunk come out of the pores. You don’t have to scud the hair side every time, but do it once or twice until there is not much coming out. When the water coming out is mostly clear, and the skin has “fallen” back into it’s un-swelled, flaccid and floppy state, it is de-limed.  You can finish with bating or drenching (soaking in poop or fermenting bran respectively, but those are another story), or at least rinse with a splash of vinegar in water before tanning begins.

USING WEAK ASS MATERIALS:  It takes quite a bit of tannin to finish out a full skin from a medium sized animal, let alone something large like an elk or cattle skin.  There are tannins everywhere.  They are in most plants to some degree.  Finding sources rich enough, or abundant enough, to make good tanning solutions and tan hides safely and thoroughly is less common.  Don't use, old dead bark or dead leaves.  You need leaves or bark that have been gathered when fresh, and have not been rained on for a season, or worse.  Keep your eyes out for freshly fallen trees and get the bark when you can, storing it for later.  It is possible to use weak-ass materials, but it is not practical, nor very fun, and the results are likely to be disappointing.  In most cases, older trees have bark that contains more tannins than younger trees.  Stripping saplings may work, but be prepared to do a lot of it!  When you get that good material, chip it up fine.  Boiling large pieces is another common mistake.  You just can't tan a skin with some big chunks of bark floating in a tub... not gonna happen.

Gather fresh material whenever possible. Old dry bark that has sat out in the rain is poor in tannins. Be opportunistic as in this case, gathering bark from a tree that fell across the road.

Gather fresh material whenever possible. Old dry bark that has sat out in the rain is poor in tannins. Be opportunistic as in this case, gathering bark from a tree that fell across the road.

MAKING THE SOLUTION TOO WEAK:  This problem can happen for numerous reasons, some already covered above.  Many people are so terrified of case hardening, that they start with a very weak solution and then finally end up with a solution that isn’t even strong enough for a good start.  The skin can be put into a pretty strong tea in the beginning without adverse effects.  It can also be brought up in strength very quickly once the skin is partly tanned.  For instance, you can go from weak to medium over the course of a day and have the skin in a fairly strong solution on day two.  Case hardening is not common and in my experience must require a very strong solution.  I just threw some squirrel skins into a full strength tanoak tea and they came out soft and beautiful. (full strength meaning shredded tanoak bark just covered with water and boiled for hours, like the picture below.). Apparently, some materials cause case hardening more than others, but it is not hard to avoid and most err too much in the weak direction. It is only a problem in the beginning of tanning, so keep ramping up the strength as suggested next…

This bark liquor is awesome. It's hard to produce good rich liquor like this from tannin poor materials. It is possible in some cases, but be prepared to work at it by using the same water on two batches of material.

This bark liquor is awesome. It's hard to produce good rich liquor like this from tannin poor materials. It is possible in some cases, but be prepared to work at it by using the same water on two batches of material.

NOT STRENGTHENING THE SOLUTION ENOUGH DURING TANNING:  This is the most common, and possibly the worst, mistake.  The skin will use up tannins very quickly in the beginning!  No really. A well prepared skin will take up most, if not all of the tannin in any starter solution in just one day, or possible less, especially if it is agitated as it should be. The process slows somewhat until the skin is struck all the way through.  If the tan is agitated, the skin will tan quickly and the solution can be strengthened frequently to keep the process moving along.  The typical beginner scenario is to put the skin in a very weak solution to start with, and then just leave it there until the solution becomes completely used up, which can take only a day, or even just a few hours in some cases. But even putting it into a strong solution, it is remarkable how fast the tannin can be used up, requiring strengthening.

If the solution is not strong enough, the skin will begin to suffer damage and loss of substance.  Add concentrate frequently.  If you are using materials which are poor in tannins, you will need a lot of the stuff to tan a skin (a good reason to do smaller experiments before moving on to full skins).  Don’t judge by how much material you are using, judge by the strength of the solution and how the color is progressing through the skin.  Judging solution strengths is difficult and has to be learned by experience for the specific materials you are using, but I also just don't think it matters that much unless it's too weak, which will be fairly obvious with a little experience.  From what I hear from other people, and judging by my own experience, I’d say that a rule for beginners might be that if you think it’s strong enough, it could probably be a lot stronger.  After the color reaches the center of the skin, most of the tannin binding sites are taken, and the fiber takes up the solution only very slowly. But it can still benefit the leather to remain in strong solution to soak up as much as it can.

Every time you check on a skin or on a liquor, pick it up in your hand and look at it. Pour it out and look at it too. While different materials will look different, you need to start getting some idea of how to judge strength and this is the most accessible way.

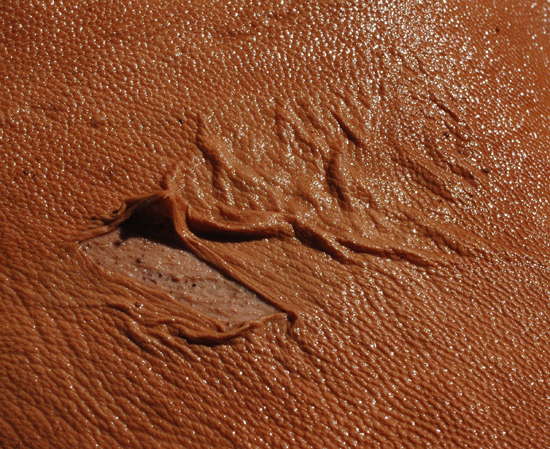
This is one weak ass tanning solution, because the new well prepared skin has slurped up all the tannin overnight. There is basically nothing left in here to tan the skins. Color does not always equate to available tannin. Add concentrate frequently…

This is one weak ass tanning solution, because the new well prepared skin has slurped up all the tannin overnight. There is basically nothing left in here to tan the skins. Color does not always equate to available tannin. Add concentrate frequently in the beginning.

NOT MOVING THE SKIN ENOUGH:  This mistake is probably most important to avoid during the tanning phase, but it applies to any process where there is a liquor involved.  Any time a skin is put into a solution, stretch it over and move it around to be sure it is soaked all the way up in all areas.  Several visits may be necessary if the skin is not well soaked up to begin with.  Air bubbles trapped in the skin can also be an issue.   Many beginners stuff skins into a bucket or vat and just leave them.  The skins must have solutions contact all surfaces to be processed evenly.  It’s okay to fold or wad hides into containers, but there should be some room, and the skins should be stirred several times a day for the first few days and then occasionally until finished.  If not, they will not tan evenly and can finish uneven in color.  A good strategy for small containers is to remove the skins and put them back folded differently each time.  Just do it often enough. It is better to use large enough containers though. A bucket is hard to tan a deer skin well in, but an 15 or more gallon tub is pretty good.

This skin was dropped in the solution overnight and left there. Think what would happen if the skin was never moved? There are exceptions, but generally speaking, more the skin is moved, the more evenly and quickly it will tan.

This skin was dropped in the solution overnight and left there. Think what would happen if the skin was never moved? There are exceptions, but generally speaking, more the skin is moved, the more evenly and quickly it will tan.

DRYING THE SKIN WITHOUT OILING:  It is best to oil or fat-liquor the skin once it is tanned, and before it is dried out.  Otherwise the grain may be brittle and liable to crack on sharp bending.  Oil functions somewhat like moisture does in living skin, providing lubrication for the fibers and engendering suppleness. A skin dried without oil, or with just a little on the grain side should still be like leather. It should not be stiff or crunchy and the grain should not be very brittle to the point where it cracks when bent just a little bit. If that is the case, the skin was damaged in tanning, likely from long soaks in weak tanning solution.

Oiling the skin re-lubricates the fiber and makes for a more wear and bend resistant grain.

Oiling the skin re-lubricates the fiber and makes for a more wear and bend resistant grain.

OVER OILING: I’ve seen many hides that are over oiled. You don’t want the hide filled with oil. You want the fibers coated lightly with oil in most cases. It can be challenging to get oil into thick heavy skins, but just do your best and worry more about over oiling than under oiling.

BAD WATER:  Water with iron can make skins dark and brittle.  If you have to use high iron water, try to keep the time the skins are in the water to a minimum.   If you have very hard water,or especially if it contains iron, consider collecting rainwater for liming and bark solutions.  It is difficult to collect enough rain water for rinsing processes however.

Whelp, there are of course a lot more details to fill in but, given a basic working knowledge of tanning, that's actually most of the wisdom you need to know to successfully barktan skins!  If you know someone dabbling in barktanning, send them this post.  I rely mostly on word of mouth to get people here.  Please let me hear your experiences and experiments in the comments section.

Posted on April 13, 2013 and filed under Animal Parts, Tanning.

Apple Breeding part 3: From seed to fruit

lady-williams-seeds.jpg

lady williams seeds header In part one I went over some reasons why I think home breeders have a decent chance of producing some good apples. Part two covered pollinating flowers to make intentional crosses of two different parent apples. In this section, I'll discuss growing the seeds into seedlings, and options for growing those out until they fruit. COLLECTING AND STORING SEEDS:  I like to collect the seed when the apple is ripe for eating, but they seem to be mature before that.  I’ve stored the seeds in little plastic baggies in the refrigerator, but they sometimes mold.  Storing the seeds in slightly damp, but not wet, sand would probably be better, or you can just plant them... PLANTING SEEDS:  I’ve had pretty good luck with germination when planting in February after storage in the refrigerator.  At least some apples are supposed to require stratification, which means that they need to undergo so many hours of low temperatures before they will sprout.  I’ve had fresh seeds sprout without chilling, so I think fresh seeds just sprout easier.  My approach in the next years will probably be to store early seeds in the fridge in damp sand, and then plant them with the latest ripening seeds in February.  If planted outdoors, the seeds should chill enough as long as your climate is not subtropical.  If it is subtropical, then you should select seed parents carefully as many apples do not do well in warm climates with no chill.  The Apples and Oranges blog is a good resource for growing apples in low chill areas. It is possible to dry the seeds before sprouting them, but I don't see any reason to do so when they can be kept in refrigeration, or even in the ground over winter. Plant the seeds in pots or flats, or outdoors in the ground, at about 1/2 inch deep.  Don’t allow them to dry out, but don’t over water either!  Over watering can lead to rotten seeds and fungal attacks.  One strategy I sometimes use is to put a growing mix in the pot or flat, followed by 3/8 inch of sand, followed seeds and finally covering the seeds with 1/2 inch of sand.  This method surrounds the seeds with clean aerated sand to sprout in, which minimizes bacterial and fungal attacks, while still providing them with nutritious flat mix just below.  My germination rate has been pretty mediocre, but since it doesn't take long to produce a couple hundred seeds, maybe that's Ok. apple seeds in flat After they grow a few leaves, you can move the seedlings outdoors into the soil, or into bigger pots.

These are on the young side for transplanting.

These seedlings are a little too big for transplanting.  They would have done Ok regardless if I had taken better care of them, or put them into pots instead of in the ground.  Better to transplant before they are crowded and when they only have a few leaves.

GROWING OUT:  Markus Kobelt at Lubera nursery gave me some tips on apple breeding.  He says that growing the seedlings as tall as possible the first year shortens the time to fruiting.  Seedlings are in what is called a juvenile stage.  Growing the seedlings fast and tall pushes them out of the juvenile stage and into sexual maturity more quickly.  My first batch of seedlings were left in flats for too long, and then planted in an out-of-the-way bed where they received poor care, resulting in some pretty stunted plants.  The seeds that I planted straight into the ground in a garden bed did quite a bit better.  Wherever you plant them, take good care of them with regular feeding and water.  Under ideal conditions you might end up with 4 to 5 foot stems.  Check out Markus Kobelt's cool video series on all stages of apple breeding! It is probably best to cull some of the seedlings, but I'm not entirely sure what to look for in culling, so I'm not culling many of mine.  Nigel Deacon, in breeding for red flesh, selects for red pigmentation in the leaves as well as for vigour.  I'd like to talk to a breeding expert about culling.  At this point, I'm kind of cull shy. TO GRAFT OR NOT TO GRAFT?:  Is that the question?  I think a more relevant question is where to graft, because it is better to graft the seedling stems onto something else.  Putting the scions onto a dwarfing rootstock that encourages early fruiting, or onto a mature fruiting age tree will give you fruit sooner than growing the seedlings out until they begin to bear fruit, in some cases much sooner.  If you don’t know how to graft, or don’t have a mature tree to graft on to, you might want to just plant the seedlings and wait.  However, if you don’t know how to graft, now is a great time to learn!  If you come up with the best apple seedling ever, someone has to propagate it by grafting, so it might as well be you.  There are plenty of apple grafting resources on the internet and I’ll probably add my own before too long.

A basket of red fleshed apple seedling scions headed for dwarfing rootstocks.

GRAFTING OPTIONS:  For the average home breeder, grafting onto a mature bearing tree may be the best option.  It requires a lot less room than growing each seedling on it’s own rootstock, way less care, and it’s cheap.  Rootstocks in small quantities will usually cost you $2.50 and up.  Larger quantities, usually 50 or more can get down into the $1.25 and up range, especially if you buy B grade stocks which have crooked stems.  Still, even at $1.25 each it adds up pretty fast, especially after shipping and handling.  Then you need room for all those stocks.  I’m planning to plant mine at 12 inches apart in rows about 6 feet apart.  All that sounds daunting, but there is one good reason to grow the plants on their own stocks and that is disease.  Apples are host to many diseases, but the concern here is with virus.  Seeds don't carry virus from the parent, so the seedlings are virus free.  Virus are transmitted to a scion that is grafted to an infected tree though.  Most of us don’t have trees that we know are virus free, so keeping your seedlings fresh and unburdened by virus is somewhat compelling. The other side of the coin is that most apple varieties are minimally affected by the common Apple Mosaic Virus and there are millions upon millions of infected trees living and bearing fruit.  It is quite possible also that your mature apple tree is not infected anyway.  It is possible to rid a variety of virus by a process of heating, but that process is probably not accessible to the homescale grower (though I'm curious, maybe it's not that hard!).  If having to graft onto individual rootstocks will keep you from experimenting, I'd say don’t let it.  Go ahead and graft them onto whatever you have. ROOTSTOCKS:  Very dwarfing rootstocks that keep trees under 10 feet will also induce fruiting early in the life of the tree.  I’ve mostly used bud-9, and this year some Geneva-11.  Geneva-11 has weak roots, so I’m not sure I like it yet, but the Bud-9 seems nice enough and it’s cheaper. M-9 is probably also a fine choice, though Bud-9 is generally thought to be an improvement on M-9.  Charts and descriptions of the various apple roostocks can be found online.  Just remember that you want one that induces early fruiting and makes for a small tree.  Trees can be planted close together in rows, I don’t think there is a reason to plant them further than 18 inches apart, and I’m probably going to use 12 inches to save space.  A trellis is necessary to support the trees since the dwarfing rootstocks lack adequate roots to anchor the trees in high winds.  Markus Kobelt says to let them grow without pruning to induce early fruiting.  I guess I’m going to follow his advice.  Don’t think of these dwarf rows as permanent.  They are more like shrubs for testing your new varieties.  If you get something good, it can be grafted and reproduced.  The original dwarf test plant is not important.  I have however saved the original seedlings which are planted about 6 inches apart in rows 12 inches apart... man is that going to be a mess in a few years!  I just wanted to save them at least temporarily in case of graft failures, gophers, accidents, etc...  Ideally I'd like to keep them all with enough space for them to grow and fruit later on, but that is not practical considering the resources I'm working with. I've gotten bulk rootstocks from both Copenhaven and Willamette Nursery, and have been happy with both companies.  Again, ask about B grade stocks to save some money.

Shaded nursery bed of seedlings on bud 9 and Geneva 11 dwarfing stocks.  If all goes well these will be ready for permanent planting in rows on a trellis by next winter/spring.  Note that I grafted the scions long.  Not sure that was a good idea yet, but I suppose I'll find out...

GRAFTING ONTO LARGER TREES:  Most grafting onto larger trees is done by a method called top working, wherein large branches are cut off, the cut is split open, and a couple of scions are wedged into the split.  That is a fast way to change a tree to another variety, but it is also crude and likely to introduce rot and disease into the heart of the branch.  Furthermore, it allows for very few varieties to be grafted onto the tree.  In Frame working by contrast, you work onto smaller wood, usually under an inch.  I avoid working into larger wood whenever possible.  If you use frame working, you are keeping the existing frame work of the tree, which has some advantages. I hope to blog about frame working sometime, and I’ll leave most of that discussion till then but, in the meantime, if you are working onto a larger tree, use scions with 8 to 15 buds.  Use cleft grafts if the branch is larger than the scion, and whip and tongue grafts if they are the same and you have a grafting skill level to do so.  I like to paint the longer scions completely with a thin coat of grafting wax to seal and prevent drying.  Other people use parafilm as a wrap to prevent desiccation of the scion.  See the Frankentree post for grafting photos.  On a large tree you can fit upwards of 200 different grafts, although if we follow Markus Kobelt advice to let the scion grow, that could get pretty messy, so leave plenty of room for each variety.  Albert Etter used frameworking to house the 500 or so varieties he collected for testing, as well as to fruit out and test the new varieties he was breeding. About 3 years ago I grafted 4 different open pollinated Wickson apple seedling scions onto various trees of mine.  They have grown great, but have yet to fruit out at all.  This season there is still no sign of blossoms at all on any of them.  So, this is a proposition that takes some time. My new seedlings have now been grafted onto dwarfing Bud-9 rootstocks and are beginning to grow in a nursery bed for planting out into a longer term growing site next winter/spring.  I grafted them rather long as that is my default any more, and it seems to work well as long as the graft is sealed.  Markus Kobelt says to graft the top of the seedling as it is less juvenile than the bottom.  In most cases I grafted most of the seedling stem, but then my seedlings were mostly well under 3 feet.  I also put 4 open pollinated red fleshed seedlings onto some larger trees to grow out for comparison.  I know I said not to use open pollinated seeds, but I just couldn't throw the cute little things in the ditch!  Who knows what's hiding in those genes. The grafted trees will be planted in rows at least 5 feet apart, probably 6' feet on 12" to 18" inch centers and allowed to grow without pruning.  Allowing them to grow without pruning is supposed to bring them out of the juvenile stage, so that's what I'm gonna do.  A trellis is necessary for support as these rootstocks are weak growers with small roots.  I hope for some fruit to examine and taste in about 3 to 5 years, but evaluating any that are decent enough to continue testing will be a much more lengthly proposition.  By that time I will have considerable investment in these plants, but the potential rewards are very exciting for an applehead like me.  Applehead, that may be the title of my next post... I'm also gearing up to make more crosses this season.  The list of interesting varieties is long but most, if not all, will be red flesh crosses.  I haven't made a complete count lately, but I have over 200 varieties on trial that I can use as parents.  I'm just hoping I can curb my enthusiasm enough to keep my time investment low, since that is part of the plan.  A lot of people growing a few seedlings promotes diversity and keeps power in the hands of the people who eat the fruit.  a few people growing a lot of apples has it's advantages to be sure, but to think that we will always be well served by such a system is naive because power is the primary currency of life, and consolidation opens the door for monopolization.  Breeding new apple varieties may not be the most important activity in reclaiming control of our food supply, but if it is a subject of interest to a person, it's one pretty neat way to keep our food closer to home and to live dynamically with a source of our sustenance. If I can come up with one apple that is really worthy of propagation, something that will make people happy, I'll be stoked.  That would probably be the most useful thing the Turkeysong project ever produces.  But the really great part that will make it all worth it, is that I get to name that apple whatever I want!  I've already spent way too much time dreaming up and listing prospective names.  So many names, so few apples... If anyone does come up with a good seedling apple, I just found this website which aims to promote seedling apples!  How cool is that... Seedlingapples on wordpress

Apple Breeding part 2: Doin' it anyway.

applebreeding header steven The awesome Photos of pollinating in this post are by tonia Chi

In part one I laid out some ideas and a little history toward the end of convincing you to try breeding new apples.  Here I present the nitty gritty of pollinating the flowers and in Part 2 I'll cover growing the seeds out.  Neither process is very difficult, nor particularly time consuming.  Later on, grafting of the trees and growing them to fruition may require some skills that most people don't have, but those can be learned elsewhere, or may be covered in future posts here, so don't let that stop you.

SELECTING PARENTS:  You can of course just plant some apple seeds from any apple you like, but the real fun is in selecting two apples that have something awesome about them and assisting them to procreate.  Albert Etter’s success was based on extensive trials using over 500 varieties to find apples with the most promising characteristics to use as parents.  In his own words....

"In selecting apples one has a double index to go by: he selects his mother variety and his "mother-apple" to take the seeds from. The immediate success, of my work may be attributed to the foundation I laid, and my ability to select the individual fruits that will develop superior progeny." 

“I am sending a collection of some of my new varieties of apples... The whole problem is now as simple as breeding up a herd of good dairy cows when one has a good herd to begin with. “

“Some people wonder where it is possible to make any very decided Improvement over existing varieties of apples now in general cultivation. To my notion we have really only begun to improve the apple systematically. I admit I have opportunity to study first hand that which gives me an insight denied to others who think and work along other lines. Comparison is a wonderful means of discerning faint lines. By this simple mental process what seems as opaque as milk reveals lines of similarity undreamed of before."

Something else that interested Etter was taking chances on more primitive apples like crabs, and the red fleshed Surprise apple, to breed in exciting new characteristics.  I would imagine that such a project can take a greater number of generations than working with more refined apples, but in his case it paid off.  Fortunately, we can build on Etter's work.  Wickson, which is probably destined to be Albert's most famous creation, is a case in point.  It is a very small, and incredibly sweet, apple having unique and intense flavor coming from somewhere other than just the standard large varieties.  Though newer apples seem to be diversifying, much of what has been done in breeding so far has been to try to improve on what people already considered to be a good, or archetypal, apple.  We aren't in great need of any more of those!  Apples with intense and diverse flavors, better textures over a greater range of seasons is something we can definitely use.  I would say that instead of crossing apples that are just good, or even really good, cross apples that are really interesting.  Not only will that give us interesting apples, but it just increases the chances that we will come up with something worth growing.  If you come up with the most bubblegum flavoredest apple ever, then we'll all just have to grow it until a better bubblegum flavored apple comes along.  If you're trying to grow a better Golden Delicious or Macintosh style apple, you're probably not going to compete with the many already released by all the advanced breeding programs out there.

My efforts select primarily for flavor and internal color, with keeping ability nudging in as an important third priority, though I'm also interested in better early apples.  All of my crosses so far have been using Albert Etter’s red fleshed apple varieties as one parent, combined with other apples that I think are awesome.

I would encourage you to work only with apples that really inspire you.  If you don't have any, consider collecting some.  At the simplest, just take two awesome apples and rub their stuff together.  It doesn't have to be that simple though.  Some traits are dominant and some recessive.  Dominant traits will express in the offspring even if only one parent carries that gene.  Recessive traits will only express if both parents carry the gene.  It only gets more complicated from there and I've yet to find and assimilate much of that information.  The truth is that  I'm dragging you with me down the path of apple breeding with very little of that knowledge.  The only thing I know at this point is that the red flesh gene is dominant.  So, I cross red fleshed apples in both directions.  I also read something indicating that a columnar habit of the tree is dominant (columnar trees have few if any side branches, having instead single upright trunks).   If anyone out there knows more about dominant and recessive apple traits, post something in the comments, or email me.  I've looked for a simple list, or short treatment of dominant and recessive traits, but have yet to find one.  For more on plant breeding on an amateur scale, including basic genetics, see Carol Deppe's cool book Breed Your Own Vegetable Varieties.  (Carole Deppe is awesome and a huge cut above the average garden writer.  Her book The Resilient Gardener is a must read for homesteader types.)

One thing you can pay attention to is who the parents of apples you like are and consider going back to one of those or using other apples which are the offspring of those same parents.  If the parents are known, that information is not usually difficult to find.  For instance, at least two promising apples here have Northern Spy as a parent.  While I'm likely to use the offspring, I also may end up going back to the source.

(I edited out a section of the original post here misinforming people that patent law extends to pollen.  I'm not totally clear on this, but I don't think it does in the case of vegetatively propagated plants)

A few apples, known as triploids, have sterile pollen.  Although triploids cannot be used as pollen doners, they can be fertilized with pollen from another tree, so look up the apples you want to work with and if one is a sterile triploid, use it as the seed parent and not as the pollen parent.  I can't find a full list of triploids anywhere, but if you google the name of the apple with the word triploid, you'll probably find out if it's a triploid easily enough... that's what I do anyway.  Triploids are uncommon, but some popular and excellent apples are included in the group, such as: Orleans Reinette, Roxbury Russet, Ashmead’s Kernel, Suntan, Belle de Boskoop, Arkansas Black, Baldwin, Bramley’s Seedling, , Gravenstein, Holstein, Jonagold, Jupiter, Lady, McIntosh, Reinette du Canada, Rhode Island Greening, Ribston Pippin, Spigold, Stayman Winesap, Suntan and King of Tompkin's County.  I've had some trouble pollinating triploids and getting their seeds to grow, but will continue trying.

NIGEL DEACON:  I first learned how to pollinate apples from Nigel Deacon in the U.K.  Who is also attempting to breed red fleshed apples.  He cuts off the calyx with a special pair of scissors removing the pollen bearing anthers in one snip.  Nigel’s method is very fast, but the apples grown after pollinating are sometimes slightly deformed due to the missing calyx.  I prefer to remove the petals and anthers carefully with fingers and scissors.  My method is slower, but leaves the apple to grow normally.  I’m not sure one way or the other is really better, but I tend to subscribe to the idea that healthy plants make the best seed doners. Genetic coding is one factor in what a plant turns out like, but it is not set in stone and good genes are better expressed in healthy plants from healthy parents, so I err on the side of caution, even though if I had to guess I'd say it's probably not very relevant.

Nigel's special emasculating scissors.  Read about nigels methods on his extensive website.

BALLOON STAGE:  Apple blossoms are pollinated when they are in what is called the balloon stage.  At this stage, the female parts of the flower in the unopened petals are already receptive to pollen, but insects can’t reach them to pollinate.  At the same time, the Anthers, or boy parts, on which the pollen is produced, have not made any pollen yet, so the flower cannot have self pollinated either.  If you open the virginal flower, you can pollinate it manually and remove all the anthers before they bear pollen, thus assuring that it is your chosen parent which fertilizes the flower.  The balloon stage is when the flowers are blown up like a balloon and look like they will open in the next day or so.  Look at a few clusters of flowers.  If some are open and others are not, the best ones to open and pollinate are the ones with the biggest balloons.  You can often pollinate over a couple of weeks, but it is best to pollinate earlier than to wait till later when there are only a few blossoms left.

Balloon stage.

COLLECTING POLLEN:  Pollen must be collected a day or two before pollinating so that the anthers have time to dry and release the pollen.  Open some flowers of the variety that you want to collect pollen from by carefully pinching away the petals.  The pollen is made by the Anthers, which grow around the edge of the flower on little stalks.  The 5 delicate center stalks are the female parts, which you can ignore for now unless you are pollinating the same flower that you gather pollen from.  In fact, it is easier to just clip them off with the anthers when you are gathering pollen than it is to try avoiding them.  The anthers will not have any pollen on them yet, but they will finish making pollen as they dry.  Trim off the anthers into a small container with a sharp pointed pair of small scissors.  Nigel Deacon uses a hair comb to comb them off.  The anthers produce a small amount of pollen only.  You don’t need a lot to do just a few pollinations, but collect anthers from at least 6 to 10 flowers or so.  Allow the anthers to dry in a warm room until the pollen powders out.  Nigel says the pollen can be stored for up to 3 years if kept very dessicated, but I haven’t tried that yet.

collecting pollen.  The anthers are snipped off and allowed to dry in a small jar.

POLLINATING:  The best time to pollinate is on a warm sunny day in mid morning to early afternoon, but just do it whenever you can make time.  To pollinate a flower, pinch off any in the cluster that are open and any that are small leaving just 2 or 3 large balloon stage buds.

Carefully pinch or trim away the petals of the remaining flower buds.

    Carefully pinch away the flower petals.

With sharp pointed scissors, trim away the anthers around the outside edge of the flower, leaving the 5 center female "pistles" untouched.  There are 5 five pistles coming out of the center of the flower and each one communicates to what will be one of the five seed cells in the mature apple.  If any of these is damaged, use a different flower if you can.  You may still get some seeds, but the tree is more likely to reject a partially fertilized apple.

Carefully trim away all the Anthers along the outside edge of the rim, leaving the five "girl parts" in the center.

Once all the anthers are removed, apply some pollen to the female parts.  Use a piece of grass blade, a fine tiny paint brush, a glass rod, or even the tip of a finger.  There is a slightly sticky tip on the pistle called the Stigma.  Pollen will stick to the stigma easily.

Pollen on grass blade ready to do it.

Pollinating the Stigma. Very little pollen is required, and no foreplay.

You can see when the flower is well pollinated, because the stigma will have pollen stuck to it, but your odds will probably increase if you visit the flower again for a second pollinating the next day.  I don't usually do so and seem to do Ok, although it is not uncommon to find only a few seeds in an apple.  Triploids can be troublesome, so it might be well to visit them again.  I've had poor luck with pollinating Suntan, a triploid, and even poorer luck growing out the few seeds I've managed to get from it.

Pollen on stigma

BTW:  I have a TERRIBLE time remembering the names of all these flower parts for some reason and am constantly looking them up again.  It doesn't really matter though, just remember: girl parts in the middle need pollinating and boy parts on the outside need removing.

BAGGING V.S. NOT BAGGING:  To be as sure as possible that the flowers you've chosen to pollinate are not pollinated with undesirable pollen by bees and other insects, you would have to bag the blossoms, or cage the tree.  I choose not to.  My rationale is that since the petals are removed, there is little to draw insects to the flower.  Also, by that time I've already pollinated the blossom and the stigma should be crusted with pollen of my choosing.  At worst a few of the seeds in the apple might receive some random pollen, but it seems unlikely, therefore I choose not to bother bagging because it would just increase the effort spent for a small degree of insurance.

LABELING:  Always label!  tie a marker around the flower cluster so you can identify it later, because all the other apples will look just the same.  Only the genetic information in the seeds is different, while the fruit will look the same as the other fruit on the tree.  I use neon colored plastic strips so they are easy to find later.  Be sure to write what the crosses are on the tag with permanent marker.  When the apples get to be about half grown, I actually write on the apple with a permanent marker so that if it is knocked off  by birds or wind, I can identify that it is an apple which I pollinated, and which cross it is.  The convention for writing crosses is Seed Parent X Pollen Parent.

A Newton Pippin pollinated with Albert Etter's Grenadine®

The next post will be on growing out the seedlings, and someday I'll write about something besides apples again!  promise...

Apple Breeding Part 1: Everyone knows you can't do it, right?

applebreeding header

"...growers, shippers and retailers, who have been giving us food that looks great but often isn’t for over a century, have their own agendas."

When writing about apples and their propagation in both technical and popular literature, it seems almost compulsory for the author to assure us that if we grow an apple from a seed, that it will not be the same as the apple that we took the seed from.  We are usually further assured that the chances of  actually growing a toothsome new apple variety bursting with juice and flavor from those little seeds are extremely dismal.  One might imagine, and sometimes we are even subject to descriptions of, the small, hard, green, sour, bitter and worm eaten result of such an experiment!  In the past, I have been discouraged from making the experiment of growing apples from seed by this common knowledge, especially upon learning that modern apple breeding programs cull thousands of seedlings to find one gem worthy of propagation.

I will concede that under many circumstances growing apples from seed may not be the wisest course of action or the most likely to yield the greatest reward.  Who wants to invest in the time and patience required for the growing of an entire tree only to find the secret unlocked from it’s genes by our roll of the dice is some hard green apples for the kids to throw at each other?   Not I, not ye, not no one!  I only know of one apple that is supposed to grow fairly true to seed and that is the Snow Apple A.K.A. Fameuse.  Otherwise the chances are that a seedling will be at least somewhat unlike it’s parents.  But then, this genetic variability is what really makes the apple able to give us the great variety that it offers.

The genes of the apple hold many secrets.  Combinations and mutations of it’s genes have already yielded a remarkable array of attributes.  Resistance can be found to many diseases.  Northern Spy is nearly immune to the wooly aphid and breeders used it to bring us resistant rootstocks.  Some trees do well in wet soil, some in drier soil.  Some require a long chill in winter while others can bask in tropic heat with virtually no chill and not only grow and fruit, but also produce a delicious apple.  And we all know that apples come in a great variety of shapes, colors, and sizes.  Some will ripen in early summer and others can hang on the tree well into winter and even into the spring.  Some must be eaten post haste before they begin to deteriorate while still others have kept in a common cellar for two years.  What most do not know however, is the flavor potential locked within the gene pool of the apple.

Apples encompass an amazingly diverse range of flavors which most people never even have a chance to explore.  banana, mango, fennel, berry, pineapple, citrus, cherry, rose, vanilla, spices, pear, wine, “apple”, jolly rancher’s candy and more all lurk in those genes.  Probably the greatest variety of flavors contained within any fruit.  While most post Red Delicious era consumers are obsessed only with the crunch of an apple, it is primarily the world of flavors contained in domestic Apples which drive the obsession of amateur grower/collectors like me and which makes the roll of the dice when growing out apples from seed seem not only worth the risk, but downright compelling!

I am no expert in the matter, but I have come to think that we have a better chance of ending up with something good from that seed than we are often told.  Maybe the idea that seedling apples are a one-in-a-gajillion chance is one of those ideas that is repeated by one author after another becoming common knowledge with a life of it’s own... just minus the knowledge part.  If the idea interests you, please read on, because previous to the turn of the century the vast majority of apples the world over were grown from random seeds, and we can do better than that.

In the 19th century, Johnny Appleseed (John Chapman) ran around planting apple seeds.  Being a folk hero, he gets all the credit, but lots of people planted seedlings and seedling orchards, or collected seeds from fortuitous trees that bore good fruit.  As a result, American Apple diversity absolutely exploded over a relatively short period.  Most of them, even the named and propagated varieties were just not that great when held up against the best apples out there, old and new, but there is also no doubt that many valuable new varieties came into being from this upswelling of apple culture.

Keep in mind, that Apple breeding is a progressive process in which we build on the foundations laid before, so progress in the field should be continual, and our chances of breeding good apples should increase with each generation.  I am all for preserving diversity, but I’m inclined to preserve diversity worth preserving.  I’m sure it’s uncool to say this, but I don’t think it is worth our while to catalogue and preserve every single heirloom plant out there, Apple or otherwise.  It is at once too daunting and too narrow minded.  Gajillions of varieties have already come and gone before us to get us where we are now.  we need a certain amount of diversity to work with in breeding up new stuff, but we just don’t need it all, and some varieties are simply not worth the effort.  The point is really to move forward in a holistic sort of way.

What I am actually more interested in than mindlessly conserving everything that has gone before is increasing, or at least maintaining diversity.  Sadly, the industrial food supply line is antithetical to the idea of diversity.  If we leave it up to them, we will lose any apple that is not what apple breeders, growers and marketers think we want and is easiest to get to us.  Thus would we lose our lovely russets and our lumpy, bumpy and otherwise unfashionable or uncomely, but delicious, apples.  In order to preserve crop diversity in a way that is relevant, we have to live a culture of food in which those plants are important to our lives.  Apples can still use improving and diversification, and I think that the layperson and fruit hobbyists can have a place in that process.

Here is an interesting piece of history.  At the Geneva agricultural research station in 1898 and 1899 an experiment in the growing of new apples from intentional crosses was made.  The experimenters claimed that up until this time, theirs was an altogether novel idea.  The selecting of seeds from good apples was commonly practiced, but hand pollinating the flowers to cross two specific apples was, if we are to believe the authors, nearly unheard of.  The operators grew what by modern breeding standards was a measly 148 seedlings of intentional cross pollinations using 10 different varieties of apples as the parents.  Of those 148 seedlings, 125 survived and at the publication of  their report “An Experiment in Apple Breeding” in 1911,  just 106 of those seedlings had fruited. After which they proclaimed....

“all will be interested it is certain, in knowing how many of the progeny of these crosses seem to the writers to have sufficient value to name or test further.”

Well yeah! way to work the suspense... drum rollllllllllllllllll-  out of the 106 seedlings, 13 varieties were deemed worthy of propagation and naming, those being Clinton, Cortland, Herkimer, Nassau, Onondaga, Otsego, Oswego, Rensselaer, Rockland, Saratoga, Schenectady, Schoharie, Tioga, Westchester,  and 14 deemed worthy of further testing, but not worth naming. Wow!, they must have been stoked! At the time apple breeding was in its infancy and few apples had known parents although one parent was often known, claimed or at least suspected.  The report, is detailed and I’m sure much was learned from the experiment regarding the breeding of apples... but times have indeed changed.

Most of those first apples selected at Geneva in their probably overly generous enthusiasm are basically unknown today, with cortland having notably stood the test of time.  It is encouraging though that the apples they came up with in such a small lot were not just plain bad, but about 1/4 of them considered worth naming or at least considering.  From there out, apple breeding became increasingly complex and the goals ever more narrow.
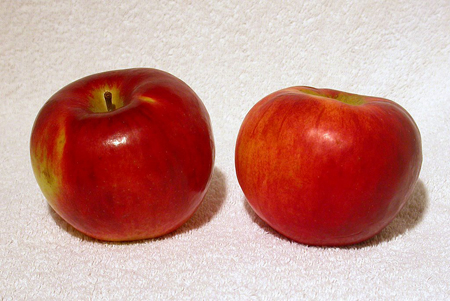
Cortland.  The only apple I know of from the Geneva experiment that has stood the test of time.

The Geneva station remains a full time apple breeding operation using traditional breeding as well as unnatural marriages of bacteria, insects and fungi with apple genes to create GMO apples.  Something I read recently claimed a 1 in 10,000 ratio for seedling selection, meaning that out of 10,000 seedlings only one will be chosen to become a new marketed cultivar. The results of these programs will no doubt be more disease resistant apples that look really “good” on the shelf 6 months after picking. Many of them taste good as well and one can’t really argue with those results.  There is a place for these apples (minus the GMO's in my considerable opinion) and these programs, but the selections are skewed by the intentions of the researchers.

Susan Brown, the head of apple breeding at Geneva breeds to make growers money.  Like most research anymore, these programs are married to industry. While the products are sometimes great, I don’t see the soul of the apple in these efforts.  Some of the most famously flavored apples relished and praised by millions throughout history would never be selected in this paradigm because they don’t look “good” enough or they lack disease resistance.  It pains me to think of all the amazingly flavored apples that must be culled from these programs every year because they don’t meet the very long list of criteria that a modern cultivar has to live up to in order to make the grade in a commercial paradigm. There can be no doubt that out of 10,000 seedlings the one that tastes the most amazing and the one that looks the "best" are not going to be the same apple!  But growers, shippers and retailers, who have been giving us food that looks great but often isn’t for over a century, have their own agendas.  Their criteria are not only flavor, but good looks, storage ability, productivity, and lower labor and chemical inputs.  Oh yeah, and Canadians have been laboring away quietly on a genetically engineered apple which doesn’t brown when it’s cut and is on the fast track to store shelves in the U.S.  Now that's progress!?

So, my objection to modern apple breeding programs is that, while their results may often be very useful to us, their goals are in line with a culture based around supermarket consumers.  What’s wrong with that?  All kinds of things.  First of all, the supermarket consumer paradigm discourages diversity.  Brands are built up as recognizable entities, ideally (but rarely so) with uniform quality.  In a way, that has always been the case, but on a local basis.  These days shippers and marketers cover large areas, global actually, and global diversity is becoming lower as a result.  Another issue is that, cosmetics are a goal that is placed above eating quality.  Sure, breeders are making great strides in growing up apples that look good and taste good, but appearance is and always has been more important.  Thirdly, another important goal is to make money.  Growers have provided us with crappy apples for decades at least, because in the grocery store paradigm they have a dependent and basically captive customer base.  I won’t go on, but let’s just say that, in short, the goals of consumers v.s. producers, packers, retailers, and ultimately the breeders that cater to them, are just not the same, and that we can’t predict the many ways in which that might affect us.  One way though is that the majority of modern cultivars are bred from one of six cultivars deemed desirable by the industry, leading to a lack of diversity and inbreeding as this article points out.

"The author’s analysis of five hundred commercial varieties developed since 1920, mainly Central European and American types, shows that most are descended from Golden Delicious, Cox's Orange Pippin, Jonathan, McIntosh, Red Delicious or James Grieve. This means they have at least one of these apples in their family tree, as a parent, grandparent or great-grandparent.

Six apples as "ancestors" of the 500 examined varieties In 274 species (55% of those investigated) the six "ancestor varieties" are represented twice or more in the family tree, in 140 varieties (28%) at least three times, in 87 varieties (17%) at least 4 times and in 55 varieties (11%) 5 times or more."

H.-J. Bannier, Pomologen-Verein,

I’d like to expand for a moment on the cosmetic issue, because I think it is key.  I love a beautiful apple as much as the next person, but what is a beautiful apple anyway?  In the supermarket consumer paradigm our chances for comparison are limited.  A couple of the apples I’ve seen that I would call most beautiful would be passed over without a thought in a modern breeding program because they are covered with a map of cracked russet (russeting, for those who don’t know is a sort of rough skin layer that covers more or less of some apples).  There is a class of Apples called russets, which are heavily russeted.  While many people might consider them to be less than attractive, I think the vast majority of people in America today have never even tasted one, even though they have been prized in the past as a group for containing varieties of exceptional quality of a specific type.  We perceive our world with expectations and standards that are built up from many sources, judging, accepting and rejecting based on those ideas.  While the uninitiated may view a rough yellow russet apple with suspicion, I think that the russet eating veteran sees these apples very differently indeed.  Besides, heavy russeting is thought by some to contribute to the style of flavor this group of apples possesses.

Egremont Russet Apple

JUST ASK ALBERT! One of my heroes is an apple breeder named Albert Etter.  Albert is the source of some of the apples I’m using in my breeding efforts.  He grew a lot of seedlings but, like the early geneva experiments, he was very encouraged with the results of intentional crosses.  So, without further ado, in the interest of supporting my theory that it is worthwhile for amateurs to try growing a few apples from seeds, here is Albert’s experience as reported in the Pacific Rural Press 101 years ago, roughly contemporary with the Geneva breeding experiments.

”Mr. Etter's Work with Apples. To the Editor: Making good my promise, I am sending you another bunch of my new varieties of apples grown from selected seed. l am not saying much about these varieties yet, because they are too new and untried. Still, it might be as well for those interested to prepare for many new varieties of new and striking characters. I see that the publication of my personal note to you, in your issue of October 7, has aroused an interest in this branch of my plant-breeding work. This work has been under way for many years in a preliminary way, and now all is ready to try out thousands of seedlings. I will not say just how many, because I do not know. But, if facts uncovered as the work progresses justify it, there is ample room and facilities to try out several hundred thousand varieties in the next twenty years. Results obtained so far more than justify my plans for the future, which are to make haste slowly, and sell guaranteed stock under a registered or copyright label."..... “When I had figured out the lines of desirable variation in the dahlia species', as a boy of eighteen, I dreamed of taking up the apple trail. The best horticulturist I knew in that day, an old gray-bearded man, After listening to my dream frankly told me to forget it. The idea of trying to do that which trained men, with all the recorded knowledge of the world on the subject, could not do, or they would have done it long ago!  But I could not forget it.  As I remember, I kept thinking of it until I reached the conclusion that the apple varieties we have at this late day are a harum-scarum lot, to make the most of it, to represent possibly 4000 years of human endeavor. What Is more and worse, as apple breeders, we are making little progress.”  [Mr. Etter's seedlings which we have examined with much interest and have kept on exhibition in our office since their arrival, certainly justify much more than he claims to have attained in his sketch of his preparatory work. They have very striking and novel characters, external and internal. In our judgment he has already attained things which generations of apple-growing have not developed. We are glad to put on record this early record of his work which will some day be looked upon as of great historic interest. — IMs.]

Apple Breeding. —A few seedling apples have already been fruited and there are also 1000 seedling grafts approaching fruiting age on the place and 1000 ungrafted seedlings, which it will take longer to try out. In this connection, Mr. Etter states in a recent letter: "My new apples are looking better every day. One is a Wagener that looks a great deal better than the Wagener and is better flavored, too. The other is a seedling of the Rome Beauty, and is a beauty beside its parent now, and as near as I can judge at this date is going to be considerably better flavored, too. "This apple breeding proposition now looks as though I am on the right idea, and, if such is the case, I will be able to do what I prophesied I was going to do over 20 years ago—produce more and better varieties of apples than the world possesses today. That is a big task, but if I am right, it will be comparatively easy. If I were not right, how could I get seedlings of the Wagener that outclass its parent the first time?" Such success with only a few seedlings indicates that better success will follow work on a more extensive scale, especially as the experience obtained will furnish a guide to future operations. Just here a few words on the origin of apple varieties is not unfitting. Without doubt practically all of our old standard commercial varieties, like the Bellefleur, Spitzenberg and Newtown Pippin, are the result of chance, not design. Seedlings came up by chance, fruited and their merit was recognized. Crossing of varieties for seedlings of merit was hardly done, if at all, and if done was not based on scientific principles. The seedlings of great merit have been carefully preserved and propagated, but the unknown possibilities of new varieties have not been explored. Then also, the joy of discovery of new varieties evidently warped the judgment of many discoverers, and an astounding proportion of the 500 named varieties grown are of as little merit as apples well could be. In fact the average of the seedlings grown purposely on the Ettersburg ranch is fully equal to the average of the 500, and the best of the seedlings is in the class with the best of the 500.  In other words, the new apple breeding is being conducted along careful and systematic lines as compared with the raising of seedlings by chance and then finding which of the seedlings were good by chance also. Of the two methods, theory and results, both indicate that the systematic and scientific one is sure to produce in a short time varieties surpassing those obtained in a haphazard way through many generations.”

Note here several things about Etter’s experiments and comments.

One is that he thought most named varieties were not that great.  My experiments here in growing out and fruiting many varieties confirm this idea.  Apples could stand to be improved.

Secondly, the crossing of apples intentionally using quality parents is much more likely to yield good results.  The explosion of variety in American apples was due to the growing and finding of random seedlings, and that worked tolerably well.  We have a world population of 7 billion now.  If .00001 percent of those grew a dozen apple seeds from selected parents, that would be 840,000 seedlings to pick some great apple varieties from! Exactly what the scientific lines Etter refers to I don't know, but I'm inclined to think that most of his success was due to his strong vision, a willingness to take chances, and taking the effort to collect and compare over 500 varieties before choosing the parents he would work with.

Thirdly, some old learned guy told him not to bother, but he did it anyway!

Albert came up with some excellent apples that are finally attracting the interest of small scale growers and collectors.  The Wickson apple in particular is going viral in the last few years, and deservedly so.
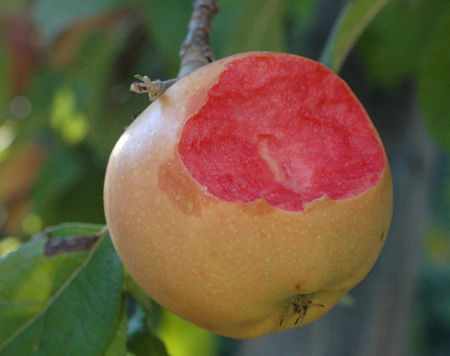
grenadine apple on tree

Having an interest in apple breeding on a small home scale, I have always marveled at the numbers you hear regarding seedling to cultivar ratio like the 1 in 10,000 mentioned above. I'm undaunted though, because when you read older stuff like the Geneva report and Albert Etter’s reports, it is clear that they were not dealing in the thousands to one ratio to produce a fruit very suitable for eating, and they were not uncommonly an improvement on what was already available. That of course was a different time and goals were different, but those goals were more in line with those of homesteaders and foodies of today than most modern breeding efforts.  We already know that increasing commercialization of the industry along with the requisite shift to home economies based on consumerism killed apple diversity which apple-collectors and enthusiasts around the world are now scrambling to save from extinction.  In reading research material on apples from the 19th century, the trend toward commercialization to supply a society moving further and further from the farm is very apparent.  Discussions among growers increasingly placed productivity, looks and keeping abilities above eating quality.  The modern programs can help with that problem and they have by providing apples which will keep well and look good while flavors are steadily improving.  However, taken as a whole, from the breeder to the farmer to the table the industrial food system is a fundamentally flawed one which never has, and never will have, the best interest of consumers and communities in the forefront.  That's not so bad, if we don't neglect our responsibility to maintain diversity, and one way we can do that is to breed new apples building on the work of modern breeders, as well as by using heirloom varieties with special qualities.

And in the meantime, we would do well not to let our apple diversity pass into oblivion.  Stephen Hayes, who is AWESOME, makes the argument that we should not spend our time trying to grow new apples from seed when there are so many heirlooms to be saved from extinction.  But I respectfully disagree.  I think all homesteader types who grow fruit trees should be growing heirlooms, but there is room for experimentation for the geekier among us, and I think we can have our apples and breed them too!  a few apples grown from seed can be grafted onto existing apple trees to bear with very little time investment or, for the more committed, a small growing plot can be kept to grow the new apples out on dwarfing rootstock.
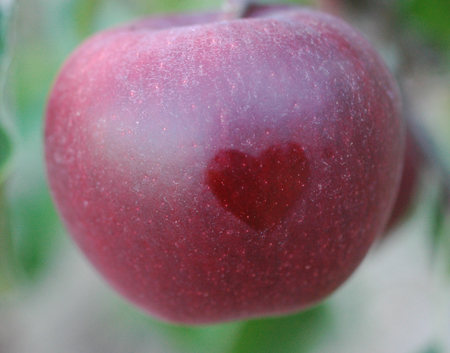
King David.  I great example of good genes waiting to be built upon.

I guess to sum it up, apples could still use improvement, but if we leave apples to the hands of the big outfits with lots of resources they will continue to produce results that cater to the source of those resources.  It is up to no one, except everyone, to preserve apple diversity and move the creation of new and exciting apples forward.  Small scale breeding efforts such as anyone with a tree or two can do in their back yards, are where that battle can be fought.  However, we should not let the apple industry set the standard, because their goals are different.  I guess what I'm saying is that if we don't pursue unmarketable lines of apple improvement, apples will only develop along certain restricted lines.

I would encourage you not to think just in terms of your accomplishments, or lack of in a backyard breeding endeavor, but rather view your efforts as a part of a larger effort.  Any of us may or may not breed apples that are really amazing and worthy of widespread fame and replication.  However, taken together as a whole, we most certainly will!

Two springs ago, I spent maybe two or three hours hand pollinating flowers and produced a couple hundred seeds.  Of those, over 100 sprouted in the greenhouse and were grown out in a small nursery bed.  Last spring I pollinated a few more, and have further plans this spring.  This month, the one year old seedlings were grafted onto dwarfing root stocks and planted in a nursery row.  Next year they go into a trial plot planted close together, and in 4 or more years I may have some results to report.  The total time devoted to this project has not been very great.  In the next installment, I’ll show you how easy it is to pollinate a few apples and grow the seeds out.  I have hopes that I can help nudge over the cliff others equally seduced by the chance to taste brand new apples that have never existed before.  Pollinating a few flowers is the first step.  Yes.... jump.... just do it.

Further reading on Albert Etter and his apples:

Albert Etter's red fleshed apples article by Ram Fishman foremost expert on Etter and his apples.

Informative Greenmantle Nursery page on Albert Etter's apples

Bending Wood: what you need to know

By Steven Edholm Bending wood is a useful, and sometimes necessary skill.  In this post I am going to present a few pieces of information which are key to successful wood bending of any kind, paleo or otherwise.  The most common need for bending wood in paleotechnology is for straightening wildcrafted shafting such as arrow shafts, hand drills and atlatl darts.  There are, however, many other uses for a straight stick.  There are also plenty of uses for curved sticks, such as in the making of hoops and basket rims.  Wood bending can be dropped neatly into the skill set of anyone who can internalize the following ideas.

*Wet (or green) wood bends more easily than dry wood. Living wood requires a degree of flexibility to adapt to it’s environment, so green or wet wood is naturally flexible.  Also, if the wood is heated to assist in bending, the heat will spread more rapidly into moist wood than it will in dry wood.  Some items can be bent while green, or after soaking, without any heating.

Green wood bends easily as demonstrated in these heart shaped apple tree grafts.

*Very fresh green wood can be slightly more brittle than barely “wilted” wood. Usually only slightly, but worth keeping in mind.  Heating very fresh wood will also effectively “wilt” it.

*Hot wood bends more easily than cold wood. Like way easier, no really.

Hot wood, and especially hot, wet wood, bends more easily than cold wood.  Heating wood through thoroughly makes bending WAY EASIER, while moisture lends increased flexibility to the fiber structure.

*Scorched wood is inflexible and liable to crack on bending. Wood is easily scorched during heating over hot coals.  Scorching changes the character of the wood making it at once more hard and more brittle. Ideally the wood should not color at all when heated.

Jay oiling a bow tip stave for heating and bending.  Oil helps spread the heat into the wood more quickly and evenly.  This is a dry bend and care must be taken not to scorch the wood while heating, especially with an item that will undergo great stress.

*Give the wood time to bend (slower is safer). Taking a gradual approach, will give the wood fibers time to stretch and compress around the new shape.  Rapid sudden bending is more likely to result in cracking.

*Wood does not bend evenly around knots or other variations in thickness. Even thickness is crucial to even bends.  Some variations in shape and thickness can be worked around with the hands by applying more or less pressure to certain spots, but generally it is difficult and sometimes impossible to force wood to bend where it doesn't want to.  Also, wood forced to bend around variations in thickness will often revert over time as the item is exposed to variations in temperature and humidity.  Thick areas can often be thinned to allow even bending, but it is best to thin on the inside of the bend so as not to violate the grain on the back where the wood has to stretch.

when bent into a hoop, this branch shows the inconsistencies in thickness by bending unevenly.

With a little thinning in the right place, the hoop almost falls into a round shape on its own.

Willow withes are grown or collected as even tapering rods.  Uniform shoots without great variations in thickness such as knots allows for safer easier bending.

*Thin wood bends more easily than thick wood.

Locust choker blank ready for bending.  This wood bends easily because there is less wood to compress on the inside of the bend than there would be on a thicker piece of wood, while the wood on the outside of the bend undergoes less stretching.

*Violations of grain are risky. a trunk or stick is made up of concentric rings of growth.  Cutting across the rings violates the grain and allows the wood to separate more easily along the growth rings.  when using wild wood, it is ideal to leave the back of the bend at one growth ring, even if it means leaving knots intact and raised above the surface.   Sometimes you have to cut across the growth rings whether you want to or not, just be aware that the wood is stronger if they are intact.

Violations of grain, as here when I a knot is cut through, are risky.  The stick has been reduced to an even thickness which could help it bend more evenly, but it becomes much more likely to break when bent.

*Quarter sawn wood is safer to bend than plain or flat sawn wood. Plain sawn wood will show layers of violated grain on the broad face of the lumber.  These violations of the wood grain are likely to result in de-lamination of the layers when bent.  Quarter sawn wood will show grain lines that are tightly parallel on the broad face and is more likely to hold together under bending stress.
"plain" or "flat" sawn wood is the epitome of violated grain on the flat side, and is often a poor choice for bending.

Quarter sawn wood shown fine parallel grain on the broad face and is much more likely to bend without breaking.

*Thickness of the wood is crucial. Take a 1 x 4 inch board.  If it is bent with the broad face out, it will bend some.  If it is bent on edge, it will barely bend, if at all.  Very thick or deep wood is hard to bend because there is so much wood to compress on the inside of the bend and an equal amount to stretch on the outside of the bend.  A 1/2 x 4 inch board will bend more easily and a 1/4 x 4 inch yet easier.  But neither of the thinner boards will bend easily in the 4 inch dimension because that 4 inches is still a limiting factor.

*Sharp bends are more likely to crack in bending than gradual bends are.

Thinning can make the difference between a successful bend and a blowout.  Note the thinning is done on the inside of the bend in this basketry technique. The wood is compressed on the inside rather than stretched.

*Retain the position while drying and/or cooling. Hold the bend until the piece is cooled (if heated dry) or dry (if steamed, soaked or green).  Heating and moisture provide plasticity for easy bending, so leave the piece bent until plasticity is gone in order to retain the new shape.

steamed and bent chokers tied into place to cool and dry.

Whelp, that is most of what you need to know to bend wood successfully!  We’ve got some cool posts in the chute on stuff like paints, fire and barktanning so stay tuned!

Jays happy bow.

finished chokers

Posted on March 26, 2013 and filed under Uncategorized.

Understanding Forms of Lime

understaning forms of lime header for turkeysong I've just done this short post on understanding the different types of lime and some of their uses on the Paleotechnics blog.  I'm cross posting as I though that it would be of interest to some Turkeysong readers, so hop on over and take a look.

http://paleotechnics.wordpress.com/2013/03/04/understanding-lime-an-introduction-to-forms-of-lime-and-where-they-come-from/

Posted on March 3, 2013 and filed under Uncategorized.

Understanding Lime: an introduction to forms of lime and where they come from

burning shells light

By Steven Edholm

I used to be so confused about lime.  Some limes have more than one name and more than one use which can be difficult to keep sorted out in your head when you have no frame of reference.  Lime is super neat though, and worth understanding.  I’ll attempt here to present the types of lime and their uses in a way that is accessible to people without that frame of reference... or maybe offer an accessible frame of reference for understanding lime.  For more on lime burning and the lime cycle see The lime squad I and Lime Squad II posts on the Turkeysong blog.

First off, lime is cool, and so useful!  Understanding what uses there are for lime can help us understand the three basic forms of lime that we might have access to or make.  The basic use groups are these.

Reactive uses:  use the caustic nature of limes to chemically attack plant and animal substances in food processing and tanning of skins.  In other reactive uses, lime reacts chemically with other elements as in dyeing or to potentiate the drug alkaloids found in Coca leaves and Betel nut.

Plastic uses:  These are used for building, painting and in the arts.  the lime is shaped it how we want it before it dries and hardens.

Agricultural uses:  Used to adjust soil acidity into a range suitable for most plant growth, as well as to provide calcium.

Nutritional uses:  as a calcium supplement.

Filler uses:  Powder used as a filler in the arts for painting and sizing.

Fluxing:  Used to lower the melting temperature of unwanted materials during smelting of metals.

Thats enough basic uses for us to tackle in this short article about understanding the different forms of lime.  In future articles, I may address each use group more specifically to cement that understanding.

Shells in a garden trench prepared for a perennial planting.  More finely ground shells are more useful, as is ground lime stone.  By the way, bones (also seen in the trench) do have quite a bit of calcium, but are not used in the production of lime.  They are more useful as a source of phosphorous.

All lime comes from biological processes!  Wow!  that’s amazing.  All those billions of tons of limestone, chalk, marble, shells, coral and all that stuff was collected from the environment by living organisms.  When the organisms died they left deposits of their calcium rich shells which have changed form over time.  That's humbling.

Lime can exist in three basic forms in a simple “cycle”.  The lime can change from one form to the next in this cycle, and back again.  The basic material is calcium with variations in what is and isn’t attached to it.  We start the cycle at limestone.

Limestone:  Limestone, shells, marble, chalk etc.... there are various forms of limestone, but they are all basically the same material.  One type contains a lot of Magnesium in a similar form and we call that Dolomite lime.  Dolomite's uses are similar to regular limestone.  The limestone form, including shells of all kinds, is Calcium Carbonate.  It is calcium with 3 carbon atoms attached to it.  You know, carbon as in carbon dioxide the famous greenhouse gas.  We are all familiar enough to know what stone and shell are like.  They are hard and tough.  Maybe more important to understand is that they are not really reactive.  We can throw rocks and shells in water and they just sit there.  The take home message is that they are stable so they resist the elements.  Calcium Carbonate is the most natural and common form of lime and the one that other forms of lime will naturally turn into if exposed to the environment.

Quicklime:  If we take our Limestone rocks or shells and heat them up to a red heat, we drive off the carbon completely replacing those three carbon atoms with one oxygen atom to make CaO (calcium oxide) one calcium to one Oxygen.  If you're starting to get nervous about all that chemistry crap, never mind the chemistry.  The important thing to know is that the burned lime is highly unstable and very quick indeed to react to moisture.  Unless stored in a completely sealed container, it will quickly begin to react with the elements of the environment and start the process of turning back into limestone.  Quicklime is so unstable (and unsafe to have around) that it should be slaked processed into the next form) as soon as possible, preferably right after burning.  Quicklime is very light in weight without those carbon molecules which are now floating around in the environment somewhere as greenhouse gasses.  It is also thirsty for water which it can pick up from even the little bit in the atmosphere.  If left out, quicklime will usually absorb moisture from the air, often falling into a pile of fine powder which brings us to our next stage of the cycle...

calcined shells

Hydrated lime and lime putty:  When water is added to the thirsty quicklime, it absorbs H2O molecules rapidly forming Calcium Hydroxide.  One Calcium, two Oxygen and two Hydrogen.  In this process heat is given off and the mixture can even boil violently.  There are a couple forms of calcium hydroxide. If the calcium hydroxide is made in the form of a putty with excess water and stored in this wet state, it is known as lime putty.  Lime putty is the most reactive form of calcium hydroxide,  and the most  stable way to store it.  Lime putty is completely safe from conversion into limestone, as long as it is kept wet with no exposure to the air.  More commonly, Calcium hydroxide is found in the form of a fine powder known as builders lime, type S or hydrated lime.  This powder of lime is often used in tanning and building because it is convenient to store and sell in the dry form, but it is less stable because a portion of it will turn back into the limestone form with exposure to air, which also makes it less reactive.  Don’t worry if you are getting confused already, we are going to drive home this information with practical examples and if you ever use lime, you will begin to form a context for understanding and remembering the different forms.

Slaking quicklime in a barrel.  Note the bubbles, this is actually boiling from the violent reaction when water is made available.

The half of the burnt shell on the left has had moisture added to it ( I peed on it.. no reallu) and has fallen into a powder making hydrated lime.

So there are the three forms of lime, but to close the cycle the last form, calcium hydroxide or hydrated lime, has to turn back into limestone.  This process is simple and we hinted at it already.  When the lime putty is dried it absorbs carbon from the air turning back into limestone.  In the case of hydrated, or powdered lime, the powdered lime is wetted first and then absorbs carbon as it dries, though it doesn’t carbonate as thoroughly as lime putty.  You might be getting the idea that I’m partial to the lime putty form rather than the powdered form, and you’re right, but the powdered form is useful too and often what is available.  More on that later...

BURN *So, we have gone from limestone rocks or shells which we heated up to drive off carbon causing the atmosphere to warm up, killing the planet.

SLAKE *Then we added water to the resulting thirsty quicklime which boiled violently or fell into a fine powder depending on how much water was added.

CURE *Then we let the spreadable, wet lime putty, or hydrated lime paste , dry slowly.  As the lime dries is reabsorbs carbon from the air saving the planet form carbon dioxide poisoning and forming limestone again.

We can use lime at these various stages for different purposes.  There are so many different uses for lime, that we’ll defer most of that discussion for another time, but here are the characteristics of each type of lime discussed in the context of some common uses.

Limestone, Shells, Etc:  (Calcium Carbonate).  Having been stabilized by the absorption of Carbon dioxide, Limestone, shell, marble etc.. are basically stone as we commonly think of it.  The stone can be used for building and paving of course.  Limestone and shell can also be used in agriculture in a powdered form, and while other forms of lime can be applied to the soil as well, it is usually the carbonate form that is used.  Lime increases the ph of soils by buffering soil acidity.  Calcium Carbonate is fairly stable and non-reactive, but acids, like Carbonic acid naturally found in the ground, slowly dissolve the lime in the soil which is washed out by rains.  Lime, usually as ground shell, can also be used as a nutritional supplement and in animal feeds, particularly to provide a source of calcium for chickens ensuring strong eggshells.

Quicklime:  Quicklime is dangerous to handle and store because it is highly reactive.  It heats rapidly and undergoes a violent reaction when water is applied.  This process is called slaking.  If the water is applied slowly and in measured quantity, the quicklime will fall into a very fine powder of hydrated lime.  If it is slaked with more water, the water may boil and spit hot lime putty and caustic alkaline solution all over the place.  It also expands a great deal during slaking, which is sometimes taken advantage of in building.  By using the still expanding quicklime to mortar walls, the lime, sand mixture is forced into all crevices in the stone.  Quicklimes uses  in the arts are actually minimal.  The most common use of quicklime is probably as a flux in smelting metals, though it is often added in the calcuim carbonate form as shells in primitive smelting, which then cook into quicklime in the smelter.

Hydrated lime and lime putty (Calcium Hydroxide): This is the form of lime with the most uses in arts, trades and cooking.  It is chemically reactive, alkaline and caustic.  Being highly alkaline, it modifies or attacks other materials like some proteins and cellulose, making it very useful.  it also reacts with fats to form soluble soaps.  When it dries it turns back into limestone as we said, which is non-reactive except with acids.  Calcium hydroxide can be used to prepare skins for tanning by attacking certain proteins to release the hair from the skin, and dissolving various substances in the skin fiber which can then be removed by washing.  It can also be used to process corn to make it more digestible in a process called nixtamalization (for more on which see this excellent page on corn processing and tortillas).  There are many many uses for Calcium Hydroxide.

  • Type S or Hydrated Lime (aka, builders lime):  is a fine powder form of calcium hydroxide.  Hydrated lime is convenient to store and ship, but is not as reactive as lime putty and makes a relatively poor material for building purposes (even though it is often called builder’s lime which says more about our building ethic than anything else).  It’s convenient form however makes it the most common form of Calcium Hydroxide and it is perfectly fine for some uses like preparing skins and nixtimalizing corn.
  •  Lime Putty:  Lime putty will keep indefinitely if stored with a thin layer of water over it and can even improve over time.  Some lime putty is stored for years to make fine quality limes for exacting uses such as fresco paintings.  It is the most caustic form of Calcium Hydroxide and should be the first choice for building purposes and arts unless a powder is required.  When used for its reactive properties, less is needed than when using hydrated lime.  When used in building, it has better workability, carbonates more thoroughly and consolidates into an all around more durable material upon curing.  Adding water to hydrated lime does not make lime putty, it has to be made during slaking by the addition of a larger amount of water.

Beautiful creamy, chemically reactive quick lime keeps indefinitely under a thin layer of water.

RECAP:

*Lime is neat and useful!

*There are three basic forms of lime with different properties and two basic forms of the most used form, which is Calcium Hydroxide.

Shells and Limestone are fairly inert and stable as they are.

burned shells narrow

*Calcium hydroxide in the form of either powder or putty is caustic and reactive with many substances making it very useful.

*Calcium hydroxide as hydrated lime powder is convenient and fine for many uses, though not as reactive.  It makes a poor building material.

*Calcium hydroxide as lime putty stores indefinitely underwater, has the highest viability and is best for building uses.

Posted on March 3, 2013 and filed under materials.

From Old Nonpareil to Lady Williams: Apple tasting notes, late season 2012/2013

Line of apples Here are my tasting notes from mid to late season.  The Late season extends quite late here with Lady Williams coming in at the end of February.  For notes on earlier apples and my thoughts on tasting and evaluation in general, see the previous post, Red Astrachan to King David.  I did not review every apple I tasted this season.  If something was really good, I'm inclined to mention it, but I feel I need more time to live with many of them before I make any judgement at all.  Young trees don't always produce exemplary fruit, and it can be difficult to judge when to pick and eat apples.  I also reserve the right to change my mind in the future as I encounter more specimens of various apples and maybe find new benchmarks for comparison.  And, as always, what does well here in sunny (often hot) Northern California might not do so well where you live, and vice versa.  This time around I’ve stuck mostly to apples that I did actually really  like, or had a lot of, and passed by many that were just not that interesting.  Some of these fruits are presented in the order of ripening, and some aren't... if that makes any sense... if that doesn't make sense, I guess I'll just give up and get on with it.


Old Nonpareil:  Light, juicy, pleasing, easy to eat.  Old Nonpareil has been very enjoyable eating this year.  Old Nonpareil has a difficult to describe quality that makes me think of some candy that I can’t remember, if it ever even existed in the first place.  It is not particularly intensely flavored or rich though, and is more along the lines of a light refreshing pleasant apple.  Everything seems to come together pretty well for an enjoyable eating experience.  It has something of a citrus quality, but I’m not sure if that's due mostly to the acidity or actual flavor compounds in the citrus realm.  Either way, citrus comes to mind, and not just to my mind.  Like many old apples, it is not crisp or crunchy.  It is alleged to keep well, but we didn’t have enough to try keeping any, especially since they seem to be prone to dropping from the tree before they are ripe.  The branch is in the shade and this is it’s first year bearing significant fruit, so I’m not sure the fruit is exemplary.  For now I’ll look forward to eating them when I can get them, and will probably graft a branch in a sunnier location for further evaluation.

Wickson:  Hella intense flavor in a tiny sugar filled package.  YUM! This tiny apple is named after then famous California Agronomy champion Edward J. Wickson, who had a large impact on agriculture in the state early in the 20th century.    Albert Etter must have recognized great quality in this fruit to name it after his friend and associate, who was an important figure at the time.  Everyone loves a Wickson.  Early in the season it did taste a bit oddly like crab (it is a crab apple after all), but the seafood element faded as the season moved on.  The latest specimens, though cracked from fall rains, were intensely flavored with insane amounts of sugar.  It is difficult to describe the flavor of Wickson, so I won't try, but it really is awesomely, rich and unique.  The only apple I've had that was close to similar in flavor is Crimson Gold, another Etter variety, which is also delicious, though not as intense.  (edit:  tonia says that if an apple could have umami, it would be wickson.  Adam of Adam's Apples blog describes one of the flavor components as malt.  I know what he means, though I wouldn't say that specifically, and haven't been able to characterize that flavor by comparison to anything else.)  I've heard two people this year say that if they could have only one apple it would be Wickson... one was a fruit expert and one was my mom.  During a talk on apples and apple growing, when asked what trees he would recommend planting Tim Bates said with confidence and practically before the question was finished, "WWWICKSON!".  He also added that when interns stay on the Apple Farm, Wickson is always their favorite apple by the time they leave.  Find one to eat, graft a branch, graft a tree, graft two, Wickson rocks!

Karmijn de Sonneville:  Ginormous cox decendent.  I tasted this Cox’s Orange Pippin/Johnathan cross from September through late October at least.  Most of my notes are very positive, though my memory is not equally positive.  The apple is very tart and that characteristic never mellowed much.  Karmijn de Sonneville had very bad watercore on frankentree the first few years, but seems to be getting over it now that the tree is bearing more regularly.  The tree that I planted of it in the garden orchard had horrible watercore this year and not a single good apple was harvested.  I’m hoping it will come around as the tree matures.

here are some excerpts from my notes on Karmijn de Sonneville:

Oct 15th  riper now.  still very tart, probably too tart for some.  Delicious though.  citrusy with other fruit flavors.  Very juicy, pretty rich, fairly complex.  The perfect apple for people who like to chew on lemons, it has a sensational level of tartness with strong undercurrents of relatively complex flavors.  Add to this a great texture and lots of juice and no wonder the Karmijn de Sonneville is a common taste test winner.

Oct 29th  very good.  Citrusy, pretty tart, yummy coxlike thing.

Grenadine®:  a fun apple that tastes as red as it looks.  Grenadine® is a rather obscure apple bred by Albert Etter of Ettersburg in Humboldt County California.  He was working on red fleshed apples, and this is the reddest of those available.  Grenadine® has one major issue (texture) and probably would not have been released in Etter’s time... and wasn’t.  Still, it is a remarkably flavorful apple with strong berry or fruit punch flavors.  Everyone seems to love it, and I’m quite fond of it myself.  The flesh is very dark pink, bordering on red.  The longer it hangs into early winter, the more intense the flavor becomes, but it also becomes more mealy.  Last year it was not as mealy as it is was this year.  It requires a long season for ripening.  This year it was probably at it’s best compromise between mealy and fully flavored around mid November.  I haven’t tried all the red fleshed Etter apples that are out there, but my guess is that another couple of generations of breeding would have yielded better specimens than are available now.  Greenmantle Nursery maintains a trademark on the name and doesn’t want anyone growing it without buying the trees exclusively from them and signing an non-propagation agreement, thus all the little ®'s.  As a result, the apple is very uncommon, but cuttings of it show up at scion exchanges, and it is not patented.

Grenadine.  Probably the reddest of the Etter red fleshed apples, and possibly the most intensely flavored.  As you can see the juice is red as well, and very delicious.

The apple formerly known as Rubaiyat®?:  Red flesh, red flavor, more please!  This is the Albert Etter apple trademarked as Rubaiyat® by Greenmantle Nursery.  The fact that Greenmantle limits propagation and demands royalties under that name serves as a disincentive to use it.  Perhaps if it had another name it could become popularized and thoroughly assessed by apple collectors and fruit growers, and could possibly even be found for sale now and then.  I had just a few of these on frankentree this year.  Many dropped from the tree prematurely and only one really fine specimen was harvested.  That specimen was, however, delicious!  The Texture is open and juicy with berry like flavors common to Etter’s red fleshed apples.  Grenadine® has stronger flavors, but this one seems to have better texture and is generally a more refined fruit.  I’m reeeeally looking forward to taste eating more of these.

Ruby is very red inside and as delicious as it looks.  Thanks Albert.

Becca’s Crab:  Tiny, crabby, but yummy.  My buddy Becca the farmer sent me some scions of this from North Carolina.  Apparently in came out of a university research orchard or something like that.  She said it made great cider.  I distributed some to other apple collectors and cider makers.  My scions died when a piece of frozen meat was set on them in the refrigerator, but one single bud miraculously lived.  It didn’t even grow the first year, but did the following year and it fruited quite a bit this year.  The apples are about an inch in diameter, beautifully red, round, with a deep yellow/orange flesh.  I ate some in the fall and more later in the December and January.  They hung well without going really soft.  A few were left hanging on January 1st, but many were starting to rot.  I picked them and the few that were still good were delicious.  The late ones had a lychee flavor as tonia pointed out.  The earlier ones were reminiscent of cherries, especially when eaten seeds and all.  It is a little crabby, with a marked astringency and it can also be somewhat mealy, but given a pile of them, I would probably eat a lot.  We’ll see what I think of it after living with it a few years.   If it makes great cider too, which seems not unlikely, I’d say this is a pretty swell little apple.  I may actually graft a whole tree of it.  Wish I had a few to munch on right now.  I wouldn't be surprised if this is a common named cultivar, but I don't know my crabs, so...  Does it look familiar to anyone?

Becca's Crab.  Tasty if a little crabby.

Pomo Sanel:  Local discovery falls short... This apple hung really late.  I picked the last ones on January first.  The texture was still firm.  The latest specimens had some skin blemishes and pitting, but were not rotting or anything like that.  The flavor is fairly rich, but not complex being dominated by a banana like flavor.  Banana not being my favorite, I found them inedible, even though I kept trying to eat them.  Suffice to say, the Chickens got to eat a lot of them.  Too bad because I am looking for late hanging apples.  This is probably an old known variety, but who knows, it might be a local seedling.  It came from a scion exchange and I believe the bag said it was from an old homestead or farm in Talmage.  I assumed that it was named by whomever collected it.  I would not say it was a bad apple at all, but just not excellent and not to my tasts, so I will not continue growing it.

Newton Pippin:  A most praised and praiseworthy apple.  (a.k.a. Newtown Pippin, Albermarle Pippin):  There is a tree of this famous American apple on the property next to us.  I grafted it onto frankentree some years back because the old tree is so decrepit that I figured it didn’t have long to live.  In fact, one of the three trees I took cuttings from fell over and died within a year.  I had a few late harvested apples off the remaining Newton Pippin this year, and it they were similar to other good newtons I’ve had.  There is a strong fruit flavor like jolly rancher candy, sometimes the watermelon flavor and sometimes just generic fake candy flavor.  I’m very intrigued.  I’ve been told numerous times that Newton will not do well here, but I’m not convinced.  (Recent conversations with local growers indicate that it probably does fine here, but that it may take a very long time to come into bearing and is scab susceptible.)  Interestingly, the apples that I harvested off frankentree, which were grafted from the original tree are not nearly as flavorful.  Still, they were quite good and when eaten out of the fridge in late January were of a very welcome quality.  I’m also looking forward to trying a couple of highly rated offspring of the Newtown Pippin- the Virginia Gold (Golden Delicious X Newton) and the New Rock Pippin, an English seedling of Newton Pippin purported to keep extremely well.  Virginia Gold scions just arrived and I’m working on getting New Rock Pippin into the country with the help of apple super enthusiast John Gasbarre of Lamb Abbey Orchards.  The Newton Pippin has an interesting history, but I’ll save all that for another time and place.  for a little more on Newton Pippin check Orange Pippin.

The Venerable Newton Pippin.  A thorough review of the literature would probably show this to be the most praised American apple.  It was still common in grocery stores when I was a kid, but only in a green and very tart state, much Like Granny Smith today.

Hauer Pippin:  Hoped for better, still hoping...  I’ve been really excited to try this apple, but it turns out I’ve been trying it for a few years under the pseudonym of Rose Pippin.  I planted a semi dwarf tree of it on recommendation from a friend in Santa Cruz County who is especially fond of it and knows his apples.  Axel of the Cloudforest Cafe is also very fond of it.  To me, it did not have Wow flavor and it didn’t actually store that well.  The texture after a short time in refrigerated storage was bordering on mealy.  The flavor is hard to describe.  There are some subtle notes of cinnamon candy that I like, but the dominant flavor is somewhat peculiar, very subtle and impossible to nail down.  It’s almost more of a sensation than a taste, like alkalinity or acidity are.  I’ll try this a couple more years and hope that it comes around.  Maybe I have to pick it earlier and store it, but so far, not so good, although it hangs late and is not a bad apple by any means when it is still firm.  I just want more out of it if it’s going to have a whole tree to itself.

More on the Hauer Pippin by Axel Kratel here:

Hauer Pippin Ripens very late and is reported to keep very well, though mine went mealy pretty fast... maybe I need to pick them sooner.

Lady Williams:  Super late and quite tasty, Lady Williams scores more points!  Lady Williams was encouraging this year.  One tree was drought stricken (no water and heavy competition from a huge Poison Oak bush) and had poorer quality apples.  The apples off frankentree were much better.  As usual, they ripened late January, being pretty prime right around Feb 1st.  Lady Williams is a tart apple, but by the time it is really ripe on the tree, the high measure of acidity is balanced by a shit ton of sugar!  It is a very sweet apple.  Flavor is also strong and I guess I would say fruity for lack of any specific descriptors.  The one odd flavor I picked out was on the drought stricken tree, Oregano of all things.  Those fruits were very stunted though.  Lady Williams is a descendent of Granny Smith and the parent of Pink Lady, which seems to be the best supermarket apple out there.  The Lineage is... French Crab begat Granny Smith, begat Lady Williams, Begat Pink Lady...  Lady Williams looks like a keeper for sure since it is not only extremely late, but it is quite good as well.  It requires this long season to ripen though, which would seem to limit its distribution to only a few areas.  It will withstand considerable frost and freezes, but I'm sure there is a limit.  We rarely see temps as low as 20 degrees.

Welcome to the Paleotechnics blog!

handdrillcloseup  

Welcome to the Paleotechnics blog.  While this blog springs forth from various motivations, the one thing we would like to be sure of is that you learn something when you visit us here.  What will you learn?  The topics will vary quite a lot, but most will fall in the realm of natural living skills and getting to know the natural world and the articulations of life around us.  A few posts may venture more into theoretical realms and philosophy, but again within the same focus on human participation in nature at a basic level using the simple equation-  Learn stuff > gather stuff > make things > use the things you’ve made = personal empowerment and greater self reliance.  We have well over a hundred potential blog post topics already jotted down.  topics will cover tanning skin, stone working, the nature and potential uses of materials, processing of materials, common mistakes, cordage, fire topics, tips and techniques for various skills, plant profiles, wild foods, photo essays and more.  Our lives are built around gaining and sharing knowledge, so we're excited to share in this format!

Paleotechnics has always been about de-mystifying and making accessible natural living skills and basic technology.  The business manifested as an outgrowth of this passion and continues to strive to empower people to become less domesticated and more self reliant.

buckskins on woven wall

Posts will likely be infrequent and short to medium in length.  The goal will be to hold subjects to an accessible degree of detail or break them up over more posts.  We plan to write much more extensively on some of these subjects in the future.  If those plans come to fruition, the books will be available as paper and/or ebook versions.

While this is a business, and we do need to make money, we would like to strike a balance between making a living and providing free information for people with the motivation to seek it out and assimilate it.  This blog provides a free service to expand and refine your skill sets.  If you want to know more about a subject consider buying one of our publications or taking a class.  In classes, we aim to be sure that you will not go away disappointed.  Paleotechnics classes are geared toward empowerment through knowledge, and we mean it.  Most of our income goes to purchasing Turkeysong, the experimental paleo/homesteading base camp in the Mountains of Northern California where we have access to space and materials to figure this stuff out.

Please visit us again, and consider subscribing to our blog in the side bar, to receive email notifications of new posts.

buffalo parfleche

Posted on January 30, 2013 and filed under Uncategorized.

Turkeysong, the Year in Chickens 2012

Chickens have been a constant source of amusement here for the past year and a half or more.  We have been testing out various breeds and just seeing how chickens might or might not integrate into the homestead.  We are learning a lot, but the main product so far has been entertainment!  More on chickens later, but here are a few frozen moments from our year of Chickens.  brrrrrraaaaaaauuk. How many speckled sussex?

tonia with a Speckled Sussex.

Speckled Sussex Chick.

baby Buckeye chicken.  Buckeyes are a very rare heritage breed that we are trying out here.  They are alleged to be good foragers, curious and are supposed to emit a dinosaur like raor

Buffy the Bug Slayer being narcissistic?

tonia and buffy, the biggest and the smallest TLA...  tonia is a sebright bantam and Buffy was a Buff Orpington.

Buffy and tonia's eggs begin hatching...

hatching seabuffs.

Checking out a new sibling.

tonia giving the warning fluff.

awww, too cute to leave out.

Speckled Sussi growing up.

Rondo makes the cut as new head rooster.  Still hoping he develops more personality though...

Buffy wears a bra.  He somehow got bra over his head while sticking it somewhere it didn't belong.  We had to rescue him because he was running around terrified.  Or was that just a ruse?

Not amused.  It used to be quiet around here.

So that's our year in Chickens.  It would be great to hear anyone's experiences with free ranging chickens.  We don't have a dog, or fencing, so we've lost quite a few, but they sure are happy running around all over the place scratching the place up.  The eggs are great too from all those bugs and plants they eat.

Better Sticks, Staves, Shafts and Withes: finding and encouraging straighter shoots

hand drill shafts lined up on table

By: Steven Edholm

Need straighter, longer, or more evenly tapered sticks?  Who doesn’t?  It’s not always easy to find a nice stick when you need one.  We might have plans for certain types of sticks, but nature has priorities other than providing us with them, and doesn't necessarily have the same criteria for "better sticks" as we do.  Knowing where to look for straight wood, and how to manage plants for the production of such, is essential knowledge in the paleo arts.  Now that it's winter, it's time to harvest twigs and sticks for our baskets and hand drills and things like that, so I thought a post on the subject would be appropriate.

Many basketry styles require long  and relatively straight materials that are difficult to find a naturally occuring growth.

What we're looking for:  More uniform than average twigs, sticks and staves find many uses.  Arrows, hoops, spears, hand drill shafts, basketry elements and bowstaves are some classic examples.  There are several characteristics that we are commonly looking for in sticks for making stuff:

Straight (or at least with long gentle curves instead of short sharp bends)


Free of branches


Gradually tapering (i.e. not a very different diameter at the top and bottom)


Long (of course that’s relative)


We may need only one or two of these characteristics, but we would often like to find them all in the same stick.

Nascent v.s. mature growth: Some trees and shrubs grow naturally straight and branch free, but the norm is various degrees of curved, zig zagging and short jointed branches growing in all directions.  Many species do however have the capability of growing straight given the proper stimulus, resources, and conditions.

When trees and shrubs grow from seed, they get off to a slow start.  Each year, the seedling root system gets bigger foraging nutrients and water underground and storing some of those resources for spring growth.  A few seedlings luck out and get the best spot ever, growing rapidly upward, but growth in seedlings is slow as a rule.

Even with the resources gathered by a large root system, more mature trees and shrubs typically grow slower with short joints and crooked branches.  This is largely due to the fact that there are so many branches competing for those resources.  The growth of a plant is largely determined by competition with itself.  If we reduce competition, we can channel an abundance of growth energy into fewer growing points- enter nascent growth...

You would probably not be able to find a single decent hand drill shaft in this older buckeye tree.  It it were burned or cut back though it would grow a profusion of new tall straight shoots from the stump.  The tree is adapted to this kind of treatment because of aeons of exposure to wildfires.

Nascent growth is fast vigorous growth.  The defining factor is that is has access to resources for rapid extension of the shoot during the growing season.  There can be numerous reasons that the shoot has access to the food and water needed for rapid growth.

One way the shoot may gain advantage in the structure of the tree is by it’s placement relative to the physiology of the tree.  The shoots known as water sprouts, or suckers, on fruit trees are a good example that many people are familiar with.  Hormones within the tree can suppress or encourage growth and the water sprout has managed to bypass the growth suppression hormones taking a large share of food for it’s growth.

Conditions conducive to nascent growth: Dormant buds can be stimulated to grow by a change in the position of the branch or trunk.  The tips of branches and trees usually send growth suppressing hormones down to stunt growth of lower branches, while continuing to grow taller themselves.  This phenomenon for the sciencey among you is called Apical Dominance.  Lower branches, guided by hormones from above, make less vegetative growth and typically do the work of reproduction, producing flowers, fruits and seeds.  If the position of the branch changes, say if a trunk falls over to a horizontal position, or a branch is bowed down heavily by snow, is bent low by a heavy fruit load or is pinned down by a fallen tree, the buds along the top of the branch are now higher than the other buds on the branch.  No longer receiving the “no grow” hormonal message from above, they grow like crazy often causing a mass of long straight shoots reaching for the sky.

When this bay tree fell over many years ago,  Dormant buds in the trunk sprouted and grew straight up.  The once dominant tip of the tree practically stopped growing.

Aside from fallen trees and bent down branches, we can look to some other natural phenomena for opportunities to gather nascent shoots.  Fires and floods can provide these opportunities.  Natural fires are common in many areas and not uncommon in most.  As a result many plants are fire adapted.  When they are burned over, most trees and shrubs can sprout back and grow new structures from their well established root systems.  After a fire, the root resources that supported the whole plant are now channeled into fewer shoots causing them to grow rapidly to compete for light and outgrow predators.  It is in the best interest of the plant to reach a mature stature and begin reproducing as quickly as possible.

Floods provide a similar effect by damaging the above ground portions of plants, though often the shoots will grow in response the plant having been bent over by flood waters rather than torn away.  Plants that grow along river banks and sandbars are well adapted to flooding and usually produce copious shoots after a high water winter.

Practices for encouraging nascent growth:  Practices for managing plant growth are used the world over in traditional cultures and must stretch very far back into the past.  It should be no surprise as it is easy enough to put two and two together when observing natural phenomena.  Now that we know some phenomena that cause nascent growth, we can use management practices to encourage shoots when and where we want them.

Coppicing and pollarding are practices in which the plant is cut back very hard during the dormant season, removing all growth since the last harvest.  The only difference between a coppice and a pollard is that in pollarding a trunk and/or a branchlike tree structure is maintained but headed off at the same point periodically, while coppiced plants are cut at ground level.  Some plants that coppice well, such as willow and osier dogwoods, can be cut to the ground every year for basketry material without suffering any setback, though they are sometimes cut on a multi-year cycle to produce larger material for fencing, fuel, timber or other uses.

willow coppice at Frey's

Cuttings of basket willows in a wet ditch planted for coppice at Turkeysong. The coppicing will begin after a few years of growth when the plants have a root system to support regrowth.

Plants can also be burned to the ground to stimulate new growth.  This is nothing more than coppicing by fire.

One last method I’ll leave you with is bending.  One way to farm shoots on some plants is to bend tall shoots over to a horizontal position, or better yet in a bow shape with the tips lower than the top of the bow.  In some plants new growth will sprout up along the bent branch.  If the branch is high enough the shoots can have an advantage in outgrowing browsing animals like deer.  Browsing could shorten your shoots or cause them to branch or have crooks.  I've been told that this method was used to produce arrow shafts of Mock Orange by Indians in Northwest California, but haven't had an opportunity to try it.

How plants grow:  There are many factors to consider when deciding what to cut and when, such as population density, make up of the forest, management goals, human use and infrastructure, what animals depend on the plant for their living and so on.  Possibly of greatest importance is to know how a particular species grows before you start chopping it down to make sticks.  Most plants will sprout readily from the base, but some will not grow back when cut down.  Others may sprout back, but will not tolerate continual annual coppicing.  Careful observation of natural and human damage to trees and shrubs and their response over time will usually give you the clues you need to get started.  Road crews regularly coppice trees and shrubs along roadsides providing useful materials as well as clues to plant responses to coppicing.  Recently logged or burned areas are other places to start looking at plant regrowth patterns.  It is generally best to cut near the dormant season, anywhere from when the plant growth stops in the fall, to soon after it begins again in the spring.

Given our seeming distance from nature in modern society, it is easy to view cutting down trees and shrubs as inherently negative, as if nature sorts itself out perfectly, but this is not so.  Human harvesting and management practices can have both positive and negative effects.  Often the effect may be negative for one aspect of the ecology and positive for another... in other words, just different, or possibly more accurately an issue of perspective and values.  It is especially true when dealing with logged over land (which is virtually all that is left to us) that some human intervention can have an effect which would be hard to argue as other than positive.  These decisions require some knowledge to be effective and we all have a lot of homework and observation to do in order to earn an honorable place in the scheme of things.  Natural systems are typically tough and chaotic environments and therefore they and their citizens are for the most part fortuitously resilient.  This resilience is amply evidenced by the phenomenon of nascent growth.

A Quick RECAP!

*Straighter, branch free, evenly tapering, long and otherwise more uniform sticks are commonly needed in the paleo arts.

*Many plants are evolved to recover quickly from damage growing up straight and fast.  This quick new growth is known as nascent growth.

*Natural phenomenon such as fires, flooding or wind storms can provide opportunities for the harvest of Nascent shoots and trunks.

*Coppicing (cutting to the ground) and Pollarding (cutting higher up on the trunk) are common pandemic practices for cultivating nice sticks.

*Knowing how a particular species grows, and how it fits into the local ecology can keep us from making management mistakes.  Plants at all stages of growth help provide this information if we pay attention.

For more information and philosophy on sustainable harvest practice see Paleotechnics bulletin #1:  Sustainable Harvest:  approaching wildcrafting with knowledge and intent
.

Before there were toy stores, there were sticks.

Posted on January 2, 2013 and filed under Fiber, materials.

Deck the Halls With Beads of Berries: paleo holiday decorating with madrone!

madrone berry macro 2

The roots of our holiday symbols stretch far back into the past.  Greenery and red berries brought into the house are the primary symbols of the holiday season for western culture.  These symbols once meant more to people in a time when we need to celebrate, life, hope, warmth and renewal.  Madrone berry beads are a beautiful addition when moving towards a sort of holiday vernacular of the west coast region.  They are attractive, free, not only safe, but edible, and can be returned to the earth from whence they came when we are done with them.  They will last for at least several seasons if well made and cared for.

Paleotechnics usually sells madrone berry garlands and necklaces around the holidays.  After years of stringing and drying the berries, we have some tips on making your madrone beads look their best.  You may or may not be able to follow all of these tips on berry quality depending on what berries you have access to, but we all have to use what we are fortunate enough to find.  We are often asked how we get our garlands so uniform and beautiful.  The answer is attention to detail as in so many other pursuits in life.  So, here are those details and a few other tips.

*Use red string.  Red embroidery thread doubled up works very well.  We have rarely had to buy it new since it is often found in thrift stores.

*Sort your berries carefully avoiding berries which look at all sooty or splotchy.  Sooty berries can get sootier as they dry.  Small black specks are common as well.  The specks will not grow in size, though they will be very visible on the dried berry.

madrone berry cluster 2

*String similar sizes together.  Remove all the berries from the stem and then string the largest berries from a double handful at a time.  Put the berries on a flat tray or dish one layer thick so that it is easy to see the different sizes.  Once the largest berries are strung from that double handful, dump them into a separate container and grab a second double handful, string the largest from that lot, and so on.  That way each round through you are stringing the next smallest size of berry.  If you want to get fancy, you can taper them from small to large, etc.

*Thread through the stem end and as straight as possible.

*String several berries onto the needle before moving them down the string.  This trick just saves time.

*String about a foot of berries near the needle and then scoot them to the end of the string by moving them down one handful at a time, another time saver.

*Once the berries are all strung, go back through them and remove crooked ones.

*Snug the berries up close together.  don’t squish them, but you want them uniformly cozy.

*Dry quickly.  Dry the berries quickly.  Very slow dried berries can turn black and begin to decay.  Hanging above a woodstove or heater is a perfect way to get them dried fast.  It can still take a week or more, but the sooner the better.  Avoid direct sunlight to retain vibrant color.

*Don’t move the berries on the string once they begin drying.  Seat the berries snuggly together on the strand, hang them up, and leave them alone to dry.  The berries will shrink and stick to the string spacing themselves evenly.

*Store the garland away from mice and insects and away from direct sunlight.

madrone berry garland hanks 2

*And finally, watch out for Kissing Bugs!  Kissing bugs are a parasitic biting insect that really likes living on Madrone berry clusters.  They commonly feed on birds and birds love madrone berries, so that probably explains why they are so commonly found there. They are around 3/8 of an inch or smaller.  I’ve never been bitten, but they are very common.  I recently sorted the berries off of three plastic shopping bags full and found as many as four in one bag.  They will usually stay on the berry clusters rather than venturing off, but I like to remove the berries from the stems outside, so the bugs don’t end up in the house.  I examine each cluster carefully before I start working with it, but still keep my eyes peeled as I’m working.  They are difficult to spot.  The Bugs are blood sucking and often bite near the mouth, thus the name.  A study in Arizona found that they frequently carry a parasitic disease than can cause serious chronic health problems.  They often bite at night, so you don’t want them in your house!  I have never noted them to be aggressive toward me at all, and suspect that they would rather feed on something besides people.

kissing bug 2

Posted on December 3, 2012 and filed under Uncategorized.

Check out the new Paleotechnics blog

When I started this blog I was going to throw everything together under one roof from music reviews to opinions, to primitive stuff, to how-to homesteading stuff.  I like that idea because it represents my life and thoughts as a diversified whole.  However, I realize that a lot of people who want to read about chickens and fruit trees might not want to read about the best heavy metal band ever, or other random topics.  I’ll probably be keeping this blog pretty focused on homesteady stuff, with suffusions of opinion and philosophy as they are relevant to how and why I do things.  For now, less related opinions and over arching philosophies will take a seat on the back burner.  I was also not too sure about writing about some of the primitive stuff I do. I’ve decided to open another blog for Paleotechnics.  The Paleotechnics blog will be for the paleo stuff,  I've been involved with for 25 years or so.  Some topics will include, wild foods, tanning and leather working, fire by friction, learning plants, natural glues and paints, fire topics, stone tools and stuff like that.  I already have over 125 potential topics lined out.  The format will be shorter than the Turkeysong blog for the most part.  I’m going to try to keep posts short and less comprehensive.  The shorter approach is partly due to the fact that I can only spend so much time on the computer, but also because I plan to (or in some cases already have done) write in much greater depth about many of these topics in the future.  It will be difficult to decide where to put an article occasionally.  In those cases, I will cross post things like tanning skins that might be of interest to Turkeysong followers.  The first Paleotechnics post is up if you want to check it out.  It is on harvesting, storing and using California bay nuts.

Posted on November 5, 2012 and filed under Uncategorized.