Posts tagged #tanning

Video Series Following the Oak Bark Leather Tanning Process

Over a pretty long period of time, I made a bunch of run-n-gun videos while tanning some leather. At first I was just going to show this experiment of removing sheeps wool by painting the flesh side of the skin with lime paste. Then I figured I’d just shoot easy videos of the whole process with an action cam Well, that took a lot more time than I thought and EIGHTEEN videos later, here is the playlist. The project was oak bark tanning several sheep skins with the hair off and a big chunk of cattle hide.

While there is a lot of “extra” footage in this very pedantic treatment, there is also a benefit to just shooting what I’m doing in real time. This is barktanning as I do it, with all the mistakes, inconveniences and triumphs of shade tree tanning. There are real life lessons here, vs a more idealized instructional approach of discreet steps that may or may not go as planned. If someone wants to learn vegetable tanning with bark and such, this is a very valuable series, even if it takes a while to get through.

The last two videos are Q&A. I gleaned out a bunch of questions from the comments to try to answer. If one person has a question, it is likely that many others have the same question.

Ground Shots Podcast Interview on Bark Tanning With Kelly Moody

I sat down with Kelly Moody and traveling podcaster to discuss bark tanning. Kelly is a tanner herself and we get into specifics about tanning with tannic acid and some related stuff. It was fun and maybe we’ll do the same with some other topics when she comes back through sometime. This was my first podcast guest spot.

https://www.ofsedgeandsalt.com/ground-shots-podcast

The Worst, Common Bark Tanning Mistake

On the road from raw skin to leather, there are many potential mishaps. Skins and plant liquors are potential food for bacteria, yeasts and fungus and growing the wrong ones, or too many, or for too long, can damage or blemish a hide. When dealing with natural materials, we typically have a sizeable degree of variability to contend with. It is very likely that home tanners are dealing with materials and quantities they aren’t familiar with.

One cluster of mistakes that all lead to similar results or scenarios stands out as the worst common error. Put most simply it is, that the hide is left for too long, in solutions that are too weak. This can come about in various ways and have differing effects, but it is super common. In this video, I lay out the typical scenarios and try to offer an approach to prevent them. This is an important video for anyone starting out in bark tanning, because this general area of understanding is so often lacking in the beginning. Nearly everyone seems to make these same mistakes, I know I did, and they need to be headed off intentionally.

Because there are so many variables in natural tanning, it is impossible to accurately quantify all of this. I can’t give out step by step instructions with times and quantities. It just doesn’t work very well that way with all the variables involved, not the least of which is tannin content by species, individual trees and condition of materials. What I can give is a general approach to this problem that will allow you to adapt to new materials and unknowns. That essentially involves observation and understanding the typical way things go as far as the hide tanning rapidly at first, then requiring a high enough level of tannin in the liquor to preserve the skin as it finishes tanning. Also, that some color in the liquor is not necessarily indicative that is has any tanning power left. There is a measuring device called a barkometer, but I don’t own one and find that I can judge when to add tannin by observing the liquor and behavior of the skin. Bullet points are…

*Always look at the liquor, before, after and during, just always; any time you add liquor or check the skin, or have a new batch of liquor. Pick it up in your hand and look at the color and density. All materials are different in color and how much tannin v.s. other coloring matter they contain, so you are making comparisons mostly with fresh, v.s. used and partially used samples of whatever you happen to be working with.

This fresh, strong bark liquor has a bright look and high color density

This fresh, strong bark liquor has a bright look and high color density

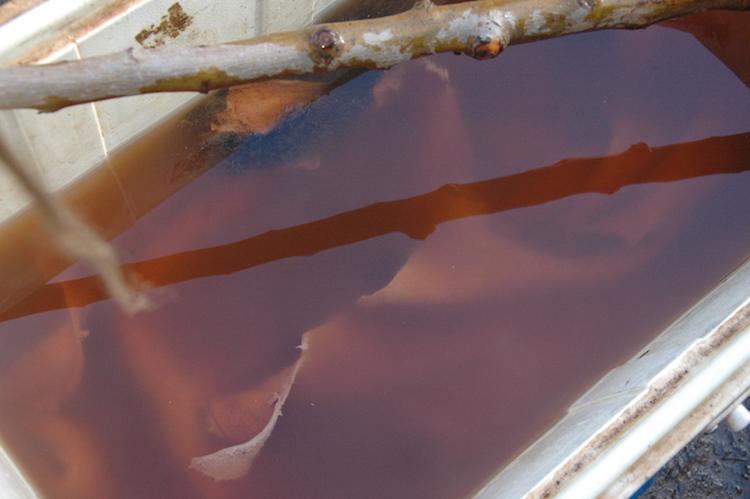
This solution, while retaining some color, has no tanning power left, or not enough to matter.  It will grow bacterial scum on top and the hide will decay slowly, because it is just starting to tan.  All color is not indicative of effective tannin. …

This solution, while retaining some color, has no tanning power left, or not enough to matter. It will grow bacterial scum on top and the hide will decay slowly, because it is just starting to tan. All color is not indicative of effective tannin. With a wll prepared skin in new starter solutions, this phenomenon can happen in one day. Unless you add a lot of tannin quickly, (which is sometimes okay) it will keep happening, but eventually it will slow way down and the solution can be left for long periods of time unattended.

*Understand that in the beginning, hides typically take up tannin very fast.

*If the skin is left for any length of time, the liquor needs to have enough excess tannin to adequately preserve it, and also to insure that tanning continues to progress.

*Be prepared to gather/prepare/add more tanning material as needed. Thoughts such as you used a “lot” or it “should” be enough are not really relevant. It’s either doing the job, or you need more. Sometimes that is a lot if the materials are not very rich in tannin, or it is something that is just hard to gather in enough mass.

*A healthy tan can smell quite strong and in a way unpleasant. I would characterize it as unpleasant, but kind of intriguing and not just flat out disgusting or vile. It is an odd smell that will cling to your skin for a time after touching it. While an element is unpleasant, there should also be a large measure of fermentation to the smell. All of that is normal. It shouldn’t just smell putrid or flat out offensive in the way that rotten food, a dead animal or an outhouse does. Some growth of stuff on the surface can be normal.

*Typically, tanning will progress very rapidly at first, then slow down a lot as the core of the hide slowly tans. Keep the solution rising in strength if anything during this initial phase, then leave it strong enough to maintain a healthy tan as it finishes. Common ways to fail at this objective are: Using low tannin materials, not using enough material, putting the hide in and leaving it without strengthening the tan, Judging by how much it seems like you’ve used instead of by how tanning is progressing (or not), and what the liquor is doing.

*A fairly reliable approach is to cook the material twice. Use the second cook liquor to start the hide, with some water add as necessary to cover the skin well. observe the liquor before putting the hide in. Add the stronger first cook liquor over the several days as you see the liquor depleting and the hide tanning. If you run out and it still seems to be drawing down the liquor, make more. I also talk in the video about dumping some of the liquor to bring the water level down and the tannin level up to get a solution you can leave the skin in. When it is no longer rapidly depleting, you can get the strength up and attend it less frequently. This approach gets most of the tannin out of the material, prevents any possibility of tanning the skin too rapidly in the beginning, is continually adaptable, and encourages familiarity with our materials and their tanning potential.

That is the quicky version, but it should be enough to avoid this worst common problem in bark tanning.

I’ll link two video playlists here. One is a lot of useful general tanning videos and the other is my strops from scratch series, which follows the tanning of a deer skin with oak bark.

Historical Care Package from a Pennsylvania Viewer, 1850's Shoemaker Ledger Pages, Leather and Tools

P1190702 2.jpg

I received a pretty amazing care package from a long time YouTube viewer Davey Jo of Pennsylvania. He is a lifetime cabinet maker, leather and metal worker. and accumulator of tools. In spite of his apparent humble attitude, I have a feeling anyone could learn a great deal from Davey about woodworking and such practical shop stuff. His Great, Great Grandfather Joseph was a shoemaker and farmer in that state. He sent some interesting pages from Joseph’s Ledger about goods and services purchased, sold and rendered. Sometime I might sit down and analyze those documents a bit for whatever insights they have to offer about life in the mid 19th century. For instance with a cursory going over, it looks like a new pair of handmade shoes or boots were about $1.25 to $1.75. He also sold 3 bushels of potatoes from his farm for $1.50 and purchased cords of oak for $2.00 each. There is also a contract for an apprenticeship in shoe making. I’ll include a few pictures here. The writing is sometimes hard to decipher and it would be a bit of a project to sort it all out and attempt to translate it in historical context. There is also an edge of bark tanned leather from probably the mid 1800s from Joseph’s shop and a very nice looking piece of leather that Davey tanned with sassafras bark following my instructional videos on bark tanning.


1847 firewood prices. About 100% of today? Oak was bought in at 2.00 a cord, but Hickory (which appears to be spelt Hickery) was 3.00 a cord. Likely at that time it was either bucked into long fireplace logs with an axe or saw, or bucked into shorte…

1847 firewood prices. About 100% of today? Oak was bought in at 2.00 a cord, but Hickory (which appears to be spelt Hickery) was 3.00 a cord. Likely at that time it was either bucked into long fireplace logs with an axe or saw, or bucked into shorter woodstove sized sections with a frame bucksaw. From the other entries in this ledger, you could calculate how many cords you would have to cut in order to buy some staple foods for winter, oats, corn and potatoes, and a pair of shoes.

Aside from some logging of shoe repairs and sales, this page contains a contract discussing a term of apprenticeship, an annuity, room, board, washing and mending of clothes, and a provision for a promise of three weeks farm labor at harvest time.

Aside from some logging of shoe repairs and sales, this page contains a contract discussing a term of apprenticeship, an annuity, room, board, washing and mending of clothes, and a provision for a promise of three weeks farm labor at harvest time.

Davey’s grandfather’s uncle Mr. Bachman was a tanner. Here is a receipt for bags of hair. Hair was used as an addition to lime plaster and no doubt for other things. It was commonly collected and sold by tanneries. Mr. Bachman appears to have attend…

Davey’s grandfather’s uncle Mr. Bachman was a tanner. Here is a receipt for bags of hair. Hair was used as an addition to lime plaster and no doubt for other things. It was commonly collected and sold by tanneries. Mr. Bachman appears to have attended a trade school and advertised those credentials on his invoice.

This glue pot was given to Davey by his mentor John Grott, a woodworker, shoemaker and all around skilled man by the sound of it. I’m honored to be thought worthy of such a gift, which I can actually use as I have no glue pot. Most of them are also …

This glue pot was given to Davey by his mentor John Grott, a woodworker, shoemaker and all around skilled man by the sound of it. I’m honored to be thought worthy of such a gift, which I can actually use as I have no glue pot. Most of them are also too large for my purposes, and as a cabinet maker, Davey found this one too small for his needs. It is essentially a double boiler, which serves two purposes, keeping the glue from burning and keeping it warm while it is being used away from the stove.

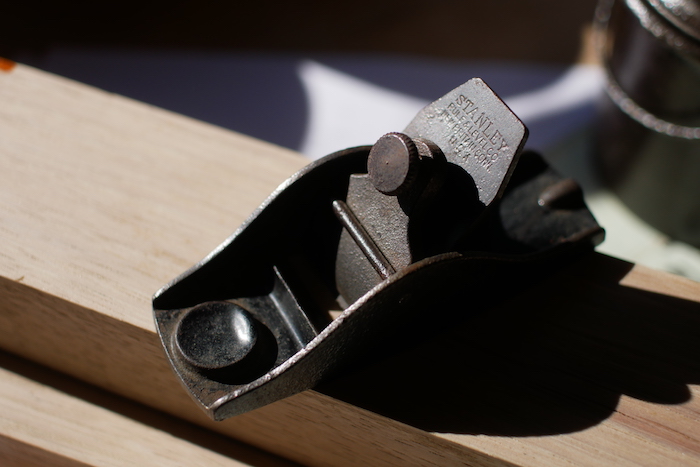
A miniature “finger” plane. There are not a lot of tools on my wants list anymore, but this was certainly one of them. Also some nice air dried Hickery harvested by Davey and seasoned for years. It appears to be very stable, which is an often overlo…

A miniature “finger” plane. There are not a lot of tools on my wants list anymore, but this was certainly one of them. Also some nice air dried Hickery harvested by Davey and seasoned for years. It appears to be very stable, which is an often overlooked factor in handle material. If I have my way with it, there will be an extensive blog post and video soon on handles and handle material, what matters and what doesn’t. Stability matters a lot and is often not considered or attended to.

Vegetable Tanning Materials, Tannin Rich Barks, Roots and Leaves Used to Tan Skins and Hides Into Leather

I am asked a lot about what tanning materials people should use in their part of the world. Well, be careful what you ask for he he. Here is a very large amount of information to address fill that gap. I had already typed up a partial list for a vegetable tanning book project that I have done some writing on which is mostly presented here (don’t hold your breath on me publishing it anytime soon). That information comes largely from Howe’s book on tanning materials, which I think is still in copyright. But I decided to list a bunch of full text excerpts on tanning materials from some other old out of copyright tanning books. To top it off, at the end there is a surprisingly long bibliography of publications on tanning materials put out by the USDA, with such fun topics as tannin content of some acorns, Tannin content of pacific coast trees, tanning materials in South Africa and the tanning industry of Washington state. There is still much more that could be dug up on the subject. If you want to research a specific material more, you can use sites like googlebooks.com and Archive.org Try different combinations of keywords such and as leather, tanning, tannin, the plant’s common names and the plants botanic name (or names, plural since they often change over the course of 100 years or more in order to keep botanists employed and make them look busy).

Tools You Need to Bark Tan Hides & Skins Into Leather at Home; Traditional Vegetable Tanning

DSC01244.jpg

In this blog post and new video, I cover all the essential tools needed to make good bark tanned leather as well as a few non-essentials. Tanning materials will have to be treated separately and I will try to revisit many of these tools and their making in the future.

Real natural vegetable tanned leather is that which is tanned with tannic acid sourced from plant materials. While there are excellent sources of tannin in not just barks, but in roots, leaves, pods, fruits, nuts and wood, tree barks are the most used sources, thus the common term bark tanning. There are only a few tools and materials that could be considered essential to the process and none are complicated. In fact, if you strip it down to the real essentials, you need very little. Adding a few simple tools will improve your experience though, and in some cases your leather.

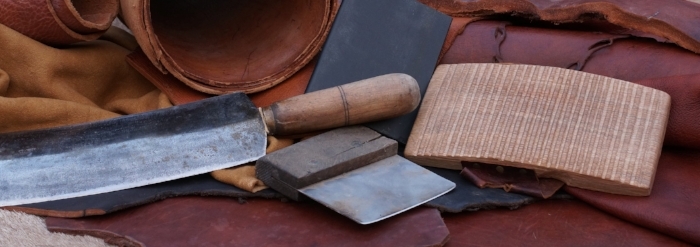
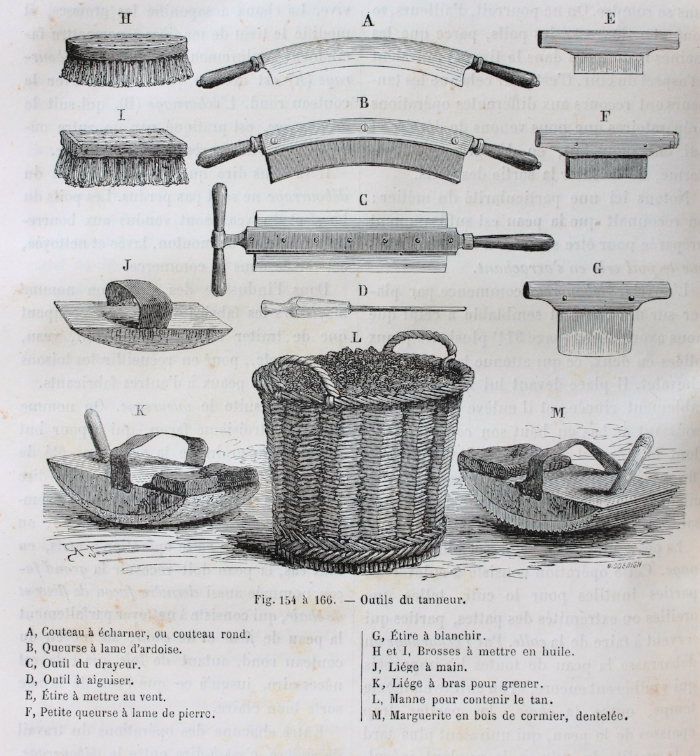
Some tools of the Tanner and Currier, most of which are discussed in this article. The slate bladed two handled knife B is especially intriguing. I need to make me one of them.

Some tools of the Tanner and Currier, most of which are discussed in this article. The slate bladed two handled knife B is especially intriguing. I need to make me one of them.


FLESHING KNIFE

The tanner’s knife, or fleshing knife, is the most important multi-tasking tool of the tanner. In a typical vegetable tanning process, I will use this tool for fleshing, dehairing, re-fleshing, scudding, removing excess water and stretching open the skin. It is also handy when re-soaking dried hides to work open dry spots so that they rehydrate faster. Many new models are available on the market, but a lot of home tanners get by well with homemade tools. Read my blog post on fleshing knives, and watch the Fleshing Knives 101 video for more than you probably wanted to know about them. I just received the Wiebe 12” Fleshing knife in the Mail so I can review it for you guys. I like the overall form a lot for general use, and was told by a dealer that it is actually tempered tool steel, not mild steel. Aside from the potentially weak, narrow and probably short tangs, it looks promising, but I haven’t had a chance to use it at all yet. Aside from unknown potential steel/tempering issues and iffy tangs, as a general purpose home tanning knife it seems likely to be a good choice for under 30.00 shipped.

A collection of tanner’s knives

A collection of tanner’s knives


BEAMS

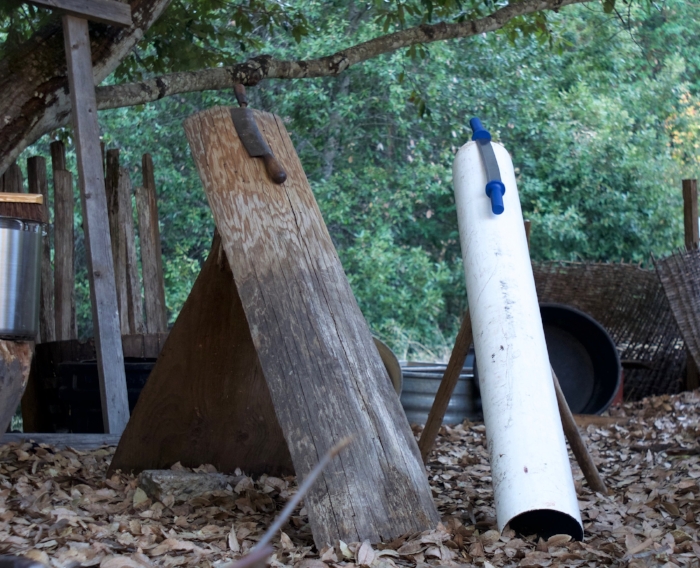
Wood and plastic beams. Left is the outside cur from a log mill and the other is cheap ABS, though PVC would be much better, thicker, more durable and heavier. I haven’t used plastic beams much, but I can see why people might need to use them.

Wood and plastic beams. Left is the outside cur from a log mill and the other is cheap ABS, though PVC would be much better, thicker, more durable and heavier. I haven’t used plastic beams much, but I can see why people might need to use them.

The tanners all purpose scrapping knife is of no use without a beam. For most, a beam around 6 to 6.5 feet long will do well. I’m currently using. 6.25 foot beam, which is just about right for me. It can be of wood or plastic pipe. If wood, it is best to have a smooth work area that is free of knots, large cracks, grain tears or other major blemishes extending at least 18 inches down from the top. I would try to stick with 8” diameter and larger, but to get started, or in emergencies, you can use a smaller diameter beam. If the diameter is very small, you can flatten off the working area to a larger radius. A very small radius results in a small area of contact between the tool and the beam surface. For most vegetable tanning related beam tasks, a larger surface contact between beam and tool is preferable. Large logs should be at least split in half, or even hollowed on the underside to thin them. Most of my old beams were hollowed out on the underside with a hatchet to reduce weight and discourage cracking. Taking the center of the log out by splitting it in half will reduce both the incidence and severity of cracking. Reducing the thickness further will reduce that risk even more. It doesn’t have to look pretty, just chop out some of the wood to form a hollow on the underside.

A good source of nearly ready made beam material are the round sided slab cuts from the outsides of logs removed in milling lumber. You may be able to get some from a local mill, or small custom miller. Check the phone book (under lumber, milling?) or ask about local portable mill owners at your chainsaw dealer or repair shop.

If making a beam out of lumber, choose vertical grain like this over plain sawn face grain if possible as it will be less likely to crack. This is never a choice with a round or split log.

If making a beam out of lumber, choose vertical grain like this over plain sawn face grain if possible as it will be less likely to crack. This is never a choice with a round or split log.

I haven’t done it, but I suspect a pretty good beam could be made by radiusing the working area of a 2x12. I don’t seen any good reason it wouldn’t work. If so, try to choose one that has edge grain on the working face and not face grain. that is to say that the rings of the tree run from about 45 degrees or more toward straight through the thickness of the board. This is usually referred to as vertical grain and will be much less prone to cracking than plain sawn wood faces.

Now that I’m thinking about it, an edge grain (if you can find that good of a board these days) 2x12, backed by another 2x12 could make a pretty nice beam. I would leave a slot in the backing board for a plywood stand, augmented by two 4x4’s firmly attached with lagbolts similar to the arrangement pictured below. For a firmer union, wedges could be used to afix the plywood in the slot.

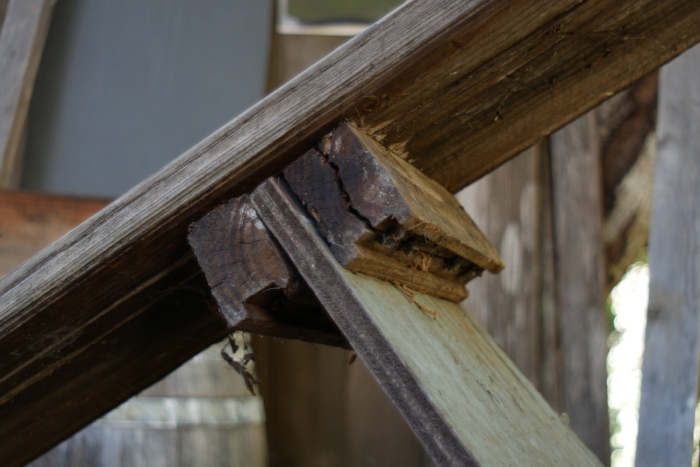
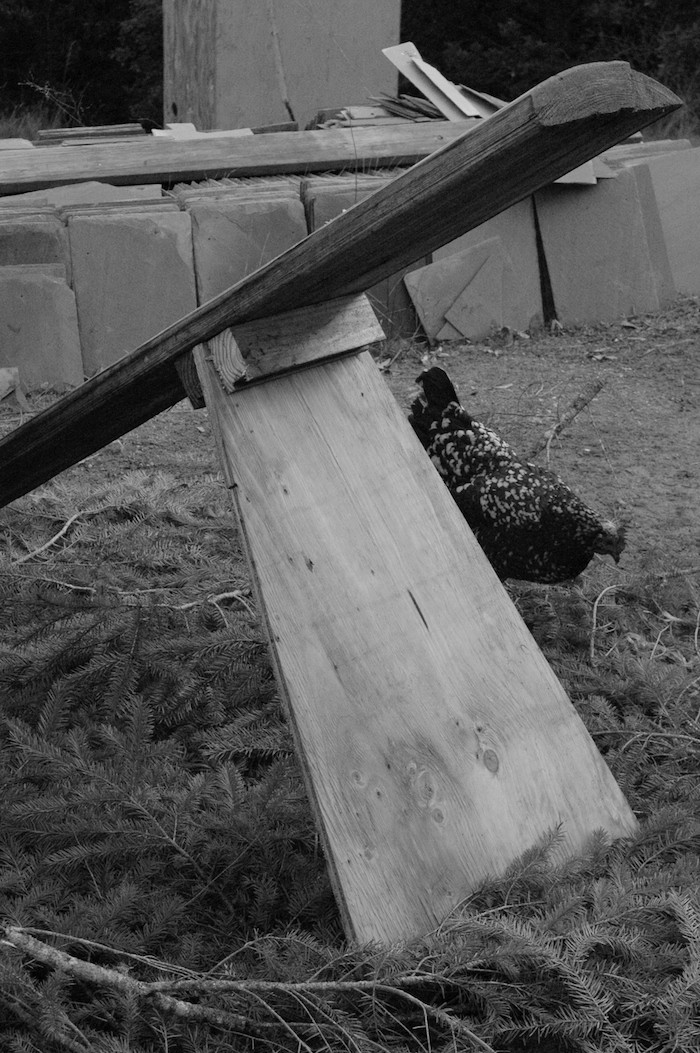
You can do many different things to put legs on the beam. A good option is to drill large holes, about 2 inches in diameter and plug in round wooden staves for supports. My current beam has two closely spaced boards screwed to the bottom on edge, just far enough apart to slide in a piece of plywood as a support. It works well enough.

Simple support that is easily taken down for transport. I would use 4x4’s next time.

Simple support that is easily taken down for transport. I would use 4x4’s next time.

DSC_0235.jpg
Screen Shot 2018-10-15 at 2.52.50 AM.png

DRAW KNIFE AND SPOKE SHAVE

Maintenance tools. The drawknife is probably more versatile and essential than the spokeshave.

Maintenance tools. The drawknife is probably more versatile and essential than the spokeshave.

These tools are used for creating and maintaining, a smooth beam surface. It is ideal to have both. The draw knife is best for major wood removal and repair, and the spoke shave for maintenance and smoothing. You can get away with just one of them though, in which case the draw knife is the more versatile of the two. Draw knives are also handy for peeling tan bark from logs if it is not slipping off easily. If you intentionally shred the bark off of the log in small, thin slices, you may not have to chop it any finer for extracting the tannins.

When shopping for used draw knives watch out for two things, wear on the blade and rounded bevels on the back side. Old draw knives can sometimes suffer severe wear. Look to see that the blade is about the same width it’s whole length. It should also be flat on the back with a bevel on the top side only. Either by long wear, or by mis-sharpening, the back is sometimes not flat. In a very well used knife the back may be subtly dished or rounded off, but if it has an obvious bevel or extreme wear, steer clear.

I would not recommend buying a spoke shave that has only one screw to adjust and no fine adjustment screws. The type shown is common and works well.


WATER AND HOSES

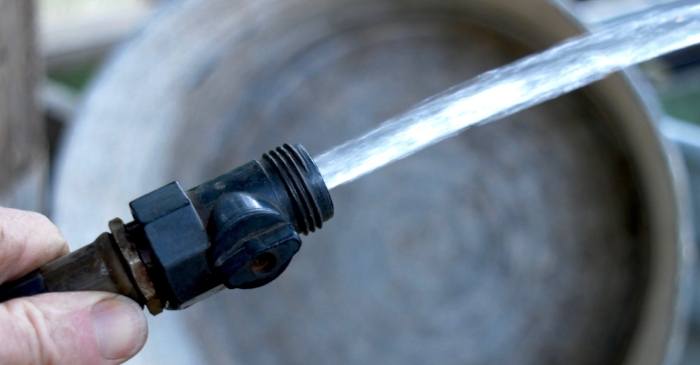
Water is not just a material, it’s a tool for cleaning things off. Skins, tools, boots, hands and tubs need frequent rinsing You will use a lot of water, and the more convenient and available it is the better. I usually use a standard hose end shut off valve to control flow. I like these valves better than most purpose made sprayers, because when opened wide the flow is fairly high, which is nice when you are filling containers with water a lot. If opened only part way, the shut off valve makes a reasonable sprayer for cleaning things off. As far as I have seen, craftsman rubber hoses are the best deal going when they are on sale in the spring, which they usually are.

Better than any sprayer I’ve tried when you want high flow.

Better than any sprayer I’ve tried when you want high flow.

Passable spray pattern and volume if not as good as a purpose made sprayer.

Passable spray pattern and volume if not as good as a purpose made sprayer.


BRUSHES

A stiff cleaning brush will be found almost indispensable for tubs, aprons, beams and tools. You may also need a finer brush to scrub bloom off of the grain side of skins. Bloom is a whitish deposit that forms on the grain surface during tanning. It is more common with certain tanning materials and also when layering or pit tanning is used.

Stiff brushes for cleaning tubs, tools and beams are almost essential

Stiff brushes for cleaning tubs, tools and beams are almost essential

Surface on the right shows bloom deposited in the tanning process. The section on the left has been scrubbed clean with an old hair brush with medium bristles. The dark stain in the center is where the skin floated above the surface of the tan liquo…

Surface on the right shows bloom deposited in the tanning process. The section on the left has been scrubbed clean with an old hair brush with medium bristles. The dark stain in the center is where the skin floated above the surface of the tan liquor :-/


PROTECTIVE CLOTHING

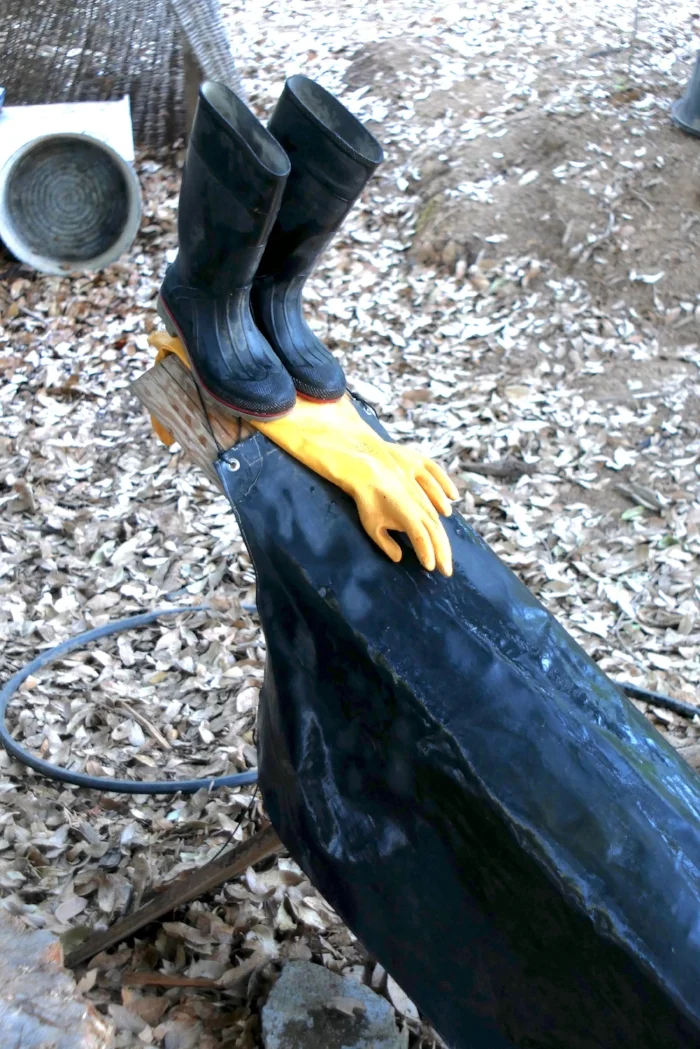
BOOTS: Rubber boots are very nice to have if you do a lot of tanning. If you don’t wear them, the hide will inevitably drip all over your feet as you stand at the beam working.

GLOVES: I tanned without gloves for years, but I love my elbow gloves now. Don’t bother with dishwashing gloves, or any other short gloves. You will inevitably reach into a solution and they will fill with smelly liquid. I use these affordable Atlas gloves, which have held up okay. When they die, I may invest in a more heavy duty glove.

APRON: I would avoid buying very cheap aprons. I am still using the same two heavy duty black, rubberized cloth aprons that I bought used at a yard sale over 20 years ago. You can make one from a sheet of vinyl or plastic of some kind, or tie a trash bag around your waist, but if you tan a lot, the protective gear is really nice to have. Hip waders are great if you already own them.

Non-Essentials, but so nice to have!

Non-Essentials, but so nice to have!


CONTAINERS

Vegetable tanning requires certain kinds of containers. Materials that can be safely used for all the processes are wood, plastic and rubber, ceramic, stainless steel and enamel ware. I use galvanized tubs, but only if there is no rust at all on them, and for liming and rinsing only. Aluminum I’ve used for rinsing only. I know aluminum and ashes don’t mix well but I don’t know about lime. While I have no idea if aluminum is safe for tanning liquors, I’ve avoided it. Anything that rusts is out of the question for all processes related to vegetable tanning except for dyeing the skin black. Any rust or iron will darken the skin permanently.

The common rectangular plastic storage tubs with lids are the most versatile. Choose designs that can be rained on without funneling any water into the tub if possible. Some do not have that kind of overhang on the lids, or have holes of some kind o…

The common rectangular plastic storage tubs with lids are the most versatile. Choose designs that can be rained on without funneling any water into the tub if possible. Some do not have that kind of overhang on the lids, or have holes of some kind on the edges. All of these others also get used, but none are particularly better than rectangular tubs.

The ubiquitous 5 gallon plastic buckets are handy to have around for various uses, but tanning anything over the size fur bearers in buckets is unpreferable. Large rectangular plastic storage tubs of 15 gallons and up are very useful as are other large tubs of various sorts. I have used wooden wine barrels cut in half quite a lot. They look really great, but aesthetics aside, they have their down sides. Wooden barrels need to be kept filled with water, or they dry out and fall apart. Since they need to be full of water, they breed mosquitoes unless you dump them regularly and they are quite heavy when full. You can tan hides up to the size of deer in half wine barrels very easily and sometimes large hides if you get creative. The size of the container should be adequate for the size of skins you are tanning. Without getting into specific details, an 18 to 20 gallon tub is adequate for deer, goat and similar sized animal skins. I’ll usually cut cattle and other large hides into sides and bellies, and those pieces can be tanned in a half wine barrel or large rectangular tub easily enough.

Rectangular tubs are an advantage over round ones, when layering, a technique where you put layers of shredded bark between layers of hide and let it sit for a month or three. I can layer a deer hide well in an 18 or 20 gallon tub, by carefully folding it up with layers of bark between all the folds, but if layering a larger hide, or even a very large deer skin, you’ll need to size the tub up. For liming, rinsing, or tanning the skins in liquors, round containers have the slight advantage in being easy to stir, but that is not important enough to favor buying them over the more versatile rectangular tubs. Use what you have or can get cheap or free if it works, but if you buy something storage tubs with lids are probably the best all around. If you are tanning cattle, elk, moose, horse or buffalo skins, and want to keep them whole (not a very good idea unless you really need it that big), start keeping your eye peeled for larger containers. However, too large is too large. You don’t want to have to use excess amounts of liquid to tan, rinse or lime a hide.


BARK CHOPPING

Primitive and slow, but effective enough. The benefits are that it makes you slow down and chill out, and it’s good hatchet practice.

Primitive and slow, but effective enough. The benefits are that it makes you slow down and chill out, and it’s good hatchet practice.

Some materials, like sumac leaves are easy to use, but you will generally have to cut up barks, roots and woods. I have almost always used a hatchet on a block of wood. I lay out a tarp to catch the chips and start hacking away. You could use a small axe, but for most people, an average sized hatchet is a good weight to start with. A heavy hatchet or axe can lead to repetitive strain injuries like carpal tunnel much faster. Just ask my tendons about that.

Hatchets can also be used to “raze” off the outer dead portion of the bark, which was sometimes so removed in traditional tanning as it was considered unnecessary or even injurious to the leather.

Chipper/shredder machines can be very effective. Garden chippers are often under-powered for thick heavy bark, but they are nice when they work. If necessary, you can break the material up into smaller pieces, or try shredding it while still fresh and softer. If there is a lot of rust in the chipper, it could contaminate and darken your liquor. Consider running some branches and leaves through the unit to clean it out.


COOKING POTS

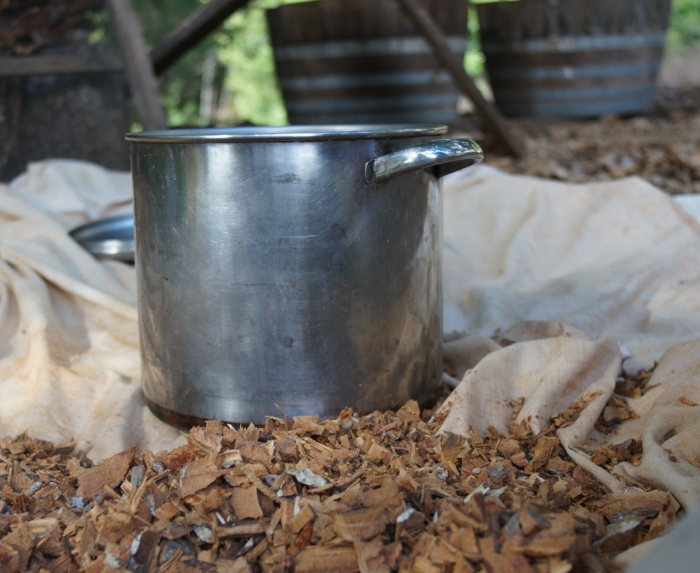
It is possible to extract the tanning materials from plants with cold leaching, but it is much faster to cook it out. Even though I don’t know that it isn’t safe, I have always avoided aluminum. That is easy for me to do though, because I have large stainless steel pots from 3 to 5 gallons. Enamel pots could work, but be sure there are no rusty spots where the enamel has chipped away. Copper was used at one time, but large copper containers are expensive and uncommon. Large thin walled stock pots with thin bottoms can be very cheap and are fine for cooking bark, but will easily burn food if you are not careful. Try to get at least 16 quart and preferably 20 quart or larger. I find large stock pots like this to be indispensable tools in my lifestyle and they are a lifetime investment. When shopping key points to look at are thickness, build quality (especially handles) and steel quality. Some stainless imports are made of inferior metal. Read reviews carefully. When I won some fancy all clad cookware in a contest, I sold it on ebay and bought a Tramontina stock pot, which I’m happy with.

A 3 gallon stainless stock pot. Get 20 quarts or larger if you can afford it or better, repurpose a stainless beer keg.

A 3 gallon stainless stock pot. Get 20 quarts or larger if you can afford it or better, repurpose a stainless beer keg.

You can also modify an old beer keg, which many home brewers do for cooking beer mash. Full sized Kegs are 15.5 gallons and a 1/4 keg is 7.5 gallons.

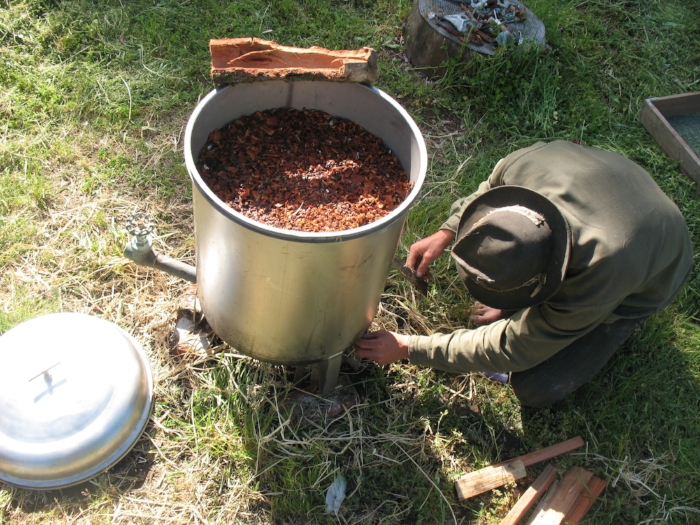
I also own a large pool filter housing that must hold around 25 to 30 gallons. I set it up with a valve and cook large batches of canning jars and bark in it. I have never seen a comparable one. In most units the lid is nearly as tall as the body, making them of limited use.

My pool filter housing bark boiler, aka the MEGA CANNER.

My pool filter housing bark boiler, aka the MEGA CANNER.


Happiness is tan liquor on tap. It doesn’t get any better than this folks.

Happiness is tan liquor on tap. It doesn’t get any better than this folks.

SLICKING TABLE OR BOARD

To use the following two tools, the slicking iron and slicker, you need a large flat surface of some kind. The skin is stretched, smoothed and flattened with this trio. These are only used if you want to dry the skin smooth and flat. If the hide is to be softened you dry it in some way that is less involved. A good technique for drying hides flat is to paste them down to the board with fat applied to the flesh side. This technique allows us to finish the grain out perfectly smooth and then leave it on the board to dry slowly. Just put it where your chickens can’t walk on it! You can also nail the skin to a wall to stretch it, or lace it into a frame, but for leaving hides well flattened and finished, you probably can’t beat the slicker and slicking Iron on a smooth slab. If you are doing thick skins, you can get away with something that has a rough surface, such as unfinished plywood. When working thin skins on a slab, the surface should be smooth or the texture of the surface will show through on the grain, much like the technique of rubbing a piece of paper placed over a textured surface with pencil or charcoal. I use plywood and a large slab of thick salvage plastic. Traditionally, stone tables have been used. If you run across a large surface that is very smooth, water resistant and 4 feet or more wide, grab it.

A large sheet of salvaged structural plastic that I use as a slicking board.

A large sheet of salvaged structural plastic that I use as a slicking board.

Cattle leather oiled and pasted out to boards to dry with the slicker. When working with thick skins, the board texture will not show through. When finishing thin skins, you will need a smooth surface unless the skin is to be softened later, or the …

Cattle leather oiled and pasted out to boards to dry with the slicker. When working with thick skins, the board texture will not show through. When finishing thin skins, you will need a smooth surface unless the skin is to be softened later, or the wood grain will show through on the hide’s grain surface.

The skin can be pasted to the board with a coating of fat on the flesh side. It will stick well enough if it is dried slowly. When pasting thick skins to boards, you must use wood for thick skins or the skin may mold from drying too slow. For thin skins you can get away with pasting them to a non breathable surface like plastic, but make sure they still dry out within a couple of days. I use this technique a lot. I also often use it if I’m going to use the graining board to soften the skin (see below), but in that case, it is okay to use a rough piece of plywood, because the grain is going to be wrinkled and reworked anyway so the texture of the board showing through the skin is of no consequence.


SLICKER

This tool is usually made of stone or glass and you can make your own with a piece of slate. it is a slab of hard material, with one rounded smooth edge, and and smooth rounded corners. A handle is nice, but not necessary. The tool is used to smooth and even the grain side of the skin and to paste it down onto a slicking table or board with fat for slow drying. You could probably have a glass shop make you one out of a 3/8” glass. A shop that works with stone tiles should be able to make you one as well, or at least cut a slab for you if they don’t already have some spare tiles of the right size. If you want to make one, cut a piece of slate or other clean hard stone and grind the edge round on a slab of cement or sand stone. Use water as a lubricant. If the stone is hard, add sand with water to make a slurry. Slate is fairly soft and easy to work. This method will even work with hard stone or glass if you are patient. It can be finished and polished with diamond sharpening hones and/or sand paper. A belt grinder would also be very handy, but the dust will mess up your lungs. Silicosis fibrosis anyone? Glass grinders are lubricated with water to prevent dust. You can also still buy slickers new, since a few leather workers use them for polishing. I have also used hardwood and moose antler in a pinch.

Size should be around 4x5 inches and 1/4 inch or more thick, with the long edge being the rounded working edge.

Vintage slickers from the museum area of the Muir McDonald Tannery in Dallas Oregon, now sadly closed. Both are slate. In the tool on the left, it appears that there may be screws for clamping the slate into the handle.

Vintage slickers from the museum area of the Muir McDonald Tannery in Dallas Oregon, now sadly closed. Both are slate. In the tool on the left, it appears that there may be screws for clamping the slate into the handle.

Glass plate in a leather working machine. This partly replaced and augmented the slicker. This may be the scariest machine I’ve ever seen in operation. Muir McDonald Tannery, used to polish the grain of tooling leather.

Glass plate in a leather working machine. This partly replaced and augmented the slicker. This may be the scariest machine I’ve ever seen in operation. Muir McDonald Tannery, used to polish the grain of tooling leather.

Smoothing the grain and flattening.

Smoothing the grain and flattening.

Home made slate slicker 1/4 inch thick and a slab of repurposed jade with the edges polished

Home made slate slicker 1/4 inch thick and a slab of repurposed jade with the edges polished

ideal slicker edge is evenly radiused and polished.

ideal slicker edge is evenly radiused and polished.

The slicker at work dealing with wrinkly edges. This tool is always used with fat as a lubricant.

The slicker at work dealing with wrinkly edges. This tool is always used with fat as a lubricant.


SLICKING IRON

My current ideal slicking iron prototype. I would favor a thick blade. This is a tool where weight and rigidity can be advantageous.

My current ideal slicking iron prototype. I would favor a thick blade. This is a tool where weight and rigidity can be advantageous.

This tool is similar to the slicker in size and shape, but it is a metal scraper with a dull edge. It is used on the flesh side of the skin to even out wrinkles and smooth and stretch the skin out toward the edges, before turning it over to use the stone or glass slicker. The slicking iron should not be super wide, about 5 inches wide at most. If I made one to my specifications right now, it would as in the diagram. It would have a very, slight radius across the working edge. I would also add a generously sized hardwood handle that is slightly drop shaped in cross section, copper riveted, and saturated in raw linseed oil. Regular carbon steel is okay to use, but always check it for rust and clean before using. Never leave it resting on the skin.

A serviceable homemade sicking iron and a cheap dough scraper. The dough scraper is on the thin side, is already rusting and should be modified to narrow it. It is probably better to check in with local scrap yards, metal fabricators and sheet metal…

A serviceable homemade sicking iron and a cheap dough scraper. The dough scraper is on the thin side, is already rusting and should be modified to narrow it. It is probably better to check in with local scrap yards, metal fabricators and sheet metal workers.

Dough scrapers can be used if modified. Most dough scrapers are wide and could stand to have an inch or more removed from their width to make them 4.5 to 5 inches wide, which you can do with a hacksaw and files. Use a file to sharpen and modify. The corners should be rounded off well to a 1/4 inch radius and the whole thing sharpened from both sides to form a fairly obtuse edge (not too thin) and then dulled enough that it won’t cut the skin. The edge should be of such a dullness that it will easily grab the skin and pull it when the tool is used, but will not cut or gouge it. If shopping for one, look at reviews to make sure it is not too thin. Cheap scrapers will bend under the high stress applied to this tool under normal use. I bought this one and it is barely thick enough. It is also already showing some rust as cheap stainless steel is prone to do. Here are a few that look like they may be thick enough, but it’s hard to say until you see them in person. pizza cutter, RSVP, OXO. Keep in mind that they will still be better if modified by narrowing them, so dropping by your local sheet metal worker or metal fab shop first is probably smarter. They usually have lots of scrap around and all the tools to make something like this quickly, minus the handle. If you have a file, a drill and a saw to cut a kerf in a wooden handle, just have them cut out a slab for you and do the rest yourself. If you have a good metal salvage yard around, look there for scrap stainless.

This paunchy spot was eventually flattened completely by persistent work with the slicking iron and slicker.

This paunchy spot was eventually flattened completely by persistent work with the slicking iron and slicker.

You may very well be able to use some sort of household item or kitchen tool in place of the slicking iron, for instance a thick stainless spatula. You can also do some of this work on the beam with the fleshing knife, like stretching the skin our toward the edges. At times though you may wish you had the slicking iron for dealing with tough wrinkles and lumps in heavy hides. I would definitely say it is more necessary and useful when dealing with big thick skins. It’s not a tool you have to have to start tanning. You will know when you need it. Checkout this image of Talcon working down a paunchy spot in a bark tanned bull hide. That spot ended up totally flat in the end. This is the kind of application where the slicking iron shines.

The same hide flattened, smoothed, pasted with fat to the board and left to dry slowly.

The same hide flattened, smoothed, pasted with fat to the board and left to dry slowly.


OTHER OPTIONS FOR STRETCHING AND DRYING

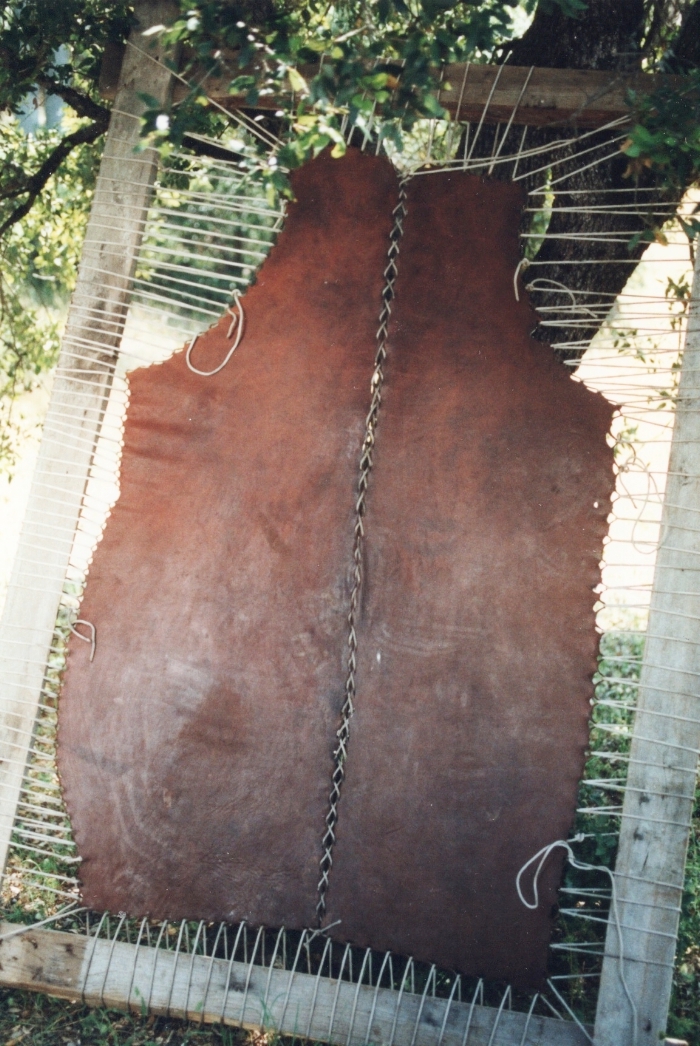
If you do not have a slicking table, and need to stretch a skin out to dry, you can use a frame with ropes. Cut many holes, parallel to the edge and lace the skin evenly and tightly. This will not always remove wrinkles and paunchy spots like slicking out on a flat surface can. Framing a hide is also a lot of work and wastes skin around the edges. Similarly, you can stake the skin out flat just off the ground. A better option than both for most people will be to nail the skin out to a large board or wall. Use hot dipped galvanized box nails if you can. Any nail that will rust is not recommended and nails that are already rusty are a sure way to leave black stains on your hide.

Horse sides framed for drying. Not the best solution in terms of labor and material conservation. It also does not provide the best options for flattening and smoothing the skin.

Horse sides framed for drying. Not the best solution in terms of labor and material conservation. It also does not provide the best options for flattening and smoothing the skin.


PALM AND ARM BOARDS

Old engraving of a Currier at work with an arm board. If you look closely, you can see that the artist illustrated the wooden teeth on the sole of the board

Old engraving of a Currier at work with an arm board. If you look closely, you can see that the artist illustrated the wooden teeth on the sole of the board

Skins can be softened by rolling on a table with the hands and forearms. These tools are used to make that job easier and work the skin a lot harder.

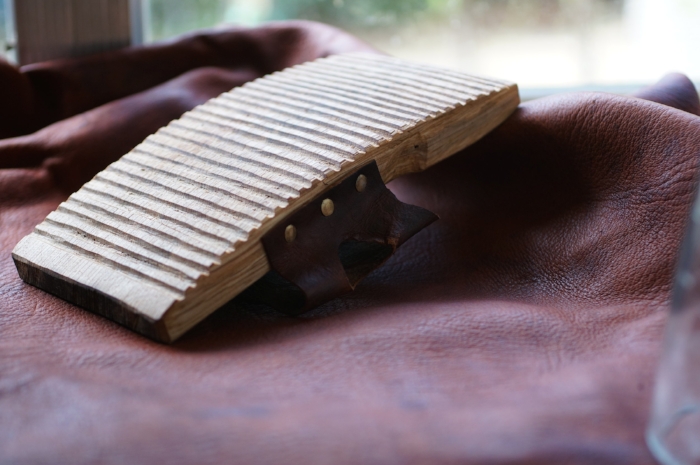
The soles are designed to grip the skin’s surface. One type has a wooden face with ridges carved into the sole from side to side for when the tool rides on the flesh side of the leather. Boards with cork glued to the soles are used when the tool will contact the grain side.

There are two basic sizes, a hand board, sometimes called a pommel, and an arm board. The hand board is short, 8” or less, with a strap that goes over the hand. The arm board rests along the forearm and has a strap at the back and a peg at the front for a handle. The difference is size and scope of work. Any home tanner ought to do fine with hand boards.

If the skin is worked folded grain side to grain side, the result is a pleasing wrinkled grain surface since the grain is crushed and compressed. The process of creating that grain effect is called graining, thus the term graining board. In this case, the sole of the tool touches the flesh side only and the teeth cut into the wood provide excellent grip.

Postion for graining process. Note the ridged graining board contacts the flesh side only.

Postion for graining process. Note the ridged graining board contacts the flesh side only.

Surface produced by graining

Surface produced by graining

DSC00568.jpg
DSC00575.jpg

If a board is used with the skin folded flesh side to flesh side, the grain surface is left smooth because it is stretched instead of compressed. The cork soled board is used in this case to prevent denting and damage to the grain surface.

An antique cork faced arm board from the Muir McDonald Tannery in Dallas Oregon. Note that the cork is partially worn off on the front of the tool

An antique cork faced arm board from the Muir McDonald Tannery in Dallas Oregon. Note that the cork is partially worn off on the front of the tool

Fancy Antique cork soled board.

Fancy Antique cork soled board.


MALLET

In some cases, we may want the skin to be compressed and hardened, not softened and broken loose. The tool for this is a wooden mallet with a polished face, which is used to condense the leather when it’s in a damp, but not wet state. The face can be close to flat, but the edges have to taper off and round out gently. If you are leaving any kind of dents in the skin, then you need to either hit the leather flatter, or refine the edges. The leather should be smooth when finished. Use the heaviest wood you can, mine is probably iron wood and is extremely dense. Polish the face to a gloss finish. In the past, both Iron and brass/bronze mallets have been used, but make sure they are very clean and polished, with zero rust or oxidation. Even so, you are risking staining the skin with a steel hammer, so I recommend sticking with wood.

The mallet for compressing and firming leather should be dead smooth. Use the densest wood available. The hide underneath in the foreground has been pounded leaving it about 1/3 thinner, much denser, stiffer and polished. Otherwise, it was exactly t…

The mallet for compressing and firming leather should be dead smooth. Use the densest wood available. The hide underneath in the foreground has been pounded leaving it about 1/3 thinner, much denser, stiffer and polished. Otherwise, it was exactly the same as the top piece.


STAKE

This is a dull metal blade set into a post that is used for softening and breaking open the fiber of skins. They are useful if you are trying to get skins really soft and for working furs. Unless you are doing one of those two things, it’s not a very essential tool. I find them more useful in braintanning buckskin and working furs of any kind. The post can be permanent or in a stand of some kind for portability. The blade should be rounded at the corners and they usually have at least a very slight radius. The width of the blade can vary. For any kind of large skins, a wider blade would be better. 5.5 inches with the edges rounded to a 1/4 inch radius and a very, very slight radius to the whole edge would be good for general home tanning work of all kinds. A lot of dough scrapers are 6 inches wide, so that might be a good source of material for a blade. It should be stainless if possible, so you can leave it wet or in the weather. Use stainless steel screws as well.

A simple portable stake used for classes. A fixed stake or one on a heavy base is better if you’re going to use it a lot.

A simple portable stake used for classes. A fixed stake or one on a heavy base is better if you’re going to use it a lot.

Use stainless steel screws

Use stainless steel screws

A good stake blade design for the home tanner.

A good stake blade design for the home tanner.

This blog post and similar content is informed by almost 30 years of research, experience and communication with other tanners. You can support my efforts to bring back and preserve these traditional self reliance skills and arts by sharing content to friends, forums and social media, with general financial support on patreon.com/skillcult, or with one time donations using the link in the side bar. I also now keep separate accounts for earmarked donations toward research in tanning and apple/plant breeding. If specified, donated funds will be used for things like tools and materials, and outside labor solely related to either endeavor. Thanks for reading :)

The Tanner's Knife, An Essential Multipurpose Tanning Tool for Fleshing, Dehairing, Scudding and Frizzing

P1160238.jpg

The fleshing knife as it is commonly known, but probably more appropriately known as a tanning or tanner’s knife, is the primary tool of the tanner. This versatile knife can be used for fleshing and re-scraping the flesh side of the skin, de-hairing, removing the grain (frizzing), scudding out liquids to flush unwanted moisture and loose material from inside the skin structure, moving the hide on the beam and trimming the edges of the skin. While there are specialized two handed knives for some of these tasks, they can all be performed with the same tool if it’s within certain design parameters, which is what will serve most home tanners best. In this Blog post and video, I go over some of the different types, both commercial and homemade with some tips on weight, length, styles, making your own, and other such things.

The focus here will be on the home tanner working on beams about 8 to 12 inches wide. Keep in mind that most new models are designed by and for fur trappers, most of whom do not do a lot of general tanning work. The amateur tanner can get by with tools that are much less than ideal, so there is no need to overthink the problem too much, or find the perfect tool just to get started. You can always upgrade later if you want to.

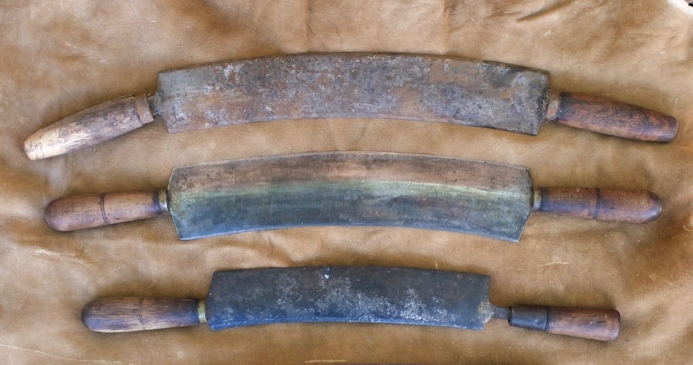
Length: The typical professional tanners knife of the European style is quite long and not really best suited to the home tanner. Samples I have range from 3 to 3-3/8 inch wide. 16 inches is a typical working edge length. These long knives were often used on very wide beams with shallow curves. The strong, experienced men using these tools, combined with the large area of contact formed between the gently curved edge of the tool and the wide beam, would make for very efficient and quick work. I think the ideal length for home tanners working a variety of skins on narrower beams is about 20” long in total with 11” working edge and 4.5” handles. A working edge up to 12 inches and down to 10” with 4.5 inch handles is also fine. With such a length, the tanner can comfortably do all manner of work from very large hides, down to fur skins. Wider beams require wider knives and/or the edge of the tool may need to protrude out in front the handles. I would not recommend working edges much smaller than about 10 inches, and then only out of necessity. It is not just the working edge though, but also the space between the handles, which allows for comfortable work.

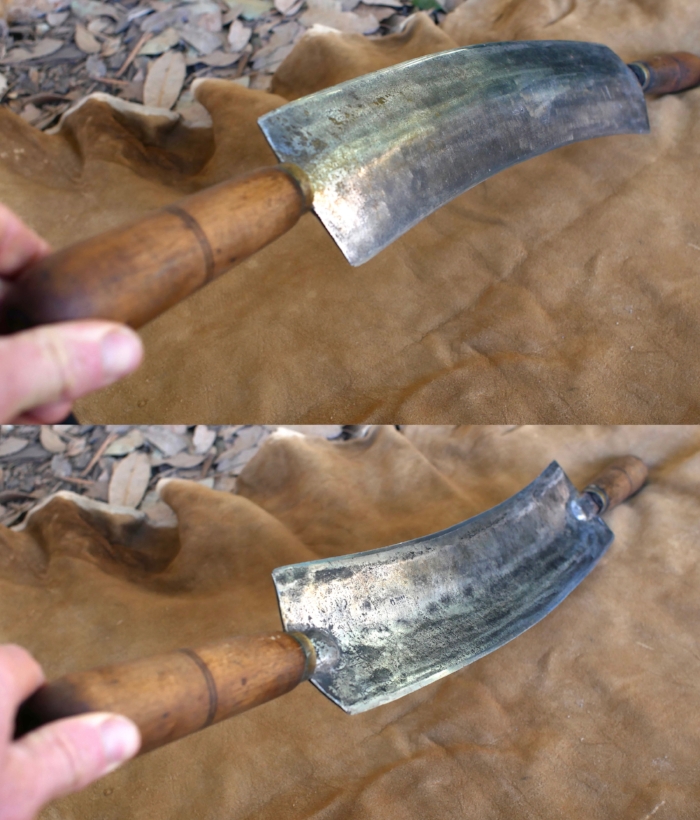
Styles: Nearly all traditional styles seem to be curved. The classic European style of tanning knife that is most common is wide, curved and dished. The compound curves of the cup and the arc combine to strengthen the tool, allowing it to be fairly thin, and yet still very rigid. The concavity of the underside seems to offer some geometric advantage in scraping. The concavity also means that the tool can be used flat on the hide without rubbing on it, which I suspect might be part of the impetus for the design, although I have rarely used them that way. Professional tanners who worked hides day in and day out would probably be able to get away with doing things that the rest of us can’t, such as using sharper tools at lower angles. These traditional, wide, dished knives are very nice to use, though if I were designing one from scratch for home tanners who are doing many different types of skins and tasks, I would probably make it considerably narrower than they usually are and no wider than 3 inches. The back edge is sometimes kept very sharp and can be used for tough spots, gaining access under tough membranes, or as a sharp slicing knife for trimming the skin during fleshing. I have also read of tanners filing teeth into the back of the knife so it can be used to pull skins up the beam to reposition them for scraping without using the hands. You can do this maneuver on small skins without cutting teeth in the back of the tool, and I do, but on large heavy hides, I can see why they would make this modification. The option is to let go of the tool with one or both hands to readjust the skin on the beam as each area is worked over, which is much slower.

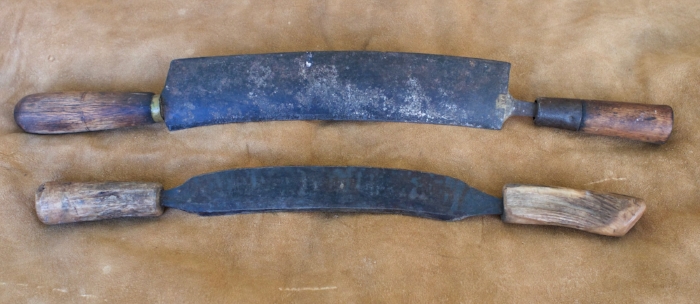
Traditional style knives. From the top down, A cheaper modern version @ 16”, W.H.Horn & Bro’s England 15” edge-3-3/8” wide- 27” total length, Horn Brand cut down to a 12 inch blade by someone who probably thought 16 inches was too long. I just saw a…

Traditional style knives. From the top down, A cheaper modern version @ 16”, W.H.Horn & Bro’s England 15” edge-3-3/8” wide- 27” total length, Horn Brand cut down to a 12 inch blade by someone who probably thought 16 inches was too long. I just saw a picture online of one cut down exactly the same way. It even had a similar handle. Just goes to show, those super wide tools are for use by professionals in a professional setting and not suited to everyone and every task.

W.H. Horn fleshing knife from ends.jpg

Other tools are narrower and usually thicker, sometimes with only one working edge. This type is good for home tanners with a surprising number of models and brands available new. Newer ones are often sharpened on the back as well and many are fairly flexible compared to older ones I’ve seen.

Width: A versatile knife for the home tanner would probably be anywhere from 1.5 to 3 inches wide. Though still very usable, extremely wide tools can be less stable when it is required to push very hard as is sometimes necessary when graining (frizzing) un-limed buckskins or fleshing very difficult skins. My two favorite tools currently are a shortened traditional cupped knife that is worn down quite a lot to about 2.5 inches wide. More relevant though, is that the concave curve, which is the main working edge, has been worn back closer to the handles, making it more stable to use when pushing very hard. A full width knife however is fine as well, but if I designed one from scratch it would probably be under 3 inches wide.

Another favorite tool I have was forged out of a wagon leaf spring and is about 3/16 inch thick and 1.5” wide, which makes for a durable, versatile tool of a good weight. Tools as narrow as 1 inch can be fine too depending on material and use. There is a type of knife that is very thin and flexes to conform to the curve of the beam, but I have never had a chance to examine, let alone use one. If the tool is both narrow and short, the handles may get in the way, necessitating the use of a very narrow beam.

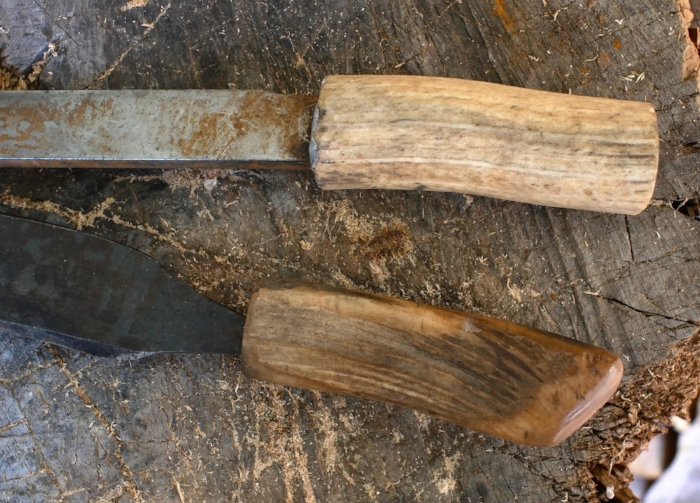
For whatever combination of reasons, these are the tools I’m most likely to grab first. The. traditional wide knife is worn back, making the edge closer in line with the handles, which is more stable when doing hard work. The second is forged from a…

For whatever combination of reasons, these are the tools I’m most likely to grab first. The. traditional wide knife is worn back, making the edge closer in line with the handles, which is more stable when doing hard work. The second is forged from a wagon leaf spring, 3/16” thick, 20” long, 1.5” wide. The working edge is only 9.25”, but there is plenty of working room between the handles. If I made a knife like this again it would have a 10” or 11” working edge. the handles are antler.

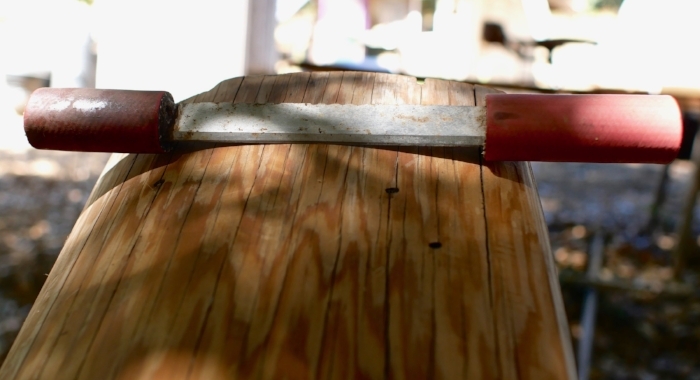
If the tool is too short and narrow, you will not be able to use it on wide beams like this one, because the handles will interfere. It also doesn’t give you a lot of real estate to work with on the edge. If the hands are held too close together, it…

If the tool is too short and narrow, you will not be able to use it on wide beams like this one, because the handles will interfere. It also doesn’t give you a lot of real estate to work with on the edge. If the hands are held too close together, it can become less ergonomic to work. The wider your shoulders, the wider the tool could be.

Thickness and weight: Wider tools are generally relatively thin in order to avoid excessive weight. Narrower tools are often a lot thicker, though many of the newer, higher end tools are thinner than the older ones were. A range of weights are usable, but tools can be both too light and too heavy in my opinion. I’d much rather a tool was too light, but some weight offers stability and the advantage of momentum in some scraping processes.

Straight v.s. curved: Straight tools are perfectly serviceable. I do prefer a curve and would never design the perfect tanning knife with straight edges, but if material is available to make a straight tool, I would not hesitate. I’ve used straight planer blade tools for countless hours and endless square feet of hide scraping. Once I started using a curved tool, I was sold instantly, but I could go back easily enough. I think the main advantage of curved tools is that it is easier to incorporate tilt and slide techniques in scraping.

Tilting the knife edge slightly off of perpendicular is an important refinement to scraping technique. Imagine a straight edged fleshing knife held at a slight angle by putting one hand slightly away from you, and one hand slightly back toward you. If the tool is pushed straight forward while tilted askew like this, there is a slight advantage in scraping, something akin to a slicing action, though not quite the same. You can achieve the same effect with any cutting edge in wood, such as a plane, spokeshave, knife or draw knife by tilting it. This subtle difference in technique can have a large effect. Curved tools, when held slightly to the left or right, create this effect automatically without having to hold the tool askew at all, or at least less so.

Sliding the tool side to side very slightly in a slicing motion as the tool is pushed forward is another very important subtle refinement of the hide scrapers art. Combined with tilt, it is even more effective. Since tilt is already built in to a curved knife, it is easier and more ergonomic to achieve this combination of techniques when using a knife with a curved edge.

The radius of the curve should not be too drastic. Shown are some curved tools to give you an idea of what some look like. A factor in degree of curvature, or lack of curvature, is that the radius of the beam combined with the radius of the knife determine how much of the tool contacts the beam. That contact width has everything to do with how much work is done with each stroke and how hard it is to do that work. In one extreme case, you might be scraping off the grain from the tough neck skin of a deer, which is going to require a narrow area of contact. If the width of contact between beam and knife is wide, you will have a very tough time of it. Still, with an 8 inch beam and a very moderately curved knife, you should still be okay. For general work, I prefer a beam around 12 to 14 inches wide with a moderate curve. Coupled with a curved knife, that makes for a reasonably wide area of contact resulting in efficient work for most processes. If I used a 6 inch wide beam with a high crown and a straight tool, I would be at my work much too long when doing most of the relatively easy processes that I engage in most often, such as fleshing and dehairing, simply because the strips I would be scraping off would be so narrow.

If a straight line is drawn from one corner of the edge to the other, the distance from that straight line to the tool edge at the center of the tools are as follows Top to Bottom:9” long, 5/16” to edge,15” long, 3/4”16” long, 3/4”12” long 1/2”Botto…

If a straight line is drawn from one corner of the edge to the other, the distance from that straight line to the tool edge at the center of the tools are as follows Top to Bottom:

9” long, 5/16” to edge,

15” long, 3/4”

16” long, 3/4”

12” long 1/2”

Bottom tool, not measured

The bottom line is that I prefer a moderately curved tool for general work. The curve I would start with as a prototype for testing would arc in an even radius, with a rise of about 3/8” at the center of the tool on an 11” blade.

Material: The cheapest knives are made from cheap mild steel which cannot be tempered to keep an edge. This type of budget tool can work, but they are not preferable and will require more frequent sharpening. Better knives are made of tool steel and tempered to take and hold an edge. If at all possible, I would recommend something that will hold an edge. Stainless tools are nice to have when working around water and salt, but If tools are taken reasonable care of, regular carbon steel is fine. Planer blades, discussed below are rust resistant, but not stainless. For making tools at home, you can use a number of common pieces of steel.

Miscellaneous steel items that could be used to make a tanner’s knife. Left to right, a set of car leaf springs, section of leaf spring, chainsaw bar, lawnmower blade, planer blades

Miscellaneous steel items that could be used to make a tanner’s knife. Left to right, a set of car leaf springs, section of leaf spring, chainsaw bar, lawnmower blade, planer blades

Leaf springs from cars are good. If possible, find a set that is narrow. Almost every junk car has a full set of springs under it waiting to be salvage with the removal of a few bolts. The steel is temperable and already hard enough to work well enough. If you can find a narrow spring, you could grind out a tool and retain the temper if you are careful and patient.

Chainsaw bars seem like a great source of steel of a good thickness. I’ve never used them, but I understand they are carbon steel of some kind, and would already be hardened and tempered to hold their shape under hard use. Once worn, they are of no use on a chainsaw and should not be hard to find in any rural area in the states.

Lawnmower blades: are fairly common and seem like reasonable stock to work with. They have a propeller twist which would have to be removed, necessitating heating, forging and preferably re-hardening and tempering afterward.

Large files are a good source of tool steel,and could be used. I would grind or file out all the teeth though. They are too hard as is, so making a good tool with one would entail at least heating to anneal (soften), grinding to shape and preferably re-tempering. If you’re going to do all that, you might as well forge it out into a better, wider, curved tool.

Misc mild steel bars can be used, but will not hold an edge well. In a pinch, you can even use a square edge, instead of a more knife like beveled edge.

Planer blades of high speed steel make very nice scrapers. They are extremely hard, tough, rust resistant and hold an edge incredibly well. Another advantage is that since they are straight, some will have two usable edges. I use two tools or edges of varying sharpness during the processing of most hides into bark tanned or braintanned leather, so having two edges of different sharpness on one tool is great.

Tools made from planer blades. The top three are made from narrow blades and pretty short. The top two have handles made of wood covered with rubber or vinyl tubing. the third is antler handled and the fourth is a short blade tied into a slotted woo…

Tools made from planer blades. The top three are made from narrow blades and pretty short. The top two have handles made of wood covered with rubber or vinyl tubing. the third is antler handled and the fourth is a short blade tied into a slotted wooden handle, giving a longer working edge on a short blade.

The steel in planer blades is too hard to drill with normal tools, but can be ground easily enough with a 4 inch grinder, belt grinder or bench grinder. [EDIT: Melvin Beattie, one of my tanning teachers, Just wrote me the following: “Yes you can drill planner blades, files, etc.. Here are the drills that work, I have used them many times putting handles on planer blades. If I am using a hand drill start with a 1/8 “ then use 1/4” but you have a drill press just use the 1/4’’ and a good drill lube.” ] Handles for planer blades can be of two pieces of half round wood with rubber or vinyl tubing or epoxied wood (rough up and clean the metal surface before applying epoxy).

Planer blades can’t be drilled or sawn easily. To shorten, grind from both sides until thin, clamp in a vice, then break off.

Planer blades can’t be drilled or sawn easily. To shorten, grind from both sides until thin, clamp in a vice, then break off.

P1160275.jpg
Vinyl tubing with wood. Grind handle section down to 1” wide. Wood 1” wide. Vinyl tubing 1” available by the foot and many hardware stores. total length 4” to 4.5” Some will just pound tubing over the flat wide handle, but it’s very uncomfortable fo…

Vinyl tubing with wood. Grind handle section down to 1” wide. Wood 1” wide. Vinyl tubing 1” available by the foot and many hardware stores. total length 4” to 4.5” Some will just pound tubing over the flat wide handle, but it’s very uncomfortable for protracted use. The wood can be any easily split straight grained wood. There is no reason to use hardwood.

Antler handles are also very nice and may be the best option if the planer blade is only 12 to 14 inches long. You need at least 1.5” stuck into the antler, preferably more. Grind the end of the tool that will go into the handle to fit within the antler pith as shown in the photo below. Smooth and round off all sharp edges and grind the end into a slight wedge. Soak the antler overnight then boil for 15 or 20 minutes. Clamp the blade in a vice if you can and pound the antler handle onto it. Don’t drill the antler, just pound it onto the end of the blade. Allow the antler to dry completely before using it at all or you will loosen the union. Finding comfortable pieces of antler that are not too curved or too small can be a trick, but you can end up with very nice handles. Antlers vary in the amount of pith they have and general density and strength. If the antler is not too pithy, this method can also work for narrow tangs.

Antler handles set while wet and boiling hot at least 1.5” deep, deeper is better.

Antler handles set while wet and boiling hot at least 1.5” deep, deeper is better.

The width of the blade should roughly match the width of the honeycombed pith.

The width of the blade should roughly match the width of the honeycombed pith.

Grind the end of the bar to a slight wedge and round off all sharp edges.

Grind the end of the bar to a slight wedge and round off all sharp edges.

Grinding out tools: If you have a piece of stock that is already tempered, such as a chainsaw blade or car leaf spring, it is possible to grind and or file it to shape without changing the temper. If you overheat a hardened and tempered tool in grinding, it will become soft, a mistake commonly referred to as “burning” the steel. If you see colors appearing on the edge of the tool during grinding, you are flirting with danger. For something the hardness of a tanning tool, avoid letting the steel turn anything darker than bronze color, after that it will turn a purplish color, then light blue. Dark blue is pretty much dead soft, so stay well on the right side of that color. Using a high speed bench grinder, 4 inch angled grinder or belt grinder, it is very easy to overheat steel, especially when thinning the edge. Work in very short spurts, with frequent water cooling and watch for those colors with unfailing vigilance. For a tanning knife, one of two soft spots are not likely to cause you huge problems, but do your best to prevent them.

So, what is the ideal tanning knife for home users? I would definitely be a compromise in some way, but that would also be it’s strength. I have drafted up some plans and I hope to someday experiment with some prototypes. So many projects, so little energy :-/ for a fairly simple tool, I would say a good place to start would be a moderately curved, 3/16” thick, 1.5” to 1.75” wide, 11” working edge and 4-1/2 inch handles for a total of 20” long. Such a tool could be filed or ground out of a chainsaw bar, or forged from leaf spring or a large file. I would put a bevel on the back, to keep sharp for trimming skins during fleshing and other tasks. The bevel on the front concave edge should be at least 45 degrees, but thinner would be better, maybe something like 20 to 30 degrees?

As far as new knives go, there are a lot on the market. On the low end, the Wiebe 12” knife is as cheap as 20.00 before shipping from some dealers. According to Dakota Line Snares, a Wiebe dealer, “The steel on all three of the fleshing knives (8”, 12” and Elite) is 3CR13: Hardness Hrc52-55. The Elites are sharpened in the U.S.”. I think the Wiebe 12” flesher might be a very good budget option for new home tanners. Reviews on Amazon are good, but it’s hard to know what people are doing with them or how many of them are experienced enough to judge. In some pictures I’ve seen, it appears to be bent just in the middle in the classic dog leg formation common in cheap knives instead of forming a long gradual arc. In others it appears to be bent off center, or not much at all. I would not expect too much quality wise. They are produced in China with Chinese steel. A step up from that class of tool, there are the Wiebe elite, Neckers of various models, the caribou and Au Sable are in the 65.00 to 95.00 range and generally get good reviews. Many of them may be more flexible than would be ideal for a home tanner, so shop with caution. I have the Necker 600 and am not crazy about the handle design or the down sloped handle angle, but I actually haven’t used it yet. It is also more flexible than I’d prefer. The wider necker 700 looks interesting but it’s a little more costly at 95.00

Also in the mid range, there are affordable imitations of the European style knives that are sold in the U.S. According to one supplier they are stainless. The 12 inch version (which I would recommend over the 16 inch) is about 45.00 to 50.00 My guess is that the tangs will be the weak link in these English knife copies. There are also new real English Sheffield knives by J. Adams which have separately attached tangs that run all the way through the handles. They are expensive at about 145.00 for the 12” model. This is the high end of new tanning knives, outside of custom made tools. I would hunt ebay for an old european style knife before purchasing the new Sheffield knives. The problem with the antique ones is that they are usually on the long side for a home tanner. Exercise caution in shopping for new English knives as the American made copies are sometimes unscrupulously marketed as being from England or Sheffield.

Typical of old school quality, the two tools at the top have heavier, thicker tangs forge welded onto the blades, while the lower tool has a thin tang that is cut out of the same metal the body is made from. As a result, the thin, sharp edged tang h…

Typical of old school quality, the two tools at the top have heavier, thicker tangs forge welded onto the blades, while the lower tool has a thin tang that is cut out of the same metal the body is made from. As a result, the thin, sharp edged tang has split the handle. The sad thing is, it’s much easier with modern welding to weld separate tangs on.

The older tools have full thick tangs that go through the handle to the end where they are pounded over like a rivet, making for much stronger handles that put less stress on the wood. I don’t think this is one of them, but I suspect that the new pr…

The older tools have full thick tangs that go through the handle to the end where they are pounded over like a rivet, making for much stronger handles that put less stress on the wood. I don’t think this is one of them, but I suspect that the new production Sheffield, English knife copies sold in the U.S. probably have these these type of cheap flat tangs. I may try to modify this tool to make is shorter with thicker tangs and handles that come more nearly straight to the sides instead of arcing downward. I’m thinking some small metal parts and some JB Weld…

For me to buy and test all of these tools would be quite expensive obviously. I also don’t tan enough currently to put them to the kind of test needed to sort them out really well. None are what I would design from scratch, but again keep in mind that most of these are designed by and for fur trappers, whose only job typically is fleshing furs.

For used tanning knives, ebay is the best market, although they do show up on Etsy now and again. Obviously you can hunt old junk and antique stores, but you will be lucky to find one at all, let alone at a reasonable price in good condition. Avoid the cheapest and very common knives that are bent in the middle instead of in a continuous arc. These cheap tools usually have wire wraps on the handles, but some have solid ferrules. They are made of mild steel. They will work, but get something better if you can afford it. With the Wiebe 12” budget knife being tempered steel, there is hardly an excuse to buy a mild steel tool.

The common very cheap tools of mild steel like these should be avoided if you can afford something better.

The common very cheap tools of mild steel like these should be avoided if you can afford something better.

Quality vintage tools of both the old school thin wide cupped European type and the thicker narrow type tools come up on ebay, but they are often over priced. Patience is key. Look at ended auctions to see what has and hasn’t sold in the past and for how much, as well as what has been re-listed recently or lowered in price. There is a W.H. Horn and Brothers knife, just like mine, in nice condition for 85.00 plus shipping on ebay right now. Last week it was listed for 150.00

A Review of Tanning, Leatherworking and Skin Related Books in My Collection

Below are Tanning and skin working related books collected by myself and Tamara Wilder over the years.  The video version talks about these books and a little history and such.  Some of them are broadly recommended, and some are only for people with certain specific interests.

Many, many books on Tanning, Glue Making and Leather working that are not listed here are available as free downloads from the Downloads page, SkillCult.com/freestuff

51Y6BJ9E6CL._SX307_BO1,204,203,200_.jpg

Buckskin, The Ancient Art of braintanning, Steven Edholm and Tamara Wilder, 1997: 

The book I wrote with Tamara Wilder in 1997.  From what I've seen, it is probably the longest and most detailed book on home tanning to date, especially considering it's focus.  As of writing this, it is currently out of print with plans to revise and re-print in digital and print forms.  Covers wetscrape braintanning, with some satellite subjects like sharpening and dyeing buckskin with natural materials.  If you've read it, please consider leaving a review on Amazon.


513MHSX5GKL._SX300_BO1,204,203,200_.jpg

Deerskins Into Buckskins, Matt Richards, 1997: 

Published the same year as our book, this one also covers the wetscrape method, but focused on bucking, which is using alkali to soak the hide instead of water.  It is the best, if not only, book reference for that technique.  There is also a companion DVD.


lotta tanning.jpg

Traditional Tanning Leather and Furskin, Lotta Rahme, 2014:

This would probably be my number one recommendation of a book on general tanning covering a lot of ground and many methods.  It has lots of anecdotes and tidbits on traditional tanning from various parts of the world, and good basic information on tanning chemistry and theory.  If a person were interested in braintanning primarily, they should get a book on that subject.  This may be currently the best single book reference for vegetable (bark) tanning.  Lotta is an experienced, small production tanner, with her own micro-tannery, so she has real insight, skill and knowledge to offer.


61V66pz-kLL._SY344_BO1,204,203,200_QL70_.jpg

Fish Leather Tanning and Sewing, Lotta Rahme, 2006: 

Lotta's cool book on tanning fish skins.  This is a popular subject.  I keep hearing about and seeing more and more fish leather. Much of the information is also contained in her general leather tanning book, but there is also a lot of information specific to fish skin and various species of fish, though they seem largely to be species from her part of the world, Sweden.


Screen Shot 2018-02-18 at 7.09.20 AM.png
jim riggs .jpg

Blue Mountain Buckskin, Jim Riggs: 

My teacher and teacher of my teacher Jim Riggs.  Jim was largely responsible for disseminating braintanning knowledge, having learned from his teacher Buckskin Slim Scheafer, who's book is below.  This is the best all around reference on dry scrape braintanning.  Fun, thorough and insightful.  #1 recommendation for a book on dry scrape braintanning.

Jim died last year.  He was friend and mentor many and had a profound and enduring effect on the primitive skills movement.  Many people's live took radically different directions because of either contact with Jim, or with others infected with his knowledge and philosophy.  My buckskin book contains much of Jim and would not exist without him.  Blue Mountain Buckskin is an enduring slice of Jim in the best way.

Tribute page for Jim Riggs: https://www.facebook.com/pg/jimriggsmemories/community/


Melvin_Beattie_Skinning.jpg

The Tanning Spirit video, Melvin Beatty, click here to watch:

Mel is one of the best tanners I know to this day and has always produced the best quality wetscrape buckskin.  His tips helped me get to producing better wetscrape buckskin.  You can watch his video on the subject on youtube now.

Also visit mel at the following.  He posts tips and experience on braintanning at his facebook page.

www.Braintanbuckskin.com

And Facebook as BraintanBuckskin


Screen Shot 2018-02-18 at 4.11.12 PM.png

The Indian Art of Tanning Buckskin
"Buckskin Slim" Schaefer, 1973

Jim Rigg's teacher Slim wrote this book at Jim's urging.  It was published the same year as Larry Belitz' book, Brain Tanning the Sioux Way, those being the first two books specific to braintanning that I know of.  This book is out of print, but they show up on ebay and elsewhere now and again at not unreasonable prices.


belitz.png

Brain Tanning the Sioux Way, Larry Belitz:

This is a small book and lacking somewhat in detail. There is enough information to learn the process, but it will be more trial and error than when using a more in depth book.  I think a lot of braintanners in the 70's and early 80's probably learned at least partly from this book.


9780941531009-us.jpg

Making the Attikamek Snowshoe, Henri Vaillancourt:

Available on the Author's website, this book is fantastic.  It is exactly what it should be, a detailed documentation of a traditional art, with as much important detail as possible, recorded in quality images and insightful text.  Henri is part anthropologist and part craftsman, which is how it should be, but almost never is.  The section on hide working outlines interesting traditional methods common to moose country for tanning skins and producing rawhide, both very important skills in that part of the world.


8490.jpg

Home Tanning and Leather Making Guide, A.B. Farnham:

This guide has some useful information, but leaves something to be desired as a stand alone guide to tanning.  It is still one of the better references for vegetable tanning and well worth taking advantage of, all the more so, because it is out of copyright and can be download from tanning book collection


Hardings_Pleasure_and_Profit_Books_Home_Manufacture_of_Furs_and_Skins_10__30838.1450192916.386.513.jpg

Home manufacture of Furs and Skins, A.B. Farnham, no date: 

A useful book when it comes to handling and dressing furs.  Available as a free download from tanning book collection


61pSFtkB0AL._SX325_BO1,204,203,200_.jpg

Home Tanning of Leather and Small Fur Skins, USDA, 1923:

Of limited use due to lack of detail, but worth reading.  Download from tanning book collection.


295352._UY475_SS475_.jpg

Primitive Wilderness Living and Survival Skills, John and Gerry McPherson, 1993:

This book contains John McPherson's small book on braintanning by the dry scrape method.  It is a competent and useful guide to that subject, and also contains lots of other great stuff on primitive living skills of all kinds.  A good and useful book worth the price of admission from some old friends back in the day.


Aboriginal Skin Dressing in Western North America, Arden Ross King, 1938: 

This book is unobtanium, and likely only available in a few large university libraries.


The art of leather manufacture, Alexander Watt, 1885:

One of the better old books on tanning, although the only digital version I could find is the later 1906 version.  Available to download from the tanning book collection.  Much of the better part may be derived from the De LA LANDE translation below, which is more recommended.


The Art of Tanning and of Currying Leather... Collected From the French of monsieure De La Lande and others, 1773:

or download in my tanning book collection here

Maybe the best all around old resource I've found, introduced to me by friend and tanning colleague Jason Leininger.  Unusually well written and exhaustive for that time period.  Anyone who reads french should go to the original text, as no doubt things are changed, left out, or lost in translation.


51ATZS12P7L._SX327_BO1,204,203,200_-1.jpg

Dictionary of Leather-Working Tools, Circa 1700-1950 R.A. Salaman,1986:

Another book primarily for the enthusiast, tool maker and researcher.  A jillion variations on leather working tools as well as some tools of the tanner and currier.  Helpful in identifying old leather working and tanning tools.


71ABI1d95uL.jpg

Secrets of Eskimo Skin Sewing, Edna Wilder, 1976:

Traditional patterns and techniques from the source.


glue book, dawidowsky.jpg

Glue, Gelatin, Isinglass, Cements and Pastes, Dawidowsky & Brannt, 1905: 

This is the book I learned most of what I know about glue making from.  It is a technical manual for manufacturers from the intersection of tradition and science at a time when hide glue was still king.  Dowload free from Glue Books Collection


41ZLXqzsHzL._SX276_BO1,204,203,200_.jpg

The American Indian Parfleche a Tradition of Abstract Painting, Gaylord Torrence, 1994:

An art book, packed full of art-speak.  There is some interesting history, and the small amount of functional detail it does contain helped me figure the process out eventually.  The photos are excellent.  This is a beautiful and unique practical art form that originally combined a functionality tailor fit to a singular lifestyle with expressive art.  Very neat book.


Bark Tannned Leather Clinic With Zack, Vegetable Tanning

graomomg booaoe.jpg

Zack Hribar came over to show me his first batch of bark tanned leather.  We shot an informal video talking about them and vegetable tanning options, troubleshooting the hides, stories and that sort of thing.  It was fun.  Zack is an enthusiastic new bark tanner, check him out on instagram as z._hriack_bar

Original Illustrations From My Book, Buckskin, The Ancient Art of Braintanning

In the 90's I wrote a book with the my partner at Paleotechnics and Wife at the time, Tamara Wilder.  We need to reprint and were sorting through the original copies so I made a quick video showing some of them.  We have a few copies of the book available on http://www.paleotechnics.com but I took it off of Amazon until we reprint, though some sellers may still have a few strays for a while and there will be the inevitable copies selling for hundreds of dollars claiming that it's out of print.  Which, I guess it almost is now.  Hopefully we'll have it back in print soon.

Axe Strops #6 Tanning the Deer Skin in Oak Bark

In this segment we finally begin tanning the skin.  Vegetable tanning is one of the neatest things I've ever learned.  This is the most exciting part where the hide fiber is transformed into leather.  Leather is not skin or tannic acid, it's a unique material made of the marriage of those two.  It can be left in the weather for years, and though it may become moldy and damaged it will not rot away for a very long time.  There are pieces in my compost piles that I pull out and throw back in every year just to see how long they will last.  The first piece of leather I tanned was a rotten piece of skin that I should have buried, but I had some oak bark sitting around so I made a solution and tossed it in.  The tan almost seemed to heal up rotten parts of the skin and knit them together.  I still have that piece of leather.  I left it hanging in a tree outside for a year or two once, but it appears pretty much unfazed.

Axe Strops Project #4, Unhairing the Deer Skin, (Cordwood Challenge)

Moving along with Part 4 of making axe strops from scratch for the cordwood challenge.  As some will remember, two of the hides for the project were stolen by a bear or bears.  The remaining hide is now ready to flesh and begin the deliming process.  In this video I finish scraping over the skin to remove as much hair as possible and then re-flesh it.  Next it is rinsed and scraped alternately to remove all of the lime and return the skin to it's normal flaccid state before tanning.  Also below is my original video on unhairing skins for tanning.

Axe Strops From Scratch #2, Fleshing the Hides and Some Tasty Poison

The Axe strop project is moving along.  Here is installment two wherein I flesh the hides out of the lime, refresh the lime solution and put them back.  Also making almond extract from wild bitter almonds growing in the local creek.  I use these same almonds to grow my own almond rootstock.

Posted on October 8, 2016 and filed under Tanning, tools.

Pocket Axe Strop Production Part 1, Introduction, Liming Hides and Selecting Wood

This is part 1 of my project to build up Pocket axe strops from scratch as incentive/rewards for the Axe Cordwood Challenge.  I may also sell some on the website depending on numerous factors.  For those who don't know, a strop is a device for polishing or refining a sharpened edge.  it is the last step in many sharpening sequences and can also be used to touch up edges, especially if polishing compound is used.  It usually involves leather, which my design of course does, but the act of stropping can also be done on wood or even cloth.  In this project, I'm building strops from the ground up, which involves, tanning, glue making and working up some wood from it's raw log-like state.  There should be no materials used in these strops that were not processed by me here on the homestead, down to the lime and fat used in preparing the leather.  The project will span an undetermined number of videos, as well as a short version of making an easy high quality hide glue from scraps that most hunters or butchers of animals typically throw away.  Almost anyone who is not me should learn a lot from this series and I hope to learn some stuff too! ;)  Feel free to vote on names for the pocket strop or think of new ones... Stropet, Pocket Strop-It, Pixie Paddle (the woods are a dangerous place full of mischievious pixies!).

Oak Gall Leather Tanning Experiments and the horrible horrors of Case Hardening

I picked some fresh oak galls to extract juice from this spring.  When fresh and green in April, our large oak galls from the California Valley White Oaks are very juicy and exude a clear liquid when squeezed.  I put a piece of skin in the straight juice to test it and it case hardened, a phenomenon where the skin is shocked by the extreme astringency, becoming shrunken and stiff.  In case hardening, the outside surface of the skin is so tight and contracted that the tanning stops or proceeds slowly because new tannin can't penetrate to the interior of the skin.  In the video, I discuss the fact that fear of case hardening often leads to just the opposite problem, which is far more common, not using enough tannin.  The experiment also provides a few other talking points.

Skinning Deer and Goats for Perfect Hides and Carcasses

I slaughtered a goat a couple of days ago for meat and used the opportunity to make this video on proper skinning.  I've skinned hundreds of animals to develop this simple strategy, which works well for me.  It could be streamlined by anyone with enough practice and experience, but I think the approach is pretty solid.  Yes, some of you aren't as big or strong as I am and may think this method is not possible for you.  It may take quite a bit longer and you may have to do a little more cutting, but don't give up too easy!  You may have to use the knife a little more, but use it only where you really actually have to and do your best to muscle and technique your way through the rest of it.  Get all up in that carcass and use your bodyweight, and you may be surprised at what you can do!  No need to be a purist.  If you have to use a knife, then so be it, but it seriously takes FOREVER to skin an animal carefully with a knife and you will still slip up and cut the skin sometimes. Countless hides are ruined every day due to poor skinning which is by far and away the norm, even when people are well intentioned.  Share this video with those hunters and animal raisers you know to help change that!  Hides are a valuable resource and tanning is an accessible skill for homesteaders and small farmers.  I'm still working on that tanning book, which is going to make it more accessible than it has every been, but this goat was a bit of a distraction among others.  It's almost processed and put away now, just have to render the fat and salt the skin (which may also be videos) and wrap some stuff for the freezer, then I won't have to worry about meat... at least until buck season opens in a couple of weeks.

This approach is somewhat applicable to lambs and sheep as well, and some parts to skinning almost any animal.

https://www.youtube.com/watch?v=J-oWBdxxMfA

Peeling Oak Bark for Tanning Leather and Apple Breeding Update

Here are a couple of recent videos I did on the stuff I do around here.  One is a short update on labeling and protecting fruit that was pollinated earlier this year as part of my apple breeding project.  I talk a little about the breeding parents and related stuff, but it's pretty straightforward and short, with a quick visit to my new pig. The second is a follow along while I cut down, cut up, and peel the bark off of a tan oak tree that is infected with the organism involved in sudden oak death.  I use the bark for tanning skins.  I'm working on a book right now on tanning with plant materials like bark, various leaves and pods and stuff like that.  Writing, research and experiments around that project now consume most ofmy time, energy and thought.  In the video I show a few pieces of leather tanned with oak bark, peel the bark, split the wood and clean it all up.  There are few things I'd rather do with my time than that type of forestry work.  Splitting wood, playing with wood, using my axe, burning brush to make charcoal, etc..   is all my idea of a good time!  woo hoo!  It's really hard for me to cut these videos down and focus them in.  There are so many satellite topics I want to talk about!   Definitely some stuff coming on axe use, wood splitting tutorials, forestry and forest ecology, and lots of tanning and skin working stuff.

https://www.youtube.com/watch?v=vNFZiu4mSts

https://www.youtube.com/watch?v=KX8g0Yt0ZmI

Video Series on Making Quality Hide Glue


I'm shooting a video series on making high grade hide glue.  At least that is the goal, we'll see when I test the glue after it's finished, or maybe have it tested by someone else.  The third video, on liming, is uploading to YouTube as I'm typing this.  The approach is a sort of learn as you follow along kind of thing, going through the process of turning a cattle hide from Tamara's recent cattle processing class into hide glue.  Every time I go to work on the skin, I take some video and edit it down.  One section is sort of a lecture type deal with some chalkboard action, one is on fleshing and, aside from the liming one uploading now, the others will be de-hairing and de-liming, cooking and pouring, then finally cutting and drying.  Maybe at some point there will be one on testing the finished glue.

This hide glue series will be fairly long, but there are things in there to learn beyond making hide glue.  Little snippets about other stuff relating to tanning skins and such inevitably work their way in.  No process is an island after all.  So far these videos have been decidedly lacking in popularity and the total number of people that really get a lot out of this will probably not be that many.  But it will be there when people are ready for it, and that is most of the reason I do this stuff at this point, as a reference archive and so it doesn't all die with me one day.  Personally, I think it's really cool, even though I've so far mostly restrained myself from going on long tangents about multiple related processes and ideas.  Poking around looking at other hide glue videos on youtube, a lot (or most?) of them use rawhide chew toys cut up in pieces.  Nothing wrong with that in context I suppose, but that has never been what we, or the genesis of Paleotechnics, has ever been about.  I'm definitely bringing you something closer to the ground up version.

The link below goes to the main Playlist into which all videos in the series will be placed as they come out.  I think anyone with any kind of google account, like Gmail, can subscribe for updates.  My channel, for now, is a mixed bag of stuff I get up to.  I'm also currently also doing a series on amateur apple breeding, which will follow my progress over the years attempting to breed up some new red fleshed apples here at the Turkeysong experimental homestead.  For the hide glue series,  I'm in the dehairing/refleshing/deliming process now, so that one should be up soon.  When finished, I will probably sell the glue on Etsy.  If that works, maybe I'll add artisan hide glue making to my list of little income sources.  Artisanal hide glue for artisanal artisans, you know instrument makers, fine artists who use traditional materials, fine woodworkers that want their furniture to be fully repairable in the future and the likes of them.  People who are keepin' it real!  See ya...

glue#1thumbFINISHEDYELLOW

Turkeysong, the Year in Pictures 2013, Summer, Fall and Early Winter.

solstice moon
solstice moon
scallions for market, Scallions and carrots are my market mainstays.  They hold in the ground for a while, so I don’t miss the crop window if I can’t make it to the market.

scallions for market, Scallions and carrots are my market mainstays.  They hold in the ground for a while, so I don’t miss the crop window if I can’t make it to the market.

They just kept hatching more all summer.  Probably just because they’re happy free range chickens driven to fulfill their biological purpose.  These two chicks made it.  Mom moved them into the coop after most of their siblings were k…

They just kept hatching more all summer.  Probably just because they’re happy free range chickens driven to fulfill their biological purpose.  These two chicks made it.  Mom moved them into the coop after most of their siblings were killed in a raccoon attack one night.  The price of freedom

Alligator lizard foreplay.  They’d probably be less than thrilled to know they were modeling for exhibition on the web.  They’ll run around like this for a while before they can get it up (cold blooded low metabolism at work I guess :).&nb…

Alligator lizard foreplay.  They’d probably be less than thrilled to know they were modeling for exhibition on the web.  They’ll run around like this for a while before they can get it up (cold blooded low metabolism at work I guess :).  I’m sure it’s totally hot to be bitten on the head if you’re an alligator lizard chick.  She looks stoked.

William’s Pride, half polished.  This apple ripens in August and seems promising for an early apple, but it has stiff competition in chestnut crab ripening in the same season.

William’s Pride, half polished.  This apple ripens in August and seems promising for an early apple, but it has stiff competition in chestnut crab ripening in the same season.

Tomatillos roasting for salsa.  Roasting really adds some great flavor!

Tomatillos roasting for salsa.  Roasting really adds some great flavor!

Zapotec tomato is a good eating and salsa tomato.  It didn’t turn out to be the great canner I hoped it would though, so it’s back to blue beech to fill that niche for now.  Paul Robeson was a great slicer and is probably here to stay (tha…

Zapotec tomato is a good eating and salsa tomato.  It didn’t turn out to be the great canner I hoped it would though, so it’s back to blue beech to fill that niche for now.  Paul Robeson was a great slicer and is probably here to stay (thanks mom for introducing me to both of those varieties!).  I usually have free seeds of my favorite tomatoes and vegetables at the farmer’s market in Ukiah, and at the winter scion exchange in Boonville.  I have a huge basket full of folded seed pockets ready to go.  They are almost like business cards.

Where the magic happens?  Grapefruits gleaned from town with lots of sugar.  According to the owners of this grapefruit tree, it produces fruit for about 11 months of the year.  Yet there is really not that much citrus planted in Ukia…

Where the magic happens?  Grapefruits gleaned from town with lots of sugar.  According to the owners of this grapefruit tree, it produces fruit for about 11 months of the year.  Yet there is really not that much citrus planted in Ukiah.  Citrus trees are ornamental, easy to care for (usually needing very little if any care), the flowers smell good and they produce food that most people like, but which is relatively expensive to buy and is currently shipped in, often from long distances.  WTF homeowners?

Curing potato onions.  Selling potato onion starts on ebay has been a helpful income boost since fall.

Curing potato onions.  Selling potato onion starts on ebay has been a helpful income boost since fall.

potato onion slice showing the "eyes" or growing points that become new bulbs

potato onion slice showing the "eyes" or growing points that become new bulbs

Grinding charcoal sifted out of the wood stove and fire pit ashes.  Every time I start a fire, I shovel out the cold ashes and charcoal from the last fire.  As you can see, it adds up!  I’ve pretty much abandoned this grinder for now,…

Grinding charcoal sifted out of the wood stove and fire pit ashes.  Every time I start a fire, I shovel out the cold ashes and charcoal from the last fire.  As you can see, it adds up!  I’ve pretty much abandoned this grinder for now, until I can restore it and set it to finer grind setting than the one it’s stuck on now, which is pea sized and down.  Now I’m using a garbage disposal unit that was set up a few years ago for grinding apples for the juice press.  It is much faster and makes a finer grind, though I sort of miss the meditative spinning of the wheel and knowing I was doing it with my own motive power.

The interstem trees that I did not graft over have come into pretty decent bearing.  Being young, I had to thin them quite a bit this year to prevent limb breakage.  They are tending to be suckery, but otherwise, I’d say this system i…

The interstem trees that I did not graft over have come into pretty decent bearing.  Being young, I had to thin them quite a bit this year to prevent limb breakage.  They are tending to be suckery, but otherwise, I’d say this system is a success.  They seem fairly self sufficient, grow fast and fruit early.  The fruit quality is high so far.

Onion braids and chili ristras at turkeysong, the romantic version.  Yellow of Parma Onion seems to be holding up pretty well in storage, but I’m not sure it’s my favorite flavor wise.

Onion braids and chili ristras at turkeysong, the romantic version.  Yellow of Parma Onion seems to be holding up pretty well in storage, but I’m not sure it’s my favorite flavor wise.

The Hall apple has an interesting story.  It was very highly respected at one time, but was nearly lost to cultivation because it was too small to compete in the markets as food shifted increasingly toward larger scale production and peopl…

The Hall apple has an interesting story.  It was very highly respected at one time, but was nearly lost to cultivation because it was too small to compete in the markets as food shifted increasingly toward larger scale production and people purchased more and grew less.  It was rediscovered by apple hunter Tom Brown (no, not the survival guy) who deserves major props for sleuthing out many old apples that would otherwise be lost forever.  Go Tom!  Hall was also grown in California at one time, and was of commercial interest, though it probably fell out of favor here for the same reasons.  Being a southern apple, it was resistant to our hot summers.  My few specimens this year were badly watercored, but that is likely to clear up as the tree matures.  The flavor was intense, even early in the season, so I’m hopeful it will stand up to the benchmarks already set by other great apples grown here.  This specimen is larger than average since it was grown on a cordon.

It was a good year for apples!  Some gigantic and some tiny.  Some delicious and some spitters.  The cordon trees have really started to produce.  They grow enormous apples.  My only complaint is that the apples seem somewha…

It was a good year for apples!  Some gigantic and some tiny.  Some delicious and some spitters.  The cordon trees have really started to produce.  They grow enormous apples.  My only complaint is that the apples seem somewhat watered down compared to those off of my other apple trees, no doubt because of watering.  I have to water them since they have small root systems and are crowded together, but I may cut back a little to see if I can get closer to the dry farmed taste intensity and sweetness of my other apples.  I got to taste a lot of new apples this year and have lost count of how many are fruiting.  I sold apples at the market and did a lot of impromptu tastings with people.  I’ve gotten some good input and insights now and feel confident to move forward with planting a few more trees for market.  I won’t be going large scale or anything.  I like keeping a diversified farm economy, it’s safe and resilient, and way more fun!  But I would like to be able to take more than a couple of boxes to market.  I’m consistently impressed by my apples and disappointed in everyone else’s.  I simply don’t take lame apples to market.  Those are for the chickens or the juice press.  All these years of research and trial testing varieties is paying off.  I’m not sure if I’ll do an apple variety blog report this year, but you’ll certainly be hearing more about worthy and unworthy apple varieties sometime in the future.  I’ve occasionally had my doubts about sinking so much time, thought and energy into the whole apple project, but tasting some great apples this year, and seeing people’s faces when trying them was very gratifying and has confirmed what my enthusiasm already knew.  That should be no surprise since it was all done out of passion and usually the thing you are most compelled to do will bear fruit in some way eventually.  That at least is how I’ve always lived.

Drying strawberries.  This was in the spring.  I just forgot to put it in the last post.  Dried strawberries are intensely flavored, but I can’t say they are super fun to just eat.  I haven’t really figured out what to do with th…

Drying strawberries.  This was in the spring.  I just forgot to put it in the last post.  Dried strawberries are intensely flavored, but I can’t say they are super fun to just eat.  I haven’t really figured out what to do with them yet.  I’ll be sure to let you know if I break the dried strawberry code, and let us know if you already have.

Red fleshed apples for making jelly

Red fleshed apples for making jelly

jelly making and madrone berries for stringing

jelly making and madrone berries for stringing

Red fleshed apple jelly with saffron.  I grow the saffron too.  Why yes, that is bad ass of me :)

Red fleshed apple jelly with saffron.  I grow the saffron too.  Why yes, that is bad ass of me :)

Leek seed heads.  These represent the third or fourth generation of seed selected from Bulgarian Giant for height, girth, uprightness, cold hardiness and long smooth stalks.  The gene pool is somewhat limited as I usually only save 8 plant…

Leek seed heads.  These represent the third or fourth generation of seed selected from Bulgarian Giant for height, girth, uprightness, cold hardiness and long smooth stalks.  The gene pool is somewhat limited as I usually only save 8 plants or so, but I’m hoping to trade for some seed from Bulgaria this year to freshen up the gene pool!  Lot’s of seed to give away this year.  You might be surprised how much seed is produced by 8 leek seed heads!  If you have been thinking about saving seed, but haven’t done it yet, my advice is to just start.  Tomatoes are easy and don’t inter-cross.  Lettuce is easy and also doesn’t cross out, so you can just let your best one or two plants go to seed.  It gets more complicated from there, but you can worry about that later!  Find the easy stuff and just start.  Our seed supply and genetic diversity are seriously threatened by current trends.  This is a real problem that we can all solve by taking control of our own seed supplies.  We don’t have to save everything either.  We can divide always trade too.

A few potato onion seedlings showing some diversity of color and size.  Maybe one of these will be the next best potato onion ever.

A few potato onion seedlings showing some diversity of color and size.  Maybe one of these will be the next best potato onion ever.

Fall colors in red fleshed apple seedlings.  Some clearly show much more red than others.

Fall colors in red fleshed apple seedlings.  Some clearly show much more red than others.

Red fleshed apple seedling in fall.

Red fleshed apple seedling in fall.

This apple, labeled Vin de St Maurice, is huge.  More huger than it actually looks in this picture.  It wasn’t super exciting to eat, but maybe it will improve.

This apple, labeled Vin de St Maurice, is huge.  More huger than it actually looks in this picture.  It wasn’t super exciting to eat, but maybe it will improve.

Winterstein.  Allegedly the only apple bred by famous plant breeder Luther Burbank

Winterstein.  Allegedly the only apple bred by famous plant breeder Luther Burbank

Saffron bulbs begining to sprout in fall.  Each of those little shoots coming out the side will become a new bulb.  I had them multiplied up to probably 800 to 1000 bulbs after starting with just 35 or so.  Then a gopher discovered my…

Saffron bulbs begining to sprout in fall.  Each of those little shoots coming out the side will become a new bulb.  I had them multiplied up to probably 800 to 1000 bulbs after starting with just 35 or so.  Then a gopher discovered my nursery bed and kicked by butt.  I lost about 2/3 of them, which at around 50 cents piece to replace them is a pretty big loss.  The remaining were replanted in a new bed which was also discovered and the plants started disappearing underground one by one.  I dug up all the plants, lined the bed with wire, and replanted.  Take that suckas!  I’m on a mission to grow saffron here.  Obviously gophers and voles are going to be a major issue, but my gears have been spinning for several years to come up with possible solutions.  Like so many things, there should be a local saffron industry in California, at least to cover local use.  It is very easy to grow aside from the rodent issue.

Saffron root growing through a piece of “the pet”, a clay charcoal kiln that was pulverized and used to amend the saffron crocus bed.  Burnt clay is supposed to be a good soil amendment.  did this root find that hole in the fired clay and …

Saffron root growing through a piece of “the pet”, a clay charcoal kiln that was pulverized and used to amend the saffron crocus bed.  Burnt clay is supposed to be a good soil amendment.  did this root find that hole in the fired clay and dive in?  Or did it just bump into it and end up in there?

Dressing a piece of lat year’s bull hide.  This piece of leather went to shoe maker Holly Embree and was used to make a pair of shoes for the fiber shed fashion gala.  She was able  to work with the chicken tracks that I couldn’t…

Dressing a piece of lat year’s bull hide.  This piece of leather went to shoe maker Holly Embree and was used to make a pair of shoes for the fiber shed fashion gala.  She was able  to work with the chicken tracks that I couldn’t manage to dress out :/

Bay nuts galore this year!  This picture shows the genetic diversity of the bay nut.  I suspect that indicates a high potential for breeding for improvements in size, form, oil content, etc… After all, it’s relative the avocado was bred fr…

Bay nuts galore this year!  This picture shows the genetic diversity of the bay nut.  I suspect that indicates a high potential for breeding for improvements in size, form, oil content, etc… After all, it’s relative the avocado was bred from a small, barely edible fruit.  Look for a book from paleotechnics on bay trees and bay nuts this fall (you might not find it, but look anyway:)

The best drier.  The car dashboards are in constant use every fall and much of the summer for drying stuff.   There are more trays and boxes in the background.  They haven’t all been weighed yet, but probably around 150 pounds total t…

The best drier.  The car dashboards are in constant use every fall and much of the summer for drying stuff.   There are more trays and boxes in the background.  They haven’t all been weighed yet, but probably around 150 pounds total this year.  I’ll be selling them on ebay and elsewhere.

Bay nuts in a mesh bag.  Just a cool picture.

Bay nuts in a mesh bag.  Just a cool picture.

Roating bay nuts in a popcorn popper, my new preferred method until I invent and build a better roaster.

Roating bay nuts in a popcorn popper, my new preferred method until I invent and build a better roaster.

Cracking bay nuts in the Davebilt nutcracker.  This machine is manufactured and sold by a very nice old couple in Lake County.  It can be set for any size of nut.  It sure beats tapping each one with a rock!  An investment, but a…

Cracking bay nuts in the Davebilt nutcracker.  This machine is manufactured and sold by a very nice old couple in Lake County.  It can be set for any size of nut.  It sure beats tapping each one with a rock!  An investment, but a solid one if you crack nuts every year.  It’s built like a tank.

Roasted bay nuts, mmmmm….

Roasted bay nuts, mmmmm….

bagged and ready for market

bagged and ready for market

Bay nut candy ingredients- chili powders, hand gathered sea salt and maple sugar

Bay nut candy ingredients- chili powders, hand gathered sea salt and maple sugar

Bay nut paste ground find for making candy.  Bay nuts contain 60% of almost entirely saturated oils, much like coconut and chocolate do.  When ground, the oils melt and the paste can be shaped to cool into chocolate like confections. &nbsp…

Bay nut paste ground find for making candy.  Bay nuts contain 60% of almost entirely saturated oils, much like coconut and chocolate do.  When ground, the oils melt and the paste can be shaped to cool into chocolate like confections.  Isn’t that cool?!

Paleotechnics cofounder and Turkeysong partner and veteran bay nut pusher Tamara Wilder rolling out bay nut paste.

Paleotechnics cofounder and Turkeysong partner and veteran bay nut pusher Tamara Wilder rolling out bay nut paste.

Cuttting

Cuttting

Cooling bay nut candies to harden.  They are hard at room temperature and melt in your mouth or hand just like chocolate.  You know you want one, but so far they are only for sale sporadically at random paleotechnics events.

Cooling bay nut candies to harden.  They are hard at room temperature and melt in your mouth or hand just like chocolate.  You know you want one, but so far they are only for sale sporadically at random paleotechnics events.

Happiness is a full woodshed, but this shed is less than full.  At least it’s half full and not half empty this year!  It does have a nice stack of fat slabs of fir bark for lime burning projects!  This bark is from 60 year old stumps…

Happiness is a full woodshed, but this shed is less than full.  At least it’s half full and not half empty this year!  It does have a nice stack of fat slabs of fir bark for lime burning projects!  This bark is from 60 year old stumps, still solid and dense with a high fuel value.  I like the florist sighn with half the F eaten off by a horse.  That’s going to market this year.  Very country chic.

Persimmons peeled for drying.

Persimmons peeled for drying.

Drying persimmons hung from the building eaves.  This is how they do it in Japan.

Drying persimmons hung from the building eaves.  This is how they do it in Japan.

Drying hachiya persimmons.  These are so good!  Persimmons are dried and eaten all over temperate asia, but are just being discovered by other-than-Asian Americans.  I’m planning to plant more, but still deciding what varieties. &nbsp…

Drying hachiya persimmons.  These are so good!  Persimmons are dried and eaten all over temperate asia, but are just being discovered by other-than-Asian Americans.  I’m planning to plant more, but still deciding what varieties.  The plants are productive, disease resistant, almost pest free and require little pruning.  My neighbors let me pick about 150 fruits off of their 30 year old tree after they had already picked 550 large fruits!  I never knew what to do with that many persimmons until I found out about drying them whole a few years ago.  Early experiments went okay, but when tonia brought some back from chinatown, I realized the true potential and I’m all over it now.  They’re like a giant natural gummy bear that’s been deboned, had it’s limbs and head removed and was given a hat and squished flat.. sort of.  Persimmons are a great example of the latent resource potential concept I’m so into since moving here.  After establishment, the long lived trees will produce persimmons whether they get used or not.  They could be eaten, sold fresh, dried and sold, traded, gifted (part of any truly stable economy), fed to animals or just left to look pretty on the tree.  Awesome.  I’ll be learning more about persimmons and figuring out how to graft them.  There is a great persimmon collection at Winters here in California with varieties from all over the world.

Happy birthday to you!  The daughters of young love on their second birthday.  Yay!  Coming out party in a few years!  And many mooore…

Happy birthday to you!  The daughters of young love on their second birthday.  Yay!  Coming out party in a few years!  And many mooore…

Hopefully the last smokey lime burn ever here at turkeysong.  I only did it for pictures to finish off the lime burning in drums era with a blog post.  All kinda plans for lime burning experimentation rattling around in here.

Hopefully the last smokey lime burn ever here at turkeysong.  I only did it for pictures to finish off the lime burning in drums era with a blog post.  All kinda plans for lime burning experimentation rattling around in here.

Slaking shell lime boiling like crazy.  Still exciting every time!

Slaking shell lime boiling like crazy.  Still exciting every time!

Lots of charcoal making experiments brewing in my head.  The cone kiln concept using a pit is especially exciting.  This guy is doing something similar in hawaii, though his burn strategy is a little different.  I think there is …

Lots of charcoal making experiments brewing in my head.  The cone kiln concept using a pit is especially exciting.  This guy is doing something similar in hawaii, though his burn strategy is a little different.  I think there is huge potential here and will be experimenting if it ever rains around here.  Thanks to reader Lars for pointing me in this direction.

A 60 year old lump of ossified douglas fir pitch.  What could that possibly be used for?  All kinds of stuff!  In this case, making soot for use in manufacturing ink.  I hope to illustrate all publications from here out with home…

A 60 year old lump of ossified douglas fir pitch.  What could that possibly be used for?  All kinds of stuff!  In this case, making soot for use in manufacturing ink.  I hope to illustrate all publications from here out with home made artist materials, the mainstay of which will be Asian style lampblack ink and turkey quill pens.

Collecting fir pitch soot (aka lampblack) off of a flat rock for use in ink making.

Collecting fir pitch soot (aka lampblack) off of a flat rock for use in ink making.

Hybrid amaryllis coming up under the interstem trees.  I’ve got quite a few trees planted to these bulb as an understory, now and will start seeing some results (or lack of) soon.  Unfortunately, these ones go beat pretty hard in an e…

Hybrid amaryllis coming up under the interstem trees.  I’ve got quite a few trees planted to these bulb as an understory, now and will start seeing some results (or lack of) soon.  Unfortunately, these ones go beat pretty hard in an extended freeze just after this was taken.  Most of them seem like they’re recovering.  I’m probably right about at the limit of what they’ll tolerate weather wise.

Black Sage bundles tied with agave fiber.

Black Sage bundles tied with agave fiber.

pink-apple.jpg

This is the apple that Greenmantle nursery trademarked under the name Pink Parfait™.  My apple guru says it’s the best of the Etter blood apples, and I’m becoming inclined to agree.  It is not as red or as intensely flavored, but it does have some of the same fruit punch/berry aromatics and it is a very pleasant eating experience with an outstanding juicy open texture.  The flesh seems to disappear as you chew it.  It also ripened very late for me (later than anything but lady williams!), hung very tight to the tree and survived an extended hard freeze in stellar condition.  But wait, there’s more!  It’s quite beautiful and sweeter than many of them as well.  All in all an excellent apple (at least this year here in California.  Our mileage will probably vary).  Now if we can only get this kind of quality with more pigmentation and more red flavor.  Thanks Albert! I wish you could have lived long enough to see your work really appreciated.

Thanks for tuning in this year!  The Turkeysong blog had 24,000 views in 2013, many of them from people searching the web for relevant information of some kind, which I hope they found (although searches for "How to grow a big ass" and "leek in ass" continue to trickle in as well and I hope those people weren't too disappointed).  Subscriptions continue to grow and I've got plenty more to say!

I'm hoping, if I can, to start an income stream from writing and blogging, so that I can keep doing this.  That will mean more books published and probably affiliate links to amazon on the blogs (Don't worry, I'm not going to try to sell you anything you don't need.  I'm all about people buying less physical stuff and doing things for themselves.  That's practically a mission for me.  Most of them will be to books I write and maybe other books or products that I review, like the gophinator trap.)  I'll probably stay away from advertising altogether, because it's just so annoying, and again, I don't want to sell people anything they don't need, because that's half of the worlds problems in a nutshell.  Or if so, they will be extremely select.  I should be moving to a domain too so I can get rid of the ads that come up on these free wordpress domains.

I really like blogging.  Exploring new and old ideas and techniques, and sharing relevant information, are at the core of my being and always have been.  I'm at something of a cross roads with the blogs and plans for other projects.  I have some other blog ideas, but don't want to get spread too far out, or over-complicate things.  When I started this blog, I thought it would cover all of my interests and ideas, representing the diverse enigma that I am.  Since I was so immersed in homestead stuff at the time, and realized that I had built a small audience around that interest, I decided to branch off and put primitive tech stuff on the Paleotechnics site.  I feel a little disjointed though, because I'm all about the integration of ideas, old and new.  Being intensely immersed in paleotechnology stuff for a long time in my 20's gave me a valuable insight into environments and of the potential for all kinds of materials to be turned to use.  That has been invaluable in helping me see the land, and basically everything, as a resource-scape full of potential, as well as being a sort of organism that I play a part in.  Part of my philosophy is that we should aim not to reject ideas and practices categorically, but rather that it behooves us to view things for what they are and what they do and don't have to offer in the view of a larger context, and integrate or reject them accordingly.  Sounds reasonable I know, but we have a strong tendency to think in black and white categories and build identities around what we are and aren't, what we do and don't do and what is and isn't too new, too old, too whatever.  I'm sorely tempted to throw all my ideas and projects, new and old, together in one place and let everyone sort it out.  While I don't want to alienate a specific audience either, it occurs to me sometimes that I should just write for an audience of diverse interests.  On the other hand, I respect that everyone doesn't want to hear what I think about The politics and social ills of the marijuana black market economy in Northern California, or Rife machines, or how to make a stone bowl using just rocks, or a pimped out chicken powered composting system.

I also can't always find my voice when writing for different audiences.  In some ways, I can best reach my generation and younger people, because we've lived in the same times and speak, to some extent, the same language.  My generation is coming into positions of power and greater influence now and could use a little shaking up. (If you were to ask me, which apparently you don't have to :D.

One thought is to have a central blog that covers everything I do and will serve as a sort of news feed.  That site could have just links to my other blogs and projects, or entire posts replicated.  Also, anything that didn't really fit in on a another blog would go there.   That is appealing in some ways, and may be the best solution, but also sounds complicated and will increase computing time and thereby decrease working time.

I'd appreciate anyone's input on these ideas and thoughts and perspectives on this blog and/or the paleotechnics blog.  What you do and don't want to hear about, what you appreciate or could do without and ideas about structuring content in one place or across multiple sites, or just whatever.

Oh yeah, and once I scrounge up enough money to get a decent video camera, I'm hoping to start a TOTALLY BAD ASS YOU TUBE CHANNEL.  Or is it two channels?  or three?  See, more spreading out :/