Interstem Grafting of Apples: small trees, big roots


UPDATE:  See my video series on Interstem grafting apples here!
UPDATE: See my video series on Interstem grafting apples here!

In which I use the tricky manipulation of grafting 3 different apple varieties together to create trees that are small yet drought resistant

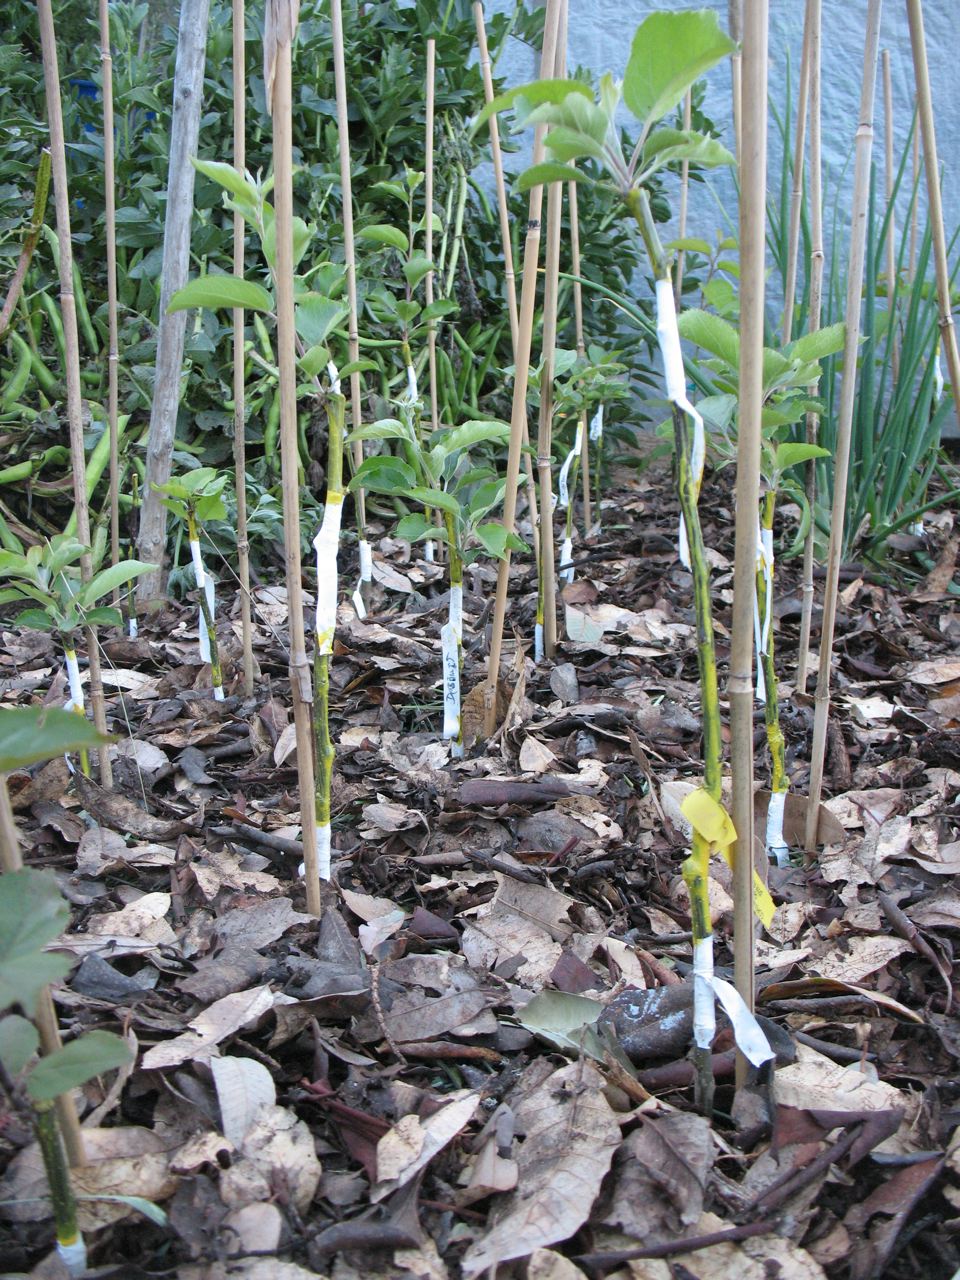
Grafted trees sprouting

Inter-stem trees sprouting on in the nursery row.  Note two bandages on each tree.

A long time ago fruit tree grafters selected certain rootstocks that would create smaller trees for small gardens and special purposes like espalier training.  Dwarfing rootstocks are naturally small varieties of trees that confer their diminutive size to the fruit varieties grafted onto them.  Early grafters had to make due with a limited selection of these dwarfing stocks, but these days there are ever smaller and more improved dwarfing rootstocks selected for size, rooting characteristics, disease resistance and ability to confer early fruiting to the variety grafted to them.  Some of these modern stocks make trees of only a few feet in height.  Last year I picked apples in a 30 year old orchard that had been grafted onto the dwarfing rootstock Malling 7.  The trees were only about 7 to 8 feet tall making picking and maintenance very easy.  These trees were also heavily loaded with fruit.  One drawback to using dwarfing rootstocks is that they tend to be shorter lived than normal sized fruit trees.  I'm planting trees for posterity and not just for myself, so I usually gravitate toward larger and healthier stocks.  After observing these ease of handling with these small trees and noting that they seemed to be doing well after 30 years I figured maybe there was a place for some dwarfed apples here.

Dwarfed trees may tend to be shorter lived, but they bear at a younger age and can give higher yields per acre when planted at closer spacings.  That's a nice advantage.  I decided to put in a group of dwarfed trees grafted to varieties suitable for hard cider making.  First I looked for a good dwarfing stock in the 9 to 12 foot high range and decided on the newer Geneva 30 rootstock.  Alas, everyone seemed to be out of it because it was late in the season.  Then I got onto the idea of using an inter-stem.

In inter-stem grafting (also known as double working and interstock) a normal sized vigorous rootstock is used for the roots of the plant, a second variety of dwarfing rootstock is grafted on top of that, and the fruit variety to be grown out is grafted on top of the dwarfing inter-stem.  The result of this strategic placement of genetic materials is a fruit tree of the variety you want, dwarfed by an inter-stem but with a full sized root system to feed it.

The conditions in this area are essentially a wet-ish Mediterranean climate.  We get plenty of rain each year, but it stops completely for the summer months at which time it can be very hot.  Even when it rains in the summer, which is very uncommon, the quantity is never enough to really soak the ground enough to water a tree.  Vigorous healthy drought resistant stocks are best under these conditions.  For the bottom rootstock I chose m111 which is very slightly dwarfing but drought tolerant while also being resistant to heavily waterlogged soils and the pest wooly Aphis.  It is a rootstock long tested by service and the one I have used almost exclusively here so far.  For the inter-stem I used bud 9 which should make a tree averaging in the 8 to 12 foot range.

One of the drawbacks to grafting interstems is that two years are supposed to be required to grow an inter-stem tree, but that turns out to be untrue.  First you are supposed to graft over the interstem onto the lower stock, and the next year you add the fruit variety you want on top of that.  The apple is an easy fruit to graft and with the great success I've had grafting apples in general I decided it would be worth a try to graft all three pieces together the first year.  I did a quick internet search was emboldened by finding that someone else reported doing just that very successfully... that discussion thread is here on the Home Orchard Society site.

One issue with grafting in general is that you are working with a stick that has no connection to the ground at all until the graft heals and therefore no way to replace any water that it uses up in trying to grow or loses to evaporation.  After grafting this stick to the rootstock it slowly begins to form callus tissue which links up with the callus tissue from the healing rootstock to form routes for food and moisture to flow into the scion allowing it to grow on.  The time between making the new graft and the healing and uniting of these tissues between stock and scion is a dangerous one for the scion.  When grafting the interstems and the scions both at once there are two of these unions to heal before the scion receives nutrients and water.   In light of these considerations I used a simple technique that I've been playing with for a few years to protect scions from moisture loss.  That technique is simply to paint the scions, and in this case also the interstems, with grafting "wax" to slow the loss of moisture.  I've used Doc Farwells grafting wax which is essentially a thick yellow paint that remains somewhat flexible.  I try not to paint over the buds or, if so, then lightly.  It seems to work.  I used primarily whip and tongue grafts... a little on that here.  Unless the scion and stock size were very different in which case I used cleft grafts.  I prefer the whip and tongue generally as it is stronger and less liable to break if disturbed.

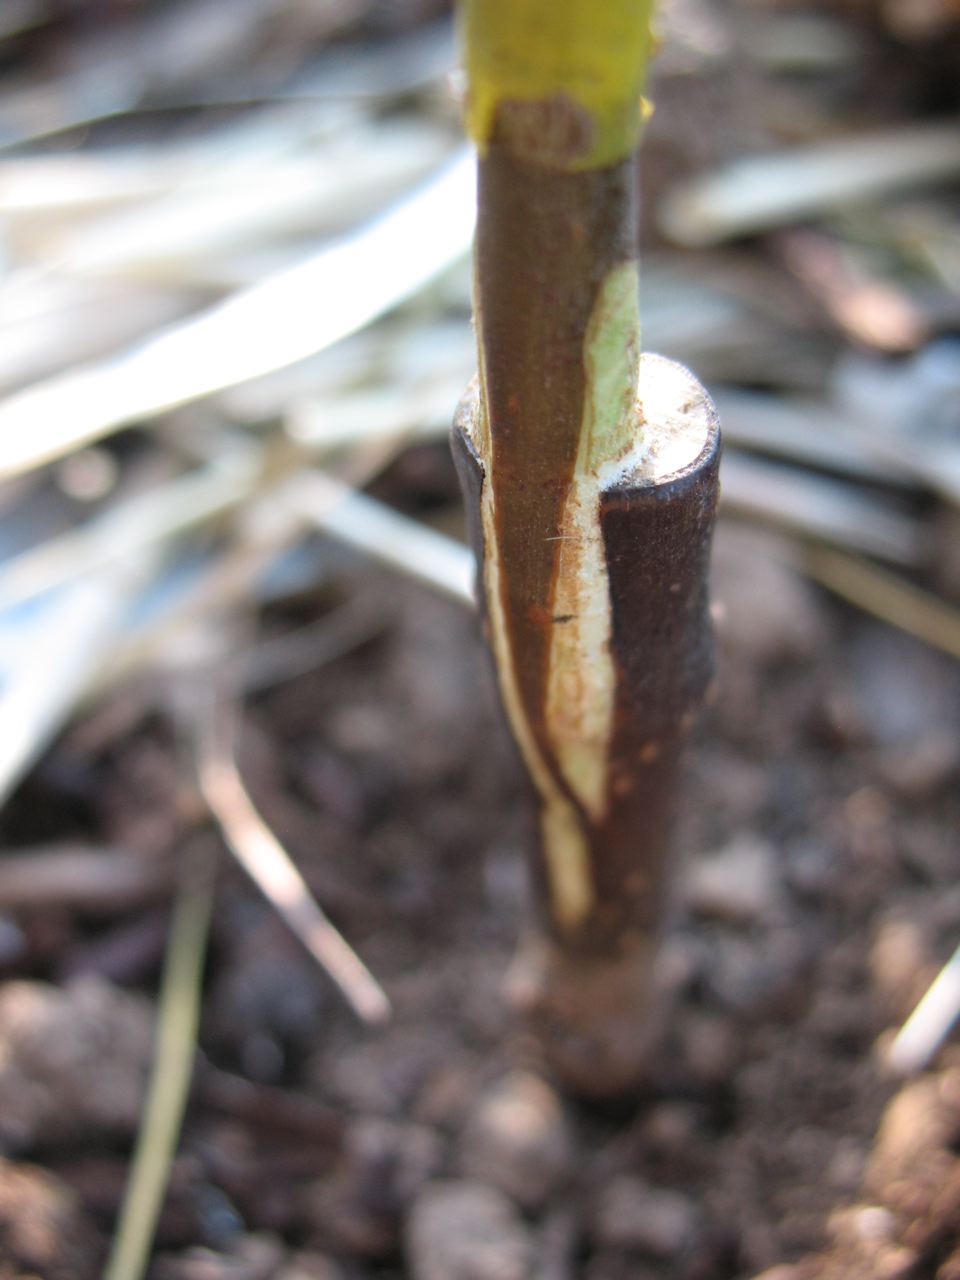
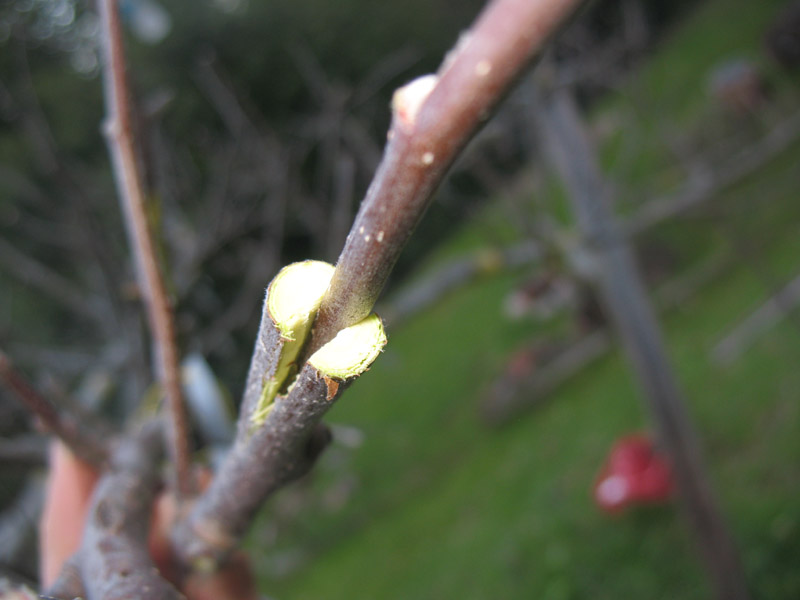
Healing cleft graft
Healing cleft graft

Out of 23 trees double grafted this year I lost only two, one of which died completely (preventable if I hadn't been pulling off all the suckers as they came out) and one on which the top died, but the bud 9 stem is sprouting and growing up again so I can re-graft it next year.  Both probably failed due to poor scion wood, so if I would have had better scion wood, I think I would likely have gotten 100% take. They're generally growing well too except a couple that, again had really poor scion wood and are having a hard time getting off the ground.... and may not really.   Still, totally acceptable, and improvable, results.

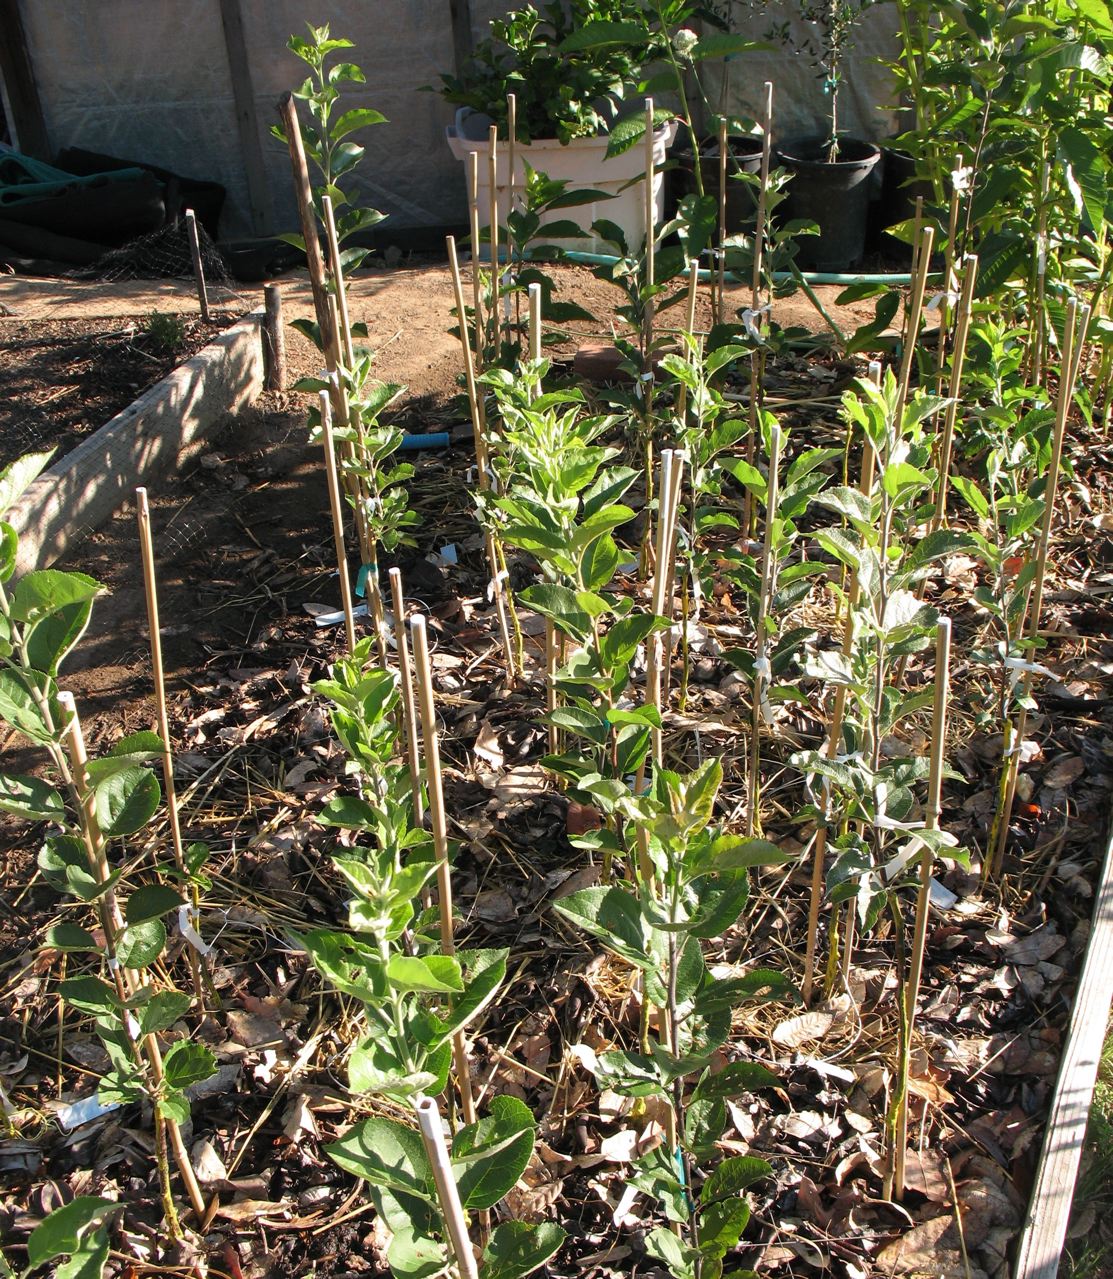
interstems growing in July

UPDATE FALL '10.  The interstem trees in the nursery bed are considerable larger than the trees that are on just bud 9 roots.  This would indicate, as I hoped, that the larger root system cancels out some of the dwarfing effect.  That is fine with me since the bud 9 trees would probably be a little smaller than I wanted, and I was actually hoping this would be the case.  I have not looked closely yet to see if there is a correlation between interstem length and dwarness, which some sources say there is.

I had to buy bud 9 rootstocks to get the interstems I needed, and after grafting the bud 9 interstems onto the m111 roots I grafted the left over bud 9 roots to some select dessert varieties and a few more cider varieties that I want to test out.  I'm not sure exactly what I'm doing with the bud 9 trees yet, but I'll probably plant them only a couple feet apart in a long row and train them each to a single stem wired to a trellis and grown only a few feet high.  This arrangement should give me a little laboratory of very early bearing trees to test out interesting varieties.

I saved a few inter-stem stocks for varieties, like Harrison, that I want to grow but was unable to acquire this year.  Once I can test some of these varieties in my climate and see if they suit my cider making tastes, I can rework the trees to other varieties as needed, grafting on whichever ones I find most suitable, or even just testing other new types that I acquire through trading or scion exchanges.  The new inter-stem trees should be ready for the ground this coming winter/spring.

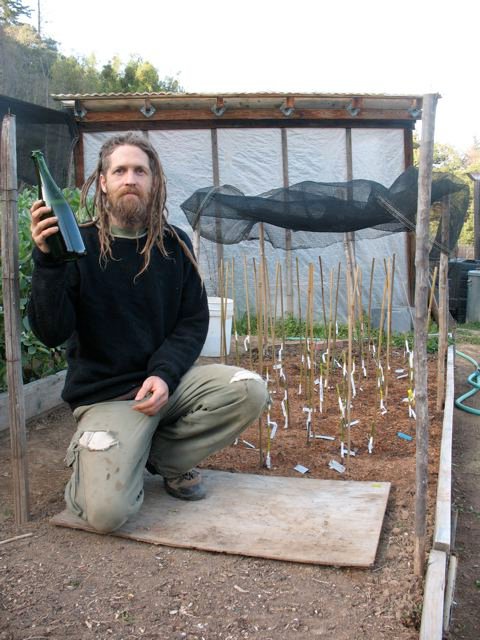
Cheers!
Cheers!

Interstem tree varieties as of 7/10 (this list has greatly changed as of 3/13) King David 2 Wickson 2 Ashmead's Kernel 2 Muscat De Bernay 2 Dabbinet 3 Yarlington Mill 2 Marmora Gold 1 Harry Master's Jersey 2 Court Royal 1 Tale Sweet 2 Kingston Black 1 Stoke Red 1 Somerset Redstreak 1 Ellis' Bitter 1 Muscat De Dieppe 1

EDIT Feb 2013:  These trees have done very well.  The ones that I got into the ground and grew out right away are over head height and some bore fruit last year.  They seem quite vigorous.  A few were grafted over to other varieties which has delayed them.  Many will provide a framework for grafting over to other varieties this year as I've changed my thinking on what I want out of them--- which is more dual purpose and dessert apples and less specifically cider apples.  I may post a follow up at some point (WHICH I HAVE HERE).  I have also done more interstem grafts and they have generally gone very well grafting all three parts at once.  As an experiment, I did an interstem graft, and then stacked another 5 varieties on top of that just to see if they would take.  Although some grew more than others (varietal dependent) all 6 grafts healed and grew!

Read the 4 year update here!

https://youtu.be/mjcWqLP65HM?list=PL60FnyEY-eJDRcuY_h1U9QX4KurnShOay

An Experiment in Using Winter Bulbs to Create Fruit Tree Under-Stories

An experiment to see whether narcissus or other early growing and early dormancy plants will form a suitable plant guild for control of weeds, soil improvement and moisture management under fruit trees in a Mediterranean climate.

FAVA BEANS!

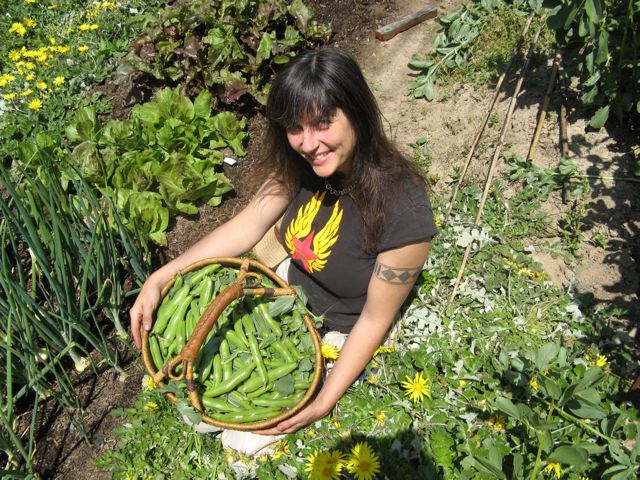
I used to think of fava beans as a cover crop only and not as a food.  People said they were good to eat, and I tried, but I found them to taste awful.  Somewhere I ran across a short and vague reference to slipping them from their skins which lead me eventually to the fact that the outer skins are fairly inedible.  You would think that out of all the mentions I read and heard about fava beans in conversations, books and seed catalogues that someone would have mentioned as much?!?!  WTF?  Anyway, they are really good after all.

To start from scratch, fava beans are a sizable plant that has been cultivated for geons for both food and soil improvement.  It seems to be fairly common knowledge that a small percentage of people are deathly allergic to them, but I haven't met one yet.  Maybe most of them are dead.  Favas are a relatively robust plant that I've seen outgrow me in height under really fertile conditions.  The large pods contain large seeds that are edible.  The plant is in the legume family and, like most legumes, it has a relationship with some specialized soil dwelling bacteria that colonize it's roots forming small nodules.  The plant provides a home for the bacteria and the bacteria returns the favor by fixing nitrogen out of the atmosphere which the plant then gets to use in it's processes.  I'm anthropomorphizing here.  Honestly I don't know exactly how the relationship plays out in the long run, but there seems to be a mutual benefit.  Like many relationships though, there is probably some compromise along with the good times.  Anyway, legumes are high in protein at least partially due to this relationship.  That bacteria/plant relationship also makes favas a good cover crop as both the plant and the roots with their nodules are high in nitrogenous matter.  They can produce a lot of bulky material for the compost pile as well, which is important if you use a lot of compost, as I do.  They can also be turned under the soil if you dig your beds, which I don't.  Or, you can just cut or break them off at ground level leaving the nitrogen rich root nodules in the soil to decay gradually, which is the method that I favor.

Favas grow best in cool weather.  They can be planted as early as late summer here (Northern California coastal ranges @ 1800 ft) but won't flower and set pods until spring.  I plant them anywhere from late August through November.  Since I don't normally dig my beds, I'll sometimes plant them in among a crop that is already in the ground, but which will eventually be killed by frost or just pulled up as it starts to decline in cool weather- like tomatoes, peppers, eggplants etc...  The fava plants remain small through the winter, biding their time until a hint of spring hits the air, at which time they explode upward and put on a good number of fragrant flowers which are visited by copious numbers of buzzing things.  I would say in general that I have not found them to really actually cover the soil that well, so they are maybe not such a great soil protector.  Soil protection is very important here in the winter with our torrential rains.  An area with "heavier" rainfall might not have this problem because it simply drizzles lightly nonstop, but our version of heavy tends toward intense downpours which literally hammer the soil, followed by sometimes long breaks.  Your mileage may vary by climate, but an under story of smaller thicker legumes such as clover or vetch can help provide more soil cover... I find that weeds work pretty well too:)  The plants lodge easily which, if you are unfamiliar with the term, means to fall over in the rain, wind, snow... actually, they will sometimes pretty much fall over without provocation, though they will fall over sooner and more definitively in inclement weather.  For this reason I really like to stake the plants up.  It's not so much that the beans mind falling over, they will continue growing and making pods, it's more that they fall into the paths making it hard to access adjoining beds and to harvest the beans.  Here we put one stake on each corner of the bed and then a stake every 4 feet or so along the bed edges.  Then a string is wrapped around the outside every foot or so.  Wrap the string once around each pole as you go around.  This is one of those jobs thats easy to ignore, but which I have decided is well worth the relatively small effort involved when you have to access beds over and over through the spring season.  That sentiment is more pronounced this year as our timing was off and all the favas lodged in a snow.  Once it happens, you can't really put them back, so we've had to live with the mess.

If the tops are harvested early for compost or mulch when one can maximize the amount of nitrogen left in the soil; but, then you don't get any beans.  I'm not saying that early harvest is a bad idea, but I rarely do it as it doesn't work into my scheme of things so well.  I've read that you're supposed to cut them while flowering and before starting to set beans in order to leave the greatest amount of nitrogen in the soil.  Sometimes I harvest some of the beds early, but I try to let as many of them seed out as possible because a lot of them are consumed in our kitchen both in season and out of season.  Also, I don't feel that I have to maximize nitrogen in the soil that way.  I see it as just another option that I can choose from when planning and harvesting.  And maybe maximizing nitrogen in the soil that way isn't always the best choice.  Where does all that nitrogen in the root nodules go?  Into the tops and pods and beans of course.  I only eat the actual inside of the bean seed and the rest (which is a lot!)makes it's way to the compost.  I lose some nitrogen there in the compost to the processes therein, but some of it makes it through.  Besides, the nitrogen I do eat mostly gets peed out and that also makes great high nitrogen fertilizer.  Besides, the longer the tops grow the more biomass they produce and I need lot's of biomass for composting.  In the process of growing things in the garden, and the processes of life in general, there is a net gain.  That's how we got this far with our fertile soils and abundance and diversity of life.  My personal observation has led me to think that it doesn't seem to be necessary to calculate everything down to a gnats ass in order to achieve good yields; yields that are in acceptable proportions to the time and energy I have to put into the system.  So I just let them go to seed and make food for me if they aren't in the way of planting something I consider more important.  It is around mid June here right now and the beans are starting to come in in large quantities right now.  This is a late year though.  Most of the beans will be harvested over the next 2 weeks before we start pulling them to plant some vigorous winter squash starts... also late, but 3 months should be enough for most of them and later maturing winter squash will keep that much longer through the winter.

When pulling the tops to clear the beds the plants are simply cut or snapped off low down near the ground and the roots left in place.  If a root mass is in my way during transplanting of the next crop it is pulled and thrown in the compost.  By the end of the season they are usually pretty well rotted away.  I do feel though that the best use of the roots is to leave them in the ground to rot whenever possible, more especially since I don't dig beds and it is important to get organic material into the soil.  Worms pull some down and more gets sifted in during incidental digging like transplanting and root harvest, but roots left in the soil may be the largest contributer.

There are many different strains of Favas out there some of which are alleged to be the more gourmet varieties, but not so many are available through standard sources.  I haven't yet met one on my plate that I didn't like.  Bell beans look like the same thing, but are much smaller.  They aren't so good for eating, so I plant only favas.  At this point I plant whatever I can get that's cheap or free and I figure I'll start selecting a sort of land race for size, flavor, hardiness and so on.  Hardiness is an issue  .I've had them die off in a cold winter, which is not really all that cold here- above 15 degrees fahrenheit.  Not all of them died, but some of the fancy and allegedly gourmet, varieties keeled over.  You'll have to do you own research on that stuff, I'm going for the survival of the fittest plan.  I plant the seeds on about 8 inch centers in a grid pattern so that each row is staggered from the next, like laying bricks.  On this planting plan, the beans end up planted 8 inches apart in every direction. I don't measure the spacing, but just eyeball it and push them in quickly... remember, I have other things to do.  Pushed in an inch or more deep they usually sprout up and grow pretty well.

When favas grow well, which they usually do, they produce copious quantities of beans. The beans can be harvested at various levels of maturity.  Some israeli guys told me to eat them when very young with the skins on.  I tried it.  No thanks.  Firstly, there is very little to them when they are that small so I'd rather let them grow.  Also, they taste bad, but there's no accounting for taste so your mileage may vary.  Different varieties vary in size, but I'm usually not harvesting till the beans are at least above dime sized.  There does seem to be an ideal level of maturity where they are not too starchy, nor too underdeveloped.  Again, that is a judgement call, so your taste may indicate otherwise.  Besides, sometimes these things are perhaps more a failure of creativity or knowledge on the the cooks behalf and less the fault of the vegetable.  I go by the look of the pod as well as the feel of the beans inside.  Look for pods that have well developed lumps and squeeze them to check for size.  Sometimes the lump is deceptive- hiding more air than bean.... other times the lump looks big, and is full, but the beans are still small and underdeveloped.  The lowest beans on the stalk tend to mature earliest, with the rest ripening consecutively up the stalk.

There are specific ways that I remove the beans from the pods and then the inside of the bean from it's skin.  I'm certainly open to finding a better way, but this method is pretty fast.  I not too long ago found myself joining a table of people who were nearing the bottom of an enormous pile of fava beans.  I was ripping through them with my superior shelling technique, but only one person seemed to notice and make any effort to imitate it which, by the way, isn't difficult.  I made some paltry effort to clue them in, but was drowned out by small talk and complaints about the quantity that had to be processed cloaked in encouragements that we were almost at the end of the pile.  Anymore I find myself less willing to put effort in that sort of direction as I'm all too often actually mocked for even stooping to paying attention to such a thing as efficiency in work.  I think that points out something that is fundamentally wrong with the society I live in, but I guess some people think it points out something that is fundamentally wrong with me.  I'll admit I'm over the top at times by most people's standards since I like to improve things, but it works for me.  People seem often more inclined toward, or I guess place more value on, symbolic acts than they do on actual results, but when work becomes more of a symbolic act than an effort to accomplish a goal, then we have become- lame.  I think that's material for another blog.  For me in my context, I have a lot of things I want to do, most of which I will never get to because I only have so much time and energy.  One of those things is to grow and process a sizable quantity of my food.  It's not that I don't enjoy growing and processing food, but I don't want to do it all the time and the truth is that the longer each thing takes the less time I have for other things that I want to do.  Then, too, the more I grow and process the less I buy, and I like that.  Investing some thought and experimentation in how to process food efficiently (and I think this can be a parable for other work) can yield great savings in time and energy leaving more time for growing more food, engaging in other useful activities, partying, going to thrift stores, writing blogs &c.  And it's not that it costs me more effort when I'm doing it, it costs much less effort!.. which is my whole point.  It does take some very small investment, but the unwillingness to invest that attention or, maybe more so, the lack of awareness that it behooves people to make that effort at all, is what puzzles me to no end.  If you have a better way, please out with it, I'm all eyes.

To remove beans from the pods:  Using both hands, grasp the pod on either side of a bean lump.  The thumbs go on the back of the bean a little as you simultaneously twist and squeeze the pod to break it open and push outward away from you.  The breaking outward with a twist opens the pod and the squeeze pops the bean out into a bowl in front of you.  pop, pop, pop, pop, pop and the shell is dropped in the compost bucket.  So elegant, so fast, so efficient... sigh....

To remove the skins:  grab each bean with the three digits of one hand (thumb, fore and middle).  with the other hand, nick the end of the skin with your thumbnail while simultaneously squeezing the bean with the holding hand.  The tearing of the skin is important.  It should proceed the squeeze, but just barely.  With practice, it almost blurs into one smooth motion.  It isn't necessary to tear it open, usually a small nick will suffice.

To freeze, the shelled beans should be blanched.  Drop them In boiling water for 5 minutes and then cool in cold water.  Drain well and freeze in the skins or out.  I like to freeze them in the skins as I think it protects the bean.  I like to lay them out on a towel for a little while if I have room.  Doing so dries them off a bit which means less ice in the bag.  I don't think it's necessary to dry them all the way though.  Pack into ziplock bags and toss in the freezer.  To use them: drop some into boiling water and when fully thawed, pip them before cooking further.

The beans can be cooked all the way in the skins and then pipped.  They are a good snack when cooked in salted water and squeezed out into the mouth, much like edamame (sp?).  Great for a before dinner appetizer while dinner is being cooked.  Cook them until just done or the skins will make them taste bitter and funky.

If I'm going to cook the beans other than for out of hand snacking, I will tend to cook them just a little, pip them and then cook them further.  If the beans are cooked too long in the skins, the color goes off, the water turns a dingy shade and a peculiar bitterness infuses the beans.  Did I make that sound bad?  Good, because it sucks.  If the beans are more mature and starchy it takes longer to cook them making this phenomenon more relevant.

Plain favas of a medium maturity, that is a little starchy, but still fine grained and tender, cooked in water with just the right amount of salt and coated in butter with a sprinkling of black pepper are pretty damn good.  Sorry to share too much, but I'm salivating.  Maybe we could add a little bit of crushed bacon.  As with pasta, I would recommend using a lot of salt in the water, how much?  a bunch.  you might lose more nutrients in salted water, but in terms of flavor it's hard to beat infusing the beans with salt rather than just putting salt on the outside after they are done.  The ideal amount of salt would leave the beans adequately salted without any further addition, but I can't tell you how much that is as I'm attempting to cultivate a feel for quantities in such matters by rarely measuring anything.  I think it's working.... I think.

Another good way to cook the pipped beans is by wet sauteing.  I just put a lid on the saute pan and use a low-ish heat maybe drizzling a bit of moisture in once in a while.  Some butter, a little ham, some mushrooms and onions.....

Overcooked, the beans will fall apart, but they are quite good smashed with some butter or fine olive oil and salt and pepper, and a sprinkling of paprika.  They also occasionally make it into soups.  They are very good in minestrone, though if over cooked they will dissolve and cloud the broth.  That tendency could probably be used to advantage in some other soup but, in my considerable opinion, it ruins most soups.  Honestly I feel that I've just scratched the tip of the iceberg in terms of ways to use fava beans and am looking forward to exploring further.

I was just recently clued in that the tips and flowers are also good to eat.  I was hesitant to try them as I had come to view the whole plant exclusive of the inside of the seeds as being nasty and inedible.  I was talked into sampling a tip by a professional cook and wasn't unfavorably impressed.  That just goes to show... something.    I'm still a little hesitant I guess, but plan to explore that option as it seems like the tips could be a valuable addition to winter and spring table fare.

When shelling, you can save seeds that are more mature to dry for re-seeding the following year.  The seeds tend to be expensive and you can use a lot in a big garden.  I can get bulk seed from my local farm supply that is pretty cheap, but I try to save some too.  The seeds rare usually mature enough to dry for a seed crop if they are big, the small umbilical part is released, they feel on the harder side and are starting to turn more yellow than green  I've dried them that way for a while and it seems to work, but I'm not really paying that close attention.  Dry thoroughly in an airy, but not too hot environment before storing in a jar or paper bag in a cool dry place till next season.  If you are a fava eater, then you are probably going to want to save the largest beans.  Good luck, we're all counting on you!

Posted on June 25, 2010 and filed under Garden Stuff, Uncategorized.

Leeks, Size Does Matter!... and so does shape.

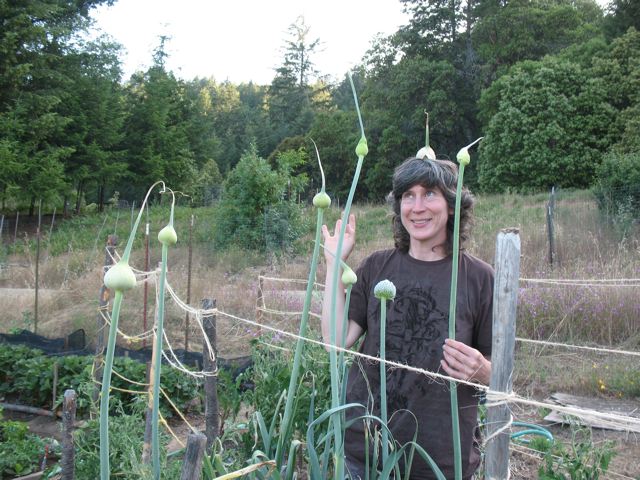
See also, How To Grow Big Ass Leeks! So I heard that in Wales they have these leek growing contests to see which dude can grow the biggest leek.  I wish they had those contests here, 'cause my leeks are hung like horses.  People ask me- "Steven, how do you grow your leeks so big?".  Following is my take on the vegetable known as the leek and how I now grow them.

First off, there are lot's of leek varieties out there.  There seem to be two basic classifications of leeks, tall and short.  Not all the tall leeks are skinny and not all the short leeks are fat, but it seems to tend that way as if the plant had only so much to grow and was guided either out or up.  I used to grow the short kind as they are much more common and there was this whole thing about how you are supposed to dig a trench (which I did) and bury manure in the bottom (which I did) and then as the plants grow fill in around them with the dirt from the trench (which I did) and then maybe put some toilet paper tubes around them to help keep the dirt out (which I tried).  Using this method you are supposed to eventually harvest a long blanched leek from deep in the earth carrying little or no dirt in the leaves.  I was disappointed in the results.  For one thing, if there is any dirt down in the leek then you still have to wash it out and it's pretty hard not to get any in a short leek.  The toilet paper tube thing seemed pretty useless.  Secondly, the whole trench preparation and filling in thing is a pain in the ass.

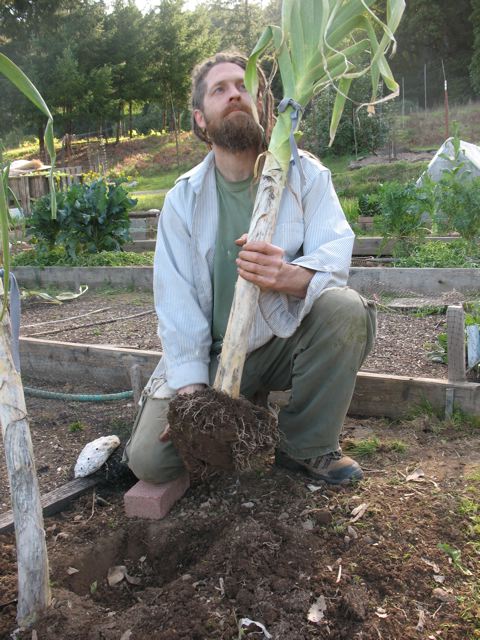
Enter the tall leek!  This astounding innovation was clearly borne of some intelligent culture which must have preferred length over girth.  A family member gave me the first tall leek seeds which she had saved from an unknown variety.  The advantages were immediately clear.  When you bring a tall leek in from the garden for dismemberment all that is necessary to use the vegetable immediately is to cut off the bottom plate with roots, peel off a few outside leaves and cut off a short portion of the top.  Very little dirt makes it into the tops of the leaves since the plants are so tall, and there is plenty of dirt free stem to use before reaching that section.  Because we grow only the tall type here, we rarely end up washing leeks at all.  In the tallest varieties, I've gotten up to and over 24 inches of clear clean stem by stripping off a few leaves and lopping off the top and bottom.  But wait, there's more!  The tall varieties grow sheathed in their own self blanching casement of old leaves so there is no reason to plant them deep which means no more trenching and in-filling.  Just why the short varieties still dominate in popularity is not entirely clear to me, but I'm thinking that there might be a few reasons.  For one thing, I think the shorties might be more cold hardy.  That is definitely a concern and one which I will address further along here.  Another is that the short types tend to look pretty and tidy on the shelf.  The tall leeks are often lanky and whippy at the top while the short flag types tend to have stiffer more shapely leaves arranged in a nice flat fan.  Also, there is cultural preference.  If these folks over here have always grown leeks and the pictures of leeks on their altars of leek worship and their statues of statesmen and cultural heroes holding leeks all show stubby flaggy specimens then I guess the notion and form of a "proper" leek is pretty well set then isn't it!?

I began to order every allegedly tall leek variety I could ferret out in the seed catalogs.  My own preferential method for growing leeks, dictated by the local climate, has been to start early, plant early and over winter them in the ground eating them through march.  This plan works here with almost any variety since the climate is very mild the temperature not usually dropping below 20 and generally pretty well above that.  I have had some leeks suffer tissue freezing damage when it has gotten very cold, but only a small percentage of the plants have to suffered so far.  I've also had the plants wilt and fall over a bit when the soil freezes.  This temporarily happens to many plant species that are actually quite hardy because with frozen roots they can't take up and move water around their vascular system.  The leeks recover Ok, but when they are in the floppy state they don't stay upright and never re-straighten.  Since I only save seed from plants that are healthy and shapely at the end of the winter, I'm selecting for strains that can endure these conditions.  Adaptation to local conditions and personal gardening styles is one of the many benefits of saving your own seed.  In trialing varieties I pretty much selected for length, but at the same time I was selecting for girth as well since the proportion between length and girth can only stretch out so far before the plants start falling over.  The winner was Bulgarian Giant, a leek that is especially tall while still being capable of achieving an impressive diameter.  The last year I did variety trials we taste tested 3 or 4 leeks and were happy to find that the Bulgarian giant also tasted the best.  I have not however done extensive comparative taste testing, so there may be a much better tasting leek out there.  Still, taste isn't everything and the cultural advantages and even the novelty of the impressive size does count for something then doesn't it? I just transplanted the third generation of my saved seed in an ongoing attempt to refine Bulgarian giant into a handsome monster adapted to local conditions and possessed of both size and girth.  From the looks of this years best 8 leeks I think it might be working.  Seed growers grow large amounts of plants to save seed from, but they are growing seed for money, so how thoroughly can they cull out the plants to refine the gene pool?  I probably planted 125 or more leeks this year and selected only 8 for seed and only a few of those are really completely exemplary.  I'm ideally selecting for height, straightness, girth and a good casement of leaves that gathers abruptly at the top to hold it all together.

So here is the cycle.

Plant leeks in a flat by sprinkling the seeds on the surface and sifting 1/2 inch of soil over them.  Start as early as January in the greenhouse or a sunny window- no later than mid February.  Do not direct seed.  Seeding in a flat allows planting of the biggest seedlings only, the first step in seed selection.  I know since I one year planted the tallest seedlings on one end of a bed and planted successively shorter ones as I went along.  They more or less retained those proportions as the season progressed.

Plant out in the ground on about 8 inch centers.  I don't currently dig my garden beds, so I just stab a trowel into the ground, pull the soil to the side, set the leek in and push the soil back.  I do tend to trim the roots shorter so that they are easier to plant.  You don't want the roots to curl up in the hole and end up pointing upward (known as J rooting a plant).

Fertilize from the top with whatever.  I usually use urine when they are young, and quite a bit of it.  Diluted 50/50 urine is hard to beat as leek fertilizer since it is a little imbalanced toward nitrogen.  Leeks can take a lot of nitrogen and seem to thrive on it.  When the plants start getting bigger, to where I'm starting to think about eating them, I don't want to be pouring pee down into the leaves, so I just start to top dress with whatever I've got, compost, seaweed, grass clippings and other weed free green stuff.  As I harvest the leeks I peel off the outside leaves and drop them on the bed.  Also, if I have a handful of ratty leaves pulled off some greens plants I'll drop those on too.  The mulching effect of all this is also very helpful in conserving moisture and keeping the soil cool and friable.  The plants will be there for a long time and if a good mulch of stuff is maintained there will be some compost left on the soil for the next crop when the leeks are finally cleared off.  Resist the temptation to peel off the dead leaves as they form a "case" that holds the leek together and keeps it upright and blanched inside.  Trimming the dead hanging leaves short is fine, just don't peel them off the stem.

Leeks prefer a cooler climate.  During the summer, they aren't at their best, but they still make Ok eating.  I start to cull out the small ones for eating as soon as they are big enough to bother with.  I suppose if I lived in a hotter climate I might resort to growing them under a light shade cloth to see if that would make them happier, but I prefer to not pamper plants if I don't really have to.  Water though is really essential to growing decent leeks.  Maybe not any more than most plants, but enough.  When the weather really cools off and rain brings abundant unwavering moisture to the leek bed they really begin to thrive.  The plants will gain in size through the entire winter and quality will improve noticeably by late fall.  the leek truly is a winter vegetable or one for cool damp climates.

We harvest the leeks that are small, short, bent or otherwise undesirable in order of their greatest undesirableness.  At the end of the season I'm left with the biggest tallest and most nicely formed from which I select the seed plants.  These "winners" are dug up with a good wad of soil and moved to the end of a bed somewhere to finish out the cycle which takes until fall when the seeds are finally ripe.  The flowers are pretty enough and pollinating bugs like them.  The plants need some support while growing to seed or they will fall over.  They also sometimes need a helping hand for the seed heads to come out of the top of the plant as it can get all tangled up in the lanky, floppy leaves.

Following this cycle I get to eat leeks most of the year.  I have the satisfaction of planting my own seed which is also one more step toward being in control of my own food supply.  I have extras seed to trade and give away.  I don't have to buy seed, and I have more control and influence on the form of my vegetables by more careful selection than is likely engaged in by large seed farms.

When it comes to leeks size does matter and so does form.  In this household, come winter the mild leek is a vegetable rather than a condiment.  With this attitude in place a leek can hardly be too big.  With Bulgarian Giant and similar leeks (let me know if you're growing something great) you can impress yourself as well as your friends and neighbors, clobber intruders, win prizes at the county fair and enjoy great leeks most of the year.  In terms of yield/space/work ratio they are a great source of food and according to Ecology Action, even of calories.  The leek is an under appreciated and under grown vegetable in America, but unjustly so as it is usually easy to grow and, if tall varieties are grown, easy to use.  Soon I hope to begin breeding my own leek variety the funnest part of which will be naming it, so in about 6 to 10 years look for Edholm's Big one, Purple Stallion, Redwood, Clobberer, Takea leek or something equally poetic or silly.

As to how to use leeks there are plenty of recipes out there.  You can generally use them as you use onions though they often benefit from longer cooking and are mild so you can often use more.  Some recipes and cooking notes are likely to follow eventually.

UPDATE: 12/19/2011  I was sadly unable to save seeds from the beautiful massive leeks in the pictures above because of a vicious attack of the rust.  Ever since it has been plaguing my leeks.  I've often had significant rust on my various onions, but never like this.  I could try employing various home remedies such as spraying with vinegar, but pampering plants through a long season with continual maintenance is not really my style.  I don't know if the problem is due to the Bulgarian Giant's being particularly susceptible, or if it is just the climate coupled with a really long growing season which allows the rust to gain a firm foot hold.  If it is that the variety is particularly susceptible, this may prove to be a deal killer :(  If anyone out there has experience with varietal susceptibility to rust in leeks, please drop some knowledge on us poor victims.  If I can find a resistant variety, maybe I can cross some resistant genes into it... stainless?

!Frankentree!

Come February and March I rarely step outside without the essential pruning shears stuffed in my back pocket.  The grafting knife gets sharpened and the fridge becomes crowded with scions (cuttings of wood from fruit trees) for grafting projects.  At this time of year, most of my time seems to get used up planting, mulching, caging, pruning fertilizing, training, inspecting and grafting fruit and nut trees.  And then there's !Frankentree!...

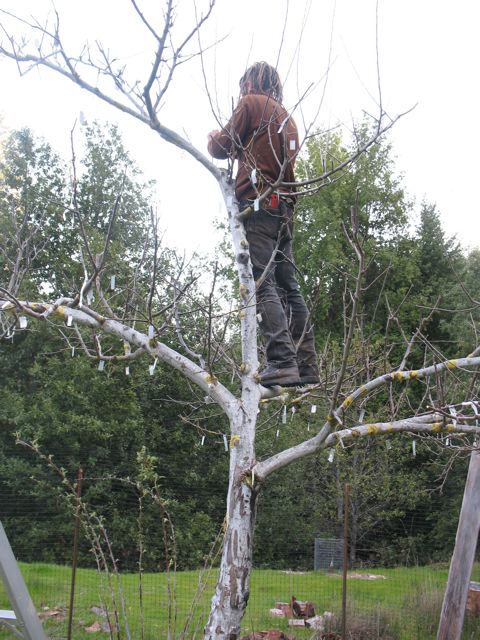
The owner planted an arkansas black apple some years back, but the top must have died and only the rootstock survived because the apples were small hard green things not fit for eating.  Not if you're a spoiled human anyway.  One day I found 4 to 6 inch claw marks covering one side of the tree up to 4 feet and more.  Long curls of bark hung from the scratches.  A few broken branches near the top told the story of a bear climbing the tree to get at the fruit.  When I first saw this tree I was very excited because in spite of receiving no care whatsoever beyond establishment it was putting on good yearly growth and looked healthy and vigorous.  I figured maybe some of the trees I intended to plant in the future might do this well without excessive pampering and was happy.  Since the apples were useless I went straight away to the Scion exchange and collected a large pile of scions to work the tree over to different varieties.  Every year in early to mid march Tamara and I go out to the !Frankentree! to add more varieties.  I graft the scions onto the tree and she makes labels and takes notes to keep track of what we put on and when.  As of today there are 84 distinct varieties (now 140), several unknowns from which the tags were lost or never put on and a few repeats.  The tree had 20 plus varieties of actual fruits on it last year, but the Stellar's Jays pecked nearly all of them to complete ruins while they were still hard and green.  As soon as acorns were ready enough they abandoned green apple eating and went to work on them.  If the ignorant villagers don't come after her with pitchforks, axes and chainsaws for being an abomination of nature, I have high hopes for an abundant diversity of apples to taste this summer through winter.

I removed pretty much all the growth from the tree the first year and replaced it with apple varietals.  Some people do this process in stages, but I don't think it's necessary if the tree is healthy and vigorous enough and if less crude methods than the usual are used.  The usual top working method, known as topworking, involves loping off limbs 2 to 5 inches in diameter, splitting them open from the end and stuffing in a couple of scions cut to a wedge shape. This method leaves only a few new shoots per tree, and those few shoots have to grow out and gather sunlight for the whole tree.  This method also leaves a large open wound which is not unlikely to become infected.  This chainsaw and axe method of grafting over a whole tree is quick and cost effective, but the small scale orchardist can get fruit much faster and preserve the health of the tree at the same time by making lots of smaller cuts and putting on an equal number of longer scions, a technique known as frameworking.

At first I used a side graft method from the Grafter's Handbook that just didn't work that well.  In this method you cut into the side of a main branch deeply at an angle.  The scion is cut to a wedge shape similar to that used in cleft grafting (see pics below) and then simply stuffed tightly into the cleft which pinches it and holds it in place without any wrapping.  It does have to be covered in grafting wax though.  The success rate on these grafts was probably less than 50% which is very poor for apple, an easy to graft fruit.  I also didn't like the fact that the branches then came out at an angle right along the parent branch instead of growing out and away from it.  that makes a bark inclusion in the tight space between the parent branch and the new scion branch, which arrangement is both weaker and more disease prone.  It is also very hard to line up the cambium layers in this method because the bark on the branch and the bark on the scion are very different thicknesses.  I imagine one could get a better take with practice, but I still don't like the other drawbacks.  The advantage is that you can put a new side branch on wherever you like, which is great when there doesn't happen to be a shoot to graft onto.

Since then I've done almost exclusively whip and tongue or cleft grafts which work great.  I only use the side cut method above when I need a branch where there is no small stub to graft onto.  Now that some of the older grafts are quite large I'm grafting material onto the ends of them to try out new stuff.  If something fruits and I'm not impressed with it, it can be replaced by something new that I'd like to try out.  I have a growing apple wish list large enough to require a couple more !Frankentrees!  When adding scions I get the longest scions I can.  Unfortunately people cut them short to fit into plastic ziploc bags, so they are usually shorter than I would like.  I learned from the grafter's handbook to use long scions with 8 or 9 or more buds when top-working (working over an existing tree to new varieties) because they will fruit faster.  When grafting onto a young roostock you need only two buds and one of them is just for insurance in case the other doesn't grow.  I usually select the stronger of the two and pinch out the other early on.  The rationale for using long scions in top-working is proved out by experience. If there are only a couple/few buds on the scion then they will all go vegetative and grow into long shoots.  If the scion has many buds generally the ones near the tip will grow out into shoots and the shoot can afford to turn the lower buds into fruiting buds.  I've actually gotten fruit the first year when there were already fruiting buds on the scion.  That kind of precocity is unusual, but it's not unusual to get a few fruits the second year and a good little crop the third year.  Early fruiting can also be encouraged by summer pruning.  Pinching back any vegetative shoots that you don't require to grow long will encourage the formation of fruiting buds near the base of the shoot.  Pinch a little off the tip when it has grown out pretty long and then come along once or twice more during the summer and prune it back yet further.  At the end of the season you end up with a shorter shoot with the lower buds differentiating into fruiting buds.  It seems to work pretty well on many varieties and helps to control the more vigorous growing types so that they don't take over the tree.

At some point !Frankentree! will hit some real world limit as to how many varieties you can practically fit on one tree and still expect to get good fruit from them.  I use the tree somewhat for holding wood I might want later and early on I just wanted apples period.  Now I'm more inclined to use it to test varieties I want to try.  Many rare varieties are very difficult to find samples of for taste testing.  Furthermore, even if you can find them there is no guarantee they will be in their best state, in fact, they usually won't be.  some apples are best off the tree.  Others ripen and improve with storage... some with lots of storage time, some with only a little.  Some years they taste better than others.  Besides, I want to know if the apple does well here and actually tastes good when grown in this climate, or stored until March or April or may.  The Earliest apples on !Frankentree! so far are Red Astrachan in mid to late July and the latest is Lady Williams which should hang into February.  The Jays knocked the last Lady Williams off the tree in mid January and it wasn't ripe yet.  So far the most intriguing apples !Frankentree! has bourne have been Karmijn de Sonneville, Cherry Cox (yes, that's an apple not a pornstar) and Egremont Russet.  I think this year is going to be very fruitful for our mutant friend... if the jay problem is resolved.  I'm trying to think of a human comparison to !Frankentree!, but it's not really possible.  Each variety of apple was originally grown from a seed or occasionally, as in Cherry Cox, was a mutated branch of a particular variety of apple known as a sport... in the case of Cherry Cox it was a mutant branch on a Cox's Orange Pippin tree which is widely thought to be the benchmark in flavor for apples.  You might think I only got Cherry Cox for the name, but really that was only 9 /10th's of it.  It has the complex flavor of Cox family apples with a varying degree of cherry essence in there.  I do like saying Cherry Cox though.  Anyway, each variety is genetically different and has been cloned by grafting cuttings over the years... in some cases hundreds of years.  Court Pendu Gris which I grafted today may be go back as far as the 1300's!  So imagine if people had these little stubs that you could graft bits of other people onto and they would grow into arms identical to those peoples arms.  So a person could have like 84 arms... except the fingers have leaves and are holding apples.  Dude, that shit could totally happen!  !Frankentree! indeed.

Operating on !Frankentree!

UPDATE:  During the 2010 season I had about 30 varieties fruit on frankentree.  Some I had already had before and some were new.  A few were eaten by birds.  I have so far usually added about 20 or 30 new varieties per year, so If good blooming weather prevails this spring, hopes are for a large number of new varieties in the 2011 season.  Some varieties like Connell Red (which looks like just regular fireside to me) and red astrachan are getting grafted over because I'm simply too little impressed by them and need the space.  With many new scions acquired through trade this year I need all the room I can get.

_________________________________

UPDATE FEBRUARY 2012:  One of the risks of putting a lot of varieties collected from random sources onto one tree is the risk of disease transmission.  This spring, sadly, Frankentree was infected with the Apple mosaic virus.  It is a common virus in Apples.  Varieties vary in their susceptibility, but all can carry it.  Susceptible varieties will show chlorotic (having a lack of green chlorophyll) spots on the leaves with may become sunburned in the summer.  The virus doesn't kill the plant, but it can make it less healthy and productive.  By the end of the spring a had 140 unique varieties on Frankentree collected over about 6 years.  All of those are now infected with virus.  Most are replaceable, but a couple like rose pippin and Beccas little pink tart might be difficult to replace.  Regardless, I am unable now to use the wood from frankentree as propagation material for my own use and to trade with others.  I can still use him as a testing ground for the varieties that are already on there, as well as for testing new material that I can reacquire if I decide I like it after it fruits.

Varieties which showed the most symptoms are:

Cherry Cox Ribston Pippin Gold Rush Cameo Netto’s Late Tart Hudson’s Golden Gem Sunrise Allington Pippin Karmijn De Sonneville Connel Red Allen’s Everlasting Cox’s Orange Queen Ambrosia Lady Williams

The better news is that we got 30 or more varieties of apples off of him this year.  We're looking forward to trying even more next year.  I will be thinning out a few losers this year as some material that was put on just to hold it over, and maybe adding a few things to test, but mostly I think Frankentree will become less of a test tree now and slowly be shifted over to just the varieties which prove to do well and taste great.

UPDATE 2014:  I get a lot of different apples off Frankentree every year now.  The Mosaic virus has proved to not be much of a problem and doesn't seem to affect yield or much of anything really.  See also my youtube video introducing Frankentree

STARTING VEGETABLE SEEDS, SEEDLING FLATS AND FLAT MIX

Just finished up planting the main seed starts for the coming season. It's a good feeling to have them up and going as they are the basis of a good garden. Buying starts is expensive, you can't be picky about the varieties you get and they are nice sometimes, but quality varies and other times they just suck. I like to start leeks in January, but most everything else I just start up in the middle of February. I almost never actually start leeks in January and often end up starting them with everything else about now. In February, I seed in flats or pots the tomatoes, eggplant, peppers, turnips, beets, lettuce, mustard greens, chard, pac choi, basil, parsley, kohlrabi, tomatillos, kale, new zealand spinach.... I'm probably forgeting something. Memory is only goes so far, but I'm not inclined to leave the comfort of my bed just yet this morning to go check. I don't grow a lot of cole crops (cabbage, broccoli, cauliflower etc) for various reasons, but I'm sure there are a few that should be started now if not earlier.

I don't start the squash and cukes and green beans in flats until about mid march. They grow faster and I don't want them to get pot bound and overgrown. Winter squash I may start even later. I tend to want it to ripen late so it will keep longer through the winter. I sometimes even direct seed it in about mid april.

I've always made my own mix. One year I didn't have it together and bought some "seed starting mix". It turned out to be just sand and peat moss which is kind of lame and provides no nutrients for the plants.  If you are going to have to start them in that and then transplant into mix to get them to grow why not just start them in somethig with nutrients in the first place?  Potting mix can be used, but it's a poor substitute for a good flat mix.

I sort of follow the biointensive method. Start with 50/50 garden soil and finely sifted compost (I use 1/4 inch screen) The soil, especially for the first time, should be nice soil with structure and some organic matter. Garden soil dug right out of the beds is best. By compost I mean well matured compost made at home with a diversity of materials, not the weak half decomposed industrial stuff you can buy. After this, the extra flat soil is always recycled. I put it into a covered container as I empty the flats through the season. Don't let it sit out in the rain. To each 2 parts of recycled flat mix add 1 part of compost and mix up. I also tend to add a few handfuls of coffee grounds and a small handful of oystershell to each 3 buckets of materials. A mix like this is rich and gives off nutrients over a long period. It will kick butt on any commercial potting mix and grow healthy vigorous starts without any extra fertilizing.

The first year I moved out here I had no compost and didn't want to buy anything. I made flat mix out of whatever was around. I found an old pot growing site in the woods where, typically, all the pipes, cages, pots, and trash were left behind years ago by some greedy slovenly scum bag. Anyway, I used a lot of that stuff and there was some fertilizers and a block of peat moss. I didn't know what the fertilizers were (obviously organic though) probably seaweed and bat guano. I threw in a bit of them, some wood ash, some of the peat, soil collected from gopher and mole hills (another good soil source in the garden). I don't remember what else I put in there, but probably some nitrogen stuff.. coffee grounds or steer manure.... I also used about 50% leaf mould. The leaf mould is gathered in the forest where the leaves pile up. Sometimes on the uphill side of a log the leaves pile up deeper, so there is more leaf mould under the dead leaves. Tanoak and Madrone seem to produce a lot. I do sort of avoid a lot of pine or fir needles. Lot's of people say Tanoak leaves are bad for compost and keep stuff from growing. That's not true. I don't even think they inhibit the growth of other plants at all except by shading and having very thick leaves that make a long lasting mulch under the tree. I've used piles of them in my compost and as mulch no problem.

Anyway, my first flat mix worked fine and I was able to start all my seeds in time. That year I had to bring some flats into the trailer a few times to get them to germinate and during an especially cold snap. Otherwise, I put them on a potting bench outside in the sun which was covered by clear plastic stretched on some PVC pipe hoops. I was concerned that this arrangement would be too cheesy to work, but it worked great and I had plenty of every kind of start. The next couple of years I put the flats under small hoop houses over a garden bed. I would watch the weather and bring the cold sensitive starts in to germinate, but it worked well enough.

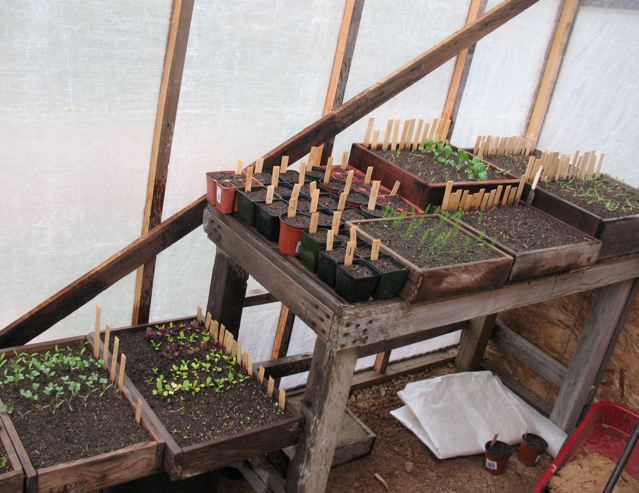
A couple years ago we got a seedling greenhouse built from recycled materials we had sitting around. This is a good arrangement. I think it's about 8x10 feet and with careful arranging, just big enough for seeds and other stuff like rooting cuttings. I also keep plants that like warm weather in there and plants that I want to force growth on like my new olive cuttings. It has clear fiberglass corrugated roofing on top, and woven greenhouse plastic on the front. I like this woven greenhouse plastic. This stuff is well over 10 years old and still going strong. I would like a bigger one someday, and better built. This one sits on the ground on redwood 2x4s and is light enough that we can figure out a way to move it to a new spot. The framing is of 2x2s which is entirely adequate. The door stays open through the warm season with bird netting over the doorway to keep birds from coming in and eating starts. I actually start all my starts in there during the summer. Even lettuce. It's hot as hell sometimes, but they seem to do fine with adequate water. I'd rather start those outside in the summer, but don't have a way to keep birds off easily, so it's just easier to do it in there. It seems to work ok, and they sure grow fast!

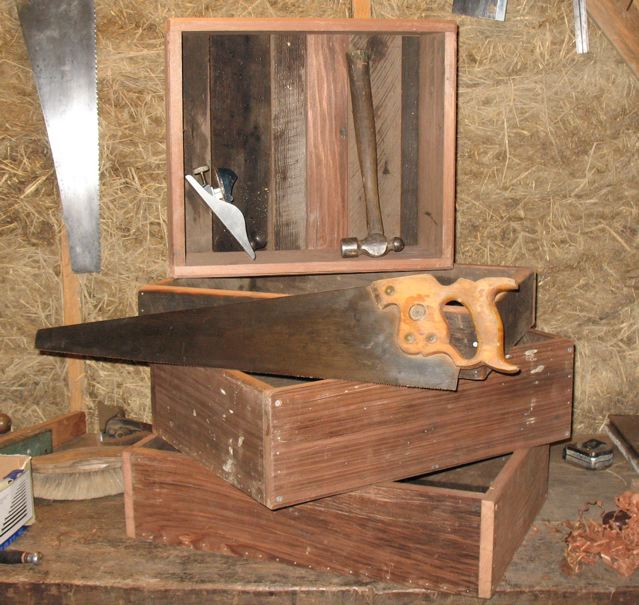
I grow most stuff in flats and a very few things in plastic pots or 6 packs. squash and cukes I do like to do in 3 to 4 inch square pots, but they can be done in flats too. I make the flats out of old redwood that I scrounge up here and there. If well built, they will last a very long time. Use galvanized or stainless nails and screws. Pre-drill all the holes before nailing or screwing to prevent splitting of the dry and brittle wood. Use mostly nails with a few screws at the top and bottom of the sides to prevent the side nails from pulling out when the boards warp due to moisture. New redwood, and especially any with white sapwood in it, will not work very well. Old growth redwood is the stuff that has the chemicals in it to prevent rotting and even after decades is going strong. I'm usually using boards that used to be siding or fence boards. Remove any old paint carefully as it is likely to contain lead.

I make the flats in two sizes, one size about 5 to 5-1/2 inches high and the others about 2-1/2 to 3 inches high. I use more of the 3 inch deep ones. I like to make some long and some shorter ones of each depth. It sucks to fill a big flat with perfectly good mix when you only need half of it. leave small spaces in between the boards of the floor to allow drainage and air circulation. I like to fit the floor boards inside the flat rather than nailing them onto the bottom. They seem stronger that way. It's more work though and some screws in the bottom might do just as well.

Keep the flats on a slatted bench when growing out or on a couple of rails to keep the bottom raised and air circulating. This will keep your bench and the bottom of the flat from rotting away.

Damping off is a common problem of seedlings in greenhouses.  The stem of the plant at the soil base is attacked by fungus and the seedling usually falls over and dies.  I have had this problem, but get very little of it now.  I'm just careful not to overwater and I use mostly wooden flats or adequately sized plastic pots.  Smaller plastic pots like 6 packs seem to more easily create a wetter less breathing environment that encourages damping off.  Air circulation on warm days will also help.

Mice are a serious problem in our greenhouse.  Snap traps baited with a roasted bay nut are very effective.  I use a small piece of wire to wire the nut onto the tread bar so that they can't pull it off and have to give it a good yank.  The trap can be reset with the same nut many times.  I probably trapped 40 to 50 mice in the greenhouse last year.  Don't know where they all come from, but it makes the cat happy!

Posted on February 24, 2010 and filed under Garden Stuff.

PLANTING AND ESTABLISHING FRUIT TREES IN OUR WET/DRY CALIFORNIA CLIMATE

We've been planting trees here for 4 years and gearing up to plant about 25 more trees and shrubs in the next couple of months.  My goal with almost all the trees is to establish well rooted, hardy, self sufficient, un-spoiled trees and then let them do their thing without irrigation and with minimal intervention otherwise.  Most will be pruned yearly, but some won't depending on intended use, location and variety or species.  I'd like to record here the methods we've been using in establishment as it seems to be going very well in general and requires only infrequent waterings during the establishment period.  Our climate is torrentially wet in most winters and reliably dry all summer. It's easy to plant a tree, but many trees that are planted fail to thrive or just plain die for lack of follow up care.  Fruit trees are expensive and a tree that is established well is going to pay you back in good health and productivity.  It's better to plant only a few trees and take care of them than plant a lot and care for them poorly.  The methods here are detailed and somewhat intensive, but success is in the details and I'm shooting for long term hardiness and self sufficiency which will save on pampering of the tree later.  Old homestead trees around here often live and produce for many years, so I know what I'm shooting for.... low maintenance and medium to high productivity.  Water is limited here but, really, water is limited everywhere and the less we all use the better.  So, it's ideal to grow stuff without it as much as possible.  I may end up irrigating some trees if they don't produce as much as I like, or can't fend for themselves, but I'm hoping good site selection and careful establishment will almost entirely negate the need for supplemental water.  We also have to establish trees that are further out than we can get water too and have had quite good luck doing this with the techniques described here.

SITE SELECTION:  Land, soil etc.. can only be modified so much.  Mostly, we're stuck with what we get.  It will pay you back to carefully consider the needs and dislikes of each type of tree to be sure that you plant it in the best spot you have.  Also, consider not planting certain tree types at all if they are likely to do poorly in the spots that you have.  We have enough diversity and good planting sites to put in a little bit of everything, but not everyone is so lucky.  If all you have is swampy area then you should probably avoid cherries no matter how much you might like them as they will almost certainly fail to thrive and are pretty likely to outright die.  Some apples, plums and pears though might do just fine or even thrive.  No fruit or nut tree really likes to sit in water, so if the area is real low and swampy in the winter, you might consider mounding up some soil to get the crown of the tree above the swampy line.  The crown is the most vulnerable part when it comes to fungal growth and drowning.

PREP AND PLANTING: Most of the trees are bare root or started from seed in place.  The trees we have seeded so far are walnuts and almonds to be grafted over to named varieties later.  I used almond rootstock for it's known drought tolerance and California black walnut growing near Carpathian (english) walnuts for my Carpathian walnut rootstock.  Since the black walnuts grew in proximity to Carpathian walnut trees they could cross pollinate and a number of the stocks appear to be Paradox walnut which is a desirable, healthy, fast growing hybrid of Carpathian and black walnut.  I wanted to seed these in place to achieve deep natural root systems.  I don't know about the almond, but the black walnut has a deep fast growing tap root that I want to stay intact.  The suitability and notably diseases resistance of the almond stock is to be seen as time goes on.  I got the seeds from bitter almonds.  Both were stratified in the ground or in the fridge in damp sawdust, or both, and then planted into a chicken wire cage about 8 inches in diameter and 16 or 18 inches high.

The bare root trees were mostly grafted by myself onto purchased rootstock.  I purchased a few trees, but they did relatively poorly in most cases.  I don't much like potted trees and avoid them when possible.  Grafting your own trees has a lot of advantages including getting the varieties you want, more personal investment in your trees, getting the rootstock you want and, most importantly, the opportunity to get the trees in the ground just after they're dug up which avoids the stresses caused by early digging, long storage and subsequent shipping and delays in planting that can plague purchased bare rooted trees.

Bare root trees are planted into wire baskets as well.  Almost everything is here since we have an abundance of voles and quite a few gophers.  The cages are only about 14 or 15 inches in diameter and about a foot and a half deep, but they protect the nexus of the root system so that it can survive most attacks.  First I used aviary wire which has smaller holes than chicken wire 1/2 inch v.s. 1 inch.  But, it is also more heavy duty and maybe more rust resistant.  I want the cages to rust away sooner than later to prevent potential choking off of the roots.  Having dug up some 2 year old aviary netting and seen no rust at all I was inclined to switch to the lighter weight larger holed chicken wire. I'd actually like some un-galvanized 1/2 inch wire that would begin to rust away in a couple of years, but I don't think that's available.  At least with the 1 inch holes it will be longer before the roots have to deal with growing around the wire as it tries to choke them off, and maybe it will rust away before then.  I originally used aviary wire on Robert Kourik's recommendation from his excellent book Designing and Maintaining Your Edible Landscape Naturally.  Which book is excellent and recommended.  I also spoke with him at the Sebastopol fruit wood Scion Exchange and he said he thought the aviary was good and might prevent young gophers from squeezing through and that the roots grow around the wire without too much trouble.  Because our gopher pressure here is not all that heavy I've chosen to switch to the chicken wire and so far so good.  Your mileage may vary.  I would not use hardware cloth as it uses thick wire and is very heavily galvanized so it lasts a very long time in the soil.

The baskets are made from a single piece of 4 foot wide wire folded down in half along the narrower length, then folded in from the sides a couple of times to make a pinched seam on the sides.  This makes a flat envelope.  Open it up a little and step into it stepping around on the inside to make a flat floor.  It will end up kind of square in shape with two little triangular tag ends on the outsides of the cage.  Fold these ends under the cage and step inside again to flatten it all down into a squarish floor.  I'll try to remember to edit this with the dimensions when I prepare this year's cages, but I think the wire rectangles start out about 4 x 2 or 4 x 2 1/2 feet.  They can be made a little bigger or smaller accordingly.

Fold in the edges of the wire basket a couple of times and then step on them to pinch together.

It's generally safest to plant trees at the level they were planted in the nursery row.... usually indicated by a change in color or texture on the trunk.  However, easily rooted trees, like those grown from cuttings are often fine to plant deeper.  Whatever you do, don't leave a depression in the ground around the trunk of the tree as it can puddle water and drown the trunk or promote fungal growth.  Since you will be fluffing the soil as you plant, the tree should end up on a slight mound and be expected to sink in with watering and weathering.

Purchased bare root trees should be soaked in water overnight to re-hydrate them before planting.  Be sure that the roots NEVER DRY OUT at any time.  If you will be working for a while digging and such, wrap the roots in plastic bags or wet cloth or carry them out in the soaking bucket.  Conventional wisdom used to say to dig a big hole and put lot's of amendments in the hole before planting.  Conventional wisdom now tends toward digging a hole just large enough for the roots and using no amendments, but amending from the top down after planting.  I follow the new school and it sure is a lot easier than digging a big ass hole!  I'm sure there's a place for digging big amended holes, but for my purposes, I want the tree roots to have to forage far and deep for water and food.  If everything they need is right near the tree, they will hang out there and have lazy roots.

Two important details in digging the hole:

Leave 4 to 6 inches of the wire basket above ground to help a little in discouraging voles and gophers.

Shovels often leave a hard compacted "glaze" of soil on the inside of the hole which can inhibit root penetration.  This is especially true of soils with high clay.  after you dig the hole to about the right size, break up the sides of the hole with a digging fork or something to expose un-compacted soil.

The soil should not be too wet.  Digging in very wet soil destroys the all important soil texture preventing proper drainage and cutting the roots off from air.  Try to treat the soil gently as you take it out and put it back in.

A stick shoved through the holes in the wire cage and suspended 2 to 4 inches above the ground level can serve as a handy planting depth guide.  Hold the nursery soil line of the tree trunk next to the stick while you fill in the hole. Most often you will need to make a mound in the center of the hole and spread the roots as evenly as possible around the area.  prune broken roots to leave a clean cut and poke long roots through the wire and even into the surrounding soil if they are long enough.  Don't allow roots to circle the edge of the hole.  Fill the hole in deliberately and somewhat carefully pushing soil under the roots as necessary, filtering it down the outsides of the wire basket and so on to make sure there aren't any large air pockets left.

Avoid compacting the soil excessively as the loose, friable structure of soil is important for the respiration of the soil and mobility and health of the plant roots.  When everything is filled in, I prefer to sprinkle some sawdust, leaf mould, compost or sand around the tree to prevent soil compaction when it is watered it.  Water the tree in well.  One thing to avoid is messing with the soil when you water the tree the first time.  The structure of very wet soil is destroyed with even the slightest agitation.  I sometimes will pour a bunch of the water on the newly planted tree and when the soil is well soaked give the tree one strong shake to fill air pockets and settle the soil.  More than one shake though or any mucking about in the soil can result in creating something like a mass of adobe brick around the roots of your plant.

MULCHING:  Mulching serves several important functions and would seem as though it could potentially create some problems which I will address from my experience.  First, mulching reduces evaporation of water from the soil.  it all but stops it actually, so the water leaves the soil only through the plants growing in it... which hopefully is mostly just your tree and the weeds growing right around the edge of the mulch.  Secondly, it stops all the plants that would be growing around the tree from drawing up and exhaling all the water in the soil.  Thirdly, it prevents the plants that would normally grow there from using nutrients that your tree would benefit from.  Fourthly, the organic material in the mulch, including the cardboard, will end up feeding the tree for a long time to come.  Voles and Gophers eat roots and bark and they like to hide under stuff like sheets of cardboard handy to their food source.  That seems as though it would be a potential problem with sheet mulching.  I have a lot of voles here and it does not seem to be a problem.  In fact I've come to think of this angle as more positive.  Piling up a large amount of organic matter and providing shelter and a moist place during dry times draws in and supports a little ecosystem of activity on and in the soil.  Bugs move in and eat the organic matter and each other and leave dead bodies and droppings.  Rodents move in and bring more organic matter for nests and food and leave droppings and dead bodies.  More insects, salamanders, snakes and lizards are attracted and so on.  So, in a real way, the mulch draws in more resources as well as the organisms that break down what is already there.  Worms also come to the surface to feed and draw nutrients back down into the soil and other bugs and animals turn over the soil.  As far as the negative effects of voles and gophers living under the mulch I've had voles chew up the bark on trees, but nothing else.  This is a real problem, but the solution is fairly simple.  I buy a few aluminum printing plates from a local printer (these plates are a by-product of printing process and are sold as scrap) and make collars for the trees.  These can be left on for years and are weak enough not to strangle the tree if neglected.  Honestly, I would put the collars on here with or without mulch until the tree was grown pretty large.  Also, I would rather have a tree that is well mulched with no weed growth around it and no collar than a tree with weed growth around the trunk with no collar because there is nothing they like better than making tunnels through the weeds to their feeding sites.  I don't know that having the mulch around the trees does not encourage more feeding on the roots underground and outside the cage, and it would take some careful controlled study to prove or disprove that, but fortunately I'm not a scientist!  So, I just care about the results and I've had good results.  I will say though that gopher pressure here is on the light side compared to many places.. but then I have done this in heavy gopher areas to a lesser extent without any noticeable problems.  To tie those thoughts up, I would actually say at this point that the fact that the mulch draws in more life, activity and resources is actually a fifth advantage more than anything else.  Finally, each season as the moisture in the soil under the mulch is used up by the tree, the tree roots have to forage deeper and wider for water making for a tough drought resistant root system.  Deep watering can achieve a similar effect, and indeed you may be deep watering under you mulch the first couple/few years, but with no mulch you are more likely to have to deep water all summer every year for the entire establishment period creating a roller coaster effect where there is water in the top soil.. then there isn't, then there is again causing the tree to grow new roots to use it... then no water again causing root die back... then water again etc...  and that coupled with the disadvantages of weed competition and without the positive effects of mulching.

Another problem that seems evident is that the mulch would actually prevent water infiltration into the soil the following winter.  Last winter was very dry.  Everyone's springs are still low the following January.   I didn't keep track of how much, but however much is was it was enough for the mulched trees.  This past summer I watered some two year old trees deeply by sticking the hose under the mulch only once in late summer and they did very well putting on shoots 2 feet and better.  Many trees at 3 and 4 years old received no supplemental watering and also did very well.  I could foresee prevention of rain penetration being a problem in some very low rainfall areas, but it hasn't been here.  Also, there is some infiltration... especially in the second season when the cardboard has become more sunken and broken

One last problem I have had with mulching is the encouragement of perenial weeds.  While annual weeds are easily smothered, most areas have at least one perennial weed that not only can find it's way through cracks in the mulch and survive, but will even thrive in the environment of reduced competition.  Around here those weeds tend to be Bindweed (wild morning glory), Sheep Sorrel, and Hedge Nettle.  I don't have a solution to this problem and have definitely seen not only survival, but proliferation of these plants under mulching over several years.  Since these plants are deep rooted and live through the summer, they could offer significant competition for water in our dry summers.  Only time will tell to what degree this is a problem.

Another wrinkle I haven't worked out is avoiding generally weedy and noxious growth under the trees as the mulch is allowed to decay.  Since the area is basically disturbed, thisles, wild lettuce, prickly annual non-native grasses and the like tend to thrive.  Making a transition to a more stable diverse understory as the mulch is allowed to go to seed is something to work on.  I have one experiment in progress using Narcissus and Daffodils as an understory.  Planted in the mulch in year 3 on 8 inch centers, the idea is to eventually pretty well fill out the whole mulch ring area with crowded bulbs.  Since these flowers grow thickly in the cold wet season and die in late spring, it would seem that they might choke out most of the grasses and herbs, but then die back in time to leave the water in the soil to the tree for the rest of the summer.  We'll see....

Timing is important with mulching.  Bare root season is during plant dormancy when soils are wet.  You want to mulch the tree BEFORE the rains stop because wild plants around the tree will rapidly use up the store of water in the soil.  I like to spread a bucket of urine (Urine is an awesome fertilizer with lot's of nitrogen, quite a bit of potassium and phosphorus, and tons of other minerals.  It is very beneficial to pee around your trees.) and any mineral or other supplements around the tree in a 6 to 8 foot circle before before mulching.  Ideally these amendments will be watered in by an inch or three of rain to carry them down into the soil before mulching is carried out.  You also want the cardboard to be rained on a few times so that it settles in and hugs the ground surface.

For mulching I use mostly cardboard several layers thick and covered with whatever organic material is handy at least thick enough to obscure the cardboard.  The first couple of years I used rotting straw from left from our neighbors' straw bale house construction.  The next year their house burned down and we ended up with lot's more straw from that.  Then a big ass forest fire came along and lit a fire under our asses to do some clearing around our place.  We chipped all the tree trimmings and are on the second year of using that material on top of cardboard.  Large sheets of cardboard are ideal.  The bigger the better.  Hit the furniture and appliance store dumpsters.  Trust me when I say that you should remove the packing tape from the cardboard before use... otherwise you will be seeing bits of it for a long time to come blowing around the place.  If I use three or more layers of good cardboard, I can generally get two years of weed free area around the tree with only some light weeding on the second year.  That is assuming that you haven't got chickens, skunks, dogs, turkeys or whatever tearing the stuff up looking for bugs or just for the pure joy of it.  My experience is that after two seasons you have to re-mulch to maintain the area weed free.   I have been shooting for at least 4 years of mulched weed free growth per tree which can be achieved with two mulchings.  I'm thinking I will do quite a few of them for 6 years, depending on site conditions and tree progress.  Apply the cardboard in a 6 to 8 foot circle (6 for the first two years and 8 thereafter is good) up to the edge of the wire basket.  Mulch with at least enough top mulch to cover the cardboard visually.

A couple more important steps!  Since the root area of a young tree is right around the planting hole and the mulch should only come to the edge of the wire basket, it is very important to prevent evaporation of water from the soil in the area of the planting hole.  After cutting the tree back and putting on the metal vole collar, I generally put an inch or more of sand in the collar right around the trunk and either more sand, or preferably some fine organic material like sawdust, old potting mix, leaf mould, compost etc... outside the collar and up to the mulch.  It's best if this is 2 inches or more thick.

With this done, I usually dump maybe 1/3 of a watering can of urine (fill rest of can with water to dilute) right on the planting hole area.  Follow this with another watering can full of water.  Urine contains all soluble minerals and nutrients by definition and gives the tree a ready source of immediately consumable food as soon as it begins to grow feeder roots and root hairs.

Check the tree in about 4 to 6 weeks and again in another 4 weeks or so for any weeds coming up around the planting hole and kill 'em.  If one weed grows it will be 100 times bigger than normal and compete with your tree.

FOLLOW UP: Your tree is now tucked in tight, provided with ready food, protected from hungry and thirsty "weeds" and has a bank account of organic matter that will slowly filter into the soil and create longer term fertility, you can relax... mostly.  Aside from a couple of weed checks the first year, you will also have to weed check every year thereafter.  I make the rounds and weed all the trees in early winter and then again in late winter.  There will probably be weeds growing in the mulch, but most of them have roots growing in the mulch above the cardboard only and can't find a way into the soil so they will eventually just die.  Look for plants growing in the mulch that look extra healthy next to the mostly stunted ones- these have found their way into the soil below the mulch.  Pull them out.  Keep an eye on the trees through spring looking for missed weeds.

WATERING AND FERTILIZING:  The first year I'll apply dilute urine and water right around the planting hole area as the roots are not yet widespread... and it's just easier.  Do this as little as you can, but don't let the tree growth stop too much.  If I'm going to water at all (watering is not much of an option for trees that are further out) I'll do it maybe three times through the summer at the most.  In year two and thereafter I still apply urine around the tree trunk/planting hole area during the late fall and or late winter by either saving it in buckets or just walking around peeing on them systematically through the wet season.  After the first year though I water by sticking a hose under the mulch for a while in a couple different places rather than putting it in the planting hole area.  Just make sure that when you do water you put on a lot of water infrequently rather than small bits frequently.

RE-MULCHING:  I apply soil amendments like oyster shell (for acidic soils), minerals, chicken feathers, urine or whatever you got on top of the old mulch before adding new cardboard and mulch for the next mulching in the third year.  If you apply this stuff well before mulching it can have a chance to be washed into the soil some before you cover it over and prevent rain infiltration.

ALTERNATIVE MATERIALS:  I strive here to reduce the amount of external inputs to the grounds.  I buy very little amendments for the garden or instance and try to rely on very local materials like leaves and grass for compost etc...  I have experimented with using locally available bio-mass for mulching fruit trees and it can work just fine.  I've used rocks, slabs of old fir bark of all sizes, rotten wood, grass stems and leaves.  This stuff can work fine, but will require a lot more weeding and will sink into the landscape pretty quickly.  One almond/peach tree that was done this way is now on it's own and has lush dark green plant growth all around the base from all the extra fertility provided by the decaying mulch and the organisms that live in it.  Put on thick enough, leaves and grass should smother   I like cardboard though and feel that it's worth the effort of dragging it up here on every town trip during the winter.  Then again, I have a lot of trees.  If I had only a handful I might be more inclined to use leaves and bark and accept the extra weeding it can entail.
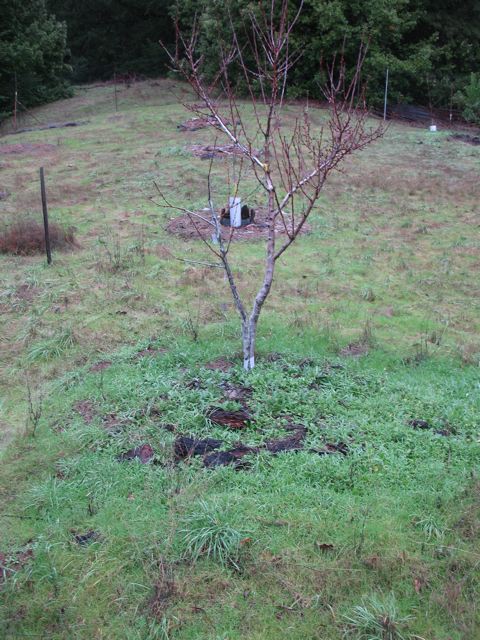
Pruning and training trees is another subject altogether, but I hope this maybe not so little tutorial sets some people off to a good start.  It may seem pedantic but, again, success is in the details and knowing why to do or not do something gives you more scope on a problem allowing for greater flexibility in creative adaptation.

Posted on January 19, 2010 and filed under Food Trees Fruits and Nuts.