Posts tagged #survival skills

A Review of Tanning, Leatherworking and Skin Related Books in My Collection

Below are Tanning and skin working related books collected by myself and Tamara Wilder over the years.  The video version talks about these books and a little history and such.  Some of them are broadly recommended, and some are only for people with certain specific interests.

Many, many books on Tanning, Glue Making and Leather working that are not listed here are available as free downloads from the Downloads page, SkillCult.com/freestuff

51Y6BJ9E6CL._SX307_BO1,204,203,200_.jpg

Buckskin, The Ancient Art of braintanning, Steven Edholm and Tamara Wilder, 1997: 

The book I wrote with Tamara Wilder in 1997.  From what I've seen, it is probably the longest and most detailed book on home tanning to date, especially considering it's focus.  As of writing this, it is currently out of print with plans to revise and re-print in digital and print forms.  Covers wetscrape braintanning, with some satellite subjects like sharpening and dyeing buckskin with natural materials.  If you've read it, please consider leaving a review on Amazon.


513MHSX5GKL._SX300_BO1,204,203,200_.jpg

Deerskins Into Buckskins, Matt Richards, 1997: 

Published the same year as our book, this one also covers the wetscrape method, but focused on bucking, which is using alkali to soak the hide instead of water.  It is the best, if not only, book reference for that technique.  There is also a companion DVD.


lotta tanning.jpg

Traditional Tanning Leather and Furskin, Lotta Rahme, 2014:

This would probably be my number one recommendation of a book on general tanning covering a lot of ground and many methods.  It has lots of anecdotes and tidbits on traditional tanning from various parts of the world, and good basic information on tanning chemistry and theory.  If a person were interested in braintanning primarily, they should get a book on that subject.  This may be currently the best single book reference for vegetable (bark) tanning.  Lotta is an experienced, small production tanner, with her own micro-tannery, so she has real insight, skill and knowledge to offer.


61V66pz-kLL._SY344_BO1,204,203,200_QL70_.jpg

Fish Leather Tanning and Sewing, Lotta Rahme, 2006: 

Lotta's cool book on tanning fish skins.  This is a popular subject.  I keep hearing about and seeing more and more fish leather. Much of the information is also contained in her general leather tanning book, but there is also a lot of information specific to fish skin and various species of fish, though they seem largely to be species from her part of the world, Sweden.


Screen Shot 2018-02-18 at 7.09.20 AM.png
jim riggs .jpg

Blue Mountain Buckskin, Jim Riggs: 

My teacher and teacher of my teacher Jim Riggs.  Jim was largely responsible for disseminating braintanning knowledge, having learned from his teacher Buckskin Slim Scheafer, who's book is below.  This is the best all around reference on dry scrape braintanning.  Fun, thorough and insightful.  #1 recommendation for a book on dry scrape braintanning.

Jim died last year.  He was friend and mentor many and had a profound and enduring effect on the primitive skills movement.  Many people's live took radically different directions because of either contact with Jim, or with others infected with his knowledge and philosophy.  My buckskin book contains much of Jim and would not exist without him.  Blue Mountain Buckskin is an enduring slice of Jim in the best way.

Tribute page for Jim Riggs: https://www.facebook.com/pg/jimriggsmemories/community/


Melvin_Beattie_Skinning.jpg

The Tanning Spirit video, Melvin Beatty, click here to watch:

Mel is one of the best tanners I know to this day and has always produced the best quality wetscrape buckskin.  His tips helped me get to producing better wetscrape buckskin.  You can watch his video on the subject on youtube now.

Also visit mel at the following.  He posts tips and experience on braintanning at his facebook page.

www.Braintanbuckskin.com

And Facebook as BraintanBuckskin


Screen Shot 2018-02-18 at 4.11.12 PM.png

The Indian Art of Tanning Buckskin
"Buckskin Slim" Schaefer, 1973

Jim Rigg's teacher Slim wrote this book at Jim's urging.  It was published the same year as Larry Belitz' book, Brain Tanning the Sioux Way, those being the first two books specific to braintanning that I know of.  This book is out of print, but they show up on ebay and elsewhere now and again at not unreasonable prices.


belitz.png

Brain Tanning the Sioux Way, Larry Belitz:

This is a small book and lacking somewhat in detail. There is enough information to learn the process, but it will be more trial and error than when using a more in depth book.  I think a lot of braintanners in the 70's and early 80's probably learned at least partly from this book.


9780941531009-us.jpg

Making the Attikamek Snowshoe, Henri Vaillancourt:

Available on the Author's website, this book is fantastic.  It is exactly what it should be, a detailed documentation of a traditional art, with as much important detail as possible, recorded in quality images and insightful text.  Henri is part anthropologist and part craftsman, which is how it should be, but almost never is.  The section on hide working outlines interesting traditional methods common to moose country for tanning skins and producing rawhide, both very important skills in that part of the world.


8490.jpg

Home Tanning and Leather Making Guide, A.B. Farnham:

This guide has some useful information, but leaves something to be desired as a stand alone guide to tanning.  It is still one of the better references for vegetable tanning and well worth taking advantage of, all the more so, because it is out of copyright and can be download from tanning book collection


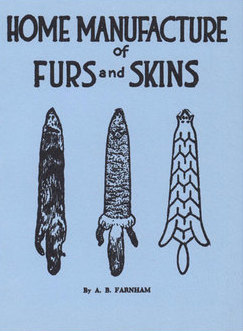
Hardings_Pleasure_and_Profit_Books_Home_Manufacture_of_Furs_and_Skins_10__30838.1450192916.386.513.jpg

Home manufacture of Furs and Skins, A.B. Farnham, no date: 

A useful book when it comes to handling and dressing furs.  Available as a free download from tanning book collection


61pSFtkB0AL._SX325_BO1,204,203,200_.jpg

Home Tanning of Leather and Small Fur Skins, USDA, 1923:

Of limited use due to lack of detail, but worth reading.  Download from tanning book collection.


295352._UY475_SS475_.jpg

Primitive Wilderness Living and Survival Skills, John and Gerry McPherson, 1993:

This book contains John McPherson's small book on braintanning by the dry scrape method.  It is a competent and useful guide to that subject, and also contains lots of other great stuff on primitive living skills of all kinds.  A good and useful book worth the price of admission from some old friends back in the day.


Aboriginal Skin Dressing in Western North America, Arden Ross King, 1938: 

This book is unobtanium, and likely only available in a few large university libraries.


The art of leather manufacture, Alexander Watt, 1885:

One of the better old books on tanning, although the only digital version I could find is the later 1906 version.  Available to download from the tanning book collection.  Much of the better part may be derived from the De LA LANDE translation below, which is more recommended.


The Art of Tanning and of Currying Leather... Collected From the French of monsieure De La Lande and others, 1773:

or download in my tanning book collection here

Maybe the best all around old resource I've found, introduced to me by friend and tanning colleague Jason Leininger.  Unusually well written and exhaustive for that time period.  Anyone who reads french should go to the original text, as no doubt things are changed, left out, or lost in translation.


51ATZS12P7L._SX327_BO1,204,203,200_-1.jpg

Dictionary of Leather-Working Tools, Circa 1700-1950 R.A. Salaman,1986:

Another book primarily for the enthusiast, tool maker and researcher.  A jillion variations on leather working tools as well as some tools of the tanner and currier.  Helpful in identifying old leather working and tanning tools.


71ABI1d95uL.jpg

Secrets of Eskimo Skin Sewing, Edna Wilder, 1976:

Traditional patterns and techniques from the source.


glue book, dawidowsky.jpg

Glue, Gelatin, Isinglass, Cements and Pastes, Dawidowsky & Brannt, 1905: 

This is the book I learned most of what I know about glue making from.  It is a technical manual for manufacturers from the intersection of tradition and science at a time when hide glue was still king.  Dowload free from Glue Books Collection


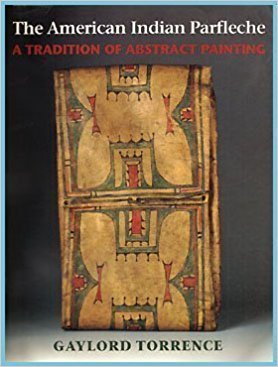
41ZLXqzsHzL._SX276_BO1,204,203,200_.jpg

The American Indian Parfleche a Tradition of Abstract Painting, Gaylord Torrence, 1994:

An art book, packed full of art-speak.  There is some interesting history, and the small amount of functional detail it does contain helped me figure the process out eventually.  The photos are excellent.  This is a beautiful and unique practical art form that originally combined a functionality tailor fit to a singular lifestyle with expressive art.  Very neat book.


Finishing the Oak Bark Tanned Deer Leather

Cute and practical, just how I like 'em!

Cute and practical, just how I like 'em!

Last winter I started a project oak bark tanning a deer skin to make leather for the axe strop project.  The project follows the collecting and processing of materials to build pocket sized sharpening strops as prizes for people who completed the Axe Cordwood Challenge.  I'm making everything I need for the strops and decided to show the whole tanning process and everything else in a series of videos.  Almost 6 months ago, I laid the prepared skin away to tan in oak bark.  It sat in there about 4 months longer than it needed to, but I took it out and finished it this week, and it looks like it turned out pretty decent.

The leather is perhaps a little light and spongy, "Empty", as they say in the tanning trade.  Emptiness results from the loss of structural proteins in the skin by chemical or bacterial action.  It isn't much of a surprise considering that I over-limed it to start with, and that it sat in a weak vegetable tanning (plant based) solution for 4 months longer than it needed to.  Those are actually the type of things that a tanner might do on purpose to a hide in order to make the finished leather soft and pliable.  That's not what I was planning though.  I would prefer a rather firm and weighty leather for this project, but that is not even the nature of deer to start with.  Deer skin, at least our deer skin here in the Western U.S. has an open, coarse-fibered, low density character that lends itself well to softened leathers.  It would have been better to move it through the process faster with shorter liming time.  But, a process that uses somewhat preservative solutions like lime and tannin, begs for procrastination.  Add that I have to make videos of it all and it's a perfect storm for not getting things done in a timely manner.  It will probably work fine for the project, but I haven't assessed it closely yet.  If it doesn't work out, I have plenty of other skins I've tanned over the years that are suitable and I got to show the process start to finish, with some of the warts and mistakes that any home tanner is likely to experience.

The next steps will be making the wooden paddles, making glue and putting it all together into the finished product.  I only need a small amount of leather for the project.  Seven brave and industrious individuals chopped one cord or more of firewood for the cordwood challenge using axes only and will receive a finished strop and a leather patch when they are made.  The balance of the leather will be stowed away with the rest of my leather cache, to wait for a suitable project.

Splitting Axe Cut Wood With a Sharp Felling Axe, Safety and Effectiveness

The first video is a short trailer or propaganda piece to promote the second video.  Below are a few non-technical points I wanted to elaborate on.

I just have a few points I want to emphasize or elaborate on.  I made this video in response to a lot of questions from people about how to deal with wood that is bucked with an axe, since it can't be set on end, or on a block.  Also, because of how I'm operating with one axe, I assumed that it would be a small short axe and that it was intended to retain the edge in chopping condition.  That wasn't so much a plan as it was just how it turned out since that's my world right now.  It is not the only way to approach it.  You could, and most probably do, have a dedicated splitting axe, or maybe a splitting edge on one side of a double bitted axe that can taste a little dirt here and there without much worry, especially if it's ground with a fat bevel that is less likely to suffer severe damage than a thinly ground edge.  A longer heavier axe with a fatter grind is great, as is not having to baby it.  However, using a small, short axe and keeping it sharp requires one to refine technique and strategy, and I think that is a good thing.  I'm also very interested in making whatever tool I have work, and in processing wood with one axe.  You'll hardly find anyone out there recommending an axe ground for felling, limbing and bucking as a splitting axe.  Probably the opposite in fact.

One of the important points in this video is that it requires some investment to figure out what is possible.  Many will discount the possibility of using axes, but not always out of experience, but rather assumption.  I've been guilty of this to an extent myself and it's a mistake.  I personally think that it's worth some investment to figure out what is possible and where an axe is more advantageous than a maul.  I really like splitting with a maul and with some of the stuff I have to split, like dry hardwoods with knots and forks, I'm not likely to ditch my maul altogether.  But, I will keep pushing my limits with axes of various kinds to find out what those limits really are. 

It is not enough to just just smack a few rounds with an axe to see if anything falls off.  It takes some investment in yourself to develop good technique and at least a basic understanding of strategy as presented in these videos.  The flick technique, as Buckin' Billy Ray Smith calls it, or the twist as the Vido's call it, is essential to develop for splitting anything difficult with an axe.  It is just a way to use the power generated in the swing to good mechanical advantage by prying the wood apart on impact instead of just wedging it apart with the shape of the axe.  It can make up for the lower mass of an axe head v.s. a maul in some cases.  I believe that Tom Clark, inventor of the buster axe, an axe optimized for this technique, actually hit the wood with the head tilted at a slight angle.  I think I twist it on impact, but it's hard to know for sure without a slow mo study.  Either way, you'll develop a feel for what works.  It is a skill that has to be learned by some time spent as it's rather clumsy at first to get the timing right. If you have a very sharp short handled axe that you are trying to stay out of the way of, which often requires somewhat awkward positioning, and on top of all that are trying to hit the center of a knotty piece of wood within a quarter inch, you can imagine that some time will have to be put in to gain a reasonable level of skill.  The catch 22 is that it's only by gaining a certain level of proficiency that we can find out what is really possible and not.

The flick technique can be used as an alternative to generating velocity in splitting at times, but should not be thought of as a permanent stand in for it.  The ability to generate a high velocity is a critical tool to have and will only complement that sideways torque when both are needed.  I didn't go much into it, but will in the future.  From my observation and experience so far, high velocity is primarily created by the axe head scribing an arc around a relatively fixed, or at least more fixed, point, like the wrists, elbows, shoulders, waist, or a complex combination of all of those.  it is a complex topic.  With the target at a certain height, it becomes less possible to generate velocity, and the higher you go from there, the harder it gets.  That is one reason I don't use splitting blocks much.  Working close to the ground has the advantage that it is easier to generate velocity, because you have more distance in the swing and can use body mechanics to better advantage.

For me, doing the axe cordwood challenge, in the way I approach it, has been perfect for developing these skills.  I stick pretty much with the axe I'm chopping with, which for now is always small and sharp, and I split in the field with no blocks or contrivances of any kind.  I can only remember abandoning two, maybe three, pieces of wood that were just really knotty or more likely forked.  Even those could likely be split with enough energy, but I know when not to beat my head against a wall for a peanut.  I'm glad that I've invested in this skill, because it will ultimately increase my splitting efficiency in all arenas.  I now have a pretty good idea of what I can get away with and am further refining and defining when an axe will be more advantageous than a maul in splitting sawn rounds as well.  For what it's worth, these videos at least show some possibility that can be put to use or invested in later.  It's not for everyone, and not for every situation, and possibly not for every species, but in the right circumstances it is remarkably efficient and satisfying.  I can say, that just splitting what I incidentally have to cut here, which is Madrone, Bay, Fir, Tan oak and Black oak, that none of those species are consistently difficult to split when young trees are cut and split green.  Older Madrone and Bay can develop some wicked cross grain, but a person is not likely to be cutting those for firewood with an axe, and if they were, large trunks would have to be split, probably with wedges, before bucking, not after. 

The axe and the technique of using it with good strategy are just another set of tools in the bag to be applied where they are best suited, or when necessary.  But, again, it is a tool that has to be developed and refined to be appreciated and applied to anything but the most easily split woods.  I'm glad I've put in some time and forced my progress by using axes that are not ideal for the job and I get to reap the rewards of that from here out.

Did I mention that it's fun?  It's really fun :D

Axe Only Firewood Processing, Felling, Limbing, Lopping, Bucking for a Splitting Video

I released a video a couple days ago on processing my last tree for the cordwood challenge.  This was a tree I chose as not particular easy to split for a splitting video I'm still waiting to record.  The question of how you split wood with an axe if it's cut with an axe instead of a saw vies with "what do you do with the chips" as the most common question regarding processing wood with an axe.  The footage I shot for the front of that video seemed like a good stand alone video, so I edited it and posted it with some commentary.

Be aware that there is a lot going on when I'm processing this tree that is invisible to the uninitiated.  If I were watching someone else do it, I could spot some of that "invisible" technique and safety stuff, but not all of it as it is very subtle and personal.  The lopping operation is especially dangerous, but I'm using several things to stay as safe as possible.  The most important might be the direction of cut, which means in what direction the force is pointed, the obvious reference point being the cutting edge.  A close second is probably body positioning to decrease the likelihood of a stray edge contacting my body.  Moderation of the force used is also extremely important.  Axe work requires constant adaptation and a certain level of humility where you have to say to yourself "I can hit this really hard, but I'm not going to!"  Finally, you really have to be able to hit what you're aiming at.  Anyway, it's mostly a lot of chopping, but some people really seem to like that.  There are some really good pointers though too.  You can count on some very detailed tutorials in the future.

How to Graft onto Existing Fruit Trees, Frameworking and Topworking Explained

I've reached #10 in the grafting video series.  I'm looking forward to finishing the last 2 or 3 segments and moving on to something else.  It's quite an investment to watch it all, and I know it is not needed just now by a lot of people, but it will be there when it is needed.  It will be really great to finally have a grafting resource to refer people to in my writings and videos and it is long overdue.  So here is #10.  I've talked about a lot of the material covered in this video in a blog post about frankentreeing some time back, which can be read here  And here is the video playlist for this series.  The summary below is an outline of what's in this video, mostly for search engines.  The information is covered better in this video and in the blog post linked above.

A distillation of this video:

Grafting onto exsisting trees is approached in one of two basic ways, either by topworking or by frameworking.  Topworking cuts most of the tree off and regrows it, while frameworking retains the main tree structural wood and replaces the fruiting wood with the new variety.  Framework grafting has the advantage of producing fruit more quickly and is less damaging to the tree.  A well frameworked tree may suffer no permanent injury, while a top worked tree is much more likely to have ensuing problems with decay due to the large open wounds created in cutting off large branches or trunks.  Also, it is possible in one year to add many varieties to a frameworked tree.  On a good sized tree you might add 50 to 90 varieties in one season, whereas you would have to wait for the top of a top worked tree to regrow in order to graft on more than a few varieties in the first year.  I favor frameworking in almost all cases except where damage done has to be remedied by growing a new top, or by some other special circumstance.  It does require more scions and more time, but unless the scale of operation is large it is a no brainer to choose frameworking in most cases.

A frameworked tree can be grafted in one year with very little or none of the old fruiting wood left on.  Some sources will recommend leaving some of the old wood and that is okay if you are concerned, or if you are not sure your grafts will take well.  I would not hesitate to work over an apple tree completely in one year if it is healthy.

A common mistake in frameworking is to graft onto smaller wood near the outside of the tree's canopy.  It is better to go back in to wood nearer a limb or large branch, thereby replacing and regrowing all of the fruiting wood.   Don't worry about grafting into stubs the same size as your scion, just set the scion to one side, and if the stub is large, set to scions, one on each side.

Another common mistake is to add a scion, but leave old fruiting and leafing out wood crowded around it.  There is a good chance that the new graft will not grow well if it is not given some room by removing proximal fruit/leaf wood. 

A spacing of about 18 to 24 inches is pretty good between main offshoots on one side of a tree.  If they are 24 inches apart, each only has to grow 12 inches to the side until they are touching.  Branches on the other side of the tree can be the same spacing, but staggered between the branches on the opposite side when possible.

There are many grafts that can be used, but cleft and whip and tongue are good mainstays to use on smaller stubs and on stubs over an inch you can start to think about using rind (bark) grafts, covered in an earlier video.  It is possible also to add a graft into the side of a bare limb or large branch by either cutting into the side of it and setting in a wedge shaped scion, or by using a rind graft of some kind.  Those operations are less likely to succeed than the familiar grafts already mentioned, but if it doesn't take, it can just be grafted again the following year.

Aftercare is similar to other grafting.  Wrap grafts very tightly and very well to prevent movement of the grafts during a couple months of critical healing time.  Seal the scions to prevent drying out, and check them in mid summer to make sure that rapid growth is not strangling the grafts where they are wrapped.  If the grafts are strangling, either remove the tape, or unwrap it and re-wrap around July sometime.

Scions for framework grafting can be much longer than those used for most other grafting.  I like to use scions with 8 or more buds personally.  Very long scions can be used if they are splinted firmly to immobilize the grafted section, but I'm not sure there is any real advantage to doing so.

Tools required are just a sharp knife, pruning saw, pruning shears, some kind of grafting wax or paint or seal and something to wrap with.   See the Tools Video for more on that stuff.  Don't forget to tag them too!