Posts tagged #lime burning

Burning Shell Lime in a Primitive Straw/Clay Kiln

Tomorrow/Today is my birthday.  As I sit here at 11:58 pm, sipping tequila out of a bottle, trying to trap a loud and pesky mouse that is rolling bay nuts around the trailer and finishing up posting this project so I can move on to the next one, I want nothing more than to top the 1000 mark on my YouTube subscriptions today.  I have 959 subscribers, so only 41 to go!  If you can share this video somewhere that you think people will truly enjoy it and help me top 1000 subs by the end of the day, I will be just really happy about that.  Small victories you know.

I have two bottles of champagne.  One for reaching 1000 subs and another one for my first really mean and stupid YouTube comment!  YouTube comments are notoriously retarded.  Other YouTubers do entire episodes devoted to the stupid comments that they get, yet I have none!  I feel left out!  Clearly I need more exposure :)

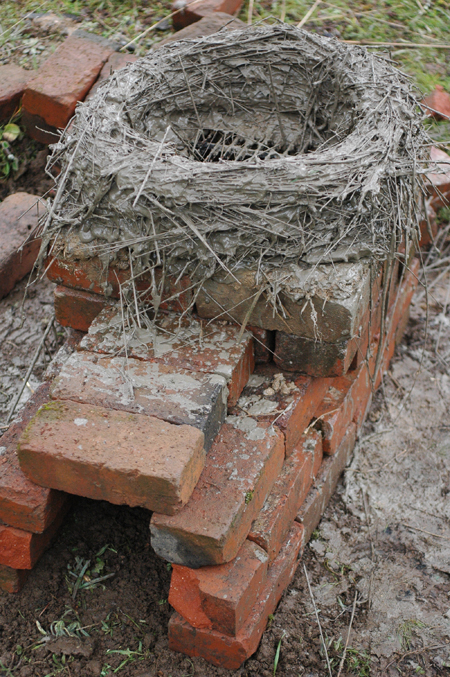
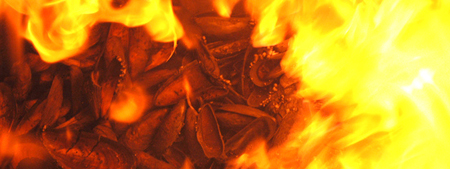
This project was so fun :  I love burning lime, and now I'm thinking about how cool it would be to build something larger using a method similar to the straw kilns I show in these videos.  Something like this ancient style of coiled straw/clay Mexican granary that was the indirect inspiration for my kiln design, via friend and natural builder Michael Smith who saw these in Mexico and then innovated a straw/clay wattle wall system.

Super neat Mexican granary design utilizing straw and clay in a coiled pot type of form.  This would almost surely use much more clay than I'm using.  I'm intrigued though by the idea of using a mix more similar to the pet to build somethi…

Super neat Mexican granary design utilizing straw and clay in a coiled pot type of form.  This would almost surely use much more clay than I'm using.  I'm intrigued though by the idea of using a mix more similar to the pet to build something larger, like a pigeon cote, a smoker, or maybe a bedroom...


I made two videos.  One is the short accessible version and the other is longer and more detailed.  It also introduces two of the new series or categories I've been dreaming up which are intended to make content more navigable and allow people to find the content they want to see more easily. 

The Buildzerker! series houses the short version.  It is a series for shorter general interest versions of projects I do.  For every person out there who is ready to know how to burn and slake lime in some detail, there must be hundreds that just think it's interesting to watch, or who might be influenced in some positive way simply by seeing it happen.  Buildzerker! is a way to entertain people, while planting seeds that may someday grow.  When anyone is ready, the long version is there.  I'm very happy with this effort.  It is fast paced, visually interesting and even beautiful, while covering a subject that is truly interesting.  I tried as hard as I could to make it worth 7 minutes of almost any persons life.

BuildCult is for more detailed how to versions of projects intended to transmit more knowledge.  This one is also fast paced, but packs a ton of information into 20 minutes, while still having all of the visual interest of the simple version.

I like both of them, and am really looking forward to making more.  I feel like I'm doing what I should be doing, and that's always good.  I hope you have a great day.

Lime Squad IV: The pets, straw clay lime kilns.

pet II header

"None of these goals and design parameters will be considered in a myopic sense.  Context must be considered with an assessment of cost benefit ratios in a holistic sense that includes values beyond convenience and control."

After taking lime burning in a steel drum as far as we felt we could without adding something to the drum.  Tonia and I decided to venture off into building a kiln with available materials.  That was one goal- to explore the possibilities of available materials.  Another was to experiment with design changes in order to improve smoke and efficiency issues.  We decided to add a grate and a fire box to see where that would lead us and how effective burning the fire separate from the shells might be.  The metal drum taught us that we needed either insulation, or mass, or both together which I gave the silly, but relevant, name massulation. We thought of using some bricks that were around, but decided to go a little more primal using stuff we might be able to scrounge up anywhere.  That meant having a base which could support a grate.  We chose to use bricks for just the base because it was faster for our experimental purposes than mudding one up with cob, though the cob would probably have worked better.  We slapped some mud onto the outside of the bricks to seal most of the air leaks.  The base had a short firebox leading to a grate at the bottom of the column.

The Pet's base, slapped together with bricks and then covered in mud, was a quick way to try out the idea of utilizing a fire box and a grate.

I got the idea for the kiln body material from a visit to Emerald Earth, a local community that does a lot of natural building.  They use a wattle and daub system that replaces the stick wattle with bundles of straw dipped in clay slip.  I decided that it would probably work for burning a kiln at least one time.  It seemed like a lot of work, so to cut down, we just dipped the bundles of straw in slip and laid them up without any vertical supports.  And it worked fine.  We pulled up bundles of dry wild grass straw, dipped them in a rough clay slip made using some clay from a deposit here on the land, and just built it right up. The walls turned out about 3 inches thick or so.  Since the straw is hollow, and the slip has substantial weight, this system gave us just the massulation that we were after with very little effort.  Our friend Yoshi said it seemed kind of like a pet and the name stuck.

Clay slip was made from some clay we dug up while digging a vernal pool.  The slip is pretty thick and we used quite a bit, since that is the glue that holds the whole thing together.  I also figured that a thick coat of clay around the straw would protect it from burning up too quickly.

Straw with quite a bit of clay slip formed the Pet's walls.

The shape of the body was somewhat constricted toward the top.  Given no limitations in materials, I’d be inclined to build a kiln slightly bulged in the middle and constricted slightly at top and bottom, with the top considerably more restricted.  Many traditional kilns are made this way.  I can’t say why for sure, but I think it’s because the larger space in the middle would give the gasses and heat a place to sort of spread out and slow down, while the constricted top could further slow the gasses down.  Also, if the inside is somewhat spherical or concave, the heat radiating from the heated walls would be radiating down and up instead of straight across, which would at least theoretically retain the heat longer as it bounce back and forth inside the curved walls of the kiln.  That's what my intuition tells me anyway.

The Pet was given a slight taper toward the top.

A small fire was kindled in the fire box to dry the kiln more quickly.  When it was partially dry and firm to the touch we did a burn in it.  Burning just the firebox, with no fuel in the kiln body was hopeless, as I suspected it would be.  Maybe it could work if using a large burn chamber with a relatively smaller kiln and a ton of wood to really pump an intense amount of heat in there.  Such an arrangement might also require more insulation than we had.  While our straw/clay kiln body contained a lot of pore space, there was also a considerable amount of clay in the body which would suck heat away.  Still, I don’t recall the outside of the kiln ever being super hot, so we were retaining most of the heat, or at least losing out the top as would be expected, rather than out the sides. Using alternating layers of fuel and shells, the firebox seemed of some assistance in getting the fire off and running with less smoke, but probably not enough to justify it’s existence.  Overall, I would say that the firebox was a fail. The good news is that the percentage of thoroughly calcined shells did go up when doing mixed fuel/shell burns.  Shells touching the side of the kiln were not destined to be under-calcined as they are when using a plain steel drum.

The percentage of calcined shells in the pet was always higher than in the drum.

We burned at least 8 burns in the pet before it disintegrated.  It was covered from the rain at all times.  It became fragile after a few burns and was barely nursed along for the last 2 or 3.  That seems like a waste of effort, but there are good points.  I think the burned clay will make a great soil amendment, we didn’t have to buy anything, it was fun to build and we got a little exercise.  In researching historic accounts of biochar in Europe and North America, I found a number of references to the great value of burned clay being used as a soil amendment.  The clay burned from the pet is really neat.  The straw burned away in most of it, leaving small tubes throughout.  A nifty system might be to burn agricultural lime in a similar kiln, while producing charcoal if possible, and then putting the whole lot into the soil when the kiln is too burned out to use anymore.  It may be quite a bit of work, but the charcoal and clay should be a permanent investment, not like a one time fertilizer application.

The pets walls fired into a porous fired clay which crumbled away from the inside with each burn.

Pet version 2.0 was built at The Buckeye Gathering in 2012.  We built this one with Bryce the blacksmith as a dual smelter/lime kiln, using a bale of wheat straw and clay slip.  Bryce collected some iron ore to smelt and we thought we could maybe cook two birds with one kiln.  this time we dug into the ground a little to make a gathering area for the slag.  That didn’t work so well with the lime burning, and probably not for the smelting either.  It just created a cool zone against the back of the kiln, in spite of adding 3 vent holes at ground level.  The lime burned, but there was a high percentage of under calcined shells.  The smelting also failed, but we were inclined to think that fail was due to bad iron ore rather than to the kiln design, or management.  Lesson learned for lime burning, the air should come from the bottom of the kiln, not part way up.  That may not be true in taller kilns, but for the micro scale kilns, I think it probably is very important to have the air enter at ground level.  This kiln was only burned twice and was then abandoned on site, but it had more burns in it yet.

The Pet II's base was below ground.  Not recommended.

The Pet II in action. (photos by tonia sing chi)

The pet’s straw clay concept is pretty cool.  It’s fast to slap together and doesn’t require that you buy anything.  Once burned out, there is no waste and, if anything, the leftovers are useful.  I would recommend building it on a low cob base, or just on the ground leaving four vents at ground level created by two shallow, intersecting trenches crossing each other in the center.  A slight constriction toward the top would probably be a good idea.  If the kiln is taller than you can reach into from top to bottom, you would probably need to build in an archway at the bottom for cleaning it out.  This design, which is basically like burning in a drum (see part one of this update), but with mass and insulation, does not solve the problem of excessive smoke.  For that solution, it’s back to the drawing board.  Smoke can be reduced a little by starting a fire before adding wood and shells in layers, allowing each layer to get underway before adding the next.  Burning from the top is also an option, but probably would require extending the height considerably with some provisions for flaring off gases (see below for more on this concept.) Cob (a mixture of clay, sand and straw for those who don’t already know) could be used to build a kiln and would probably outlast a pet by a long stretch.  It would also be a lot more work and still far from permanent.  Cob would also be much less insulating than the pet’s clay coated straw construction.  I have the good fortune to hang out a little with Kiko Denzer each year at the Buckeye Gathering.  He is pretty savvy when it comes to fire stuff.  One of his ideas was to use sawdust, or probably more like wood flour, mixed with clay to build a kiln body; he says this is how firebricks are made.  The sawdust would serve as a sort of aggregate, but would burn out when fired, leaving a light, porous material.  Another idea he tossed out was to try a technique used in firing pottery, where the wood and pots stacked together are wrapped with newspaper which is first dipped in clay slip.  This forms a temporary kiln.

The pet two.  (photo by tonia sing chi)

If energy and other priorities don’t get in the way (not unlikely), I’m hoping to explore home-scale lime burning some more.  The objective is to keep kiln design simple and accessible in order to remain inline with homey goals, while increasing efficiency and decreasing pollution in the form of smoke.  Raising the percentage of thoroughly calcined shells as close to 100% as possible is also on the agenda, but that really falls under efficiency. None of these goals and design parameters will be considered in a myopic sense.  Context must be considered with an assessment of cost benefit ratios in a holistic sense that includes values beyond convenience and control.  This is important (thus the bold italics ;).  For instance I am not going to focus narrowly on 100% calcination if it means burning 50% more fuel.  And what would I profit from a small gain in any goal if it means buying 500.00 worth of special manufactured insulating material or switching from wood to propane? The smoke issue will probably take priority for now.  I’m interested in a concept called TLUD Top Lit Up Draft.  I did one top lit burn in the pet using a piece of stovepipe to extend the kiln in order to provide draw.  The TLUD concept also requires flaring off of unburned gasses which, for me, was provided by unsealed gaps between the top of the kiln and the stove pipe.  The burn went Ok as I remember (though I'm not sure how well I do, I think I'd remember if it went very poorly), and with much less smoke.  so I’m encouraged.  The basic concept is that the draft comes in at the bottom (the air is often preheated by passing through a space between the inside container which holds the burn and an outside layer) and travels all the way through the kiln where it is consumed by the fire at the combustion zone.  Since the fire is lit from the the top, it is not smothered by a giant pile of fuel and shells as it is in a bottom lit kiln.  The fire is actually starved for oxygen in a way, but the extra gasses created by that are flared off at the top of the unit, consuming all of the smoke.  The TLUD concept is used in gasification stoves and to produce biochar.  I have some new metal drums to play with and already hope to be exploring this idea for making charcoal to use as a soil amendment. Finally, I’ve been interested from the start in exploring the possibility of producing biochar and lime at the same time.  I have no idea if that can work yet, but I’d sure like to try.  I hope to produce a lot of char anyway and it would be nice to use that heat for something.  Since we have acidic soils here, lime is a necessary addition, though using char in the soil is supposed to help raise ph as well.  I can get oyster shells by the ton for cheap or free (except gas and driving of course), so calcining a few shells while already producing a bunch of heat during charring sounds pretty awesome.  If that works, I have a feeling it will be in a fast burning, high heat TLUD design with mostly wood and just a few shells.  Those shells would still add up though when making a lot of char.   Hopefully this will not be the last lime burning post.  If anyone tries any of these ideas, please come back and let us all know how it went!

Shells, we're rich!

Posted on November 2, 2013 and filed under Uncategorized.

Lime Squad III: Burning lime in metal drums. Advantages, limitations and where to go from here.

lime header This update is loooong overdue.  In fact, it was started maybe as much as a couple of years ago, but never finished.  So overdue in fact, that I've divided it into two parts.  This part will deal with burning in a metal drum, while part two next week will assess some clay and straw kilns that were built later on.

Warning, extreme geekage ahead!  This will be TMI for most people, but hopefully useful for those who want to understand and pursue lime burning.  Although I think using a drum is not the greatest, I'm using it as a reference point to try to understand and relate the process as a stepping off point, because this has been our evolution.  Future posts may be more along the lines of “how to do this right”.  This article is somewhat of a chronicle of an evolution, but contains a lot of relevant ideas and information to help the would be lime burner better understand the issues involved.

Lime burning at Turkeysong is pursuing broad goals.  One goal is to make home-scale lime burning practical enough to use in development of infrastructure here on the land.  I'm also interested in assessing the practicality of burning lime for agricultural use.  A small amount of lime is already in use here for processing leather and rawhide, as well as for preparing corn for tortillas and hominy.  Other uses will no doubt arise, such as the tree trunk paint formula I’ve been working on and all sorts of building and paint projects.   Another goal or motivation, as always, is to be able to share this information out to the end of providing achievable alternatives for small scale builders and self reliant tinkerers.  I am encouraged by the results so far and am looking forward to experimenting more.  I wanted to offer some insights gained up to this point, both for the benefit of people who want to try burning lime on their own and also just to have it written down for future reference.

The first burn (see lime squad #1) was done in an open ended (both ends open) section of old rusted water tank.  After that burn, tonia and I decided to move to a 55 gallon drum with both ends cut out, essentially the same thing, but different proportions.  We stuck with this plain unmodified 55 gallon drum for quite a while in order to observe just how far we could go with this simple and widely available object.  We also used a smaller drum about 10 or 15 gallons, which worked, but harder to keep the shells in the middle of such a small drum.  Having done 8 or 9 burns now, the capabilities and limitations of the drum on it's own seem pretty clear.  insights into what might be important in future kiln designs have also been gained.  So this review will be a summary of lessons learned by sticking with the plain metal drum for a while with an eye toward better kilns.

The simple drum, burning mixed layers of wood and shells, works but it does have many limitations which are unacceptable in the long run.  Still, as it stands it can be a useful method and its accessibility is great.  If a person wanted to do just one burn to make lime for nixtamalizing corn, to lime wash a building, or to build a small masonry project, etc… I don't see any reason why they should not go ahead and use this method if there is a clean (already burned out) drum and plenty of wood lying about.  For anyone who wishes to continue to burn lime or needs a larger quantity than that provided by just a few burns, it may be considered fairly irresponsible to use these huge quantities of wood and produce so much smoke without trying to improve the system.

The basic drum system as used here is a 55 gallon steel drum with the top and bottom cut out.  The drums are easy enough to cut with a cold chisel and hammer by simply chasing around the edge of the rim while holding the chisel at an angle.  Two intersecting trenches are dug in the ground forming a cross which allows draft from four sides directly to the center of the fire.  The trenches are probably 3 or 4 inches deep and about that wide.  The trenches and ground were sometimes smeared with clay soil paste to keep the burn cleaner and stabilize the trench walls.  This expedient, though not necessary, is quite nice and is recommended if there is some clay, or even just clay bearing soil, handy.

chiseling out the top of a drum is easy with a sharp cold chisel and a hammer.

some clay slip smeared over the trench can keep things clean.  It is not necessary, but worth thinking about if the soil is very loose, as here, or you are going to do many consecutive burns.

The vent mouth.  4 of these evenly spaced around the drum provide plenty of high velocity draft.

When adding sticks to build up a base for the fire, work in enough small stuff to spread the fire quickly.  The starter fire is built up on 1 to 2 inch sticks laid parallel across the trench intersection with one inch spaces between to allow a good draft.  On this platform/grid, lay alternating layers of crisscrossed sticks.  Be sure to leave spaces between the all sticks for air flow, and put fine twiggy material in between the layers of larger sticks.  Build up a pyre of sorts about 8 to 10 inches high.  Place some wood in to fill in any gaps around the edges which will keep shells from falling below the level of this platform.  A good quantity of small wood is used in these first layers to help spread the fire quickly, while most of the mass of the wood in the rest of the burn should be a little larger and up to 4 inches in diameter.  Larger wood burns more slowly which increases dwell time (how long a shell or stone stays hot in the kiln), though too much will cause slower combustion and therefore more smoking time before the fire gets burning well enough to start flaming off the smoke at the top of the drum.  Using a portion of green or damp wood will probably still burn the shells, but will produce more smoke and increase start up time.  If available, working in some pitch saturated wood from an old pine of fir stump will help get things off to a quicker start.

This actually looks like fairly large wood, but there is a lot of small twiggy stuff and splintered pitch saturated wood (fat pine in colloquial) on the inside.  Be sure to set something like this up to get the fire off to a good start.  It will still smoke plenty, but it helps.

Once a good layer of wood, including some big stuff, is in place and forms a flattish table, shells are poured in.  In order to keep the the shells away from the sides of the drum, wood is sometimes stacked upright against the sides before pouring in the shells.  At the least, try to pour the shells toward the middle of the drum, so as few as possible start out touching the sides.  One square milk crate full of oyster shells has been our standard measurement for a shell layer.  On top of the shells another layer of wood is added of mixed sizes, but use mostly larger wood in terms of the total mass.  up to 3 layers of shells and a cap of wood can be fit into the first run, though if the lay is sloppy, only 2 layers of shells with a cap of wood will result, which seems okay since more shells and wood are added once combustion is well under way.  The fire is lit from underneath by shoving in a wad of burning twigs and grass.

building up the wood and shells.  Note that the column of twigs in the middle as been eliminated.  It was intended to encourage the fire to spread more quickly, but it just never worked that well.  Note also, the wood against the sides of the drum to keep the shells away from the metal.  You don't have to be this neat about it, but it does help to have wood between the shells and the drum since any shell touching the side will be under-burned.

The drum, ready to light.  I only set this up and loaded it for the pictures, but I'll go ahead and burn it.  If the wood and shells are carefully placed, up to three small milk crates of shells can fit in the drum with wood on top.

Even if the wood is dry, this arrangement will put out huge amounts of smoke for quite some time, that being one of its main drawbacks.  Once the smoke and other gasses begin to flame off at the top and the kiln is burning more cleanly, some extra wood is added followed by another layer of shells, and then more wood.  We have, with this method, burned up to 6 crates of shells in one run, starting with 3 and adding three more over the course of the burn.  But at 6 crates, the top shells seemed a little under calcined and I’m more inclined to use 5 crates total in one burn. It’s good to put a fairly generous layer of wood on top of the last shell layer to help insure that they are burned adequately.  It's okay to mound the wood above the top of the drum, because it will sink down as it burns.  The vents are left open, and by morning the shells are cool enough to sort.  If rain is imminent, put a lid on the drum when it burns low, so that the burned lime does not begin slaking.  Slake as soon as possible.

(edit:  In writing this post I completely forgot to mention that we did do a burn with charcoal only and that it totally works to eliminate the smoke issue.  Charcoal is pricey, but if you need to do a smoke free burn for some reason, it does work.)

Smoke!  No really, huge quantities of smoke.  That's why we're burning at night here.

After burning, the lime shells are sorted according to color, weight and/or texture.  Heavy shells with considerable greying (a sooty blackish grey color on the surface) are sorted from the "good" shells which are light weight, whiter and often soft or flakey.  Many shells will appear to fit in between these criteria and a judgement call has to be made.  Knowing what to select and not select is difficult.  Around here, we slake the less ideal stuff for tanning hides, or it is used for agricultural purposes.  The lime is slaked with hot water in a half barrel or wheel barrow using a hoe to stir after which it is diluted with water to a cream consistency, poured through a 1/32 inch screen and allowed to settle.  The feed sack method can be used to achieve a firm putty more quickly, by pouring the lime cream into a woven plastic feed sack and allowing it to drip out water until firm.  Store lime putty under a layer of water in a sealed container.  The feed sack method gives a firm putty more quickly.  (for more on slaking, see limesquad II)

One advantage of the drum is that it can be lifted off the burned shells for easy sorting.

SUMMARY OF THE DRUM METHOD

SMOKIN’:  Because the fuel and shells are in layers, the draft is greatly inhibited by the shells and wood stacked inside, so the system produces copious amounts of smoke.  Typically the arrangement will produce billowing smoke for 20 to 40 minutes before the top starts to flame off.  For a while, a sort of chimney of bound small twigs was placed in the center of the burn to help with draft and spread the fire more quickly, but it really didn’t seem to help enough to bother.  We also tried starting a fire in the bottom and then feeding the fire layers of shells and wood.  By adding wood, letting it begin to burn, and then adding more shells and wood before repeating that process, somewhat less smoke may be produced, but not all that much less.  The smoke is a fundamental problem with this approach which is probably unavoidable, so that is major issue #1 motivating toward a better system.

USES A TON OF WOOD: The system is also inefficient.  I have not really weighed or otherwise quantified the amount of wood used per amount of lime gained, but it is certainly quite a lot of wood.  Cutting wood is the most labor and time intensive part of the method and if a chainsaw is used that incurs use of non-renewable resources, so a more efficient system is definitely in order.  Who wouldn't want that!

TOO MANY UNBURNED SHELLS:  Another problem encountered is that only a certain percentage of the shells calcine completely.  Many shells will show under burned grey areas and feel heavy.  These are sorted out and can be slaked for hide tanning and agricultural purposes, if they will slake at all, but then the point of the process is to burn lime and make putty; so, although there is no "waste" here at Turkeysong in some senses of the word, the closer we can get to 100% calcined, the better.  Numbers above 80% can be achieved in the drum with more careful fire lays where the shells don’t touch the side (I almost said sides, but I guess a cylinder only has one side, or does it?) which is not so horrible I suppose, but it would be nice to see that number rise.

left over partly burned shell is buried in a garden bed for soil improvement.  I now have a grinder set up to reduce it to a meal.

LIME QUALITY: The lime burning literature from days of yore not infrequently mentions differences in the quality of lime from different burning methods and kiln designs which basically equates to how thoroughly the raw material is calcined.  It is difficult for us to tell just how Turkeysong lime measures up in that regard because it is a qualitative judgement.  The lime does slake very actively, but the question is how much remains un-slaked and under burned in very small particles that pass through our 1/32 inch screen?  Aging should help by insuring that anything that will slake eventually does so, but the qualitative judgement of lime in the past is one that was hard won by generations of knowledge and experience which I don't have and am unlikely to encounter on the west coast of California, so I'm a bit in the dark.  It just remains to use the lime and make what observations I can.  I’m inclined not to worry overly much about it at this point, and think our lime is probably actually of very high quality.

DWELL TIME:  Part of this quality equation may have to do with dwell time, which is how long the shell or stone is held at the calcining temperature.  The drum burns are relatively fast.  If started at dusk,  the burn is cold by dawn.  The actual calcining happens only in the short section of time that each area of the kiln is very hot.  At this point, I feel unsure about what adequate dwell time is, but feel that it is probably not very long.  In one burn we decided we should try to slow the process for longer dwell time and to make sure the burn was not too hot.  We packed the wood in extra tight which took a very long time and required shorter wood.  Once it was burning well,  the vents on the bottom of the drum were shut all the way down.  It was a total failure and the shells didn't even slake.  Next time around we began measuring the temperature through a nail hole in the side of the drum and with the vents running wide open we always seem to be right around 900 celsius/1500 fahrenheit in the burn zone which is just where we want to be, and the temperature at which wood wants to burn without an artificial draft.  This parameter has been so consistent in fact that we just quit measuring.  (For the geekier readers, we used a two wire probe on a digital meter.  Some electrical meters, notably Flukes, have a temperature setting.  The probes use two parallel wires and often burn off in the fire, but are simply trimmed back each time.  They last long enough to get a measurement.)

SHELLS TOUCHING THE DRUM DON’T BURN ENOUGH: Of shells which appear under burned (noted mostly by a grayish color to the surfaces, but also by weight and texture) most are those which are close to the outside of the drum.  Our solution so far has been to try to keep the shells to the inside.  In some burns we stack wood against the outside edges standing upright and pour the shells into this pen so that there is always a layer of wood between the shells and the drum sides.  I recommend this approach actually, but the whole thing still falls to pieces and many shells end up against the outside.  Shells touching the drum sides usually comprise the majority of those that are under burned.  I think this problem touches on at least two factors in kiln construction that can lead us to a better design, which are mass and insulation.

ABOUT MASS AND INSULATION: I’ve done a little reading on kiln design, but mostly what follows is extrapolated from a working knowledge of, and intuition regarding, heat and fire.  I feel sure that adding insulation would help minimize under burned shells by evening out the temperature.  As it stands now, because the metal is a great conductor, the drum is a big radiator and is literally sucking heat away from any shells that touch it.  Using enough insulation should help with that problem by insulating the metal of the drum enough to keep it hot while allowing heat to build inside the drum.  It’s hard to say to what degree the temperature would be raised, but my guess is that it won't ever be too hot when burning wood with a natural draft, and may help keep the kiln at a more all around even temperature.  Since we have consistently measured the temperature we want, the goal is not so much to raise the temperature, as it is to make the heat in the kiln more consistent and, if possible, have a larger area of heat in the kiln at any given time; that is to say that the heat zone of the kiln would have more depth.  Still, a slight rise in temperature shouldn't hurt anything.  It is probably difficult to get the wood to burn at a temperature that is high enough to over-burn lime, which is one of the advantages of using wood in the first place.

I feel that mass could help too, by creating a more even heat due to a moderating action. The three types of heating are essentially radiation of heat (think standing near hot coals), contact with a hot object and contact with heated air (Ok, so the last one is contact with gasses and therefore is similar to contact with an object, but for practical discussion purposes it is a common and useful division…).  What we have when the shell touches the side of the drum is the opposite of contact heating.  In the drum, we are relying on all three types of heating.  When a shell touches the side of the low mass drum which is exposed to the open air on the outside, we suck heat away from the shell because steel is an excellent conductor of heat.  Insulation would help keep the gaseous environment more evenly warm, but the thin drum still has a low mass.  If mass was added it would suck up some heat from the fire initially but, even with no insulation, a thick, but not too thick, mass might have a moderating influence once it came up to similar temperature relative to the rest of the kiln.  Also, and this is an important distinction, any material we are likely to use as a source of mass, or as a kiln building material or modifier, will have at least some insulating value when compared to metal.  Any mud or clay based material would be a far cry from metal in terms of heat conduction and should function partially as an insulator as well as being potentially useful as a temperature moderating mass.  Most traditional kiln designs do not seem to be insulated at all beyond whatever it is they are built of, so this concept of massulation must work more or less.  What the mass portion has to offer would be an evening out of the internal temperature.  Once heat is absorbed it is given back off as radiation toward the interior of the kiln.  The re-radiation of the heat from the mass toward the inside of the drum should add a third useful element of heating, that being to even out the heat environment.

The short version of the above is that with a plain drum, we have hot gasses and a little bit of contact with the hot coals to cause calcination, while we simultaneously radiate heat away from the process with the highly heat conductive drum exposed to the air.  A metal drum is probably one of the worst things we could use in that regard.  Adding some mass (preferably slightly insulative) would add the element of heat radiation to keep the internal temperatures more even throughout the kiln.  I'm leaning toward a thin layer of mass followed by a layer of insulation as an ideal.  A combination of the two, a massulation, might provide enough insulation to prevent the radiator effect while possessing enough mass and its special benefits to improve the system.  Practically speaking this may be the more useful option depending on what is available locally for kiln building.  And this exactly what we’ve done in building a straw and clay kiln, which will be discussed in the next installment of the lime burning saga...

Straw with quite a bit of clay slip formed the Pet's walls.

Posted on October 26, 2013 and filed under Building etc---, Infrastructure, Lime.

Understanding Forms of Lime

understaning forms of lime header for turkeysong I've just done this short post on understanding the different types of lime and some of their uses on the Paleotechnics blog.  I'm cross posting as I though that it would be of interest to some Turkeysong readers, so hop on over and take a look.

http://paleotechnics.wordpress.com/2013/03/04/understanding-lime-an-introduction-to-forms-of-lime-and-where-they-come-from/

Posted on March 3, 2013 and filed under Uncategorized.

LIME SQUAD! II: The Slaking

LIME SQUAD! I:   A PHOTOESSAY ON LIME BURNING

LIME SQUAD! II: THE SLAKING

Having burned some sea shells into quicklime in photoessay part one, it was time to slake the shells into lime putty.

In the morning we went out to the kiln all excited and grabbed a few well-burned-looking shells for a quick experiment.  We put the shells into a dish and crushed them lightly with a spoon and added water.  In order to turn into calcium hydroxide, a.k.a. lime putty, quicklime has to undergo a chemical reaction with water which creates a good deal of heat.  Well, our quicklime just sat there cold in the water, no churning and boiling :(  what a let down...   After getting over our initial disappointment it seemed just not right that our lime didn't react.  The shells were completely white through and through.  So, we put the shells and water on the stove to heat a bit and that seemed to slowly kick off the reaction and eventually they broke down into lime putty.  That was encouraging, but it wasn't time for the champagne yet.

I had pretty much decided that we should use hot water to slake at this point, but considering the time and energy we had invested so far we wanted a more informed opinion.  I called Jeff Price at Virginia Lime Works who generously spent a small piece of his morning in the pursuit of my edification in regards to lime and lime burning.  Sure enough, he recommended hot water to start it off when using shells because the structure of shells is less conducive to the slaking process than the structure of stone.  The up side is that shells make more lime putty than an equivalent amount of burned stone.  I took my page of notes and was ready to rock.

The burned shells were added to an old wine barrel pre-charged with hot water.

It wasn't long before the exothermic reaction began to take place.  Note the surface of the water is roiling in this picture and the shells are starting to break down.

The lime was stirred constantly.  Goggles should definitely be worn here.  The the lime is dangerous not only because it is literally boiling and splattering but also because the Ph is very high making it caustic enough to cause chemical burns to the eyes.

Jeff had told me to keep the reaction going by constant stirring and addition of water as necessary.  A lot of water was added as the process continued.  The picture above shows the putty partially slaked, but still with a curdy, cottage cheese look to it.  The lime was stirred constantly to keep this stuff in contact with the water it needed to insure a continued reaction.

When the reaction had pretty much subsided the lime was broken down into a smooth batter-like consistency.

A few days after slaking the lime was stirred up with extra water to suspend the fine lime particles in a thin liquid for straining through a screen.

The lime was poured through a screen or two to strain out un-slaked particles which consist in this case wholly of under-burned shells.  The remaining milk of lime was stirred again in the barrel with a quantity of water to allow remaining particles to settle to the bottom as the stirring subsided. If any under-burned particles remain, they will make good aggregate for plaster or mortar, but for the finest finish plasters or lime washes (lime paint) these particles would be undesirable.

From here the lime sits under its blanket of water.  In time it will settle and congeal into a firm putty.  Hopefully the barrel will facilitate this process as the porous wood draws away water from the putty allowing it to evaporate out the sides of the barrel.

So far so good.  The seemingly small amount of shells expanded into a significant amount of lime putty... maybe 12 to 15 gallons?... and with the addition of at least two parts aggregate for almost any use, there is enough to do a significant level of experimentation in using it.  It the meantime it ages away improving with time in its wine barrel vintage 2011.