Posts tagged #homesteading

Recent Gardening Videos, Vlog Style, FPG, First Person Gardening

Here are a couple of recent videos I did vlogging style, just working on stuff and touring the garden. I want to do more gardening content, since the recent events around COVID 19 virus pandemic should have people thinking about vulnerabilities in our material needs related to the supply stream of industrial goods that keep most of us going. in particular, I think that Self Reliant Gardening (SRG), is an important skill.

It is very different to garden as much as possible with what is free and easily available in your immediate environment than it is to purchase a lot of stuff in. Gardening can not only get expensive when purchasing a lot of fertilizers, starts, seeds, soil mixes and amendments, but if those become expensive, hard to get or just unavailable, it will put a real wrench in the gears of a dependent gardener. Self Reliant Gardeners can take advantage of those resources when needed and available, but we don’t need them.

When I first moved here, I decided to use very little from the outside. I bought oystershell for the acid soil, and the very first year of each bed I used steer manure because it was cheap and I needed something to get beds started right away since I had not even made any compost. After that, for the following 10 years I brought in minimal stuff; just oyster shell and waste coffee grounds from my neighbors and some places in town. For me to switch back now to using no imports is very easy. I have some holes in my game, but mostly related to more advanced seed saving.

Look forward to more gardening content and consider learning to grow some food if you don’t already. You can start small, even a few plants in pots, but the time to learn self reliance skills is definitely not when you suddenly need them. Our communities are ridiculously vulnerable to interruptions in the supply lines. Even in rural areas like mine, the agriculture is not at all geared toward being able to feed the local populace. In case of emergency, we’d have a lot of pot and a lot of wine, but not a lot else! As I’ve said for so long, FOOD NOT BONGS! This is a a very, very bad situation, and we should start living in a direction that begins to remedy it, or it will eventually be a serious problem. It’s not a matter of if, just when. The party is winding down folks. It’s time to invest in our own abilities and resilience, as well as that of our communities.

Stay safe and healthy out there, and plant something in the ground.

DIRT ROAD HACKS: Designing for Low Maintenace, Eco Friendly, Cost Effective Graveled Roads

When I moved here, the road was 4 wheel drive only most of the winter. It was an old roadbed that was poorly maintained, rutted, with various slippery and mushy spots. The road was built at some point, maintained a few times, but I would say that it had never been designed.

The previous owner suggested that we look into fish friendly roads; Basically designing roads to reduce sediment load in streams and rivers where it clogs the clean gravel beds that Salmon and Steelhead lay eggs in. If the gravel beds become too sedimented, it smothers the eggs and they die.


Download this book here

Danny Hagans of Pacific Watershed Associates, made a study of this problem and where the sediment was coming from and found that rural ranch and logging roads were a huge contributor. Over time, he put together a philiosophy and a set of design tools and practices to keep the sediment on the road and prevent other related erosion. Well, it just so happens that keeping dirt and gravel from washing off your road surface or out of gullies is pretty much what all of us land owners want too. We have a good example on the property of what happens when poorly designed dirt roads are abandoned. Due to the old road bed, a huge amount of water used to flow down the road to near my garden where it dumped off the side. It carved a huge gully that is probably 15 feet deep and 30 feet wide at the largest point. I don’t think there was even any waterway there before at all! At most, maybe a low spot. This was no doubt prime planting ground and would now be orchard and garden. It also drains ground water out of the adjacent landscape. It’s a huge pain the butt just to get through or around it. That soil never comes back and replacing it is impractical. It’s good to build these things not just for you, but to not fail when you are gone.

The original road was a rough, rutted mess for the most part, 4wd only in the winter with some mushy, slippery areas, like this spring coming up in the road.

The original road was a rough, rutted mess for the most part, 4wd only in the winter with some mushy, slippery areas, like this spring coming up in the road.

For the first couple of years, I learned about roads and made important observations. We went on a tour with Danny Hagans of roads they had re designed and installed, roads in the process of reworking and some examples of poorly designed failing roads. I got the book Handbook for Forest, Ranch and Rural Roads which you can download for free at that link, and read that thoroughly. Another very important thing I did was to observe roads as I drove them and see how they worked and didn’t work. Recognizing clear patterns on other roads and redesigning them in my head gave me a lot of confidence to redesign mine and to contradict what the road builders preferred to do.

Then came clearing preparations, mapping and designing the road. Trees were trimmed and removed, the map was filled in with design features and slopes and the road was flagged at critical design points like pitch changes, profile changes, culverts and rolling dips.

We hired a guy that we knew could build good roads and installed the road in a couple of weeks. It was a bit daunting to stand up to the operators who had their own standard ideas of what to do. They were good builders, but along more traditional lines. I was able to hold my ground though, because I had done so much observation on my road and on other roads. Whereas they would want to put ditches in everywhere, I only put them where I thought they were needed. As a result, I have a wider road with way less ditch to maintain. The problem with ditches is that they collect water. Once water is concentrated, it has the potential to do damage. It also has to be dumped somewhere in quantity. so you usually need a culvert, which is expensive to buy and install. All of that can be avoided where ditches are unnecessary, by sloping the road from one side to the other to drain off one side only. This road profile is called outsloping and it works some places and not others. Where it does work, there are numerous advantages as stated above, including no ditch to clean out. They actually cut a full ditch along a long section and I had them fill it back in. I agonized over that decision, but in the end I knew it was right and time has proven that I was right and I have been very happy with the results.

IMG_2098.jpg

so, eleven winters later I’m super happy with my road. It is in amazing condition except for a few short problem areas. The only serious problems have been caused by work done by the neighbors which messed up what we installed, and a section that was not made how I wanted it due to other reasons. I’m happy with all of my decisions in the context that they were made and I don’t expect to have any maintenance work done on the road for at least another 10 years. If anything gets done, it will be to rework and ditch a section of road that was lightly graded and graveled the first time around because the neighbor didn’t want the road disturbed too much near her house.

Building an armored crossing for a seasonal creek. This solution can be better than a culvert sometimes, and often a lot cheaper.

Building an armored crossing for a seasonal creek. This solution can be better than a culvert sometimes, and often a lot cheaper.

Water can be incredibly destructive if not controlled. This is the spillway for the seasonal creek with an armored crossing after a heavy rainstorm, otherwise a perfect storm for headward erosion. I finished the spillway the night before this was ta…

Water can be incredibly destructive if not controlled. This is the spillway for the seasonal creek with an armored crossing after a heavy rainstorm, otherwise a perfect storm for headward erosion. I finished the spillway the night before this was taken, just in time.

Aside from watching my video, here are some suggestions for those maintaining, driving and designing dirt access roads:

LEARN: about road design and progressive road design principals. Download the book and read it. If you happen to live in NorCal, you might be able to attend a workshop by Pacific Watershed Associates. If they still do them, it’s worthwhile.

OBSERVE: Soil, slope and water behavior. Especially observe the site during and right after heavy rains or snow melt. Equally important is to observe every dirt road you drive on to look at how it fails and how it could be improved to get water off fast while keeping the road surface in place.

MAP: Even if your road is already built, map it out and redesign it. That way if you ever have work done, you can fix problem areas or rework the road to be more stable and lower maintenance. This practice will really get you looking closely at your road and how it works or doesn’t.

Good rock and enough rock are a huge factor, but road design and shape should be priority one.

Good rock and enough rock are a huge factor, but road design and shape should be priority one.

FIND ROCK: Find local rock if you can, so you can use enough to matter. Shape is first priority, rock won’t fix everything, but it sure helps to have enough and the right kind. You can always add more later. A source of 6” & down quarry run rock is especially useful. We were fortunate to get rock from our awesome neighbors, which made a big difference in certain areas.

Rick is a maestro on these machines and knows how to move dirt fast. Some things I saw him do blew my mind.

Rick is a maestro on these machines and knows how to move dirt fast. Some things I saw him do blew my mind.

FIND A GOOD OPERATOR: get a good operator with all the tools they need. They’ll do a better job and do it faster. When machines are costing you over 120.00 an hour to operate (probably a lot more now), you want people that know what they are doing. Selecting someone randomly out of the phone book and cutting them loose on your property to build a road is a worst case scenario. Many guys that will build roads know almost nothing about road design and are just capable of running the machines. I’ve seen terrible installations and “maintenance” that made roads much worse. If possible get personal references and even look at roads they’ve built or worked on. Tell them what you want to do and make sure they are willing to do it the way you want it. Ideally, find someone that understands these modern road building principals. That is not possible most places, but it is in others. Finally, make sure you take advantage of the knowledge and wisdom that your operator does have, especially if cutting an entirely new road. They know things you don’t and they know how to actually move the dirt.

DRIVE BETTER: There are multiple reasons that my road is in great shape, but as important as anything is the way I drive it. I drive the entire road surface to keep it flat. You can maintain your road with your car instead of damaging and deforming it. That is something of a revelation. It helps if the road is wide enough to traverse completely, so your tires can reach all the way to the center of the road. If I didn’t drive my whole road surface, we’d have had a grader in here a while ago and the road would be in much worse shape. Best road hack ever. Get in the habit!

I have notes for a lecture to complement this video and also outlines for a full series that is more planned, complete and concise, but this will have to do for now. It may not be perfect, but it could be very useful to anyone driving, designing or maintaining a dirt road. https://youtu.be/DLG566dod4I

Quite an accomplishment for a couple of new homesteaders, but well worth all the effort, thought, expense and time to have reliable, easy, low maintenance access. Still going strong 11 years on with no foreseeable problems.

Quite an accomplishment for a couple of new homesteaders, but well worth all the effort, thought, expense and time to have reliable, easy, low maintenance access. Still going strong 11 years on with no foreseeable problems.

Homestead Walkaround Video, 50+ Apple Seedlings Blooming!, Project Updates, Bulb Understories for Fruit Trees

Pretty much all of my productive time is taken up right now by grafting, weeds and other spring stuff. However, I do have a much better action cam now, with clear picture, amazing stabilization and acceptable sound. That device will allow me to do more run and gun, spur of the moment, off the cuff videos. In this one, I just hit some projects and talking points around the property, mostly projects in process.

For one thing, there are over 50 apple seedlings blooming this year! That is a huge jump from probably under 25 that have ever fruited previously. There are also a number of combinations that have not ever bloomed yet, like king david, maypole, cherry cox and sweet 16 all crossed to rubaiyat and some crosses made using the red fleshed columnar Maypole. I’m very much looking forward to what the season brings us in that department and hoping that bears don’t get in the garden again, which could be an epic disaster in those seedling trial rows. I about peed myself when I saw there are 4 Rubaiyat x Cherry Cox blooming.

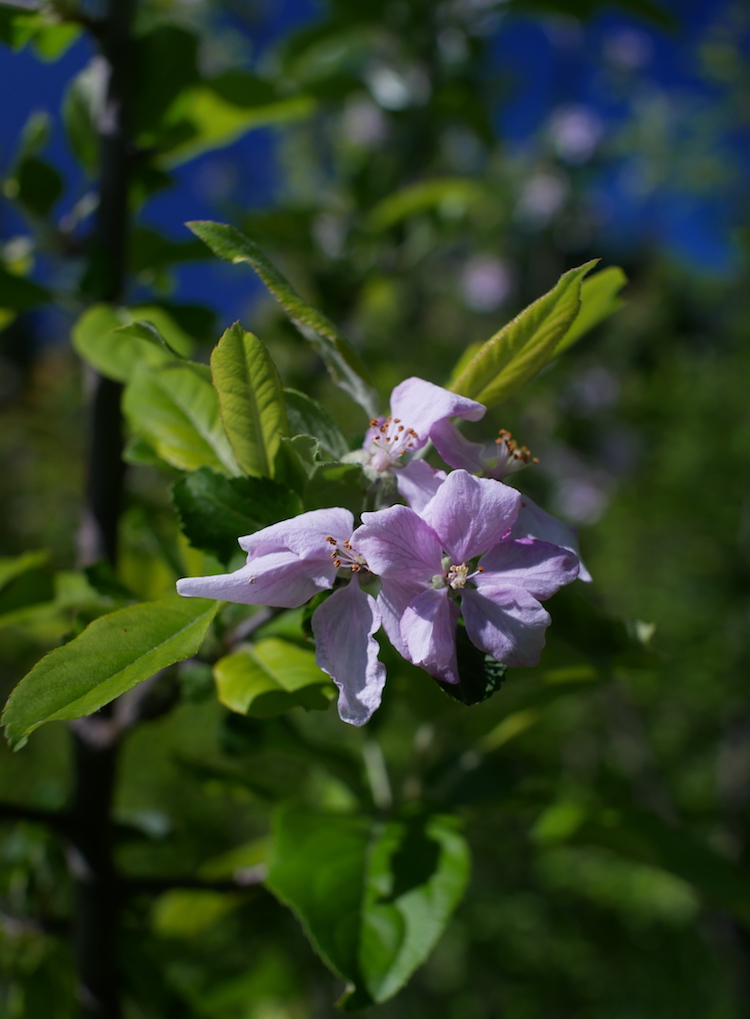
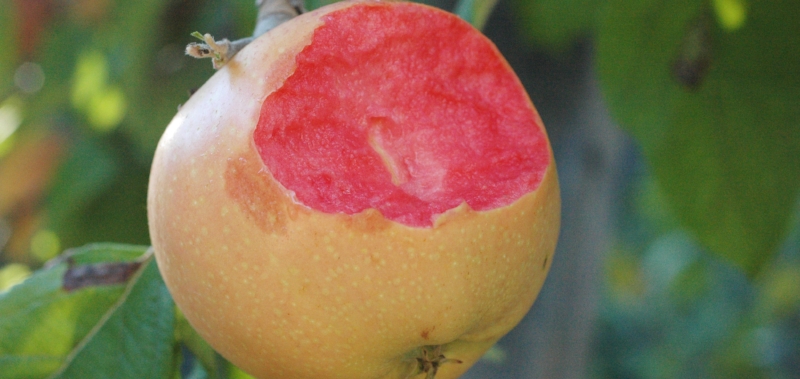
Pinker than average blossoms on a Rubaiyat x Cherry Cox seedling seems like a good omen. Cherry flavored apple, meet fruit punch flavored apple. May your offspring be blood red to the core and delicious.

Pinker than average blossoms on a Rubaiyat x Cherry Cox seedling seems like a good omen. Cherry flavored apple, meet fruit punch flavored apple. May your offspring be blood red to the core and delicious.

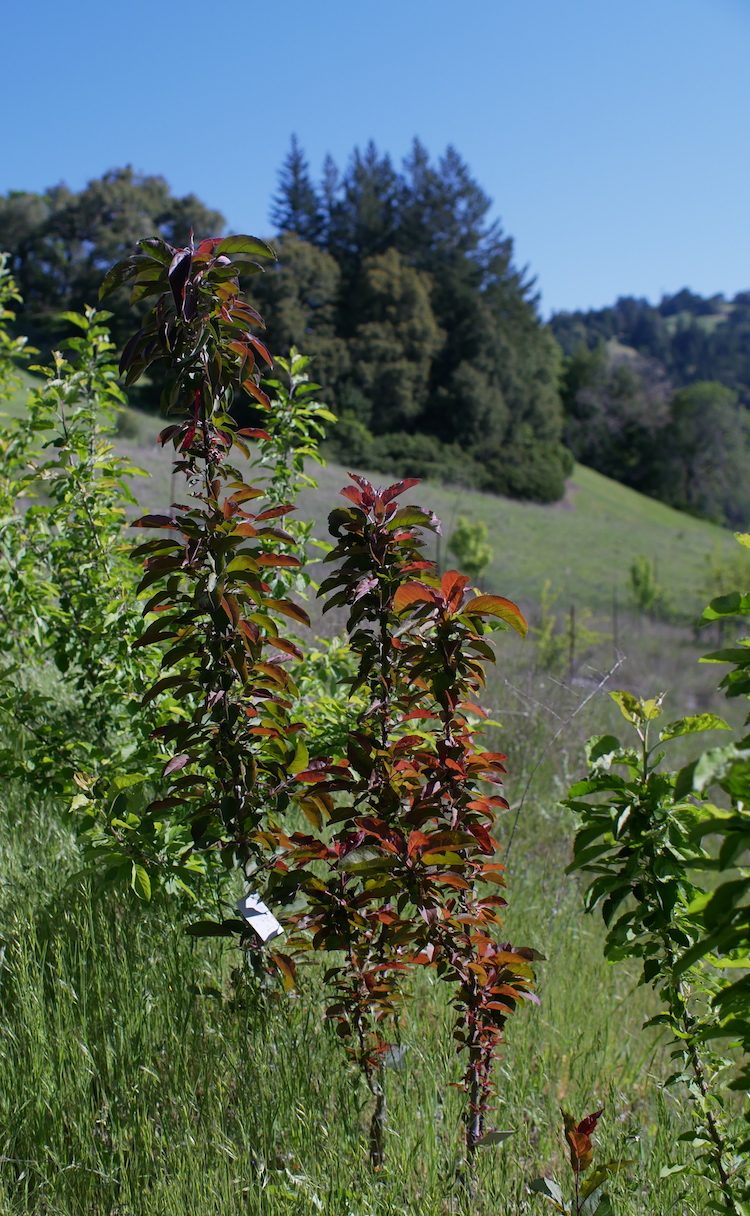
Many of my Maypole crosses are showing this columnar trait. They will produce short, compact trees that grow upward with few side branches and fruits clustered along the stems. The buds are spaced very close together. This can be a valuable trait fo…

Many of my Maypole crosses are showing this columnar trait. They will produce short, compact trees that grow upward with few side branches and fruits clustered along the stems. The buds are spaced very close together. This can be a valuable trait for restricted spaces. Given how many seedlings are expressing this habit with only a single columnar parent, it should be easy to breed for. Three of these seedlings are blooming this year, and they are the only trees blooming in this youngest block of seedlings, so apparently they are precocious as well, which is nice in a plant that usually takes so long to come into bearing. Oh, AND they take up less space than the other seedlings, so could potentially be planted even closer in trial rows, both in row spacing and between row spacing. I have one other columnar-ish tree, but it’s more like a dwarf. But there are others out there and I think there is a lot of potential here for both backyard and cider production with these compact, pretty, easy to maintain trees. I would not be surprised to get a decent cider apple out of this first generation of Maypole crosses using Wickson and Chestnut Crab pollen.

This Grenadine x GoldRush seedling showed some promise last year, but only produced one apple. This year there are hundreds of fruitlets, and it will require heavy thinning. It wasn’t really that good last year, but often trees will have to become e…

This Grenadine x GoldRush seedling showed some promise last year, but only produced one apple. This year there are hundreds of fruitlets, and it will require heavy thinning. It wasn’t really that good last year, but often trees will have to become established before producing exemplary fruit, so I’m keeping an eye on it.

I don’t think I’ve ever talked about my flower bulb understory for fruit trees experiment as much as I do in this video. Introducing that project is one of those videos that has been on the back burner, but never seems to get done. I started it a long while back with a couple of blog posts. This system shows promise, but long term comparative trials are critical to an assessment of it’s actual field worthiness and real world performance. Proof of concept is established and the project is ready for phase two. I may be able to set up those trials in the next couple of years using a block of trees that could be used for at least a whopping FIVE different trials at once: trialing seedlings, tree paint, tree training, interstem suckering prevention and bulb understories! Now that is some stacking! Hey, why not add some biochar trials to that! Maybe it really is finally time to look for some help. Those trials could yield a great amount of useful information.

One of my early bulb understory experiments now well established and pretty much out competing all weeds. It is already dying back and will be pretty flat and not really using any water by mid May. It will also leave a nice mat of dying mulch on the…

One of my early bulb understory experiments now well established and pretty much out competing all weeds. It is already dying back and will be pretty flat and not really using any water by mid May. It will also leave a nice mat of dying mulch on the ground for the rest of the dry season. I would guess that there are enough bulbs in here now to plant at least 8 more of these, and the project is ready for phase two, long term trials. There are probably also other plants out there which could serve this purpose, but very few and they may be hard to suss out.

My tree collard, Peasant King, is sill performing admirably. It is bigger, purpler, fatter stalked, and straighter than all others in that seed grown population. Not only that, but out of all the first batch of seedlings, it is one of only two which have never flowered, the other being a sad looking runt of a thing. Infrequent flowering is one of my selection criteria for this plant. My last batch of cuttings did very poorly, but I have a new batch rooting (I hope) and more cuttings growing. I may try air layering them this year. That means wrapping some rooting medium and plastic around the stem while the cutting is still on the plant, then cutting it off after roots have formed. Ideally, I would propagate many cuttings and sell them in the coming years. If not, I hope to at least get them to people who will.

Peasant King Leaves.

Peasant King Leaves.

I gave what remained of my original Montenegran tree collard seeds acquired from Sophia Bates to Chris Homanics, plant collector, enthusiast, breeder, hunter, preserver and cataloger. He will grow them out and use them in his tree kale breeding project, which you may be able to be part of by growing out seeds: https://www.experimentalfarmnetwork.org/project/14

Or: https://mariannasheirloomseeds.com/seed-catalog/special-crosses/chris-homanics-seeds/homesteaders-perennial-kaleidoscopic-kale-grex-new-2016-detail.html

And here is a Podcast interview with Chris on his work: https://www.cultivariable.com/podcast-8-chris-homanics/

And Website for Chris’ apple farm, Queener Farms, in the Willamette Valley Oregon: https://www.queenerfarm.com/

And now I’m off to graft the many very interesting apple varieties that Chris Homanics brought me this winter. Now that I’m ready to cull out many of the varieties I’ve collected that have failed to perform adequately, I may do one more collecting push this coming winter and re-graft many of those losers over to trial a last batch of promising apples.

Posted on May 1, 2019 .

Lessons from Established Fruit and Nut Trees, Training Mistakes and Remedies

This video is a walk around to look at the lessons that can be learned from some of my fruit and nut trees that have been growing for a while. Between careful and not so careful training, lack of training, regular maintenance or neglect, we can see how things go right or wrong and how important early shaping and training are to avoid future problems. I also taste some Lady Williams Apples off the tree, still good in March! These apples, while especially late this year, demonstrate I think that it will be possible to eventually have apple varieties that routinely hang on through winter and ripen in spring. Two new terms I’ve coined are Winter Hanging Apples and now Spring Hanging Apples, because these are classifications we need, beyond winter apples or storage apples. Next steps in that direction are finding more winter hangers and spring hangers if possible and making intentional crosses between them for new seedlings. Another step is simply promoting the idea and phenomenon in general, which will be easier as more of them are discovered or created. Also important is to test more of these apples in various climates to see how cold they can go, or how other climate factors affect them.

The long reach pruner I’m using in this video is a pretty neat tool. It is not cheap, but it can nearly obviate a ladder if trees are pruned yearly and are under 15 feet tall. That is pretty a major boon, especially if trees are spread out like they are here on myu homestead. I rarely use a ladder to prune anymore. They are also still cheaper than a good orchard ladder, even an 8 foot one. They can cut green wood up to about 3/4 inch if cut at an angle. For older people (or those that will be older soon lol) it could save a lot of clumsy ladder moving and setting up and ultimately could prevent a fall and the complications that often come with broken bones past 70. We got my mom one and I’m going to try to convince my 82 year old friend to get one. He is still climbing rickety old step ladders in the backyard. There is a short review on my amazon store page and full video review coming soon.

The Blood Zone, Common Mistakes In Splitting Firewood On the Ground With Axes

blood zone header.jpg

Since releasing my video on splitting axe cut wood on the ground with axes, I have seen people engaged in what I consider to be risky behavior when engaged in this potentially very dangerous activity. Ben Scott, new head of the axe cordwood challenge project noticed the exact same thing and released a video pointing this specific problem out about the same time that I recorded this one. This is already an awkward and difficult to learn skill without having to stand in strange positions, but standing just any old place when ground splitting wood is something like driving around blind corners and relying on hope that no one is coming the other way. The difference is that we have some control of the tool and ability to read the circumstances. But we are not reliably accurate and faultless machines and that has to be accounted for. The main problem I see is that I don’t think people understand exactly what can go wrong and how serious the consequences might be, and and pointing those things out is the most important aspect of this video.

For learning ground splitting, for instance if working with a group of scouts, you could literally draw a line on the ground and place the firewood in such a way as to form these good visual habits until they stick. Name one side the blood zone and the other the safe zone.

A backing log for the buckstop could be an axecellent axecessory for training this method. Axeidents can easily happen when learning this technique. I’ve seen in happen. It could also make a good fixture in a longer term camp, so that anyone at any …

A backing log for the buckstop could be an axecellent axecessory for training this method. Axeidents can easily happen when learning this technique. I’ve seen in happen. It could also make a good fixture in a longer term camp, so that anyone at any skill level can split wood for camp, or practice unsupervised. Flatten the bottom of the log and cut 5 or 6 notches. But, use it to teach good habits and the importance of direction of cut. Also realize that it is not a 100% guarantee of safety, because the buckstop can only be made so tall before the axe handle will be struck against the top edge.

For learning to split against a back log, the buckstop can be used until axe control is developed and direction of cut is understood. Using a buckstop with an accessory backing log tucked up against it could also be useful in a fixed camp where a number of people at different levels of skill, could safely split wood for camp. A backing log alone is not enough. A friend of mine cut her foot trying to learn to split against a back log, because she wasn’t able to learn direction of cut quickly enough and the axe popped over the log.

Flatten the bottom side for stability and to insure the log is low enough.

Flatten the bottom side for stability and to insure the log is low enough.

Pruning and Training Chuck's Apple Franktree, Year 4 from Grafting

I’ve managed to make an update video every year of grafting and training my friend Chuck’s apple frankentree. The tree has grown quickly into a well balanced, classic Modified Central Leader form. The Main scaffold branches look pretty good and most of the laterals have been set. That only took 3 years. This 4th year, I just notched a few more buds to get the last few laterals where I want them and the rest is mostly maintenance with light training. If I were to do this now, I would approach it with even a little more intent to get exactly what I want, possibly even a little quicker. To understand the tree form a little better and how to get it, watch the video below on tree forms. I like this tree form a lot. It is not the only game in town, but it is good for making long lived, well balanced trees that are relatively easy to control. It is popular with fruit tree enthusiasts for a reason. It also looks very nice, making a somewhat spreading tree with reasonably good light distribution if well maintained.

This is probably the last training and pruning video of chucks tree as the videos are becoming redundant, but the form is in place and from here on it’s mostly thinning excess growth, and then shortening what is left. maybe we’ll check in on fruiting and maturity in a couple/few years. A playlist with all previous videos of chucks tree is also linked below if you want to follow it’s development from the beginning.


The full playlist… https://www.youtube.com/playlist?list=PL60FnyEY-eJCwRV46RC-aoybNgDRjCAw4


The video explains a couple of very good common tree training forms, the delayed open center and modified central leader.

Formula Books, The Treasure Chest of Free DIY, Self Reliance Information You Need to Know About

formula books header.jpg

While I’m inclined to ignore the holidays for the most part, I have a gift for you. Christmas can be downright disturbing in it’s materialism and focus on over consumption. Well, my gift to you is a knife in the corrupted festering heart of that particular Santa of commerce, a downloadable treasure trove of DIY information from a very different time, from a time when DIY was a necessary way of life and not an internet niche. The very fact that we call someone a do-it-yourselfer, indicates that those people are novel in an age where products for almost anything can be bought ready made.

This is about formula books, a phenomenon from the past that would now be a quaint piece of history to most if they even knew about them at all, but which the self reliant minded, and technologically curious, can find immensely helpful and fascinating. I think the reason that these great books are no longer common, is that they were a product of a different time. Cue history fable…

Once upon a time, there were no letters. No, not letters as in I wrote you a letter, I mean the characters that make up words. Ideas spread verbally were slow and limited in range, and culture and community knowledge existed on a smaller scale, with much less homogeneity between geographic groups. Then people invented writing, which gradually grew in scale. At first, few knew how to read and books were only produced as one offs or had to be copied by handwriting and illustrating. Then printing began, followed by more efficient printing, and eventually by more people learning to read. In that era, previous to transmittable media such as radio and television, printed books and periodicals were what allowed ideas and information to be spread broadly. Books were popular enough, but so were periodicals. Periodicals were the way that groups of people with similar interests or professions interacted in their niches with others around a country, or even between continents. It may seem painfully slow in this age of internet forums, instant news and comment threads, but aside from in person meetings, that was what was available. Editorials and reader interaction via letters to the editors were an extremely important mechanism of communication and evolution of understanding among these niche groups. Some of those periodicals were not sent out very often, but it provided a place for readers of similar interest to write in and offer experience or tips and recipes. Being an inveterate researcher of antique information, I have gleaned a lot of knowledge from these periodicals. So there is one piece of our context, and here is the next...

Going back far enough, circumstances determined that people made a lot of stuff from scratch. Not just individuals, but professionals. Most pharmacy items were probably compounded by the pharmacist, not purchased pre-made. Real compounding pharmacies are the exception now, and most just buy finished products and re-package them. Artists mixed most of their own paints, sometimes from the raw minerals, preparing specialty oils, etc. The supermarkets, hardware stores and drug stores with miles of diverse products would drop the jaws of someone in the 19th century. Professionals used books and periodicals for information on how to formulate items for their trades, and average people often compounded raw materials to make what they needed.

I think it’s likely that these two circumstances eventually lead to the phenomenon of formula books. I imagine that at some point, some enterprising individual went through and compiled a bunch of these general formulas and tips from various sources or from their own periodical, and printed them in a book. Many of these collections were compiled and printed well into the 20th century. Some are intended more for the home market, others more for practical “shop dudes”, technical entrepreneurs and inventors. Others were specific to an industry or interest.

books on end.jpg

Imagine in a time where your access to a store might even be limited, and when you did go to a store, the products were also limited and expensive. Even raw materials might need to be special ordered from an in-store catalogue or the Sears and Roebuck catalogue, and waited on for weeks. A book like this could prove extremely valuable to have around the house to compile these and common household materials to useful ends. Now it seems that problems are practically invented to sell products. These books are also full of general tips for daily household, farm and shop life.

Keep in mind when perusing these offerings, that whomever printed the book you are reading didn’t actually try all that stuff out! Many of these would be untested recipes from essentially random sources. Just because K.W. Micklemaus from blington New Jersey wrote into a periodical once and sounded like he knew his business when it comes to lubricating an old watch with rattlesnake oil, doesn’t mean he was right. These recipes should be read with a very critical mindset. Another thing you will notice is that they use a lot of toxic stuff. Lead and Benzine were staples, and many other toxic substances. Some of these can be substituted and some cannot, but the recipe may still give you some ideas on making something of your own devising.

oilskin quip.jpg

There will also be a lot of materials that you have never heard of. Further, you may not know which form of the material is referred to, or which name a material refers to. For instance, it is difficult to determine for sure what is meant by Plumbago, which seems to usually refer to graphite can be confused with Galena, a lead ore which looks similar. The name Plumbago is derived from the word for lead and many recipes will call for “black lead” when they mean powdered graphite. but which one is called for in your stove polish recipe? I’ve had this exact problem when trying to figure out if the recipes for stove blacking I’ve been looking at are referring to lead or graphite. According to Wikipedia, some guy actually invented the term graphite, now the dominant term, in order to avoid confusion caused by the terms black lead and plumbago.

An example of ambiguity regarding the different forms of substances would be lime. Lime is often called for in recipes, but it is rarely specified whether the reference is to lime putty, which was once very common, or dry lime hydrate. They have similar properties, but would be measured out very differently. Usually if quicklime is called for it will be called either quicklime, freshly burned lime, or maybe lime shells. Freshly slaked lime probably refers to lime putty, but it could conceivably refer to dry hydrate. Having been interested in this sort of archaic information, I have a glossary in my brain of quite a few of these terms, but like learning botany and all it’s specific terminology, newcomers will spend a fair amount of time looking up unfamiliar terms and trying to sleuth out what is actually meant by them. I used to have to do that secondary research in other old books in my collection, but now we have the internet which makes it much easier.

upright cyclopedia.jpg

It’s worth keeping an eye out for these in print. I was introduced to them a long time back when some practical artist friends Scott McGrath, Todd Barriclow and Spring Maxfield busted out a copy as if they were showing me some holy book. It was a big enough deal that I still remember the event lol. More like they were unlocking the door to a technical candy store. You can read most of the old formula books online for free and I’ve set up a file where you can download them. You can also always find the links by going to www.skillcult.com/freestuff With modern search functions, it is easy to find what you are looking for in them... well, sometimes. These books are in PDF form, which is imperfect. When converting a very old book from scans and PDF’s to plain text like kindle’s mobi or to epub, the print character recognition software often misinterprets many letters or runs the characters together into compound words. So, the search functions may or may not find what you are looking for regardless of the digital format. Sometimes (possibly even often, although I’m loathe to admit it :) I find myself looking for the search function while reading an actual book or piece of paper! Search is absolutely awesome as a tool. Most books, especially older ones, have terrible indexes if they have any at all. But, in spite of the lack of a search function, sitting down with an old, yellowed copy of The Scientific American Encyclopedia of Receipts, Notes and Queries is an entirely different experience than skimming through photos of it on an ipad. Unless you go out and search for these books though, you won’t just run into many of them. I just did some quick searching and it looks like ebay is probably the best place to look for them and maybe check out Etsy too. Some were printed later in the century, but they gradually fell out of popularity. There is still a niche of weirdos like me (and I hazard to guess you too :) that will find them fascinating and useful. I own physical copies of Henleys, The Scientific American Cylopedia of etc, etc…, Standard Book of Formulas, Techno-Chemical Receipt book and The Materials of the Artist. Those were collected randomly at bookstores and flea markets over the past 25 years. All but the last are in this digital collection I put together. I’m sure there are more, but these are the ones I could find, some of which I’ve barely looked at. Also, keep in mind that there are many, many more niche books of this sort for specific trades. For instance, there are a boatload of old pharmacy compounding books and many painters books.

Yesterday was the shortest day of the year, so we are on the right side of that equation now, yay! Last night was the coldest night so far, and here the teeth of winter are really just starting to bite. A couple of days ago I ran through all the formula books looking for stove blacking recipes as I make moves to restore a rusty woodstove I’m trying to get installed. Now I just have to figure out if they mean graphite or lead when they say plumbago! Best wishes to you and yours in this new year and heartfelt thanks to all the people that have supported me from sharing content, to comments, to the thank you notes I receive from complete strangers almost every week, and for the much needed financial support. Things have been very difficult lately to put it mildly, and my ability to produce good content is at a low ebb. I’d like to report that I expect that to improve, but my hope for resolving the chronic health issues that I’m severely hobbled by is also at a low ebb, and unfortunately, I think justifiably so. My plan remains the same though, to continue at whatever pace I can, the work I set out to do from early in my life, which is essentially the pursuit and dissemination of practical knowledge and practical philosophy with a focus on self reliance and archaic skills that I believe still have relevance. Formula books have been exceedingly useful in that pursuit and I hope they are to you as well. <3

And here is a plug for www.archive.org Wow, what a fantastic resource this is. I’ve used google books for a lot of my research of this type in the past, but archive.org has become my go to resource for digging up old books and information. They are a non-profit with the goal of creating universal access to information, including books and periodicals, photos, film and audio. They are in a fund raising drive right now and have a 2 x matching grant. Try it out for a subject you are interested in. The books and periodicals available have generally run out their copyright protection, which I believe is defined by the life of the author, plus 50 years, so the great majority of it is from long ago, which is just what I’m usually looking for. I recently used it to do research on the medicinal uses of turpentine and found a huge number of references going as far back as the 1600’s. So cool!

Here is an example a text search of the entire archive for the term blacksmithing this is using the search text function. The search titles field will turn up fewer results.

By using the lower search field, you can search within a book or periodical.

Well, I either just enabled you to go down endless impractical rabbit holes full of endless wheel spinning information, or offered you the most amazing tool to further your personal development. Which one it will be is probably largely up to you :) Just remember that book learning is only really very useful as part of a trinity composed of INFORMATION, EXPERIENCE and CONTEMPLATION. I might add communication in there as #4, but that is sort of covered by both contemplation and information. In a very real way, information is not knowledge.

DOWNLOAD THE FORMULA BOOKS HERE

boiled linseed page.jpg
Posted on December 24, 2018 and filed under Books, Homesteading, Self Reliance.

Tools You Need to Bark Tan Hides & Skins Into Leather at Home; Traditional Vegetable Tanning

DSC01244.jpg

In this blog post and new video, I cover all the essential tools needed to make good bark tanned leather as well as a few non-essentials. Tanning materials will have to be treated separately and I will try to revisit many of these tools and their making in the future.

Real natural vegetable tanned leather is that which is tanned with tannic acid sourced from plant materials. While there are excellent sources of tannin in not just barks, but in roots, leaves, pods, fruits, nuts and wood, tree barks are the most used sources, thus the common term bark tanning. There are only a few tools and materials that could be considered essential to the process and none are complicated. In fact, if you strip it down to the real essentials, you need very little. Adding a few simple tools will improve your experience though, and in some cases your leather.

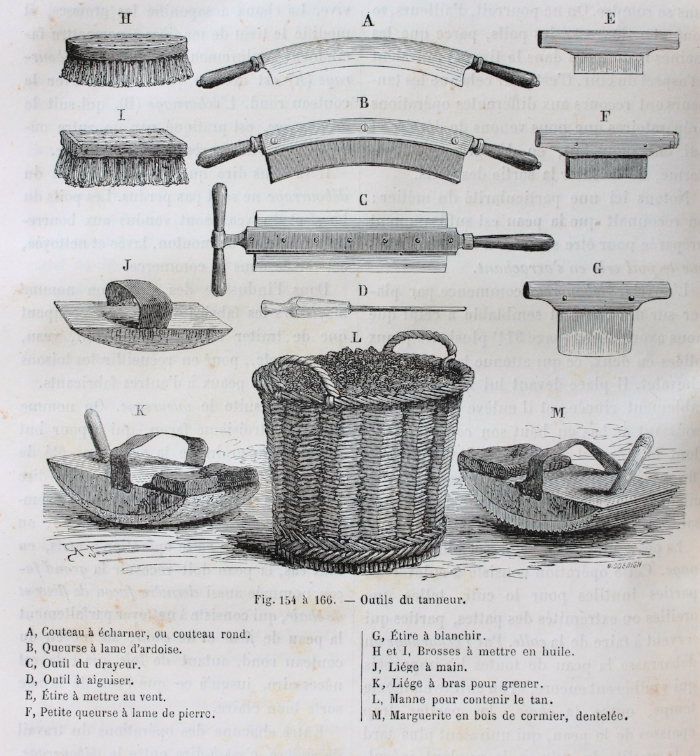
Some tools of the Tanner and Currier, most of which are discussed in this article. The slate bladed two handled knife B is especially intriguing. I need to make me one of them.

Some tools of the Tanner and Currier, most of which are discussed in this article. The slate bladed two handled knife B is especially intriguing. I need to make me one of them.


FLESHING KNIFE

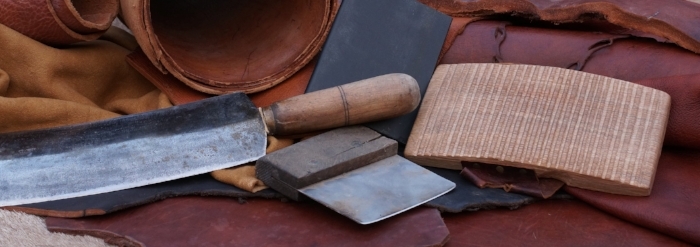
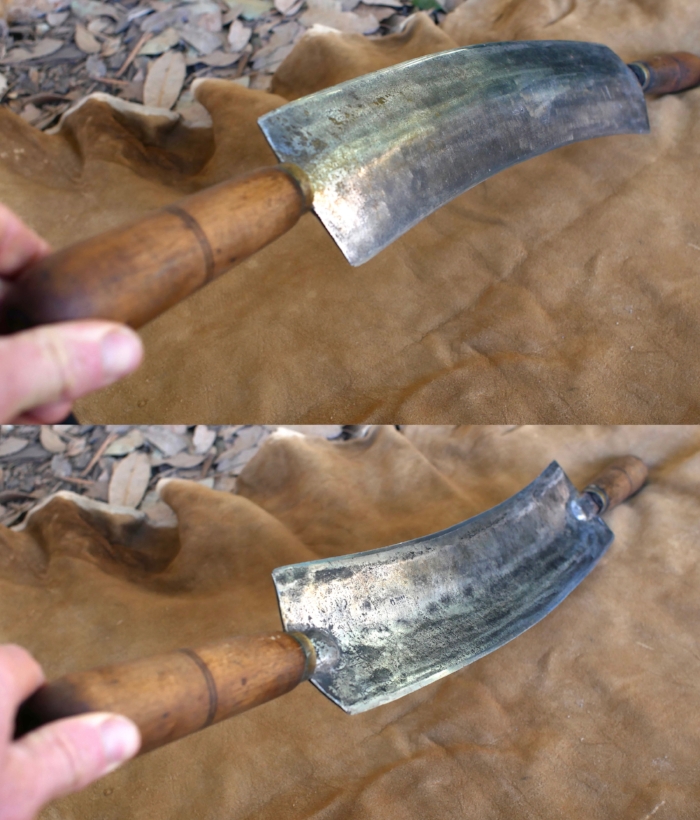
The tanner’s knife, or fleshing knife, is the most important multi-tasking tool of the tanner. In a typical vegetable tanning process, I will use this tool for fleshing, dehairing, re-fleshing, scudding, removing excess water and stretching open the skin. It is also handy when re-soaking dried hides to work open dry spots so that they rehydrate faster. Many new models are available on the market, but a lot of home tanners get by well with homemade tools. Read my blog post on fleshing knives, and watch the Fleshing Knives 101 video for more than you probably wanted to know about them. I just received the Wiebe 12” Fleshing knife in the Mail so I can review it for you guys. I like the overall form a lot for general use, and was told by a dealer that it is actually tempered tool steel, not mild steel. Aside from the potentially weak, narrow and probably short tangs, it looks promising, but I haven’t had a chance to use it at all yet. Aside from unknown potential steel/tempering issues and iffy tangs, as a general purpose home tanning knife it seems likely to be a good choice for under 30.00 shipped.

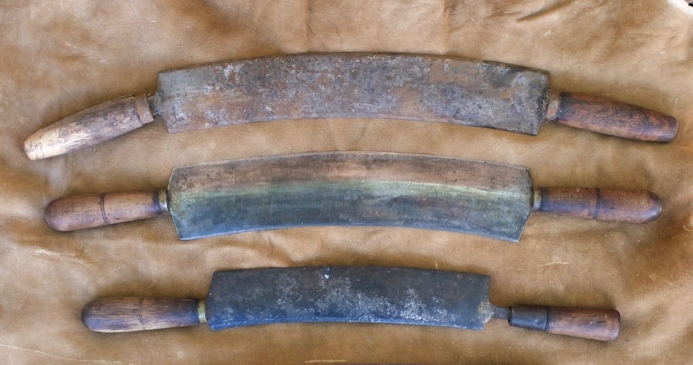
A collection of tanner’s knives

A collection of tanner’s knives


BEAMS

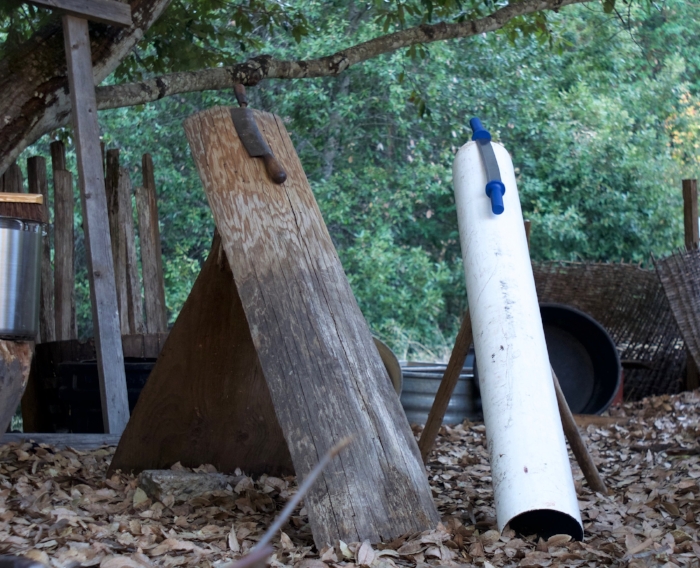
Wood and plastic beams. Left is the outside cur from a log mill and the other is cheap ABS, though PVC would be much better, thicker, more durable and heavier. I haven’t used plastic beams much, but I can see why people might need to use them.

Wood and plastic beams. Left is the outside cur from a log mill and the other is cheap ABS, though PVC would be much better, thicker, more durable and heavier. I haven’t used plastic beams much, but I can see why people might need to use them.

The tanners all purpose scrapping knife is of no use without a beam. For most, a beam around 6 to 6.5 feet long will do well. I’m currently using. 6.25 foot beam, which is just about right for me. It can be of wood or plastic pipe. If wood, it is best to have a smooth work area that is free of knots, large cracks, grain tears or other major blemishes extending at least 18 inches down from the top. I would try to stick with 8” diameter and larger, but to get started, or in emergencies, you can use a smaller diameter beam. If the diameter is very small, you can flatten off the working area to a larger radius. A very small radius results in a small area of contact between the tool and the beam surface. For most vegetable tanning related beam tasks, a larger surface contact between beam and tool is preferable. Large logs should be at least split in half, or even hollowed on the underside to thin them. Most of my old beams were hollowed out on the underside with a hatchet to reduce weight and discourage cracking. Taking the center of the log out by splitting it in half will reduce both the incidence and severity of cracking. Reducing the thickness further will reduce that risk even more. It doesn’t have to look pretty, just chop out some of the wood to form a hollow on the underside.

A good source of nearly ready made beam material are the round sided slab cuts from the outsides of logs removed in milling lumber. You may be able to get some from a local mill, or small custom miller. Check the phone book (under lumber, milling?) or ask about local portable mill owners at your chainsaw dealer or repair shop.

If making a beam out of lumber, choose vertical grain like this over plain sawn face grain if possible as it will be less likely to crack. This is never a choice with a round or split log.

If making a beam out of lumber, choose vertical grain like this over plain sawn face grain if possible as it will be less likely to crack. This is never a choice with a round or split log.

I haven’t done it, but I suspect a pretty good beam could be made by radiusing the working area of a 2x12. I don’t seen any good reason it wouldn’t work. If so, try to choose one that has edge grain on the working face and not face grain. that is to say that the rings of the tree run from about 45 degrees or more toward straight through the thickness of the board. This is usually referred to as vertical grain and will be much less prone to cracking than plain sawn wood faces.

Now that I’m thinking about it, an edge grain (if you can find that good of a board these days) 2x12, backed by another 2x12 could make a pretty nice beam. I would leave a slot in the backing board for a plywood stand, augmented by two 4x4’s firmly attached with lagbolts similar to the arrangement pictured below. For a firmer union, wedges could be used to afix the plywood in the slot.

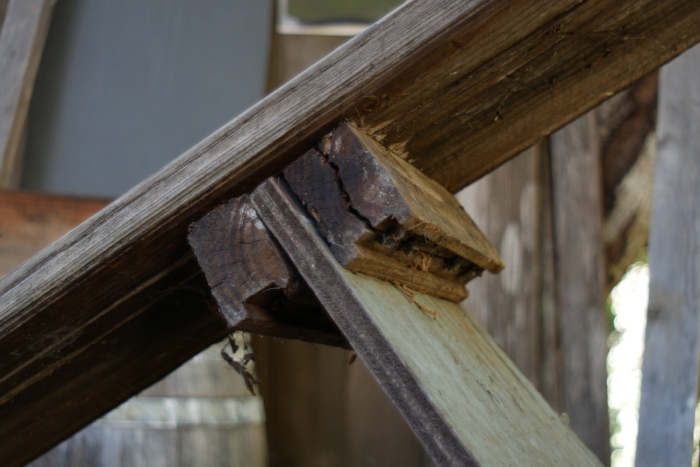
You can do many different things to put legs on the beam. A good option is to drill large holes, about 2 inches in diameter and plug in round wooden staves for supports. My current beam has two closely spaced boards screwed to the bottom on edge, just far enough apart to slide in a piece of plywood as a support. It works well enough.

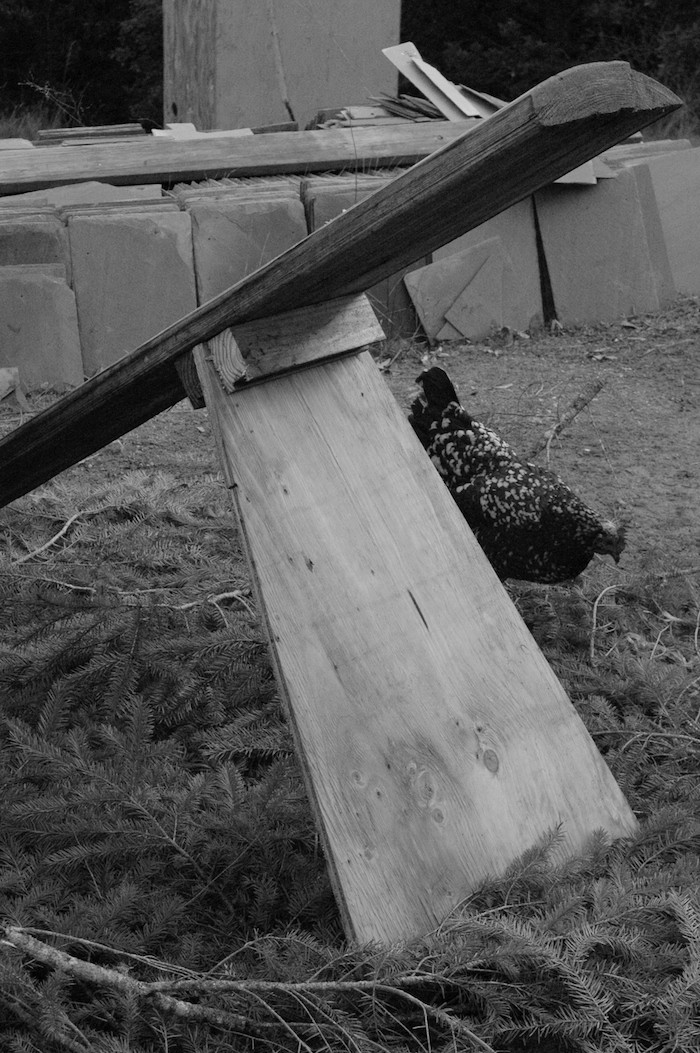
Simple support that is easily taken down for transport. I would use 4x4’s next time.

Simple support that is easily taken down for transport. I would use 4x4’s next time.

DSC_0235.jpg
Screen Shot 2018-10-15 at 2.52.50 AM.png

DRAW KNIFE AND SPOKE SHAVE

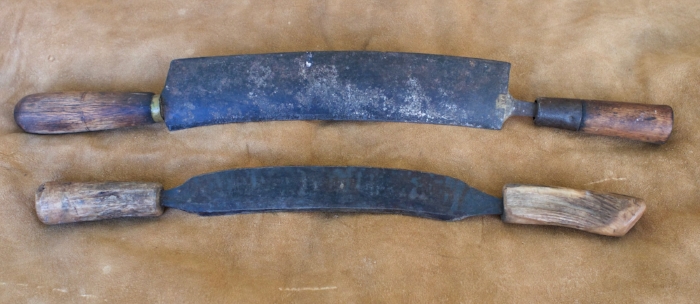
Maintenance tools. The drawknife is probably more versatile and essential than the spokeshave.

Maintenance tools. The drawknife is probably more versatile and essential than the spokeshave.

These tools are used for creating and maintaining, a smooth beam surface. It is ideal to have both. The draw knife is best for major wood removal and repair, and the spoke shave for maintenance and smoothing. You can get away with just one of them though, in which case the draw knife is the more versatile of the two. Draw knives are also handy for peeling tan bark from logs if it is not slipping off easily. If you intentionally shred the bark off of the log in small, thin slices, you may not have to chop it any finer for extracting the tannins.

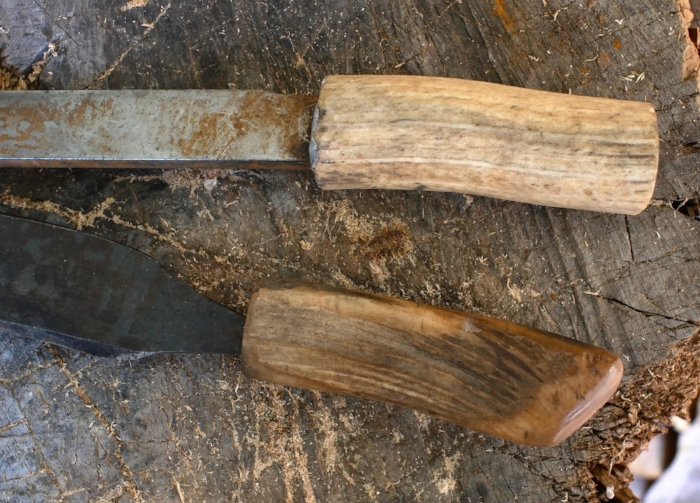
When shopping for used draw knives watch out for two things, wear on the blade and rounded bevels on the back side. Old draw knives can sometimes suffer severe wear. Look to see that the blade is about the same width it’s whole length. It should also be flat on the back with a bevel on the top side only. Either by long wear, or by mis-sharpening, the back is sometimes not flat. In a very well used knife the back may be subtly dished or rounded off, but if it has an obvious bevel or extreme wear, steer clear.

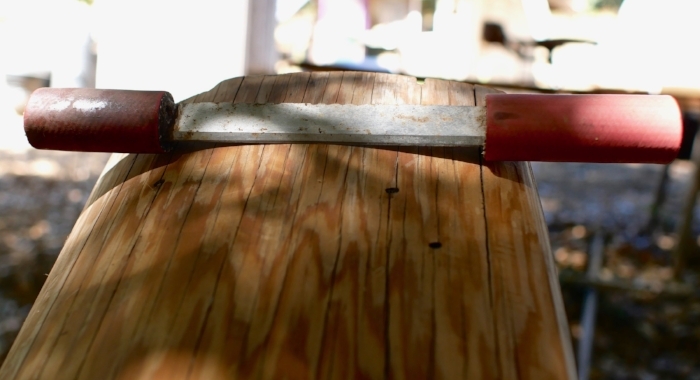
I would not recommend buying a spoke shave that has only one screw to adjust and no fine adjustment screws. The type shown is common and works well.


WATER AND HOSES

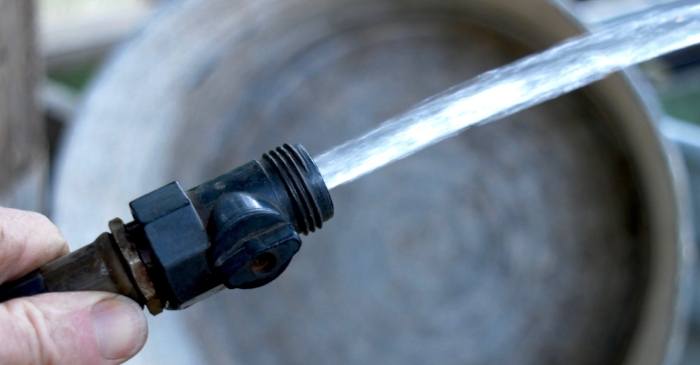
Water is not just a material, it’s a tool for cleaning things off. Skins, tools, boots, hands and tubs need frequent rinsing You will use a lot of water, and the more convenient and available it is the better. I usually use a standard hose end shut off valve to control flow. I like these valves better than most purpose made sprayers, because when opened wide the flow is fairly high, which is nice when you are filling containers with water a lot. If opened only part way, the shut off valve makes a reasonable sprayer for cleaning things off. As far as I have seen, craftsman rubber hoses are the best deal going when they are on sale in the spring, which they usually are.

Better than any sprayer I’ve tried when you want high flow.

Better than any sprayer I’ve tried when you want high flow.

Passable spray pattern and volume if not as good as a purpose made sprayer.

Passable spray pattern and volume if not as good as a purpose made sprayer.


BRUSHES

A stiff cleaning brush will be found almost indispensable for tubs, aprons, beams and tools. You may also need a finer brush to scrub bloom off of the grain side of skins. Bloom is a whitish deposit that forms on the grain surface during tanning. It is more common with certain tanning materials and also when layering or pit tanning is used.

Stiff brushes for cleaning tubs, tools and beams are almost essential

Stiff brushes for cleaning tubs, tools and beams are almost essential

Surface on the right shows bloom deposited in the tanning process. The section on the left has been scrubbed clean with an old hair brush with medium bristles. The dark stain in the center is where the skin floated above the surface of the tan liquo…

Surface on the right shows bloom deposited in the tanning process. The section on the left has been scrubbed clean with an old hair brush with medium bristles. The dark stain in the center is where the skin floated above the surface of the tan liquor :-/


PROTECTIVE CLOTHING

BOOTS: Rubber boots are very nice to have if you do a lot of tanning. If you don’t wear them, the hide will inevitably drip all over your feet as you stand at the beam working.

GLOVES: I tanned without gloves for years, but I love my elbow gloves now. Don’t bother with dishwashing gloves, or any other short gloves. You will inevitably reach into a solution and they will fill with smelly liquid. I use these affordable Atlas gloves, which have held up okay. When they die, I may invest in a more heavy duty glove.

APRON: I would avoid buying very cheap aprons. I am still using the same two heavy duty black, rubberized cloth aprons that I bought used at a yard sale over 20 years ago. You can make one from a sheet of vinyl or plastic of some kind, or tie a trash bag around your waist, but if you tan a lot, the protective gear is really nice to have. Hip waders are great if you already own them.

Non-Essentials, but so nice to have!

Non-Essentials, but so nice to have!


CONTAINERS

Vegetable tanning requires certain kinds of containers. Materials that can be safely used for all the processes are wood, plastic and rubber, ceramic, stainless steel and enamel ware. I use galvanized tubs, but only if there is no rust at all on them, and for liming and rinsing only. Aluminum I’ve used for rinsing only. I know aluminum and ashes don’t mix well but I don’t know about lime. While I have no idea if aluminum is safe for tanning liquors, I’ve avoided it. Anything that rusts is out of the question for all processes related to vegetable tanning except for dyeing the skin black. Any rust or iron will darken the skin permanently.

The common rectangular plastic storage tubs with lids are the most versatile. Choose designs that can be rained on without funneling any water into the tub if possible. Some do not have that kind of overhang on the lids, or have holes of some kind o…

The common rectangular plastic storage tubs with lids are the most versatile. Choose designs that can be rained on without funneling any water into the tub if possible. Some do not have that kind of overhang on the lids, or have holes of some kind on the edges. All of these others also get used, but none are particularly better than rectangular tubs.

The ubiquitous 5 gallon plastic buckets are handy to have around for various uses, but tanning anything over the size fur bearers in buckets is unpreferable. Large rectangular plastic storage tubs of 15 gallons and up are very useful as are other large tubs of various sorts. I have used wooden wine barrels cut in half quite a lot. They look really great, but aesthetics aside, they have their down sides. Wooden barrels need to be kept filled with water, or they dry out and fall apart. Since they need to be full of water, they breed mosquitoes unless you dump them regularly and they are quite heavy when full. You can tan hides up to the size of deer in half wine barrels very easily and sometimes large hides if you get creative. The size of the container should be adequate for the size of skins you are tanning. Without getting into specific details, an 18 to 20 gallon tub is adequate for deer, goat and similar sized animal skins. I’ll usually cut cattle and other large hides into sides and bellies, and those pieces can be tanned in a half wine barrel or large rectangular tub easily enough.

Rectangular tubs are an advantage over round ones, when layering, a technique where you put layers of shredded bark between layers of hide and let it sit for a month or three. I can layer a deer hide well in an 18 or 20 gallon tub, by carefully folding it up with layers of bark between all the folds, but if layering a larger hide, or even a very large deer skin, you’ll need to size the tub up. For liming, rinsing, or tanning the skins in liquors, round containers have the slight advantage in being easy to stir, but that is not important enough to favor buying them over the more versatile rectangular tubs. Use what you have or can get cheap or free if it works, but if you buy something storage tubs with lids are probably the best all around. If you are tanning cattle, elk, moose, horse or buffalo skins, and want to keep them whole (not a very good idea unless you really need it that big), start keeping your eye peeled for larger containers. However, too large is too large. You don’t want to have to use excess amounts of liquid to tan, rinse or lime a hide.


BARK CHOPPING

Primitive and slow, but effective enough. The benefits are that it makes you slow down and chill out, and it’s good hatchet practice.

Primitive and slow, but effective enough. The benefits are that it makes you slow down and chill out, and it’s good hatchet practice.

Some materials, like sumac leaves are easy to use, but you will generally have to cut up barks, roots and woods. I have almost always used a hatchet on a block of wood. I lay out a tarp to catch the chips and start hacking away. You could use a small axe, but for most people, an average sized hatchet is a good weight to start with. A heavy hatchet or axe can lead to repetitive strain injuries like carpal tunnel much faster. Just ask my tendons about that.

Hatchets can also be used to “raze” off the outer dead portion of the bark, which was sometimes so removed in traditional tanning as it was considered unnecessary or even injurious to the leather.

Chipper/shredder machines can be very effective. Garden chippers are often under-powered for thick heavy bark, but they are nice when they work. If necessary, you can break the material up into smaller pieces, or try shredding it while still fresh and softer. If there is a lot of rust in the chipper, it could contaminate and darken your liquor. Consider running some branches and leaves through the unit to clean it out.


COOKING POTS

It is possible to extract the tanning materials from plants with cold leaching, but it is much faster to cook it out. Even though I don’t know that it isn’t safe, I have always avoided aluminum. That is easy for me to do though, because I have large stainless steel pots from 3 to 5 gallons. Enamel pots could work, but be sure there are no rusty spots where the enamel has chipped away. Copper was used at one time, but large copper containers are expensive and uncommon. Large thin walled stock pots with thin bottoms can be very cheap and are fine for cooking bark, but will easily burn food if you are not careful. Try to get at least 16 quart and preferably 20 quart or larger. I find large stock pots like this to be indispensable tools in my lifestyle and they are a lifetime investment. When shopping key points to look at are thickness, build quality (especially handles) and steel quality. Some stainless imports are made of inferior metal. Read reviews carefully. When I won some fancy all clad cookware in a contest, I sold it on ebay and bought a Tramontina stock pot, which I’m happy with.

A 3 gallon stainless stock pot. Get 20 quarts or larger if you can afford it or better, repurpose a stainless beer keg.

A 3 gallon stainless stock pot. Get 20 quarts or larger if you can afford it or better, repurpose a stainless beer keg.

You can also modify an old beer keg, which many home brewers do for cooking beer mash. Full sized Kegs are 15.5 gallons and a 1/4 keg is 7.5 gallons.

I also own a large pool filter housing that must hold around 25 to 30 gallons. I set it up with a valve and cook large batches of canning jars and bark in it. I have never seen a comparable one. In most units the lid is nearly as tall as the body, making them of limited use.

My pool filter housing bark boiler, aka the MEGA CANNER.

My pool filter housing bark boiler, aka the MEGA CANNER.


Happiness is tan liquor on tap. It doesn’t get any better than this folks.

Happiness is tan liquor on tap. It doesn’t get any better than this folks.

SLICKING TABLE OR BOARD

To use the following two tools, the slicking iron and slicker, you need a large flat surface of some kind. The skin is stretched, smoothed and flattened with this trio. These are only used if you want to dry the skin smooth and flat. If the hide is to be softened you dry it in some way that is less involved. A good technique for drying hides flat is to paste them down to the board with fat applied to the flesh side. This technique allows us to finish the grain out perfectly smooth and then leave it on the board to dry slowly. Just put it where your chickens can’t walk on it! You can also nail the skin to a wall to stretch it, or lace it into a frame, but for leaving hides well flattened and finished, you probably can’t beat the slicker and slicking Iron on a smooth slab. If you are doing thick skins, you can get away with something that has a rough surface, such as unfinished plywood. When working thin skins on a slab, the surface should be smooth or the texture of the surface will show through on the grain, much like the technique of rubbing a piece of paper placed over a textured surface with pencil or charcoal. I use plywood and a large slab of thick salvage plastic. Traditionally, stone tables have been used. If you run across a large surface that is very smooth, water resistant and 4 feet or more wide, grab it.

A large sheet of salvaged structural plastic that I use as a slicking board.

A large sheet of salvaged structural plastic that I use as a slicking board.

Cattle leather oiled and pasted out to boards to dry with the slicker. When working with thick skins, the board texture will not show through. When finishing thin skins, you will need a smooth surface unless the skin is to be softened later, or the …

Cattle leather oiled and pasted out to boards to dry with the slicker. When working with thick skins, the board texture will not show through. When finishing thin skins, you will need a smooth surface unless the skin is to be softened later, or the wood grain will show through on the hide’s grain surface.

The skin can be pasted to the board with a coating of fat on the flesh side. It will stick well enough if it is dried slowly. When pasting thick skins to boards, you must use wood for thick skins or the skin may mold from drying too slow. For thin skins you can get away with pasting them to a non breathable surface like plastic, but make sure they still dry out within a couple of days. I use this technique a lot. I also often use it if I’m going to use the graining board to soften the skin (see below), but in that case, it is okay to use a rough piece of plywood, because the grain is going to be wrinkled and reworked anyway so the texture of the board showing through the skin is of no consequence.


SLICKER

This tool is usually made of stone or glass and you can make your own with a piece of slate. it is a slab of hard material, with one rounded smooth edge, and and smooth rounded corners. A handle is nice, but not necessary. The tool is used to smooth and even the grain side of the skin and to paste it down onto a slicking table or board with fat for slow drying. You could probably have a glass shop make you one out of a 3/8” glass. A shop that works with stone tiles should be able to make you one as well, or at least cut a slab for you if they don’t already have some spare tiles of the right size. If you want to make one, cut a piece of slate or other clean hard stone and grind the edge round on a slab of cement or sand stone. Use water as a lubricant. If the stone is hard, add sand with water to make a slurry. Slate is fairly soft and easy to work. This method will even work with hard stone or glass if you are patient. It can be finished and polished with diamond sharpening hones and/or sand paper. A belt grinder would also be very handy, but the dust will mess up your lungs. Silicosis fibrosis anyone? Glass grinders are lubricated with water to prevent dust. You can also still buy slickers new, since a few leather workers use them for polishing. I have also used hardwood and moose antler in a pinch.

Size should be around 4x5 inches and 1/4 inch or more thick, with the long edge being the rounded working edge.

Vintage slickers from the museum area of the Muir McDonald Tannery in Dallas Oregon, now sadly closed. Both are slate. In the tool on the left, it appears that there may be screws for clamping the slate into the handle.

Vintage slickers from the museum area of the Muir McDonald Tannery in Dallas Oregon, now sadly closed. Both are slate. In the tool on the left, it appears that there may be screws for clamping the slate into the handle.

Glass plate in a leather working machine. This partly replaced and augmented the slicker. This may be the scariest machine I’ve ever seen in operation. Muir McDonald Tannery, used to polish the grain of tooling leather.

Glass plate in a leather working machine. This partly replaced and augmented the slicker. This may be the scariest machine I’ve ever seen in operation. Muir McDonald Tannery, used to polish the grain of tooling leather.

Smoothing the grain and flattening.

Smoothing the grain and flattening.

Home made slate slicker 1/4 inch thick and a slab of repurposed jade with the edges polished

Home made slate slicker 1/4 inch thick and a slab of repurposed jade with the edges polished

ideal slicker edge is evenly radiused and polished.

ideal slicker edge is evenly radiused and polished.

The slicker at work dealing with wrinkly edges. This tool is always used with fat as a lubricant.

The slicker at work dealing with wrinkly edges. This tool is always used with fat as a lubricant.


SLICKING IRON

My current ideal slicking iron prototype. I would favor a thick blade. This is a tool where weight and rigidity can be advantageous.

My current ideal slicking iron prototype. I would favor a thick blade. This is a tool where weight and rigidity can be advantageous.

This tool is similar to the slicker in size and shape, but it is a metal scraper with a dull edge. It is used on the flesh side of the skin to even out wrinkles and smooth and stretch the skin out toward the edges, before turning it over to use the stone or glass slicker. The slicking iron should not be super wide, about 5 inches wide at most. If I made one to my specifications right now, it would as in the diagram. It would have a very, slight radius across the working edge. I would also add a generously sized hardwood handle that is slightly drop shaped in cross section, copper riveted, and saturated in raw linseed oil. Regular carbon steel is okay to use, but always check it for rust and clean before using. Never leave it resting on the skin.

A serviceable homemade sicking iron and a cheap dough scraper. The dough scraper is on the thin side, is already rusting and should be modified to narrow it. It is probably better to check in with local scrap yards, metal fabricators and sheet metal…

A serviceable homemade sicking iron and a cheap dough scraper. The dough scraper is on the thin side, is already rusting and should be modified to narrow it. It is probably better to check in with local scrap yards, metal fabricators and sheet metal workers.

Dough scrapers can be used if modified. Most dough scrapers are wide and could stand to have an inch or more removed from their width to make them 4.5 to 5 inches wide, which you can do with a hacksaw and files. Use a file to sharpen and modify. The corners should be rounded off well to a 1/4 inch radius and the whole thing sharpened from both sides to form a fairly obtuse edge (not too thin) and then dulled enough that it won’t cut the skin. The edge should be of such a dullness that it will easily grab the skin and pull it when the tool is used, but will not cut or gouge it. If shopping for one, look at reviews to make sure it is not too thin. Cheap scrapers will bend under the high stress applied to this tool under normal use. I bought this one and it is barely thick enough. It is also already showing some rust as cheap stainless steel is prone to do. Here are a few that look like they may be thick enough, but it’s hard to say until you see them in person. pizza cutter, RSVP, OXO. Keep in mind that they will still be better if modified by narrowing them, so dropping by your local sheet metal worker or metal fab shop first is probably smarter. They usually have lots of scrap around and all the tools to make something like this quickly, minus the handle. If you have a file, a drill and a saw to cut a kerf in a wooden handle, just have them cut out a slab for you and do the rest yourself. If you have a good metal salvage yard around, look there for scrap stainless.

This paunchy spot was eventually flattened completely by persistent work with the slicking iron and slicker.

This paunchy spot was eventually flattened completely by persistent work with the slicking iron and slicker.

You may very well be able to use some sort of household item or kitchen tool in place of the slicking iron, for instance a thick stainless spatula. You can also do some of this work on the beam with the fleshing knife, like stretching the skin our toward the edges. At times though you may wish you had the slicking iron for dealing with tough wrinkles and lumps in heavy hides. I would definitely say it is more necessary and useful when dealing with big thick skins. It’s not a tool you have to have to start tanning. You will know when you need it. Checkout this image of Talcon working down a paunchy spot in a bark tanned bull hide. That spot ended up totally flat in the end. This is the kind of application where the slicking iron shines.

The same hide flattened, smoothed, pasted with fat to the board and left to dry slowly.

The same hide flattened, smoothed, pasted with fat to the board and left to dry slowly.


OTHER OPTIONS FOR STRETCHING AND DRYING

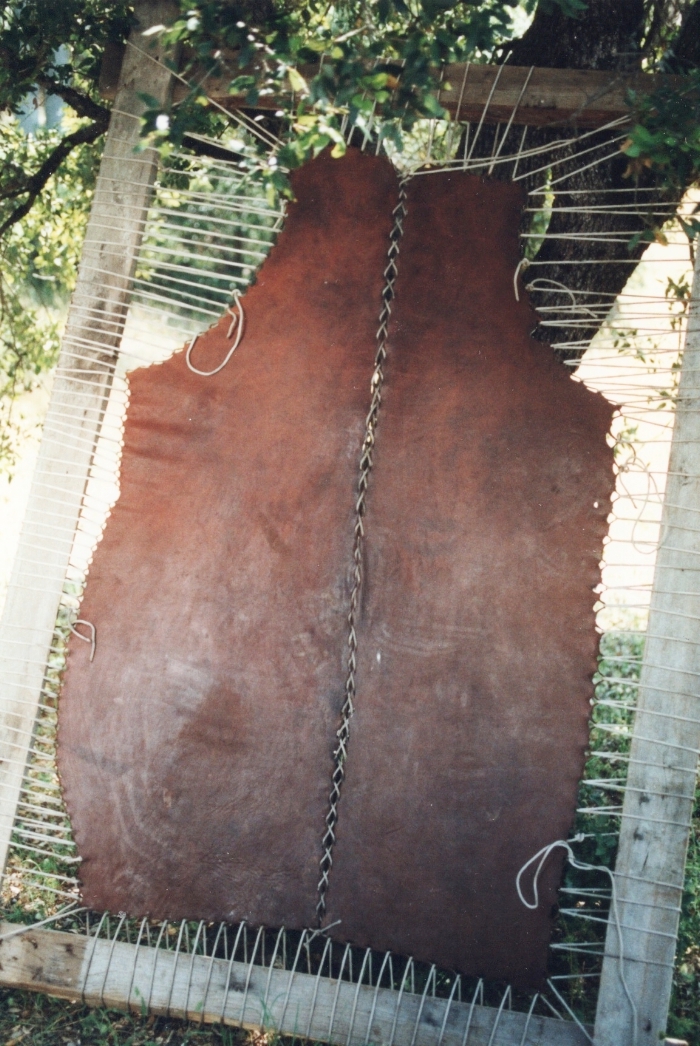
If you do not have a slicking table, and need to stretch a skin out to dry, you can use a frame with ropes. Cut many holes, parallel to the edge and lace the skin evenly and tightly. This will not always remove wrinkles and paunchy spots like slicking out on a flat surface can. Framing a hide is also a lot of work and wastes skin around the edges. Similarly, you can stake the skin out flat just off the ground. A better option than both for most people will be to nail the skin out to a large board or wall. Use hot dipped galvanized box nails if you can. Any nail that will rust is not recommended and nails that are already rusty are a sure way to leave black stains on your hide.
Horse sides framed for drying. Not the best solution in terms of labor and material conservation. It also does not provide the best options for flattening and smoothing the skin.

Horse sides framed for drying. Not the best solution in terms of labor and material conservation. It also does not provide the best options for flattening and smoothing the skin.


PALM AND ARM BOARDS

Old engraving of a Currier at work with an arm board. If you look closely, you can see that the artist illustrated the wooden teeth on the sole of the board

Old engraving of a Currier at work with an arm board. If you look closely, you can see that the artist illustrated the wooden teeth on the sole of the board

Skins can be softened by rolling on a table with the hands and forearms. These tools are used to make that job easier and work the skin a lot harder.

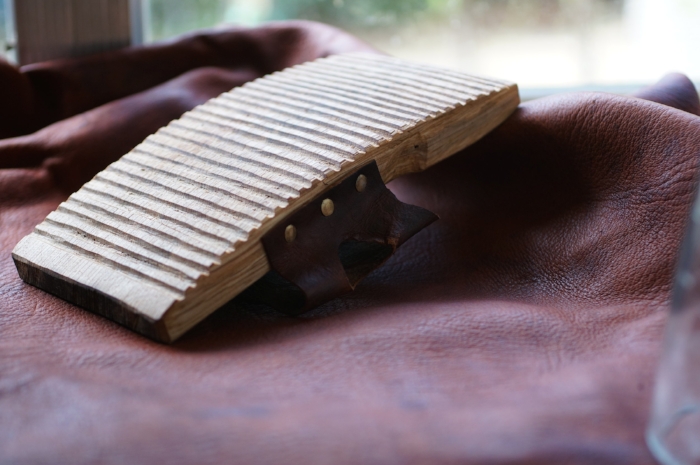
The soles are designed to grip the skin’s surface. One type has a wooden face with ridges carved into the sole from side to side for when the tool rides on the flesh side of the leather. Boards with cork glued to the soles are used when the tool will contact the grain side.

There are two basic sizes, a hand board, sometimes called a pommel, and an arm board. The hand board is short, 8” or less, with a strap that goes over the hand. The arm board rests along the forearm and has a strap at the back and a peg at the front for a handle. The difference is size and scope of work. Any home tanner ought to do fine with hand boards.

If the skin is worked folded grain side to grain side, the result is a pleasing wrinkled grain surface since the grain is crushed and compressed. The process of creating that grain effect is called graining, thus the term graining board. In this case, the sole of the tool touches the flesh side only and the teeth cut into the wood provide excellent grip.

Postion for graining process. Note the ridged graining board contacts the flesh side only.

Postion for graining process. Note the ridged graining board contacts the flesh side only.

Surface produced by graining

Surface produced by graining

DSC00568.jpg
DSC00575.jpg

If a board is used with the skin folded flesh side to flesh side, the grain surface is left smooth because it is stretched instead of compressed. The cork soled board is used in this case to prevent denting and damage to the grain surface.

An antique cork faced arm board from the Muir McDonald Tannery in Dallas Oregon. Note that the cork is partially worn off on the front of the tool

An antique cork faced arm board from the Muir McDonald Tannery in Dallas Oregon. Note that the cork is partially worn off on the front of the tool

Fancy Antique cork soled board.

Fancy Antique cork soled board.


MALLET

In some cases, we may want the skin to be compressed and hardened, not softened and broken loose. The tool for this is a wooden mallet with a polished face, which is used to condense the leather when it’s in a damp, but not wet state. The face can be close to flat, but the edges have to taper off and round out gently. If you are leaving any kind of dents in the skin, then you need to either hit the leather flatter, or refine the edges. The leather should be smooth when finished. Use the heaviest wood you can, mine is probably iron wood and is extremely dense. Polish the face to a gloss finish. In the past, both Iron and brass/bronze mallets have been used, but make sure they are very clean and polished, with zero rust or oxidation. Even so, you are risking staining the skin with a steel hammer, so I recommend sticking with wood.

The mallet for compressing and firming leather should be dead smooth. Use the densest wood available. The hide underneath in the foreground has been pounded leaving it about 1/3 thinner, much denser, stiffer and polished. Otherwise, it was exactly t…

The mallet for compressing and firming leather should be dead smooth. Use the densest wood available. The hide underneath in the foreground has been pounded leaving it about 1/3 thinner, much denser, stiffer and polished. Otherwise, it was exactly the same as the top piece.


STAKE

This is a dull metal blade set into a post that is used for softening and breaking open the fiber of skins. They are useful if you are trying to get skins really soft and for working furs. Unless you are doing one of those two things, it’s not a very essential tool. I find them more useful in braintanning buckskin and working furs of any kind. The post can be permanent or in a stand of some kind for portability. The blade should be rounded at the corners and they usually have at least a very slight radius. The width of the blade can vary. For any kind of large skins, a wider blade would be better. 5.5 inches with the edges rounded to a 1/4 inch radius and a very, very slight radius to the whole edge would be good for general home tanning work of all kinds. A lot of dough scrapers are 6 inches wide, so that might be a good source of material for a blade. It should be stainless if possible, so you can leave it wet or in the weather. Use stainless steel screws as well.

A simple portable stake used for classes. A fixed stake or one on a heavy base is better if you’re going to use it a lot.

A simple portable stake used for classes. A fixed stake or one on a heavy base is better if you’re going to use it a lot.

Use stainless steel screws

Use stainless steel screws

A good stake blade design for the home tanner.

A good stake blade design for the home tanner.

This blog post and similar content is informed by almost 30 years of research, experience and communication with other tanners. You can support my efforts to bring back and preserve these traditional self reliance skills and arts by sharing content to friends, forums and social media, with general financial support on patreon.com/skillcult, or with one time donations using the link in the side bar. I also now keep separate accounts for earmarked donations toward research in tanning and apple/plant breeding. If specified, donated funds will be used for things like tools and materials, and outside labor solely related to either endeavor. Thanks for reading :)

Spoiler Alert, BITE ME Delivers the Goods! Early Oct 2018 Apple Variety Taste Testing, With New Seedling Apples

In my latest apple tasting, Sunrise and my own seedling BITE ME! rose to the top of the heap out of 18 tested. I also taste tested 3 new seedlings, out of which one is decidedly mediocre, one pretty good and one incredibly sweet, even though it is still ripening. Some others were bad others I am ambivalent about.

Rubinette: Intense anise flavor this year with high flavor, sugar and good acid balance. I am still not a big fan of this one for whatever reasons, but it’s very popular. If I approached apple tasting analytically for the most part, I might like it more, but I don’t, and I don’t.

Norcross Red Flesh: Got this from apple collector Nick Botners some years back. It is not very good. Light, juicy, tender, barely any red flesh, low sugar, low flavor.

Sunrise: This was one of the stars of the show in this tasting. Everything comes together really well in this apple. Very juicy, very crisp, good sugar levels, good acid/sugar balance, unoffensive skin and mild, but tasty flavors. More of a modern crisp type of apple than anything else in this tasting. It’s downfall may be a lack of distinctive flavor, but I want to eat them and that’s the best acid test.

Reinette Thounin: I got this from the USDA I believe. It is a true spitter. Totally inedible, bitter, tannic, low sugar. Honestly doesn’t even seem suited to cider, maybe just for the tannins.

Zabergau Reinette: Pretty good, always kind of tart, dry flesh, interesting but not sensational flavor. Could take it or leave it. Alleged to improve in storage.

St. Edmund Pippin: This one was no good when tasted a couple of weeks ago off of another branch on another tree. This time, some small stunted apples off of another tree were quite good, juicy and crunchy enough, with nice flavor and no discernible pear taste like the last ones had.

Tydeman’s Red: Or so it’s labelled, unconfirmed. Large lopsided apple. Open texture, juicy, crisp, tasty enough, more like a cooker and seems like it’s probably great for sauce.

Sweet 16: This year has none of the beloved cherry and almond flavors, but it has anise flavor that is seriously all up in your face. Not my favorite flavor. This apple can really vary drastically from year to year.

Mannington Pearmain: This apple has always cracked badly, but this year it didn’t too much. It’s not very good though and I still won’t keep it. It’s not bad, just not anything I’d recommend for any use.

Saltcote Pippin: the presentation is a little thin, lowish sugar and fairly acid. Good flavor though. probably would be a good sauce apple.

Coe’s Golden Drop: Intense candy flavor, said by some to be “pear drop”. Definitely does have a pear taste, but with more going on too, making it a very singular apple. It is small, dry, hard fleshed, tannic, thick rough skin, and still very intriguing. I think better specimens are coming down the pipe as it ripens more.

Peace Garden: small, stripped red apple. Outstandingly boring in every way.

Seedling, Grenadine x ? (proably Goldrush) 11/4: Kind of boring, a bit tannic, nothing really very wrong with it, just a generic yellow apple. Probably will not make the grade

Seedling, Grenadine x Goldrush, 11/17: A very healthy looking seedling that stood out for scab free, healthy green foliage early in the season. Apples are small for the most part, fairly round, often with flesh protruding out of the stem well, like an outy belly button. Small speckles, yellow skin. Flesh is fine grained and a little chewy. Flavor unremarkable yellow apple flavor. Sugar seems very high! As it is chewed, the fine chewy flesh gradually releases a rising flood of sugar. It also still had a bit of starchiness to it, so the sugar will probably continue to rise even further. Thanks to Mike of Walla Walla’s contributions to my apple breeding project fund, I just purchased a brix refractometer. That measures dissolved solids, which in fruit juice is more or less indicative of the sugar content. So, I’ll get to test this apple next week.

Seedling, BITE ME!: This was the first apple I ever fruited. Read more about BITE ME! here. In this tasting it is probably tied with Sunrise for me, though Bite me has the more interesting flavor for sure, Sunrise is a very pleasant eating experience and has outstanding texture. I’m thinking a Wickson Sunrise cross could be good. Mild flavors as always, with the special crab flavor component inherited from it’s mother Wickson. Any specific analysis and description aside, I want to stuff them in my face and chew them up to get that awesome flavor out. Sugary and low acid, thin skin. Flesh texture can tend toward what is called melting in fruit tasting terminology, or kind of chewy and tender. At least this one was. The downside to BITE ME! is probably going to be apple scab, which is had very bad last year.

Seedling, Wickson, OP, 2010: Red skin, very pretty, with crazing, like the surface of an old cracked oil painting. It has watercore this year, which makes it hard to test. The bits I found without watercore were not super remarkable, though perfectly good. As a small apple, it kind of needs to perform very well as a dessert apple to justify it’s existence, unless it’s some kind of amazing cider apple. Not as promising as I thought earlier in the season. I’ll give it a couple more years and hopefully it will outgrow the watercore.

I hope to have scions of some of my best apples available in the web-store this winter.

The Tanner's Knife, An Essential Multipurpose Tanning Tool for Fleshing, Dehairing, Scudding and Frizzing

P1160238.jpg

The fleshing knife as it is commonly known, but probably more appropriately known as a tanning or tanner’s knife, is the primary tool of the tanner. This versatile knife can be used for fleshing and re-scraping the flesh side of the skin, de-hairing, removing the grain (frizzing), scudding out liquids to flush unwanted moisture and loose material from inside the skin structure, moving the hide on the beam and trimming the edges of the skin. While there are specialized two handed knives for some of these tasks, they can all be performed with the same tool if it’s within certain design parameters, which is what will serve most home tanners best. In this Blog post and video, I go over some of the different types, both commercial and homemade with some tips on weight, length, styles, making your own, and other such things.

The focus here will be on the home tanner working on beams about 8 to 12 inches wide. Keep in mind that most new models are designed by and for fur trappers, most of whom do not do a lot of general tanning work. The amateur tanner can get by with tools that are much less than ideal, so there is no need to overthink the problem too much, or find the perfect tool just to get started. You can always upgrade later if you want to.

Length: The typical professional tanners knife of the European style is quite long and not really best suited to the home tanner. Samples I have range from 3 to 3-3/8 inch wide. 16 inches is a typical working edge length. These long knives were often used on very wide beams with shallow curves. The strong, experienced men using these tools, combined with the large area of contact formed between the gently curved edge of the tool and the wide beam, would make for very efficient and quick work. I think the ideal length for home tanners working a variety of skins on narrower beams is about 20” long in total with 11” working edge and 4.5” handles. A working edge up to 12 inches and down to 10” with 4.5 inch handles is also fine. With such a length, the tanner can comfortably do all manner of work from very large hides, down to fur skins. Wider beams require wider knives and/or the edge of the tool may need to protrude out in front the handles. I would not recommend working edges much smaller than about 10 inches, and then only out of necessity. It is not just the working edge though, but also the space between the handles, which allows for comfortable work.

Styles: Nearly all traditional styles seem to be curved. The classic European style of tanning knife that is most common is wide, curved and dished. The compound curves of the cup and the arc combine to strengthen the tool, allowing it to be fairly thin, and yet still very rigid. The concavity of the underside seems to offer some geometric advantage in scraping. The concavity also means that the tool can be used flat on the hide without rubbing on it, which I suspect might be part of the impetus for the design, although I have rarely used them that way. Professional tanners who worked hides day in and day out would probably be able to get away with doing things that the rest of us can’t, such as using sharper tools at lower angles. These traditional, wide, dished knives are very nice to use, though if I were designing one from scratch for home tanners who are doing many different types of skins and tasks, I would probably make it considerably narrower than they usually are and no wider than 3 inches. The back edge is sometimes kept very sharp and can be used for tough spots, gaining access under tough membranes, or as a sharp slicing knife for trimming the skin during fleshing. I have also read of tanners filing teeth into the back of the knife so it can be used to pull skins up the beam to reposition them for scraping without using the hands. You can do this maneuver on small skins without cutting teeth in the back of the tool, and I do, but on large heavy hides, I can see why they would make this modification. The option is to let go of the tool with one or both hands to readjust the skin on the beam as each area is worked over, which is much slower.

Traditional style knives. From the top down, A cheaper modern version @ 16”, W.H.Horn & Bro’s England 15” edge-3-3/8” wide- 27” total length, Horn Brand cut down to a 12 inch blade by someone who probably thought 16 inches was too long. I just saw a…

Traditional style knives. From the top down, A cheaper modern version @ 16”, W.H.Horn & Bro’s England 15” edge-3-3/8” wide- 27” total length, Horn Brand cut down to a 12 inch blade by someone who probably thought 16 inches was too long. I just saw a picture online of one cut down exactly the same way. It even had a similar handle. Just goes to show, those super wide tools are for use by professionals in a professional setting and not suited to everyone and every task.

W.H. Horn fleshing knife from ends.jpg

Other tools are narrower and usually thicker, sometimes with only one working edge. This type is good for home tanners with a surprising number of models and brands available new. Newer ones are often sharpened on the back as well and many are fairly flexible compared to older ones I’ve seen.

Width: A versatile knife for the home tanner would probably be anywhere from 1.5 to 3 inches wide. Though still very usable, extremely wide tools can be less stable when it is required to push very hard as is sometimes necessary when graining (frizzing) un-limed buckskins or fleshing very difficult skins. My two favorite tools currently are a shortened traditional cupped knife that is worn down quite a lot to about 2.5 inches wide. More relevant though, is that the concave curve, which is the main working edge, has been worn back closer to the handles, making it more stable to use when pushing very hard. A full width knife however is fine as well, but if I designed one from scratch it would probably be under 3 inches wide.

Another favorite tool I have was forged out of a wagon leaf spring and is about 3/16 inch thick and 1.5” wide, which makes for a durable, versatile tool of a good weight. Tools as narrow as 1 inch can be fine too depending on material and use. There is a type of knife that is very thin and flexes to conform to the curve of the beam, but I have never had a chance to examine, let alone use one. If the tool is both narrow and short, the handles may get in the way, necessitating the use of a very narrow beam.

For whatever combination of reasons, these are the tools I’m most likely to grab first. The. traditional wide knife is worn back, making the edge closer in line with the handles, which is more stable when doing hard work. The second is forged from a…

For whatever combination of reasons, these are the tools I’m most likely to grab first. The. traditional wide knife is worn back, making the edge closer in line with the handles, which is more stable when doing hard work. The second is forged from a wagon leaf spring, 3/16” thick, 20” long, 1.5” wide. The working edge is only 9.25”, but there is plenty of working room between the handles. If I made a knife like this again it would have a 10” or 11” working edge. the handles are antler.

If the tool is too short and narrow, you will not be able to use it on wide beams like this one, because the handles will interfere. It also doesn’t give you a lot of real estate to work with on the edge. If the hands are held too close together, it…

If the tool is too short and narrow, you will not be able to use it on wide beams like this one, because the handles will interfere. It also doesn’t give you a lot of real estate to work with on the edge. If the hands are held too close together, it can become less ergonomic to work. The wider your shoulders, the wider the tool could be.

Thickness and weight: Wider tools are generally relatively thin in order to avoid excessive weight. Narrower tools are often a lot thicker, though many of the newer, higher end tools are thinner than the older ones were. A range of weights are usable, but tools can be both too light and too heavy in my opinion. I’d much rather a tool was too light, but some weight offers stability and the advantage of momentum in some scraping processes.

Straight v.s. curved: Straight tools are perfectly serviceable. I do prefer a curve and would never design the perfect tanning knife with straight edges, but if material is available to make a straight tool, I would not hesitate. I’ve used straight planer blade tools for countless hours and endless square feet of hide scraping. Once I started using a curved tool, I was sold instantly, but I could go back easily enough. I think the main advantage of curved tools is that it is easier to incorporate tilt and slide techniques in scraping.

Tilting the knife edge slightly off of perpendicular is an important refinement to scraping technique. Imagine a straight edged fleshing knife held at a slight angle by putting one hand slightly away from you, and one hand slightly back toward you. If the tool is pushed straight forward while tilted askew like this, there is a slight advantage in scraping, something akin to a slicing action, though not quite the same. You can achieve the same effect with any cutting edge in wood, such as a plane, spokeshave, knife or draw knife by tilting it. This subtle difference in technique can have a large effect. Curved tools, when held slightly to the left or right, create this effect automatically without having to hold the tool askew at all, or at least less so.

Sliding the tool side to side very slightly in a slicing motion as the tool is pushed forward is another very important subtle refinement of the hide scrapers art. Combined with tilt, it is even more effective. Since tilt is already built in to a curved knife, it is easier and more ergonomic to achieve this combination of techniques when using a knife with a curved edge.

The radius of the curve should not be too drastic. Shown are some curved tools to give you an idea of what some look like. A factor in degree of curvature, or lack of curvature, is that the radius of the beam combined with the radius of the knife determine how much of the tool contacts the beam. That contact width has everything to do with how much work is done with each stroke and how hard it is to do that work. In one extreme case, you might be scraping off the grain from the tough neck skin of a deer, which is going to require a narrow area of contact. If the width of contact between beam and knife is wide, you will have a very tough time of it. Still, with an 8 inch beam and a very moderately curved knife, you should still be okay. For general work, I prefer a beam around 12 to 14 inches wide with a moderate curve. Coupled with a curved knife, that makes for a reasonably wide area of contact resulting in efficient work for most processes. If I used a 6 inch wide beam with a high crown and a straight tool, I would be at my work much too long when doing most of the relatively easy processes that I engage in most often, such as fleshing and dehairing, simply because the strips I would be scraping off would be so narrow.

If a straight line is drawn from one corner of the edge to the other, the distance from that straight line to the tool edge at the center of the tools are as follows Top to Bottom:9” long, 5/16” to edge,15” long, 3/4”16” long, 3/4”12” long 1/2”Botto…

If a straight line is drawn from one corner of the edge to the other, the distance from that straight line to the tool edge at the center of the tools are as follows Top to Bottom:

9” long, 5/16” to edge,

15” long, 3/4”

16” long, 3/4”

12” long 1/2”

Bottom tool, not measured

The bottom line is that I prefer a moderately curved tool for general work. The curve I would start with as a prototype for testing would arc in an even radius, with a rise of about 3/8” at the center of the tool on an 11” blade.

Material: The cheapest knives are made from cheap mild steel which cannot be tempered to keep an edge. This type of budget tool can work, but they are not preferable and will require more frequent sharpening. Better knives are made of tool steel and tempered to take and hold an edge. If at all possible, I would recommend something that will hold an edge. Stainless tools are nice to have when working around water and salt, but If tools are taken reasonable care of, regular carbon steel is fine. Planer blades, discussed below are rust resistant, but not stainless. For making tools at home, you can use a number of common pieces of steel.

Miscellaneous steel items that could be used to make a tanner’s knife. Left to right, a set of car leaf springs, section of leaf spring, chainsaw bar, lawnmower blade, planer blades

Miscellaneous steel items that could be used to make a tanner’s knife. Left to right, a set of car leaf springs, section of leaf spring, chainsaw bar, lawnmower blade, planer blades

Leaf springs from cars are good. If possible, find a set that is narrow. Almost every junk car has a full set of springs under it waiting to be salvage with the removal of a few bolts. The steel is temperable and already hard enough to work well enough. If you can find a narrow spring, you could grind out a tool and retain the temper if you are careful and patient.

Chainsaw bars seem like a great source of steel of a good thickness. I’ve never used them, but I understand they are carbon steel of some kind, and would already be hardened and tempered to hold their shape under hard use. Once worn, they are of no use on a chainsaw and should not be hard to find in any rural area in the states.

Lawnmower blades: are fairly common and seem like reasonable stock to work with. They have a propeller twist which would have to be removed, necessitating heating, forging and preferably re-hardening and tempering afterward.

Large files are a good source of tool steel,and could be used. I would grind or file out all the teeth though. They are too hard as is, so making a good tool with one would entail at least heating to anneal (soften), grinding to shape and preferably re-tempering. If you’re going to do all that, you might as well forge it out into a better, wider, curved tool.

Misc mild steel bars can be used, but will not hold an edge well. In a pinch, you can even use a square edge, instead of a more knife like beveled edge.

Planer blades of high speed steel make very nice scrapers. They are extremely hard, tough, rust resistant and hold an edge incredibly well. Another advantage is that since they are straight, some will have two usable edges. I use two tools or edges of varying sharpness during the processing of most hides into bark tanned or braintanned leather, so having two edges of different sharpness on one tool is great.

Tools made from planer blades. The top three are made from narrow blades and pretty short. The top two have handles made of wood covered with rubber or vinyl tubing. the third is antler handled and the fourth is a short blade tied into a slotted woo…

Tools made from planer blades. The top three are made from narrow blades and pretty short. The top two have handles made of wood covered with rubber or vinyl tubing. the third is antler handled and the fourth is a short blade tied into a slotted wooden handle, giving a longer working edge on a short blade.

The steel in planer blades is too hard to drill with normal tools, but can be ground easily enough with a 4 inch grinder, belt grinder or bench grinder. [EDIT: Melvin Beattie, one of my tanning teachers, Just wrote me the following: “Yes you can drill planner blades, files, etc.. Here are the drills that work, I have used them many times putting handles on planer blades. If I am using a hand drill start with a 1/8 “ then use 1/4” but you have a drill press just use the 1/4’’ and a good drill lube.” ] Handles for planer blades can be of two pieces of half round wood with rubber or vinyl tubing or epoxied wood (rough up and clean the metal surface before applying epoxy).

Planer blades can’t be drilled or sawn easily. To shorten, grind from both sides until thin, clamp in a vice, then break off.

Planer blades can’t be drilled or sawn easily. To shorten, grind from both sides until thin, clamp in a vice, then break off.

P1160275.jpg
Vinyl tubing with wood. Grind handle section down to 1” wide. Wood 1” wide. Vinyl tubing 1” available by the foot and many hardware stores. total length 4” to 4.5” Some will just pound tubing over the flat wide handle, but it’s very uncomfortable fo…

Vinyl tubing with wood. Grind handle section down to 1” wide. Wood 1” wide. Vinyl tubing 1” available by the foot and many hardware stores. total length 4” to 4.5” Some will just pound tubing over the flat wide handle, but it’s very uncomfortable for protracted use. The wood can be any easily split straight grained wood. There is no reason to use hardwood.

Antler handles are also very nice and may be the best option if the planer blade is only 12 to 14 inches long. You need at least 1.5” stuck into the antler, preferably more. Grind the end of the tool that will go into the handle to fit within the antler pith as shown in the photo below. Smooth and round off all sharp edges and grind the end into a slight wedge. Soak the antler overnight then boil for 15 or 20 minutes. Clamp the blade in a vice if you can and pound the antler handle onto it. Don’t drill the antler, just pound it onto the end of the blade. Allow the antler to dry completely before using it at all or you will loosen the union. Finding comfortable pieces of antler that are not too curved or too small can be a trick, but you can end up with very nice handles. Antlers vary in the amount of pith they have and general density and strength. If the antler is not too pithy, this method can also work for narrow tangs.

Antler handles set while wet and boiling hot at least 1.5” deep, deeper is better.

Antler handles set while wet and boiling hot at least 1.5” deep, deeper is better.

The width of the blade should roughly match the width of the honeycombed pith.

The width of the blade should roughly match the width of the honeycombed pith.

Grind the end of the bar to a slight wedge and round off all sharp edges.

Grind the end of the bar to a slight wedge and round off all sharp edges.

Grinding out tools: If you have a piece of stock that is already tempered, such as a chainsaw blade or car leaf spring, it is possible to grind and or file it to shape without changing the temper. If you overheat a hardened and tempered tool in grinding, it will become soft, a mistake commonly referred to as “burning” the steel. If you see colors appearing on the edge of the tool during grinding, you are flirting with danger. For something the hardness of a tanning tool, avoid letting the steel turn anything darker than bronze color, after that it will turn a purplish color, then light blue. Dark blue is pretty much dead soft, so stay well on the right side of that color. Using a high speed bench grinder, 4 inch angled grinder or belt grinder, it is very easy to overheat steel, especially when thinning the edge. Work in very short spurts, with frequent water cooling and watch for those colors with unfailing vigilance. For a tanning knife, one of two soft spots are not likely to cause you huge problems, but do your best to prevent them.

So, what is the ideal tanning knife for home users? I would definitely be a compromise in some way, but that would also be it’s strength. I have drafted up some plans and I hope to someday experiment with some prototypes. So many projects, so little energy :-/ for a fairly simple tool, I would say a good place to start would be a moderately curved, 3/16” thick, 1.5” to 1.75” wide, 11” working edge and 4-1/2 inch handles for a total of 20” long. Such a tool could be filed or ground out of a chainsaw bar, or forged from leaf spring or a large file. I would put a bevel on the back, to keep sharp for trimming skins during fleshing and other tasks. The bevel on the front concave edge should be at least 45 degrees, but thinner would be better, maybe something like 20 to 30 degrees?

As far as new knives go, there are a lot on the market. On the low end, the Wiebe 12” knife is as cheap as 20.00 before shipping from some dealers. According to Dakota Line Snares, a Wiebe dealer, “The steel on all three of the fleshing knives (8”, 12” and Elite) is 3CR13: Hardness Hrc52-55. The Elites are sharpened in the U.S.”. I think the Wiebe 12” flesher might be a very good budget option for new home tanners. Reviews on Amazon are good, but it’s hard to know what people are doing with them or how many of them are experienced enough to judge. In some pictures I’ve seen, it appears to be bent just in the middle in the classic dog leg formation common in cheap knives instead of forming a long gradual arc. In others it appears to be bent off center, or not much at all. I would not expect too much quality wise. They are produced in China with Chinese steel. A step up from that class of tool, there are the Wiebe elite, Neckers of various models, the caribou and Au Sable are in the 65.00 to 95.00 range and generally get good reviews. Many of them may be more flexible than would be ideal for a home tanner, so shop with caution. I have the Necker 600 and am not crazy about the handle design or the down sloped handle angle, but I actually haven’t used it yet. It is also more flexible than I’d prefer. The wider necker 700 looks interesting but it’s a little more costly at 95.00

Also in the mid range, there are affordable imitations of the European style knives that are sold in the U.S. According to one supplier they are stainless. The 12 inch version (which I would recommend over the 16 inch) is about 45.00 to 50.00 My guess is that the tangs will be the weak link in these English knife copies. There are also new real English Sheffield knives by J. Adams which have separately attached tangs that run all the way through the handles. They are expensive at about 145.00 for the 12” model. This is the high end of new tanning knives, outside of custom made tools. I would hunt ebay for an old european style knife before purchasing the new Sheffield knives. The problem with the antique ones is that they are usually on the long side for a home tanner. Exercise caution in shopping for new English knives as the American made copies are sometimes unscrupulously marketed as being from England or Sheffield.

Typical of old school quality, the two tools at the top have heavier, thicker tangs forge welded onto the blades, while the lower tool has a thin tang that is cut out of the same metal the body is made from. As a result, the thin, sharp edged tang h…

Typical of old school quality, the two tools at the top have heavier, thicker tangs forge welded onto the blades, while the lower tool has a thin tang that is cut out of the same metal the body is made from. As a result, the thin, sharp edged tang has split the handle. The sad thing is, it’s much easier with modern welding to weld separate tangs on.

The older tools have full thick tangs that go through the handle to the end where they are pounded over like a rivet, making for much stronger handles that put less stress on the wood. I don’t think this is one of them, but I suspect that the new pr…

The older tools have full thick tangs that go through the handle to the end where they are pounded over like a rivet, making for much stronger handles that put less stress on the wood. I don’t think this is one of them, but I suspect that the new production Sheffield, English knife copies sold in the U.S. probably have these these type of cheap flat tangs. I may try to modify this tool to make is shorter with thicker tangs and handles that come more nearly straight to the sides instead of arcing downward. I’m thinking some small metal parts and some JB Weld…

For me to buy and test all of these tools would be quite expensive obviously. I also don’t tan enough currently to put them to the kind of test needed to sort them out really well. None are what I would design from scratch, but again keep in mind that most of these are designed by and for fur trappers, whose only job typically is fleshing furs.

For used tanning knives, ebay is the best market, although they do show up on Etsy now and again. Obviously you can hunt old junk and antique stores, but you will be lucky to find one at all, let alone at a reasonable price in good condition. Avoid the cheapest and very common knives that are bent in the middle instead of in a continuous arc. These cheap tools usually have wire wraps on the handles, but some have solid ferrules. They are made of mild steel. They will work, but get something better if you can afford it. With the Wiebe 12” budget knife being tempered steel, there is hardly an excuse to buy a mild steel tool.

The common very cheap tools of mild steel like these should be avoided if you can afford something better.

The common very cheap tools of mild steel like these should be avoided if you can afford something better.

Quality vintage tools of both the old school thin wide cupped European type and the thicker narrow type tools come up on ebay, but they are often over priced. Patience is key. Look at ended auctions to see what has and hasn’t sold in the past and for how much, as well as what has been re-listed recently or lowered in price. There is a W.H. Horn and Brothers knife, just like mine, in nice condition for 85.00 plus shipping on ebay right now. Last week it was listed for 150.00

Some August Apple Tasting

In this video I taste some usual suspects, Kerry Pippin, Chestnut Crab and Williams' Pride, and a couple of newer ones, Viking (very interesting) and Salem June (meh...)

How to Find Fruit Wood Scions for Grafting, Scion Exchanges and People to Trade Varieties With

DSC05929.jpg

I commonly get requests for scion wood or questions about where to find scions in general, or of a particular variety.  Below are my best recommendations.


Scion Exchanges and Swaps

These are usually free, sometimes with a small entrance fee, but I've never heard of one where the scions are not free.  There are more and more of them, though large areas of the U.S. still don't have any.  Search the web for terms like scion exchange, scion swap, grafting class or grafting workshop along with your large city, state or region.  If there are none nearby, maybe you can find some like minded people and eventually start one.  To my way of thinking, there should be one within easy driving distance of everywhere :)


Online Trading, Fruit Communities and Fruit and Nut Organizations

  Below are listed some online forums, destinations and organizations where people trade cuttings and seeds. They generally are also places to meet like minded people in your region.  The best information and collaborations are often local.

!GROWING FRUIT’S SCION SOURCE PAGE! http://growingfruit.org/t/scionwood-s...   I like this forum a lot.  Friendly with a lot of knowledgeable people.

NORTH AMERICAN SCION EXCHANGE Facebook page: https://www.facebook.com/groups/scion...  Started by my Friends Andy and Little John because they had no nearby scion exchanges.  There is a website too, but the facebook group is most active

NAFEX, North American Fruit Explorers: http://www.nafex.org/  A long standing organization of fruit variety enthusiasts.

MidFEX, Midwest Fruit Explorers: http://www.midfex.org/

CRFG, California Rare Fruit Growers: https://crfg.org/  Membership organization with multiple chapters up and down the state.  CRFG scion swaps happen up and down the state over the winter.

Home Orchard Society (Pacific Northwest): http://www.homeorchardsociety.org/  An excellent organization for NorthWesterners.  From what I hear, their scion swap is one of the largest and best in the country.

Temperate Orchard Society: Apparently cloned the enormous Nick Botner apple collection, so they should have over 2000 apple varieties. (scion sales) http://www.temperateorchardconservancy.org/contact-us/

DBG Scion Exchange, EDMONTON CANADA: https://dbgfruitgrowers.weebly.com/sc...

MOGFA, Maine Organic Farmers Association, Scion Exchange: http://www.mofga.org/Events/SeedSwapS...

SEEDS Durham North Carolina: http://www.seedsnc.org/2018/01/upcoming-grafting-workshop-scion-exchange/

WCFS, Western Cascade Fruit Society, Scion and Grafting Fair in March:  http://wcfs.org/

Michigan Home Orchard group:  https://groups.google.com/forum/#!forum/mi-home-orchard  Group by YouTube user Prof Kent for michigan folks.

For Europe, Fruitiers.net scion trading:  www.fruitiers.net


Buying Scions

Finally, you can buy scions.  They have become more expensive, but if you really want a variety and you can't find it anywhere else, it might be worthwhile.  Also, once you get interesting varieties, it gives you trading leverage.  I sell scions sometimes, but I rarely trade, because I'm not collecting much anymore.  Also, the apples that remain on my wants list are very rare, some probably even extinct or at least lost.  If you want a specific variety, just search the net for the variety name and the work scion.  You might be surprised to find some for sale, or to find at least someone that grows that variety or has it for trade.  If I have scions for trade, they will be in the webstore around January and February.  Unless you have some amazing rare stuff to trade, don't contact me about trading.  I like to help people and will go out of my way to help serious collectors and breeders, but I get way too many requests.  If you can find it anywhere else, please do.

If were to make a list of scion wood sources, they would all be on this page on the GrowingFruit.org site anyway, so I'll just refer you there....   http://growingfruit.org/t/scionwood-sources/3346

Grafting, the collecting fruit varieties and scion trading are fast growing in popularity, and for good reason.  It's always an adventure finding out about new varieties, tracking them down and fruiting them out.  I hope it grows enormously in the future.  It is important to the preservation of food plant diversity that everyday citizens grow, share, eat, talk about and even create many different varieties.  Even at it's most diverse, the larger industrial food model will always lack true diversity and soul.  When there are quite possibly tens of thousands of apple varieties, even 20 varieties in markets looks pretty weak.

Feel free to contact me or leave a comment if you know of other good online communities, organizations or annual scion exchanges.  Happy hunting

IMG_0338.jpg

Axe Buying Checklist Series, #1 Damage and Wear

This is a series on common problems found with axes from craftsmanship to use and abuse.  There are many points, like a checklist of things to look at when picking up an axe or axe head which few people are savvy enough to know to look for all of.  After this series, you'll have that mental checklist. 

The four video segments are on:

Wear and Damage,

Symmetry,

Handles

Options and Axe Hunting

Most used axes are either worn or abused in some way.  Fortunately, they are often perfectly serviceable anyway, usually after a little work.  New axes can have various issues and seemingly perfect axes seem to be the exception. 

This links to the video playlist.  One video will come out every day for the next few days.

Tasting 9 Late Winter Apples, The Good, The Great and The Mushy

Anyone that has followed my apple content for a while knows I'm obsessed with late hanging apples.  In this video I'm tasting 9 late winter apples, mostly off the tree and a few out of storage.  Results below.

Some favorites, roughly in order.

1. Katherine.  Named for early 20th century apple breeder Albert Etter's wife, this is an exceptional apple.  It hangs very late and seems to be at it's best sometime in December.  This late specimen has a rich multi-dimensional flavor.  It was popular at new year dinner last night, one person described it as like wine.  The flavor is not very describable, but it's deep and sophisticated.  Earlier, it is often less complex and just pleasantly flavored.  It has an unbeatable texture when it's at it's best, with a very light crisp flesh and plenty of juice.  This would be in my top 10 apples as grown here.  I have never stored it to speak of.

2. Whitwick Pippin:  This beats out Katherine for intensity and any one person might easily prefer it to that apple.  It is more intensely flavored, complex, quite sweet but also acidic.  The texture at this time of year is better and I suspect it will prove to be a later hanger in the long run.  I only scored Katherine higher because I am more compelled to eat it for whatever reasons and I would never argue with that.

3. Gold Rush:  Even out of storage, this scores 3rd, although Lady Williams would likely go in this spot if it were ripe.  These have held good texture and although they have picked up or developed some off flavors in the fridge, they are quite good, with a forward acidity, plenty of sugar and plenty going on in the flavor department.  Thumbs up for a storage apple.

4:  Pomo Sanel:  Some specimens at this apple at this time will beat some specimens of Gold Rush, but today, gold rush won by a small margin.  This is a very rare apple discovered locally.  It bears some resemblance and eating characteristics to gold rush and it seems quite possible that it is from the same grimes' golden/golden delicious line that Gold rush is part of.  Pomo Sanel is more rubbery in texture and will hold it's shape very well when cooked.  I threw a slice in my coconut milk shrimp soup base the other day and let it boil for a while and it held up very well.  I think you could probably get away with canning it for apple pie filling.

5. Hauer Pippin:  I've not been able to get super excited about this apple, but it has some good characteristics.  It is a rare apple outside of Northern and Central California.  It was originally discovered in Central California and is rare outside of this state, though I hear it was grown commercially at one time.  It is a very beautiful apple and hangs well to the tree through the first half of winter.  The flavor is somewhat odd to me, but this specimen makes me think I should keep a branch of it.

Lady Williams would be higher on this list if it were ripe now, but it is a couple weeks too early.  It may even deserve to be before Hauer Pippin, even now.

More apples could be on this list, those are just the ones I had to taste on this new years day.  Here is a previous video on some of the same apples and others.

Etter's Blood Apples, Unique, Beautiful and Tasty, Red Flesh, Red Flavor

gren bited.jpg

This year I have three of apple breeder Albert Etter's red fleshed apples fruiting.  They are very unique and interesting apples, though they still represent unfinished work.  Red fleshed apples will be coming more and more into the public eye over the coming years.  They could have arrived much sooner had anyone taken up Etter's work, which was already well started.  With all their faults, these apples are still worth growing.  Also a short video on Gold Rush, which might be the apple I've seen most universally endorsed by home growers for flavor, keeping ability and disease resistance.

Cherry Cox Apple Variety and a Few Others, Tasting and Review

DSC09983.jpg

When I moved here 12 years ago, one of the first things I did was start to plan my fruit orchards.  I well knew then that the time to plant a fruit tree is ten years ago, now I might extend that to 15.  I began doing research on apple varieties, which I was very unfamiliar with.  I figured there must be hundreds of them, but the best resource I had available was a thick book called Cornucopia, a source book of edible plants which only listed a few of what I later found out were probably tens of thousands of named varieties.  I also talked to friend and fruit explorer Freddy Menge, who made his best recommendations at the time.  I had helped Mark Dupont of Sandy Bar nursery graft his first batch of fruit trees many years before, and had an outstanding favor owed for fruit trees whenever I finally got my own place.  I called in that favor.  Looking through their catalogue, they said they had a variety called cherry cox that had become a homestead favorite.  I was intrigued.   They had no trees to sell that year, but Mark sent me a scion, one of the first scions I grafted onto frankentree.  I've since sent out lots of scions to other people all over the country.

Cherry Cox has not disappointed.  It really does taste like cherries, among other flavors.  Few descriptions mention that it has a cherry flavor, suggesting even that the name is for the redder color it has.  There is no doubt though that the name is from the flavor, though I don't doubt that it does not always develop and some say they can't detect it at all.  It was also precocious, being one of the first apples to ever fruit on frankentree and one of the most consistent since.  If anything, it sets too much fruit, though it has taken years off as almost any apple will do when poorly managed.  It seems healthy enough so far, but I can't say too much about that as apple diseases are just getting a real foothold here.  It does get scab, and I think it could be called moderately susceptible.  Don't quote me on that, it's just a vague impression.

Cherry Cox is a sport of the very famous Cox's Orange Pippin.  A sport is a bud mutation.  One bud on a tree mutates into something new and thus begins a new variety, no tree sex required.  While many sports are very minor variations on the parent tree, Cherry Cox seems to be considerably different than it's parent.  It tastes different, performs different, allegedly keeps longer, and I'd just about bet that if you planted rows of each side by side there would be some obvious differences.  I was at my friend Tim Bray's orchard and his Cox's Orange Pippins were notably small and the trunks and branches completely covered in lichens, unlike the other trees.  They are known for their poor growability and have no doubt only survived by the virtue of exceptional flavor.  Cox's Orange Pippin is widely used in apple breeding because of it's eating quality, and is probably the apple most commonly said to be the best out of hand eating apple in the world.  Cox's Orange Pippin is indeed one of the few apples I've ever eaten worthy of the classification "best".  Even at it's best, Cherry cox is still not in that category.  It's a good lesson though that Cox's Orange Pippin seems to do poorly under my conditions and cherry cox is consistently good to very good.

Flavor wise, Cherry Cox has a lot going on, like it's parent Cox's Orange Pippin it is complex.  Obvious flavors are cherry, something almost like cherry cough drops, but in a good way, Anise is also present and I've detected some flavor of spice.  There is certainly more going on, other fruit flavors, but I'm not good at picking them out.  If I were to change things about Cherry Cox, I would.  It could use more sugar, which would bring the flavors out more.  Have you ever noticed how much better fruit tastes when you sprinkle sugar on it?  It's not just that it's sweeter, sugar is to fruit what salt is to meat and savory foods.  Cook a fantastic soup with no salt and you will barely taste the potential of it's flavor.  Add salt to it and boom, flavor city.  The cherry flavor develops early in cherry cox, but the sugar develops late.  It is a fairly acidic apple, and maybe even tart before it gets really ripe.  I would not reduce the acidity, I would just balance it with more sugar.  More sugar would also make it a richer flavored apple.  It can be a little thin tasting at times.  More scab resistance wouldn't hurt.  In the Beauty department it lacks nothing. It's is a beautiful apple.  it can grow plenty large under good cultural conditions, though it is not generally a very large apple.  Cherry Cox is a little known and little grown apple.  I doubt it has great potential as a broader market apple, but it has huge potential as a small scale specialty orchard and farmer's market apple.  And then there is the breeding potential.

DSC09983.jpg

Looking toward improvement, I think cherry cox is very promising breeding material.  If nothing else for the cherry flavor, but it also must carry most of the exceptional flavor gene pool of Cox's Orange Pippin.  My own breeding efforts include Cherry Cox crossed with various other apples.  If my efforts don't breed anything exceptional, maybe they will produce something that is worth using in further breeding.  I've crossed it with several red fleshed apples in the hopes that I might be lucky enough to co-mingle the berry flavors of blood apples with C.C.'s complexity and cherry flavor.  I've also crossed it with Sweet Sixteen, which has sometimes a cherry candy component, while also being a good grower and carrying some disease resistance.  I've crossed it with Wickson for higher sugar content and unique flavor and probably others I'm forgetting about.  I think Golden Russet might be a good candidate since it is one of the best apples I've ever tasted, and it also has an extremely high sugar content.  I'd like to see more crosses made along these lines.  I would like to see Cherry Cox crossed with sweet 16 and Sweet 16 also crossed with the generally scab susceptible red fleshed apples, and the offspring of both back crossed in an attempt to keep Sweet Sixteen's scab resistance, while reinforcing the cherry component and hoping for a red fleshed offspring.... or something along those lines.  I don't know anything about breeding for scab resistance, but the information on dominance of traits is available out there somewhere if one cared to look for it.  I've got all of those genetic crosses made, and then some, so fingers crossed.

Cherry Cox crossed with Rubaiyat in 2013 and with Pink Parfait this past spring, both red fleshed apples.

Cherry Cox crossed with Rubaiyat in 2013 and with Pink Parfait this past spring, both red fleshed apples.

For various reasons, I'll have few Cherry Cox scions to offer for grafting, if any.  Being uncommon, it may be hard to find scions, but I think with a little effort they can be found.  The more that people grow it, the more scions will be available.  If you have a scion exchange in your area, that is a good place to look.  Online scion trading and fruit discussions can be found at GrowingFruit.org and The North American Scion Exchange.  Information on grafting can now by found on my Youtube channel and on this website.
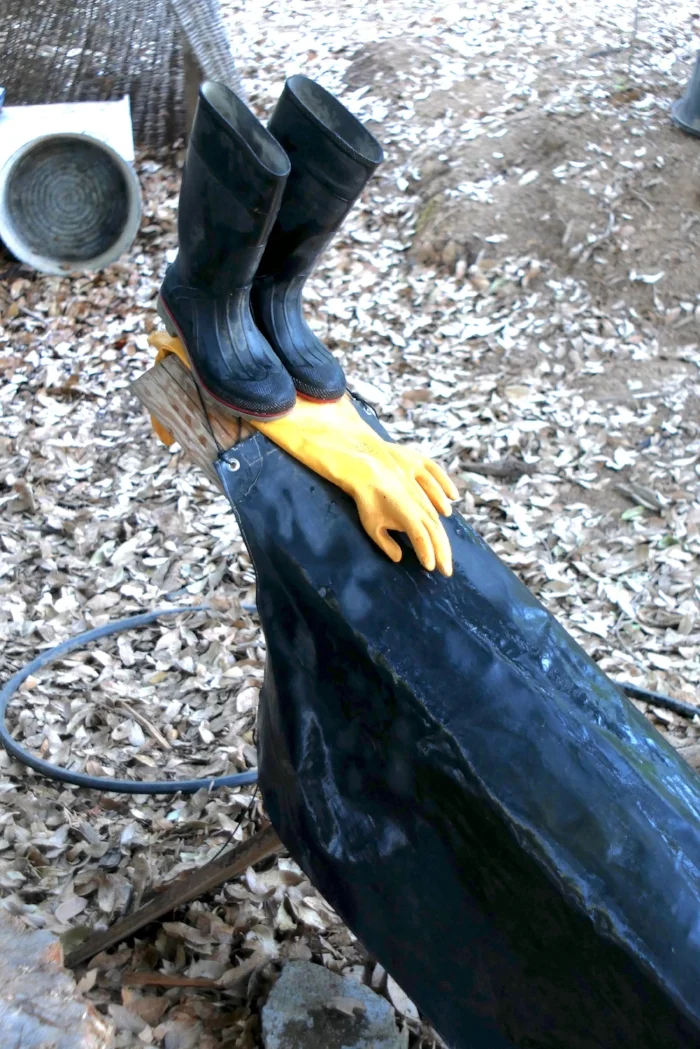
Cherry Cox trees are listed for sale at Raintree Nursery and Maple Valley lists scions and benchgrafts.


Other apples in my cherry cox tasting video that are worth mentioning are:

Egremont Russet:  A nice russet.  Not up to the best russets as it is grown here, but a good performer and very good at it's best.  Stephen Hayes in the UK is a big fan.  Here is his video review.

 Sam Young is an Irish apple that is rare in the US.  My small branch is just starting to fruit, but seems promising. It's somewhat russeted and is also known as Irish Russet.  I'll be keeping an eye on this one.  It is hard and very sweet.  Below are some old descriptions.

Old Sam Young

Old Sam Young

Sam Young:  Fruit small, flattish, about an inch and half from the eye to the stalk, and two inches in its transverse diameter; eye remarkably large, having some of the calyx attached to it; colour yellowish clouded with russet, reddish to the sun; very apt to crack; flesh yellowish, firm, crisp, sweet and well flavoured. In use from the beginning of November to January. Tree flat headed, shoots declining, of a light brown colour ; leaves sub-rotund, acuminate, coarsely serrated, upper surface shining, under slightly pubescent. An abundant bearer, and healthy on all soils.

Transactions of the Horticultural Society of London, 1820
___________________________

Sam Young, aka Irish Russet:

Fruit of a smallish size, somewhat globular, flattened, about one inch and three quarters deep, and two inches and a half in diameter. Eye remarkably wide and open, in a broad depression. Stalk short. Skin bright yellow, with minute brown spots, and a considerable quantity of russet, especially round the stalk; in some specimens red on the sunny side, usually cracking. Flesh inclining to yellow, mixed with green; tender, and melting. Juice plentiful, sweet, with a delicious flavour, scarcely inferior to that of the Golden Pippin.
An Irish dessert apple, of high reputation, ripe in November, and will keep good for two months.
The merits of this very valuable apple were made known in 1818 by Mr. Robertson, of Kilkenny. It is certainly one of the best of our modern apples, and cannot have too general a cultivation.

A Guide to the Orchard and Fruit Garden: Or, An Account of the Most Valuable Fruits Cultivated in Great Britain, 1833


You can support this blog and my projects by bookmarking this link in your web browser, and using it if you shop on Amazon.com.  No cost to you and a big help to me.  http://amzn.to/2yv0FSw

Some Slightly Ranty Advice on Expensive Boutique Axes

My main points in this video.  Expensive axes do not carry super powers and will not be greatly more effective than an inexpensive axe of reasonable quality.  Quality can matter up to a point, but an axe which does not have the best edge retention or strength is often suitable enough.  Beginners should not be seduced into buying expensive axes.  It is better to start with an inexpensive axe and beat it up, break some handles and generally learn one's way around them.  That kind of use and experience can build experience for making a larger purchase as some point.  One might find that after using some inexpensive axes and vintage axes, that they don't really want to buy any, and may be perfectly happy with vintage heads.  A lot of axe purchases are for collecting's sake alone, or maybe retail therapy or over accessorizing.  The problem is that beginners often won't know what is and isn't important and can be easily up-sold to higher cost axes on selling points that are probably not going to matter that much to them if they are even true in the first place.  Expensive axes are worth a lot and will be devalued by the clumsy use they will often see in amateur hands.  Don't learn to drive in an expensive sports car.

Bottom line, get a cheap axe and use it a lot.  Mess it up, play with modifying it, break handles, learn to sharpen, then see if you want to spend money on fancy axes.  Best case scenario, get a cheap or free axe with a handle.  Next best, get a cheap or free used head and make or buy a handle.  Third best, buy a budget line axe, like the council boys axe and hope that you get a good handle and head.

Finishing the Oak Bark Tanned Deer Leather

Cute and practical, just how I like 'em!

Cute and practical, just how I like 'em!

Last winter I started a project oak bark tanning a deer skin to make leather for the axe strop project.  The project follows the collecting and processing of materials to build pocket sized sharpening strops as prizes for people who completed the Axe Cordwood Challenge.  I'm making everything I need for the strops and decided to show the whole tanning process and everything else in a series of videos.  Almost 6 months ago, I laid the prepared skin away to tan in oak bark.  It sat in there about 4 months longer than it needed to, but I took it out and finished it this week, and it looks like it turned out pretty decent.

The leather is perhaps a little light and spongy, "Empty", as they say in the tanning trade.  Emptiness results from the loss of structural proteins in the skin by chemical or bacterial action.  It isn't much of a surprise considering that I over-limed it to start with, and that it sat in a weak vegetable tanning (plant based) solution for 4 months longer than it needed to.  Those are actually the type of things that a tanner might do on purpose to a hide in order to make the finished leather soft and pliable.  That's not what I was planning though.  I would prefer a rather firm and weighty leather for this project, but that is not even the nature of deer to start with.  Deer skin, at least our deer skin here in the Western U.S. has an open, coarse-fibered, low density character that lends itself well to softened leathers.  It would have been better to move it through the process faster with shorter liming time.  But, a process that uses somewhat preservative solutions like lime and tannin, begs for procrastination.  Add that I have to make videos of it all and it's a perfect storm for not getting things done in a timely manner.  It will probably work fine for the project, but I haven't assessed it closely yet.  If it doesn't work out, I have plenty of other skins I've tanned over the years that are suitable and I got to show the process start to finish, with some of the warts and mistakes that any home tanner is likely to experience.

The next steps will be making the wooden paddles, making glue and putting it all together into the finished product.  I only need a small amount of leather for the project.  Seven brave and industrious individuals chopped one cord or more of firewood for the cordwood challenge using axes only and will receive a finished strop and a leather patch when they are made.  The balance of the leather will be stowed away with the rest of my leather cache, to wait for a suitable project.

My Hand Watering Tool of Choice, the Fan Sprayer, and Cheap Hoses Just Got Cheaper

My watering nozzle of choice is the fan sprayer.  Unfortunately it's hard to find a good one these days.  Read more below, or watch the video. 

Also, the hoses I just recommended in another video and blog post, Craftsman 50 foot, 5/8 inch rubber hose, just went down in price further for the next day.  They go off sale TODAY.  Someone commented that Sears is in financial crisis and may go under, so it might be a good time to buy some.  They're like "WE'RE GOING DOWN, QUICK, SELL ALL THE HOSES!"  They are 17.99 with free shipping on orders above 50.00,  or free in store pick up even if they aren't actually on sale in the store.  The 100 foot are about twice that much, so same per foot price.  http://www.sears.com/lawn-garden-watering-hoses-sprinklers-garden-hoses/b-1024024

The package says the hose contains lead and chemicals known to cause cancer as everything must in California.  I did a brief search and found this hose to actually score very well against most tested for toxic compounds including lead, of which none was found.  http://www.ecocenter.org/healthy-stuff/samples/50-ft-craftsman-premium-heavy-duty-rubber-garden-hose

Quite a few people commented on the video with positive reviews of this hose, including people that have used them for over 10 years.

I like fan sprayer nozzles because they deliver a lot of water and deliver it gently if designed well.  The other major reason I like them is that the spray pattern and water delivery can be adjusted by tilting the head side to side.  I can cover a 3 to 4 foot wide swath 8 feet away by holding it horizontally, or concentrate most of that water in a one foot circle at the same distance by simply tilting the head vertically.  In between those extremes, you can adjust the width by adjusting the tilt.  This versatility and the wide horizontal coverage make them especially good for watering wide beds as well as for variable conditions.  nothing else I know of delivers this amount of water in that sort of versatile pattern.  Unfortunately good ones are hard to find and I can't recommend a new one, though I can recommend some old ones.

Hole size is a major design issue with these.  If sprayers with small holes are available new at all, they will be the exception.  Small holes mean finer streams of water, which equals less trauma to seedlings and seedbeds as well as the fragile soil surface.  High volume and gentle delivery are hard to find in one package.  The older fan sprayers seem to have small holes for the most part.  THE ROSS is the brand I've used most and they are not that uncommon to run into.  THE ROSS #10 shown in this video was patented in 1924.  There are at least two models I can recommend, the #10 and #11. Both have similar holes, but different construction.  Examine old ones for leaks at any soldered or folded seams.  The cast metal body of the #11 can corrode through in some cases, so examine them closely as well.

Three good fan sprayers.&nbsp; THE ROSSes #'s 10 and 11 and a no name short brass one that is every bit as functional, if a little less durable.

Three good fan sprayers.  THE ROSSes #'s 10 and 11 and a no name short brass one that is every bit as functional, if a little less durable.


A common design feature in new models is a valve in the handle of the sprayer.  I think that is a mistake.  The valve will fail eventually and can't be replaced.  From my experience with hose shut off valves, it will probably fail rather sooner than later.  Most people will want a hose shut off valve on the end of a hose anyway for switching appliances and such without going back to shut off the valve at the spigot.  I have one on the end of every hose, which makes a valve in the sprayer body not only an unnecessary failure waiting to happen, but it's also an unneeded restriction in the line.
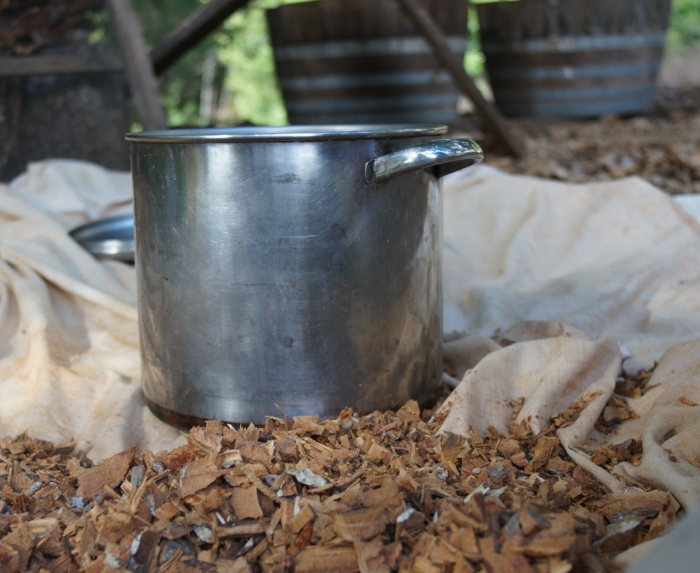
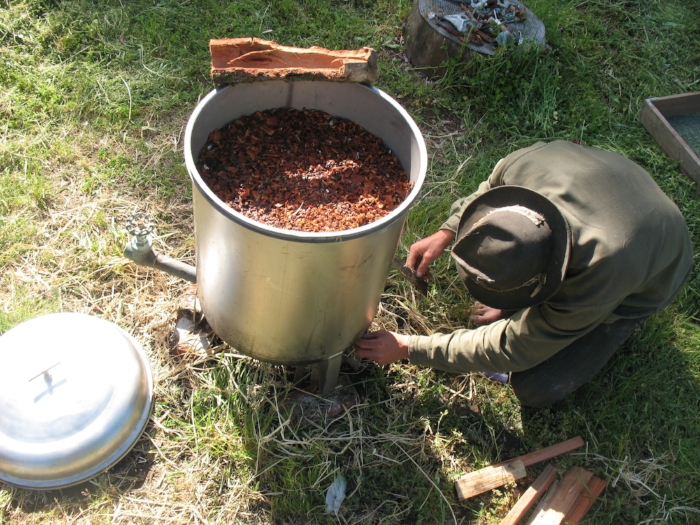
Most hoses should have a shut off valve already.&nbsp; Putting a valve on the sprayer is usually going to be a disadvantage, let a lone redundant.

Most hoses should have a shut off valve already.  Putting a valve on the sprayer is usually going to be a disadvantage, let a lone redundant.

The vintage ones can be found on ebay or etsy.  Etsy seems to have quite a few, but I had to search "garden sprinkler" and sort through a bunch of results to find them.  They are not super cheap, but given what is usually available on the market now, it might be worth spending 10.00 to 15.00 on a vintage one.  I've found quite a few of them over the years at flea markets and such, but most of mine came from one single estate sale where I found a pile of them.  Lucky me :)  I have excellent thrift store/yardsale/flea market juju though.  Just ask my mom, or my pile of all clad cookware.

My second hand juju is strong.&nbsp; Pray to the flea market gods all you want, some of us are just born with it.

My second hand juju is strong.  Pray to the flea market gods all you want, some of us are just born with it.