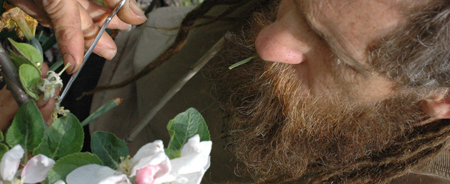
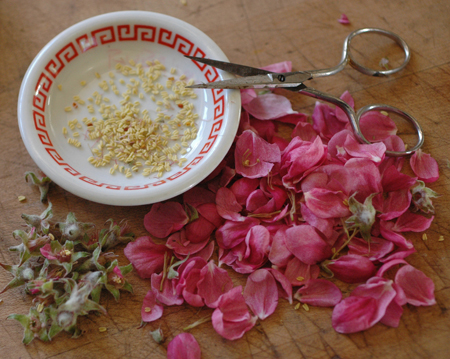
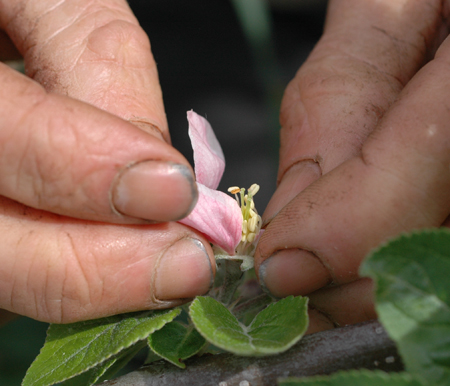
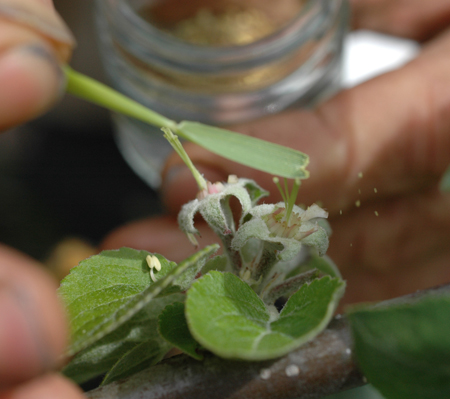
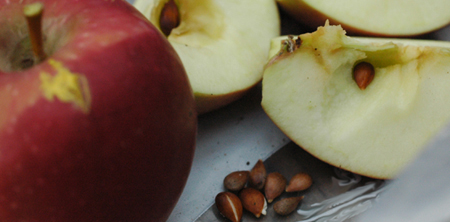
 In part one I went over some reasons why I think home breeders have a decent chance of producing some good apples. Part two covered pollinating flowers to make intentional crosses of two different parent apples. In this section, I'll discuss growing the seeds into seedlings, and options for growing those out until they fruit. COLLECTING AND STORING SEEDS: I like to collect the seed when the apple is ripe for eating, but they seem to be mature before that. I’ve stored the seeds in little plastic baggies in the refrigerator, but they sometimes mold. Storing the seeds in slightly damp, but not wet, sand would probably be better, or you can just plant them... PLANTING SEEDS: I’ve had pretty good luck with germination when planting in February after storage in the refrigerator. At least some apples are supposed to require stratification, which means that they need to undergo so many hours of low temperatures before they will sprout. I’ve had fresh seeds sprout without chilling, so I think fresh seeds just sprout easier. My approach in the next years will probably be to store early seeds in the fridge in damp sand, and then plant them with the latest ripening seeds in February. If planted outdoors, the seeds should chill enough as long as your climate is not subtropical. If it is subtropical, then you should select seed parents carefully as many apples do not do well in warm climates with no chill. The Apples and Oranges blog is a good resource for growing apples in low chill areas. It is possible to dry the seeds before sprouting them, but I don't see any reason to do so when they can be kept in refrigeration, or even in the ground over winter. Plant the seeds in pots or flats, or outdoors in the ground, at about 1/2 inch deep. Don’t allow them to dry out, but don’t over water either! Over watering can lead to rotten seeds and fungal attacks. One strategy I sometimes use is to put a growing mix in the pot or flat, followed by 3/8 inch of sand, followed seeds and finally covering the seeds with 1/2 inch of sand. This method surrounds the seeds with clean aerated sand to sprout in, which minimizes bacterial and fungal attacks, while still providing them with nutritious flat mix just below. My germination rate has been pretty mediocre, but since it doesn't take long to produce a couple hundred seeds, maybe that's Ok.
 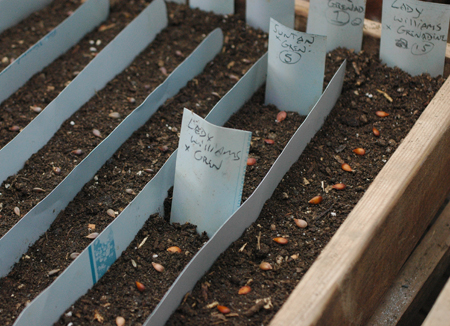 After they grow a few leaves, you can move the seedlings outdoors into the soil, or into bigger pots.


GROWING OUT: Markus Kobelt at Lubera nursery gave me some tips on apple breeding. He says that growing the seedlings as tall as possible the first year shortens the time to fruiting. Seedlings are in what is called a juvenile stage. Growing the seedlings fast and tall pushes them out of the juvenile stage and into sexual maturity more quickly. My first batch of seedlings were left in flats for too long, and then planted in an out-of-the-way bed where they received poor care, resulting in some pretty stunted plants. The seeds that I planted straight into the ground in a garden bed did quite a bit better. Wherever you plant them, take good care of them with regular feeding and water. Under ideal conditions you might end up with 4 to 5 foot stems. Check out Markus Kobelt's cool video series on all stages of apple breeding! It is probably best to cull some of the seedlings, but I'm not entirely sure what to look for in culling, so I'm not culling many of mine. Nigel Deacon, in breeding for red flesh, selects for red pigmentation in the leaves as well as for vigour. I'd like to talk to a breeding expert about culling. At this point, I'm kind of cull shy. TO GRAFT OR NOT TO GRAFT?: Is that the question? I think a more relevant question is where to graft, because it is better to graft the seedling stems onto something else. Putting the scions onto a dwarfing rootstock that encourages early fruiting, or onto a mature fruiting age tree will give you fruit sooner than growing the seedlings out until they begin to bear fruit, in some cases much sooner. If you don’t know how to graft, or don’t have a mature tree to graft on to, you might want to just plant the seedlings and wait. However, if you don’t know how to graft, now is a great time to learn! If you come up with the best apple seedling ever, someone has to propagate it by grafting, so it might as well be you. There are plenty of apple grafting resources on the internet and I’ll probably add my own before too long.
GRAFTING OPTIONS: For the average home breeder, grafting onto a mature bearing tree may be the best option. It requires a lot less room than growing each seedling on it’s own rootstock, way less care, and it’s cheap. Rootstocks in small quantities will usually cost you $2.50 and up. Larger quantities, usually 50 or more can get down into the $1.25 and up range, especially if you buy B grade stocks which have crooked stems. Still, even at $1.25 each it adds up pretty fast, especially after shipping and handling. Then you need room for all those stocks. I’m planning to plant mine at 12 inches apart in rows about 6 feet apart. All that sounds daunting, but there is one good reason to grow the plants on their own stocks and that is disease. Apples are host to many diseases, but the concern here is with virus. Seeds don't carry virus from the parent, so the seedlings are virus free. Virus are transmitted to a scion that is grafted to an infected tree though. Most of us don’t have trees that we know are virus free, so keeping your seedlings fresh and unburdened by virus is somewhat compelling. The other side of the coin is that most apple varieties are minimally affected by the common Apple Mosaic Virus and there are millions upon millions of infected trees living and bearing fruit. It is quite possible also that your mature apple tree is not infected anyway. It is possible to rid a variety of virus by a process of heating, but that process is probably not accessible to the homescale grower (though I'm curious, maybe it's not that hard!). If having to graft onto individual rootstocks will keep you from experimenting, I'd say don’t let it. Go ahead and graft them onto whatever you have. ROOTSTOCKS: Very dwarfing rootstocks that keep trees under 10 feet will also induce fruiting early in the life of the tree. I’ve mostly used bud-9, and this year some Geneva-11. Geneva-11 has weak roots, so I’m not sure I like it yet, but the Bud-9 seems nice enough and it’s cheaper. M-9 is probably also a fine choice, though Bud-9 is generally thought to be an improvement on M-9. Charts and descriptions of the various apple roostocks can be found online. Just remember that you want one that induces early fruiting and makes for a small tree. Trees can be planted close together in rows, I don’t think there is a reason to plant them further than 18 inches apart, and I’m probably going to use 12 inches to save space. A trellis is necessary to support the trees since the dwarfing rootstocks lack adequate roots to anchor the trees in high winds. Markus Kobelt says to let them grow without pruning to induce early fruiting. I guess I’m going to follow his advice. Don’t think of these dwarf rows as permanent. They are more like shrubs for testing your new varieties. If you get something good, it can be grafted and reproduced. The original dwarf test plant is not important. I have however saved the original seedlings which are planted about 6 inches apart in rows 12 inches apart... man is that going to be a mess in a few years! I just wanted to save them at least temporarily in case of graft failures, gophers, accidents, etc... Ideally I'd like to keep them all with enough space for them to grow and fruit later on, but that is not practical considering the resources I'm working with. I've gotten bulk rootstocks from both Copenhaven and Willamette Nursery, and have been happy with both companies. Again, ask about B grade stocks to save some money.
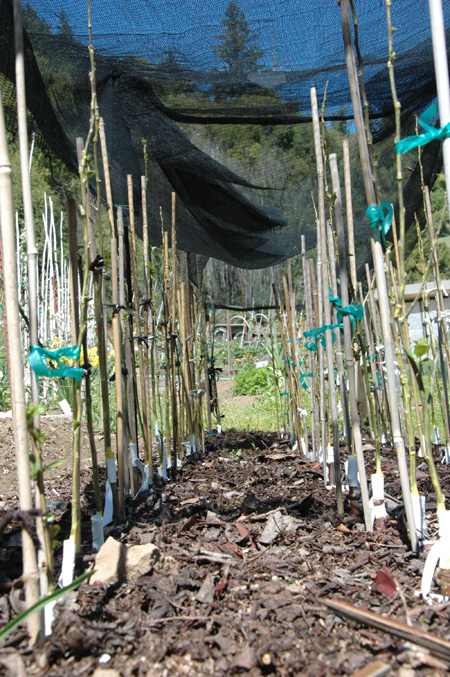
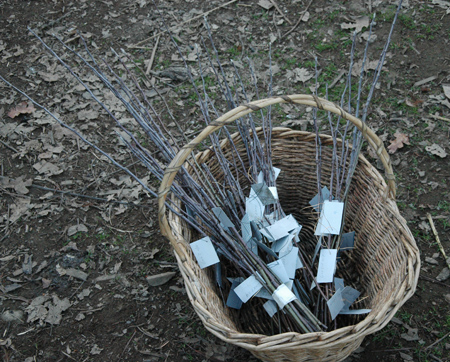
GRAFTING ONTO LARGER TREES: Most grafting onto larger trees is done by a method called top working, wherein large branches are cut off, the cut is split open, and a couple of scions are wedged into the split. That is a fast way to change a tree to another variety, but it is also crude and likely to introduce rot and disease into the heart of the branch. Furthermore, it allows for very few varieties to be grafted onto the tree. In Frame working by contrast, you work onto smaller wood, usually under an inch. I avoid working into larger wood whenever possible. If you use frame working, you are keeping the existing frame work of the tree, which has some advantages. I hope to blog about frame working sometime, and I’ll leave most of that discussion till then but, in the meantime, if you are working onto a larger tree, use scions with 8 to 15 buds. Use cleft grafts if the branch is larger than the scion, and whip and tongue grafts if they are the same and you have a grafting skill level to do so. I like to paint the longer scions completely with a thin coat of grafting wax to seal and prevent drying. Other people use parafilm as a wrap to prevent desiccation of the scion. See the Frankentree post for grafting photos. On a large tree you can fit upwards of 200 different grafts, although if we follow Markus Kobelt advice to let the scion grow, that could get pretty messy, so leave plenty of room for each variety. Albert Etter used frameworking to house the 500 or so varieties he collected for testing, as well as to fruit out and test the new varieties he was breeding. About 3 years ago I grafted 4 different open pollinated Wickson apple seedling scions onto various trees of mine. They have grown great, but have yet to fruit out at all. This season there is still no sign of blossoms at all on any of them. So, this is a proposition that takes some time. My new seedlings have now been grafted onto dwarfing Bud-9 rootstocks and are beginning to grow in a nursery bed for planting out into a longer term growing site next winter/spring. I grafted them rather long as that is my default any more, and it seems to work well as long as the graft is sealed. Markus Kobelt says to graft the top of the seedling as it is less juvenile than the bottom. In most cases I grafted most of the seedling stem, but then my seedlings were mostly well under 3 feet. I also put 4 open pollinated red fleshed seedlings onto some larger trees to grow out for comparison. I know I said not to use open pollinated seeds, but I just couldn't throw the cute little things in the ditch! Who knows what's hiding in those genes. The grafted trees will be planted in rows at least 5 feet apart, probably 6' feet on 12" to 18" inch centers and allowed to grow without pruning. Allowing them to grow without pruning is supposed to bring them out of the juvenile stage, so that's what I'm gonna do. A trellis is necessary for support as these rootstocks are weak growers with small roots. I hope for some fruit to examine and taste in about 3 to 5 years, but evaluating any that are decent enough to continue testing will be a much more lengthly proposition. By that time I will have considerable investment in these plants, but the potential rewards are very exciting for an applehead like me. Applehead, that may be the title of my next post... I'm also gearing up to make more crosses this season. The list of interesting varieties is long but most, if not all, will be red flesh crosses. I haven't made a complete count lately, but I have over 200 varieties on trial that I can use as parents. I'm just hoping I can curb my enthusiasm enough to keep my time investment low, since that is part of the plan. A lot of people growing a few seedlings promotes diversity and keeps power in the hands of the people who eat the fruit. a few people growing a lot of apples has it's advantages to be sure, but to think that we will always be well served by such a system is naive because power is the primary currency of life, and consolidation opens the door for monopolization. Breeding new apple varieties may not be the most important activity in reclaiming control of our food supply, but if it is a subject of interest to a person, it's one pretty neat way to keep our food closer to home and to live dynamically with a source of our sustenance. If I can come up with one apple that is really worthy of propagation, something that will make people happy, I'll be stoked. That would probably be the most useful thing the Turkeysong project ever produces. But the really great part that will make it all worth it, is that I get to name that apple whatever I want! I've already spent way too much time dreaming up and listing prospective names. So many names, so few apples... If anyone does come up with a good seedling apple, I just found this website which aims to promote seedling apples! How cool is that... Seedlingapples on wordpress