
 By Steven Edholm
Making hide glue, is well within the reach of anyone with access to the necessary materials, and is a great addition to your skill set. In part one I discussed hide glue in general, what it is, and some of it's strengths and weaknesses. This article is a combination of personal experience and research into technical aspects of glue making. Like most people, I started my glue making career boiling down hide shavings and stray hock skins, without any further preparation. Glue strong enough for many uses can be made with little care and marginal materials, but over time and with the input of glue making professionals of the 19th and early 20th century, I found that a little care goes a long way toward making stronger, prettier and better smelling, glue Here are the most important basic concepts and steps in making very high quality hide glue.
By Steven Edholm
Making hide glue, is well within the reach of anyone with access to the necessary materials, and is a great addition to your skill set. In part one I discussed hide glue in general, what it is, and some of it's strengths and weaknesses. This article is a combination of personal experience and research into technical aspects of glue making. Like most people, I started my glue making career boiling down hide shavings and stray hock skins, without any further preparation. Glue strong enough for many uses can be made with little care and marginal materials, but over time and with the input of glue making professionals of the 19th and early 20th century, I found that a little care goes a long way toward making stronger, prettier and better smelling, glue Here are the most important basic concepts and steps in making very high quality hide glue.
Common materials for glue making are: Skin (including fish skins), fish air bladders, sinew scraps, and antler. (Bone can be used to make a glue, but it is harder to make and inferior to glue from the sources we'll be talking about.) All share in common a large amount of a protein known as collagen, which is the basis of both leather and glue. Hide glue is also sometimes known as collagen glue.
*Skin is easily accessible and easy to work with unless it contains a lot of fat. It is generally best for the home producer to avoid very fatty skins such as pig, bear and raccoon. The legs, and other tag ends trimmed from skins before tanning, are a good source of glue stock and were a staple material for traditional hide glue makers. Fish skins can also be used, but I don’t have any personal experience using them.
*Fish air bladders are supposed to make excellent glue, but they are not very accessible to most of us.
*Sinew makes excellent glue. Be sure to collect sinew that is free of meat and fat, scraping it clean as necessary. The sheaths that surround the tendons in the lower legs of browsers and grazers also make excellent glue.
*Antler, from elk, moose, caribou, deer, etc... contains a good deal of collagen. The collagen can be difficult to extract, but reducing the size of the antler by grinding or slicing helps. It is important to note that horn proper, from cows, sheep and goats, is entirely different. Horn is an outgrowth similar to hair, and does not contain collagen. Hooves are similar to horn and also do not contain any collagen (see part one for more discussion on that point.)
Previously frozen materials should never be used.
Dried material is preferred over fresh material.
Decayed materials should be avoided.
Ideal steps in Collagen glue making:
*Clean the material: The very strongest glues are made with un-decayed and thoroughly cleaned materials. Fats, muscles, dirt and other non-collagen materials are removed as much as possible before the material is boiled. This can be accomplished by liming, or soaking in wood ashes, followed by thorough, repeated scraping and washing to remove dissolved solids and residual lime. However, very strong glue can be made by boiling fairly clean materials like sinew and even skin from lean animals without undergoing so thorough a treatment. At the very least though, skin should be very thoroughly fleshed and washed.

*Dry the material at some point before cooking: All glue stock should be dried as some point before boiling. If it has been limed, the stock should be dried after liming and before boiling to change the residual caustic lime (calcium hydroxide) into inert calcium carbonate (limestone).
*Simmer the material in clean soft water: If you have very hard water, buy some distilled water. Just cover the stock with water. Avoid scorching the glue stock in the pan. Traditionally, a layer of straw was often used to line the boiling vessel to keep the glue stock away from the metal, so that it would not stick and burn.

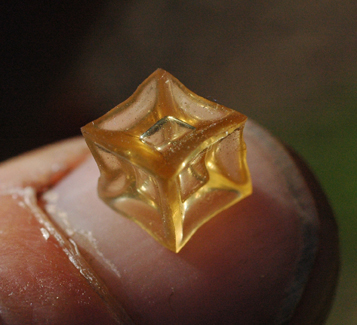
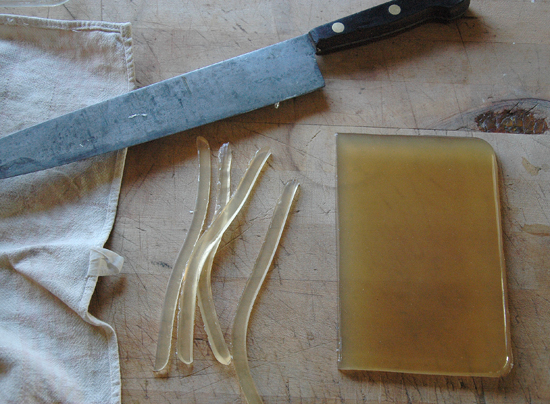
*Cool the resulting gelatin solution: When the glue solution seems thick, cool a small amount in an egg shell. When ready, it should set upon cooling into a firm, easily handled piece. Pour the solution into a clean flat pan of some kind, to a thickness of 3/8 inch or less. When cool, it should be easily handled when picked up with dry hands. If not firm enough to handle, it will crack apart easily and maybe stick to the hands. If too wet, evaporate it further in the sun or in a low oven until it will jell more firmly when cooled. If not fairly easy to handle, it will stick to the drying surface.

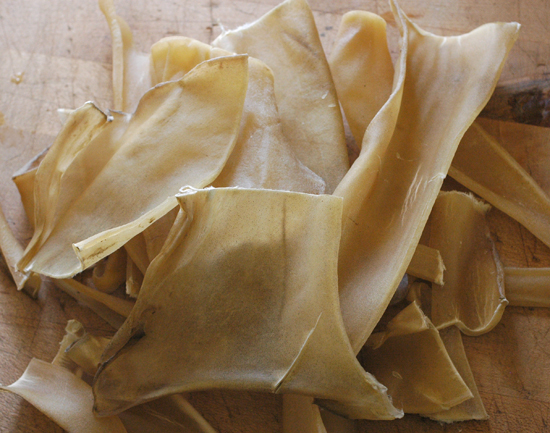
*Cut and dry the gelatin before use: When the glue is firm, but still cutable, you can dice it into small cubes before drying further. Large pieces of glue are difficult to break apart for soaking.If firm enough, the gelatin can be dried on a clean cloth. The glue must be dried in a cool area with good air circulation. The un-dried gelatin will turn back into liquid if it gets too warm. The drier the gelatin becomes, the warmer it can be without melting. Glue has traditionally been dried on nets. Glue dried during thunderstorms can be damaged by ozone and may melt.


Now you have glue. Skipping some of these steps such as drying the material before boiling, cleaning the glue stock thoroughly, or drying the gelatin, will result in a usable and sometimes even very strong glue. However, all of these steps combined and executed properly will assure that you end up with very a very high quality product. Glue is not the best place for sloppiness and procrastination. Believe me. Here at Paleotechnics, we’ve already made all these mistakes for you!
To drive home some of these points, here is what not to do!
*Don’t freeze the glue materials before boiling.
*Don’t use decayed materials.
*Don’t use greasy, fleshy or dirty materials.
*Don’t burn the glue material in the pot.
*Don’t let the boiled solution sit around and decay at all before drying it out.
*Don’t make, use or dry glue during lightning/thunder storms (ozone supposedly affects glue quality causing it to lose it’s jelling power.)


