In the comments on the biochar experiment post, Lars mentioned Japanese cone kilns. I checked them out on Kelpie’s cool blog, Green Your Head and they do indeed look way cool. Although slapping a crude one together out of sheet metal would probably be pretty easy, Lars had just simply dug a pit in the same shape. I tried Lar's pit idea the other day, burned some charcoal in it, and learned a few things that I want to pass on. This is slightly premature compared to most of my post, which are typically backed by a bit more experience and contemplation, but I'd like to get this idea out there more. There is very little posted about it anywhere on the net, but it seems very promising, accessible and meets a lot of criteria for a good charcoal production system with very little effort.
Part one. Sage, Agave and fishes (which have little to do with charcoal production.) If you are interested in burning charcoal and have a short attention span from internet overstimulation, skip ahead!
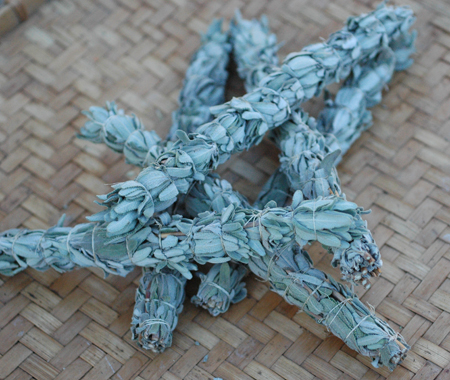
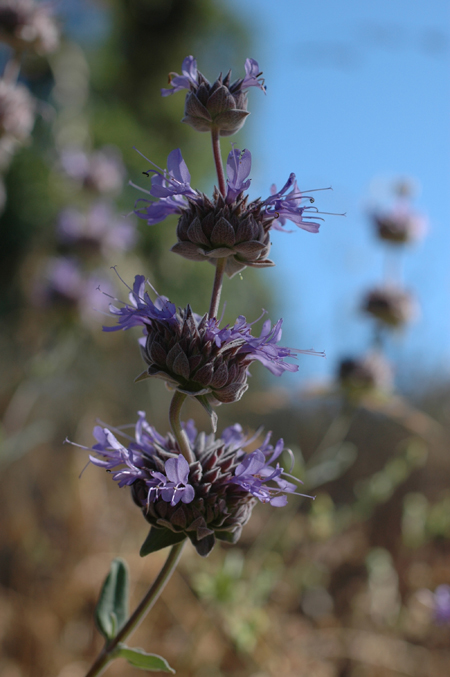
When I was in my 20’s I spent a lot of time backpacking out of Big Sur, on the coast of Central California. One of the common plants is Black Sage, White Sage’s little known, and much more potent sibling. I've always loved Black Sage and much prefer burning it to the white. When I moved here, I got some cuttings from someone and rooted them so I could have it around me. The scent still evokes a lot of fond memories from those good times out in the mountains. At the time, I lived in the Santa Cruz mountains and used to pick Black Sage and tie it into smudges. I now have quite a few plants growing, and tying Black Sage smudge sticks is one of many crafty cottage industry occupations that help bring in a little income around here. Most sage bundles are tied with cotton thread, wrapped in a spiral. That was way too domesticated for me back then, so I tied mine off with another plant I harvested in the Big Sur area, Yucca.
When I’d go out backpacking, I’d always harvest some yucca leaves on the way in to camp, pound them on a log by the river, and wash them clean of pulp to extract the long fibers. I’d twist those fibers into a cord, attach that cord to a stick, add a couple feet of fishing line on the end. The hook was nearly always a crude fishing fly I'd make by wrapping on whatever bits of feathers or fur I spotted on the hike in. My fishing kit fit in a tiny pouch, and that’s all I had to carry. My crude makeshift fishing rig worked awesome! Wow did those fish bite. Anything that remotely resembled a bug in the water got hit. That is elegance. extremely effective, low input, low cost, less junk to carry, connects me with the environment, builds skills, very little landfill material. Anyhoo, I always brought out some extra fiber or yucca leaves with me when I eventually made my way back to civilization, and ended up using yucca to tie up my sage bundles. The practice stuck.
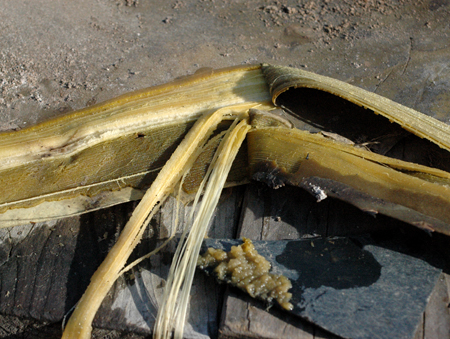
There are several ways to process yucca. You can pound it fresh with a wood mallet on a smooth log and repeatedly wash and scrape it. (the pulp is soapy, so you can wash your clothes or dishes while you’re at it.) The pulp is somewhat tenacious though, so it’s easier to clean off if it is softened by either cooking it, or rotting in water in a process known as retting. Retting in water is pretty easy, but it takes a long time, and boy does it stink! The fibers don’t absorb the smell at all, but hands sure do. If left soaking too long, the fibers are also attacked by bacteria and weakened.
Up around these parts, there isn’t any yucca, but my neighbor Rob grows a lot of Agave americana, a large plant related to yucca which is also used to make tequilla. Agave americana is not the best agave species for fiber, but it is decent and good enough for tying sage bundles. I recently harvested some leaves over at Robs garden, an impressive meandering wild affair built up on a bare skim of soil over a serpentine rock outcrop and consisting only of the toughest most drought resistant plants. I wanted to bake the leaves because the last batch I tried to ret didn’t work out that great, and it’s winter so it could take months to ret a leaf that is 2 to 3 inches thick in some sections.

Ok, on to the charcoal kiln: I couldn’t just build a cone kiln. As soon as I saw the shape of the cone, I knew I’d be spending a lot of time cutting wood to fit it. That is a problem with many charcoal making apparatus. Fuel sometimes has to be reduced to a certain size. I figured that the principal of the Japanese cone kiln ought to work just as well (and actually better for my purposes) if the shape were longer. With a longer kiln pit, much less wood cutting would be entailed. I don’t mind doing work to get what I want. I’m not workophobic. I like cutting wood. But I like getting shit done too, and cutting longer wood means more wood cut at the end of the day, which equals more charcoal. I also like efficiency.
So I put agave leaves and charcoal pit together. I could dig a long pit kiln, burn the long wood and use the residual heat to roast long agave leaves to soften them up for processing out the fiber.
Ideally the kiln would have been even longer for even less wood cutting (UPDATE: which I've now done and it was great for long unprocessed limbs with twigs and all), but I didn’t have a ton of wood set aside to fill it this time around, and didn’t need a huge pit to cook the leaves in. I think the opening was probably about 6 feet long and sloped down from there on all four sides. I didn’t screw around trying to make it nice, even though I had already generated ideas about how to best build and run such a pit. This run was all about observing what did happened, rather than second guessing exactly what was going to happen. I knew I’d learn something by just digging a hole and going for it. I lined the bottom of the pit with bricks to retain heat for roasting the agave. It is sometimes possible to use just the heat stored in soil to cook things in the ground, but I knew it wouldn’t be adequate in this case, especially since the ground was already wet. I had doubts that one layer of bricks would even provide enough mass for heat storage, but I just left it at that. I think more mass would have been better, but it worked okay.
The fire was built and maintained until the pit was fairly full. The coals were then raked out (most of them anyway) and a few scrappy sacrificial leaves laid on the bottom against the hot bricks and coals, followed by the remaining leaves. About a gallon of water was thrown on for steam, and the dirt was piled back on as quickly as possible. No really, as quickly as possible, like all out, fast as you can. (No pictures of putting the pit together, since I was rushing in order to retain precious heat.) The charcoal was quenched with water on the ground. A small brush fire was built on top of the pit for about 8 hours to keep heat in.
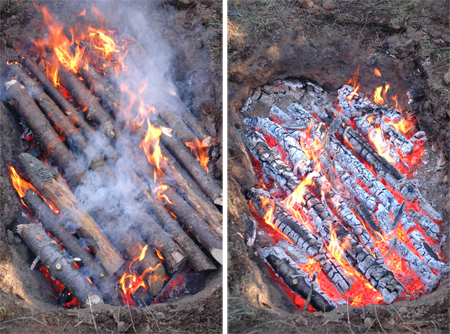

Here is some of what I learned.
The cone kiln concept works. The principal is so simple that I’m surprised I hadn’t heard of it before and almost surprised that I didn’t think of it myself. You start with a fire and establish a layer of coals covering the bottom. When each layer is almost burned to coals, another layer is added. Each new layer effectively uses up incoming oxygen before it can get to the coals below, thus putting them out, or causing them to barely burn. You can see this effect in a brush burn pile. Generally there is a good pile of unburned charcoal in a burn pile when the flames subside, and it takes up to a day or more to finish burning out. That is with piles that are managed for less smoke by piling stuff on one layer at a time as the fire burns, which is how I usually do it. I don't like making piles way ahead and burning them, because lizards, frogs, salamanders and snakes all move in and get burned up. A brush pile is a wildlife magnet. Kelpie builds brush piles and burns them from the top down to reduce smoke and produce char. The cone pit burns with very little smoke. Low smoke is a huge departure from most primitive charcoal making methods, and one of my criteria for a good system of char production. You could probably do this in many backyards without raising any eyebrows or calls to the fire department.
I think that using wood of similar size for each layer is important. Each new addition should burn down fairly evenly, that is with all pieces burning at a similar rate. If half the wood is one inch diameter and the rest is 3 inch, the one inch material is going to be burned to ash by the time the 3 inch stuff is burned down enough to add a new layer of fuel. This principal probably would also apply to differences in wood species and condition, i.e. oak mixed with pine, or green mixed with seasoned.
The layer of wood added should be tightly spaced and/or thick enough to adequately smother the fire below. Think of each layer of wood as an intercepting shield. the shield should adequately cover and protect the layer below from infiltrating air. I chopped the pieces to fit as necessary, and packed them pretty close together. I left just enough room between pieces to let a little air in between them to keep it all burning cleanly. More experimentation should be revealing as to what can be gotten away with. At some point too much attention to detail is going to cost more than it gains.
Square corners are an issue. I should have seen this one coming. Square corners create cold zones. Visualize fire in a rounded corner, v.s. in a square corner. The rounded corner creates no cold zone and heat is radiated back into the fire in a parabolic effect, like a satellite dish, or solar dish cooker. I had trouble filling the squared corners with wood in order to keep a hot fire in them. The corners also ironically tended to burn out underneath once they did get going due to too much oxygen infiltration. In short, they seemed hard to manage. Not horrible or anything, but they seemed unpreferable. I’m not sure one couldn’t effectively manage a pit with square corners, but it seems more finicky at the least.
The shallowly sloped walls are there for a reason. I mean duh, we’re dealing with Japanese technology here, elegant and effective. I think the shallowly sloped walls are there because they lead to more effective covering of the previous layer. Wood on top extends out past the previous layer shielding it from oxygen more effectively. I could tell I was having losses on one side that was dug with a pretty steep wall, making it more difficult to cover the lower layers adequately. That's what it seemed like anyway. Maybe some other reason will become apparent with more experience, but I think that is the reason.
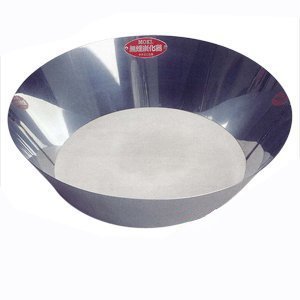
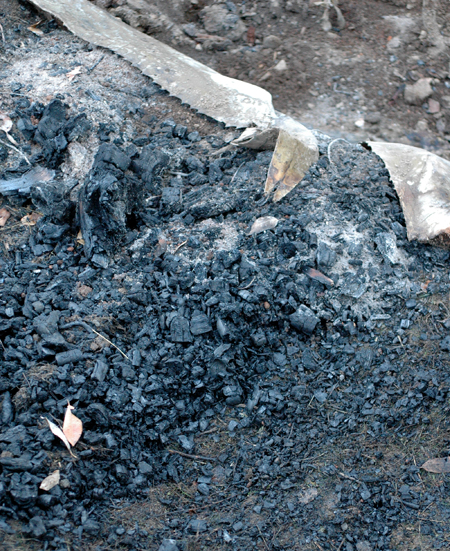
Dirt is messy. I dug this pit, barely cleaned it out, raked the charcoal out onto the ground and dumped water on it. It was messy. Lots of rocks and dirt in the charcoal, and grass and leaves everywhere. It would have been much easier to get the charcoal out of the pit if the sides were smooth and clean. And, it wouldn’t hurt to have a clean area to rake coals out onto. Dirt and rocks can be washed out by throwing all the charcoal in a tub of water and swirling it around for a second. All the rocks and nails or whatever will fall to the bottom, and the charcoal is scooped out with a colander, but it’s a messy hassle.
I plan to test all of these observations and assumptions in the future. For now, I feel like I know where to go next. If you want to experiment with the cone kiln principal, here are some bullet points.
*Use shallowly sloping sides. Just like the free standing metal kiln in the picture above.
*If you dig a long pit, make rounded corners. More like a diminishing oval than a diminishing rectangle.
*Dirt can be dealt with and may not even be a significant hassle in some contexts, but if the kiln is to be used many times (as for biochar production) paving the sides with brick or pasting it over with a clay sand mix might be in order. Adding that mass would also make the pit into an effective oven as well. With the right sized pit and enough mass, you could cook large amounts of food, a whole animal, agave leaves, or whatever. It’s nice to be able to use all that residual heat for something, even if it's just to set a pot of beans in there overnight.
The metal cone kilns are way cool and have the obvious advantage of portability. But they are also expensive, if you can even find one to buy outside of Japan. You can probably have one fabricated out of stainless steel at a metal shop. You could also probably whip a decent one up out of sheet metal with a pop riveter and a pair of metal shears, which I hope to get around to (caution, don't use galvanized metal. Zinc is toxic when burned.) It doesn’t have to look good, though the seams might need to be reasonably tight to prevent air infliltration. The pit is very attractive as an idea. Anyone can dig a pit, and many could effectively line it with stone or masonry. A pit is going to be cheap or free, and you can use the residual heat to do other stuff. One idea I had was to build an above ground pit. Here I can only burn in the rainy season, so a lined “pit” built in a raised mound of well draining material like gravel or gravelly soil, would be ready to use all year, even when the ground is soaked.
My yield of charcoal to fuel burned seemed decent, and there were almost no unburned pieces remaining. I think there may be room for improvement in yield with better management or feedstock, but I'm happy enough with what I got out of it. I want to go other places with this concept eventually, with as much function stacking as possible. For instance, burnt clay is also a great soil amendment and could be produced by lining the pit with clay and chipping it off to add a new layer each time the pit is burned. Maybe a few shells could be added to make some agricultural lime while we’re at it. Wish I'd thought of that this last time around.
Many char producing systems will only take one size/shape of wood. In the cone system, it seems like each layer should be composed of pieces of similar thickness, but otherwise, there is a lot of leeway in fuel size and shape. Some methods also use up extra fuel in order to burn the charcoal. Not using extra wood to generate adequate heat, and being relatively efficient, are other good design parameters that the cone kiln, in spite of it's simplicity, seems to do pretty well with. In producing char, it is probably going to be best to have a variety of options here for the different types of feed stock that might be produced on 40 acres of varied species, combined with pallet and scrap wood, wood chips I can scrounge up, etc. For now, the cone kiln concept seems well worth pursuing further, and a great addition to the stable. I'm actually pretty excited about it, because it possesses a lot of good points, combined with simplicity/accessibility. I’ll leave you with some agave processing pictures.
(edit: Since writing this, I trailed some links back to find Josiah Hunt is doing something similar in Hawaii. His burning style is different, but pretty much the same concept. Check it out. https://groups.google.com/forum/#!topic/biochar-hawaii/ohoqDcuHMiQ )