(The comments in this article have been slightly updated and the title changed since first publishing. The original title was: Some 19th Century References on Biochar Use in Europe and America, which was just sort of lame.)
Biochar, the promising expedient of adding charcoal as a soil amendment, is often represented as a recent discovery of a very ancient technique originating in South America. But, the research I've been doing lately shows that its use probably has more of a history than we may think and may have been gaining momentum among European and American horticulturalists in the 19th century. I will present all of that research here after a short introduction.
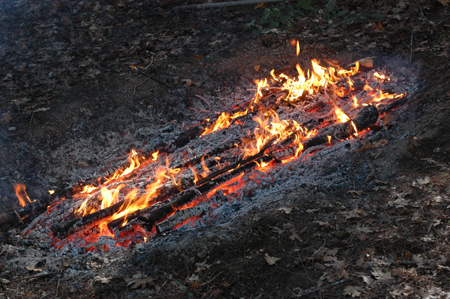
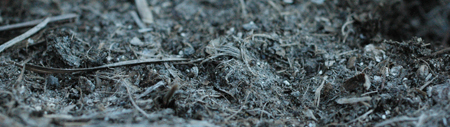
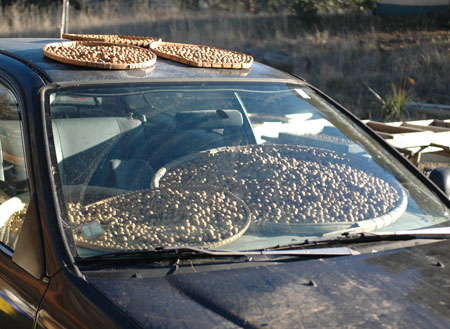
As a keen experimenter, super geek and infoholic interested in what are now mostly considered archaic arts, I find myself frequenting online archives of old books to find knowledge on various subjects. The most searchable and useful of these that I know of is the arm of our big brother known as Googlebooks. This is an astounding tool for the type of research I do! Wow! I have collected over the last 2 and a half decades any interesting books I can find on various archaic subjects such as glue making, argiculture, electricity, casein, animal fats, tanning etc... Those few books have been hard won by perusing used book stores, flea markets, junk shops and yard sales, but in the end often amount to little in the way of information when I go to consult them on this or that subject. Sometime a couple of years ago I ran across a reference to something called biochar. I had always wondered if charcoal might be either useful or detrimental when added to soil, so I looked into it a little. I found a collection of enthusiastic experimenters making claims about the greatness of adding specially burned charcoal to the soil. I was intrigued by some of the evidence, but it was all good news, which generally raises red flags for me and I was hesitant to jump in with both feet preferring to wait a bit for more research and more information, both old and new, to become available. The information available on the net has exploded since then. In the meantime, I’ve instructed everyone in the house to pick the charcoal out of the fire in the morning before relighting it and have also salvaged charcoal from campfires and brush burn piles and we have accumulated enough to start experimenting. Researching some other subject last year, I ran across a 19th century reference to putting charcoal in potting soil. Having recently discovered that I could search a gigantic array of books by century, I did a short bit of poking around on the subject of using charcoal as a fertilizer (or fertiliser as the archaic spelling goes) and came up with quite a few interesting looking references. I determined to go back and collect some of them systematically and have now finally done so. I used the search “charcoal fertilizer” and spent many hours systematically sifting through 35 pages of results collecting snippets with references and URLs. Presented below is sort of a reader’s digest version of what I thought were interesting sections. I cut out a huge amount of material and anyone more interested might consult the Long PDF version and possibly also follow the URLs to see if anything else of interest is missing, or to view the broader context of the publication or discussion. Also note that spelling is somewhat dicey. I did a quick correction, but the text recognition software often makes mistakes. If you plan to quote this material, I highly recommend that you consult the original references rather than relying on my selection of material and spelling correction. Having read this material, I’m ready to jump into char with both feet now and hoping to get started post haste. What interests me the most I suppose was the enthusiasm of people with first hand accounts. I feel and hear the same enthusiasm and indeed the same claims from biochar proponents now, only many of these older accounts were borne out of greater personal experience by farmers fit to judge the matter and sometimes over a longer period of time. Another thing that interests me in the material is the repeated claim that everybody was privy to the fact that charcoal has a positive effect on plant growth as well as the claims of its widespread use. These claims may be somewhat exaggerated, but my feeling is that there was a small boom going on which had gained some little momentum. So what happened? That is a question worth asking, but which is not going to delay my haste in beginning to make and use char here at Turkeysong. There was a debate about the action of charcoal and the role of carbonic acid which I’ve mostly deleted. Also, the size of the charcoal that should be used is in debate. I’m leaning toward powdered or at least very fine charcoal, but that remains to be determined. Just how far a rootlet can penetrate a lump of charcoal is beyond my knowledge, but it would seem that smaller particles would give access to a much greater area. There are also, I noticed, many references to burnt clay as a valuable soil amendment. This claim interests me a great deal. For one, it would be possible, and probably easy, to add some clay or soil to a charcoal burn to make use of the heat to vitrify the clay. I plan to look into this concept more and, if it seems promising, experiment along with doing charcoal burns which could produce burned clay and possibly lime at the same time. Some seem to claim that only charcoal burned in a certain way qualifies as biochar, these men were using whatever plain old charcoal they had or could get and, produced by the same slow smoky creosote producing methods that had always been used and are still mostly used the world over today. That to me does not mean that charcoal burned more carefully, cleanly and thoroughly is not better than traditionally produced charcoal, I wouldn't know for sure, but rather that it is clear that regular ol’ charcoal works and that we might accordingly all do well to call this claim into question. I feel at this point that we needn’t worry overly much about the source of our charcoal unless it is from a toxic industrial process which may be contaminated with toxic metals or chemicals. It would seem likely that charcoal made by one or the other method would have more beneficial effects due to a greater total surface area or some other factor, and that we might go out of our way to “do it right” when setting up to burn our own. However, there may be many situations where burning a brush pile in a manner which yields some charcoal might be the better choice over something more inconvenient or too high tech. Intelligent adaptation always wins over dogma. I hope some people find this information useful and inspiring. It is from the 19th century only. I have not followed up any references mentioned and probably will not. I got what I need out of it for now and have other things to do besides sit in front of a computer, such as applying the knowledge I’ve gleaned. It would be interesting however to search in other languages of Europe and Asia. A friend told me that in the sixties he knew loggers in Humboldt county that would burn huge brush piles and then bury the charcoal with their bulldozers to make lush gardens. His claim is that they were after the charcoal specifically. Another friend just told me that charcoal is or was buried in gardens in Japan. Another friend from Guatemala claims that it is used there as well. I’m sure there are interesting references and anecdotes from all over the world if one seeks them out. ________________________________________
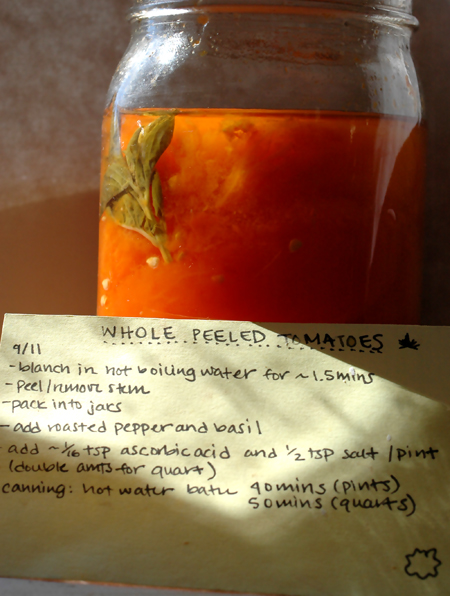
Charcoal Dust As A Fertilizer. Charcoal is composed almost entirely of pure carbon; and when small fragments are exposed to the influences of the weather, they undergo very little change during a long term of years. Still the roots of growing plants will lay hold of the small pieces of charcoal, and appropriate the substance contained in the coal to the growth and development of the stems, leaves, and seeds of grain, fruit, and vegetables. Experienced chemists assure us, charcoal, and particularly charcoal dust, has the power of attracting and fixing large quantities of ammonia, a substance which enters largely into the formation of useful plants, and of retaining this fertilizing material when buried in the soil, until the fine fibres of the roots of growing plants require it for promoting their growth. Charcoal has the power of attracting and retaining other gaseous substances besides ammonia, which are highly beneficial to growing wheat plants, as well as grass, vines, trees, and shrubs. Every observing farmer who has been accustomed to raise wheat cannot have failed to notice the luxuriant growth of cereal grain round about the places where charcoal has been burned, even more than thirty or forty years ago. The growing stems of wheat that are produced on such old charcoal-beds are seldom affected with rust; and besides this, the straw is always much stiffer than that which grows where there is not a dressing of charcoal. Before charcoal can promote the growth of plants of any kind, the particles must be thoroughly decomposed, and reduced to a liquid condition. For this reason, previous to the application of charcoal dust as a fertilizer to any kind of soil, the coal should be run through a mill that will reduce the small pieces to fine powder. And even when charcoal is thus finely comminuted by some mechanical means, the action of the fertilizing matter on vegetation will be very slow. .......... R. Ranson, Ashtabula County, Ohio, writes, touching pulverized charcoal, as follows: "I tried another experiment in 1860. My lands are coarse or loose gravel of rather poor quality. I sowed an acre of winter wheat (the blue-stem) preparing my ground as follows: "The field was sown with barley in the spring previous ; yield small (eighteen bushels per acre). I turned in the stubble the last week in August, harrowed it over, then took about eighteen bushels charcoal crushed fine, and top-dressed a strip through the middle of the acre over about one-third of its length; I then sowed on my wheat broadcast and harrowed it over twice. The result was, the heads when ripe were at least twice as long as where no coal was put on. I harvested all together; the yield was forty-three bushels. I think by applying about fifty bushels of coal to the acre as a top-dressing, made fine by grinding in a common bark mill, it would increase the yield at least four hundred per cent., if the soil is poor. "He further states he used burned clay and ashes in the fall of 1860, at the rate of about one hundred bushels of burned clay, taken from a fallow where timber had been uprooted several years by heavy winds. The soil on which the timber grew was burned together with the old roots and clay entwined, and perhaps some muck; the whole, ashes, clay and muck, after being burned as above, were hauled off in a wagon and put upon the wheat field as a top-dressing, and harrowed in with the wheat. The land was poor quality of gravel; the yield was about five hundred per cent. over the remainder of the field where no clay was put. I think there is no fertilizer ahead of this as a top-dresser." See Mixing Soils, second volume of Young Farmer's Manual. ___________________________________________
Charcoal Soot, a chief constituent of which is charcoal, has long been known as a very effective fertilizer; and burning has still longer been known as a mode of reducing stubborn soils to prompt productiveness. But both these sources of fertility might owe their efficiency to other causes than their affording carbon to plants; and it is only within these very few months that anything like a general knowledge has been diffused that mere charcoal is one of the best of manures. The fact has been known for many years to individuals, as, for example, to Mr. Barnes, of Bicton; but it is only very lately that gardeners generally have learned, and I am happy in being able to join my voice to that excellent cultivator’s in announcing, that - charcoal is a most efficient manure to all cultivated plants, especially to those under glass. Heaths, rhododendrons, cucumbers, roses, orchidaceous plants, hydrangeas, camellias, melons, and pine apples, have been the subjects of extended and most successful experiments. The advocates are too well known to require more than naming, for among them are Dr. Lindley, Mr. Barnes, Mr. Maund, Mr. Snow of Swinton Gardens, Mr. Stewart of Stradsett Hall Gardens, and Mr. Rivers. I think no cultivated plant would be unbenefited by having charcoal applied to the soil in which it is rooted. The following communication from Mr. Barnes shows, that carbonized vegetables are a better manure for onions than even bone-dust. “A piece of ground that was cropped with coleworts last autumn, (1843,) was cleared early, and the refuse trenched in during the winter. 95 feet in length and 10 feet in width, was planted with small onions on the 14th of February, which onions had been sown the second week of September in the previous autumn. They were planted in rows one foot apart, and six inches from plant to plant - with the intention of drawing every alternate one for use through the summer - but the whole nine rows did not get entirely thinned. The following is the weight when ripe for storing on the 1st of August. “Five rows grown where 4 lbs. of bone-dust to each row had been sown in a drill drawn 3 inches deep and filled up, and the onions planted over it - producing 420 lbs. weight of onions - each row yielding from 82 to 88 lbs. “The other 4 rows had applied to them of fresh dry charred refuse and ashes, made from the garden rubbish-heap, two common buckets full, weight 14 lbs. They produced 366 lbs. of onions, the rows weighing respectively 99, 89, 95, and 83 lbs. The last row being injured by a row of red cabbage growing near. “Many of the foregoing onions, which were a mixture of the Globe, Deptford, and Reading, measured in circumference from 14 to 16.V inches, and weighed as many ounces. I weighed 12 together, that turned the scale at 12 lb. 9 oz. I can only fancy what a wonderful saving and benefit it would be to the country, to char the refuse of old tan, chips, sawdust, ditch scourings containing sods, weeds, bushes, and refuse. By keeping the surface of the earth well stirred, no crops appear to suffer by drought that are manured by charrings, but continue in the most vigorous health throughout the season, never suffering materially by either drought or moisture”. On spring sown onions and on turnips, Mr. Barnes finds charred or carbonized vegetable refuse equally beneficial. Three rows, each 95 feet long, of the white globe onion, manured with bone-dust, weighed 251 lbs.; whilst three similar rows of the same variety, and grown under precisely similar circumstances, but manured with char-rings, weighed 289 lbs.
___________________________________________
Liebig gives the results of a series of experiments by Lukas on the use of charcoal as a manure, which seem to corroborate his opinion. From the facts which these chemists, however, adduce, it is evident that the beneficial action of charcoal, as a fertilizer, depends upon the presence of other substances besides carbon. Liebig notes (Organic Chem., p. 62) that "plants thrive in powdered charcoal, and may be brought to blossom, and bear fruit, if exposed to the influence of the rain and the atmosphere. Plants do no not, however, attain maturity under ordinary circumstances in charcoal powder when they are moistened with pure distilled water instead of rain or river water. Rain water must, therefore, contain within it one of the essentials of vegetable life; and it has been shown that this is the presence of a compound containing nitrogen; the exclusion of which entirely deprives humus and charcoal of their influence on vegetation. It is ammonia, to whose presence in rain water Professor Liebig thus refers, in whose valuable work (p. 207) the experiments of Lukas will be found. From these we learn that in a division of a low hothouse, in the Botanic Garden at Munich, a bed was set apart for young tropical plants; but instead of being filled with tan, as is usually the case, it was filled with powdered charcoal, the large pieces of charcoal having been previously separated by means of a sieve. The heat was conducted by means of a tube of white iron into a hollow space in this bed, and distributed a gentle warmth, sufficient to have caused tan to enter into a state of fermentation. The plants placed in this bed of charcoal quickly vegetated and acquired a healthy appearance. As always is the case in such beds, the roots of many of the plants penetrated through the holes in the bottom of the pots, and then spread themselves out; but these plants evidently surpassed in vigor and general luxuriance plants grown in the common way; for example, in tan. M. Lukas then gives a list of several of the exotic plants upon which charcoal appears to have produced the most beneficial effects. It appeared also to promote the rapid germination of seeds. He then proceeded to try the effects of charcoal when mixed with vegetable mould, all of which answered very well. "The charcoal," continues M. Lukas, "used in these experiments was the dust-like powder of charcoal from Firs and Pines. It was found to have most effect when allowed to lie during the winter exposed to the action of the air. In order to ascertain the effects of different kinds of charcoal, experiments were also made upon that obtained from the hard woods and peat, and also upon animal charcoal; although I foresaw the probability that none of them could answer so well as that of Pine wood, both on account of its porosity and the ease with which it is decomposed. The action of charcoal consists primarily in its preserving the parts of plants with which it is in contact, whether they be roots, branches, leaves, Ac., unchanged in their vital power for a long space of time, so that the plant obtains time to develop the organs for its further support and propagation. ........In moist charcoal the seeds of the gardener are found to sprout with remarkable quickness and certainty, but after they have sprouted they do not continue to grow well in charcoal alone." - (7. W. Johnson's Modern Agricultural Improvements.) - J., in Cottage Gardener.
___________________________________________
All red flowers are greatly benefited by covering the earth in their pots with about an inch of pulverized charcoal. The colors (both red and violet) are rendered extremely brilliant. Yellow flowers are not affected in any way by charcoal
___________________________________________
Experiments with Charcoal. We have been favored with the following extract from the forthcoming Report of the Survey of Essex County, by W. C. Watson, Esq., which will be read with interest: Enormous masses of dust or debris of the charcoal, accumulate about the iron works of the county, and create incumberances and deformities. It has been annually spread in vast quantities along the highways, constituting an admirable material for roads. An incalculable amount has been cast into the streams. The attention of men of observation and sagacity has been, within a few years, drawn to the use of this ingredient as a fertilizer. Experience has established its exceeding utility. In the midst of the disastrous drouth of last summer, while crossing a field in Moriah, occupied by Mr. Richmond, in pursuit of some Durham cattle I wished to examine, I observed a lot with its surface deeply and singularly blackened. -Upon inspection I found it thickly strewn with pulverized charcoal. The field presented a rich verdure, strongly contrasting with the parched and blighted aspect of the adjacent country. The following detail of this experiment, supplied at my request, attests the value of this material as a fertilizing principle. "The soil is loamy. The charcoal was applied on four acres of dry land, and one acre of moist soil, by top-dressing. The amount used was about one thousand bushels to the acre, spread on so as to make the surface look black, but not to incumber or obstruct vegetation. It was applied in September and October, 1850, at an expense by contract, of forty dollars. It was procured at a furnace, from a mass of pulverised charcoal left as useless, and was drawn one mile and a half. The effect was immediate. The grass freshened, and continued green and luxuriant after the surrounding fields were blackened by the early frosts. Although the last season had been so unfavorable for vegetation, Mr. Richmond realized one-third more than the ordinary yield of hay, and sufficient to repay the whole outlay. He thinks that he cut nearly double the quantity of grass upon this lot, that he did upon any similar meadow on his farm, and that the quantity of the hay is improved." The Hon. J. S. Whallon has made the most decisive and valuable experiments on this subject. His operations were extended through several seasons, and were observed with great intelligence and discrimination. The result amply sustains the conclusions derived from the preceding experiment I may add that a similar application has been made under Mr. Whallon's supervisor upon another tract in Elizabeth town on a soil of lighter texture and with entire success. In this instance the charcoal was applied chiefly to a crop of oats. The action of this substance seems to be effected by its physical combinations and its chemical affinities. It attracts the rays of the sun and unites with the fertilising gasses of the atmosphere; it absorbs moisture, and combines as a new constituent in the formation of the soil. Almost imperishable, it must remain indefinitely, with no exhaustion of its properties, a perpetual invigorating agent in the earth. The succeeding extract from a communication of Mr. Whallon, elucidates his experiments and views on this very important subject: “I began the use of it in the year 1846, and first employed it as a top-dressing on a strong clay soil, which was plowed in the fall of 1845. I spread on about fifteen wagon loads of the dust to the acre, after the wheat had been sowed and harrowed one way. I was surprised to find my crop a heavy one, compared with my neighbor’s, raised on the same kind of land. The wheat was of better quality and yielded four or five bushels extra to the acre. I have since used it on similar land, sometimes mixed with barn-yard manure, and sometimes alone, but always as a top-dressing, usually on land seeded for meadow. ‘ The results were always the most favorable. I find my land, thus seeded, produces more than an average crop of hay and always of the finest quality. “I have also used the dust on loamy and interval land, with the potato crop. During the series of years in which the rot almost ruined the potato crop, I scarcely lost any potatoes from that cause, and supposed it was owing to the coal dust I used. My manner has been to drop the seed and cover it with a small shovel-full of the dust, and then cover with earth. In this way I have used all the coal dust I have been able to save from the coal consumed in a forge of five fires, and which amounts to about 250 loads per year.” In the colder regions of the Adirondacks, charcoal dust has been used with great advantage. The note of Mr. Ralph presents the experiment in tho following language: “As a top-dressing for meadows, charcoal dust and the accumulation of ashes and burnt earth left on old charcoal pit bottoms have been used here with remarkable results, and I judge from the trials which have been made, that this application has added at least one-third to the hay crop, where it has been used. It was remarked during the past very dry season, when vegetation was almost burnt up by the long continued drouth, that those fields which had been dressed with this substance were easily distinguished by the rich green color of their herbage.”
___________________________________________
PEAT CHARCOAL. TO JASPER W. ROGERS, ESQ. TO THE POOR-LAW COMMISSIONERS OF IRELAND. Gentlemen,—In consequence of my being in temporary charge of the Workhouse Infirmary of this Union, I have had the opportunity of seeing your circular of the 16th instant, No. 61,763, 1849; and I beg to state—and I trust that the information will not be considered unacceptable — that your recommendation of the employment of peat charcoal as a deodorizer has been, at my suggestion, anticipated ; and, according to my directions, fully carried into effect, at the workhouse here, since the 3rd of May last, with the most gratifying and satisfactory results. Having been called on that day to attend a meeting of the Board of Health, held at the workhouse, I was at once struck with the intolerable and sickening effluvinm which, arising from the sewers, cesspools, and privies, pervaded every part of the establishment; and which, with the chlorine, which was being evolved in every direction for the purpose of correcting it, formed a compound of villanous smells, which no stomach but one accustomed to it could for a moment tolerate. Your very active and efficient inspector, Captain Hanley, told me that he had done everything that could be thought of, and had spared no expense to try and have the nuisance abated, but that all his exertions were useless. I then begged him to send down and purchase a few loads of peat charcoal, which were selling at the market; and having told the master how to employ it, the suggestion was at once adopted, and though the material was not of the best description, nor “ recently prepared,” in a very few hours the most delicate and practiced nose could not have detected the slightest offensive odour. Since then the master, with very praiseworthy attention, has had a large pit of the charcoal prepared every week, and by its occasional use through the grating of the sewers, and by sprinkling it over the nightsoil in the privies, the workhouse is, as far as entire freedom from every noxious and offensive effluvinm, a model to every other in the kingdom. In every respect the results have been most satisfactory. Instead of paying from five to ten pounds, every half year, for having the privies cleansed; and having itself and the whole surrounding neighbourhood at the same time poisoned for weeks by the intolerable stench ; the establishment has that task now performed by the paupers, without the slightest reluctance on their part;—and the contents of the sewers, cess-pools, and privies are now collected into inodorous and innoxious heaps, or mixed with the other refuse of the workhouse until removed by the contractor; which, before, he absolutely refused doing, but which he now considers the most valuable portion of what he contracted for. But the efforts on the health of the inmates of the workhouse are very far more satisfactory. I find that the numbers registered during the half year ending 25th March last were 353, of these 132 (or one 26 ll-13ths) died during that period. In the half year ending 29th September last, the numbers are respectively 4,262 and 68, or a mortality of one in 62.23-24ths, and of these 68.23 died between the 25th March and 4th of May—a period of little more than five weeks, before the charcoal was employed, while during the last four weeks in which I had the temporary charge of the Infirmary and Fever Hospital but three deaths have occurred; one from Phthisis, one from Variola, and the third, a poor bed-ridden idiot, from Chronic disease of the bowels. Giving the utmost credit to all the officers of the establishment for the extreme cleanliness and order which prevails throughout, the difference in the mortality of the two periods is so striking, and even startling, that I feel I am not assuming too much in attributing it principally to the improved and healthy state in which the atmosphere is maintained. It must also be recollected that the latter was the period during which cholera was so prevalent, and, though some rapidly fatal cases occurred in the town and neighbourhood, not a single one presented itself in the workhouse, where it was most likely and most dreaded to prevail.
___________________________________________
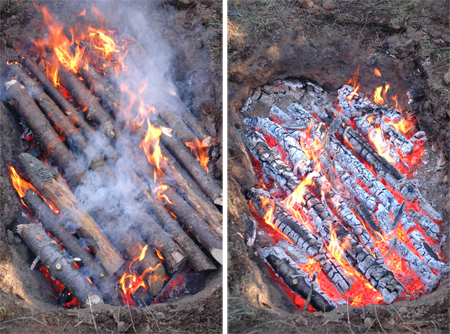
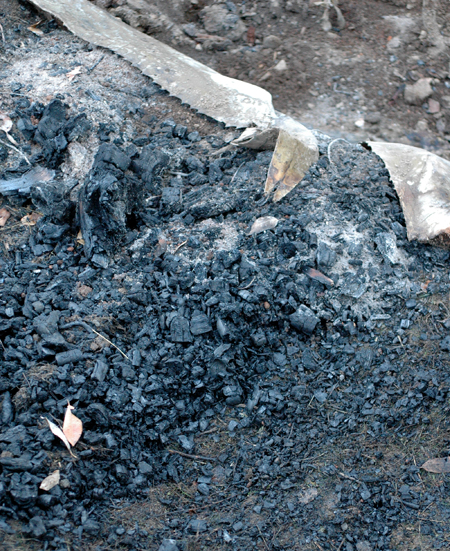
"NEW" FERTILIZER FOR GRAPES. It is interesting to observe how "old things become new," and how old methods and receipts are periodically revived. Many years ago there was a great stir made about the value of the pruning of the grapevine as a fertilizer for vineyards. Those of your readers that have read Liebig's Agricultural Chemistry will remember how emphatic hoe was in advocating the value of such matters. The California Farmer has lately been impressed with the importance of returning to the soil all the prunings and other waste matter; and the American Journal of Horticulture and some other periodicals give their endorsement of the system. That the prunings, finely chopped up and well plowed in, would be of value there is no doubt, although there are some drawbacks which have not been taken into consideration. Thus it has occasionally been suspected that decaying wood is apt to induce disease in the roots of vines if in contact with them. But the great difficulty is the labor involved. In this country of expensive labor we cannot afford to hire men or even boys for the purpose of cutting up our waste prunings. It is not impossible, however, that a very strong and powerful machine like a straw-cutter might be used. One such machine would serve a whole neighborhood and would reduce the cuttings to such a condition that they could easily be plowed under without any difficulty. Still after all it is a serious question whether it would pay. Our impression is that the benefit to be derived from the use of chopped up cuttings has been greatly over-rated. We tried the plan once, selecting out the smaller shoots and cutting them up with a straw cutter, while the larger we cut with a small hatchet. We applied the prunings of ten vines to the roots of five, and then we invested the amount which we thought we ought to have for our labor, in charcoal which we applied to the remaining five. We thought the charcoal produced the best results. Since that time we have disposed of our prunings of all kinds by converting them into charcoal and at the same time burning with them a quantity of heavy clay. The greatest difficulty is to make the heap sufficiently compact to allow it to be covered conveniently. This we accomplish by means of a few stout hooked stakes. After all the rubbish from the fall, winter and spring prunings, has been collected together, we lay a few stout branches or poles on the top. These poles are then pegged down by means of two or three hooked sticks applied to each pole, and in this way the mass is rendered so compact that it is easily covered with sods and similar matter. The heap after being kindled is allowed to smoulder away, more earth being thrown on as the fire progresses. Several days generally elapse before the work is finished, but at the end of that time we find ourselves in possession of several tons of material of the very best kind for fertilizing vines or any kind of fruit trees. It consists of a mixture of ashes, charcoal and burned clay, and our present opinion Is that there are no better fertilizers for fruit trees, and especially grape vines and peach trees, than just these three articles. As for the shoots and leaves which are removed during the summer, the proper place for them is the compost heap. In many parts of the country the cheapest plan no doubt is to go to the woods and make a lot of charcoal or buy the refuse of the charcoal heaps, and in that case of course the easiest way to get rid of the prunings is to burn them. Under any circumstances we are in favor of subjecting most of the prunings of our gardens or orchards to fire. We thus get rid of a great many Insects and their nests. The prunings of the apple, peach and plum trees; of currants, raspberries, blackberries, gooseberries, &c, should all be brought together in one heap and treated as described. The quantity which thus accumulates is astonishing, and still more astonishing is the amouut of clay which it will burn.
___________________________________________
YET MORE OF PEAT CHARCOAL AS A DISINFECTOR AND FERTILIZER. “I then stated what I do now, that the fertilizing power of peat charcoal can scarcely be over-estimated. It acts upon all that the soil produces—I except nothing: and, to use the words of Dr. Lindley, in reply to a correspondent, (although the learned doctor was at first a doubter,) ‘ Use it for your onions, but it is good for every thing.’ (Hear, hear.) My own experiments have proved its value beyond a question, but I shall give you a few particulars of those made by two- gentlemen of large landed property in Ireland, who, immediately after my first publication on the subject, entered into correspondence with me, and closely followed out my “proposition—Henry Newton, Esq., Mount Leaster^ county Carlow, and James Russell, Esq., Danlivey House, county Donegal—and I beg to say that both were strangers to me until my publications came before them. Mr. Russell commenced his experiments in 1846. He tried it with all the usual farm produce except wheat, with uniform success, and as a top-dressing for grass land he had fully borne out all I had stated in that respect; but his trial on a field of four acres with potatoes in 1847, was very remarkable. They were planted in ridges, or, as termed here, ‘lazy beds;’ one-half the field manured with farm-yard manure, the other with peat charcoal only, about a handful thrown on each seed. The result was more than a double crop from the charcoal; and he informed me that he was himself so astonished at the fact, that he requested Lord Donegal to see and vouch it. At my suggestion he planted oats the next year On the whole field without any further manure, and he assured me the increase on that portion manured with charcoal was nearly in the same, ratio as the potatoes. Now, what is the cause? Simply this. The charcoal lay on the land throughout the winter. Every shower of rain that came brought it ammonia and common salt in abundance. This continued for the winter months, and when spring came, every grain was rich in nutriment, while it held moisture besides, to give it to the seed at once, and stimulate it into growth. Mr. Newton was most anxious to tell you these facts himself, but he arrived in London too late for our last meeting. He brought potatoes, of which I will tell you the history. In February last he planted a large field in drills, manured as usual, not then having charcoal; but in. April he got some, and, before the potatoes being earthed, he top-dressed a few yards at the foot of all the drills as far as he had charcoal. He authorizes me to state that the result was not only very nearly a double crop, but that there was not a taint in one of them, while all the rest of the field was more or less diseased. (Hear, hear.) I regret extremely that he was unable to “wait for the present meeting; but he also authorizes me to say he has now a crop of Swede turnips that cannot be exceeded, to use his own expression. Yet they were not sown till June/. No rain came for a month after; all the crops in his neighbourhood failed, and his were only manured with peat charcoal. In short, he has fully proved its value for all plants; like me, he excepts nothing. But I must tell you his reply to my inquiry as to his experience of its value for grass land. He said,1 Nothing can exceed it; and there is little or no labour in using it.’ My friend Fenwick swears by it, and he declares he will write his name on the best grass in the country with black charcoal, and it will be the greenest part of the field in ten days.”
___________________________________________
As a fertilizing application by itself, charcoal can never be injudiciously used, if the supply of the article is abundant. The qualities that make it valuable to manure, render it equally so to soil in cultivation, as a storehouse of the food of vegetation; while its physical properties may be made useful when it can be applied in sufficient quantities. For garden purposes, its special and peculiar effects upon the health of diseased, and the vigour and beauty of all flowers and plants, make it an acquisition much appreciated..... ...We are not, however, without direct experiment upon the subject of charcoal as a manure, beyond that which has been furnished by ancient authority or indirect practice. The American publications give many striking experiments with it. "It is frequently used for Indian corn at planting, also on grass land, and we have generally noticed that its effects were very favourable."—(Albany Cultivator, 1844, p. 142.) In a trial by Mr. Pell, recorded in the same Journal (1844, p. 183), land which had been manured with charcoal powder produced seventy eight and three-fourths bushels of wheat per acre. Some equally striking evidences of the fertilizing power of charcoal are given by Mr. IHepburn, of Jersey Shore, Lycoming County, Pennsylvania. Many precise experiments with vegetable charcoal, and also with other carbonized substances, upon farm crops, have been made during the last few years, to a few only of which we are now able to refer. In an experiment made in 1841, by Mr. Fleming, Barochan, fifty bushels of wood charcoal increased the crop nearly three tons per acre:— In an elaborate experiment with twenty-eight substances, as top-dressings upon the hay crop, in 1842, by Mr. Maclean, of Braidwood, Pennicuik [Trans. High. Agr. Soc., July 1843, p. 30):— Nothing . . . yielded 125 per acre.
Carbon . . 8 cwt." 230"
Animulizcd carbon 8 cwt." 170"
Soot . . 80 bus." 200" Upon a crop of white turnips, carbon was again tested in 1842, with success:— 30 carts of dung per acre . . . yielded 19 4 15 do., and carbon . . .5 cwt. " 21 9 15 do., and sulphate of magnesia 2" "19 10 15 do., and nitrate of soda. . H" "20 5 15 do., and common salt . . •" "25 4 15 do., and sulphate of ammonir. } '• "19 3 15 do., and gypsum . . . 3" "18 15 In this trial, it will be observed that five cwt. of carbon produced two tons, five cwt. of turnips more than an extra fifteen loads of dung, and exceeded all the other dressings except salt. Upon Oats, the crop dressed with carbon, Mr. Maclean states, "made considerable advances over the undressed portions." An experiment with charcoal, by the Earl of Essex, upon turnips and carrots, in 1844, serves to show the striking influence of charcoal pushing on vegetation. In this trial, No. 1, nothing; No. 2, charcoal and salt; and No. 3, charcoal alone, were sown on the 3d of June. The drought being severe, Nob. 2 and 3 vegetated quickly, and grew rapidly, while No. 1 appeared to make no progress. On July 17, the Earl of Essex exhibited a plant from each plot, which plants, he states (Jour. Roy. Agr. Soc., vol. v. p. 280), bore the following proportions to each other:—. "No. 1. Just coming into rough leaf. "No. 2. Eleven inches long, from end of root to the head. "No. 3. Twenty inches long, and as big as my little finger at the crown of the root, and very vigorous." Six acres of carrots were also sown by Lord Essex with charcoal, "the ground at tho time being dusty, and no rain falling for many weeks." Upon which trial he comments—" Carrots, under any circumstances of rain, <kc, seldom come up in less than four or five weeks; mine, in spite of the drought, were up in three weeks, and held their own during the drought." The sources from which charcoal, for farm purposes, may be obtained, and the several processes connected with its preparation, are subjects of agricultural importance. The supply of pure vegetable charcoal, through the ordinary commercial markets, can only be obtained at a price which excludes it from the list of purchased manures. It may, however, in a great majority of cases, be imported or prepared upon the farm, at a price that makes it an acquisition. The districts where timber is in abundance, or where clearings of wood are in progress, abundant supply of waste wood is not unfrequently at hand, and may be prepared very cheaply. Upon our own farms, we have, in a majority of instances, in the branches of useless trees, in the roots and branches of hedges which may be removed, and, failing these, in the loppings of trees and hedges, and other vegetable remains, material enough for the manufacture of a valuable stock of vegetable charcoal. The ordinary process of preparation is as follows:—.... ....."In the spring of last year," he remarks, "I collected a quantity of peat for various purposes, and part of it was charred, or burned. This mixture was applied to land about the beginning of May, to a sandy soil, for a crop of Swedish turnips. The quantity used was at the rate of at least 200 bushels per acre. We tried it against well-made stable manure, in a state like mould, to cut well with the spade, which was applied at the rate of about twenty tons to the acre, and spread into drills. The plants grew well in both cases. We tried to ascertain the amount of produce per acre from each manure, as late as the middle of January 1846; for, from the mildness of the season, the turnips till then appeared to be in a growing state, each plant having had about two square feet to grow upon. The surface was kept flat, and the ground chiefly worked with the Dutch hoe. The weight of bulbs fit for use, manured by the peaty mixture, was upwards of forty tons per acre; while those produced from stable dung weighed only about thirty tons."
___________________________________________
From the Farmer and Mechanic Comparative Merits of Charcoal and Barn-yard Manure as Fertilizers. In the year 1788, my father purchased and removed upon the tract of land in Hanover township, Morris county, N. J. The land, owing to the bad system of cultivation then prevailing, was completely exhausted, and the buildings and fences in a state of dilapidation. The foundation of the barn was buried several feet beneath a pile of manure, the accumulation of years: little or none ever having been removed upon the lands. Even the cellar, beneath the farm-house, was half filled with the dung of sheep and other animals, which had been sheltered in it. The former occupant of the farm had abandoned it on account of its supposed sterility, and taken up the line of march for the Valley of the Miami, along with the first caravan of pioneers who accompanied Judge Symmes. The barn, before referred to, was removed to another situation soon after its foundation was uncovered, by the removal of the manure to the exhausted fields; and its site, owing to the new arrangements of the farm, became the centre of one of its enclosures. During the seventeen years which I afterwards remained upon the farm, the spot could easily be found by the luxuriousness of the grass, or other crops growing thereon; though the abatement in its fertility was evident and rapid. On revisiting the neighbourhood in the autumn of 1817, I carefully examined the corn crops then standing upon the spot, and was unable to discover the slightest difference in the growth or product, upon that and other parts of the field. This was about twenty-eight years after the removal of the barn. Upon the same farm and upon soil every way inferior, were the remains of several pit-bottoms, where charcoal had been burned before the recollection of any person now in the vicinity, and most probably, judging from appearances, between the years 1760-70. These pit-bottoms were always clothed, when in pasture, with a luxuriant covering of grass, and when brought under tillage, with heavy crops of grain. Eleven years ago I pointed out these facts to the present occupant, and his observations since, coincide with my own, previously made; that they retain their fertility, very little impaired, a period probably of about seventy or eighty, certainly not less than sixty-five or seventy years. Here then is an excellent opportunity of observing the comparative value of charcoal and barn-yard manures, as a fertilizer of lands. The former has not, after at least sixty or seventy years exposure, exhausted its powers of production, while the latter lost its influence entirely in twenty-eight years, and most probably in much less time. I have since had many opportunities of’ observing the effects of charcoal left in pitbottoms, upon vegetation, one of which only,. I will relate. The last season, in the northern part of Ohio, was one of uncommon frost and drought . In May, the wheat fields, when promising a luxuriant crop, were cut off by frost;—especially in the valleys, and very much injured in the high lands—which was succeeded by the most severe drought ever experienced in the West. The moiety which escaped both these scourges, was afterwards very much injured by rust. Near the village of Canton, upon a farm on high ground, which had been mostly cleared of its timber by its conversion into charcoal, it was observed that upon the old pit-bottoms, the wheat grew very luxuriantly—was clear of rust—and had ripened plump in the berry; while in the adjacent parts of the field it was short in growth, the stem blackened with rust, and the berry light and shrivelled.. The hint has not been altogether lost upon some of the farmers in the vicinity, and some of them are preparing to make an application of charcoal upon their lands; the result of which, when fully ascertained, I shall be happy to communicate to the public, especially if the facts above stated succeed in attracting the attention of agriculturists. Lewis Vail
___________________________________________
CHARCOAL AS A FERTILIZER. For two years past I have used some fifty loads each season of refuse charcoal, and being fully convinced that it pays, I wish to recommend it to my brother farmers. I have tried it on grass, corn and potatoes—hare tried it alone and in the compost heap, and in all situations it has proved faithful to its trust. As a top dressing for grass, it gives a green color and luxuriant growth.. Applied to half an acre of early potatoes the last summer, the yield was 75 bushels of as fine healthy potatoes as could be desired, that sold readily for one dollar per bushel, and yielded the best profit of anything raised on the farm. The virtue of charcoal mainly consists in its absorbing power. The purity of the air around a charcoal pit has long been known, and the colliers, notwithstanding their smutty appearance, are robust men. The secret of this purity of the air and the health of the colliers, lies in the fact that charcoal absorbs from the air the ammonia and other noxious gasses, unsuited for our lungs, but just the food for plants.— Every good housekeeper knows that if her boiling meat gives forth an unsavory odor, a piece of fresh charcoal put into the pot will not only sweeten the air, but will remedy that taint of the meat. In the same manner it acts when applied to the land. It absorbs from the air those gasses offensive to the nostrils, but the main food of plants. And this it will do, not once only, or for one season, but very possibly for a century. Where an old coal-pit has been burnt, the land never seems to wear out, and the first settlers point to the coal bottoms that are fifty years old, still by their exuberant vegetation marking well the spot where the wood was converted into coal. A fertilizer so lasting is well worth some expense at the outset. But where can we get it? some may ask. If any charcoal pits are burned in your vicinity, the bottoms will furnish three or four loads each of refuse charcoal, mingled with burnt soil. The latter is highly valued also as an absorbent.— Around furnaces and blacksmith shops, the waste charcoal also accumulates, and in many instances may be had for the carting. It may be found also around engine houses, thrown out from locomotiv«s. If none of these resources are at hand, then use the best substitute possible, which is muck, or swamp mud, and double the manure heap by composting, and if the crops are not doubled, then my experience is vain.— Country Gentleman.
___________________________________________
LEAF-MOULD, MUCK, AND CHARCOAL IN VINE BORDERS.
BY FOX MEADOW. If Mr. Bright should ask Dr. Lindley for his opinion of the use of charcoal in the soil, (vine borders,) he could refer him to thousands of instances of it as an effective fertilizer, and especially to those plants grown under glass. Heaths, Rhododendrons, Cucumbers, and Melons, Onions, Roses, Orchidaceous plants, Camellias, Hydrangeas, Pineapples, and a host of other plants, have been the subjects of extensive and successful experiments; and we will vouch our word for it, that Dr. Lindley would tell friend Bright that charcoal may, with decided advantage, be applied to almost every known plant in cultivation.
___________________________________________
Apparently, however, much remains to be done before the delicate chemical processes required to obtain many of the valuable chemical products alluded to can be made commercially useful; but the employment of peat charcoal as a manure or fertilizer, as well as a valuable disinfecting agent, is now established, and is extensively used
___________________________________________
Charcoal In Horticulture.—Not only florists but the growers of small fruits in Europe are making use of charcoal for promoting the growth of the plants they cultivate. It is not claimed that the charcoal is in any sense a fertilizer. It is an inert substance, and one not liable to pass into a state of decay even under the most favorable circumstances It endures longer when exposed to the action of the elements than any of the metals, except those that are ranked as precious. When it forms a union with the oxygen of the air it forms nothing but carbonic acid, which, though highly useful to plants, is obtained from the air without the trouble of producing it. It contains considerable potash and some lime, which the roots of plants will appreciate. Its principal use, however, consists in storing up moisture, fertilizing elements contained in water, and various gases, as ammonia, and giving them out as the wants of plants require. A barrel of freshly burned charcoal will absorb nearly its own bulk of soap-suds or liquid manure without presenting the appearance of being wet. The roots of the plants will pass between the pieces of charcoal, and will often penetrate them, and in so doing will be in a position to appropriate the substances in the pores. Charcoal is very desirable for placing in pots or boxes in which house plants are raised. It will retain many of the bad odors that are likely to arise from most fertilizers. It is also very desirable for garden beds, in which roses, annual flowers, and edible vegetables are raised. It is an excellent substance to bury in the ground where grape vines are planted. For placing in pots, boxes, and garden beds, it should be tolerably fine. For grape vines and large shrubs it may be in the form in which it is taken from the kiln, or is usually found in the market. For these purposes it should be buried quite deeply. Persons who sell or use charcoal often have considerable that is too fine for keeping up a fire, and will dispose of it at a nominal price. This will be very suitable for use in the house, or flower, or vegetable garden. Persons who have large graperies will find it to their advantage to burn their own charcoal.
___________________________________________
CHARCOAL AS A FERTILIZER. It will be recollected by our readers, that in our last two volumes we have published several able papers upon the virtues of charcoal as a fertilizer of the soil, and of its supposed efficacy in the preservation of wheat from rust. One of these papers, by Judge Hepburn, particularly points out cases in which lands which had been dressed by charcoal had grown wheat free from rust, when wheat grown on other lands, contiguous, which had not been so treated, had suffered greatly from that cause. We allude to these circumstances now, with a view of introducing the subjoined paragraph to the notice of our readers ; by which it will be seen, that in France the same virtues have been ascribed to charcoal as in our own country. Of the precise mode of action by which this exemption from rust is produced, we are not prepared to speak positively ; but will claim permission to observe, that it may be owing to the very great affinity which charcoal is known to possess for ammonia, and the reluctance with which it gives it out after having once absorbed it. If the opinion which is now gaining strength and consequence, that the cause of rust is plethora, and that ammonia is one of the chief aliments or food of plants, be correct, the preventive properties of the charcoal may arise, first, from its absorption of ammonia as formed, and, secondly, from its yielding it slowly to the wheat plant in the last stage of the maturing of its stem, thus, as it were, hindering it from feeding to that degree of excess productive of repletion, and the consequent disruption of the stem of the plant. At all events, as the rust is one of the most disastrous diseases in its effects, to which the wheat crop is subjected, we think that the use of charcoal to a limited extent, by way of experiment, is worthy of the consideration of every wheat grower. If it should, on trial, fail of the anticipated efficacy, it can do no possible injury either to the grain or to the soil, and may be beneficial to the latter, in supplying it with silicate of potash, a substance of vast importance to all grain crops, and especially useful in giving strength and elasticity to the straw. With these remarks we will direct attention to the following paragraph : Charcoal As A Fertilizer.—We have been astonished at the enormous increase of the wheat crop in France within the last eight or ten years, and have devoted some attention to the investigation of the subject. It appears that charcoal—an article that can be obtained here for a tithe of its cost in France—has been extensively used, and with marked effect, in fertilizing the wheat lands in that kingdom. A correspondent of the New Farmers’ Journal, an English print, states that during a sojourn in one of the central departments of France he learned that some of the most productive farms were originally very sterile; but that for a number of years their proprietors had given them a light dressing of charcoal, which had resulted in a large yield of wheat of excellent quality. Since his return to England he has tried the experiment upon his own lands with the same happy effect. The charcoal should be well pulverized, and sown like lime, after a rain or in a still, damp day. Even in England, the writer says, “the expense is a mere trifle, in comparison with the permanent improvement effected, which on grass is truly wonderful.”— He states one other very important result from its liberal use. “I am quite satisfied that by using charcoal in the way described rust in wheat will be entirely prevented; for I have found in two adjoining fields, one of which was coaled and the other manured with farm-yard dung, the latter was greatly injured by rust, while that growing in the other was perfectly free from it.”—Buffalo Commercial Advertiser.
___________________________________________
[Charcoal renders the soil light and triable, gives It a dark color, and additional warmth for early crops. The bed whereon charcoal has been burnt is always marked by a most vigorous growth of plants when it becomes effectively mixed with earth. It contains also small quantities of salts of potash and other fertilising salts. It absorbs both carbonic acid and ammonia from the air. and yields them to the roots of plants. It is most marked in its effects on plants which require abundant nitrogen. As it is indestructible, its beneficial effects last as long as it remains m the soil, sup. [.King the rootlets of plants with carbonic.acid, which Is renewed as fast as abstracted. Its good effects Begin to be seen when the dust is applied at the rate of forty bushels per acre. Charcoal is invaluable for destroying the odor of decaying animal matter, retaining the gases in its own substance ready to yield them up fur the use of plants. Hence, the best application of this substance is not directly to the soil, but to compost it with putrescent animal matters, urine or night soil, of which it will absorb all the odor and fertilising gases given off during their decomposition. Composted with the last named substance, It becomes Poudrette is second only to guano as a fertilizer.
ln striking cuttings or potting plants, fine charcoal is a valuable substitute for sand, plants rooting in it with great certainty. Plants will flourish in powdered charcoal alone with considerable vigor, and, added to the other materials used in potting, it is found greatly to promote healthy growth in most plants.)
___________________________________________
Charcoal and Some of its Uses. There are various opinions afloat in regard to the value of charcoal as a fertilizer. As an absorbent of ammonia, carbonic acid, &c, it certainly has scarcely a superior. It is also pretty well ascertained, that it readily yields up for the use of the plant, the substances thus absorbed. But there are two features connected with its use which have always commended it to my favor. One is its mechanical effects upon the soil, rendering it more open and friable, and consequently more easily worked, and more open to the action of the atmosphere. The other is the warming effect produced where it is applied in any considerable quantity. A dark soil, we all know, has the power to a greater extent of absorbing heat than a light-colored one. This, in many locations, is a great desideratum. Many plants which it is desirable to grow, but which, for the want of a sufficiently warm soil, is next to impossible, may be cultivated by the use of charcoal. Its carbon yields no food to plants, consequently, even if applied in large quantities, it can do no harm, unless it renders the soil too light and open; not a very likely result. In gardens, therefore, I esteem it highly, and have found it, for the purposes briefly named above, most excellent.—Farmer and Gardener.
___________________________________________
A still better mode, when the quantity and quality of the manure, as in a farm, is an object. is to mix the gypsum with a considerable proportion of either charred peat, burnt clay, or any other substance containing a portion of charcoal; for by this plan the whole of the urine, of at least the shed-fed stock, is not only entirely preserved in the pores of the charcoal from putrefaction, but when carried on to the field it is gradually and steadily emitted, and becomes the food of growing crops. Of the use of charcoal as a fertilizer I shall hereafter have occasion to speak, and for these purposes an impure variety is profitably attainable, either in charred peat or refuse tanners’ bark, or even in the charred matters of clay on moist farms. Whatever doubt there may exist of the value of charcoal, in its tolerably pure state, as a manure, there is I am convinced, from the result of my own trials and observations, none as to its value for the purpose of forming a bed on which the ordinary manure of animals is prepared.
___________________________________________
Charcoal powder acts mechanically in absorbing ammoniacal gas, and also by its color in absorbing the heat of the sun’s rays, and retaining the heat by impeded conduction. When the charcoal is burned only to brownness, then it acts also chemically, being in a condition to form humus, and to undergo oxidation by the action of the atmosphere. Charcoal is undoubtedly a powerful fertilizer, and one of great duration, as is shown by the continued fertility of places where the aboriginal inhabitants of New England built their camp-fires more than two hundred years ago, while nothing peculiar to those spots can be discovered beyond the admixture of large quantities of charcoal and clam-shells with the soil.
___________________________________________
PEAT CHARCOAL THE BEST DEODORIZER. In 1845 we brought before the public the facts which had come to our knowledge of the value of peat charcoal in its natural state as a fertilizer of the soil. It was then doubted, because Liebig and his followers had laid it down that all plants were indebted to the atmosphere for the carbon they contained—in fact, that inhalation gave to the general structure their mass of woody fibre, amounting, when converted into carbon, to from 40 to 50 per cent, of the whole. We doubted this assumption; and since, our doubts have been set at rest; for the Royal Agricultural Society offered a prize for an essay on the subject, and almost every farmer in the country now knows the value of charcoal as a manure, and that which was smiled at then, is not only admitted, but practised now. We feel no small gratification in having been the first to draw general attention in England to this most valuable fact; and we feel the same as regards the extraordinary value of peat charcoal as a deodorizer—but not only a deodorizer, hut the producer of a manure, the value of which we believe there is scarcely any means of estimating.
___________________________________________
Charcoal as a Fertilizer. Mr. Bateham:—Sometime since there was an enquiry in your paper, respecting the use of charcoal as a fertilizer. I have one word to offer on the subject, which is this: some 15 or 20 years since, while owned by another individual, there was much coal burned on my farm while in the act of clearing the land. The land since that time has undergone much tilling, with little or no manure and not much rest until lately; and notwithstanding the time that has elapsed, the places where the coal pits were burned, produce the best of crops of every kind whenever the fields in which they are found are tilled. I am so much pleased with it that I wish my farm was covered I 3 or 4 inches thick with pulverized charcoal. I think the benefits of it could never be exhausted. Respectfully,
___________________________________________
I sowed, on May sixteenth, six seed grains which had been steeped twenty-four hours in urine, and then coated with charcoal dust; and the same number similarly steeped, but not dried with charcoal dust. From the former, on May twenty-first, nine plants had come up; on the twenty-second, thirteen; and, on the twenty-third, two more, making fifteen in all. From the latter there were, on the twenty-first, five plants; on the twenty-second, eight; on the twenty-third, thirteen. It thence follows that the seed kernels treated with charcoal dust produced more and stronger plants than without. That fifteen plants should be produced from six kernels (planted one fourth inch deep) is in consequence of the size of the capsules. A large seed capsule may produce five plants; only a single plant sprouts from a very small one.
___________________________________________
CHARCOAL AS A FERTILIZER. We have all noticed that where a charcoal pit has been burned the soil remains good for a long time. On the mountains of Berkshire we have seen white clover growing luxuriantly on the bed of an old charcoal pit, making an oasis in the desert of ferns and briars that surrounded it, and on inquiry we found that the coal pit must have been burned half a century ago. On digging into this soil we discovered the charcoal with little if any appearance of decay, and promising to do good service for half a century more.
___________________________________________
PEAT CHARCOAL. The use of charcoal as a fertilizer is generally well known. Its expense, however, often precludes its use. To cut down a forest for the sake of the charcoal it would furnish for agriculture would undoubtedly be bad policy. As a substitute, however, for the ordinary wood charcoal, it is certainly important for many to know, that peat charcoal will prove an excellent substitute. In some respects it may be regarded as a superior article to wood charcoal, inasmuch as it will be obtained in a state of fine subdivision, and consequently in a state to operate to the best advantage. Most persons are perfectly familiar with the effects of charcoal upon vegetation. The great desideratum is how to obtain it in quantities, and at a rate to make it an object in husbandry. Surely no one can afford to buy coal, not because there is so much expense in making it, but on account of the value of the materials of which it is formed. Peat however, is a material lying in a waste, useless as it is, and in order to make it valuable, it is only necessary to raise from its half submerged condition, and char it
___________________________________________
Last year we investigated a ease and found, on inquiry at Washington, that the government had given a man a patent on a method of making a “complete fertilizer,” the whole of which was to cover a large heap of pine-needles partly with earth, and then set fire to the pine-needles and burn them, as charcoal is burned. When they had burned all they would, you were told to mix the earth and charred mass together, which was your fertilizer.
___________________________________________
The first day of our trip, we saw the farmers engaged in burning stocks of millet, &c., in heaps of earth, as it is done in the manufacture of charcoal, in order, we supposed, to bring out their fertilizing properties. It a very likely then, that, in China, they have known the value of charcoal as a fertilizer long before us, It’s use for that purpose being among us of a recent date.
___________________________________________
The refuse charcoal, obtained from the rectifiers of spirits, from the Railroads where wood is burned in locomotives, from old charcoal beds, &c., is a very useful material in the garden. As a mulching about fruit trees I consider it very valuable. It keeps out frost in winter: it keeps the soil loose and moist in summer, and it does not afford a harbor for mice or insects. In the soil, it assists to promote moisture in a dry season;........ It is an excellent mulching for Strawberries, in winter or summer.
___________________________________________
ON THE USE OF CHARCOAL AS A
FERTILIZER. By Cuthbert W. Johnson, Eso., F.R.S. I Hardly deem it necessary to prove to any one the value of charcoal as a valuable manure; and if it was necessary to obviate the suspicion that there is any difference in the effect produced by the use of charcoal-ashes and the impure variety of these ashes afforded by peat, I am readily supplied with the means of doing so by a recent report by Mr. Peter Mackenzie, of West Plean, near Stirling. He tells us that he has been for some years past trying experiments with peat, charred peat, and peat-ashes, as a substitute for stable manure, and for many kinds of crop grown by farmers and gardeners. He remarks,—“ In the spring of last year, I collected a quantity of peat for various purposes, and part of it was intended to be charred or burned. It was not so well prepared for burning as I wished, a good deal of moisture being in it; however, a good fire was made of wood to begin with, and as the peat dried it was drawn to the fire, and in this way was kept burning for two weeks. It required little watching, only once or twice in twelve hours. The partially dried peat was drawn to the fire, because it was intended to have a quantity of charred peat and ashes mixed together, and in order to obtain both, the fire was kept in a smothered state to char the peat (let the farmer mark the distinction). It commonly burst through in some parts, and there supplied the ashes. When we had a quantity to begin with, the unburnt peat, and the charred, with the ashes, were all well mixed together; at least one-half of the mass was unburnt peat.” This mixture was applied about the beginning of May, to a light sandy soil, for a crop of Swedish turnips. The quantity used was at least at the rate of 200 bushels per acre. “ We tried it,” continues Mr. Mackenzie, “ against well-made stable-manure in a state like mould, cut well with the spade, which was applied at the rate of about 20 tons to the acre, and spread into drills, like the peaty mixture. The plants grew well in both cases. We tried to ascertain the amount of produce per acre from each manure, as late as the middle of January 1846; for, from the mildness of the season, the turnips till then appeared to be in a growing state, each plant having had about two square feet of surface to grow upon. The surface was kept flat, and the ground chiefly worked with the Dutch hoe. The weight of bulbs fit for use manured with the peaty mixture was upwards of 40 tons per acre; while those produced from stable-dung weighed only about 30 tons.
___________________________________________
(on peat charcoal as a fertilizer...) I have previously mentioned the power of charcoal as a fertilizer in hastening the germination of the seed, and on this account alone charred peat may with great advantage be used as a manure for root-crops. Its manner of application maybe broadcast by hand, or with the shovel; this may be better performed by means of a broadcast drill, or by drilling in rows at the same time as the seed by the common manure-drill. For the latter purpose it. is a cheap and excellent substance for mixing with the more expensive artificial manures previous to their application, such as guano, bones, super-phosphate of lime, &c. &c. Ashes are frequently added to artificial manures; but an objection to their being used in a dry state (which by the way is the only state in which they can be applied by the generality of drills) is this: that, should dry weather follow the sowing, the dry ashes, being under the seed, will retard its germination. It is perhaps hardly necessary to mention that the charred peat will require to be sifted before it is drilled. The large pieces that will not pass through the sieve can be pulverised by a rammer, or by drawing a garden-roll over them. The quantity used per acre will of course vary with the circumstance of the crop: when drilled in rows, with or without the addition of other artificial manure, the quantity need not exceed * Mr. Crosskill of Beverley has constructed an excellent implement for sowing manures, which, I believe, has been approved by the Royal Agricultural Society. from 20 to 40 bushels per acre; when drilled broadcast, from 100 to 150 bushels will not be a very expensive dressing. I have never made any very careful experiments with peat charcoal in comparison with other manures; but if we maybe allowed to judge from appearances, the results are evidently satisfactory. As an instance, on July 2, 1845, 40 bushels per acre of peat-charcoal were drilled with green-top Aberdeen turnips on a light sandy loam, the previous crop being rye and vetches mown for soiling. The young plants appeared above ground in a short space of time, and were singled out within a week, as soon as turnips of a quicker growing kind that had been drilled twelve days earlier with 14 cwt. of guano mixed with peat-ashes per acre; this was on the same description of soil, the previous crop being rye fed off with sheep, and the land then manured with 15 cartloads per acre of farm-yard dung; the other, in addition to the peat-charcoal, had been folded. The crops were good, but the cost of the peat-charcoal was barely one-half that of the guano, without taking into consideration the extra dressing of farm-yard manure.* Cirencester, Nov. 28, 1846. * The crop of turnips to which the peat-charcoal was applied in 1845, was fed off late in the spring of 1846; the land ploughed and subsoiled, and on May the 9th drilled with Belgian carrots; the seed being mixed with 2 bushels per acre of powdered wood charcoal: notwithstanding the dry weather the carrots came up well. The produce was about 1200 bushels per acre, and each bushel of carrots weighing 3 stone 3 lbs., will give upwards of 24 tons of roots per acre, exclusive of the tops. The only manure, besides the 2 bushels of charcoal, being the folding of the sheep while feeding the previous crop of turnips.
___________________________________________
ON THE USE OF CHARCOAL. BY COL. M. P. WILDER. I notice in the last number of your valuable periodical the request of Mr. Trimble, soliciting advice as to the advantages of charcoal, and the best method of using it as a manure. I reply with pleasure, but my experience has been on a limited scale, and my operations confined rather to the garden than the farm, on account of the difficulty of procuring it in sufficient quantity for the latter purpose. My attention was first drawn to the influence of charcoal, by the wonderful experiments of Baron Von Liebig, in the propagation of plants, and the facility with which cuttings were rooted in this substance. Its use became very general in Europe by amateurs and cultivators of plants, and for a time it was considered a great fertilizer. Chemists soon, ascertained, however, that its chief virtue consisted in its great porosity, being able to absorb 90 per cent, of its bulk of ammonia. As a medium for storing up the volatile portions of manure and compost heaps, and for absorbing the ammonia which descends in the snow and rain, it has probably no superior. But what renders charcoal still more valuable is its power of holding in reserve those subtle elements, and yielding them up only as they are wanted for the purposes of nutrition, and as the vital force of the root searches for food. It will therefore readily be perceived, that charcoal is not only valuable as a component part of manures, but that its influence, when applied alone, is highly beneficial. Instances similar to those quoted by Mr. Trimble, where large crops had been obtained from lands on which charcoal pits had been burned years' before, are frequently witnessed. In this vicinity a farmer has annually, for the last eight years, harvested extraordinary crops of hay on these charcoal lands, without the application of any manure whatever; and from the indestructibility of this substance, I know no reason why he may not continue to do so for the next twenty years to come. One of the most striking illustrations of its efficacy, when applied alone, that has come to my notice, was the experiment made by Mr. Hayward, of Sandusky, Ohio, many years since, and which, if I am not mistaken, was published either in the last volume of your Farmer's Library, or the first volume of The Plough, the Loom, and the Anvil. The facts I think were substantially as follows: — Mr. H., having prepared his coal by grinding in a mill, set apart seven lots of land for experiments, the soil and cultivation being precisely alike on each, except as it regarded the application of charcoal. The result was, that on the lots where fiftly bushels of coal were applied, there were twenty-five bushels of wheat obtained, while on those lots where there was no coal applied the crop was only five or six bushels. It will be borne in mind that there was no other manure administered to the crop, and that consequently the fertilizing properties must have been imparted by the ammonia which was stored up in the coal. This experiment was very satisfactory, but not more so than many others which we have witnessed, particularly in the application of charcoal to fruit trees, plants, and garden vegetables; and I have yet to see the first instance where charcoal formed a part of the compost, that vegetation did not grow luxuriantly,producing the increasing and quickening effects described by Mr. Trimble. In fact, it is no unusual circumstance to notice the roots of trees and plants either clasping pieces of charcoal, or piercing them through with their fibres. The best method, where any considerable quantity is to be used, would undoubtedly be to grind the charcoal, and I should prefer that one half at least should be as coarse as Indian corn. As to the amount which may be applied to the acre, I think Mr. Hayward’s experience will furnish a good criterion, although I have no doubt a larger quantity than fifty bushels to the acre, for the first dressing, might produce an increase of the crop. If charcoal is to be applied alone, and without manure, the time is not material, except that should be well incorporated with the soil, either by ploughing in, or harrowing, but not deeply. Mr. Trimble describes his soil as being “ generally a strong yellow clay based upon limestone.” Charcoal will no doubt prove valuable on these lands, but more so on light soils which allow the salts of manure to leach through; for clay is also a substance which holds securely the volatile portions of manure, and when made fine by the frost or otherwise, is a capital ingredient for the compost heap,
___________________________________________
When the baskets have been selected, cover the bottom to the depth of two inches with little pieces of charcoal which serve a threefold purpose,—that of fertilizer, purifier and drainage. The dust of charcoal is excellent, beside, to mix with the earth for growing plants.
___________________________________________
Palm culture is not nearly so difficult as most people imagine. Nearly all the finest sorts thrive well in good, fibrous, yellow loam or soil composed of rotted sods, sand and old, well-decayed manure. A sprinkling of charcoal added to this will help to keep the soil fresh and sweet for the tender young rootlets.... ....I like to use broken bits of charcoal for draining all my pots, because when the roots reach down to it they feed upon it greedily, the tiny fibers clinging all about it; and then, too, the charcoal keeps the drainage and bottom soil sweet and healthful for the roots. My experience has been altogether with wood charcoal....
___________________________________________
Charcoal, already well known to be of inestimable value as an absorbent or disinfectant, and likewise containing abundance of nutritious food for growing plants, has also a remarkable influence on the color of flowers. This fact is too well known to gardeners to require much repetition. A few years since, a New-Haven gardener tried the experiment of the use of charcoal on the health of plants in pots in his greenhouse, and said that he could not possibly see the advantage of continuing under the old system without it. " The result of my experience is, that, when not using charcoal in growing roses, they have been more or less subject to mildew, and the roots of the plants more apt to be injured by fungus, whereas with the free use of that material they are not liable at all to be attacked. " And besides, when treated in this way the plants are remarkable for their freshness and beauty; the flowers are so much improved that they seem as though they had been “dipped in colors native well”. We observe that the subject is again being discussed with practical interest in France, and we quote a paragraph from the Revue Horticole, of appropriate effect. “ A correspondent of that journal says that not long ago he made a bargain for a rose-bush of magnificent growth and full of buds. He waited for them to blow, and expected roses worthy of such a noble plant and of the praises bestowed on it by the vender; but when it bloomed, all his hopes were blasted. The flowers were of a faded hue, and he discovered that he had only a middling multiflora, stale colored enough. He therefore resolved to sacrifice it to some experiments which he had in view. His attention had been directed to the effects of charcoal, as stated in some English publications. He then covered the earth in the pot in which it was, about half an inch deep, with pulverized charcoal. Some days after, he was astonished to see those which bloomed of as fine a lively rose-color as he could wish. He determined to repeat the experiment, and therefore, when the rose-bush had done flowering, he took off the charcoal and put fresh earth about the roots, and waited for the next spring impatiently, to see the result of this experiment. When it bloomed, the roses were at first pale and discolored, but, by applying the charcoal as before, they soon assumed their rosy-red color. He then tried the powdered charcoal in large quantities upon petunias, and found that both the white and violet colored flowers were equally sensitive to its action. It always gave great vigor to the red or violet colors of the flowers, and the white petunias become veined with red or violet tints ; the violets became covered with irregular spots of a bluish or almost black tint. Many persons who admired them thought they were choice new varieties. Charcoal has no effect on yellow flowers.”